
Recommended
More Related Content
What's hot
What's hot (14)
Viewers also liked
Similar to Getting Started with Prezi Presentations
Similar to Getting Started with Prezi Presentations (20)
Recently uploaded
Recently uploaded (20)
Getting Started with Prezi Presentations
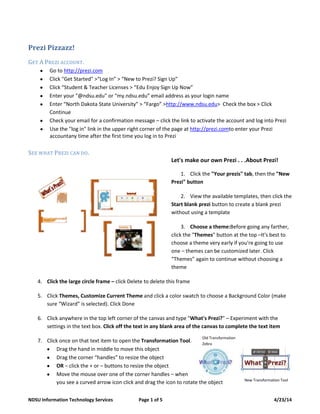
- 1. NDSU Information Technology Services Page 1 of 5 4/23/14 Prezi Pizzazz! GET A PREZI ACCOUNT. Go to http://prezi.com Click "Get Started" >“Log In” > “New to Prezi? Sign Up” Click “Student & Teacher Licenses > “Edu Enjoy Sign Up Now” Enter your "@ndsu.edu" or “my.ndsu.edu” email address as your login name Enter “North Dakota State University” > “Fargo” >http://www.ndsu.edu> Check the box > Click Continue Check your email for a confirmation message – click the link to activate the account and log into Prezi Use the "log in" link in the upper right corner of the page at http://prezi.comto enter your Prezi accountany time after the first time you log in to Prezi SEE WHAT PREZI CAN DO. Let's make our own Prezi . . .About Prezi! 1. Click the "Your prezis" tab, then the "New Prezi" button 2. View the available templates, then click the Start blank prezi button to create a blank prezi without using a template 3. Choose a theme:Before going any farther, click the "Themes" button at the top –It's best to choose a theme very early if you're going to use one – themes can be customized later. Click “Themes” again to continue without choosing a theme 4. Click the large circle frame – click Delete to delete this frame 5. Click Themes, Customize Current Theme and click a color swatch to choose a Background Color (make sure “Wizard” is selected). Click Done 6. Click anywhere in the top left corner of the canvas and type "What's Prezi?" – Experiment with the settings in the text box. Click off the text in any blank area of the canvas to complete the text item 7. Click once on that text item to open the Transformation Tool. Drag the hand in middle to move this object Drag the corner “handles” to resize the object OR – click the + or – buttons to resize the object Move the mouse over one of the corner handles – when you see a curved arrow icon click and drag the icon to rotate the object Old Transformation Zebra New Transformation Tool
- 2. NDSU Information Technology Services Page 2 of 5 4/23/14 Use the Edit Text button to return to edit mode Drag the side handle icon to decrease or increase the line length Click and drag a bottom corner handle to scale the object larger or smaller Click the Delete button to delete the object 8. Using Zooming techniques: Click the +/- icons that appear on the right side of the screenwhen you move the mouse to the right then click and drag the canvas on the “P” in Prezi, orposition the mouse pointer over the “P” and rotate your mouse wheel to zoom in very close on the "P" 9. Click inside the “P” to add a text box - type"Prezi: A ‘zooming’ presentation tool!Shrink it down to a very small size using the Transformation Tool.Returnthe canvas to the original size by zooming out or clicking the house icon on the left 10. Insert graphics:Click Insert | Image . . . on the top menu– enter this URL in the blank space: http://www.ndsu.edu/pubweb/~lolsen/oldprezi.gif- clickSearch (the magnifying glass icon)- a copy of the old Prezi bubble menu will appear in your Prezi 11. Click Insert | Image . . . again – enter this URL into the blank space: http://www.ndsu.edu/pubweb/~lolsen/newprezi.gif - click Search - a copy of the new Prezi top menu will appear 12. Click once on each image to open the Transformation Tool to resize and move each image to the right of the “What’s Prezi?” text 13. Combine elements:Click below the 1st image and type - The classic Prezi “Bubble Menu"- use the Transformation Tool to size the words and place them partially on top of the menu graphic 14. Click above the 2nd image and type - The “New” Prezi Menu! 15. To group and move several objects together temporarily, hold down the shift key and draw a box around the whole group. Release the shift key and click and drag the group objects to a new location 16. To permanently group objects – click the Group button at the top 17. Click the Home button on the right – click and add a new text box below the “What’s Prezi?” text. Type: You can insert: * Shapes * Images * Videos * Files * Drawings & Diagrams * Sound . . . and now Voiceovers!
- 3. NDSU Information Technology Services Page 3 of 5 4/23/14 18. Using the highlighter:Zoom back out and add another text box on the left side of the canvas: "Use Frames to organize your content into main points" 19. Highlight the word Frames using the “Frames & Arrows” | Highlighter feature. Notice that the highlight and the text box are 2 separate items when you resize! 20. Send to Front/Back: If you have trouble selecting items that are ‘stacked’ on top of each other, right- click an item and select Bring Forward, Bring to Front, Send Backward, or Send to Back – when you click on the item again you should be able to select the correct object to make changes 21. Using Shapes:Click Insert | Symbols & Shapes | Click and drag a circle shape onto the canvas – click on the circle to activate the Transformation Tool to move and resize it so surrounds the bulleted text about what you can insert 22. Insert a Youtube video:Click on Insert |YouTube Video . . . - type http://youtu.be/TK6gbn9Bx80 into the box. Click Insert 23. Add a new text box above the Youtube video - "Use Prezi as a Collaboration Tool!" 24. Zoom in on this text item and click to add another small text box inside any letter: "Set Privacy Settings and invite co-editors. Only the owner can delete!" 25. Using frames:Click on Frames & Arrows | Draw Bracket Frameand draw brackets around each of thethreemain areas. (You’ll need to select the *+ brackets choice each time!) This is the easy way to move them around as units If you “shift-drag” when drawing the brackets, you’ll get the 4X3 ratio. 26. Click the Home button to zoom out so you can see the whole canvas at once 27. Create the PATH:Click the “Edit Path" button on the left – Click Clear All (Bottom left side of screen) 28. Click the Add current view button (bottom left) to create an invisible frame around the entire group and set it as path point #1 29. Click through the presentation in the order you'd view it, zooming in with the mouse wheel to get to the tiny text additions. When finished, click Done 30. Drag a path number off the edge of the screen to delete that path 31. To change the path order, click on a path thumbnail on the left side of the screen and drag it to a new position. Click “Done” when finished adding the path 32. After clicking the last path point, click the Home button to zoom out again, then click “Add current view” again to add another invisible frame around the entire group and make it the last path point 33. Showing your Prezi:Click the "Present" button in upper left corner to view the Prezi as a presentation. Click on the arrow in the bottom right corner to proceed through it. Press ESC to quit.
- 4. NDSU Information Technology Services Page 4 of 5 4/23/14 34. Use the Fade-In: Right-click on the “YouTube video” thumbnail on the left of the screen and choose animate frame contents. Click on the text item 1st, then click on the video image. Click on the Start Preview button at top to preview. ClickDone. Notice the shooting star icon on the thumbnail. 35. Click the Present button to show your Prezi again Check out your options View Help and Settings Invite others to watch or edit this Prezi Download Prezi to PDF file or as a portable Prezi Exit to save and close this Prezi - (Prezi automatically saves your work throughout) 36. Other Options Edit – return to the previous mode to make changes Present remotely – Gives you a concise url for collaborating on a Prezi in real time Download – save a copy to offline storage for offline viewing Save a copy – Creates a 2nd copy in your Prezi library Share – generates a URL you can use to share Prezi with others (viewing only) Embed – copy HTML code to embed Prezi in a web page 37. Privacy Settings: Want to learn more? You’ll find several tutorials under the “Learn” tab at prezi.com. See what’s possible using the “Explore” tab. Learn more at Atomic Learning – Free, brief video tutorials covering 200+ applications, including Excel – log in at http://ndsu.me/atomiclearning
- 5. NDSU Information Technology Services Page 5 of 5 4/23/14