This document discusses various linear and angular measurement instruments. It describes scales, calipers, vernier calipers, micrometers, slip gauges, sine bars, bevel protractors, and auto-collimators. Linear measuring instruments are classified as direct or indirect and graduated or non-graduated. Precision is increased with vernier scales and indicators that allow for smaller unit measurements. Angular instruments like protractors and auto-collimators use optical principles to measure small angles. Accessories aid in applications like marking dimensions. Sources of error are also discussed to ensure accuracy.
The mechanical metrology is a subject which is studying about how to measure the length or meter. These will show all the tools, how to measurement, noticeable using tools in minimizing placement.
The mechanical metrology is a subject which is studying about how to measure the length or meter. These will show all the tools, how to measurement, noticeable using tools in minimizing placement.
TYPES OF DIAL GAUGE
HOW TO USE DIAL GAUGE Mass production
Check the flatness of component
Check the roundness
Use at a temperature range from 10 °F to 170 °F (-12 °C to 75 °C)
Least count is 0.01 mm
CALIBRATION OF DIAL GAUGE
CALIBRATION CERTIFICATE
MAKE , RANGE AND PRICE
DIAL GAUGE AT NUV WORKSHOP
ERROR IN DIAL GAUGE
When we measuring the amplitudes and vibration, the dial gauge is found to be two major errors,
At low frequency
Due to the weakness of hairspring which takes up backlash in the mechanism.
At high frequency
It is produced by jumping of the gauge finger. It is postponed by using stronger gauge spring.
Error = Actual reading – Instrumental reading
% Error = Error x 100 / Actual reading
ADVANTAGE Accuracy is as high as 0.01 mm.
Operating Range up to 100 mm
Easy to Read
Quick in use if only comparison is required.
LIMITATIONS Does not Measure but will only indicate differences in size.
Easily damaged if mishandled.
Loss of Accuracy through number of moving parts.
Presentation gives brief overview of Linear and angular measurements related to engineering, different types of instruments used for Linear and angular measurements such as vernier calipers ,micrometers,their types,non precision measuring instruments etc.
These may be used as reference standards for transferring the dimension of the unit of length from the primary standard to gauge blocks of lower accuracy and for the verification and graduation of measuring apparatus. These are high carbon steel hardened, ground and lapped rectangular blocks, having cross sectional area 0f 30 mm
10mm. Their opposite faces are flat, parallel and are accurately the stated distance apart. The opposite faces are of such a high degree of surface finish, that when the blocks are pressed together with a slight twist by hand, they will wring together. They will remain firmly attached to each other. They are supplied in sets of 112 pieces down to 32 pieces. Due to properties of slip gauges, they are built up by, wringing into combination which gives size, varying by steps of 0.01 mm and the overall accuracy is of the order of 0.00025mm. Slip gauges with three basic forms are commonly found, these are rectangular, square with center hole, and square without center hole.
Responsibilities of the office bearers while registering multi-state cooperat...Finlaw Consultancy Pvt Ltd
Introduction-
The process of register multi-state cooperative society in India is governed by the Multi-State Co-operative Societies Act, 2002. This process requires the office bearers to undertake several crucial responsibilities to ensure compliance with legal and regulatory frameworks. The key office bearers typically include the President, Secretary, and Treasurer, along with other elected members of the managing committee. Their responsibilities encompass administrative, legal, and financial duties essential for the successful registration and operation of the society.
NATURE, ORIGIN AND DEVELOPMENT OF INTERNATIONAL LAW.pptxanvithaav
These slides helps the student of international law to understand what is the nature of international law? and how international law was originated and developed?.
The slides was well structured along with the highlighted points for better understanding .
RIGHTS OF VICTIM EDITED PRESENTATION(SAIF JAVED).pptxOmGod1
Victims of crime have a range of rights designed to ensure their protection, support, and participation in the justice system. These rights include the right to be treated with dignity and respect, the right to be informed about the progress of their case, and the right to be heard during legal proceedings. Victims are entitled to protection from intimidation and harm, access to support services such as counseling and medical care, and the right to restitution from the offender. Additionally, many jurisdictions provide victims with the right to participate in parole hearings and the right to privacy to protect their personal information from public disclosure. These rights aim to acknowledge the impact of crime on victims and to provide them with the necessary resources and involvement in the judicial process.
WINDING UP of COMPANY, Modes of DissolutionKHURRAMWALI
Winding up, also known as liquidation, refers to the legal and financial process of dissolving a company. It involves ceasing operations, selling assets, settling debts, and ultimately removing the company from the official business registry.
Here's a breakdown of the key aspects of winding up:
Reasons for Winding Up:
Insolvency: This is the most common reason, where the company cannot pay its debts. Creditors may initiate a compulsory winding up to recover their dues.
Voluntary Closure: The owners may decide to close the company due to reasons like reaching business goals, facing losses, or merging with another company.
Deadlock: If shareholders or directors cannot agree on how to run the company, a court may order a winding up.
Types of Winding Up:
Voluntary Winding Up: This is initiated by the company's shareholders through a resolution passed by a majority vote. There are two main types:
Members' Voluntary Winding Up: The company is solvent (has enough assets to pay off its debts) and shareholders will receive any remaining assets after debts are settled.
Creditors' Voluntary Winding Up: The company is insolvent and creditors will be prioritized in receiving payment from the sale of assets.
Compulsory Winding Up: This is initiated by a court order, typically at the request of creditors, government agencies, or even by the company itself if it's insolvent.
Process of Winding Up:
Appointment of Liquidator: A qualified professional is appointed to oversee the winding-up process. They are responsible for selling assets, paying off debts, and distributing any remaining funds.
Cease Trading: The company stops its regular business operations.
Notification of Creditors: Creditors are informed about the winding up and invited to submit their claims.
Sale of Assets: The company's assets are sold to generate cash to pay off creditors.
Payment of Debts: Creditors are paid according to a set order of priority, with secured creditors receiving payment before unsecured creditors.
Distribution to Shareholders: If there are any remaining funds after all debts are settled, they are distributed to shareholders according to their ownership stake.
Dissolution: Once all claims are settled and distributions made, the company is officially dissolved and removed from the business register.
Impact of Winding Up:
Employees: Employees will likely lose their jobs during the winding-up process.
Creditors: Creditors may not recover their debts in full, especially if the company is insolvent.
Shareholders: Shareholders may not receive any payout if the company's debts exceed its assets.
Winding up is a complex legal and financial process that can have significant consequences for all parties involved. It's important to seek professional legal and financial advice when considering winding up a company.
Introducing New Government Regulation on Toll Road.pdfAHRP Law Firm
For nearly two decades, Government Regulation Number 15 of 2005 on Toll Roads ("GR No. 15/2005") has served as the cornerstone of toll road legislation. However, with the emergence of various new developments and legal requirements, the Government has enacted Government Regulation Number 23 of 2024 on Toll Roads to replace GR No. 15/2005. This new regulation introduces several provisions impacting toll business entities and toll road users. Find out more out insights about this topic in our Legal Brief publication.
Car Accident Injury Do I Have a Case....Knowyourright
Every year, thousands of Minnesotans are injured in car accidents. These injuries can be severe – even life-changing. Under Minnesota law, you can pursue compensation through a personal injury lawsuit.
DNA Testing in Civil and Criminal Matters.pptxpatrons legal
Get insights into DNA testing and its application in civil and criminal matters. Find out how it contributes to fair and accurate legal proceedings. For more information: https://www.patronslegal.com/criminal-litigation.html
ASHWINI KUMAR UPADHYAY v/s Union of India.pptxshweeta209
transfer of the P.I.L filed by lawyer Ashwini Kumar Upadhyay in Delhi High Court to Supreme Court.
on the issue of UNIFORM MARRIAGE AGE of men and women.
PRECEDENT AS A SOURCE OF LAW (SAIF JAVED).pptxOmGod1
Precedent, or stare decisis, is a cornerstone of common law systems where past judicial decisions guide future cases, ensuring consistency and predictability in the legal system. Binding precedents from higher courts must be followed by lower courts, while persuasive precedents may influence but are not obligatory. This principle promotes fairness and efficiency, allowing for the evolution of the law as higher courts can overrule outdated decisions. Despite criticisms of rigidity and complexity, precedent ensures similar cases are treated alike, balancing stability with flexibility in judicial decision-making.
The Main Procedures for Obtaining Cypriot Citizenship
Presentation1
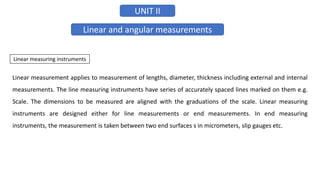
1. UNIT II
Linear and angular measurements
Linear measuring instruments
Linear measurement applies to measurement of lengths, diameter, thickness including external and internal
measurements. The line measuring instruments have series of accurately spaced lines marked on them e.g.
Scale. The dimensions to be measured are aligned with the graduations of the scale. Linear measuring
instruments are designed either for line measurements or end measurements. In end measuring
instruments, the measurement is taken between two end surfaces s in micrometers, slip gauges etc.
2. The instruments used for linear measurements can be classified as:
1. Direct measuring instruments
2. Indirect measuring instruments
3. Graduated
4. Non Graduated
The graduated instruments include rules, vernier callipers, vernier height gauges, vernier depth
gauges, micrometres, dial indicators etc. The non graduated instruments include callipers, trammels,
telescopic gauges, surface gauges, straight edges, wire gauges, screw pitch gauges, radius gauges,
thickness gauges, slip gauges etc.
1. Non precision instruments such as steel rule, calipers etc.,
2. Precision measuring instruments, such as vernier instruments, micrometers, dial gauges etc.
3. Scales:
• The most common tool for crude measurements is the scale (also known as rules, or rulers).
• Although plastic, wood and other materials are used for common scales, precision scales use tempered
steel alloys, with graduations scribed onto the surface.
• These are limited by the human eye. Basically they are used to compare two dimensions.
• The metric scales use decimal divisions, and the imperial scales use fractional divisions.
• Some scales only use the fine scale divisions at one end of the scale. It is advised that the end of the scale
not be used for measurement. This is because s they become worn with use, the end of the scale will no
longer be at a `zero' position.
• Instead the internal divisions of the scale should be used. Parallax error can be a factor when making
measurements with a scale.
4.
5. Calipers:
Caliper is an instrument used for measuring distance between or over surfaces comparing
dimensions of work pieces with such standards as plug gauges, graduated rules etc. Calipers may be
difficult to use, and they require that the operator follow a few basic rules, do not force the , they
will bend easily, and invalidate measurements made. If measurements are made using calipers for
comparison, one operator should make all of the measurements (this keeps the feel factor a minimal
error source). These instruments are very useful hen dealing with hard to reach locations that
normal measuring instruments cannot reach. Obviously the added step in the measurement will
significantly decrease the accuracy.
6. Vernier Calipers:
The vernier instruments generally used in workshop and engineering metrology have comparatively low
accuracy. The line of measurement of such instruments does not coincide with the line of scale. The
accuracy therefore depends upon the straightness of the beam and the squareness of the sliding jaw with
respect to the beam. To ensure the squareness, the sliding jaw must be clamped before taking the re ding.
The zero error must also be taken into consideration. Instruments are now available with measuring range
up to one meter with a scale value of 0.1 or 0.2 mm.
7. According to Indian Standard IS: 3651-1974, three types of vernier calipers have been specified to make
external and internal measurements a d are shown in figures respectively. All the three types are made with
scale on the front of the beam for direct reading.
Types of Vernier Calipers:
Type A: Vernier has jaws on both sides for external and internal measurements and a blade for depth
measurement
8. Type B: It is provided with jaws on one side for external and internal measurements.
9. Type C: It has jaws on both sides for making the measurement and for marking operations
10. Errors in Callipers:
The degree of accuracy obtained in measurement greatly depends upon the condition of the jaws
of the calipers and a special attention is needed before proceeding for the measurement The
accuracy and natural wear, and warping of Vernier caliper jaws should be tested frequently by
closing them together tightly and setting them to 0-0 point of the main and Vernier scales.
11. Micrometers:
There are two types in it.
1. Outside micrometer — To measure external dimensions.
2. Inside micrometer — To measure internal dimensions.
An outside micrometer is shown. It consists of two scales, main scale and thimble scale. While the pitch of
barrel screw is 0.5 mm the thimble has graduation of 0.01 mm. The least count of this micrometer is 0.01 mm
12. The micrometer requires the use of an a urate screw thread as a means of obtaining a
measurement. The screw is attached to a spindle and is turned by movement of a thimble or
ratchet at the end. The barrel, which is attach d to the frame, acts as a nut to engage the screw
threads, which are accurately made with a pitch of 0.05mm. Each revolution of the thimble
advances the screw 0.05 . On the barrel a datum line is graduated with two sets of division
marks.
13. Slip gauges:
These may be used as reference standards for transferring the dimension of the unit of length from the
primary standard to gauge blocks of lower accuracy and for the verification and graduation of
measuring apparatus. These are high carbon steel hardened, ground and lapped rectangular blocks,
having cross sectional area of 30 mm x 10 mm.
Their opposite faces are flat, parallel and are accurately the stated distance apart. The opposite faces
are of such a high degree of surface finish, that when the blocks are pressed together with a slight twist
by hand, they will wring together. They will remain firmly attached to each other. They are supplied in
sets of 112 pieces down to 32 pieces. Due to properties of slip gauges, they are built up by, wringing
into combination which gives size, varying by steps of 0.01 mm and the overall accuracy is of the order
of 0.00025mm. Slip gauges with three basic forms are commonly found, these are
rectangular, square with center hole, and square without center hole.
14.
15. Wringing or Sliding is nothing but combining the faces of slip gauges one over the other. Due to
adhesion property of slip gauges, they will stick together. This is because of very high degree of surface
finish of the measuring faces.
16. Classification of slip gauges:
Slip gauges are classified into various types according to their
use as follows:
Grade 2
Grade 1
Grade 0
Grade 00
Calibration grade.
17. 1) Grade 2:
It is a workshop grade slip gauges used for setting tools, utters and checking
dimensions roughly.
2) Grade 1:
The grade I is used for precise work in tool rooms.
3) Grade 0:
It is used as inspection grade of slip gauges mainly by inspection department.
4) Grade 00:
Grade 00 mainly used in high pre ision works in the form of error detection in
instruments.
5) Calibration grade:
The actual size of the slip gauge is calibrated on a chart supplied by
the manufactures.
18. Manufacturing of slip gauges:
The following additional operations are carried out to obtain the necessary qualities in slip gauges
during manufacture.
i) First the approximate size of slip gauges is done by preliminary operations.
ii) The blocks are hardened and wear resistant by a special heat treatment process.
iii) To stabilize the whole life of blocks, seasoning process is done.
iv) The approximate required dimension is done by a final grinding process.
v) To get the exact size of slip gauges, lapping operation is done.
vi) Comparison is made with grand master sets.
19. Slip gauges accessories:
The application slip gauges can be increased by providing accessories to the slip
gauges. The various accessories are:
• Measuring jaw
• Scriber and Centre point.
• Holder and base
1. Measuring jaw:
It is available in two designs specially made for internal and external features.
2. Scriber and Centre point:
It is mainly formed for marking purpose.
3. Holder and base:
Holder is nothing but a holding device used to hold combination of slip gauges.
Base in designed for mounting the holder rigidly on its top surface.
20. Interferometers:
They are optical instruments used for measuring flatness and determining the length of the slip gauges by
direct reference to the wavelength of light. It overcomes the drawbacks of optical flats used in ordinary
daylight. In these instruments the lay of the optical flat can be controlled and fringes can be oriented as per
the requirement. An arrangement is made to view the fringes directly from the top and avoid any distortion
due to incorrect viewing.
21. Optical flat and calibration:
Optical flat are flat lenses, made from quartz, having a very accurate surface to transmit light. They are
used in interferometers, for testing plane surfaces. The diameter of an optical flat varies from 50 to 250
nun and thickness varies from 12 to 25 mm. Optical flats are made in a range of sizes and shapes. The
flats are available with a coated surface. The coating is a thin film, usually titanium ox de, appl ed on the
surface to reduce the light lost by reflection. The coating is so thin that it does not affect the position of
the fringe bands, but a coated flat. The supporting surface on which the optical flat measurements are
made must provide a clean, rigid platform.
22. Optical flats are cylindrical in form, with the working surface and are of two types are i) type A, ii) type B
i) Type A:
It has only one surface flat and is used for testing of precision measuring surfaces of flats, slip gauges and
measuring tables. The tolerance on flat should be 0.05 µm for type A.
ii) Type B:
It has both surfaces flat and parallel to each other. They are used for testing measuring surfaces of
micrometers, Measuring anvils and similar length of measuring devices for testing flatness and
parallelism. For these instruments, their thickness and grades are important. The tolerances on flatness,
parallelism and thickness should be 0.05 µm.
23. Interference bands by optical flat:
Optical flats arc blocks of glass finished to within 0.05 microns for flatness When art optical flat is on a flat
surface which is not perfectly flat then optical flat will not exactly coincide with it, but it will make an angle e
with the surface as shown in Figure 2.8.
24. Sine bar:
Sine bars are always used along with slip gauges s a device for the measurement
of angles very precisely. They are used to
1) Measure angles very accurately.
2) Locate the work piece to a given angle with very high precision.
Generally, sine bars are made from high carbon, high chromium, and corrosion resistant steel. These mat
rials are highly hardened, ground and stabilized. In sine bars, two cylinders of equal diam t r are attached at
lie ends with its axes are mutually parallel to each other. They are also at equal distance from the upper
surface of the sine bar mostly the distance between the axes of two cylinders is 100mm, 200mm or 300mm.
The working surfaces of the rollers are finished to 0.2µm R value. The cylindrical holes are provided to
reduce the weight of the sine bar.
25. Working principle of Sine bar:
The working of sine bar is based on trigonometry principle. To measure the angle of a given specimen, one
roller of the sine bar is placed on the surface plate and another one roller is placed over the surface of slip
gauges. Now, ‘h be the height of the slip gauges and ‘L’ be the distance between roller centers, then the
angle is calculated as
sin
h
L
1
sin
h
L
26. i) To set at an angle θ, first ‘h’ of the slip
gauge is calculated by the formula given in
equation 1.
ii) After calculating the height ‘h’, the
required height ‘h’ is made by using
suitable slip gauge combinations.
iii) After this, one of the rollers is placed on
the top of the slip gauge combination.
27. i) Before checking the unknown angle of the specimen,
first the angle (0) of given specimen is found
approximately by bevel protractor.
ii) Then the sine bar is set at angle of 0 and
clamped on the angle plate.
iii) Now, the work is placed on the sine bar and
the dial indicator set at one end of the work is moved
across the work piece and deviation is noted.
iv) Slip gauges are adjusted so that the dial
indicator reads zero throughout the work surface.
28. Limitations of sine bars:
1) Sine bars are fairly reliable for angles than 15°.
2) It is physically difficult to old in position.
3) Slight errors in sine bar cause larger angular errors.
4) A difference of deformation occurs at the point of
roller contact with the surface plate and to the
gauge blocks.
5) The size of parts to be inspected by sine bar is
limited
29. Sources of errors sine bars:
The different sources of errors are listed below:
1) Error in distance between roller centers.
2) Error in slip gauge co bination.
3) Error in checking of parallelism.
4) Error in parallelism of roller axes with each other.
5) Error in flatness of the upper surface of sine bar.
30. Bevel Protractor:
Bevel protractors are nothing but angular measuring instruments. The different types of bevel protractors used
are:
Types of bevel protractors:
1) Vernier bevel protractor
2) Universal protractor
3) Optical protractor
31. Vernier Bevel Protractor:
A vernier bevel protractor is attached with acute angle attachment. The body is designed its back is
flat and no projections beyond its back. The base plate is attached to the main body and an
adjustable blade is attached to the circular plate containing Vernier sc le. The main scale is
graduated in degrees from 0° to 90° in both the directions. T e adjustable can be made to rotate
freely about the center of the main scale and it can be locked at any position. For measuring acute
angle, a special attachment is provided. The base plate is made fiat for measuring angles and can
be moved throughout its length. The ends of the blade are beveled at angles of 45° and 60°. The
main scale is graduated as one main scale division is 1° and Vernier is graduated into 12 divisions
on each side of zero. Therefore the least count is calculated as
32. Least count= One main scale division/ No. of divisions on vernier scale
1
(deg )
12
o
rees
1
60 5
12
minutes
Thus, the bevel protractor can be used to
measure to an accuracy of 5 minutes.
33. Applications of bevel protractor:
The bevel protractor can be used in the following applications.
1. For checking V-block 2. For checking acute angle
35. Auto Collimator:
Auto-collimator is an optical instrument used for the measurement of small angular differences, changes or
deflection, plane surface inspection etc. For small angular measurements, autocollimator provides a very
sensitive and accurate approach. An autocollimator is essentially an infinity telescope and a collimator tor
combined into one instrument.
36. Basic principle of auto-collimator:
If a light source is placed in the flows of a collimating lens, it is projected as a parallel beam of light. If this
beam is made to strike a plane reflector, kept normal to the optical axis, it is reflected back along its own
path and is brought to the same focus. The reflector is tilted through a small angle ‘0’. Then the parallel
beam is deflected twice the angle and is brought to focus in the same plane as the light source. The distance
of focus from the object is given:
2 .
x f
Where,
f= focal length of the lens
θ= Fitted angle of the reflecting mirror
37. Working of auto-collimator:
There are three main parts in auto-collimator.
1. Micrometer microscope.
2. Lighting unit and
3. Collimating lens.
Figure shows a line diagram of a modern auto-collimator. A target graticule is positioned perpendicular to
the optical axis. When the target graticule is illuminated by a lamp, rays of light diverging from the
intersection point reach the objective lens via beam splitter. From objective, the light rays are projected as a
parallel rays to the reflector.
38.
39. A flat reflector placed in front of the objective and exactly normal to the optical
axis reflects the parallel rays of light back along their original paths. They are then
brought to the target graticule and exactly coincide with its intersection. A portion of the returned light
passes through the beam splitter and is visible through the eyepiece. If the reflector is tilted through a
small angle, the reflected beam will be changed its path at an angle. It can also be brought to target
graticule but linearly displaced from the actual target by the amount 2θ x f. linear displacement of the
graticule image in the plane tilted angle of eyepiece is directly proportional to the reflector. This can be
measured by optical micrometer. The photoelectric auto- collimator is particularly suitable for
calibrating polygons, for checking angular indexing and for checking small l near displacements.
40. Application of auto-collimator:
1) Measuring the difference in height of length standards.
2) Checking the flatness and straightness of surfaces.
3) Checking square ness of two surfaces.
4) Precise angular indexing in conjunction with polygons.
5) Checking alignment or parallelism.
6) Comparative measurement using master angles.
7) Measurement of small linear dimensions.
8) For machine tool adjustment testing.
41. Angle Dekkor:
This is also a type of auto-collimator. There is an illuminated scale in the focal plane of the collimating
lens. This illuminated scale is projected as a parallel beam by the collimating lens which after striking a
reflector below the instrument is refocused by the lens in the filed of view of the eyepiece. In the field of
view of microscope, there is another datum scale fixed across the center of screen. The reflected image
of the illuminated scale is received at right angle to the fixed scale as shown in fig. Thus the changes in
angular position of the reflector in two planes are indicated by changes in the point of intersection of the
two scales. One division on the scale is calibrated to read 1 minute.
42.
43. Application of Angle dekkor:
1. Measuring angle of a component:
Angle dekkor is capable of measuring small variations in angular setting i.e. determining angular tilt.
Angle dekkor is used in combination with angle gauge. First the angle gauge combination is s t up to the
nearest known angle of the component. Now the angle dekkor is set to zero reading on the illuminated
scale. The angle gauge build up is then removed and replaced by the component under test. Usually a
straight edge being used to ensure that there is no change in lateral positions. The new position of the
reflected scale with respect to the fixed scale gives the angular tilt of the component from the set angle.
44. 2. Checking the slope of a V-block:
Figure shows the set up for checking the sloping angle of
V block. Initially, a polished reflector or slip gauge is
attached in close contact with the work surface. By using
angle gauge zero reading is obtained in the angle dekkor.
Then the angle may be calculated by comparing the
reading obtained from the angle dekkor and angle gauge.
45. 3. To measure the angle of cone or taper gauge:
Initially, the angle dekkor is set for t e nominal angle of cone by using angle gauge or sine bar. The cone is
then placed in position with its base resting on the surface plate. A slip gauge or reflector is attached on
the cone since no reflection can be obtained from the curved surface. Any deviation from the set angle
will be noted by the angle dekkor in the eyepiece and indicated by the shifting of the image of illuminated
scale.
46. Straightness measurement :
A line is said to be straight over a given length, if the variation of the distance of its from two planes
perpendicular to each other and parallel to the general direction of the line remains within the
specified tolerance limits. The tolerance on the straightness of a line is defined as the maximum
deviation in relation to the reference straight line joining the two extremities of the line to be checked.
47. Straight edge :
A straight edge is a measuring tool which consists of a length of a length of a steel of narrow and
deep section in order to provide resistance to bending in the plane of measurement without
excessive weight. For checking the straightness of any surface, the straight edge is placed over the
surface and two are viewed against the light, which clearly indicate the straightness. The gap
between the straight edge and surface will be negligibly small for perfect surfaces. Straightness is
measured by observing the colour of light by diffraction while passing through the small gap. If
the colour of light be red, it indicates a gap of 0.0012 to 0.0075mm. A more accurate method of
finding the straightness by straight edges is to place it in equal slip gauges at the correct point for
minimum deflection and to measure the uniformity of space u der the straight edge with slip
gauges.
48. Test of straightness by using spirit level and auto-collimator :
The straightness of any surface could be determined by either of these instruments by measuring the
relative angular positions of number of adjacent sections of the surface to be tested. First straight line is
drawn on the surface then it is divided into a number of sections the length of each section being equal to
the length of sprit level base or the plane reflector’ s base in case of auto collimator. The bases of the spirit
level block or reflector are fitted with two feet so that only feet have line contact with the surface and the
surface of base does not touch the surface to he tested. The angular division obtained is between the
specified two points. Length of each section must be equal to distance between the centerlines of two feet.
49. The special level can be used only for the measurement of straightness of horizontal surfaces while
auto-collimator can be used on surfaces are any plane. In case of spirit level, the block is moved along
the line equal to the pitch distance between the centerline of the feet and the angular variation of the
direction of block. Angular variation can be determined in terms of the difference of height between
two points by knowing the least count of level and length of the base
50. In case of autocollimator the instrument is placed at a distance of 0.5 to 0.75m from the surface to
be tested. The parallel beam from the instrument is projected along the length of the surface to be
tested. A block fixed on two feet and fitted with a plane vertical reflector is placed on the surface
and the reflector face s facing the instrument. The image of the cross wires of the collimator
appears nearer the center of the field and for the complete movement of reflector along the
surface straight line the image of cross wires will appear in the field of eyepiece. The reflector is
then moved to the other end of the surface in steps equal to. The center distance between the feet
and the tilt of the reflector is noted down in second from the eyepiece.
51. Flatness testing:
Flatness testing is possible by comparing the surface with an accurate surface. This method is suitable for
small plates and not for large surfaces. Mathematically flatness error of a surface states that the departure
from flatness is the minimum separation of a pair of parallel planes which will contain all points on the
Surface. The figure which shows that a surface can be considered to be composed of number of lines. The
surface will be flat only if all the lines are straight same plane. In the case of rectangular table arc the lines
are straight and parallel to the sides of the rectangle in both the perpendicular direction. Even this is not flat,
but concave and convex along two diagonals. For verification, the essential straightness of diagonals in
addition to the lines parallel to the sides.
52. Procedure for determining flatness:
The fig. shows the flatness testing procedure.
(i) Carry out the straightness test and tabulate the reading up to the cumulative error column.
(ii) Ends of lines AB, AD and BD are corrected to zero and thus the height of the points A, B and D are zero.
53. The height of the point I is determined relative to the arbitrary plane ABD = 000. Point C is now fixed relative to the
arbitrary plane and points B and D are set at zero, all intermediate points on BC and DC can be corrected
accordingly. The positions of H and G, E and F are known, so it is now possible to fit in lines HG and EF. This also
provides a check on previous evaluations sin e the midpoint of these lines should coincide with the position of mid-
point I. In this way, the height of all the points on the surface relative to the arbitrary plane ABD is known.