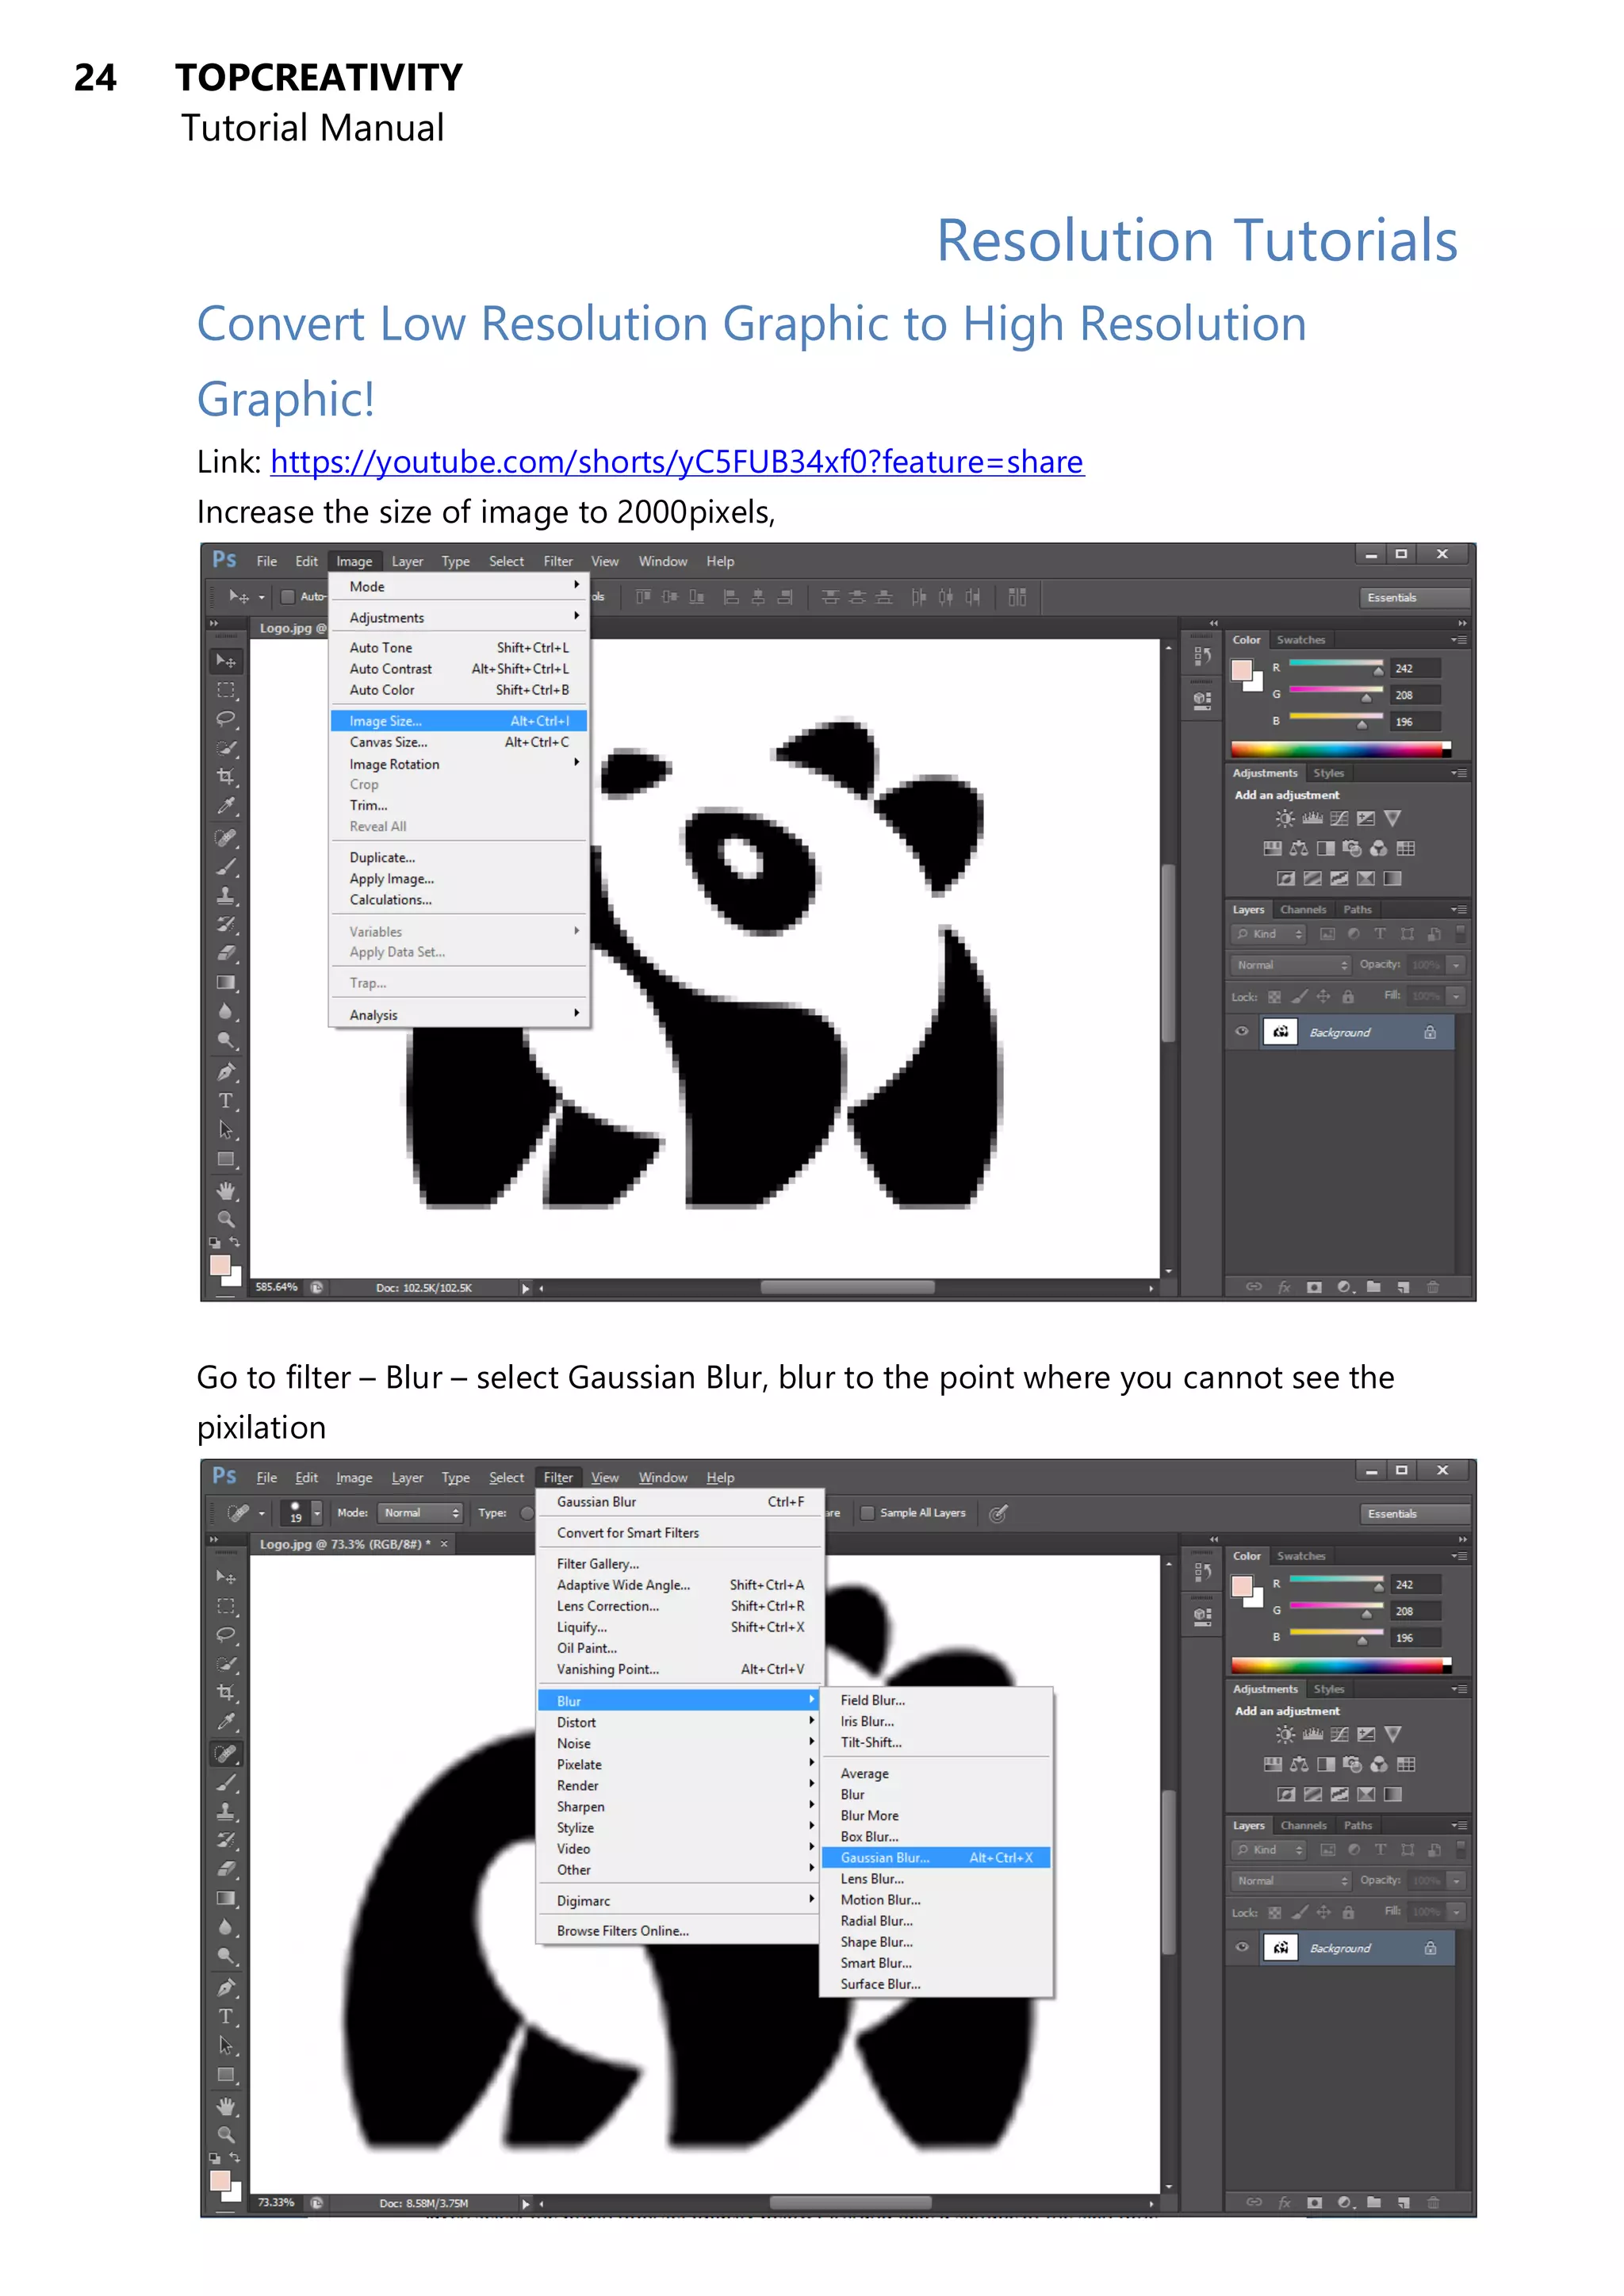
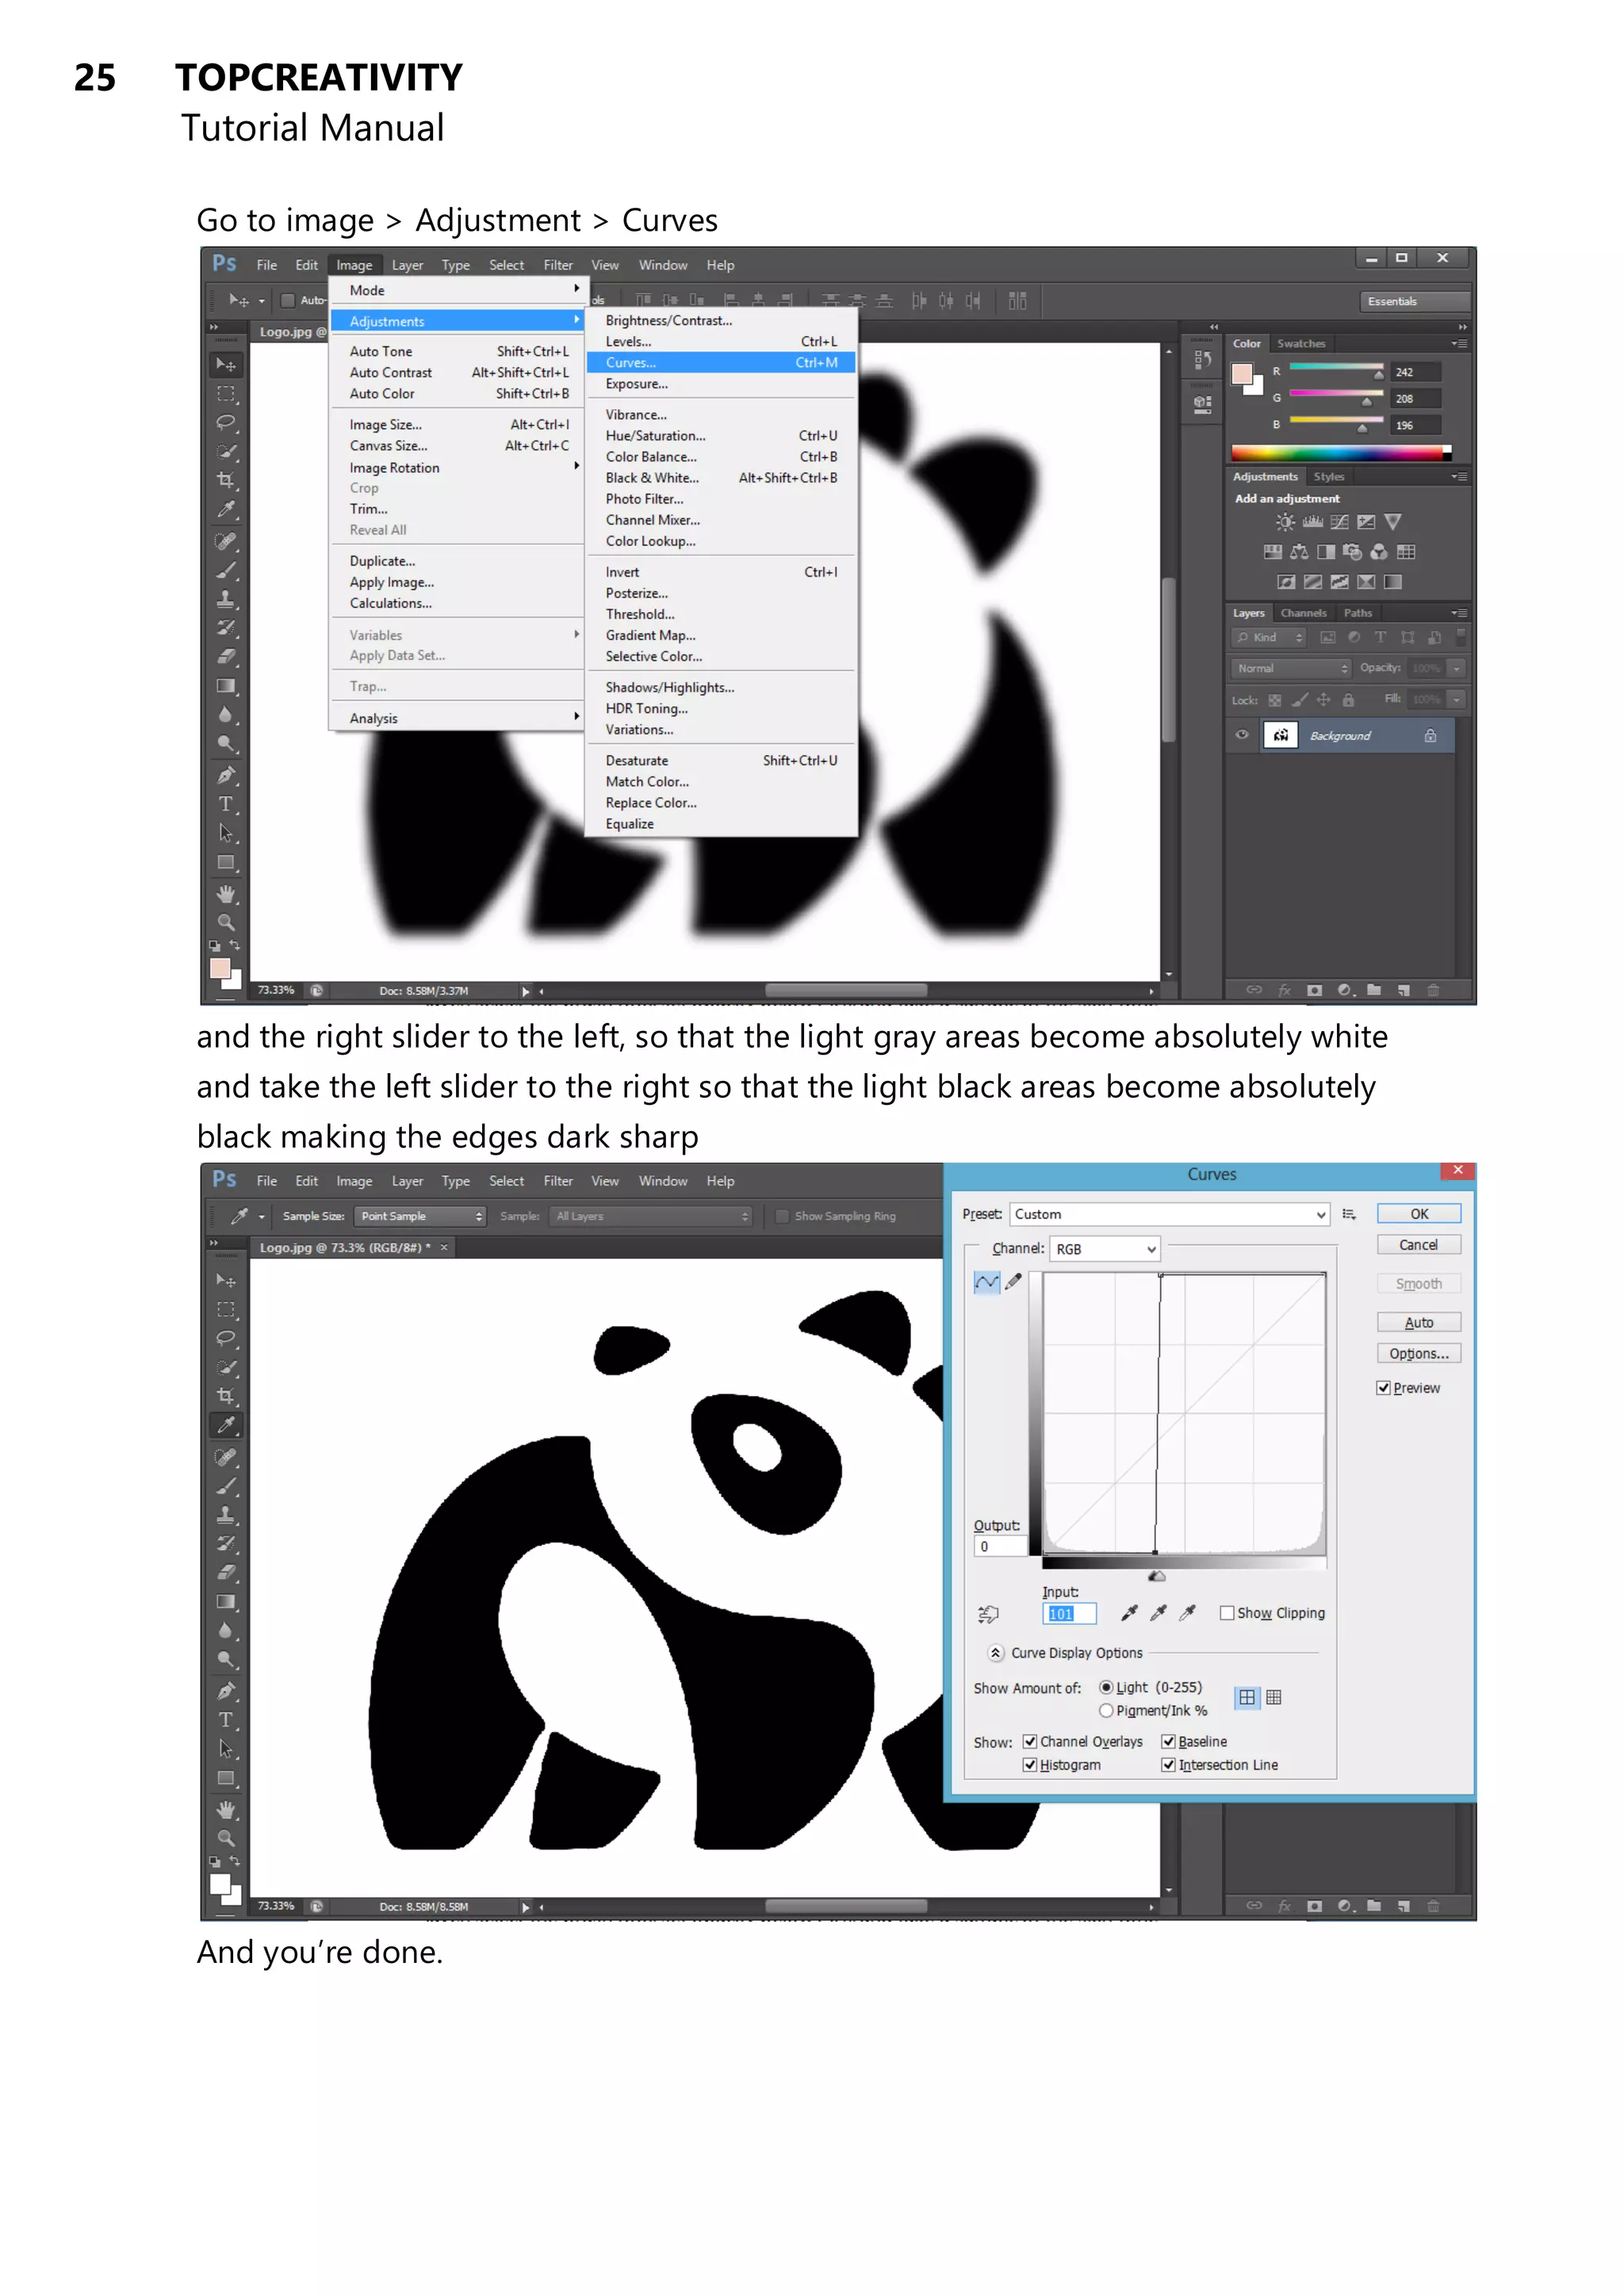
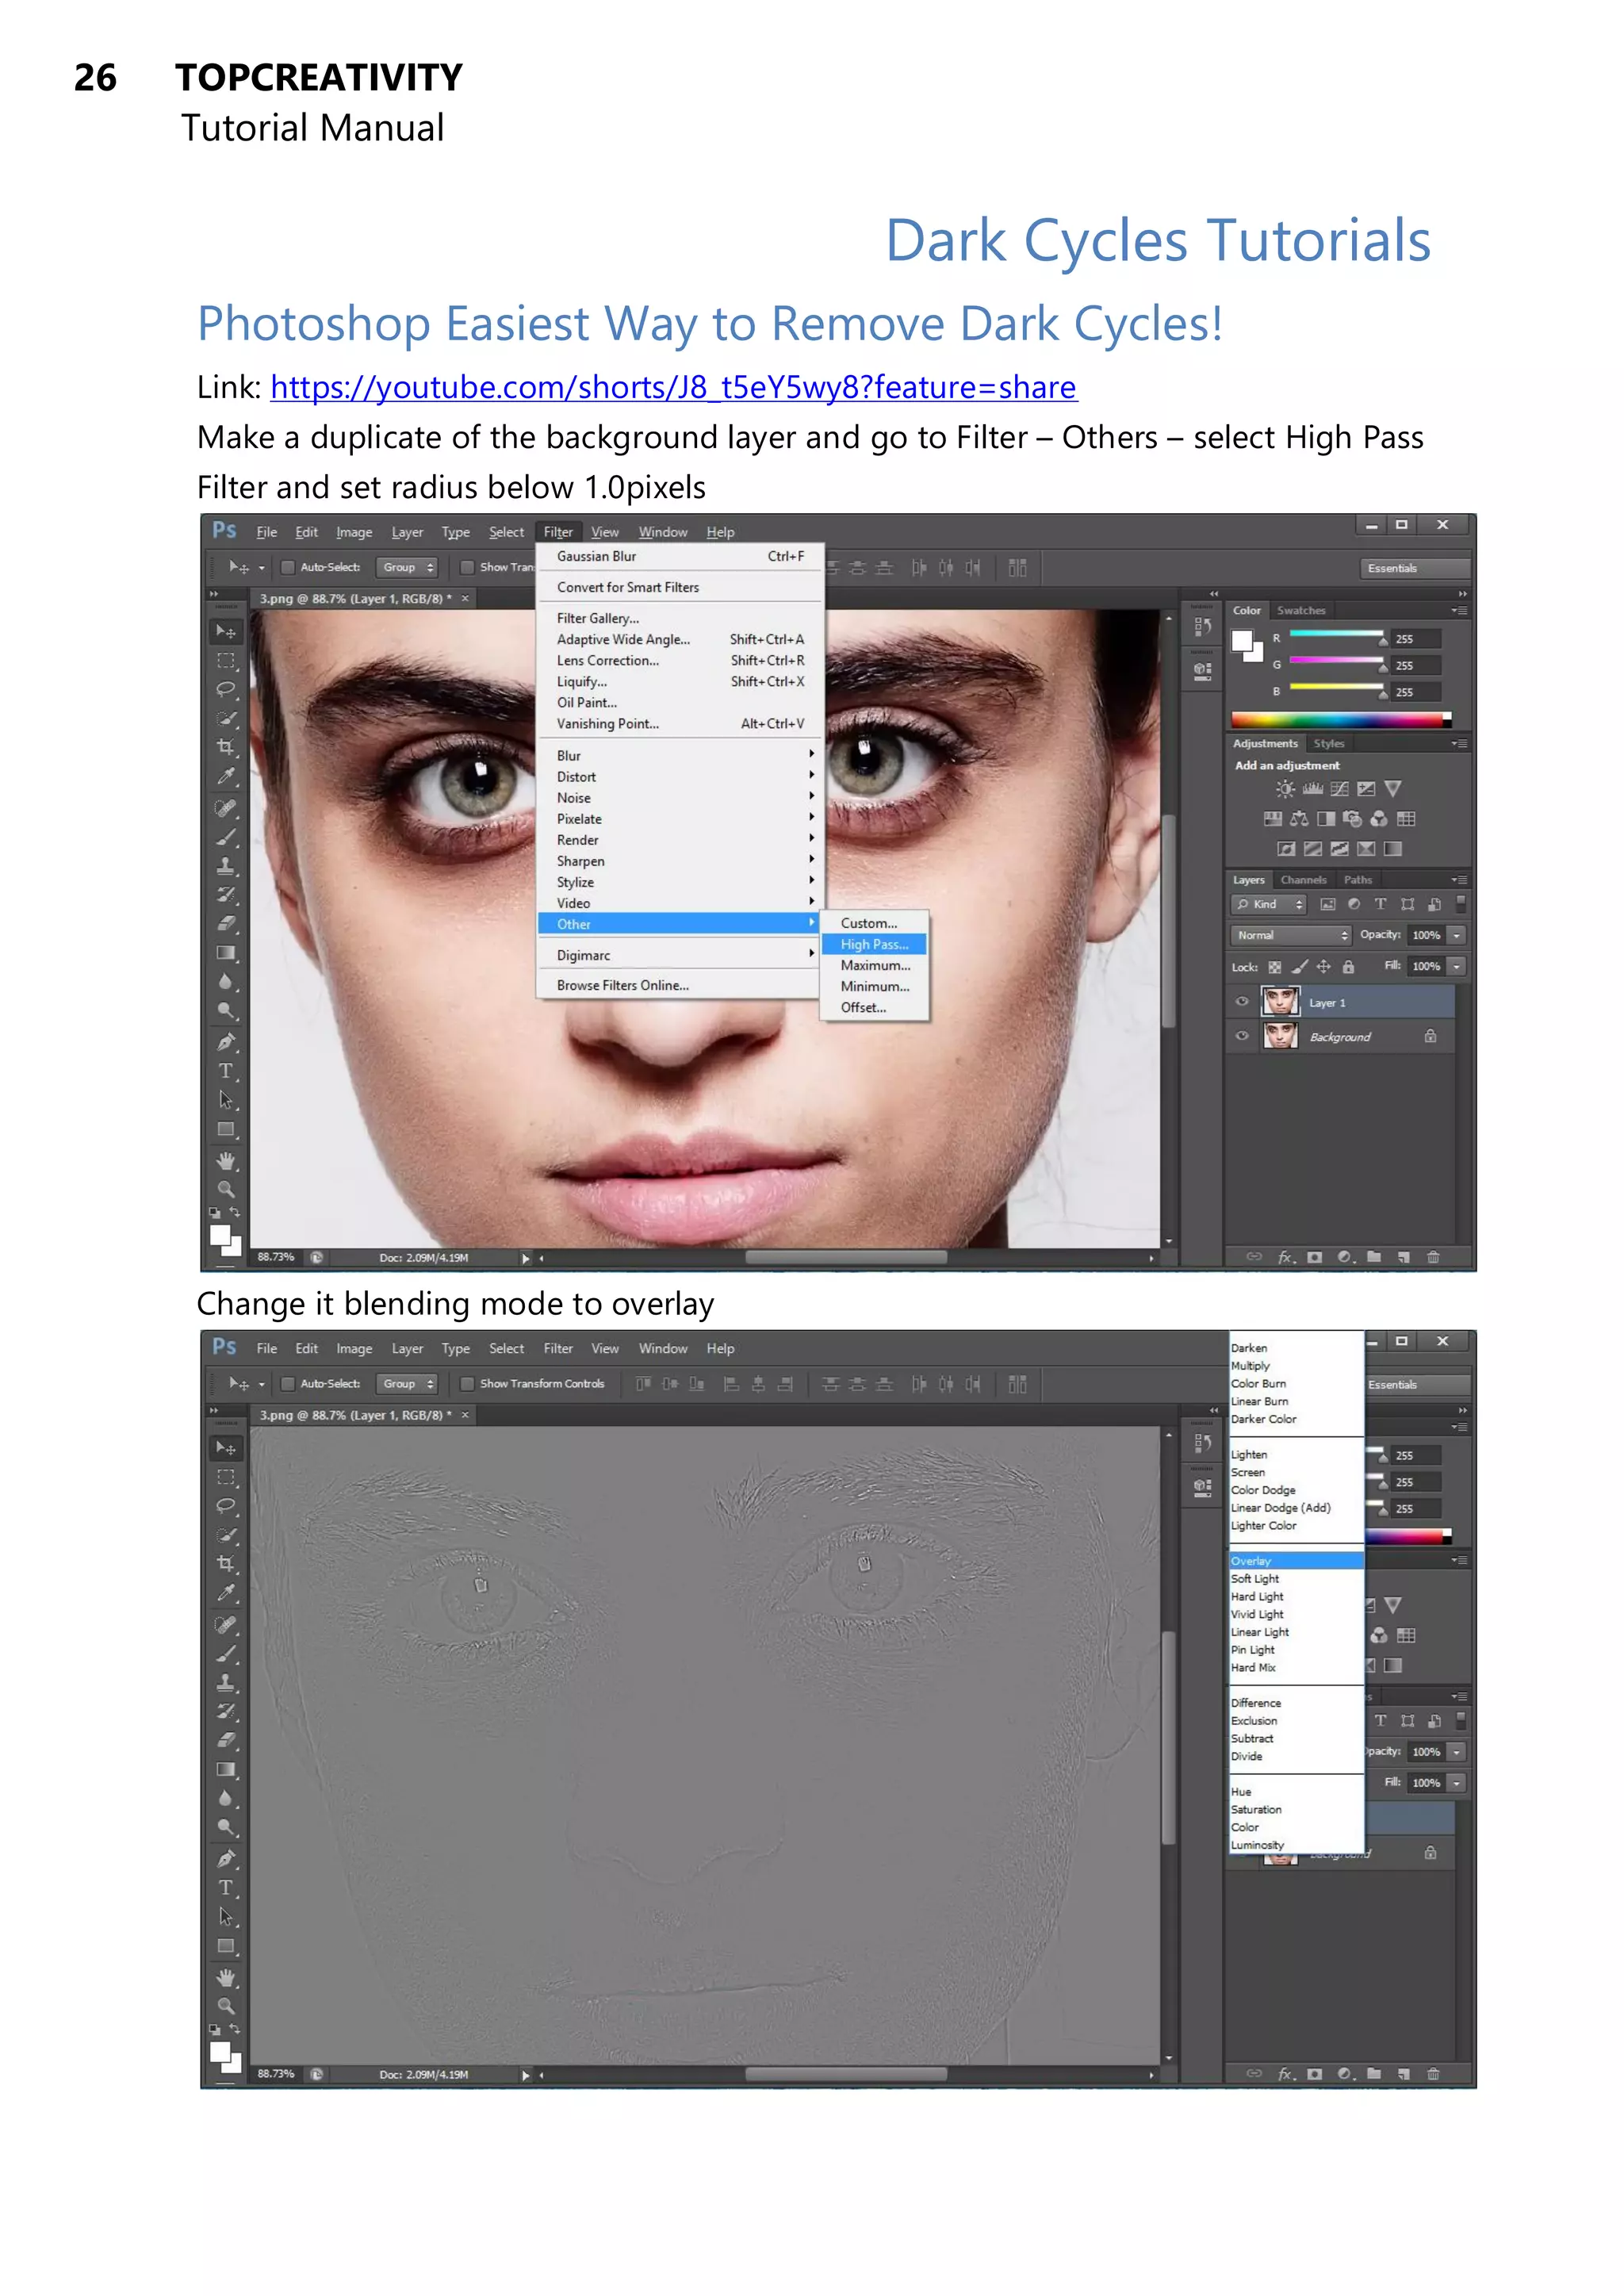
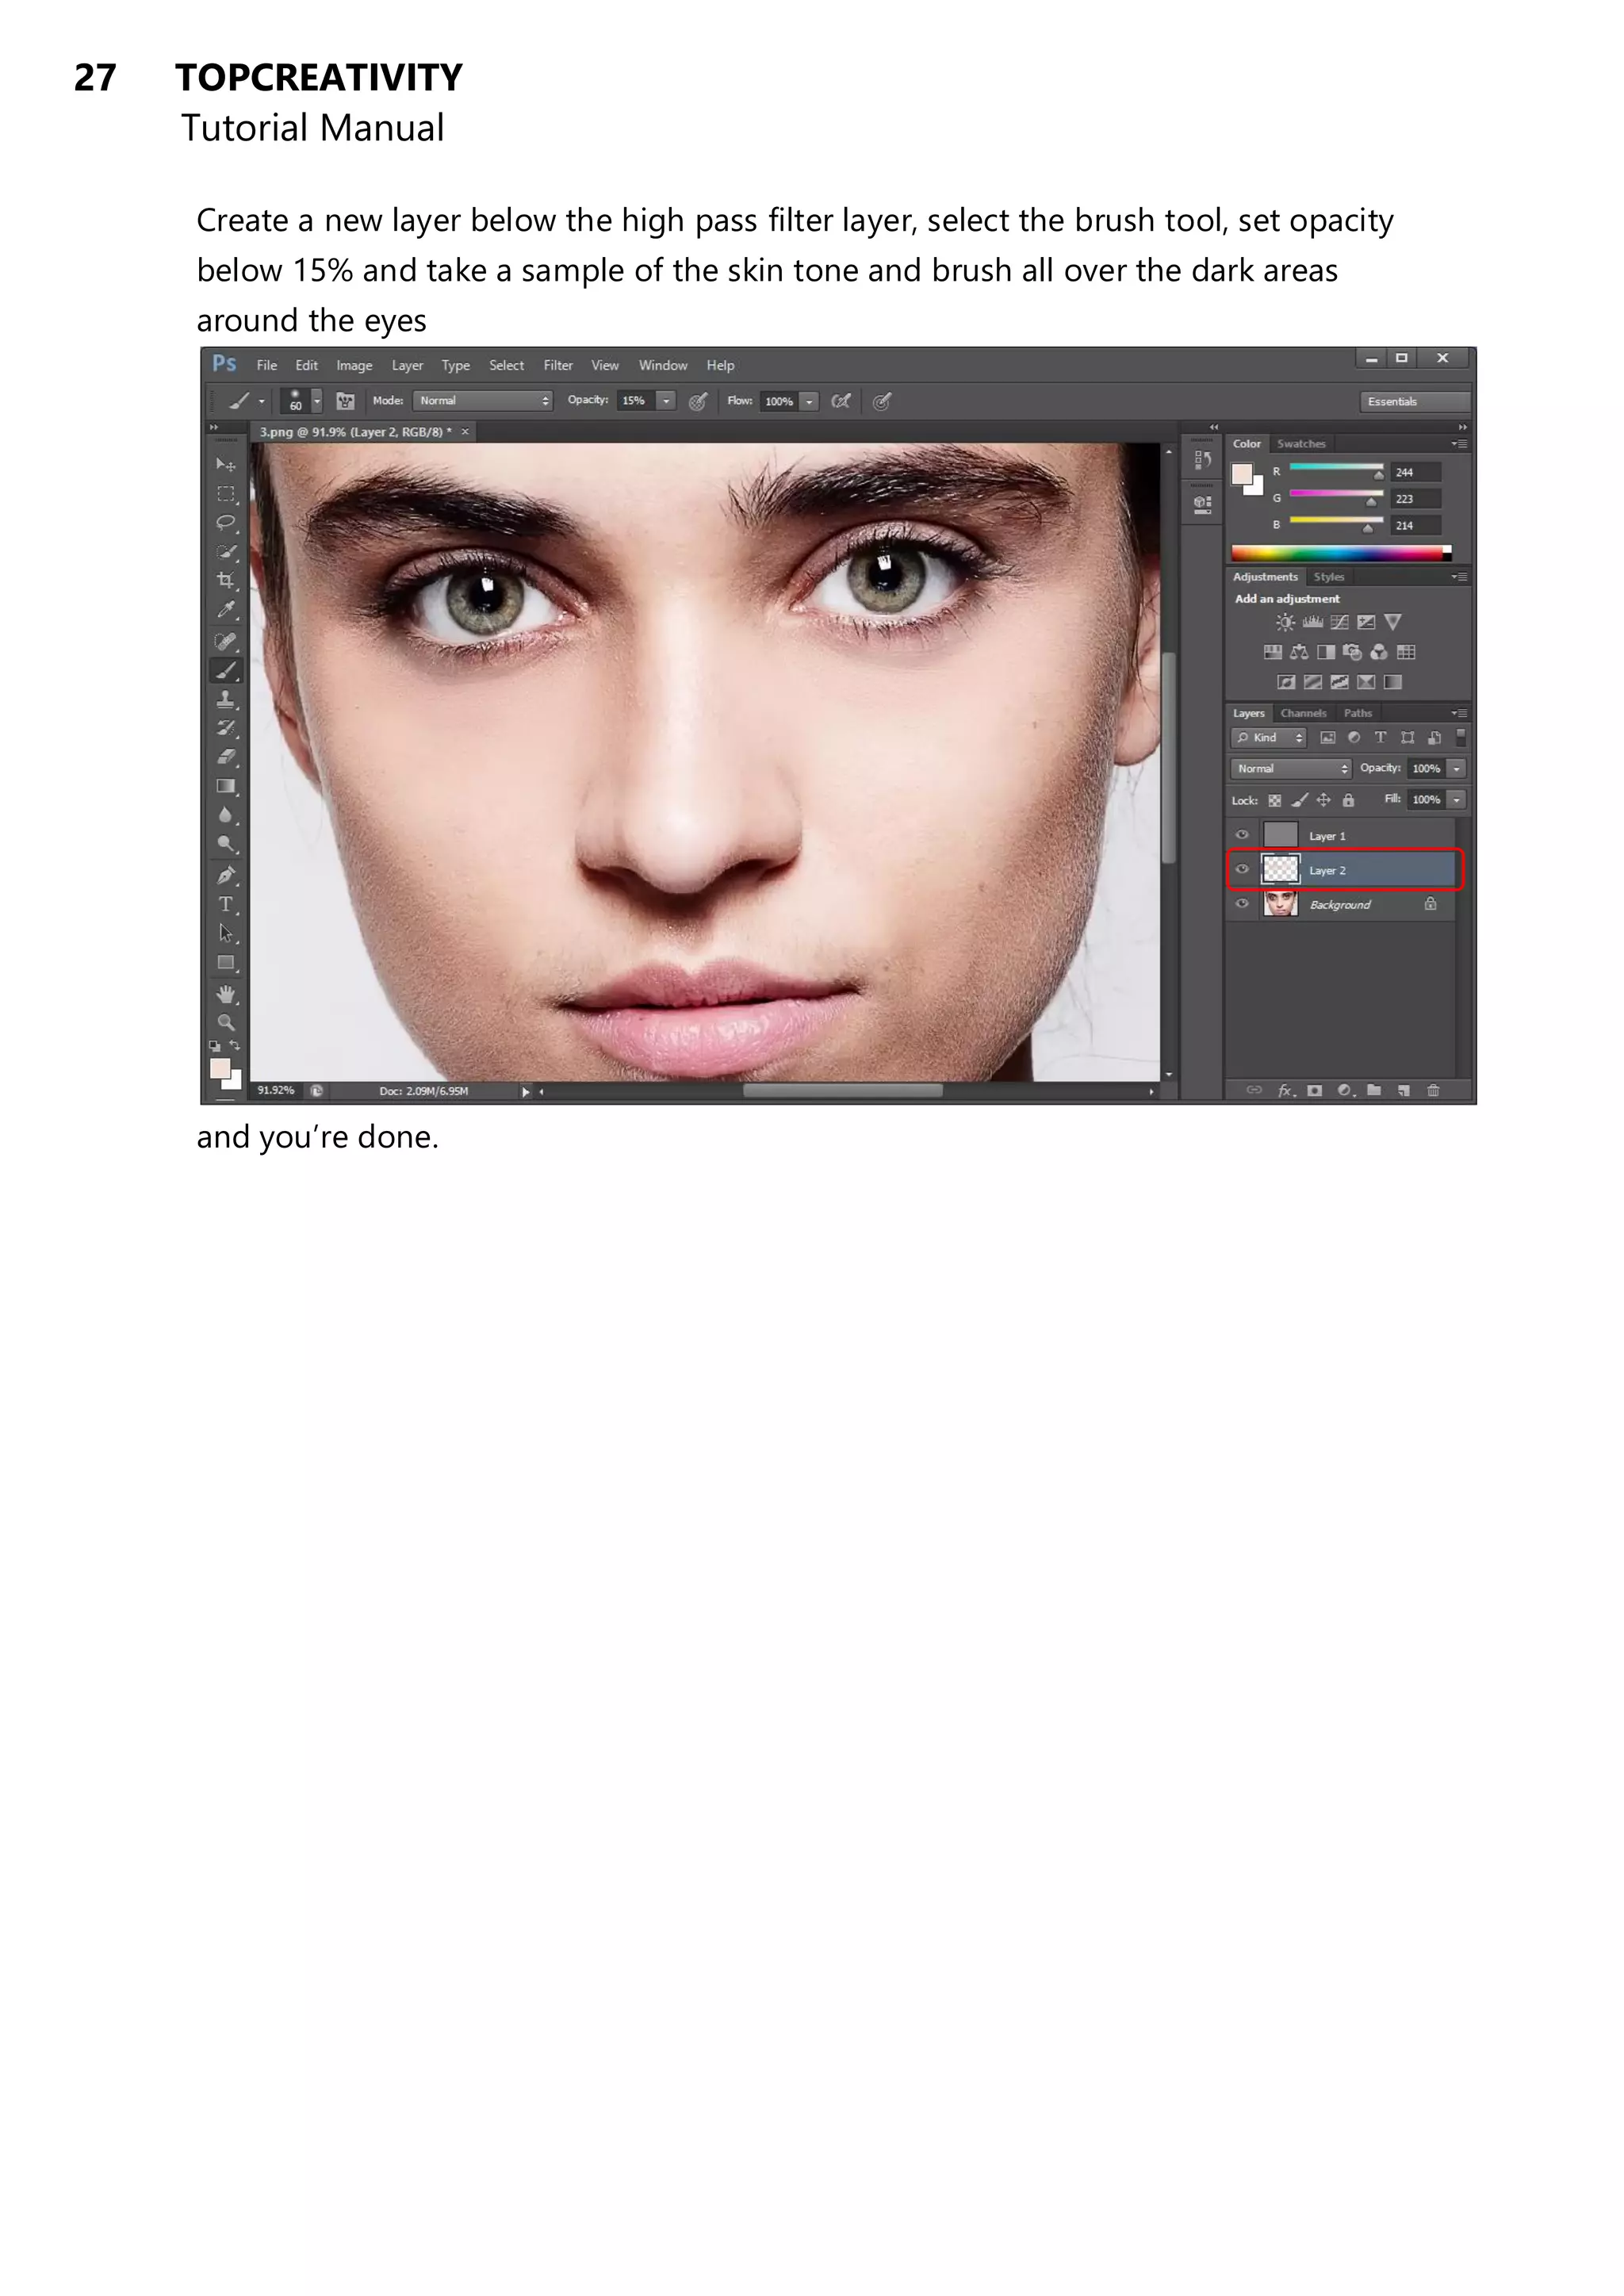
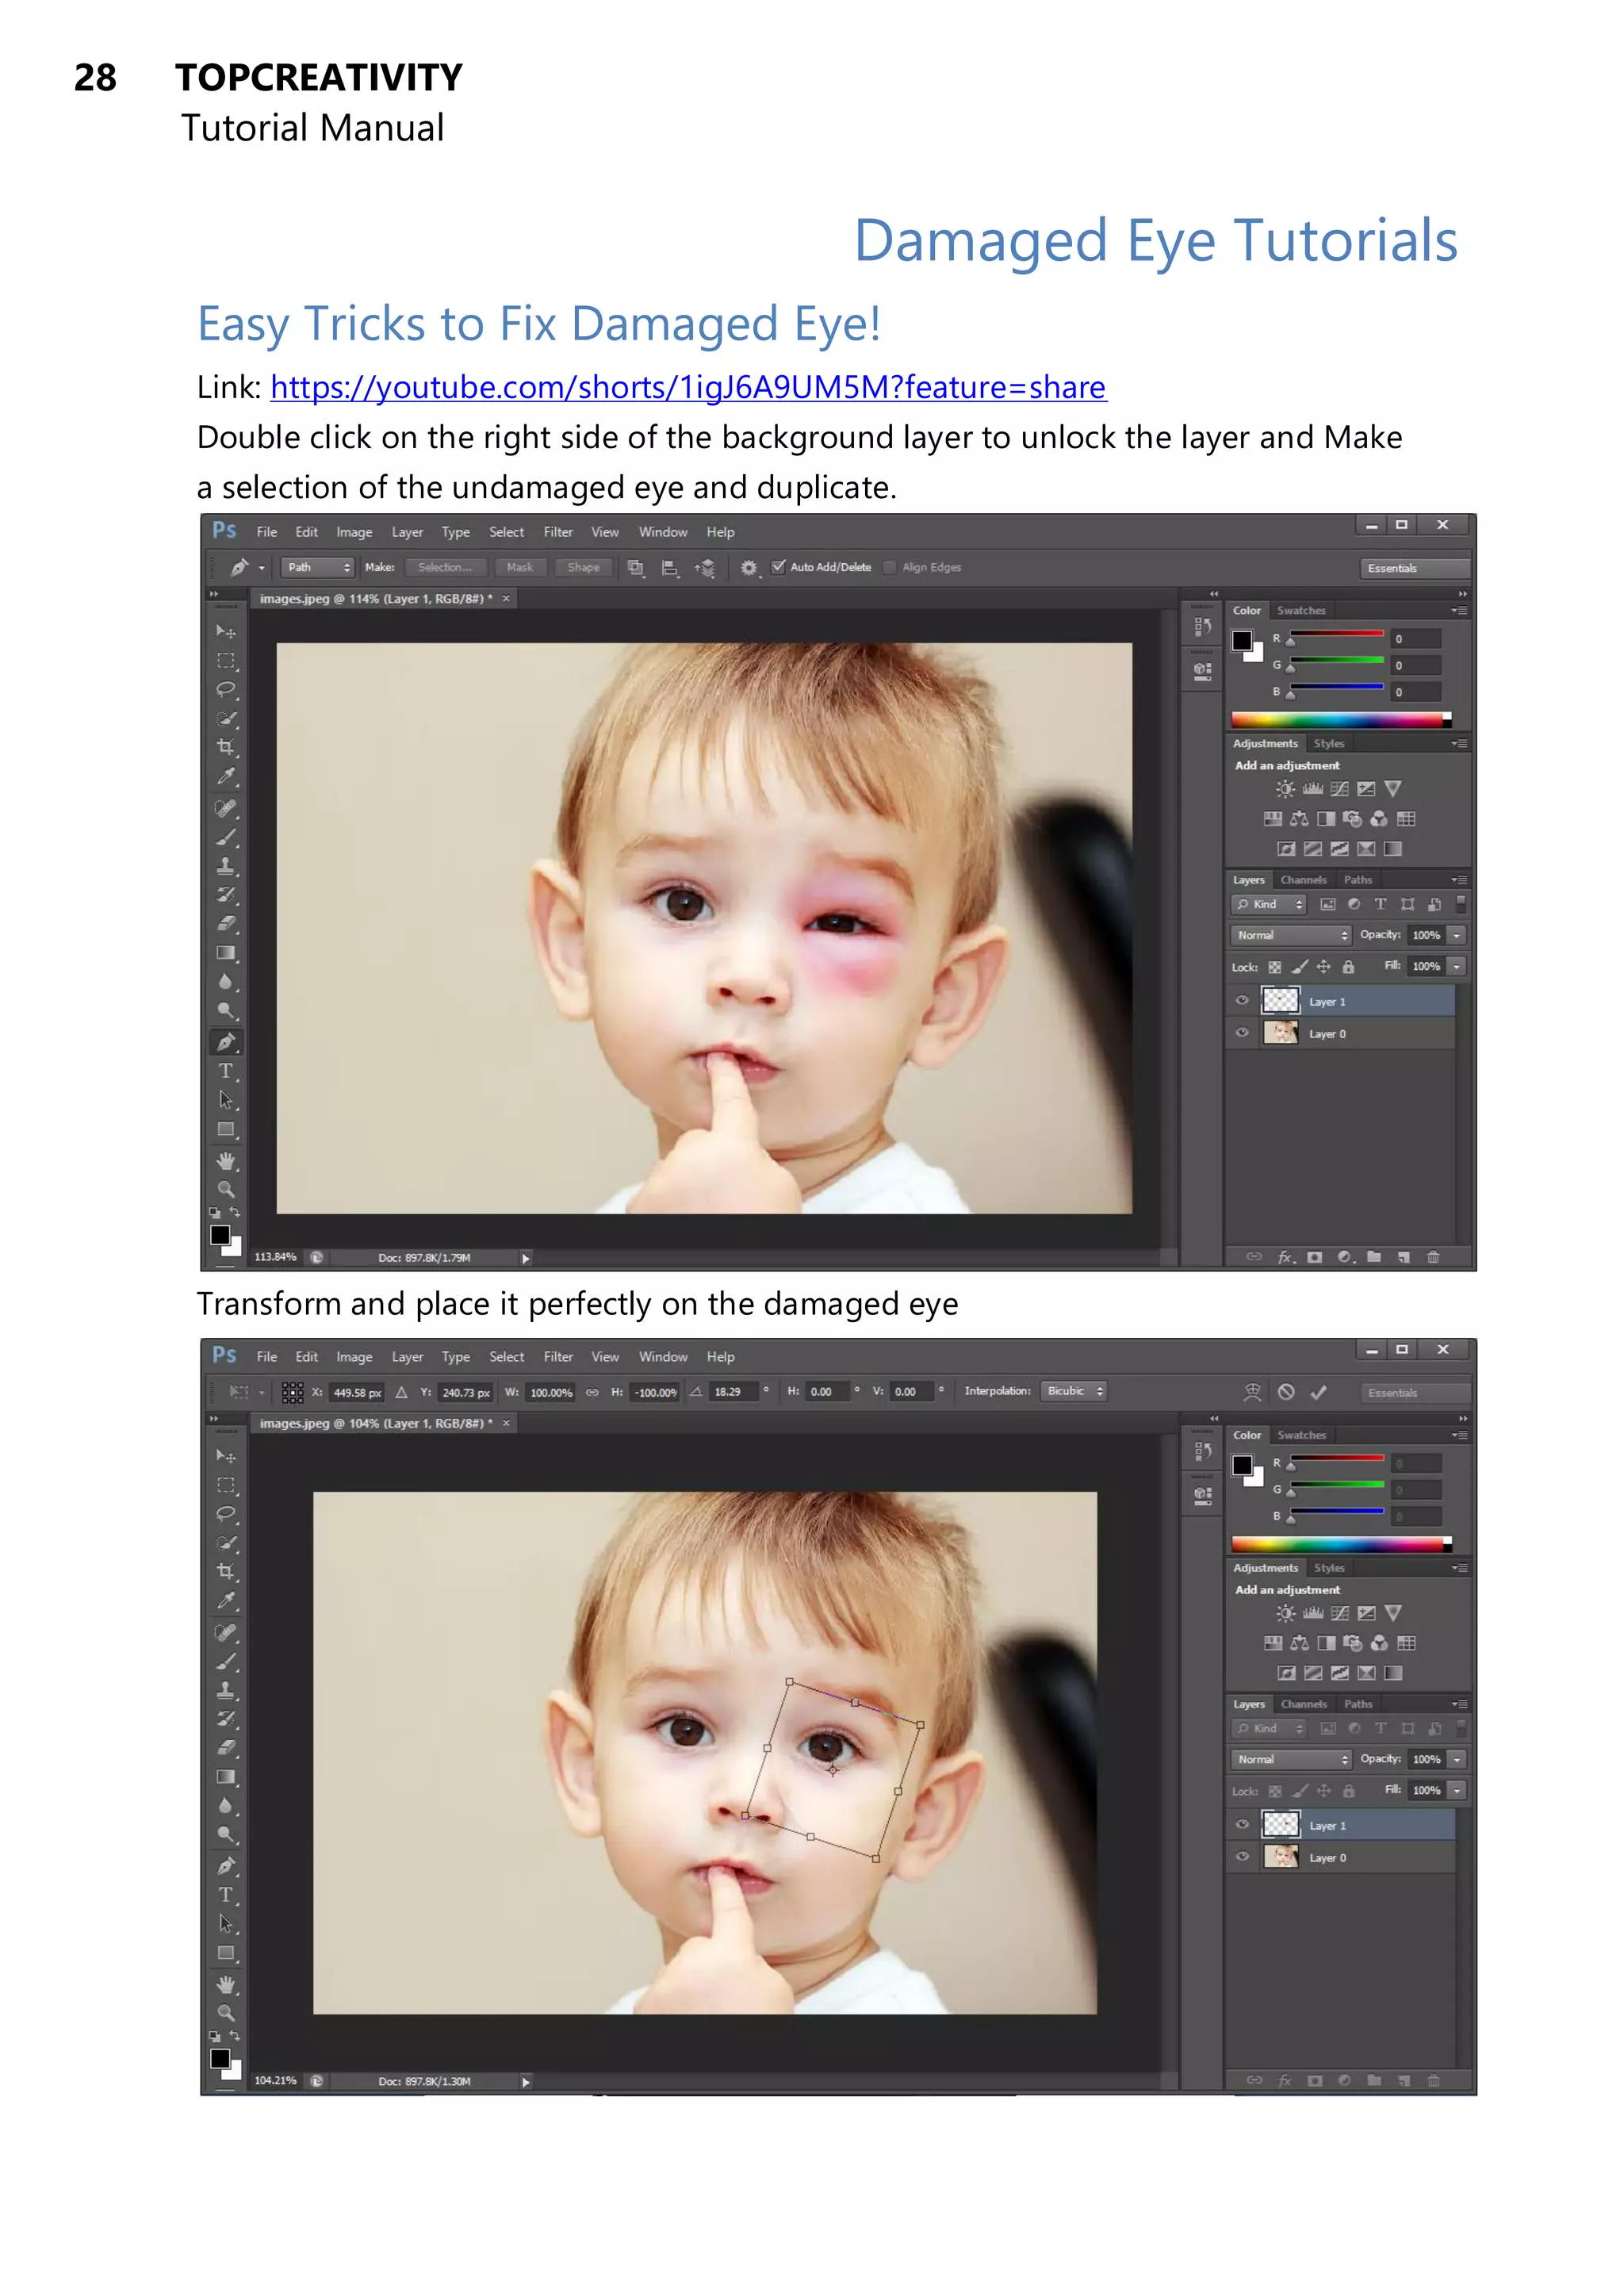
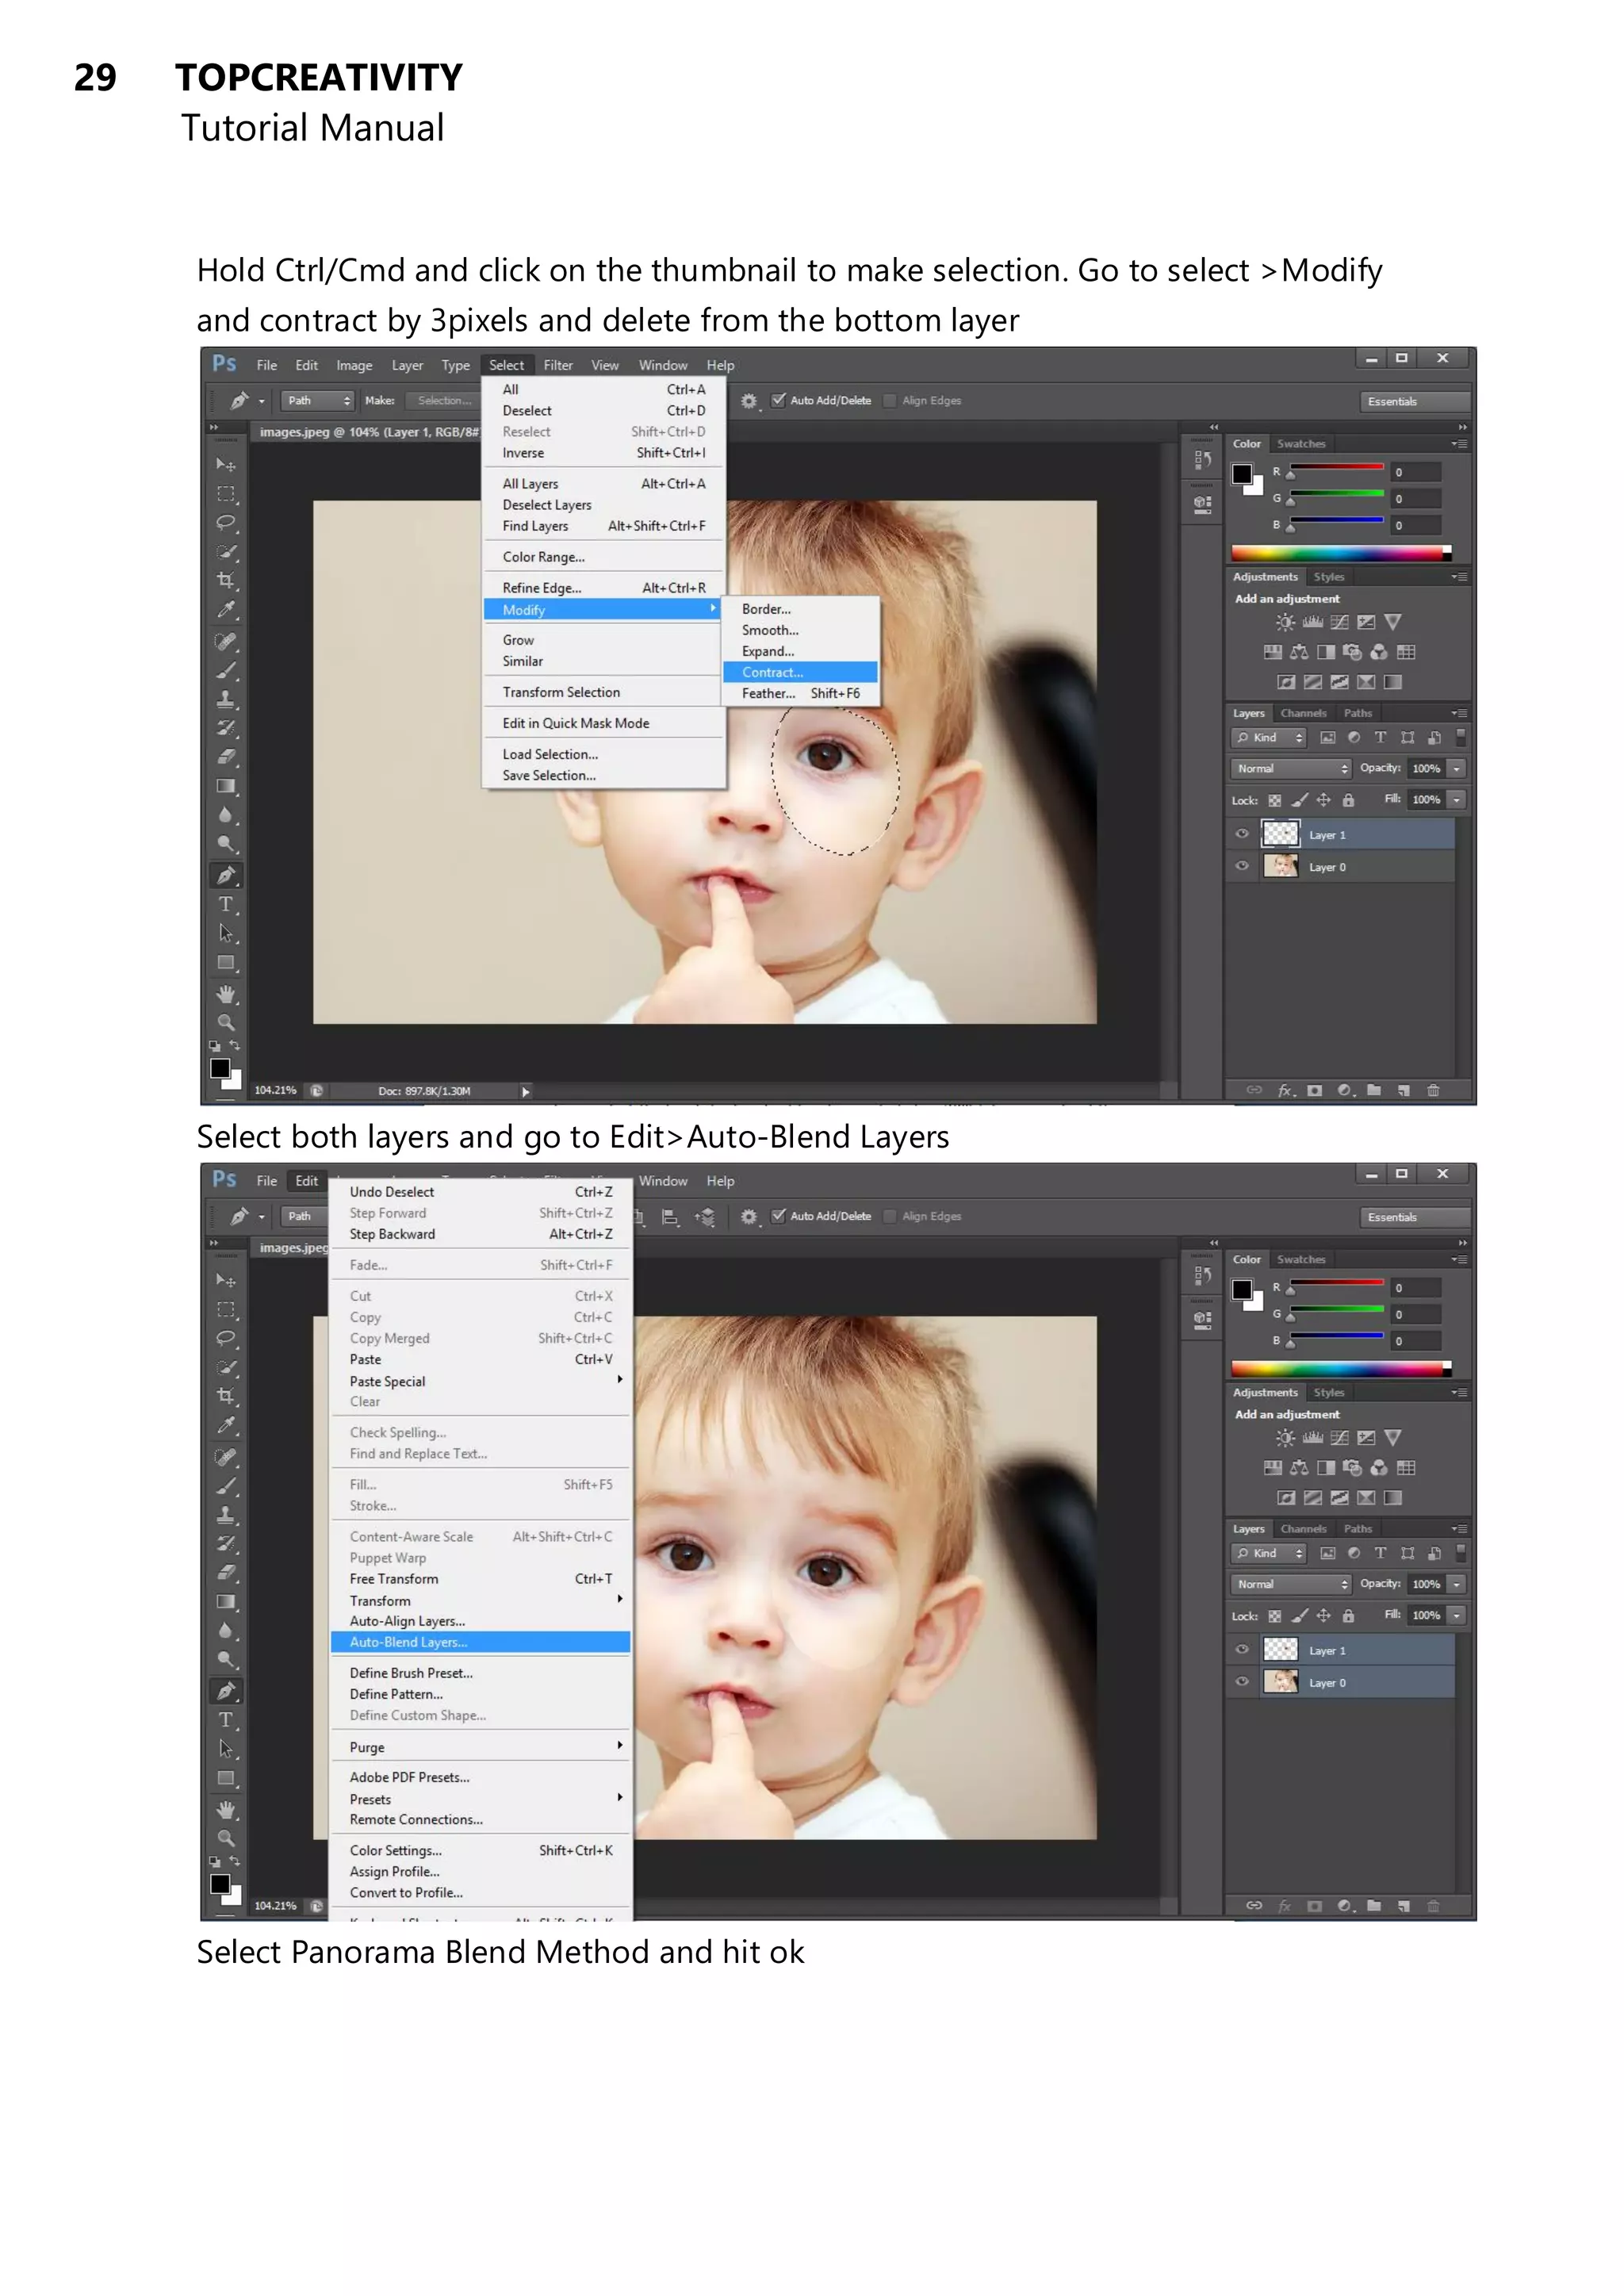
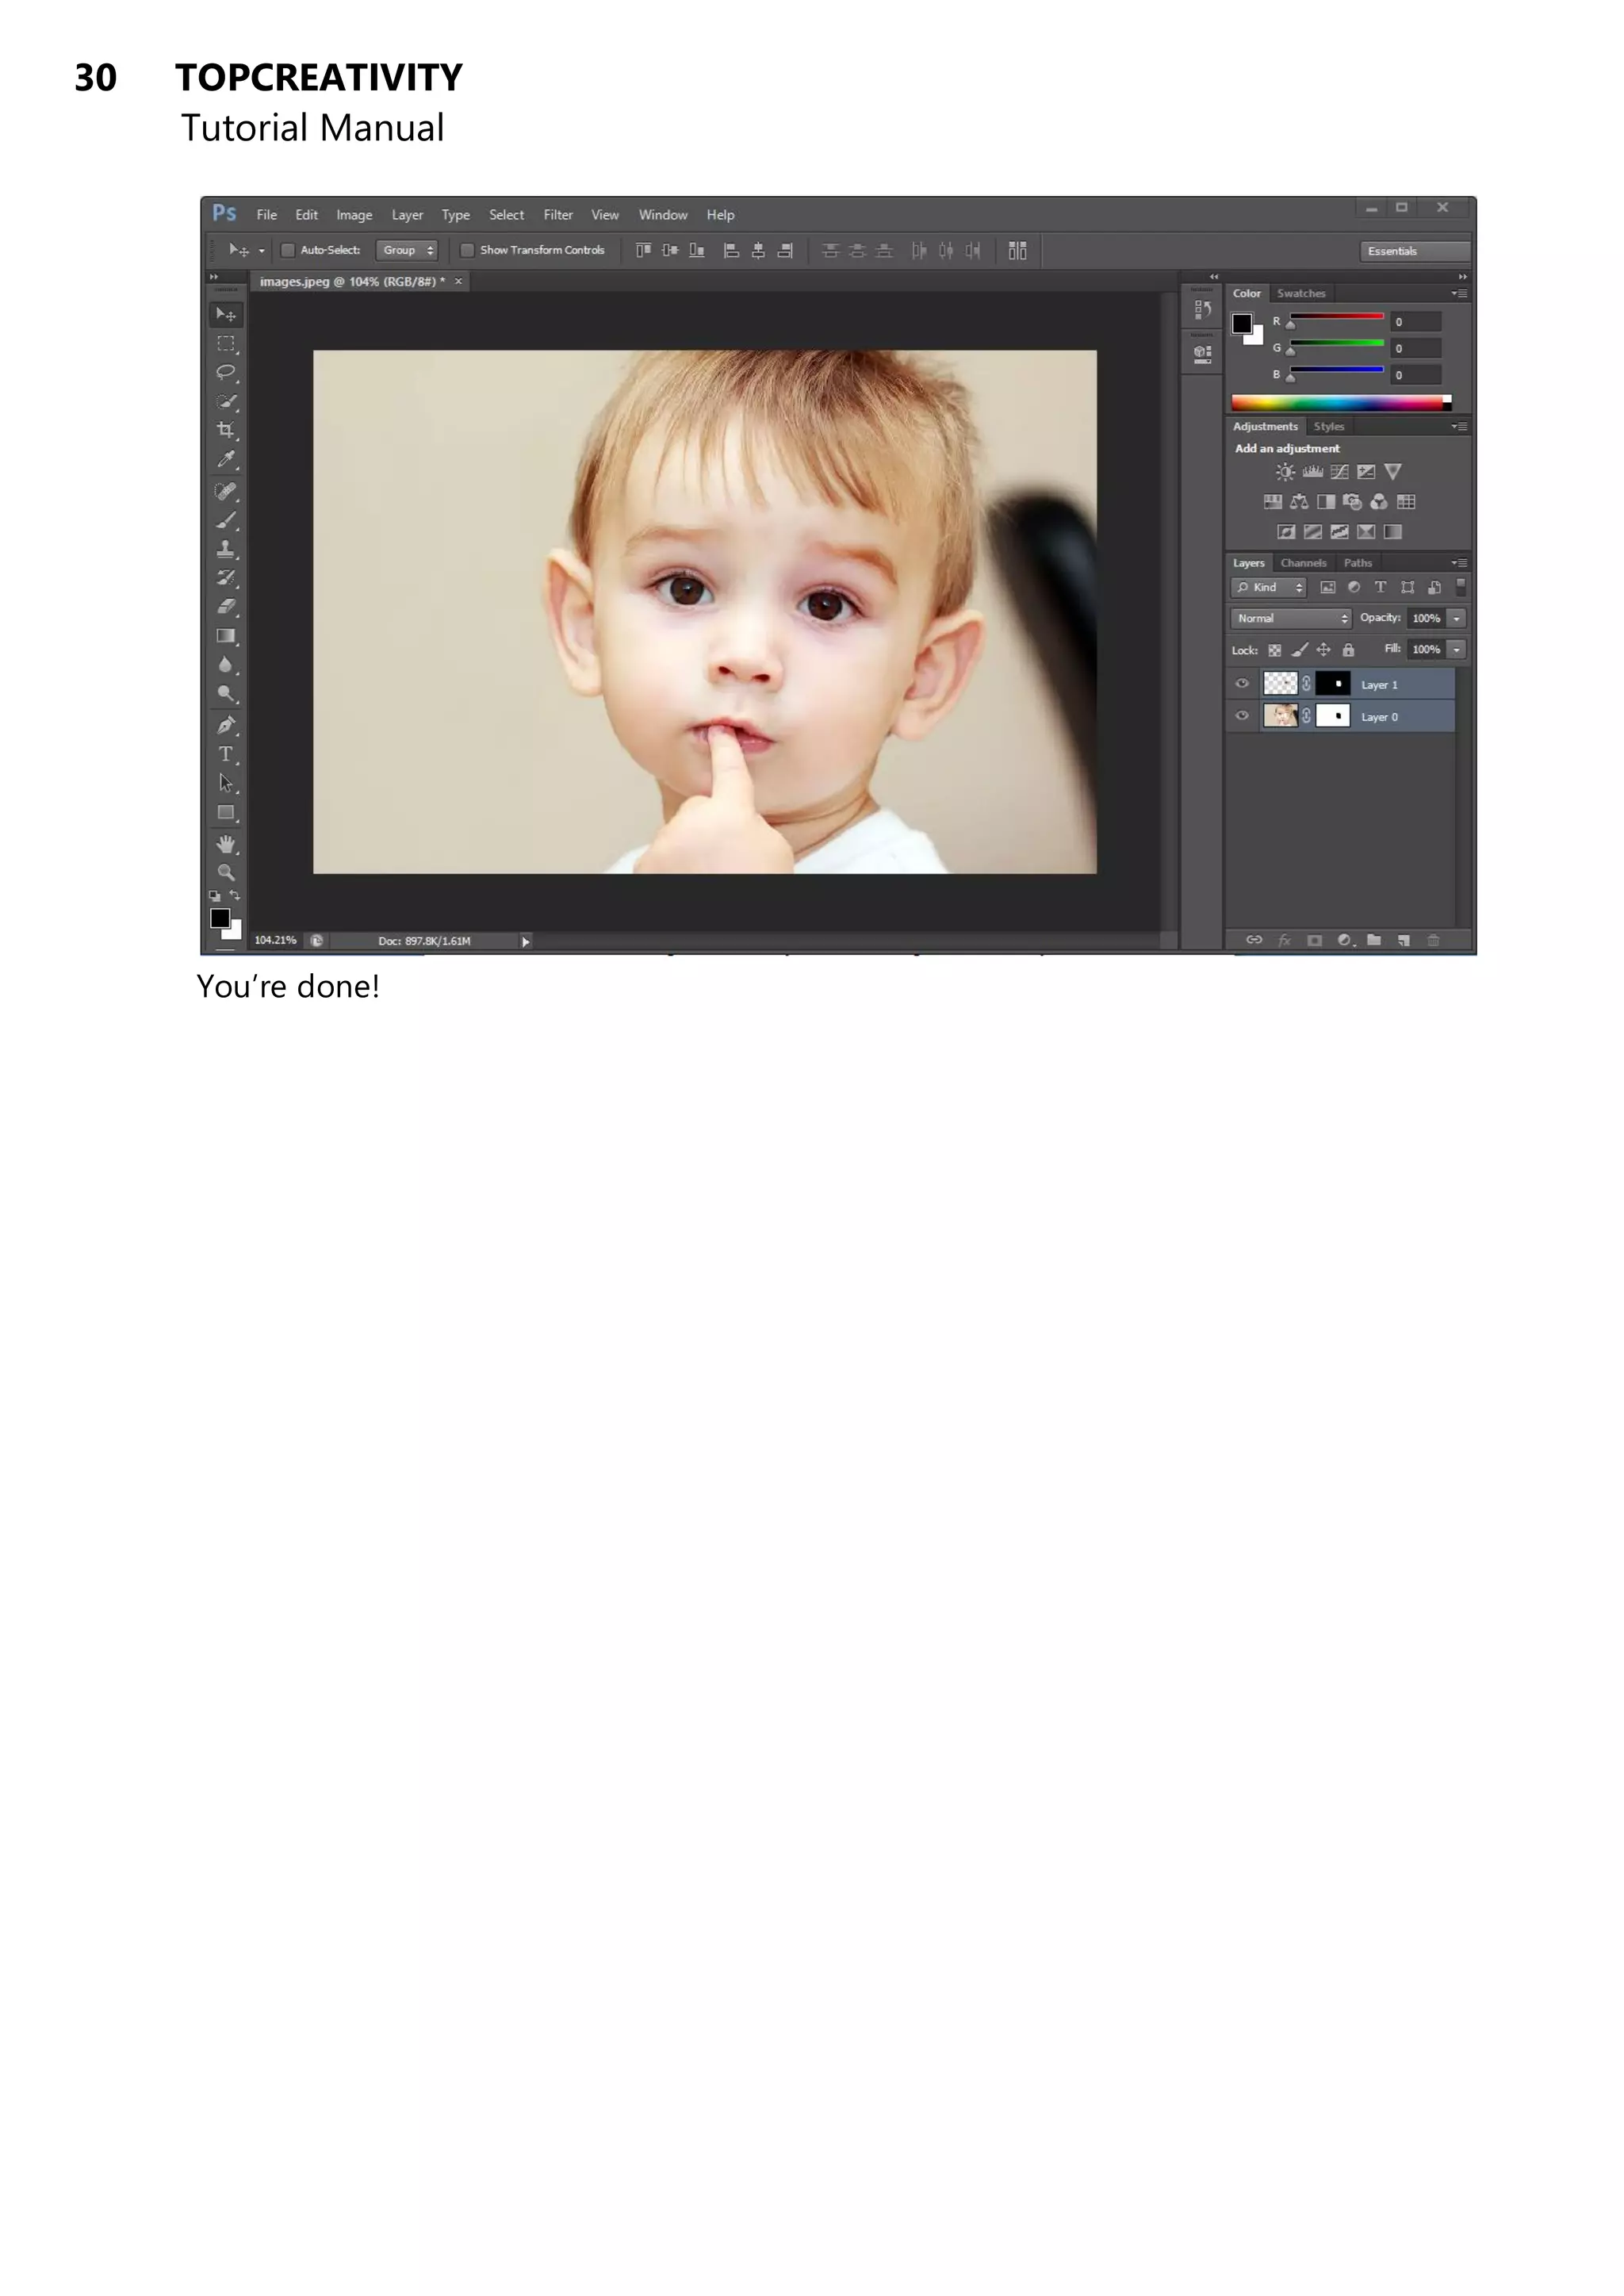
The document is a comprehensive tutorial manual for Photoshop, covering essential topics including keyboard shortcuts, basic tools, and techniques for tasks like skin retouching and color grading. It is structured to guide both beginners and experienced users through various aspects of the software, with a focus on practical applications and non-destructive editing methods. Additionally, specific tutorials offer quick solutions for common editing challenges, making it a valuable resource for enhancing photo editing skills.
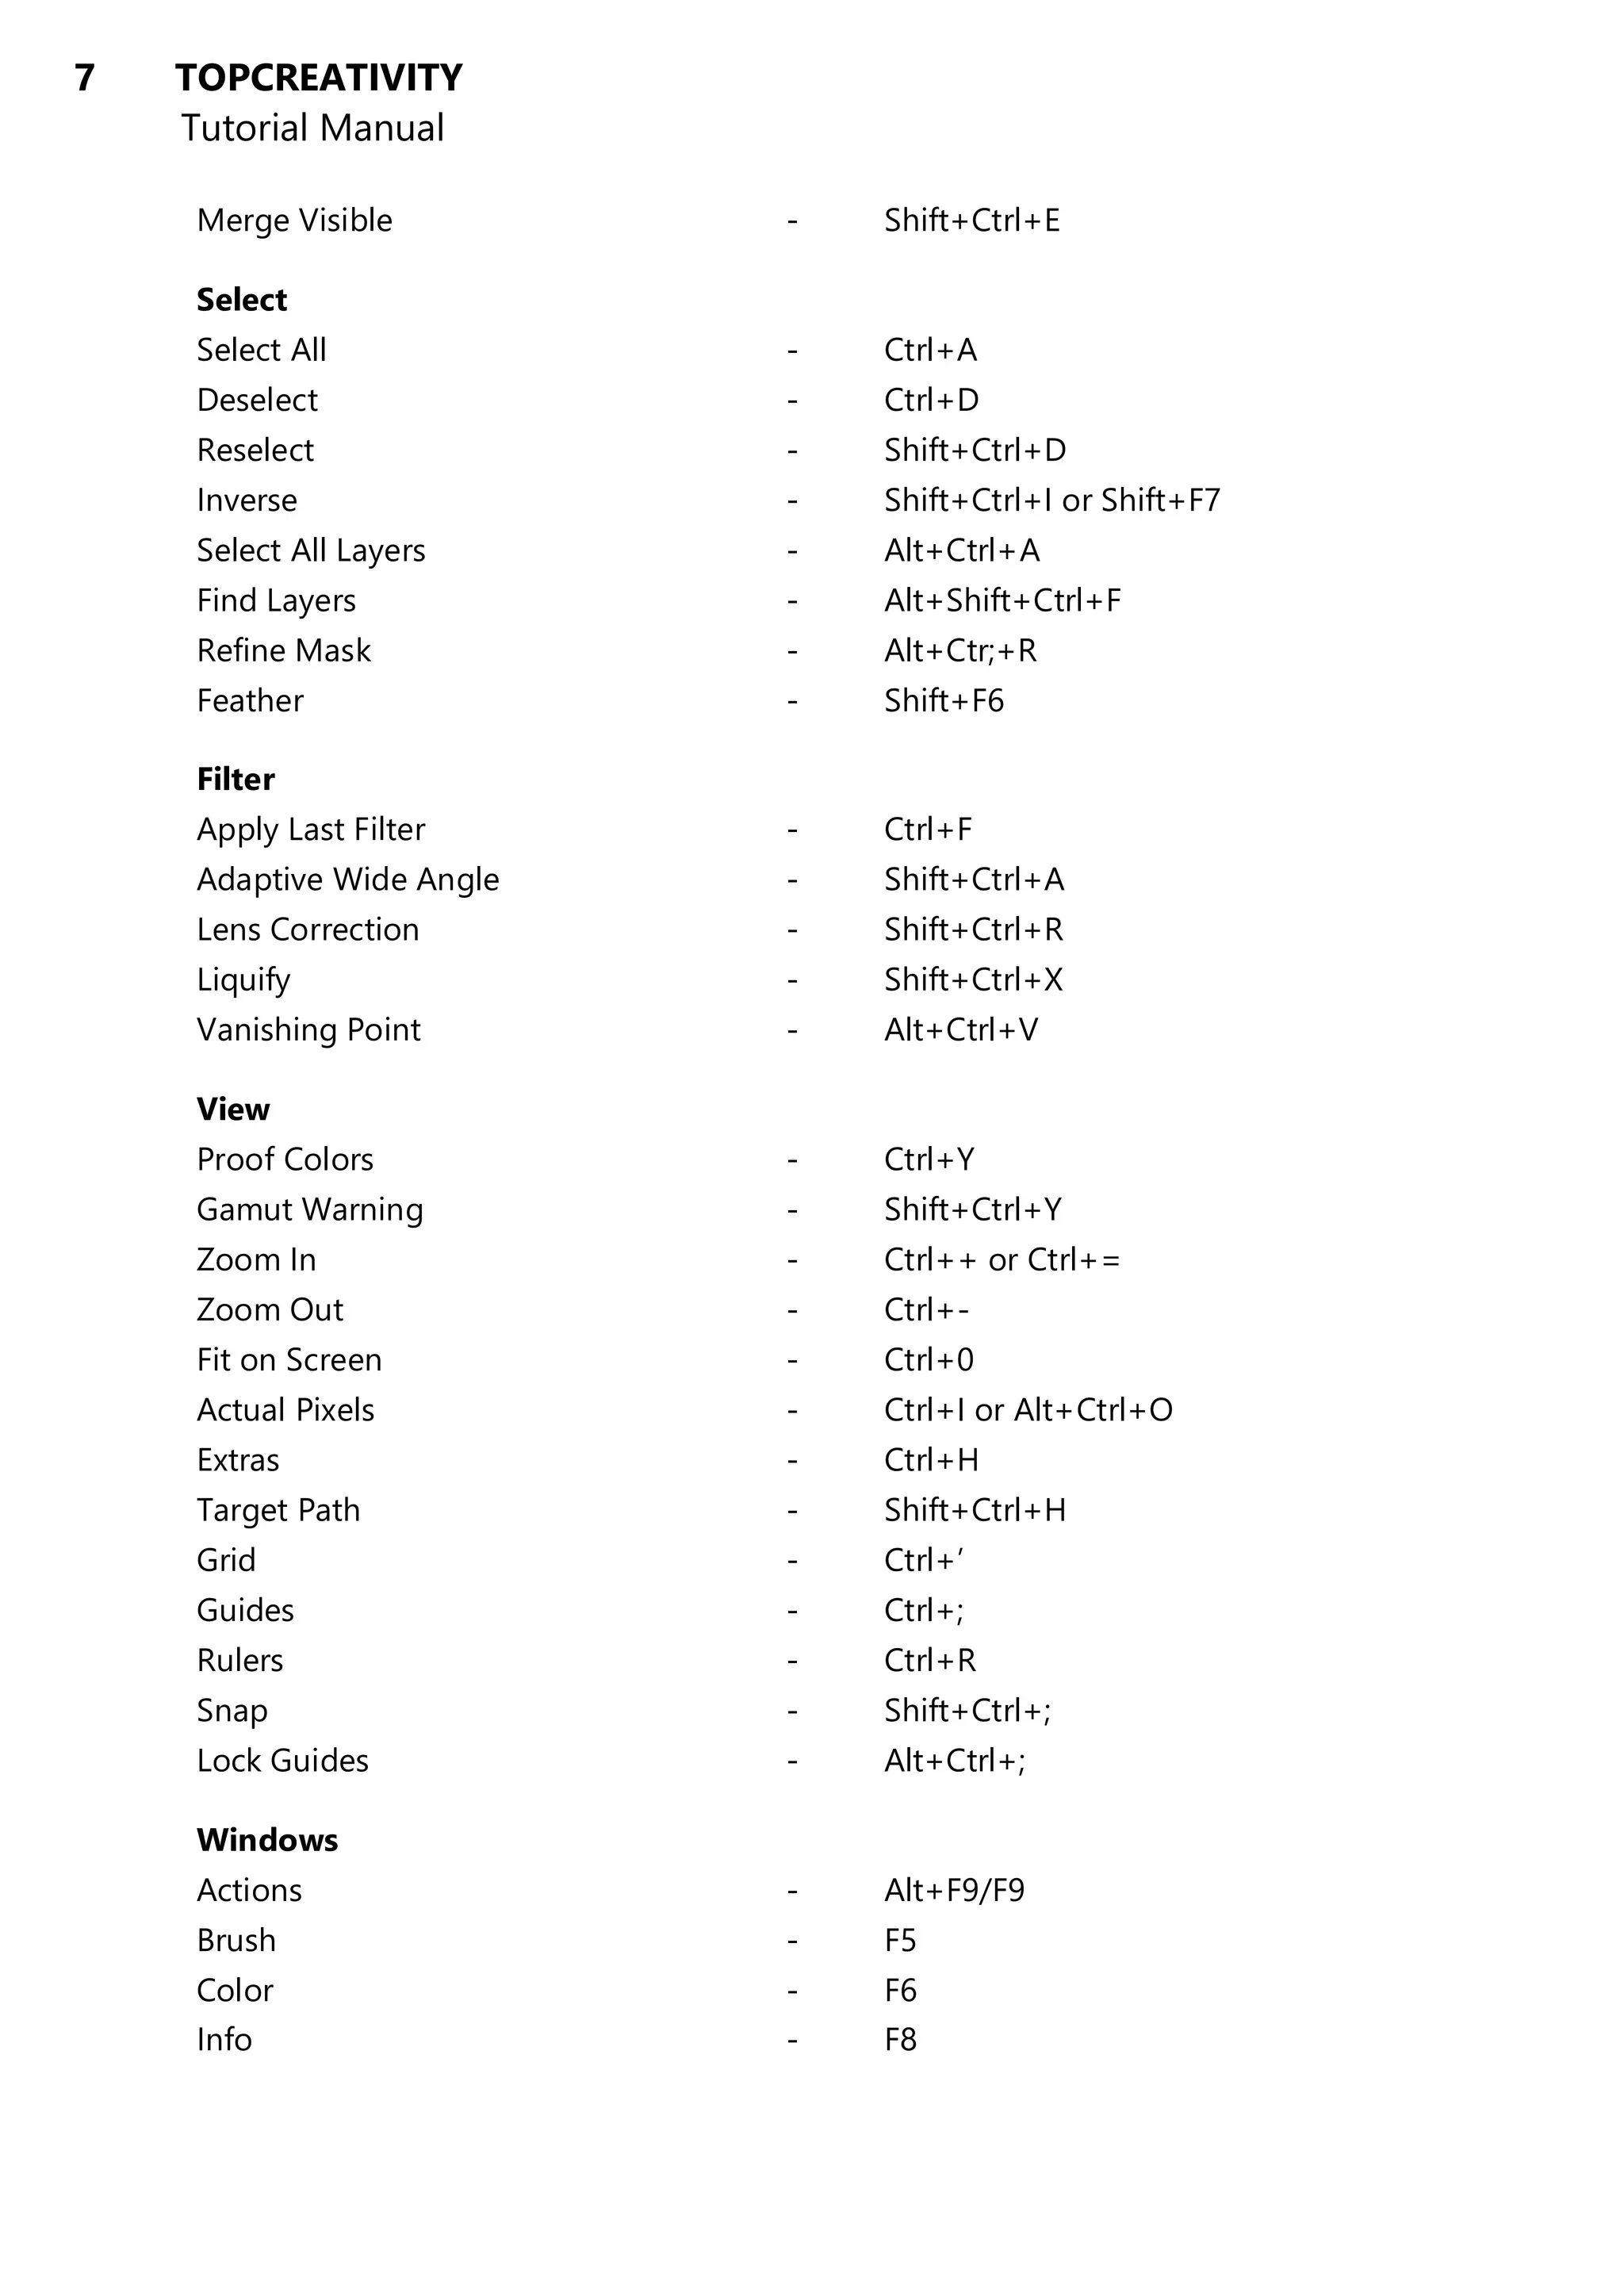
![6 TOPCREATIVITY
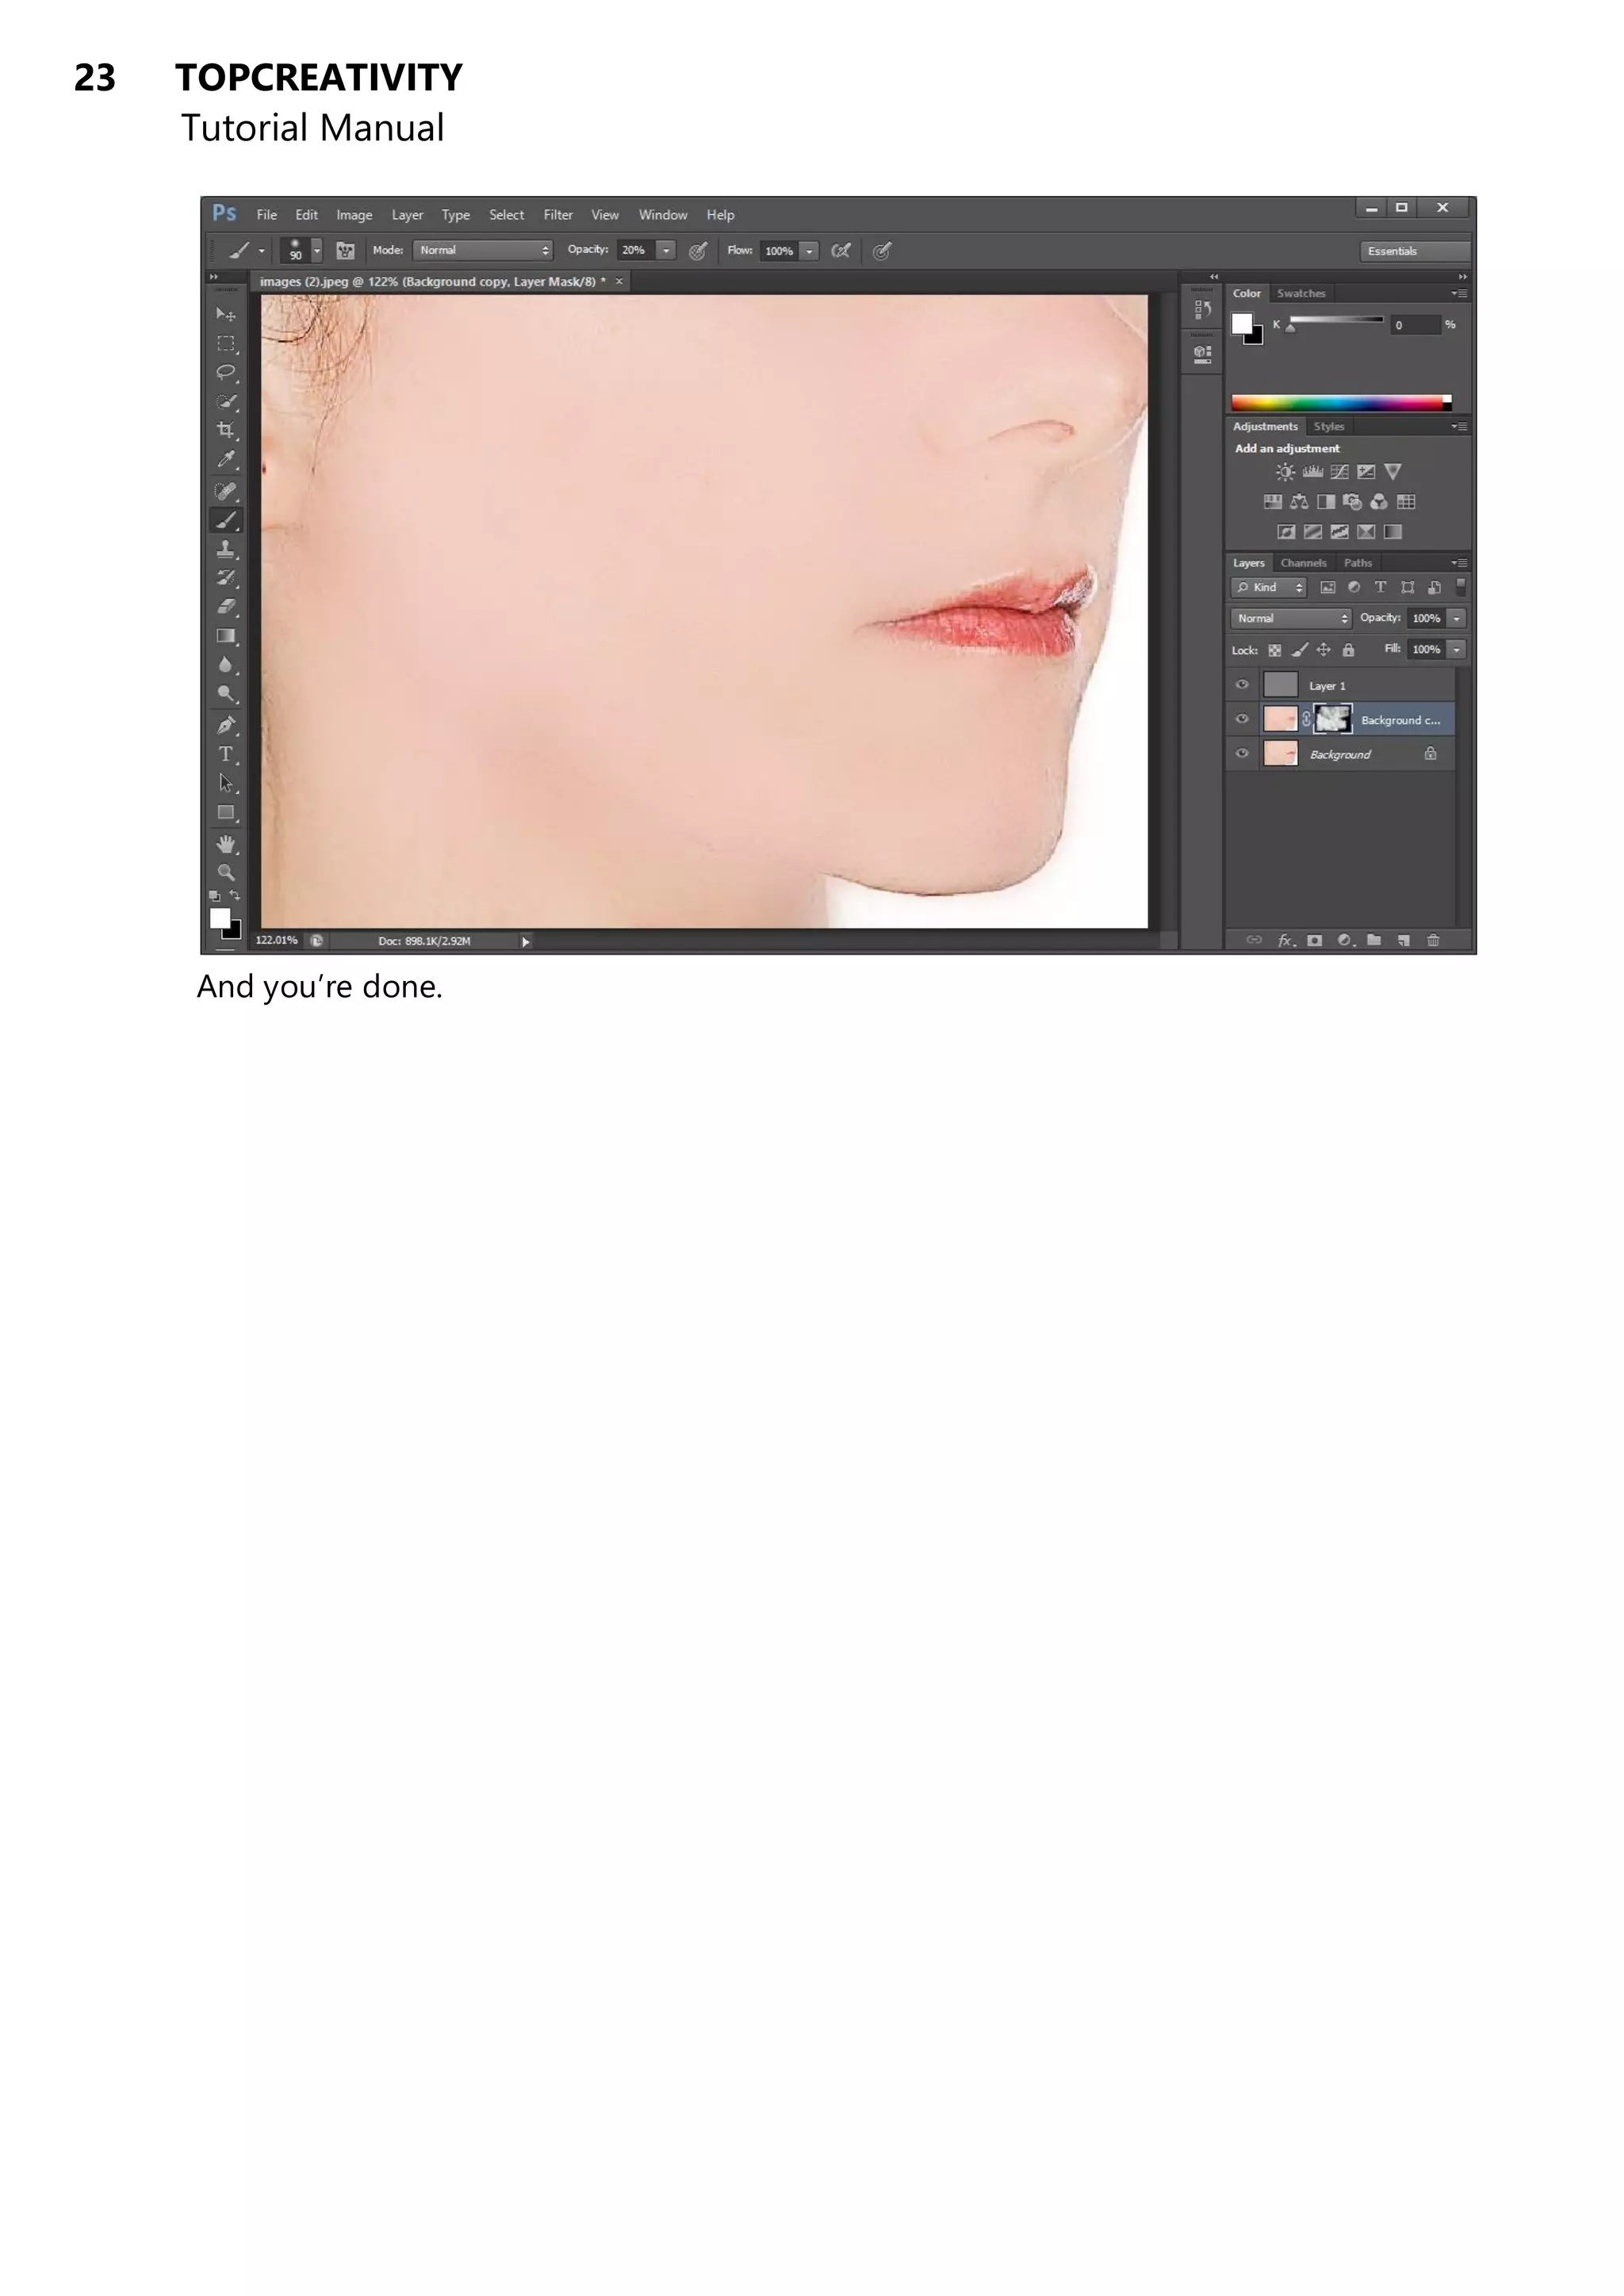
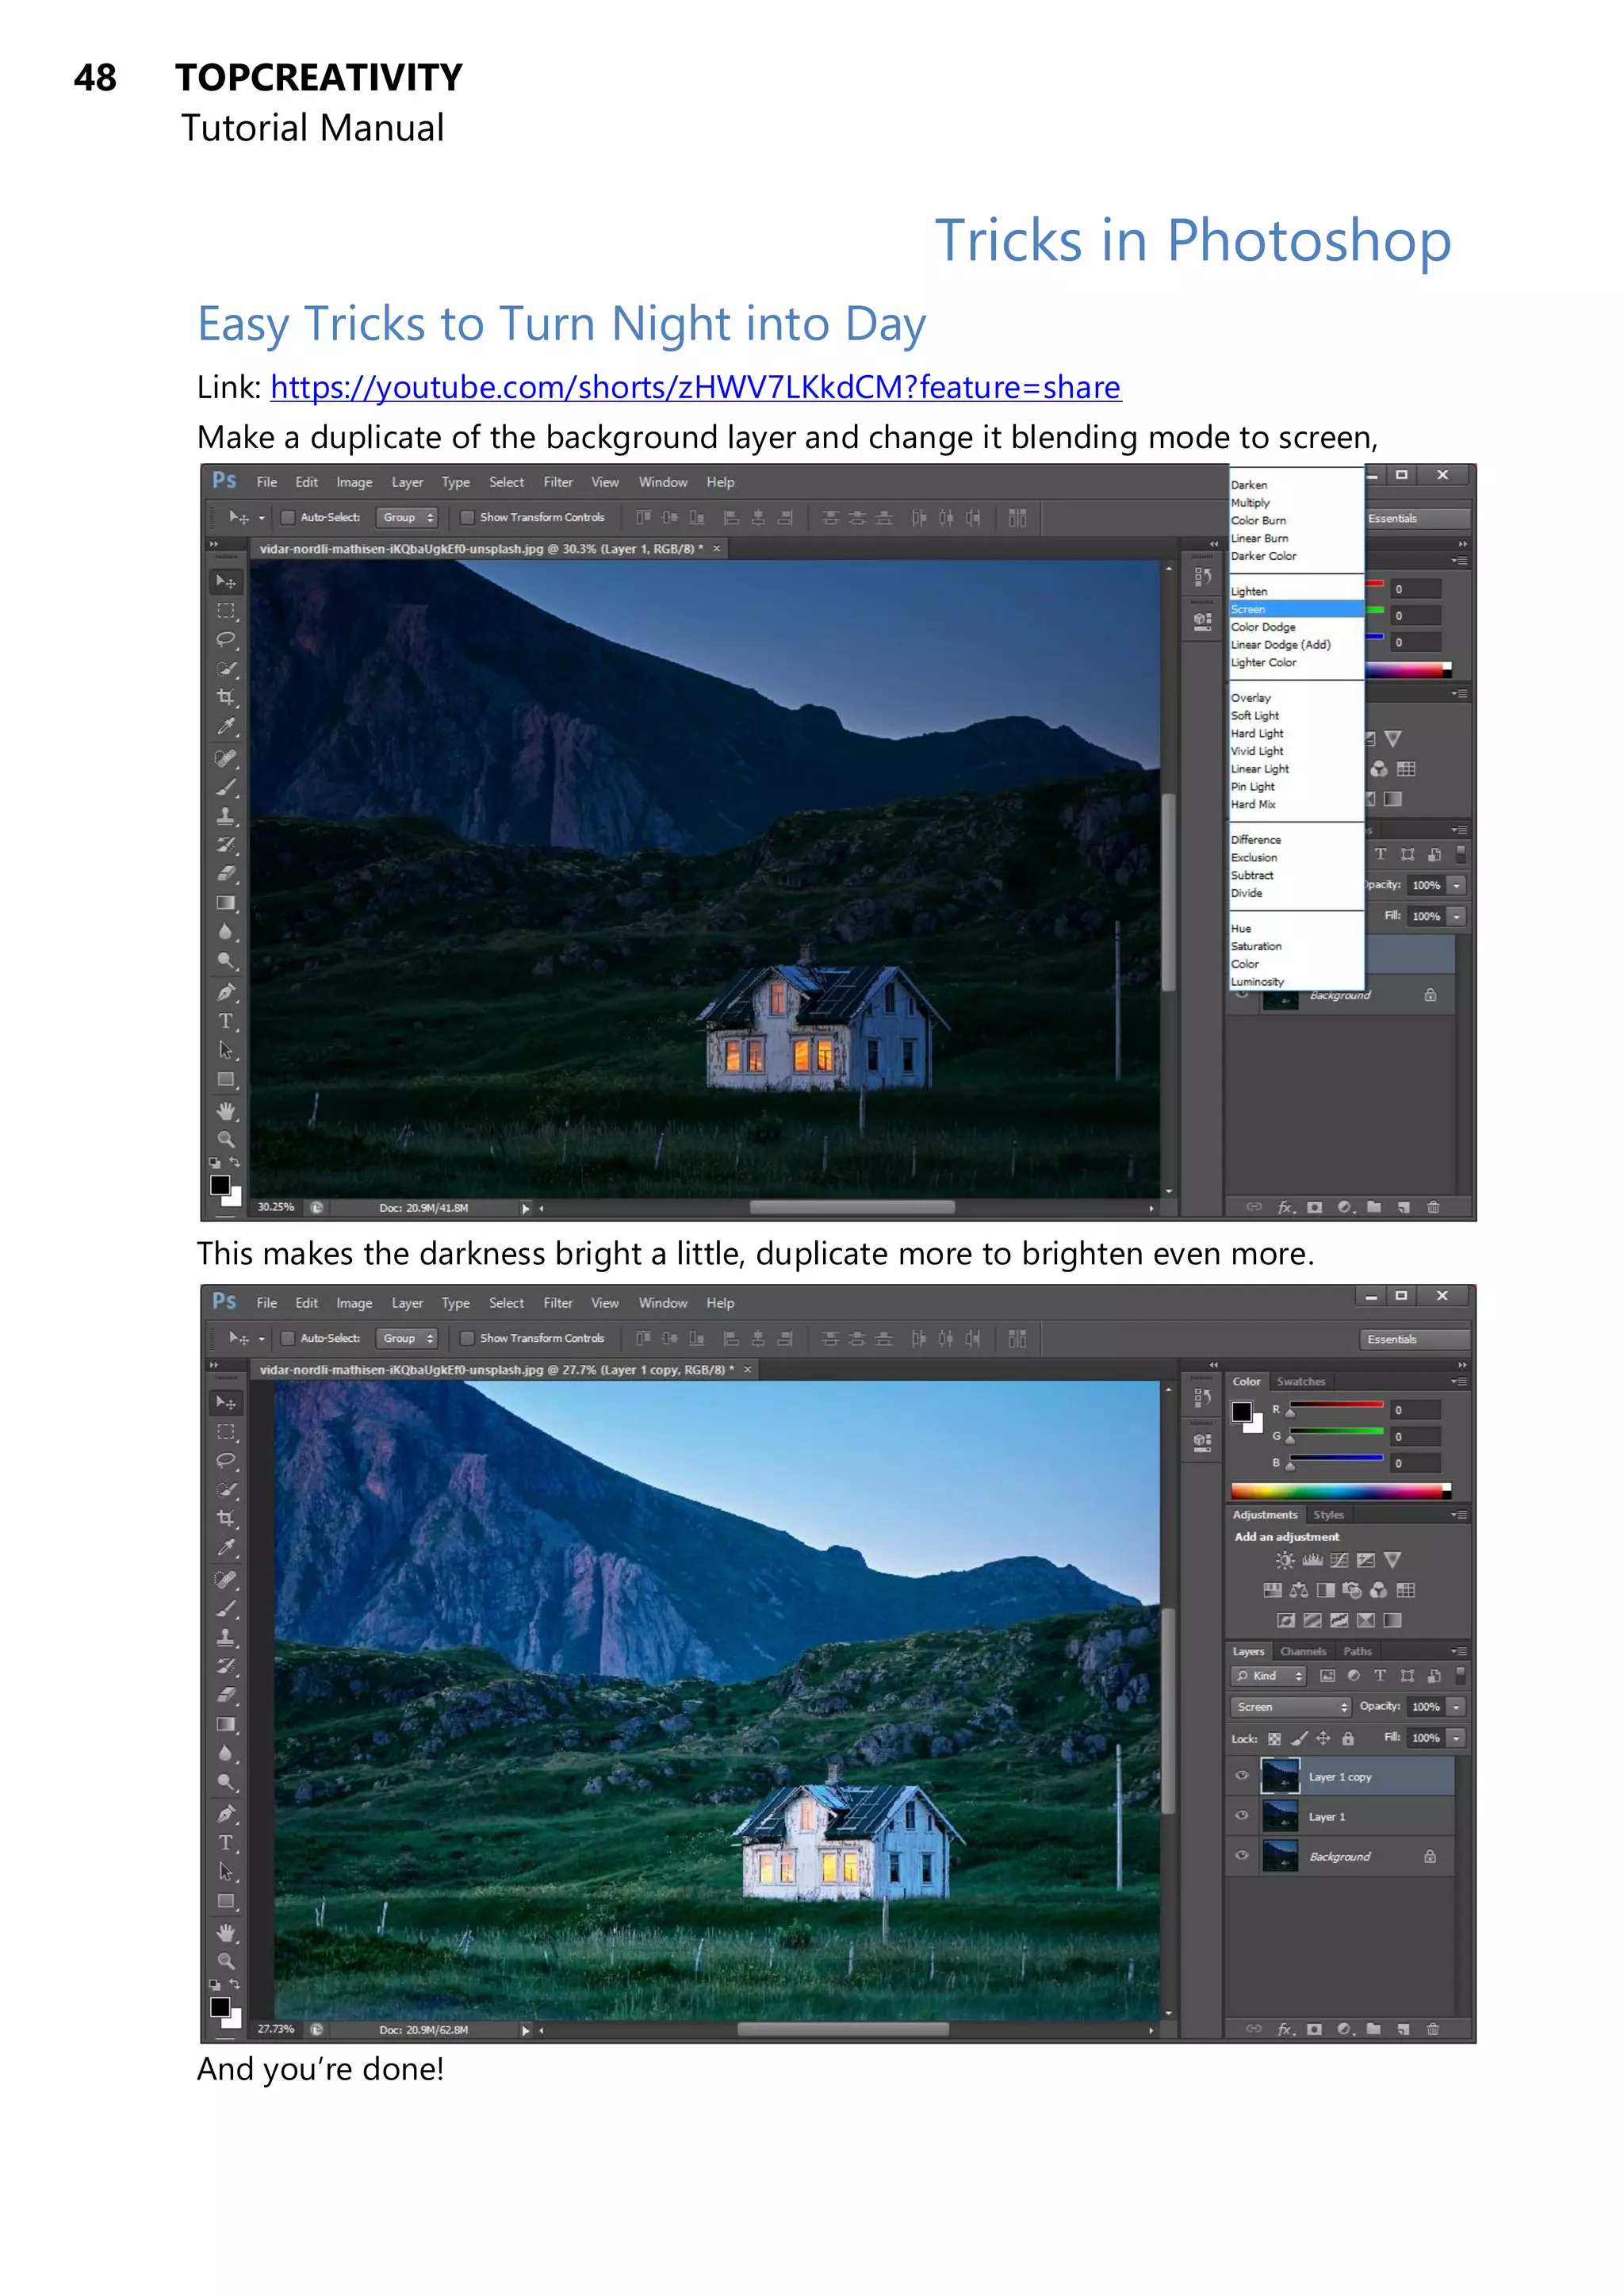
Tutorial Manual
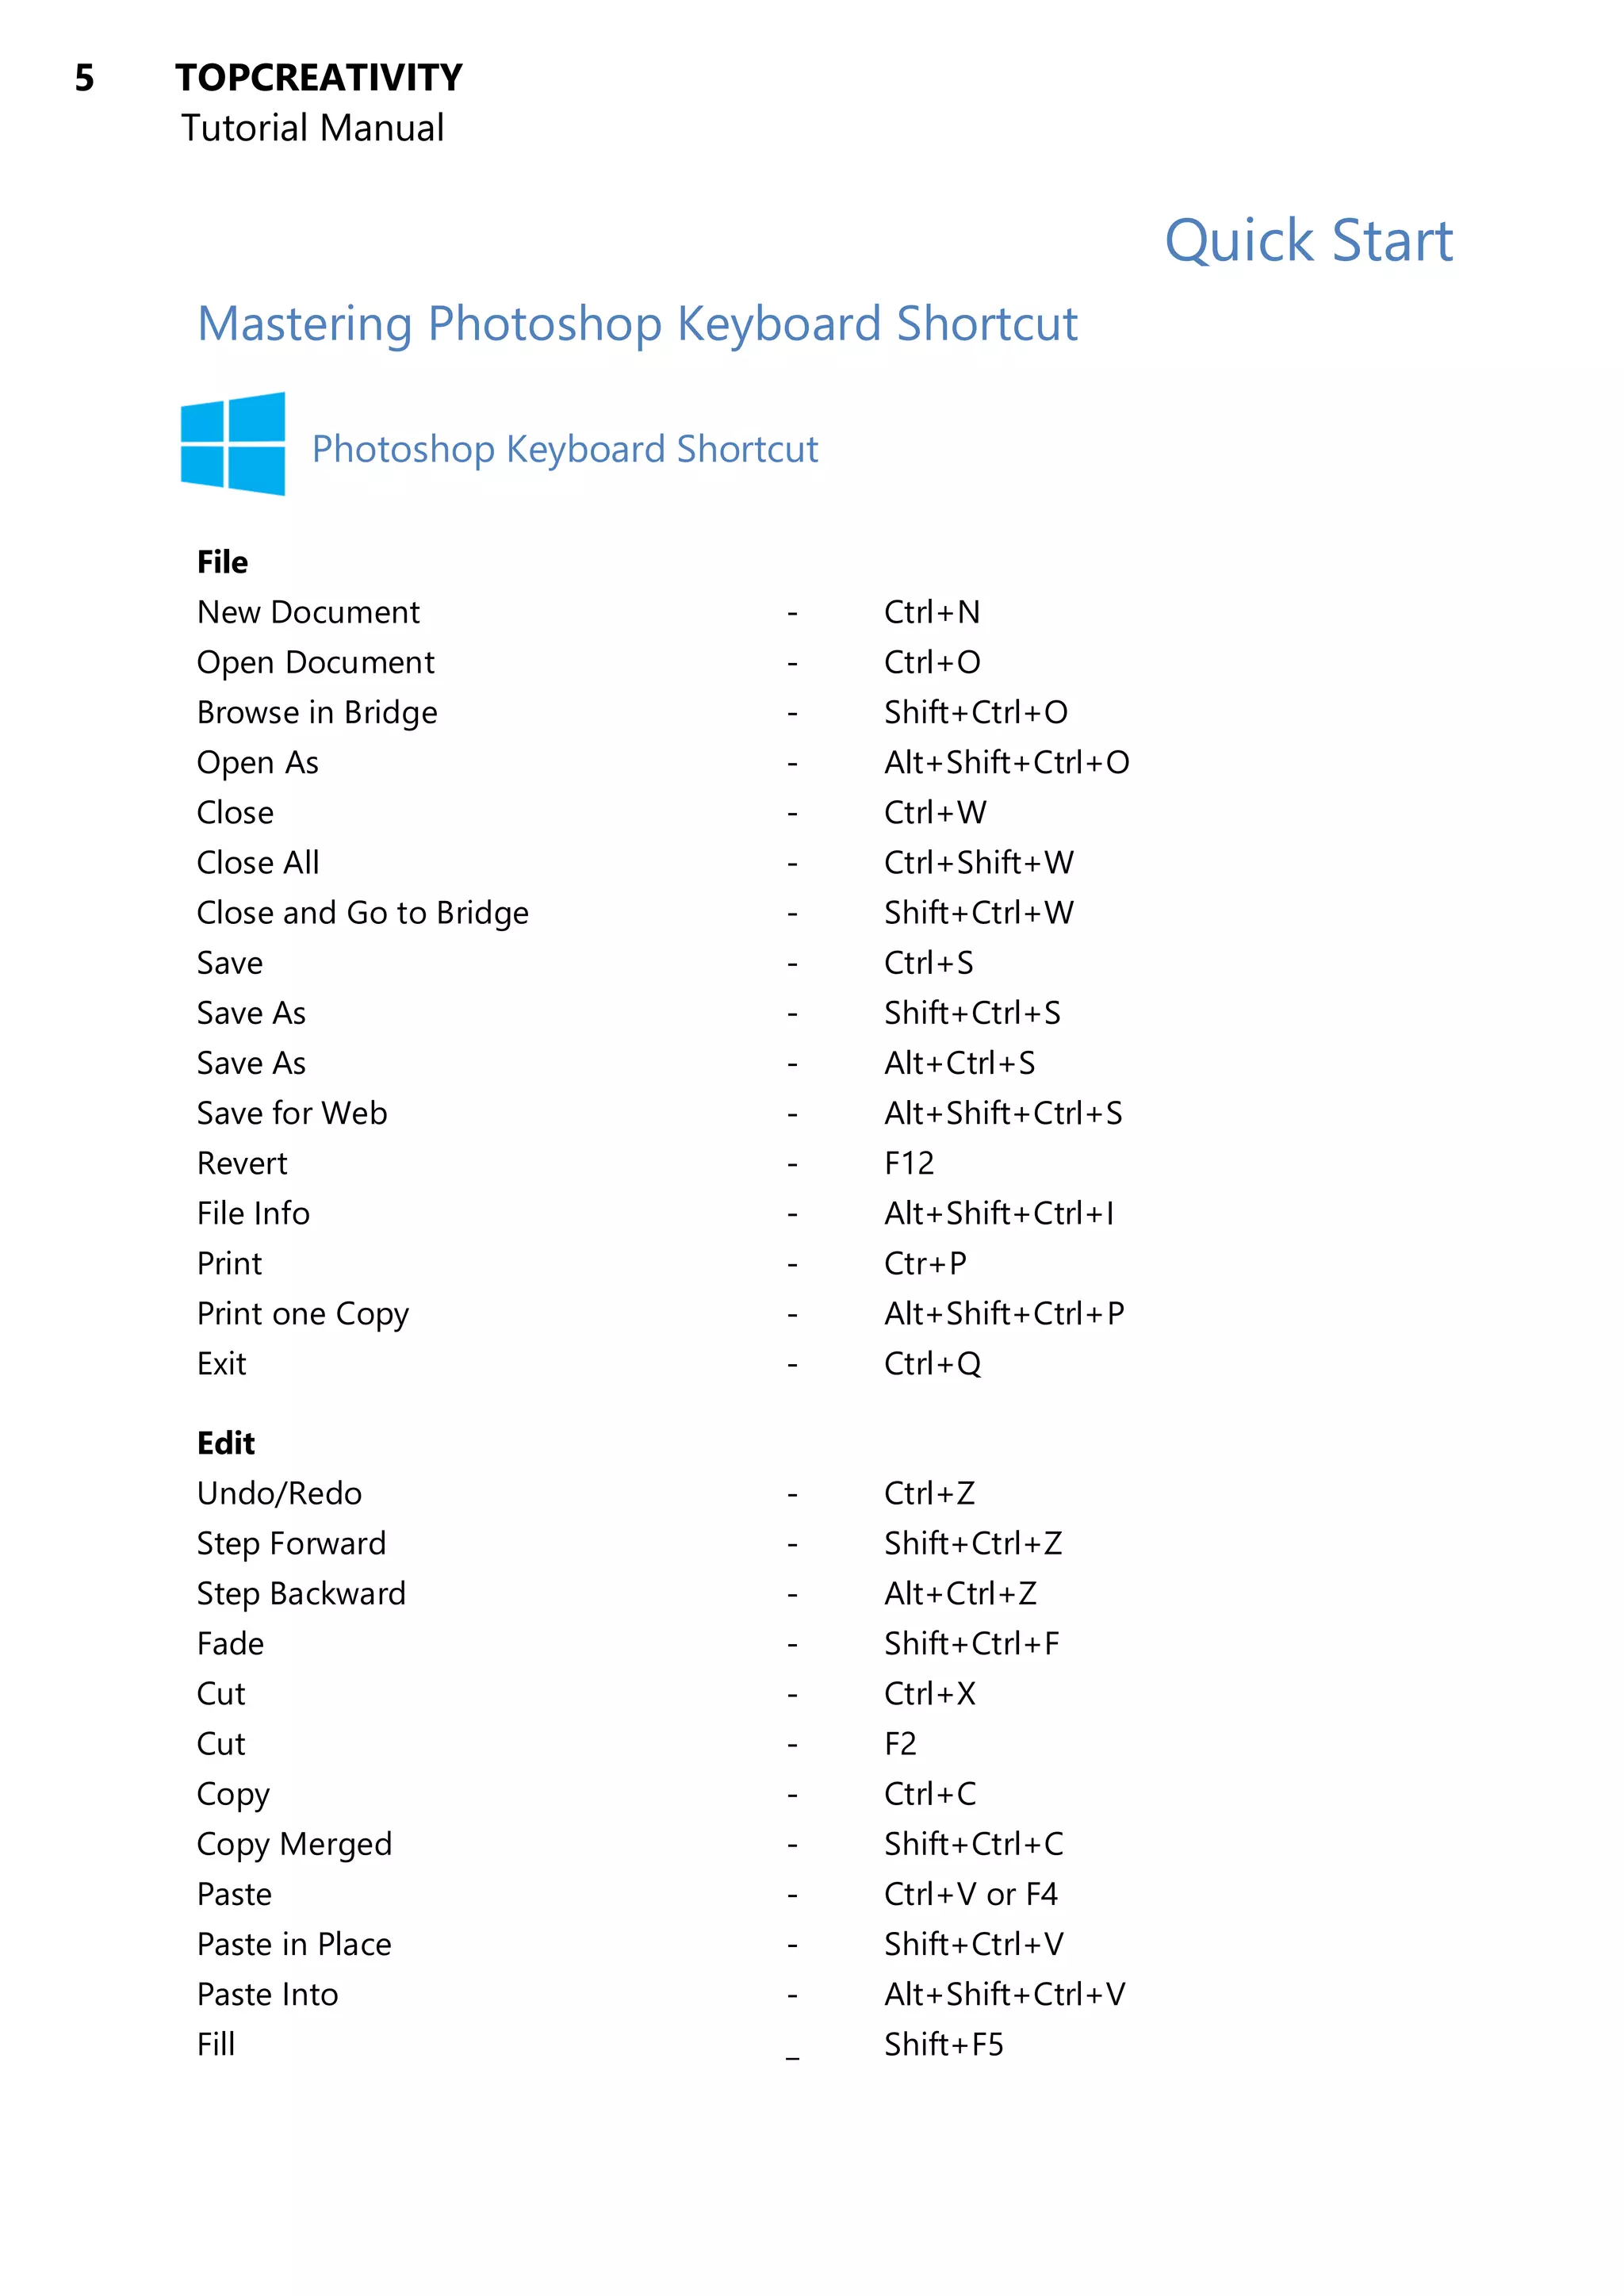
Content Aware Scale - Alt+Shift+Ctrl+C
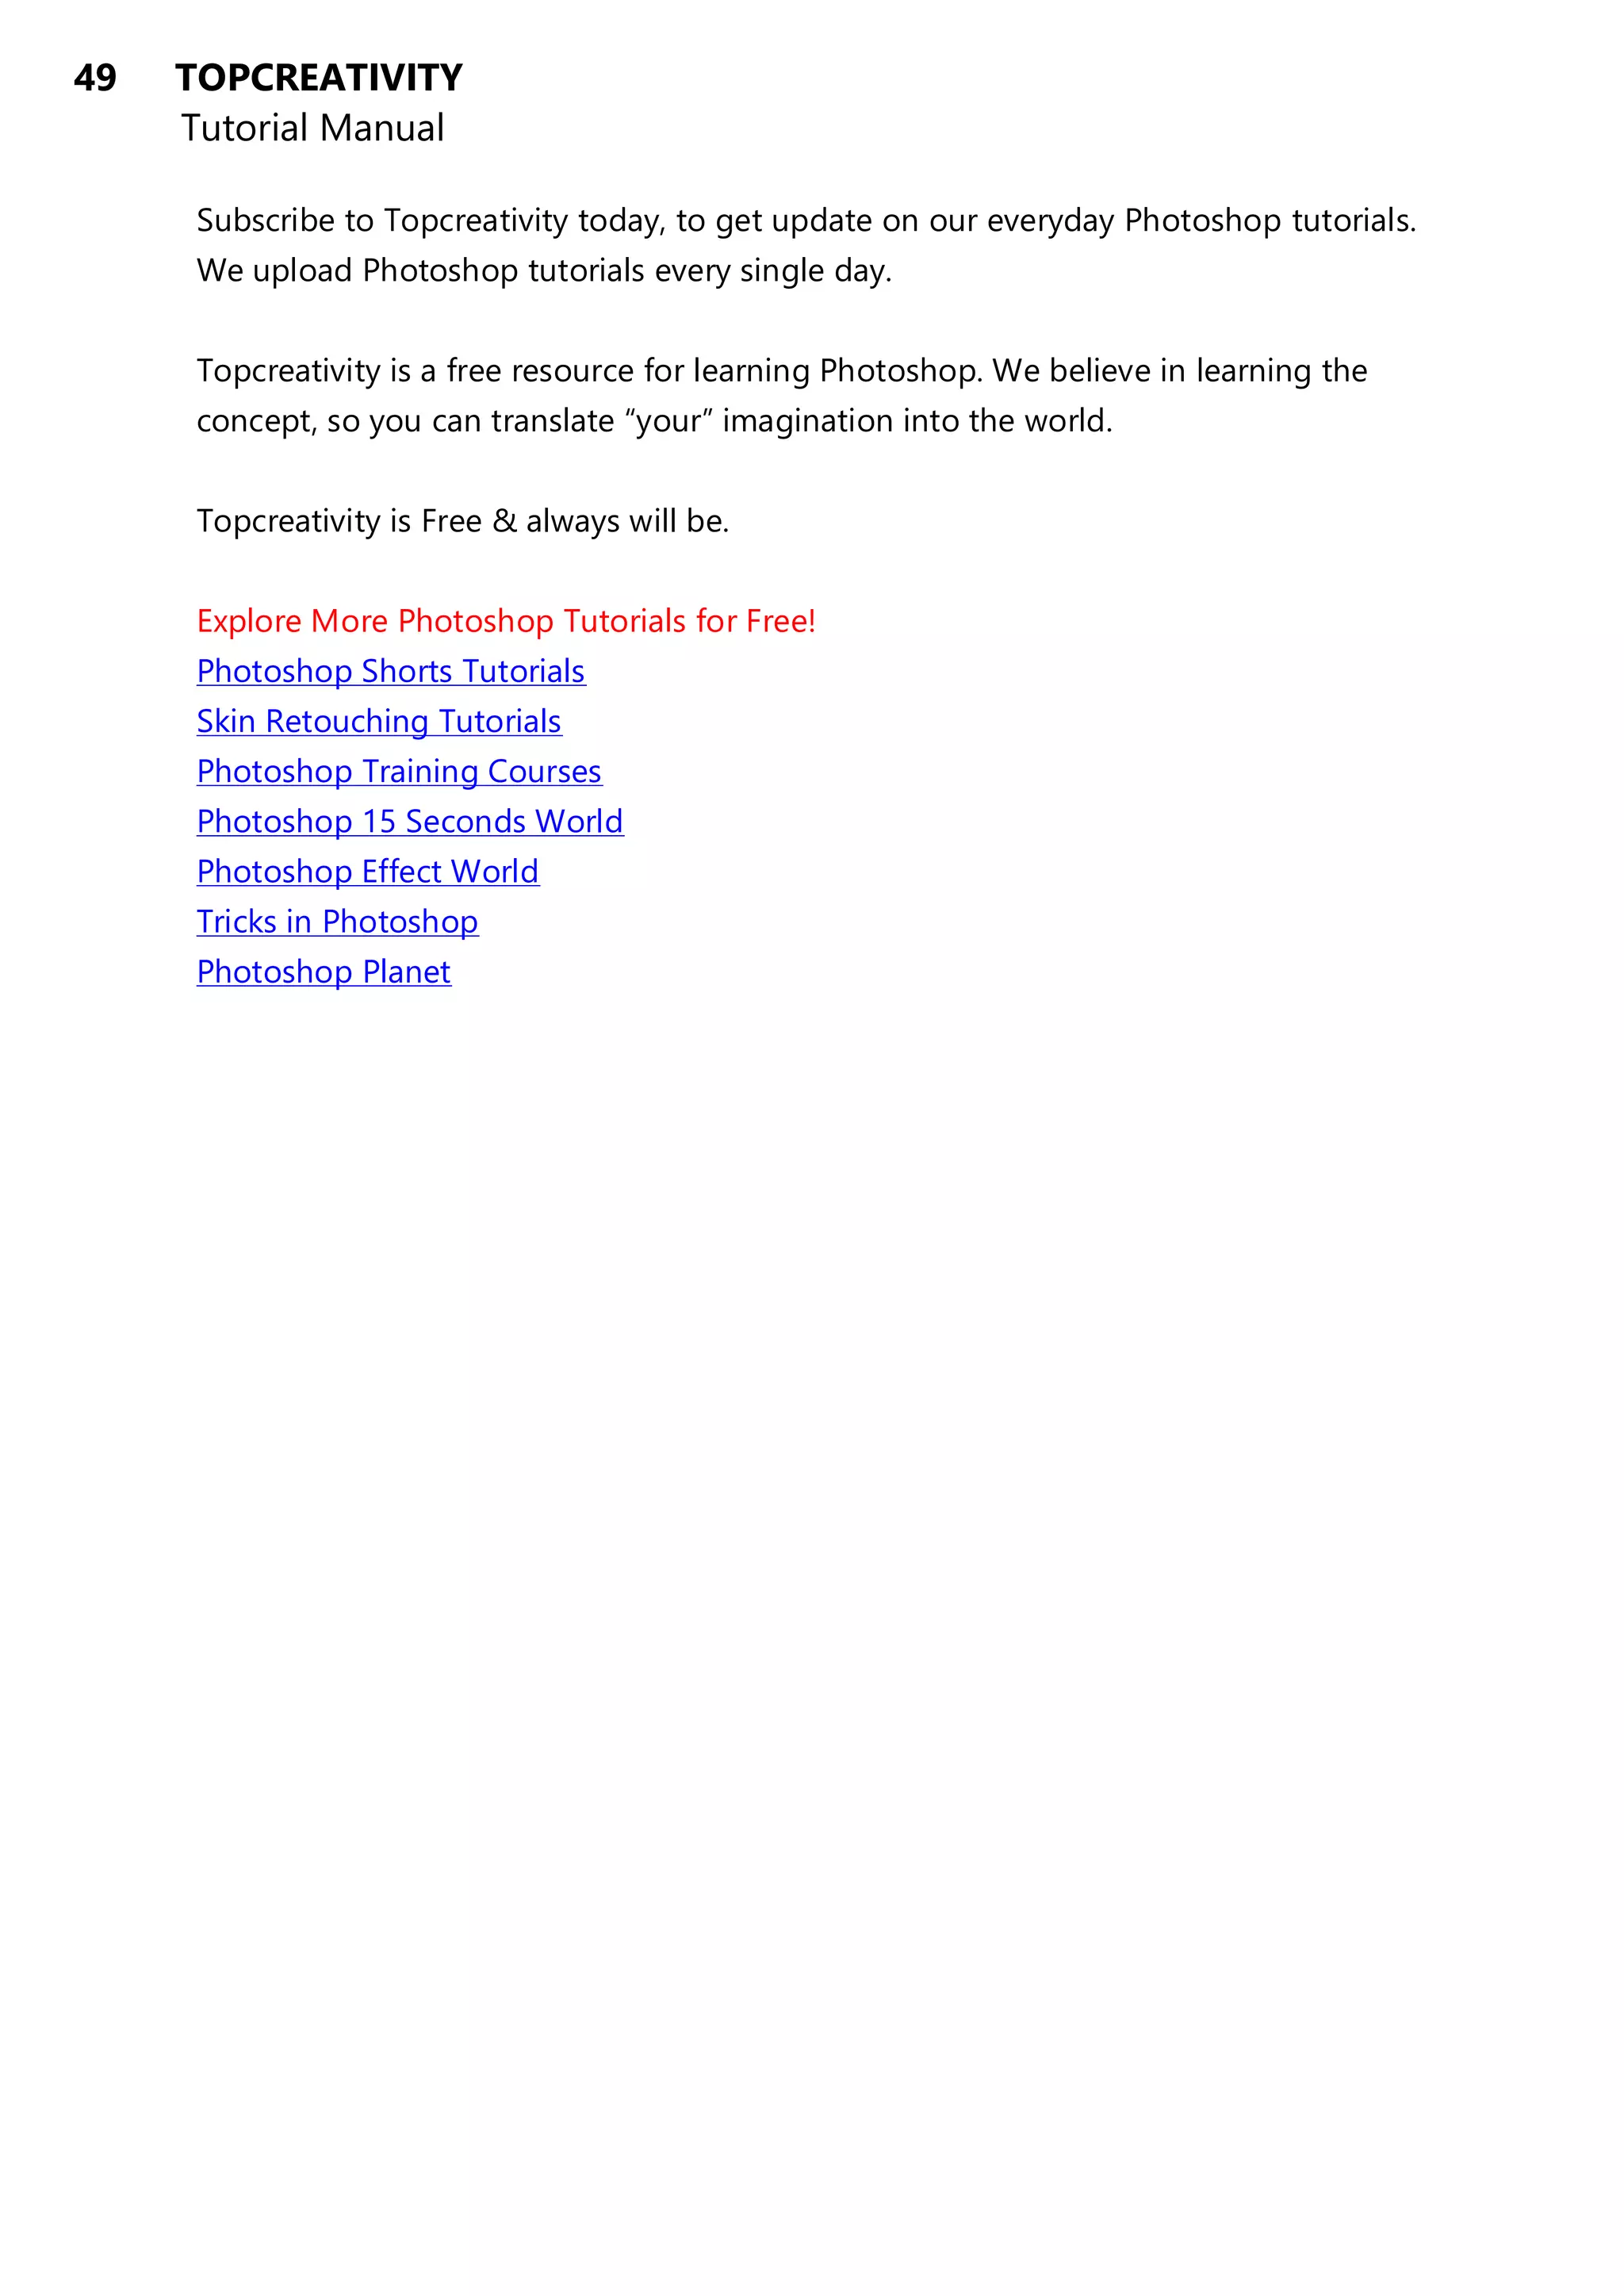
Free Transform - Ctrl+T
Transform Again - Shift+Ctrl+T
Color Setting - Shift+Ctrl+K
Keyboard Shortcuts - Alt+Shift+Ctrl+K
Menus - Alt+Shift+Ctrl+M
Preferences >
General - Ctrl+K
Image
Adjustment >
Levels - Ctrl+L
Curves - Ctrl+M
Hue/Saturation - Ctrl+U
Color Balance - Ctrl+B
Black and White - Alt+Shift+Ctrl+B
Invert - Ctrl+I
Desaturatate - Shift+Ctrl+U
Auto Tone - Shift+Ctrl+L
Auto Contrast - Alt+Shift+Ctrl+L
Auto Color - Shift+Ctrl+B
Image Size - Alt+Ctrl+I
Canvas Size - Alt+Ctrl+C
Layer
New Layer - Shift+Ctrl+N
Background - F5
Layer Via Copy/Duplicate - Ctrl+J
Layer Via Cut - Shift+Ctrl+J
Create/Release Clipping Mask - Alt+Ctrl+G
Group Layers - Ctrl+G
Ungroup Layers - Shift+Ctrl+G
Arrange Layers >
Bring to Front - Shift+Ctrl+]
Bring Forward - Ctrl+]
Send Backward - Ctrl+[
Send to Back - Shift+Ctrl+[
Merge Layers - Ctrl+E](https://image.slidesharecdn.com/topcreativitytutorials1-220906000557-513fbab4/75/Photoshop-Beginners-Course-6-2048.jpg)
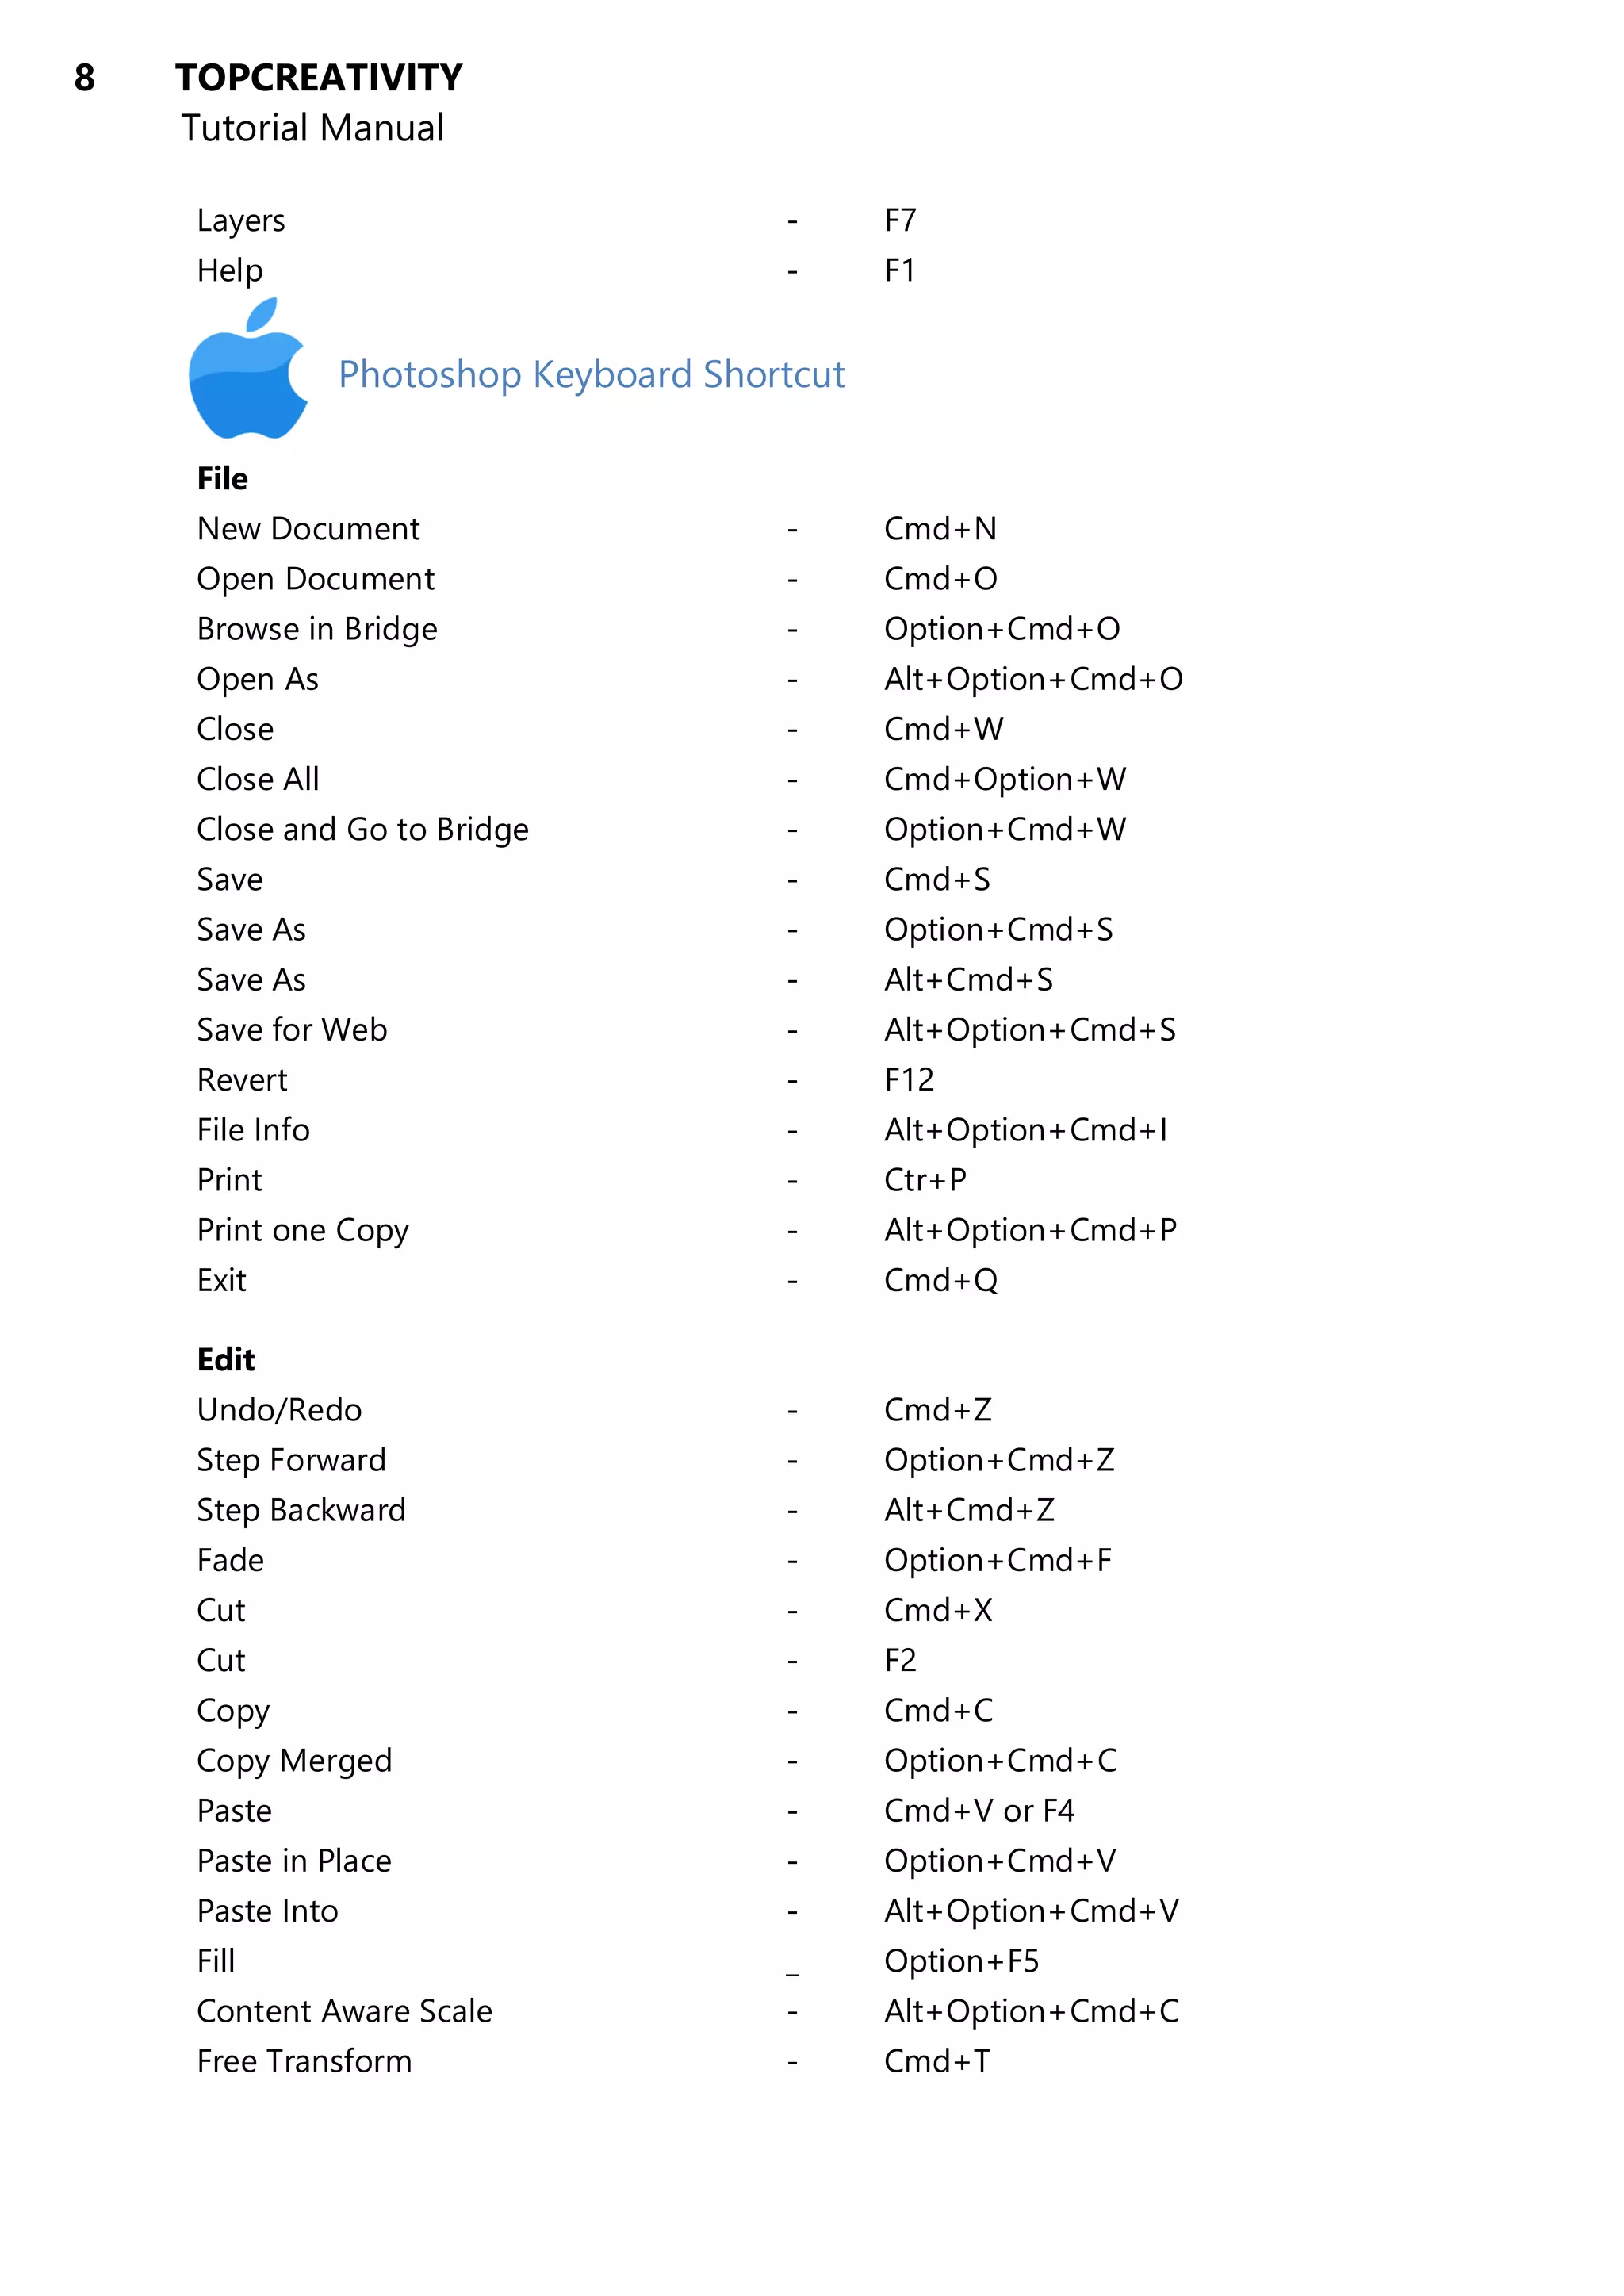
![9 TOPCREATIVITY
Tutorial Manual
Transform Again - Option+Cmd+T
Color Setting - Option+Cmd+K
Keyboard Shortcuts - Alt+Option+Cmd+K
Menus - Alt+Option+Cmd+M
Preferences >
General - Cmd+K
Image
Adjustment >
Levels - Cmd+L
Curves - Cmd+M
Hue/Saturation - Cmd+U
Color Balance - Cmd+B
Black and White - Alt+Option+Cmd+B
Invert - Cmd+I
Desaturatate - Option+Cmd+U
Auto Tone - Option+Cmd+L
Auto Contrast - Alt+Option+Cmd+L
Auto Color - Option+Cmd+B
Image Size - Alt+Cmd+I
Canvas Size - Alt+Cmd+C
Layer
New Layer - Option+Cmd+N
Background - F5
Layer Via Copy/Duplicate - Cmd+J
Layer Via Cut - Option+Cmd+J
Create/Release Clipping Mask - Alt+Cmd+G
Group Layers - Cmd+G
Ungroup Layers - Option+Cmd+G
Arrange Layers >
Bring to Front - Option+Cmd+]
Bring Forward - Cmd+]
Send Backward - Cmd+[
Send to Back - Option+Cmd+[
Merge Layers - Cmd+E
Merge Visible - Option+Cmd+E
Select](https://image.slidesharecdn.com/topcreativitytutorials1-220906000557-513fbab4/75/Photoshop-Beginners-Course-9-2048.jpg)