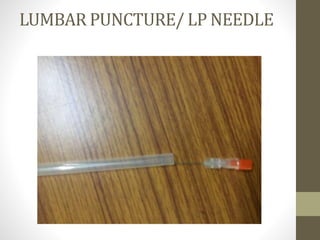
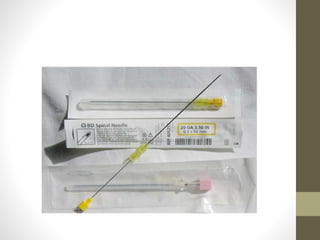
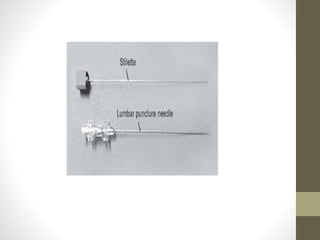
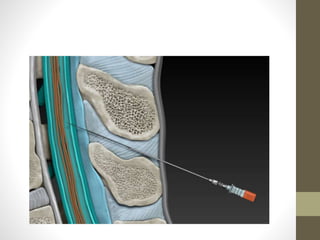
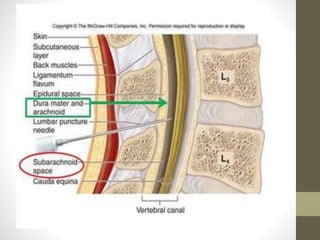
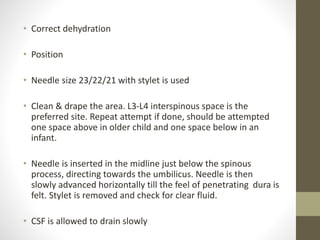
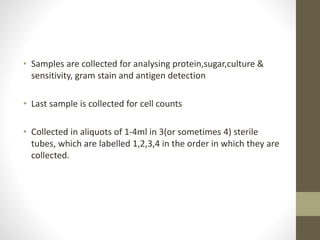
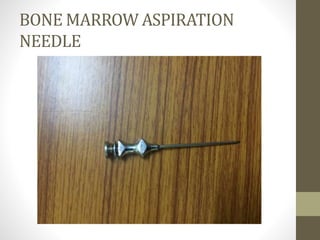
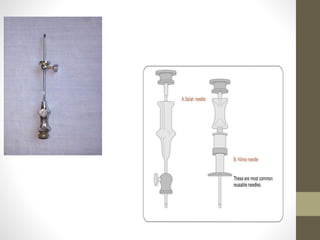
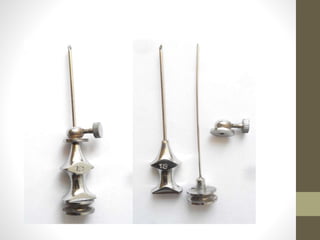
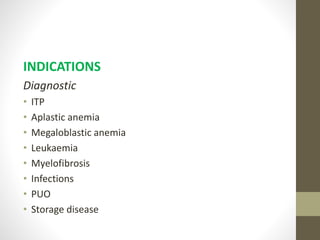
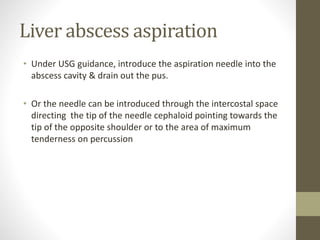
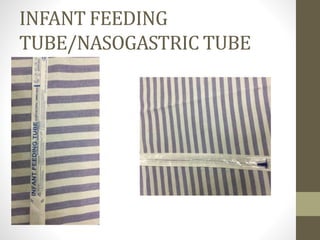
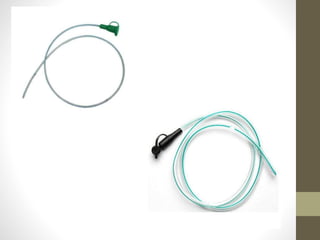
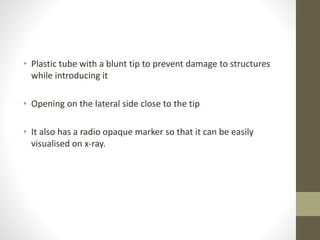
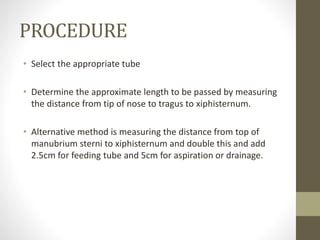
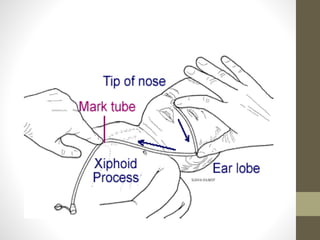
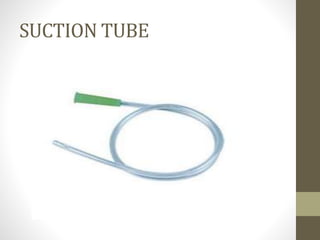
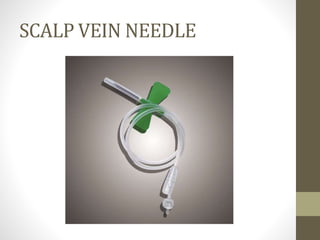
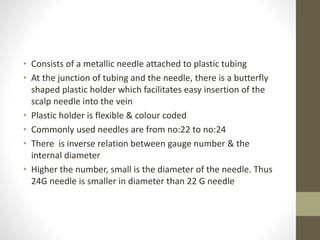
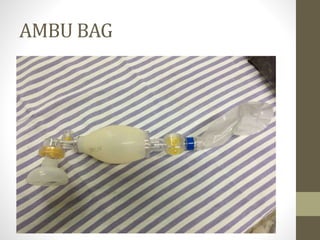
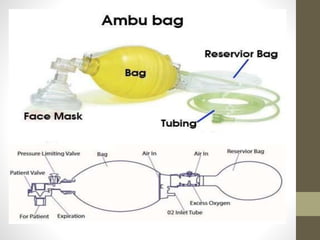
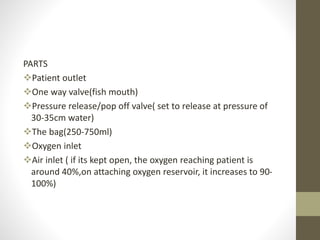
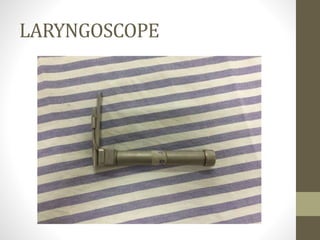
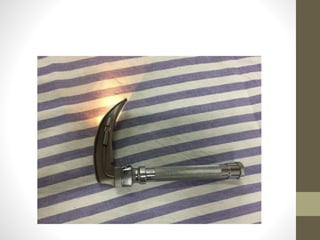
PEDIATRIC
INSTRUMENTS
Dr. Lakshmi
Prasad
Senior resident
LUMBAR PUNCTURE/ LP NEEDLE
Indications of Lumbar puncture
Therapeutic
• Analgesia ,anaesthesia
• Administration of antibiotics
• Intra thecal anti neoplastics.
Diagnostic
• Infections ie meningitis
• Inflammatory conditions e.g.. GBS,MS
• Malignancy
• Metabolic
• Spontaneous SAH
Contraindications
• Increased ICT
• Cerebral herniation
• Impending herniation
• Focal neurological deficits
• Coagulopathy
• Hemodynamically unstable
Complications
• Herniation
• Cardiorespiratory compromise
• Head ache
• Pain
• Infection
• CSF leak
Procedure
• Patient position
• Lateral decubitus
• Sitting( mostly in adults)
• A line connecting the posterior superior iliac crest will
intersect the midline at approx,the L4 spinous process
• A topical anaesthetic (e.g.: EMLA cream) can be applied 30-
60minutes before the procedure to minimise pain on
penetration
• Make sure hips and shoulders are aligned & are perpendicular
to the bed surface.
• Spine should be maximally flexed to increase spacing between
spinous processes
• monitor the patient visually and with pulse oxymetry for any
signs of cardio respiratory compromise as a result of the
assumed position
• Correct dehydration
• Position
• Needle size 23/22/21 with stylet is used
• Clean & drape the area. L3-L4 interspinous space is the
preferred site. Repeat attempt if done, should be attempted
one space above in older child and one space below in an
infant.
• Needle is inserted in the midline just below the spinous
process, directing towards the umbilicus. Needle is then
slowly advanced horizontally till the feel of penetrating dura is
felt. Stylet is removed and check for clear fluid.
• CSF is allowed to drain slowly
• Samples are collected for analysing protein,sugar,culture &
sensitivity, gram stain and antigen detection
• Last sample is collected for cell counts
• Collected in aliquots of 1-4ml in 3(or sometimes 4) sterile
tubes, which are labelled 1,2,3,4 in the order in which they are
collected.
• WBCs & RBCs begin to degrade as soon as 1 hour after
collection
• As many as 40% of neutrophils can disintegrate in 2-3hours.
• CELL COUNT SHOULD BE DONE STAT
• Specimen can be refrigerated for up to 4 hours
BONE MARROW ASPIRATION
NEEDLE
INDICATIONS
Diagnostic
• ITP
• Aplastic anemia
• Megaloblastic anemia
• Leukaemia
• Myelofibrosis
• Infections
• PUO
• Storage disease
Therapeutic
• Bone marrow transplantation
• Intra osseous drug administration
CONTRAINDICATIONS
• Hemorrhagic disorders e.g. coag factor deficiencies, DIC etc.
• Skin Infection(local site)
• Bone disorders e.g. Osteomyelitis, Osteogenesis imperfecta
Site
• In more than 2 Years: iliac crest
• Less than 2 years: proximal tibia medial to tibial tuberosity(to
prevent injury to pelvic structures)
PROCEDURE
• Use sterile technique
• Prone position
• Drape the area
• Anesthetize the area with 1% xylocaine. Anesthetize the
periosteum also
• Enter the ileum, at the posterior superior iliac spine which is
visible & palpable bony prominence, superior to lateral to
intergluteal cleft. It is inferior & medial to the crest.
• Introduce the needle by screwing (boring) motion, directing
the needle perpendicular to the bone.
• When needle enters the bone marrow, a decreased resistance
may be felt & the needle does not sway side to side.
• Aspirate the marrow using a 10 or 20ml syringe
• Marrow is smeared over 8-10 clean glass slides kept in slanting
position
• Apply pressure for 5 minutes at the site & give a dressing.
COMPLICATIONS
• Haemorrhage
• Infection
• Persistent pain at marrow site
• Retroperitoneal hematoma
• Trauma to neighbouring structures( gluteal artery injury, soft
tissue injury )
Bone marrow biopsy needle
JAMSHIDI-SWAIN marrow biopsy needle
PROCEDURE
Anesthetize the skin, subcutaneous tissue & periosteum
Make a small skin incision
Lock the stylet to the needle
Needle is pushed through cortex of bone by gentle firm
screwing motion
Remove the stylet
Introduce the needle little more
Move the needle sideways to 15˚ so as to break any biopsy
material within the needle
Repeat the procedure in another direction
Remove the needle by pulling it out by rotation or by
attaching a syringe & applying gentle suction
Prepare imprint smears by touching the biopsy material to
clean slides or rolling it over clean slides.
Seal the area
Bone specimen is placed in fixative and sent for HPE
SEMIAUTOMATED LIVER
BIOPSY GUN
INDICATIONS
Cirrhosis of liver e.g. ICC,Biliary Cirrhosis
Storage disorders e.g. GSD,Wilsons,Hemochromatosis
Malignancy , primary & metastasis. E.g. hepatoblastoma,
Neuroblastoma
Leukemia,Lymphoma
Infiltrations e.g. Tb,sarcoidosis,Infections
COMPLICATIONS
• Local pain & infection
• Bleeding in the liver
• Intrathoracic & intra peritoneal bile leak
• Pleural pain & Pneumothorax
• Penetration of other abdominal organs.
CONTRAINDICATIONS
• Bleeding disorders
• Extreme dyspnoea
• Pyogenic abscess in Right lobe of liver
• Biliary tract infection
• Peritoneal infection
• Hydatid disease
PROCEDURE
Percutaneous approach
1. Epigastric
2. Sub Costal
3. Right lateral approach (most common)- Intercostal( 10th ICS
in mid axillary line)
• Patient is asked to lie down & put right hand on head
• Anesthetize the skin , subcutaneous tissue, capsule of liver(2%
lignocaine)
• Make a tract to the capsule of liver with large bore needle
• Assistant should fix liver by applying firm pressure from the
right hypochondrium
• Older children- ask to hold breath
• Needle of gun is introduced through the track into the liver,
trigger is released and gun is withdrawn
• Apply firm pressure over the puncture site
• Linear piece of liver tissue will be collected inside the outer
sheath of the biopsy
• Liver tissue obtained is taken with a fine needle & transferred
to alcohol( if for GSD) or formaldehyde
• Monitor the patient’s PR,BP, & abdominal girth before and half
hourly after the procedure.
• Abdomen should be palpated gently for signs of peritoneal
irritation( next 6 hours)
Liver abscess aspiration
• Under USG guidance, introduce the aspiration needle into the
abscess cavity & drain out the pus.
• Or the needle can be introduced through the intercostal space
directing the tip of the needle cephaloid pointing towards the
tip of the opposite shoulder or to the area of maximum
tenderness on percussion
INFANT FEEDING
TUBE/NASOGASTRIC TUBE
• Plastic tube with a blunt tip to prevent damage to structures
while introducing it
• Opening on the lateral side close to the tip
• It also has a radio opaque marker so that it can be easily
visualised on x-ray.
INDICATIONS
o DIAGNOSIS OF
1. Internal bleeding in stomach & upper GI
2. Tuberculosis (gastric lavage)
3. TEF
4. Poisoning
5. Localisation of oesophageal strictures
6. Gastric analysis
.
• THERAPEUTIC
1. Nasogastric feeds
2. Remove gastric contents in poisoning, persistent GI bleed,
abdominal distension with bilious emesis, hepatic
encephalopathy
3. Administration of drugs
4. Gastric decompression pre operatively, when sufficient time
for fasting is not available.
5. Gastric decompression after BMV, post operative etc.
Other uses
• As an oxygen catheter
• For nasal, endotracheal & tracheostomy suction
• As a tourniquet
CONTRAINDICATIONS
• Head trauma
• coagulopathy
COMPLICATIONS
• Trauma to nose & pharynx
• Placement of tube in trachea
• Vomiting with aspirations during the procedure
• Ulceration/ infection of nasal mucosa.
PROCEDURE
• Select the appropriate tube
• Determine the approximate length to be passed by measuring
the distance from tip of nose to tragus to xiphisternum.
• Alternative method is measuring the distance from top of
manubrium sterni to xiphisternum and double this and add
2.5cm for feeding tube and 5cm for aspiration or drainage.
• Position the child at a 45 degree angle with head in midline
• Lubricate the lower 3-4cm of the tube and pass it through a
nostril directing towards the occiput
• Slight neck flexion may help the tube to correctly enter the
oesophagus
• Withdraw the tube, if there is severe coughing, choking or
cyanosis
• Introduce the selected length and fix the tube lightly to cheek
• Confirm the position in stomach by aspirating the stomach
contents or air pushed through the tube, a gurgling sound
confirms the position.
SUCTION TUBE
• Size in french
• Premature : 5-6 Fr
• Term : 6-8 Fr
• Infant : 8 Fr
• Older chldren : 10-14 Fr
INDICATIONS
• Orotracheal/ nasotracheal suction both direct &
ET/tracheostomy clearance
• E.g.: MAS
• Inability to clear airway
• Also for urethral catheterisation in distended bladder/
sampling of urine.
• Keep suction pressure at 80-100mm hg
• Max 3cm for nose & 5cm for mouth
• Max time of suctioning: 15s
CONTRAINDICATIONS
• Laryngospasm
• Basal skull fracture
• Nasal bleeding
• Severe bronchospasm
COMPLICATIONS
• Vasovagal attack
• Mechanical trauma
• Hypoxia
• Gagging/vomiting
• Laryngospasm/ bronchospasm
• Infection
SCALP VEIN NEEDLE
• Consists of a metallic needle attached to plastic tubing
• At the junction of tubing and the needle, there is a butterfly
shaped plastic holder which facilitates easy insertion of the
scalp needle into the vein
• Plastic holder is flexible & colour coded
• Commonly used needles are from no:22 to no:24
• There is inverse relation between gauge number & the
internal diameter
• Higher the number, small is the diameter of the needle. Thus
24G needle is smaller in diameter than 22 G needle
USES
• Collection of blood
• Infusion of IV fluids, drugs, blood etc.
• ABG analysis
AMBU BAG
PARTS
Patient outlet
One way valve(fish mouth)
Pressure release/pop off valve( set to release at pressure of
30-35cm water)
The bag(250-750ml)
Oxygen inlet
Air inlet ( if its kept open, the oxygen reaching patient is
around 40%,on attaching oxygen reservoir, it increases to 90-
100%)
• Intermittent positive pressure ventilation during resuscitation
• Mask can be cushioned or uncushioned
• Round/anatomical( triangular)
• Mask should cover nose, mouth including tip of chin, but not the
EYES
• In the resting stage, the AMBU bag is filled with air. On
squeezing the bag to initiate ventilation, the one way valve
proximal to the patients outlet opens resulting in release of
air, stored in the bag to the patient.
• On releasing the pressure, the bag gets re inflated with air.
• The patients exhaled air cannot re enter the bag due to one
way mechanism of valve at the patient outlet.
CONTRAINDICATIONS
• Congenital diaphragmatic hernia
BAG VALVE MASK
Usually made of plastic or rubber
Types Shapes
• Uncushioned * Round
• Cushioned * Triangular
• Mask should cover nose, mouth including tip of chin, but not
the EYES  RIGHT SIZED MASK
Advantages of Cushioned mask
• Mask conforms to the face
• Requires less pressure to obtain air tight seal
• Less chances of damage to eyes or other structures of the
face.
GUEDEL AIRWAY
• As necessary, clear the oropharynx of obstructing secretions,
vomitus, or foreign material.
• Determine the appropriate size of the oropharyngeal airway.
Hold the airway beside the patient’s cheek with the flange at
the corner of the mouth. The tip of an appropriately sized
airway should just reach the angle of the mandibular ramus.
• Next, begin inserting the airway into the mouth with the tip
pointed to the roof of the mouth (ie, concave up).
• To avoid cutting the lips, be careful not to pinch the lips
between the teeth and the airway as you insert the airway.
• Rotate the airway 180 degrees as you advance it into the
posterior oropharynx. This technique prevents the airway
from pushing the tongue backwards during insertion and
further obstructing the airway.
• When fully inserted, the flange of the device should rest at the
patient’s lips.
• Alternatively, use a tongue blade to depress the tongue as you
insert the airway with the tip pointed to the floor of the
mouth (ie, concave down). Use of the tongue blade prevents
the airway from pushing the tongue backward during
insertion.
INDICATION
Oropharyngeal airways are indicated for unconscious patients in
the setting of
• Bag-valve-mask ventilation
• Spontaneously breathing patients with soft tissue obstruction
of the upper airway who are deeply obtunded and have no
gag reflex
CONTRAINDICATIONS
Absolute contraindications:
• Consciousness or presence of a gag reflex
Relative contraindications:
• Insertion of an oropharyngeal airway may not be feasible in
some settings, such as
• Oral trauma
• Trismus (restriction of mouth opening including spasm of
muscles of mastication)
COMPLICATIONS
• Airway obstruction by an improperly sized or improperly
inserted oropharyngeal airway
• Gagging and the potential for vomiting and aspiration
LARYNGOSCOPE
It has 2 parts
• A handle( has batteries)
• A blade(contains light source) – straight(miller)
-- curved (Macintosh)
• Straight blade more useful in young children, since larynx is
placed more anteriorly and above
• Curved blade in older children & adults, helps to displace the
tongue.
SIZE
• 0 : Preterm & LBW
• 1 : Term
• 2 : Children between 2-10 years
• 3 : Children > 10 years.
USES
• DIRECT LARYNGOSCOPY IN
1. In Cord palsy
2. To detect foreign body
3. Anatomical lesion
• PRIOR TO ET INTUBATION
1. Neonatal asphyxia
2. Meconium aspiration
3. RDS
4. GA administration for surgeries
5. CDH/TEF etc
6. Resuscitation
PROCEDURE
• Align the areas of mouth,pharynx,trachea by extension of neck
by small pillow or blanket below shoulder
• Hold the laryngoscope handle in left hand and insert blade
into the mouth in midline to base of tongue
• After proper positioning of blade, traction is exerted upward
in the direction of long axis of handle to expose glottis
• Insert the ET tube from the right corner of the mouth, with
cricoid pressure by an assistant to visualise glottis.
• The black glottic marker of tube is placed at level of vocal
cords, placing tip of tracheal tube in mid trachea. Secure tube
after confirming tube placement.
CONTRAINDICATIONS
• Diseases or injuries of cervical spine
• Moderate or marked respiratory obstruction
STRUCTURES EXAMINED
SERIALLY………
1. Base of tongue
2. Right & left valleculae
3. Epiglottis
4. Right & left pyriform sinuses
5. Aryepiglottic folds
6. Arytenoids
7. Post cricoid region
8. False cords
9. Anterior & posterior commissures
10. Ventricles & vocal cords
11. Subglottic area.
COMPLICATIONS
• Mechanical injury
• Hyperextension of neck- stimulation of posterior pharyngeal
wall- vasovagal attack
• Cough
• Vomiting
• Displacement/obstruction of tube
• Pneumothorax
ENDORACHEAL TUBE
• Made of PVC(plastic)
• Easy disposable, hypoallergenic,& transparent
• Parts : proximal end , 15mm adapter. Connects to the
ventilator/ AMBU Bag
• Central portion : vocal cord guide (black line) which should be
placed at the level of opening of vocal cord, so that tip of ET
tube is above bifurcation of trachea.
• Distal end : murphys eye (opening in the lateral wall) which
prevents complete blockage in case distal end is impacted
• Cuffed tube is used in older children
• Inflating the cuff helps in keeping the ET in place and avoids
aspiration.
• Uncuffed- younger children with narrow subglottic area.
SIZE
• From 2mm to 16mm (internal diameter)
• Size of tube can be determined by-
Internal diameter of ET tube (mm) = age in years + 4
4
• Length to be fixed in cm = internal diameter x 3
• Premature : 2-2.5mm
• Full Term : 3-3.5mm
• Young infants : 4-4.5mm
• 6m – 1 yr :4-4.5mm
• 12m- 5yr : increase by 0.5mm 6 monthly.
USES
• Mechanical ventilation
• Resuscitation
• IPPV
• Tracheal suctioning in meconium aspiration
• Epiglottitis & Croup
• Tetanus
• Angioneurotic edema
COMPLICATIONS
• Mechanical trauma
• Pressure necrosis
• Pneumothorax
• Posterior pharyngeal wall stimulation
THREE –WAY CONNECTOR
• T shaped device
• Device contains 2 inlets and 1 outlet
• The connector is devised in such a way that by turning the
handle (which operates the screw) either of the 2 inlets can be
connected with the outlet, whereas remaining inlet is
disconnected from outlet
• Facilitates administration of IV medications through one inlet
while Iv fluids pass through the other inlet
USES
• Administration of IV fluids and IV medications simultaneously
by connecting the 3 way connector to IV set
• Exchange transfusion in case of neonatal hyperbilirubinemia
• Haemodialysis in case of renal failure/ poisonings
• Pleural/ ascitic tap
• CVP monitoring.
IV CANULA
• Being plastic in nature, it doesn’t damage the endothelium of
the vein
• Plastic sheath being flexible, can be inserted into thin &
tortuous vein easily
• Uses: venepuncture, transfusion of drugs/ blood etc..
INTRA OSSEOUS NEEDLE
INDICATIONS
• Any age group where vascular access is indicated but difficult
to establish
• Cardiac arrest or shock when immediate vascular access is
required for resuscitation
SITE
• Proximal tibia
• Distal tibia
• Distal femur
CONTRAINDICATIONS
Absolute
• Fracture of the bone or previous IO insertion in the same site
• Crush injuries
• Osteogenesis imperfecta
RELATIVE
• Infection at point of insertion
• Osteoporosis
COMPLICATIONS
• Failure to enter bone marrow
• Through and through penetration of bone
• Osteomyelitis
• Epiphyseal plate injury
• Local infection/ necrosis/pain/compartment syndrome, fat &
bone micro emboli
TUBERCULIN SYRINGE
• It is a 1 cc syringe with a plastic piston (plastic syringe), or a
metal piston(glass syringe)
USES
• To administer PPD for Mantoux test
• To administer BCG vaccine
• To administer test doses of drugs such as penicillin
• Provocative testing – to test for allergies in Bronchial asthma,
atopy
• Insulin injection in Diabetes mellitus
• Giving small doses of drugs
FOLEY’S CATHETER
• Self retaining catheter, made up of latex
• self retaining by means of a balloon which should be inflated
with saline
Use 5ml distilled water for inflating
balloon ( NS will crystallise)
INDICATIONS
URINARY NON-URINARY
CBD # Arrest postnasal bleeding
Monitor urine O/P in intractable epistaxis
in case of shock/renal failure # Arrest bleeding from
Differentiate anuria oesophageal varices in
from retention portal hypertension
Haematuria- bladder injury # EASI
Urinary incontinence
Bladder wash (cystitis0
Supra pubic cystotomy
Intra vesical chemotherapy
Equipment
Sterile gloves - consider Universal Precautions
Sterile drapes
Cleansing solution
Cotton swabs
Forceps
Sterile water
Foley catheter
Syringe (usually 10 cc)
Lubricant (water based jelly or xylocaine jelly)
Collection bag and tubing
1. Gather equipment.
2. Explain procedure to the patient
3. Assist patient into supine position with legs spread and feet
together
4. Open catheterization kit and catheter
5. Prepare sterile field, apply sterile gloves
6. Check balloon for patency.
7. Generously coat the distal portion (2-5 cm) of the catheter with
lubricant
8. Apply sterile drape
9. If female, separate labia using non-dominant hand. If male, hold the
penis with the non-dominant hand. Maintain hand position until
preparing to inflate balloon.
10. Using dominant hand to handle forceps, cleanse peri-urethral
mucosa with cleansing solution. Cleanse anterior to posterior, inner to
outer, one swipe per swab, discard swab away from sterile field.
•
11 .Pick up catheter with gloved (and still sterile) dominant
hand. Hold end of catheter loosely coiled in palm of dominant
hand.
12. In the male, lift the penis to a position perpendicular to
patient's body and apply light upward traction (with non-
dominant hand)
13. Identify the urinary meatus and gently insert until 1 to 2
inches beyond where urine is noted
14. Inflate balloon, using correct amount of sterile liquid (usually
10 cc but check actual balloon size)
• Gently pull catheter until inflation balloon is snug against bladder
neck
• Connect catheter to drainage system
• Secure catheter to abdomen or thigh, without tension on tubing
• Place drainage bag below level of bladder
• Evaluate catheter function and amount, color, odor, and quality of
urine
• Remove gloves, dispose of equipment appropriately, wash hands
• Document size of catheter inserted, amount of water in balloon,
patient's response to procedure, and assessment of urine
COMPLICATIONS
• Injury to urethra or urinary bladder
• Inadvertent catheterisation of the vagina may occur
• Urinary tract infection in the absence of aseptic precautions
3 way Foley
• In haematuria for continuous bladder irrigation to prevent
formation of clots blocking drainage of urine
• Post operative bladder irrigation
CONTRAINDICATION
• Urethral rupture (blood at tip of meatus)
METERED DOSE INHALER
PARTS
• Metallic canister
• Which contains the medicine along with the propellant 9
usually a CFC) which delivers the medicine to the patient in
the form of an aerosol
• Plastic actuator
• Cap
• The canister is inverted and fixed to the inhaler and fixed to
the inhaler before actuating the device.
STEPS
1. Remove cap and shake inhaler in vertical direction
2. Breathe out gently
3. Put mouth piece in mouth. At start if inspiration, that should be slow
and deep, press canister down and continue to inhale deeply
4. Hold breathe for 10s or as long as possible, then breathe out slowly
5. Wait for a few seconds before repeating steps 2-4
MDI
Spacers are bottle shaped plastic devices which
have a mouth piece at one end and other end has
an opening where the MDI can be attached.
ADVANTAGES
• Deliver the drug into lower airways
• Less coordination between inspiration and activation
USED IN
• Children
• Adults without coordination
MDI with Spacer
1. Remove cap, shake inhaler and insert into spacer device
2. Place mouth piece of spacer in mouth
3. Start breathing in and out gently and observe movements of
valve
4. Once breathing pattern is established, press canister and
continue to breathe 5-10times( tidal breathing)
5. Remove the device from mouth and wait for 30s, before
repeating steps 1-4
USES
• Prevention and management of asthma
Medicines given via MDI
• Short acting drugs e.g. salbutamol, terbutaline
• Long acting e.g. salmetrol, formetrol
• Inhaled anti cholinergic drugs e.g. ipratropium bromide
• Inhaled steroids e.g. budesonise, fluticasone etc.
• S/E: oral candidiasis ( tackled by rinsing mouth after use of
steroid inhaler)
DISADVANTAGES of MDI
• Perfect coordination between inspiration and activation of
device
• Not possible in small children
• To eliminate problem, spacer is advised.
DRY POWDER INHALERS
• Rotahaler
• Diskhaler
• Spinhaler
• Turbohaler
• Acuhaler
• Can be used in children above 4-5 years of age
• Do not require coordination of actuation and breathing
• Do not contain CFC
• Salbutamol, salmetrol, budesonide etc. are available.
• Dry powdered inhalers consists of 2 halves
• The upper half consists of mouth piece and raised square slot into
which a capsule containing the medication in dry powdered form
can be inserted
• The lower half is a kind of reservoir which can be attached to the
upper half
• The lower half consists of a fin like device which cuts the capsule on
rotating , thus depositing the powder into the reservoir
• The patient breathes out , puts the mouth piece in his mouth and
takes a deep breath thus inhaling the powder
• DPIs are suited for children over5 years as they require greater
inspiratory effort
ADVANTAGES
• Small portable device
• No need to coordinate inspiration with device actuation
DISADVANTAGES
• Cannot be used in less than 5 years
• Dry powder can be deposited in the mouth or pharynx if
inspiratory effort is not good
• Dry powder might be affected by humid climate
OXYGEN DELIVERY SYSTEMS
NASAL CANULA
Nasal Cannula
• Delivered FiO2 is 22-60%
• Appropriate oxygen flow rate is 0.25L-4l/min
• Suitable for infants and children who require low
concentrations of supplimental oxygen
SIMPLE OXYGEN MASK
• Delivers FiO2 35-60%
• Appropriate flow rate 6-10L/min
NRM
• Delivers FiO2 95%
• Flow rate 10-15L/min
• Device has 2 one way valves
• A valve in one or both exhalation port(s) to prevent
entrainment of room air during inhalation
• A valve between reservoir bag and the mask to prevent the
flow of exhaled gas into the reservoir
OXYGEN HOOD
THANK YOU

Pediatric instruments.pptx

  • 1.
  • 2.
  • 5.
    Indications of Lumbarpuncture Therapeutic • Analgesia ,anaesthesia • Administration of antibiotics • Intra thecal anti neoplastics. Diagnostic • Infections ie meningitis • Inflammatory conditions e.g.. GBS,MS • Malignancy • Metabolic • Spontaneous SAH
  • 6.
    Contraindications • Increased ICT •Cerebral herniation • Impending herniation • Focal neurological deficits • Coagulopathy • Hemodynamically unstable
  • 7.
    Complications • Herniation • Cardiorespiratorycompromise • Head ache • Pain • Infection • CSF leak
  • 8.
    Procedure • Patient position •Lateral decubitus • Sitting( mostly in adults)
  • 10.
    • A lineconnecting the posterior superior iliac crest will intersect the midline at approx,the L4 spinous process • A topical anaesthetic (e.g.: EMLA cream) can be applied 30- 60minutes before the procedure to minimise pain on penetration • Make sure hips and shoulders are aligned & are perpendicular to the bed surface. • Spine should be maximally flexed to increase spacing between spinous processes • monitor the patient visually and with pulse oxymetry for any signs of cardio respiratory compromise as a result of the assumed position
  • 15.
    • Correct dehydration •Position • Needle size 23/22/21 with stylet is used • Clean & drape the area. L3-L4 interspinous space is the preferred site. Repeat attempt if done, should be attempted one space above in older child and one space below in an infant. • Needle is inserted in the midline just below the spinous process, directing towards the umbilicus. Needle is then slowly advanced horizontally till the feel of penetrating dura is felt. Stylet is removed and check for clear fluid. • CSF is allowed to drain slowly
  • 16.
    • Samples arecollected for analysing protein,sugar,culture & sensitivity, gram stain and antigen detection • Last sample is collected for cell counts • Collected in aliquots of 1-4ml in 3(or sometimes 4) sterile tubes, which are labelled 1,2,3,4 in the order in which they are collected.
  • 17.
    • WBCs &RBCs begin to degrade as soon as 1 hour after collection • As many as 40% of neutrophils can disintegrate in 2-3hours. • CELL COUNT SHOULD BE DONE STAT • Specimen can be refrigerated for up to 4 hours
  • 18.
  • 21.
    INDICATIONS Diagnostic • ITP • Aplasticanemia • Megaloblastic anemia • Leukaemia • Myelofibrosis • Infections • PUO • Storage disease
  • 22.
    Therapeutic • Bone marrowtransplantation • Intra osseous drug administration
  • 23.
    CONTRAINDICATIONS • Hemorrhagic disorderse.g. coag factor deficiencies, DIC etc. • Skin Infection(local site) • Bone disorders e.g. Osteomyelitis, Osteogenesis imperfecta
  • 24.
    Site • In morethan 2 Years: iliac crest • Less than 2 years: proximal tibia medial to tibial tuberosity(to prevent injury to pelvic structures)
  • 25.
    PROCEDURE • Use steriletechnique • Prone position • Drape the area • Anesthetize the area with 1% xylocaine. Anesthetize the periosteum also • Enter the ileum, at the posterior superior iliac spine which is visible & palpable bony prominence, superior to lateral to intergluteal cleft. It is inferior & medial to the crest. • Introduce the needle by screwing (boring) motion, directing the needle perpendicular to the bone.
  • 26.
    • When needleenters the bone marrow, a decreased resistance may be felt & the needle does not sway side to side. • Aspirate the marrow using a 10 or 20ml syringe • Marrow is smeared over 8-10 clean glass slides kept in slanting position • Apply pressure for 5 minutes at the site & give a dressing.
  • 29.
    COMPLICATIONS • Haemorrhage • Infection •Persistent pain at marrow site • Retroperitoneal hematoma • Trauma to neighbouring structures( gluteal artery injury, soft tissue injury )
  • 30.
  • 31.
    JAMSHIDI-SWAIN marrow biopsyneedle PROCEDURE Anesthetize the skin, subcutaneous tissue & periosteum Make a small skin incision Lock the stylet to the needle Needle is pushed through cortex of bone by gentle firm screwing motion Remove the stylet
  • 32.
    Introduce the needlelittle more Move the needle sideways to 15˚ so as to break any biopsy material within the needle Repeat the procedure in another direction Remove the needle by pulling it out by rotation or by attaching a syringe & applying gentle suction Prepare imprint smears by touching the biopsy material to clean slides or rolling it over clean slides. Seal the area Bone specimen is placed in fixative and sent for HPE
  • 33.
  • 34.
    INDICATIONS Cirrhosis of livere.g. ICC,Biliary Cirrhosis Storage disorders e.g. GSD,Wilsons,Hemochromatosis Malignancy , primary & metastasis. E.g. hepatoblastoma, Neuroblastoma Leukemia,Lymphoma Infiltrations e.g. Tb,sarcoidosis,Infections
  • 35.
    COMPLICATIONS • Local pain& infection • Bleeding in the liver • Intrathoracic & intra peritoneal bile leak • Pleural pain & Pneumothorax • Penetration of other abdominal organs.
  • 36.
    CONTRAINDICATIONS • Bleeding disorders •Extreme dyspnoea • Pyogenic abscess in Right lobe of liver • Biliary tract infection • Peritoneal infection • Hydatid disease
  • 37.
    PROCEDURE Percutaneous approach 1. Epigastric 2.Sub Costal 3. Right lateral approach (most common)- Intercostal( 10th ICS in mid axillary line) • Patient is asked to lie down & put right hand on head • Anesthetize the skin , subcutaneous tissue, capsule of liver(2% lignocaine) • Make a tract to the capsule of liver with large bore needle • Assistant should fix liver by applying firm pressure from the right hypochondrium • Older children- ask to hold breath
  • 38.
    • Needle ofgun is introduced through the track into the liver, trigger is released and gun is withdrawn • Apply firm pressure over the puncture site • Linear piece of liver tissue will be collected inside the outer sheath of the biopsy • Liver tissue obtained is taken with a fine needle & transferred to alcohol( if for GSD) or formaldehyde • Monitor the patient’s PR,BP, & abdominal girth before and half hourly after the procedure. • Abdomen should be palpated gently for signs of peritoneal irritation( next 6 hours)
  • 39.
    Liver abscess aspiration •Under USG guidance, introduce the aspiration needle into the abscess cavity & drain out the pus. • Or the needle can be introduced through the intercostal space directing the tip of the needle cephaloid pointing towards the tip of the opposite shoulder or to the area of maximum tenderness on percussion
  • 40.
  • 42.
    • Plastic tubewith a blunt tip to prevent damage to structures while introducing it • Opening on the lateral side close to the tip • It also has a radio opaque marker so that it can be easily visualised on x-ray.
  • 43.
    INDICATIONS o DIAGNOSIS OF 1.Internal bleeding in stomach & upper GI 2. Tuberculosis (gastric lavage) 3. TEF 4. Poisoning 5. Localisation of oesophageal strictures 6. Gastric analysis
  • 44.
    . • THERAPEUTIC 1. Nasogastricfeeds 2. Remove gastric contents in poisoning, persistent GI bleed, abdominal distension with bilious emesis, hepatic encephalopathy 3. Administration of drugs 4. Gastric decompression pre operatively, when sufficient time for fasting is not available. 5. Gastric decompression after BMV, post operative etc.
  • 45.
    Other uses • Asan oxygen catheter • For nasal, endotracheal & tracheostomy suction • As a tourniquet
  • 46.
  • 47.
    COMPLICATIONS • Trauma tonose & pharynx • Placement of tube in trachea • Vomiting with aspirations during the procedure • Ulceration/ infection of nasal mucosa.
  • 48.
    PROCEDURE • Select theappropriate tube • Determine the approximate length to be passed by measuring the distance from tip of nose to tragus to xiphisternum. • Alternative method is measuring the distance from top of manubrium sterni to xiphisternum and double this and add 2.5cm for feeding tube and 5cm for aspiration or drainage.
  • 50.
    • Position thechild at a 45 degree angle with head in midline • Lubricate the lower 3-4cm of the tube and pass it through a nostril directing towards the occiput • Slight neck flexion may help the tube to correctly enter the oesophagus • Withdraw the tube, if there is severe coughing, choking or cyanosis • Introduce the selected length and fix the tube lightly to cheek • Confirm the position in stomach by aspirating the stomach contents or air pushed through the tube, a gurgling sound confirms the position.
  • 51.
  • 53.
    • Size infrench • Premature : 5-6 Fr • Term : 6-8 Fr • Infant : 8 Fr • Older chldren : 10-14 Fr
  • 54.
    INDICATIONS • Orotracheal/ nasotrachealsuction both direct & ET/tracheostomy clearance • E.g.: MAS • Inability to clear airway • Also for urethral catheterisation in distended bladder/ sampling of urine. • Keep suction pressure at 80-100mm hg • Max 3cm for nose & 5cm for mouth • Max time of suctioning: 15s
  • 55.
    CONTRAINDICATIONS • Laryngospasm • Basalskull fracture • Nasal bleeding • Severe bronchospasm
  • 56.
    COMPLICATIONS • Vasovagal attack •Mechanical trauma • Hypoxia • Gagging/vomiting • Laryngospasm/ bronchospasm • Infection
  • 57.
  • 58.
    • Consists ofa metallic needle attached to plastic tubing • At the junction of tubing and the needle, there is a butterfly shaped plastic holder which facilitates easy insertion of the scalp needle into the vein • Plastic holder is flexible & colour coded • Commonly used needles are from no:22 to no:24 • There is inverse relation between gauge number & the internal diameter • Higher the number, small is the diameter of the needle. Thus 24G needle is smaller in diameter than 22 G needle
  • 59.
    USES • Collection ofblood • Infusion of IV fluids, drugs, blood etc. • ABG analysis
  • 60.
  • 62.
    PARTS Patient outlet One wayvalve(fish mouth) Pressure release/pop off valve( set to release at pressure of 30-35cm water) The bag(250-750ml) Oxygen inlet Air inlet ( if its kept open, the oxygen reaching patient is around 40%,on attaching oxygen reservoir, it increases to 90- 100%)
  • 63.
    • Intermittent positivepressure ventilation during resuscitation • Mask can be cushioned or uncushioned • Round/anatomical( triangular) • Mask should cover nose, mouth including tip of chin, but not the EYES
  • 64.
    • In theresting stage, the AMBU bag is filled with air. On squeezing the bag to initiate ventilation, the one way valve proximal to the patients outlet opens resulting in release of air, stored in the bag to the patient. • On releasing the pressure, the bag gets re inflated with air. • The patients exhaled air cannot re enter the bag due to one way mechanism of valve at the patient outlet.
  • 65.
  • 66.
  • 69.
    Usually made ofplastic or rubber Types Shapes • Uncushioned * Round • Cushioned * Triangular • Mask should cover nose, mouth including tip of chin, but not the EYES  RIGHT SIZED MASK
  • 70.
    Advantages of Cushionedmask • Mask conforms to the face • Requires less pressure to obtain air tight seal • Less chances of damage to eyes or other structures of the face.
  • 71.
  • 75.
    • As necessary,clear the oropharynx of obstructing secretions, vomitus, or foreign material. • Determine the appropriate size of the oropharyngeal airway. Hold the airway beside the patient’s cheek with the flange at the corner of the mouth. The tip of an appropriately sized airway should just reach the angle of the mandibular ramus. • Next, begin inserting the airway into the mouth with the tip pointed to the roof of the mouth (ie, concave up). • To avoid cutting the lips, be careful not to pinch the lips between the teeth and the airway as you insert the airway.
  • 76.
    • Rotate theairway 180 degrees as you advance it into the posterior oropharynx. This technique prevents the airway from pushing the tongue backwards during insertion and further obstructing the airway. • When fully inserted, the flange of the device should rest at the patient’s lips. • Alternatively, use a tongue blade to depress the tongue as you insert the airway with the tip pointed to the floor of the mouth (ie, concave down). Use of the tongue blade prevents the airway from pushing the tongue backward during insertion.
  • 78.
    INDICATION Oropharyngeal airways areindicated for unconscious patients in the setting of • Bag-valve-mask ventilation • Spontaneously breathing patients with soft tissue obstruction of the upper airway who are deeply obtunded and have no gag reflex
  • 79.
    CONTRAINDICATIONS Absolute contraindications: • Consciousnessor presence of a gag reflex Relative contraindications: • Insertion of an oropharyngeal airway may not be feasible in some settings, such as • Oral trauma • Trismus (restriction of mouth opening including spasm of muscles of mastication)
  • 80.
    COMPLICATIONS • Airway obstructionby an improperly sized or improperly inserted oropharyngeal airway • Gagging and the potential for vomiting and aspiration
  • 81.
  • 83.
    It has 2parts • A handle( has batteries) • A blade(contains light source) – straight(miller) -- curved (Macintosh) • Straight blade more useful in young children, since larynx is placed more anteriorly and above • Curved blade in older children & adults, helps to displace the tongue.
  • 84.
    SIZE • 0 :Preterm & LBW • 1 : Term • 2 : Children between 2-10 years • 3 : Children > 10 years.
  • 85.
    USES • DIRECT LARYNGOSCOPYIN 1. In Cord palsy 2. To detect foreign body 3. Anatomical lesion • PRIOR TO ET INTUBATION 1. Neonatal asphyxia 2. Meconium aspiration 3. RDS 4. GA administration for surgeries 5. CDH/TEF etc 6. Resuscitation
  • 86.
    PROCEDURE • Align theareas of mouth,pharynx,trachea by extension of neck by small pillow or blanket below shoulder • Hold the laryngoscope handle in left hand and insert blade into the mouth in midline to base of tongue • After proper positioning of blade, traction is exerted upward in the direction of long axis of handle to expose glottis • Insert the ET tube from the right corner of the mouth, with cricoid pressure by an assistant to visualise glottis. • The black glottic marker of tube is placed at level of vocal cords, placing tip of tracheal tube in mid trachea. Secure tube after confirming tube placement.
  • 87.
    CONTRAINDICATIONS • Diseases orinjuries of cervical spine • Moderate or marked respiratory obstruction
  • 88.
    STRUCTURES EXAMINED SERIALLY……… 1. Baseof tongue 2. Right & left valleculae 3. Epiglottis 4. Right & left pyriform sinuses 5. Aryepiglottic folds 6. Arytenoids 7. Post cricoid region 8. False cords 9. Anterior & posterior commissures 10. Ventricles & vocal cords 11. Subglottic area.
  • 89.
    COMPLICATIONS • Mechanical injury •Hyperextension of neck- stimulation of posterior pharyngeal wall- vasovagal attack • Cough • Vomiting • Displacement/obstruction of tube • Pneumothorax
  • 90.
  • 93.
    • Made ofPVC(plastic) • Easy disposable, hypoallergenic,& transparent • Parts : proximal end , 15mm adapter. Connects to the ventilator/ AMBU Bag • Central portion : vocal cord guide (black line) which should be placed at the level of opening of vocal cord, so that tip of ET tube is above bifurcation of trachea. • Distal end : murphys eye (opening in the lateral wall) which prevents complete blockage in case distal end is impacted
  • 94.
    • Cuffed tubeis used in older children • Inflating the cuff helps in keeping the ET in place and avoids aspiration. • Uncuffed- younger children with narrow subglottic area.
  • 95.
    SIZE • From 2mmto 16mm (internal diameter) • Size of tube can be determined by- Internal diameter of ET tube (mm) = age in years + 4 4 • Length to be fixed in cm = internal diameter x 3
  • 96.
    • Premature :2-2.5mm • Full Term : 3-3.5mm • Young infants : 4-4.5mm • 6m – 1 yr :4-4.5mm • 12m- 5yr : increase by 0.5mm 6 monthly.
  • 97.
    USES • Mechanical ventilation •Resuscitation • IPPV • Tracheal suctioning in meconium aspiration • Epiglottitis & Croup • Tetanus • Angioneurotic edema
  • 98.
    COMPLICATIONS • Mechanical trauma •Pressure necrosis • Pneumothorax • Posterior pharyngeal wall stimulation
  • 99.
  • 101.
    • T shapeddevice • Device contains 2 inlets and 1 outlet
  • 102.
    • The connectoris devised in such a way that by turning the handle (which operates the screw) either of the 2 inlets can be connected with the outlet, whereas remaining inlet is disconnected from outlet • Facilitates administration of IV medications through one inlet while Iv fluids pass through the other inlet
  • 103.
    USES • Administration ofIV fluids and IV medications simultaneously by connecting the 3 way connector to IV set • Exchange transfusion in case of neonatal hyperbilirubinemia • Haemodialysis in case of renal failure/ poisonings • Pleural/ ascitic tap • CVP monitoring.
  • 104.
  • 107.
    • Being plasticin nature, it doesn’t damage the endothelium of the vein • Plastic sheath being flexible, can be inserted into thin & tortuous vein easily • Uses: venepuncture, transfusion of drugs/ blood etc..
  • 108.
  • 109.
    INDICATIONS • Any agegroup where vascular access is indicated but difficult to establish • Cardiac arrest or shock when immediate vascular access is required for resuscitation
  • 110.
    SITE • Proximal tibia •Distal tibia • Distal femur
  • 111.
    CONTRAINDICATIONS Absolute • Fracture ofthe bone or previous IO insertion in the same site • Crush injuries • Osteogenesis imperfecta RELATIVE • Infection at point of insertion • Osteoporosis
  • 112.
    COMPLICATIONS • Failure toenter bone marrow • Through and through penetration of bone • Osteomyelitis • Epiphyseal plate injury • Local infection/ necrosis/pain/compartment syndrome, fat & bone micro emboli
  • 113.
  • 114.
    • It isa 1 cc syringe with a plastic piston (plastic syringe), or a metal piston(glass syringe)
  • 115.
    USES • To administerPPD for Mantoux test • To administer BCG vaccine • To administer test doses of drugs such as penicillin • Provocative testing – to test for allergies in Bronchial asthma, atopy • Insulin injection in Diabetes mellitus • Giving small doses of drugs
  • 116.
    FOLEY’S CATHETER • Selfretaining catheter, made up of latex • self retaining by means of a balloon which should be inflated with saline
  • 118.
    Use 5ml distilledwater for inflating balloon ( NS will crystallise)
  • 120.
    INDICATIONS URINARY NON-URINARY CBD #Arrest postnasal bleeding Monitor urine O/P in intractable epistaxis in case of shock/renal failure # Arrest bleeding from Differentiate anuria oesophageal varices in from retention portal hypertension Haematuria- bladder injury # EASI Urinary incontinence Bladder wash (cystitis0 Supra pubic cystotomy Intra vesical chemotherapy
  • 121.
    Equipment Sterile gloves -consider Universal Precautions Sterile drapes Cleansing solution Cotton swabs Forceps Sterile water Foley catheter Syringe (usually 10 cc) Lubricant (water based jelly or xylocaine jelly) Collection bag and tubing
  • 122.
    1. Gather equipment. 2.Explain procedure to the patient 3. Assist patient into supine position with legs spread and feet together 4. Open catheterization kit and catheter 5. Prepare sterile field, apply sterile gloves 6. Check balloon for patency.
  • 123.
    7. Generously coatthe distal portion (2-5 cm) of the catheter with lubricant 8. Apply sterile drape 9. If female, separate labia using non-dominant hand. If male, hold the penis with the non-dominant hand. Maintain hand position until preparing to inflate balloon. 10. Using dominant hand to handle forceps, cleanse peri-urethral mucosa with cleansing solution. Cleanse anterior to posterior, inner to outer, one swipe per swab, discard swab away from sterile field. •
  • 124.
    11 .Pick upcatheter with gloved (and still sterile) dominant hand. Hold end of catheter loosely coiled in palm of dominant hand. 12. In the male, lift the penis to a position perpendicular to patient's body and apply light upward traction (with non- dominant hand) 13. Identify the urinary meatus and gently insert until 1 to 2 inches beyond where urine is noted 14. Inflate balloon, using correct amount of sterile liquid (usually 10 cc but check actual balloon size)
  • 125.
    • Gently pullcatheter until inflation balloon is snug against bladder neck • Connect catheter to drainage system • Secure catheter to abdomen or thigh, without tension on tubing • Place drainage bag below level of bladder • Evaluate catheter function and amount, color, odor, and quality of urine • Remove gloves, dispose of equipment appropriately, wash hands • Document size of catheter inserted, amount of water in balloon, patient's response to procedure, and assessment of urine
  • 126.
    COMPLICATIONS • Injury tourethra or urinary bladder • Inadvertent catheterisation of the vagina may occur • Urinary tract infection in the absence of aseptic precautions
  • 127.
    3 way Foley •In haematuria for continuous bladder irrigation to prevent formation of clots blocking drainage of urine • Post operative bladder irrigation
  • 128.
    CONTRAINDICATION • Urethral rupture(blood at tip of meatus)
  • 129.
  • 130.
    PARTS • Metallic canister •Which contains the medicine along with the propellant 9 usually a CFC) which delivers the medicine to the patient in the form of an aerosol • Plastic actuator • Cap • The canister is inverted and fixed to the inhaler and fixed to the inhaler before actuating the device.
  • 132.
    STEPS 1. Remove capand shake inhaler in vertical direction 2. Breathe out gently 3. Put mouth piece in mouth. At start if inspiration, that should be slow and deep, press canister down and continue to inhale deeply 4. Hold breathe for 10s or as long as possible, then breathe out slowly 5. Wait for a few seconds before repeating steps 2-4 MDI
  • 133.
    Spacers are bottleshaped plastic devices which have a mouth piece at one end and other end has an opening where the MDI can be attached.
  • 135.
    ADVANTAGES • Deliver thedrug into lower airways • Less coordination between inspiration and activation USED IN • Children • Adults without coordination
  • 136.
    MDI with Spacer 1.Remove cap, shake inhaler and insert into spacer device 2. Place mouth piece of spacer in mouth 3. Start breathing in and out gently and observe movements of valve 4. Once breathing pattern is established, press canister and continue to breathe 5-10times( tidal breathing) 5. Remove the device from mouth and wait for 30s, before repeating steps 1-4
  • 139.
    USES • Prevention andmanagement of asthma Medicines given via MDI • Short acting drugs e.g. salbutamol, terbutaline • Long acting e.g. salmetrol, formetrol • Inhaled anti cholinergic drugs e.g. ipratropium bromide • Inhaled steroids e.g. budesonise, fluticasone etc. • S/E: oral candidiasis ( tackled by rinsing mouth after use of steroid inhaler)
  • 140.
    DISADVANTAGES of MDI •Perfect coordination between inspiration and activation of device • Not possible in small children • To eliminate problem, spacer is advised.
  • 141.
    DRY POWDER INHALERS •Rotahaler • Diskhaler • Spinhaler • Turbohaler • Acuhaler • Can be used in children above 4-5 years of age • Do not require coordination of actuation and breathing • Do not contain CFC • Salbutamol, salmetrol, budesonide etc. are available.
  • 143.
    • Dry powderedinhalers consists of 2 halves • The upper half consists of mouth piece and raised square slot into which a capsule containing the medication in dry powdered form can be inserted • The lower half is a kind of reservoir which can be attached to the upper half • The lower half consists of a fin like device which cuts the capsule on rotating , thus depositing the powder into the reservoir • The patient breathes out , puts the mouth piece in his mouth and takes a deep breath thus inhaling the powder • DPIs are suited for children over5 years as they require greater inspiratory effort
  • 145.
    ADVANTAGES • Small portabledevice • No need to coordinate inspiration with device actuation DISADVANTAGES • Cannot be used in less than 5 years • Dry powder can be deposited in the mouth or pharynx if inspiratory effort is not good • Dry powder might be affected by humid climate
  • 146.
  • 147.
  • 148.
    Nasal Cannula • DeliveredFiO2 is 22-60% • Appropriate oxygen flow rate is 0.25L-4l/min • Suitable for infants and children who require low concentrations of supplimental oxygen
  • 149.
  • 150.
    • Delivers FiO235-60% • Appropriate flow rate 6-10L/min
  • 151.
  • 152.
    • Delivers FiO295% • Flow rate 10-15L/min • Device has 2 one way valves • A valve in one or both exhalation port(s) to prevent entrainment of room air during inhalation • A valve between reservoir bag and the mask to prevent the flow of exhaled gas into the reservoir
  • 153.
  • 154.