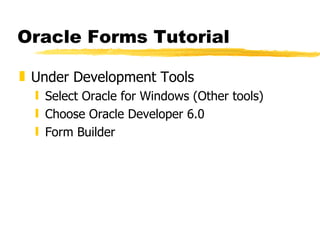
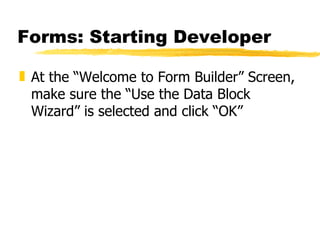
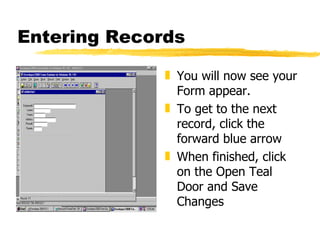
Oracle Forms
Oracle Forms Tutorial Under Development Tools Select Oracle for Windows (Other tools) Choose Oracle Developer 6.0 Form Builder
Forms: Starting Developer At the “Welcome to Form Builder” Screen, make sure the “Use the Data Block Wizard” is selected and click “OK”
Data Block Wizard At the initial screen click Next Make sure Table View is selected and choose Next
Data Block Wizard: Part 2 At this Screen select the Browse Option
Data Block Wizard: Part 3 A Connect screen will then appear. Enter your User Name, Password and Database that you were given for your Oracle Accounts
Data Block Wizard: Part 4 At the Tables window, Choose Current User and Ok At the next Tables window, double click on the table you wish to create a form for.
Data Block Wizard: Part 5 The Table and its fields will appear. If this is the wrong table click back and repeat from Part 2 Move all fields you wish to include in your Form to the right side
Data Block Wizard: Part 6 After clicking Next, you will see the congratulations screen. Highlight the “Create the Data Block and Call Layout Wizard” button and select finish.
Layout Wizard Select Next at the initial two screens Next, Select all fields you wish to include and move them to the right column
Layout Wizard: Part 2 At this field you may edit the name and size of your attributes, but the defaults match your table definitions. When finished select Next
Layout Wizard: Part 3 Select Forms and Click Next Title your record and Choose one Record to be displayed and click next Then Click Finish at the Congratulations Screen
Adding more tables In some instances you will want multiple tables in your form. First, if your runtime screen is open, close it to get back to Developer. To add an additional table, go to the Tools menu then to Data Block Wizard.
Adding more tables (cont.) After you choose the additional table, it will prompt you to make a join to the current table. To create a join: Uncheck the “Auto-join data blocks” box Click “Create Relationship…” Make sure the “Based on a join condition” radius is marked and click OK Choose the master table and click OK Match the Detail Item with the Master Item   then click next
Altering the Design A window similar to this one will next appear.  You may drag and edit the fields in this window. Change font, size, height, width, location, etc. You may also add triggers and specialized actions to the form using PL/SQL
PL/SQL Stands for Procedural Language/SQL Implements application logic into SQL With PL/SQL you can write triggers that fire in response to the end-users actions (ex: press a button, execute a query, etc.) To learn more about using PL/SQL in forms, go to cbt.bus.iastate.edu and take a CBT (under Oracle Introduction and Oracle Database Programming)
Run the Form Click the green stop light to run the Form (Forms Runtime)
Entering Records You will now see your Form appear. To get to the next record, click the forward blue arrow When finished, click on the Open Teal Door and Save Changes
Creating and Using Forms This will update your Oracle account adding all new records to your tables
Learning more… To learn more about Oracle Developer: Goto: cbt.bus.iastate.edu Under Oracle Developer/2000 there are many CBTs to help.

oracle-forms

  • 1.
  • 2.
    Oracle Forms TutorialUnder Development Tools Select Oracle for Windows (Other tools) Choose Oracle Developer 6.0 Form Builder
  • 3.
    Forms: Starting DeveloperAt the “Welcome to Form Builder” Screen, make sure the “Use the Data Block Wizard” is selected and click “OK”
  • 4.
    Data Block WizardAt the initial screen click Next Make sure Table View is selected and choose Next
  • 5.
    Data Block Wizard:Part 2 At this Screen select the Browse Option
  • 6.
    Data Block Wizard:Part 3 A Connect screen will then appear. Enter your User Name, Password and Database that you were given for your Oracle Accounts
  • 7.
    Data Block Wizard:Part 4 At the Tables window, Choose Current User and Ok At the next Tables window, double click on the table you wish to create a form for.
  • 8.
    Data Block Wizard:Part 5 The Table and its fields will appear. If this is the wrong table click back and repeat from Part 2 Move all fields you wish to include in your Form to the right side
  • 9.
    Data Block Wizard:Part 6 After clicking Next, you will see the congratulations screen. Highlight the “Create the Data Block and Call Layout Wizard” button and select finish.
  • 10.
    Layout Wizard SelectNext at the initial two screens Next, Select all fields you wish to include and move them to the right column
  • 11.
    Layout Wizard: Part2 At this field you may edit the name and size of your attributes, but the defaults match your table definitions. When finished select Next
  • 12.
    Layout Wizard: Part3 Select Forms and Click Next Title your record and Choose one Record to be displayed and click next Then Click Finish at the Congratulations Screen
  • 13.
    Adding more tablesIn some instances you will want multiple tables in your form. First, if your runtime screen is open, close it to get back to Developer. To add an additional table, go to the Tools menu then to Data Block Wizard.
  • 14.
    Adding more tables(cont.) After you choose the additional table, it will prompt you to make a join to the current table. To create a join: Uncheck the “Auto-join data blocks” box Click “Create Relationship…” Make sure the “Based on a join condition” radius is marked and click OK Choose the master table and click OK Match the Detail Item with the Master Item then click next
  • 15.
    Altering the DesignA window similar to this one will next appear. You may drag and edit the fields in this window. Change font, size, height, width, location, etc. You may also add triggers and specialized actions to the form using PL/SQL
  • 16.
    PL/SQL Stands forProcedural Language/SQL Implements application logic into SQL With PL/SQL you can write triggers that fire in response to the end-users actions (ex: press a button, execute a query, etc.) To learn more about using PL/SQL in forms, go to cbt.bus.iastate.edu and take a CBT (under Oracle Introduction and Oracle Database Programming)
  • 17.
    Run the FormClick the green stop light to run the Form (Forms Runtime)
  • 18.
    Entering Records Youwill now see your Form appear. To get to the next record, click the forward blue arrow When finished, click on the Open Teal Door and Save Changes
  • 19.
    Creating and UsingForms This will update your Oracle account adding all new records to your tables
  • 20.
    Learning more… Tolearn more about Oracle Developer: Goto: cbt.bus.iastate.edu Under Oracle Developer/2000 there are many CBTs to help.