
Recommended
Recommended
More Related Content
Similar to Global warming
Similar to Global warming (20)
More from PiLNAfrica
More from PiLNAfrica (20)
Recently uploaded
Recently uploaded (20)
Global warming
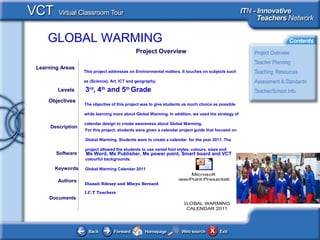
- 1. GLOBAL WARMING Documents Authors Dianah Ndessy and Mbeya Bernard I.C.T Teachers The objective of this project was to give students as much choice as possible while learning more about Global Warming. In addition, we used the strategy of calendar design to create awareness about Global Warming. Objectives Ms Word, Ms Publisher, Ms power point, Smart board and VCTSoftware Description For this project, students were given a calendar project guide that focused on Global Warming. Students were to create a calendar for the year 2011. The project allowed the students to use varied font styles, colours, sizes and colourful backgrounds. Learning Areas This project addresses on Environmental matters. It touches on subjects such as (Science), Art, ICT and geography. Levels 3rd , 4th and 5th Grade Global Warming Calendar 2011Keywords Project Overview Microsoft PowerPoint Presentation GLOBAL WARMING CALENDAR 2011
- 2. GLOBAL WARMING Teacher Planning and Management Background & Planning Classroom Images: Documents BACKGROUND AND PLANNING LESSON PLAN AND MANAGEMENT CLASSROOM IMAGES
- 5. GLOBAL WARMING Teacher and School Information ABOUT MAKINI SCHOOLS TEACHERS PROFILES SCHOOL PICTURE ABOUT MAKINI SCHOOLS TEACHERS PROFILES SCHOOL PICTURE
- 6. GLOBAL WARMING Teacher and School Information ABOUT MAKINI SCHOOLS TEACHERS PROFILES SCHOOL PICTURE ABOUT MAKINI SCHOOLS TEACHERS PROFILES SCHOOL PICTURE
Editor's Notes
- This Virtual Classroom Tour template has been provided so you can develop your own Virtual Classroom Tours. Use the template to record a special learning project that you have found particularly successful in your classroom. Then share the project with other teachers in your school, district or beyond. Here’s how: Follow the prompts on each slide and in the embedded Word documents, in this PowerPoint document, to insert your project information. When you have finished inputting all of the project information that is requested, delete the prompts. Select each one and press the Delete key. Note: To enter the title of your Virtual Classroom Tour you must select View, Master, Slide Master, and enter it on the slide master. Then click Close Slide Master. This will cause the title to appear on each of the slides. From the File menu choose Save As… and save the document as a PowerPoint Show. (Use the File type: drop-down list to choose PowerPoint Show). You can then distribute the Virtual Classroom Tour.
- Open the Word documents at the bottom of each slide by double clicking the icons. Follow the prompts [in the yellow boxes] for inserting information about your learning project.
- On this slide, embed the student handouts and the resources created for this project. Some examples are a student project overview, Internet and other resources, directions for art projects, or instructions to students for peer editing of projects. To embed the resources, follow these steps: Have the resource document available. From the Insert menu choose Object. Select Create from File… and click Browse…. Find the file you want to include and click OK. Select Display as icon and click Change Icon… and add a suitable caption. Click OK to add the caption and click OK to embed the file. Position the document icon at the bottom of the slide. You can go to View, Grid and Guides, and click Display Grid on Screen for a grid on which to line up your icons.
- Add any assessment materials you developed for the project to this slide. Have the resource document available. From the Insert menu choose Object. Select Create from File… and click Browse…. Find the file you want to include and click OK. Select Display as icon and click Change Icon… and add a suitable caption. Click OK to add the caption and click OK to embed the file. Position the document icon at the bottom of the slide. You can go to View, Grid and Guides, and click Display Grid on Screen for a grid on which to line up your icons. To include the Standards targeted through your learning project, open the Mapping the Standards document and then add your own standards at the bottom of the document. Links are included to help you search for local curriculum and technology standards.
- Use these resources for assistance in working with and learning more about Microsoft Office applications.