Download to read offline

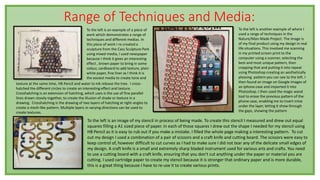
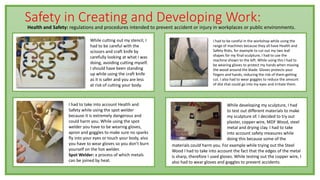


The document provides details about Courtney Grant's Nature/Man-Made project. It discusses the use of primary and secondary resources in the project. Primary resources included drawings Courtney created directly from sculptures at the Cass Sculpture Park. Secondary resources included drawings of sculptures by artists like Barbara Hepworth created from images rather than direct observation. The document also outlines Courtney's development of ideas, use of techniques like mark-making, and consideration of safety practices. It evaluates their time management, research, development of outcomes, and new skills learned through completing the project.


