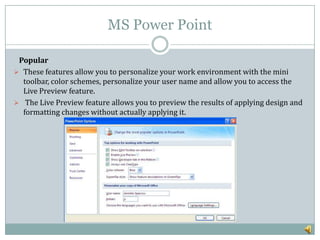
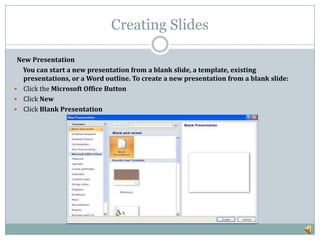
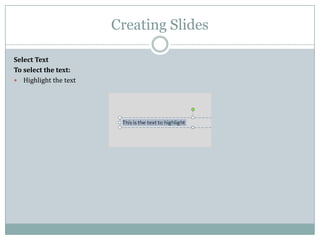
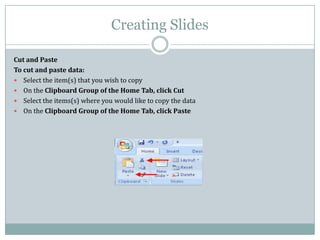
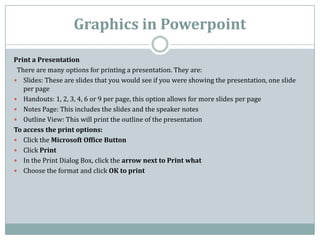
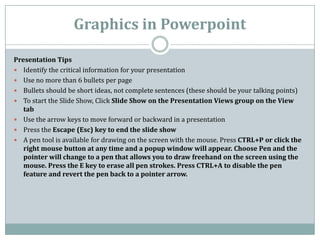
SlideShare a Scribd company logo
AGENDA
1. MS Power Point
2. Creating Slide
3. Graphics in PowerPoint
MS Power Point
Presentations
 A presentation is a collection of data and information that is to be delivered to a specific
audience.
 A PowerPoint presentation is a collection of electronic slides that can have text, pictures,
graphics, tables, sound and video. This collection can run automatically or can be controlled
by a presenter.
MS Power Point
Microsoft Office Button
The Microsoft Office Button performs many of the functions that were located in the
File menu of older versions of PowerPoint. This button allows you to create a new
presentation, Open an existing presentation, save and save as, print, send, or close.
MS Power Point
Ribbon
 The ribbon is the panel at the top portion of the document It has seven tabs: Home, Insert,
Design, Animations, Slide Show, Review and View.
 Each tab is divided into groups. The groups are logical collections of features designed to
perform function that you will utilize in developing or editing your PowerPoint slides.
Commonly utilized features are displayed on the Ribbon. To view additional features
within each group, click the arrow at the bottom right corner of each group.
MS Power Point
 Home: Clipboard, Slides, Font, Paragraph, Drawing, and Editing
 Insert: Tables, Illustrations, Links, Text, and Media Clips
 Design: Page Setup, Themes, Background
 Animations: Preview, Animations, Transition to this Slide
 Slide Show: Start Slide Show, Set Up, Monitors Review: Proofing, Comments,
Protect
 View: Presentation Views, Show/Hide, Zoom, Window, Macros
MS Power Point
Quick Access Toolbar
 The quick access toolbar is a customizable toolbar that contains commands that you may
want to use. You can place the quick access toolbar above or below the ribbon.
 To change the location of the quick access toolbar - click Show Below the Ribbon.
MS Power Point
You can also add items to the quick access toolbar. Right click on any item in the
Office Button or the Ribbon and click Add to Quick Access Toolbar and a shortcut
will be added.
MS Power Point
Mini Toolbar
A new feature in Office 2007 is the Mini Toolbar. This is a floating toolbar that is displayed
when you select text or right-click text. It displays common formatting tools, such as Bold,
Italics, Fonts, Font Size and Font Color.
MS Power Point
Navigation
Navigation through the slides can be accomplished through the Slide Navigation menu
on the left side of the screen. Also, an outline appears from materials that have been
entered in the presentation. To access the outline, click the outline tab.
MS Power Point
Slide Views
Presentations can be viewed in a variety of manners. On the View tab, the Presentation
Views group allows you to view the slides as Normal, Slide Sorter, Notes Page, Slide Show,
Slide Master, Handout Master, and Notes Master.
MS Power Point
Customize PowerPoint
 PowerPoint 2007 offers a wide range of customizable options that allow you to
make PowerPoint work the best for you. To access these customizable options:
 Click the Office Button
 Click PowerPoint Options include picture of OB menu.
MS Power Point
Popular
 These features allow you to personalize your work environment with the mini
toolbar, color schemes, personalize your user name and allow you to access the
Live Preview feature.
 The Live Preview feature allows you to preview the results of applying design and
formatting changes without actually applying it.
MS Power Point
Proofing
This feature allows you personalize how word corrects your text. You can customize auto
correction settings and have word ignore certain words or errors in a document through the
Custom Dictionaries.
MS Power Point
Save
This feature allows you personalize how your workbook is saved. You can
specify how often you want auto save to run and where you want the workbooks
saved.
MS Power Point
Advanced
This feature allows you to specify options for editing, copying, pasting, printing,
displaying, slide shows, and other general settings.
MS Power Point
Customize
Customize allows you to add features to the Quick Access Toolbar. If there are tools that you
are utilizing frequently, you may want to add these to the Quick Access Toolbar.
Creating Slides
New Presentation
You can start a new presentation from a blank slide, a template, existing
presentations, or a Word outline. To create a new presentation from a blank slide:
 Click the Microsoft Office Button
 Click New
 Click Blank Presentation
Creating Slides
To create a new presentation from a template:
 Click the Microsoft Office Button
 Click New
 Click Installed Templates or Browse through Microsoft Office Online Templates
 Click the template you choose
Creating Slides
To create a new presentation from an existing presentation:
 Click the Microsoft Office Button
 Click New
 Click New from Existing
 Browse to and click the presentation
Creating Slides
To create a new presentation from a Word outline:
 Click the slide where you would like the outline to begin
 Click New Slide on the Home tab
 Click Slides from Outline
 Browse and click the Word Document that contains the outline
Creating Slides
Save a Presentation
When you save a presentation, you have two choices: Save or Save As. To save a
document:
 Click the Microsoft Office Button
 Click Save
Creating Slides
You may need to use the Save As feature when you need to save a presentation under a
different name or to save it for earlier versions of PowerPoint. Remember that older
versions of PowerPoint will not be able to open PowerPoint 2007 presentation unless you
save it as a PowerPoint 97-2003 Format. To use the Save As feature:
 Click the Microsoft Office Button
 Click Save As
 Type in the name for the Presentation
 In the Save as Type box, choose Excel 97-2003 Presentation
Creating Slides
Add Slides
There are several choices when you want to add a new slide to the presentation: Office
Themes, Duplicate Selected Slide, or Reuse Slides. To create a new slide from Office Themes:
 Select the slide immediately BEFORE where you want the new slide
 Click the New Slide button on the Home tab
 Click the slide choice that fits your material
Creating Slides
To create a slide as a duplicate of a slide in the presentation:
 Select the slide to duplicate
 Click the New Slide button on the Home tab
 Click Duplicate Selected Slides
Creating Slides
To create a new slide from another presentation:
 Select the slide immediately BEFORE where you want the new slide
 Click the New Slide button on the Home tab
 Click Reuse Slides
 Click Browse
 Click Browse File
 Locate the slide show and click on the slide to import
Creating Slides
Themes
Themes are design templates that can be applied to an entire presentation that allows for
consistency throughout the presentation. To add a theme to a presentation:
 Click the Design tab
 Choose one of the displayed Themes or click the Galleries button
To apply new colors to a theme:
Click the Colors drop down arrow
Choose a color set or click Create New Theme Colors
Creating Slides
To change the background style of a theme
 Click the Background Styles button on the Design tab
Creating Slides
Working with Content
Enter Text
To enter text:
 Select the slide where you want the text
 Click in a Textbox to add text
Creating Slides
To add a text box:
 Select the slide where you want to place the text box
 On the Insert tab, click Text Box
 Click on the slide and drag the cursor to expand the text box
 Type in the text
Creating Slides
Select Text
To select the text:
 Highlight the text
Creating Slides
Copy and Paste
To copy and paste data:
 Select the item(s) that you wish to copy
 On the Clipboard Group of the Home Tab, click Copy
 Select the item(s) where you would like to copy the data
 On the Clipboard Group of the Home Tab, click Paste
Creating Slides
Cut and Paste
To cut and paste data:
 Select the item(s) that you wish to copy
 On the Clipboard Group of the Home Tab, click Cut
 Select the items(s) where you would like to copy the data
 On the Clipboard Group of the Home Tab, click Paste
Creating Slides
Undo and Redo
To undo or redo your most recent actions:
 On the Quick Access Toolbar
 Click Undo or Redo
Creating Slides
Spell Check
To check the spelling in a presentation:
 Click the Review tab
 Click the Spelling button
Graphics in Powerpoint
Adding Picture
To add a picture:
 Click the Insert Tab
 Click the Picture Button
 Browse to the picture from your files
 Click the name of the picture
 Click insert
 To move the graphic, click it and
drag it to where you want it
Graphics in Powerpoint
Adding Clip Art
To add Clip Art:
• Click the Insert Tab
• Click the Clip Art Button
• Search for the clip art using the
search Clip Art dialog box
• Click the clip art
• To move the graphic, click it
and drag it to where you want it
Graphics in Powerpoint
Editing Pictures and Clip Art
When you add a graphic to the presentation, an additional Tab appears on the Ribbon. The
Format Tab allows you to format the pictures and graphics. This tab has four groups:
 Adjust: Controls the picture brightness, contrast, and colors
 Picture Style: Allows you to place a frame or border around the picture and add effects
 Arrange: Controls the alignment and rotation of the picture
 Size: Cropping and size of graphic
Graphics in Powerpoint
Adding a Shape
To add Shapes:
 Click the Insert Tab
 Click the Shapes Button
 Click the shape you choose
 Click the Slide
 Drag the cursor to expand the Shape
To format the shapes:
 Click the Shape
 Click the Format tab
Graphics in Powerpoint
Adding SmartArt
SmartArt is a feature in Office 2007 that allows you to choose from a variety of graphics, including flow
charts, lists, cycles, and processes.
To add SmartArt:
 Click the Insert Tab
 Click the SmartArt Button
 Click the SmartArt you choose
 Click the SmartArt
 Drag it to the desired location in the slide
Graphics in Powerpoint
To format the SmartArt:
 Click the SmartArt
 Click either the Design or the Format tab
 Click the SmartArt to add text and pictures.
Graphics in Powerpoint
Adding a Photo Album
The photo album feature is new in PowerPoint 2007 and allows you to easily create a photo
album to share pictures.
To create a photo album:
 Click the Photo Album button on the Insert tab
 Click New Photo Album
 Click File/Disk to add pictures to the photo album
 Move the pictures up and down in the order of the album but clicking the up/down arrows
Graphics in Powerpoint
Tables:
Tables are used to display data in a table format.
Create a Table To create a table:
 Place the cursor on the page where you want the new table
 Click the Insert Tab of the Ribbon
 Click the Tables Button on the Tables Group.
You can create a table one of four ways:
 Highlight the number of row and columns
 Click Insert Table and enter the number of rows and columns
 Click the Draw Table, create your table by clicking and entering the rows and columns
 Click Excel Spreadsheet and enter data
Graphics in Powerpoint
Enter Data in a Table
Place the cursor in the cell where you wish to enter the information. Begin typing.
Graphics in Powerpoint
Modify the Table Structure and Format a Table
To modify the structure of a table:
 Click the table and notice that you have two new tabs on the Ribbon: Design and Layout. These pertain
to the table design and layout.
On the Design Tab, you can choose:
 Table Style Options
 Table Styles
 Draw Borders
Graphics in Powerpoint
To format a table, click the table and then click the Layout Tab on the Ribbon. This Layout tab
allows you to:
 View Gridlines and Properties (from the Table Group)
 Insert Rows and Columns (from the Rows & Columns Group)
 Delete the Table, Rows and/or Columns (from the Rows & Columns Group)
 Merge or Split Cells (from the Merge Group)
 Increase and decrease cell size (Cell Size Group)
 Align text within the cells and change text directions (Alignment Group)
Graphics in Powerpoint
Insert a Table from Word or Excel
 Open the Word document or Excel worksheet
 Select the chart
 Click Copy on the Home tab
 Go to the PowerPoint document where you want the chart located
 Click Paste on the Home tab
Graphics in Powerpoint
Charts allow you to present information contained in the worksheet in a graphic format.
PowerPoint offers many types of charts including: Column, Line, Pie, Bar, Area, Scatter and
more. To view the charts available click the Insert Tab on the Ribbon.
Create a Chart To create a chart:
Click the Insert tab on the ribbon
Click the type of Chart you want to create
Insert the Data and Labels
Graphics in Powerpoint
Edit Chart Data To edit chart data:
Click on the chart
Click Edit Data on the Design tab
Edit data in the spreadsheet
Graphics in Powerpoint
Modify a Chart
Once you have created a chart you can do several things to modify the chart.
To move the chart:
 Click the Chart and Drag it another location on the same slide, or
 Copy it to another slide
 Choose the desired location and click Paste
To modify the chart size:
Click the Chart
Click on any of the corners and drop and drag to resize
Graphics in Powerpoint
To modify the labels and titles:
 Click the chart
 Click the Layout tab
 Choose the appropriate label to change
Graphics in Powerpoint
Chart Tools
The Chart Tools appear on the Ribbon when you click on the chart. The tools are located on three tabs: Design, Layout, and
Format.
Within the Design tab you can control the chart type, layout, styles, and location.
Within the Layout tab you can control the insertion of pictures, textboxes, and shapes, labels, backgrounds, and data analysis.
Within the Format tab you can adjust the Fill Colors and Word Styles.
Graphics in Powerpoint
Paste a Chart from Excel
 Open the Excel worksheet
 Select the chart
 Click Copy on the Home tab
 Go to the PowerPoint document where you want the chart located
 Click Paste on the Home tab
Graphics in Powerpoint
Slide Effects
Slide Transitions
Transitions are effects that are in place when you switch from one slide to the next. To add
slide transitions:
 Select the slide that you want to transition
 Click the Animations tab
 Choose the appropriate animation or click the Transition dialog box.
Graphics in Powerpoint
To adjust slide transitions:
 Add sound by clicking the arrow next to Transition Sound
Modify the transition speed by clicking the arrow next to Transition Speed
Graphics in Powerpoint
To apply the transition to all slides:
 Click the Apply to All button on the Animations tab
To select how to advance a slide:
Choose to Advance on Mouse Click, or
Automatically after a set number of seconds
Graphics in Powerpoint
Slide Animation
Slide animation effects are predefined special effects that you can add to objects on a
slide. To apply an animation effect:
 Select the object
 Click the Animations tab on the Ribbon
 Click Custom Animation
 Click Add Effect
 Choose the appropriate effect
Graphics in Powerpoint
Animation Preview
To preview the animation on a slide:
 Click the Preview button on the Animations tab
Graphics in Powerpoint
Slide Show Options
The Slide Show tab of the ribbon contains many options for the slide show. These options
include:
 Preview the slide show from the beginning
 Preview the slide show from the current slide
 Set up Slide Show
Graphics in Powerpoint
Formatting Text
Change Font Typeface and Size
To change the font typeface:
 Click the arrow next to the font name and choose a font.
 Remember that you can preview how the new font will look by highlighting the text, and
hovering over the new font typeface.
Graphics in Powerpoint
To change the font size:
 Click the arrow next to the font size and choose the appropriate size, or
 Click the increase or decrease font size buttons.
Font Styles and Effects
Font styles are predefined formatting options that are
used to emphasize text. They include: Bold, Italic,
and Underline. To add these to text:
Select the text and click the Font Styles included
on the Font group of the Home tab or
Select the text and right click to display the font tools
Graphics in Powerpoint
Change Text Color
To change the text color:
 Select the text and click the Colors button included on the Font Group of the Ribbon, or
 Highlight the text and right click and choose the colors tool.
 Select the color by clicking the down arrow next to the font color button.
Graphics in Powerpoint
WordArt
WordArt are styles that can be applied to text to create a visual effect.
To apply WordArt:
 Select the text
 Click the Insert tab
 Click the WordArt button
 Choose the WordArt
Graphics in Powerpoint
To modify the styles of WordArt
 Select the WordArt
 Click the Format tab for the Drawing Tools
 Click the WordArt Fill button, the WordArt Outline button, or the Text Effects button
Graphics in Powerpoint
Change Paragraph Alignment
The paragraph alignment allows you to set how you want text to appear. To change the
alignment:
 Click the Home Tab
 Choose the appropriate button for alignment on the Paragraph Group.
 Align Left: the text is aligned with your left margin
 Center: The text is centered within your margins
 Align Right: Aligns text with the right margin
 Justify: Aligns text to both the left and right margins.
Graphics in Powerpoint
Indent Paragraphs
To indent paragraphs, you can do the following:
 Click the Indent buttons to control the indent.
 Click the Indent button repeated times to increase the size of the indent.
Text Direction
To change the text direction:
Select the text
Click the Text Direction button on the Home tab
Click the selection
Graphics in Powerpoint
Adding Content
Resize a Textbox
To resize a textbox:
 Click on the textbox
 Click the corner of the box and drag the cursor to the desired size
Graphics in Powerpoint
Bulleted and Numbered Lists
Bulleted lists have bullet points, numbered lists have numbers, and outline lists
combine numbers and letters depending on the organization of the list.
To add a list to existing text:
 Select the text you wish to make a list
 Click the Bulleted or Numbered Lists button
To create a new list:
Place your cursor where you want the list in the document
Click the Bulleted or Numbered Lists button
Begin typing
Graphics in Powerpoint
Adding Video
Video clips can be added to the presentation.
To add a video clip:
 Click the Movie button on the Insert tab
 Choose Movie from File or Movie from Clip Organizer
Adding Audio
Audio clips can be added to the presentation.
To add an audio clip:
•Click the Audio button on the Insert tab
•Choose Sound from File, Sound from Clip Organizer, Play CD Audio Track, or Record
Sound
Graphics in Powerpoint
Printing
Create Speaker Notes
Speaker Notes can be added to allow you to create notes for each slide. To add speaker
notes:
 Select the slide
 Click View
 Click Note Pages
 Click the Click to add Notes section
of the screen
 Type in the Notes for that slide
Graphics in Powerpoint
Print a Presentation
There are many options for printing a presentation. They are:
 Slides: These are slides that you would see if you were showing the presentation, one slide
per page
 Handouts: 1, 2, 3, 4, 6 or 9 per page, this option allows for more slides per page
 Notes Page: This includes the slides and the speaker notes
 Outline View: This will print the outline of the presentation
To access the print options:
 Click the Microsoft Office Button
 Click Print
 In the Print Dialog Box, click the arrow next to Print what
 Choose the format and click OK to print
Graphics in Powerpoint
To print preview:
 Click the Microsoft Office Button
 Place the cursor over Print
 Click Print Preview
 Click the arrow next to Print
What to change print options
 To print from Print Preview, click Print
To Exit Print Preview:
Click the Close Print Preview button
Graphics in Powerpoint
Package a Presentation
There are times when you want to package a presentation with all of the additional files
attached as well. To package a presentation for CD:
 Click the Microsoft Office Button
 Click Publish
 Click Package for CD
 Type a name for the CD
 Click Copy to CD or Copy to Folder
Graphics in Powerpoint
Design Tips
 Slides should be of a consistent design throughout the presentation
 Use graphics and pictures when possible
 Remove unnecessary information and graphics
 Use contrasting background and text colors
 Keep the number of fonts used in the presentation to 3
 Keep the fonts consistent throughout the presentation
Graphics in Powerpoint
Presentation Tips
 Identify the critical information for your presentation
 Use no more than 6 bullets per page
 Bullets should be short ideas, not complete sentences (these should be your talking points)
 To start the Slide Show, Click Slide Show on the Presentation Views group on the View
tab
 Use the arrow keys to move forward or backward in a presentation
 Press the Escape (Esc) key to end the slide show
 A pen tool is available for drawing on the screen with the mouse. Press CTRL+P or click the
right mouse button at any time and a popup window will appear. Choose Pen and the
pointer will change to a pen that allows you to draw freehand on the screen using the
mouse. Press the E key to erase all pen strokes. Press CTRL+A to disable the pen
feature and revert the pen back to a pointer arrow.
Graphics in Powerpoint
 If you would like to use the pen to draw on a blank screen during a presentation, press the B
or W keys, or select Screen/Black Screen from the popup menu and the screen will
turn black. Press B or W again or choose Next from the popup menu to return to the
presentation when you are finished drawing.
 To hide the pointer and button from the screen press the A key.
 Be sure to preview the slide show using a projector if one will be used during the
presentation. Words or graphics that are close to the edge of the screen may be cut off by the
projector.
Graphics in Powerpoint
Spell Check
To check the spelling throughout a presentation:
 Click the Spelling button in the Proofing group on the Review tab
Mspowerpoint 111212103552-phpapp01

More Related Content

What's hot

Microsoft PowerPoint 2007: Create Your First Presentation
Microsoft PowerPoint 2007: Create Your First PresentationMicrosoft PowerPoint 2007: Create Your First Presentation
Microsoft PowerPoint 2007: Create Your First Presentation
omoviejohn
 
New Features In Power Point 2007 Ppt
New Features In Power Point 2007 PptNew Features In Power Point 2007 Ppt
New Features In Power Point 2007 Ppt
joelk
 
Power point 2016
Power point 2016Power point 2016
Power point 2016
Hugo Eduardo Napa Rojas
 
Introduction to Microsoft PowerPoint 2010 for Microsoft Windows Slides
Introduction to Microsoft PowerPoint 2010 for Microsoft Windows SlidesIntroduction to Microsoft PowerPoint 2010 for Microsoft Windows Slides
Introduction to Microsoft PowerPoint 2010 for Microsoft Windows Slides
Saide OER Africa
 
Powepoint
PowepointPowepoint
Powepoint
loveroman
 
MS PowerPoint Essential Training- Module 1
MS PowerPoint Essential Training- Module 1MS PowerPoint Essential Training- Module 1
MS PowerPoint Essential Training- Module 1
Olapade Samuel B.Tech(Hon), PMP, BDP, AIPMA
 
Essential training on microsoft office power point 2007
Essential training on microsoft office power point 2007Essential training on microsoft office power point 2007
Essential training on microsoft office power point 2007
ashok_142
 
05. ms powerpoint
05. ms powerpoint05. ms powerpoint
05. ms powerpoint
Lakshmi Prasad
 
MS PowerPoint Training
MS PowerPoint TrainingMS PowerPoint Training
MS PowerPoint Training
Michael Sheyahshe
 
Powerpoint.01 copy
Powerpoint.01   copyPowerpoint.01   copy
Powerpoint.01 copy
madisaat78
 
Microsoft Powerpoint
Microsoft PowerpointMicrosoft Powerpoint
Microsoft Powerpoint
Mi L
 
Zekepowerpoint
ZekepowerpointZekepowerpoint
Zekepowerpoint
Zeke Kilbride
 
Ms power point traininghhs
Ms power point traininghhsMs power point traininghhs
Ms power point traininghhs
Mayor Cyrille
 
Ms powerpoint
Ms powerpointMs powerpoint
Ms powerpoint
LALIT MAHATO
 
Nine Easy Steps To Creating A PPt Presentation
Nine Easy Steps To Creating A PPt PresentationNine Easy Steps To Creating A PPt Presentation
Nine Easy Steps To Creating A PPt Presentation
joelk
 
Microsoft PowerPoint 2013 Quickstart
Microsoft PowerPoint 2013 QuickstartMicrosoft PowerPoint 2013 Quickstart
Microsoft PowerPoint 2013 Quickstart
comatsg
 
How to create MS PowerPoint
How to create MS PowerPointHow to create MS PowerPoint
How to create MS PowerPoint
Saleah Ahmed Lisan
 
Learning power point 2016
Learning power point 2016Learning power point 2016
Learning power point 2016
Aakanksha Shrivastava
 
Ms Office Powerpoint Tutorial
Ms Office Powerpoint TutorialMs Office Powerpoint Tutorial
Ms Office Powerpoint Tutorial
virtualMaryam
 
Powerpoint for beginners level 1
Powerpoint for beginners   level 1Powerpoint for beginners   level 1
Powerpoint for beginners level 1
Lee Haynes
 

What's hot (20)

Microsoft PowerPoint 2007: Create Your First Presentation
Microsoft PowerPoint 2007: Create Your First PresentationMicrosoft PowerPoint 2007: Create Your First Presentation
Microsoft PowerPoint 2007: Create Your First Presentation
 
New Features In Power Point 2007 Ppt
New Features In Power Point 2007 PptNew Features In Power Point 2007 Ppt
New Features In Power Point 2007 Ppt
 
Power point 2016
Power point 2016Power point 2016
Power point 2016
 
Introduction to Microsoft PowerPoint 2010 for Microsoft Windows Slides
Introduction to Microsoft PowerPoint 2010 for Microsoft Windows SlidesIntroduction to Microsoft PowerPoint 2010 for Microsoft Windows Slides
Introduction to Microsoft PowerPoint 2010 for Microsoft Windows Slides
 
Powepoint
PowepointPowepoint
Powepoint
 
MS PowerPoint Essential Training- Module 1
MS PowerPoint Essential Training- Module 1MS PowerPoint Essential Training- Module 1
MS PowerPoint Essential Training- Module 1
 
Essential training on microsoft office power point 2007
Essential training on microsoft office power point 2007Essential training on microsoft office power point 2007
Essential training on microsoft office power point 2007
 
05. ms powerpoint
05. ms powerpoint05. ms powerpoint
05. ms powerpoint
 
MS PowerPoint Training
MS PowerPoint TrainingMS PowerPoint Training
MS PowerPoint Training
 
Powerpoint.01 copy
Powerpoint.01   copyPowerpoint.01   copy
Powerpoint.01 copy
 
Microsoft Powerpoint
Microsoft PowerpointMicrosoft Powerpoint
Microsoft Powerpoint
 
Zekepowerpoint
ZekepowerpointZekepowerpoint
Zekepowerpoint
 
Ms power point traininghhs
Ms power point traininghhsMs power point traininghhs
Ms power point traininghhs
 
Ms powerpoint
Ms powerpointMs powerpoint
Ms powerpoint
 
Nine Easy Steps To Creating A PPt Presentation
Nine Easy Steps To Creating A PPt PresentationNine Easy Steps To Creating A PPt Presentation
Nine Easy Steps To Creating A PPt Presentation
 
Microsoft PowerPoint 2013 Quickstart
Microsoft PowerPoint 2013 QuickstartMicrosoft PowerPoint 2013 Quickstart
Microsoft PowerPoint 2013 Quickstart
 
How to create MS PowerPoint
How to create MS PowerPointHow to create MS PowerPoint
How to create MS PowerPoint
 
Learning power point 2016
Learning power point 2016Learning power point 2016
Learning power point 2016
 
Ms Office Powerpoint Tutorial
Ms Office Powerpoint TutorialMs Office Powerpoint Tutorial
Ms Office Powerpoint Tutorial
 
Powerpoint for beginners level 1
Powerpoint for beginners   level 1Powerpoint for beginners   level 1
Powerpoint for beginners level 1
 

Similar to Mspowerpoint 111212103552-phpapp01

mspowerpoint-111212103552-phpapp01.pptx
mspowerpoint-111212103552-phpapp01.pptxmspowerpoint-111212103552-phpapp01.pptx
mspowerpoint-111212103552-phpapp01.pptx
LadyChristianneBucsi
 
mspowerpoint-111212103552-phpapp01.pptx
mspowerpoint-111212103552-phpapp01.pptxmspowerpoint-111212103552-phpapp01.pptx
mspowerpoint-111212103552-phpapp01.pptx
RolandMaya4
 
ID lecture-7.PPT
ID lecture-7.PPTID lecture-7.PPT
ID lecture-7.PPT
DanielSalazar693807
 
ID lecture-7 (1).PPT
ID lecture-7 (1).PPTID lecture-7 (1).PPT
ID lecture-7 (1).PPT
IANROLDAN1
 
ID lecture-7.PPT
ID lecture-7.PPTID lecture-7.PPT
ID lecture-7.PPT
rohitkumar451275
 
ppt introduction.ppt
ppt introduction.pptppt introduction.ppt
ppt introduction.ppt
BanbanUmbod
 
Mid-Fi Prototyping with PowerPoint.PPT
Mid-Fi Prototyping with PowerPoint.PPTMid-Fi Prototyping with PowerPoint.PPT
Mid-Fi Prototyping with PowerPoint.PPT
shahid1204as
 
Microsoft Power-Point Guide
Microsoft Power-Point GuideMicrosoft Power-Point Guide
Microsoft Power-Point Guide
Seunsmith Elijah
 
Lesson 2 presentation basics
Lesson 2   presentation basicsLesson 2   presentation basics
Lesson 2 presentation basics
guevarra_2000
 
Lesson 2 presentation basics
Lesson 2   presentation basicsLesson 2   presentation basics
Lesson 2 presentation basics
guevarra_2000
 
Powerpoint.02
Powerpoint.02Powerpoint.02
Powerpoint.02
Alber Louis
 
Power point 1
Power point 1Power point 1
Power point 1
Álvaro López
 
MS PowerPoint Tasks (1).docx
MS PowerPoint Tasks (1).docxMS PowerPoint Tasks (1).docx
MS PowerPoint Tasks (1).docx
PrashanthGatla
 
Pks ms powerpointl unit 3_bcomcs
Pks ms powerpointl unit 3_bcomcsPks ms powerpointl unit 3_bcomcs
Pks ms powerpointl unit 3_bcomcs
KALAISELVI P
 
better_ppt_guide.pdfjjffjihfffghhuuggfyi
better_ppt_guide.pdfjjffjihfffghhuuggfyibetter_ppt_guide.pdfjjffjihfffghhuuggfyi
better_ppt_guide.pdfjjffjihfffghhuuggfyi
hk9976614
 
Microsoft Power Point 2010
Microsoft Power Point 2010Microsoft Power Point 2010
Microsoft Power Point 2010
home
 
Computer education presentation - ARCH 383
Computer education presentation - ARCH 383Computer education presentation - ARCH 383
Computer education presentation - ARCH 383
LipikaPandey
 
Powerpoint handout07
Powerpoint handout07Powerpoint handout07
Powerpoint handout07
azilla_alif
 
Sample xx
Sample xxSample xx
Sample xx
Lindy Alejandro
 
PowerPoint__2013.pptx
PowerPoint__2013.pptxPowerPoint__2013.pptx
PowerPoint__2013.pptx
Elma Shahid
 

Similar to Mspowerpoint 111212103552-phpapp01 (20)

mspowerpoint-111212103552-phpapp01.pptx
mspowerpoint-111212103552-phpapp01.pptxmspowerpoint-111212103552-phpapp01.pptx
mspowerpoint-111212103552-phpapp01.pptx
 
mspowerpoint-111212103552-phpapp01.pptx
mspowerpoint-111212103552-phpapp01.pptxmspowerpoint-111212103552-phpapp01.pptx
mspowerpoint-111212103552-phpapp01.pptx
 
ID lecture-7.PPT
ID lecture-7.PPTID lecture-7.PPT
ID lecture-7.PPT
 
ID lecture-7 (1).PPT
ID lecture-7 (1).PPTID lecture-7 (1).PPT
ID lecture-7 (1).PPT
 
ID lecture-7.PPT
ID lecture-7.PPTID lecture-7.PPT
ID lecture-7.PPT
 
ppt introduction.ppt
ppt introduction.pptppt introduction.ppt
ppt introduction.ppt
 
Mid-Fi Prototyping with PowerPoint.PPT
Mid-Fi Prototyping with PowerPoint.PPTMid-Fi Prototyping with PowerPoint.PPT
Mid-Fi Prototyping with PowerPoint.PPT
 
Microsoft Power-Point Guide
Microsoft Power-Point GuideMicrosoft Power-Point Guide
Microsoft Power-Point Guide
 
Lesson 2 presentation basics
Lesson 2   presentation basicsLesson 2   presentation basics
Lesson 2 presentation basics
 
Lesson 2 presentation basics
Lesson 2   presentation basicsLesson 2   presentation basics
Lesson 2 presentation basics
 
Powerpoint.02
Powerpoint.02Powerpoint.02
Powerpoint.02
 
Power point 1
Power point 1Power point 1
Power point 1
 
MS PowerPoint Tasks (1).docx
MS PowerPoint Tasks (1).docxMS PowerPoint Tasks (1).docx
MS PowerPoint Tasks (1).docx
 
Pks ms powerpointl unit 3_bcomcs
Pks ms powerpointl unit 3_bcomcsPks ms powerpointl unit 3_bcomcs
Pks ms powerpointl unit 3_bcomcs
 
better_ppt_guide.pdfjjffjihfffghhuuggfyi
better_ppt_guide.pdfjjffjihfffghhuuggfyibetter_ppt_guide.pdfjjffjihfffghhuuggfyi
better_ppt_guide.pdfjjffjihfffghhuuggfyi
 
Microsoft Power Point 2010
Microsoft Power Point 2010Microsoft Power Point 2010
Microsoft Power Point 2010
 
Computer education presentation - ARCH 383
Computer education presentation - ARCH 383Computer education presentation - ARCH 383
Computer education presentation - ARCH 383
 
Powerpoint handout07
Powerpoint handout07Powerpoint handout07
Powerpoint handout07
 
Sample xx
Sample xxSample xx
Sample xx
 
PowerPoint__2013.pptx
PowerPoint__2013.pptxPowerPoint__2013.pptx
PowerPoint__2013.pptx
 

Recently uploaded

Microbial characterisation and identification, and potability of River Kuywa ...
Microbial characterisation and identification, and potability of River Kuywa ...Microbial characterisation and identification, and potability of River Kuywa ...
Microbial characterisation and identification, and potability of River Kuywa ...
Open Access Research Paper
 
Promoting Multilateral Cooperation for Sustainable Peatland management
Promoting Multilateral Cooperation for Sustainable Peatland managementPromoting Multilateral Cooperation for Sustainable Peatland management
Promoting Multilateral Cooperation for Sustainable Peatland management
Global Landscapes Forum (GLF)
 
Evolving Lifecycles with High Resolution Site Characterization (HRSC) and 3-D...
Evolving Lifecycles with High Resolution Site Characterization (HRSC) and 3-D...Evolving Lifecycles with High Resolution Site Characterization (HRSC) and 3-D...
Evolving Lifecycles with High Resolution Site Characterization (HRSC) and 3-D...
Joshua Orris
 
Wildlife-AnIntroduction.pdf so that you know more about our environment
Wildlife-AnIntroduction.pdf so that you know more about our environmentWildlife-AnIntroduction.pdf so that you know more about our environment
Wildlife-AnIntroduction.pdf so that you know more about our environment
amishajha2407
 
Peatland Management in Indonesia, Science to Policy and Knowledge Education
Peatland Management in Indonesia, Science to Policy and Knowledge EducationPeatland Management in Indonesia, Science to Policy and Knowledge Education
Peatland Management in Indonesia, Science to Policy and Knowledge Education
Global Landscapes Forum (GLF)
 
Epcon is One of the World's leading Manufacturing Companies.
Epcon is One of the World's leading Manufacturing Companies.Epcon is One of the World's leading Manufacturing Companies.
Epcon is One of the World's leading Manufacturing Companies.
EpconLP
 
原版制作(Newcastle毕业证书)纽卡斯尔大学毕业证在读证明一模一样
原版制作(Newcastle毕业证书)纽卡斯尔大学毕业证在读证明一模一样原版制作(Newcastle毕业证书)纽卡斯尔大学毕业证在读证明一模一样
原版制作(Newcastle毕业证书)纽卡斯尔大学毕业证在读证明一模一样
p2npnqp
 
在线办理(lboro毕业证书)拉夫堡大学毕业证学历证书一模一样
在线办理(lboro毕业证书)拉夫堡大学毕业证学历证书一模一样在线办理(lboro毕业证书)拉夫堡大学毕业证学历证书一模一样
在线办理(lboro毕业证书)拉夫堡大学毕业证学历证书一模一样
pjq9n1lk
 
Optimizing Post Remediation Groundwater Performance with Enhanced Microbiolog...
Optimizing Post Remediation Groundwater Performance with Enhanced Microbiolog...Optimizing Post Remediation Groundwater Performance with Enhanced Microbiolog...
Optimizing Post Remediation Groundwater Performance with Enhanced Microbiolog...
Joshua Orris
 
Kinetic studies on malachite green dye adsorption from aqueous solutions by A...
Kinetic studies on malachite green dye adsorption from aqueous solutions by A...Kinetic studies on malachite green dye adsorption from aqueous solutions by A...
Kinetic studies on malachite green dye adsorption from aqueous solutions by A...
Open Access Research Paper
 
Improving the Management of Peatlands and the Capacities of Stakeholders in I...
Improving the Management of Peatlands and the Capacities of Stakeholders in I...Improving the Management of Peatlands and the Capacities of Stakeholders in I...
Improving the Management of Peatlands and the Capacities of Stakeholders in I...
Global Landscapes Forum (GLF)
 
Improving the viability of probiotics by encapsulation methods for developmen...
Improving the viability of probiotics by encapsulation methods for developmen...Improving the viability of probiotics by encapsulation methods for developmen...
Improving the viability of probiotics by encapsulation methods for developmen...
Open Access Research Paper
 
Global Climate Change and global warming
Global Climate Change and global warmingGlobal Climate Change and global warming
Global Climate Change and global warming
ballkicker20
 
Enhanced action and stakeholder engagement for sustainable peatland management
Enhanced action and stakeholder engagement for sustainable peatland managementEnhanced action and stakeholder engagement for sustainable peatland management
Enhanced action and stakeholder engagement for sustainable peatland management
Global Landscapes Forum (GLF)
 
ENVIRONMENT~ Renewable Energy Sources and their future prospects.
ENVIRONMENT~ Renewable Energy Sources and their future prospects.ENVIRONMENT~ Renewable Energy Sources and their future prospects.
ENVIRONMENT~ Renewable Energy Sources and their future prospects.
tiwarimanvi3129
 
Recycling and Disposal on SWM Raymond Einyu pptx
Recycling and Disposal on SWM Raymond Einyu pptxRecycling and Disposal on SWM Raymond Einyu pptx
Recycling and Disposal on SWM Raymond Einyu pptx
RayLetai1
 
Climate Change All over the World .pptx
Climate Change All over the World  .pptxClimate Change All over the World  .pptx
Climate Change All over the World .pptx
sairaanwer024
 
Global Peatlands Map and Hotspot Explanation Atlas
Global Peatlands Map and Hotspot Explanation AtlasGlobal Peatlands Map and Hotspot Explanation Atlas
Global Peatlands Map and Hotspot Explanation Atlas
Global Landscapes Forum (GLF)
 
Overview of the Global Peatlands Assessment
Overview of the Global Peatlands AssessmentOverview of the Global Peatlands Assessment
Overview of the Global Peatlands Assessment
Global Landscapes Forum (GLF)
 
Peatlands of Latin America and the Caribbean
Peatlands of Latin America and the CaribbeanPeatlands of Latin America and the Caribbean
Peatlands of Latin America and the Caribbean
Global Landscapes Forum (GLF)
 

Recently uploaded (20)

Microbial characterisation and identification, and potability of River Kuywa ...
Microbial characterisation and identification, and potability of River Kuywa ...Microbial characterisation and identification, and potability of River Kuywa ...
Microbial characterisation and identification, and potability of River Kuywa ...
 
Promoting Multilateral Cooperation for Sustainable Peatland management
Promoting Multilateral Cooperation for Sustainable Peatland managementPromoting Multilateral Cooperation for Sustainable Peatland management
Promoting Multilateral Cooperation for Sustainable Peatland management
 
Evolving Lifecycles with High Resolution Site Characterization (HRSC) and 3-D...
Evolving Lifecycles with High Resolution Site Characterization (HRSC) and 3-D...Evolving Lifecycles with High Resolution Site Characterization (HRSC) and 3-D...
Evolving Lifecycles with High Resolution Site Characterization (HRSC) and 3-D...
 
Wildlife-AnIntroduction.pdf so that you know more about our environment
Wildlife-AnIntroduction.pdf so that you know more about our environmentWildlife-AnIntroduction.pdf so that you know more about our environment
Wildlife-AnIntroduction.pdf so that you know more about our environment
 
Peatland Management in Indonesia, Science to Policy and Knowledge Education
Peatland Management in Indonesia, Science to Policy and Knowledge EducationPeatland Management in Indonesia, Science to Policy and Knowledge Education
Peatland Management in Indonesia, Science to Policy and Knowledge Education
 
Epcon is One of the World's leading Manufacturing Companies.
Epcon is One of the World's leading Manufacturing Companies.Epcon is One of the World's leading Manufacturing Companies.
Epcon is One of the World's leading Manufacturing Companies.
 
原版制作(Newcastle毕业证书)纽卡斯尔大学毕业证在读证明一模一样
原版制作(Newcastle毕业证书)纽卡斯尔大学毕业证在读证明一模一样原版制作(Newcastle毕业证书)纽卡斯尔大学毕业证在读证明一模一样
原版制作(Newcastle毕业证书)纽卡斯尔大学毕业证在读证明一模一样
 
在线办理(lboro毕业证书)拉夫堡大学毕业证学历证书一模一样
在线办理(lboro毕业证书)拉夫堡大学毕业证学历证书一模一样在线办理(lboro毕业证书)拉夫堡大学毕业证学历证书一模一样
在线办理(lboro毕业证书)拉夫堡大学毕业证学历证书一模一样
 
Optimizing Post Remediation Groundwater Performance with Enhanced Microbiolog...
Optimizing Post Remediation Groundwater Performance with Enhanced Microbiolog...Optimizing Post Remediation Groundwater Performance with Enhanced Microbiolog...
Optimizing Post Remediation Groundwater Performance with Enhanced Microbiolog...
 
Kinetic studies on malachite green dye adsorption from aqueous solutions by A...
Kinetic studies on malachite green dye adsorption from aqueous solutions by A...Kinetic studies on malachite green dye adsorption from aqueous solutions by A...
Kinetic studies on malachite green dye adsorption from aqueous solutions by A...
 
Improving the Management of Peatlands and the Capacities of Stakeholders in I...
Improving the Management of Peatlands and the Capacities of Stakeholders in I...Improving the Management of Peatlands and the Capacities of Stakeholders in I...
Improving the Management of Peatlands and the Capacities of Stakeholders in I...
 
Improving the viability of probiotics by encapsulation methods for developmen...
Improving the viability of probiotics by encapsulation methods for developmen...Improving the viability of probiotics by encapsulation methods for developmen...
Improving the viability of probiotics by encapsulation methods for developmen...
 
Global Climate Change and global warming
Global Climate Change and global warmingGlobal Climate Change and global warming
Global Climate Change and global warming
 
Enhanced action and stakeholder engagement for sustainable peatland management
Enhanced action and stakeholder engagement for sustainable peatland managementEnhanced action and stakeholder engagement for sustainable peatland management
Enhanced action and stakeholder engagement for sustainable peatland management
 
ENVIRONMENT~ Renewable Energy Sources and their future prospects.
ENVIRONMENT~ Renewable Energy Sources and their future prospects.ENVIRONMENT~ Renewable Energy Sources and their future prospects.
ENVIRONMENT~ Renewable Energy Sources and their future prospects.
 
Recycling and Disposal on SWM Raymond Einyu pptx
Recycling and Disposal on SWM Raymond Einyu pptxRecycling and Disposal on SWM Raymond Einyu pptx
Recycling and Disposal on SWM Raymond Einyu pptx
 
Climate Change All over the World .pptx
Climate Change All over the World  .pptxClimate Change All over the World  .pptx
Climate Change All over the World .pptx
 
Global Peatlands Map and Hotspot Explanation Atlas
Global Peatlands Map and Hotspot Explanation AtlasGlobal Peatlands Map and Hotspot Explanation Atlas
Global Peatlands Map and Hotspot Explanation Atlas
 
Overview of the Global Peatlands Assessment
Overview of the Global Peatlands AssessmentOverview of the Global Peatlands Assessment
Overview of the Global Peatlands Assessment
 
Peatlands of Latin America and the Caribbean
Peatlands of Latin America and the CaribbeanPeatlands of Latin America and the Caribbean
Peatlands of Latin America and the Caribbean
 

Mspowerpoint 111212103552-phpapp01

  • 1. AGENDA 1. MS Power Point 2. Creating Slide 3. Graphics in PowerPoint
  • 2. MS Power Point Presentations  A presentation is a collection of data and information that is to be delivered to a specific audience.  A PowerPoint presentation is a collection of electronic slides that can have text, pictures, graphics, tables, sound and video. This collection can run automatically or can be controlled by a presenter.
  • 3. MS Power Point Microsoft Office Button The Microsoft Office Button performs many of the functions that were located in the File menu of older versions of PowerPoint. This button allows you to create a new presentation, Open an existing presentation, save and save as, print, send, or close.
  • 4. MS Power Point Ribbon  The ribbon is the panel at the top portion of the document It has seven tabs: Home, Insert, Design, Animations, Slide Show, Review and View.  Each tab is divided into groups. The groups are logical collections of features designed to perform function that you will utilize in developing or editing your PowerPoint slides. Commonly utilized features are displayed on the Ribbon. To view additional features within each group, click the arrow at the bottom right corner of each group.
  • 5. MS Power Point  Home: Clipboard, Slides, Font, Paragraph, Drawing, and Editing  Insert: Tables, Illustrations, Links, Text, and Media Clips  Design: Page Setup, Themes, Background  Animations: Preview, Animations, Transition to this Slide  Slide Show: Start Slide Show, Set Up, Monitors Review: Proofing, Comments, Protect  View: Presentation Views, Show/Hide, Zoom, Window, Macros
  • 6. MS Power Point Quick Access Toolbar  The quick access toolbar is a customizable toolbar that contains commands that you may want to use. You can place the quick access toolbar above or below the ribbon.  To change the location of the quick access toolbar - click Show Below the Ribbon.
  • 7. MS Power Point You can also add items to the quick access toolbar. Right click on any item in the Office Button or the Ribbon and click Add to Quick Access Toolbar and a shortcut will be added.
  • 8. MS Power Point Mini Toolbar A new feature in Office 2007 is the Mini Toolbar. This is a floating toolbar that is displayed when you select text or right-click text. It displays common formatting tools, such as Bold, Italics, Fonts, Font Size and Font Color.
  • 9. MS Power Point Navigation Navigation through the slides can be accomplished through the Slide Navigation menu on the left side of the screen. Also, an outline appears from materials that have been entered in the presentation. To access the outline, click the outline tab.
  • 10. MS Power Point Slide Views Presentations can be viewed in a variety of manners. On the View tab, the Presentation Views group allows you to view the slides as Normal, Slide Sorter, Notes Page, Slide Show, Slide Master, Handout Master, and Notes Master.
  • 11. MS Power Point Customize PowerPoint  PowerPoint 2007 offers a wide range of customizable options that allow you to make PowerPoint work the best for you. To access these customizable options:  Click the Office Button  Click PowerPoint Options include picture of OB menu.
  • 12. MS Power Point Popular  These features allow you to personalize your work environment with the mini toolbar, color schemes, personalize your user name and allow you to access the Live Preview feature.  The Live Preview feature allows you to preview the results of applying design and formatting changes without actually applying it.
  • 13. MS Power Point Proofing This feature allows you personalize how word corrects your text. You can customize auto correction settings and have word ignore certain words or errors in a document through the Custom Dictionaries.
  • 14. MS Power Point Save This feature allows you personalize how your workbook is saved. You can specify how often you want auto save to run and where you want the workbooks saved.
  • 15. MS Power Point Advanced This feature allows you to specify options for editing, copying, pasting, printing, displaying, slide shows, and other general settings.
  • 16. MS Power Point Customize Customize allows you to add features to the Quick Access Toolbar. If there are tools that you are utilizing frequently, you may want to add these to the Quick Access Toolbar.
  • 17. Creating Slides New Presentation You can start a new presentation from a blank slide, a template, existing presentations, or a Word outline. To create a new presentation from a blank slide:  Click the Microsoft Office Button  Click New  Click Blank Presentation
  • 18. Creating Slides To create a new presentation from a template:  Click the Microsoft Office Button  Click New  Click Installed Templates or Browse through Microsoft Office Online Templates  Click the template you choose
  • 19. Creating Slides To create a new presentation from an existing presentation:  Click the Microsoft Office Button  Click New  Click New from Existing  Browse to and click the presentation
  • 20. Creating Slides To create a new presentation from a Word outline:  Click the slide where you would like the outline to begin  Click New Slide on the Home tab  Click Slides from Outline  Browse and click the Word Document that contains the outline
  • 21. Creating Slides Save a Presentation When you save a presentation, you have two choices: Save or Save As. To save a document:  Click the Microsoft Office Button  Click Save
  • 22. Creating Slides You may need to use the Save As feature when you need to save a presentation under a different name or to save it for earlier versions of PowerPoint. Remember that older versions of PowerPoint will not be able to open PowerPoint 2007 presentation unless you save it as a PowerPoint 97-2003 Format. To use the Save As feature:  Click the Microsoft Office Button  Click Save As  Type in the name for the Presentation  In the Save as Type box, choose Excel 97-2003 Presentation
  • 23. Creating Slides Add Slides There are several choices when you want to add a new slide to the presentation: Office Themes, Duplicate Selected Slide, or Reuse Slides. To create a new slide from Office Themes:  Select the slide immediately BEFORE where you want the new slide  Click the New Slide button on the Home tab  Click the slide choice that fits your material
  • 24. Creating Slides To create a slide as a duplicate of a slide in the presentation:  Select the slide to duplicate  Click the New Slide button on the Home tab  Click Duplicate Selected Slides
  • 25. Creating Slides To create a new slide from another presentation:  Select the slide immediately BEFORE where you want the new slide  Click the New Slide button on the Home tab  Click Reuse Slides  Click Browse  Click Browse File  Locate the slide show and click on the slide to import
  • 26. Creating Slides Themes Themes are design templates that can be applied to an entire presentation that allows for consistency throughout the presentation. To add a theme to a presentation:  Click the Design tab  Choose one of the displayed Themes or click the Galleries button To apply new colors to a theme: Click the Colors drop down arrow Choose a color set or click Create New Theme Colors
  • 27. Creating Slides To change the background style of a theme  Click the Background Styles button on the Design tab
  • 28. Creating Slides Working with Content Enter Text To enter text:  Select the slide where you want the text  Click in a Textbox to add text
  • 29. Creating Slides To add a text box:  Select the slide where you want to place the text box  On the Insert tab, click Text Box  Click on the slide and drag the cursor to expand the text box  Type in the text
  • 30. Creating Slides Select Text To select the text:  Highlight the text
  • 31. Creating Slides Copy and Paste To copy and paste data:  Select the item(s) that you wish to copy  On the Clipboard Group of the Home Tab, click Copy  Select the item(s) where you would like to copy the data  On the Clipboard Group of the Home Tab, click Paste
  • 32. Creating Slides Cut and Paste To cut and paste data:  Select the item(s) that you wish to copy  On the Clipboard Group of the Home Tab, click Cut  Select the items(s) where you would like to copy the data  On the Clipboard Group of the Home Tab, click Paste
  • 33. Creating Slides Undo and Redo To undo or redo your most recent actions:  On the Quick Access Toolbar  Click Undo or Redo
  • 34. Creating Slides Spell Check To check the spelling in a presentation:  Click the Review tab  Click the Spelling button
  • 35. Graphics in Powerpoint Adding Picture To add a picture:  Click the Insert Tab  Click the Picture Button  Browse to the picture from your files  Click the name of the picture  Click insert  To move the graphic, click it and drag it to where you want it
  • 36. Graphics in Powerpoint Adding Clip Art To add Clip Art: • Click the Insert Tab • Click the Clip Art Button • Search for the clip art using the search Clip Art dialog box • Click the clip art • To move the graphic, click it and drag it to where you want it
  • 37. Graphics in Powerpoint Editing Pictures and Clip Art When you add a graphic to the presentation, an additional Tab appears on the Ribbon. The Format Tab allows you to format the pictures and graphics. This tab has four groups:  Adjust: Controls the picture brightness, contrast, and colors  Picture Style: Allows you to place a frame or border around the picture and add effects  Arrange: Controls the alignment and rotation of the picture  Size: Cropping and size of graphic
  • 38. Graphics in Powerpoint Adding a Shape To add Shapes:  Click the Insert Tab  Click the Shapes Button  Click the shape you choose  Click the Slide  Drag the cursor to expand the Shape To format the shapes:  Click the Shape  Click the Format tab
  • 39. Graphics in Powerpoint Adding SmartArt SmartArt is a feature in Office 2007 that allows you to choose from a variety of graphics, including flow charts, lists, cycles, and processes. To add SmartArt:  Click the Insert Tab  Click the SmartArt Button  Click the SmartArt you choose  Click the SmartArt  Drag it to the desired location in the slide
  • 40. Graphics in Powerpoint To format the SmartArt:  Click the SmartArt  Click either the Design or the Format tab  Click the SmartArt to add text and pictures.
  • 41. Graphics in Powerpoint Adding a Photo Album The photo album feature is new in PowerPoint 2007 and allows you to easily create a photo album to share pictures. To create a photo album:  Click the Photo Album button on the Insert tab  Click New Photo Album  Click File/Disk to add pictures to the photo album  Move the pictures up and down in the order of the album but clicking the up/down arrows
  • 42. Graphics in Powerpoint Tables: Tables are used to display data in a table format. Create a Table To create a table:  Place the cursor on the page where you want the new table  Click the Insert Tab of the Ribbon  Click the Tables Button on the Tables Group. You can create a table one of four ways:  Highlight the number of row and columns  Click Insert Table and enter the number of rows and columns  Click the Draw Table, create your table by clicking and entering the rows and columns  Click Excel Spreadsheet and enter data
  • 43. Graphics in Powerpoint Enter Data in a Table Place the cursor in the cell where you wish to enter the information. Begin typing.
  • 44. Graphics in Powerpoint Modify the Table Structure and Format a Table To modify the structure of a table:  Click the table and notice that you have two new tabs on the Ribbon: Design and Layout. These pertain to the table design and layout. On the Design Tab, you can choose:  Table Style Options  Table Styles  Draw Borders
  • 45. Graphics in Powerpoint To format a table, click the table and then click the Layout Tab on the Ribbon. This Layout tab allows you to:  View Gridlines and Properties (from the Table Group)  Insert Rows and Columns (from the Rows & Columns Group)  Delete the Table, Rows and/or Columns (from the Rows & Columns Group)  Merge or Split Cells (from the Merge Group)  Increase and decrease cell size (Cell Size Group)  Align text within the cells and change text directions (Alignment Group)
  • 46. Graphics in Powerpoint Insert a Table from Word or Excel  Open the Word document or Excel worksheet  Select the chart  Click Copy on the Home tab  Go to the PowerPoint document where you want the chart located  Click Paste on the Home tab
  • 47. Graphics in Powerpoint Charts allow you to present information contained in the worksheet in a graphic format. PowerPoint offers many types of charts including: Column, Line, Pie, Bar, Area, Scatter and more. To view the charts available click the Insert Tab on the Ribbon. Create a Chart To create a chart: Click the Insert tab on the ribbon Click the type of Chart you want to create Insert the Data and Labels
  • 48. Graphics in Powerpoint Edit Chart Data To edit chart data: Click on the chart Click Edit Data on the Design tab Edit data in the spreadsheet
  • 49. Graphics in Powerpoint Modify a Chart Once you have created a chart you can do several things to modify the chart. To move the chart:  Click the Chart and Drag it another location on the same slide, or  Copy it to another slide  Choose the desired location and click Paste To modify the chart size: Click the Chart Click on any of the corners and drop and drag to resize
  • 50. Graphics in Powerpoint To modify the labels and titles:  Click the chart  Click the Layout tab  Choose the appropriate label to change
  • 51. Graphics in Powerpoint Chart Tools The Chart Tools appear on the Ribbon when you click on the chart. The tools are located on three tabs: Design, Layout, and Format. Within the Design tab you can control the chart type, layout, styles, and location. Within the Layout tab you can control the insertion of pictures, textboxes, and shapes, labels, backgrounds, and data analysis. Within the Format tab you can adjust the Fill Colors and Word Styles.
  • 52. Graphics in Powerpoint Paste a Chart from Excel  Open the Excel worksheet  Select the chart  Click Copy on the Home tab  Go to the PowerPoint document where you want the chart located  Click Paste on the Home tab
  • 53. Graphics in Powerpoint Slide Effects Slide Transitions Transitions are effects that are in place when you switch from one slide to the next. To add slide transitions:  Select the slide that you want to transition  Click the Animations tab  Choose the appropriate animation or click the Transition dialog box.
  • 54. Graphics in Powerpoint To adjust slide transitions:  Add sound by clicking the arrow next to Transition Sound Modify the transition speed by clicking the arrow next to Transition Speed
  • 55. Graphics in Powerpoint To apply the transition to all slides:  Click the Apply to All button on the Animations tab To select how to advance a slide: Choose to Advance on Mouse Click, or Automatically after a set number of seconds
  • 56. Graphics in Powerpoint Slide Animation Slide animation effects are predefined special effects that you can add to objects on a slide. To apply an animation effect:  Select the object  Click the Animations tab on the Ribbon  Click Custom Animation  Click Add Effect  Choose the appropriate effect
  • 57. Graphics in Powerpoint Animation Preview To preview the animation on a slide:  Click the Preview button on the Animations tab
  • 58. Graphics in Powerpoint Slide Show Options The Slide Show tab of the ribbon contains many options for the slide show. These options include:  Preview the slide show from the beginning  Preview the slide show from the current slide  Set up Slide Show
  • 59. Graphics in Powerpoint Formatting Text Change Font Typeface and Size To change the font typeface:  Click the arrow next to the font name and choose a font.  Remember that you can preview how the new font will look by highlighting the text, and hovering over the new font typeface.
  • 60. Graphics in Powerpoint To change the font size:  Click the arrow next to the font size and choose the appropriate size, or  Click the increase or decrease font size buttons. Font Styles and Effects Font styles are predefined formatting options that are used to emphasize text. They include: Bold, Italic, and Underline. To add these to text: Select the text and click the Font Styles included on the Font group of the Home tab or Select the text and right click to display the font tools
  • 61. Graphics in Powerpoint Change Text Color To change the text color:  Select the text and click the Colors button included on the Font Group of the Ribbon, or  Highlight the text and right click and choose the colors tool.  Select the color by clicking the down arrow next to the font color button.
  • 62. Graphics in Powerpoint WordArt WordArt are styles that can be applied to text to create a visual effect. To apply WordArt:  Select the text  Click the Insert tab  Click the WordArt button  Choose the WordArt
  • 63. Graphics in Powerpoint To modify the styles of WordArt  Select the WordArt  Click the Format tab for the Drawing Tools  Click the WordArt Fill button, the WordArt Outline button, or the Text Effects button
  • 64. Graphics in Powerpoint Change Paragraph Alignment The paragraph alignment allows you to set how you want text to appear. To change the alignment:  Click the Home Tab  Choose the appropriate button for alignment on the Paragraph Group.  Align Left: the text is aligned with your left margin  Center: The text is centered within your margins  Align Right: Aligns text with the right margin  Justify: Aligns text to both the left and right margins.
  • 65. Graphics in Powerpoint Indent Paragraphs To indent paragraphs, you can do the following:  Click the Indent buttons to control the indent.  Click the Indent button repeated times to increase the size of the indent. Text Direction To change the text direction: Select the text Click the Text Direction button on the Home tab Click the selection
  • 66. Graphics in Powerpoint Adding Content Resize a Textbox To resize a textbox:  Click on the textbox  Click the corner of the box and drag the cursor to the desired size
  • 67. Graphics in Powerpoint Bulleted and Numbered Lists Bulleted lists have bullet points, numbered lists have numbers, and outline lists combine numbers and letters depending on the organization of the list. To add a list to existing text:  Select the text you wish to make a list  Click the Bulleted or Numbered Lists button To create a new list: Place your cursor where you want the list in the document Click the Bulleted or Numbered Lists button Begin typing
  • 68. Graphics in Powerpoint Adding Video Video clips can be added to the presentation. To add a video clip:  Click the Movie button on the Insert tab  Choose Movie from File or Movie from Clip Organizer Adding Audio Audio clips can be added to the presentation. To add an audio clip: •Click the Audio button on the Insert tab •Choose Sound from File, Sound from Clip Organizer, Play CD Audio Track, or Record Sound
  • 69. Graphics in Powerpoint Printing Create Speaker Notes Speaker Notes can be added to allow you to create notes for each slide. To add speaker notes:  Select the slide  Click View  Click Note Pages  Click the Click to add Notes section of the screen  Type in the Notes for that slide
  • 70. Graphics in Powerpoint Print a Presentation There are many options for printing a presentation. They are:  Slides: These are slides that you would see if you were showing the presentation, one slide per page  Handouts: 1, 2, 3, 4, 6 or 9 per page, this option allows for more slides per page  Notes Page: This includes the slides and the speaker notes  Outline View: This will print the outline of the presentation To access the print options:  Click the Microsoft Office Button  Click Print  In the Print Dialog Box, click the arrow next to Print what  Choose the format and click OK to print
  • 72. Graphics in Powerpoint To print preview:  Click the Microsoft Office Button  Place the cursor over Print  Click Print Preview  Click the arrow next to Print What to change print options  To print from Print Preview, click Print To Exit Print Preview: Click the Close Print Preview button
  • 73. Graphics in Powerpoint Package a Presentation There are times when you want to package a presentation with all of the additional files attached as well. To package a presentation for CD:  Click the Microsoft Office Button  Click Publish  Click Package for CD  Type a name for the CD  Click Copy to CD or Copy to Folder
  • 74. Graphics in Powerpoint Design Tips  Slides should be of a consistent design throughout the presentation  Use graphics and pictures when possible  Remove unnecessary information and graphics  Use contrasting background and text colors  Keep the number of fonts used in the presentation to 3  Keep the fonts consistent throughout the presentation
  • 75. Graphics in Powerpoint Presentation Tips  Identify the critical information for your presentation  Use no more than 6 bullets per page  Bullets should be short ideas, not complete sentences (these should be your talking points)  To start the Slide Show, Click Slide Show on the Presentation Views group on the View tab  Use the arrow keys to move forward or backward in a presentation  Press the Escape (Esc) key to end the slide show  A pen tool is available for drawing on the screen with the mouse. Press CTRL+P or click the right mouse button at any time and a popup window will appear. Choose Pen and the pointer will change to a pen that allows you to draw freehand on the screen using the mouse. Press the E key to erase all pen strokes. Press CTRL+A to disable the pen feature and revert the pen back to a pointer arrow.
  • 76. Graphics in Powerpoint  If you would like to use the pen to draw on a blank screen during a presentation, press the B or W keys, or select Screen/Black Screen from the popup menu and the screen will turn black. Press B or W again or choose Next from the popup menu to return to the presentation when you are finished drawing.  To hide the pointer and button from the screen press the A key.  Be sure to preview the slide show using a projector if one will be used during the presentation. Words or graphics that are close to the edge of the screen may be cut off by the projector.
  • 77. Graphics in Powerpoint Spell Check To check the spelling throughout a presentation:  Click the Spelling button in the Proofing group on the Review tab