Download to read offline

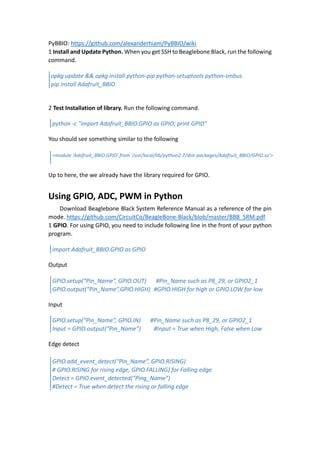
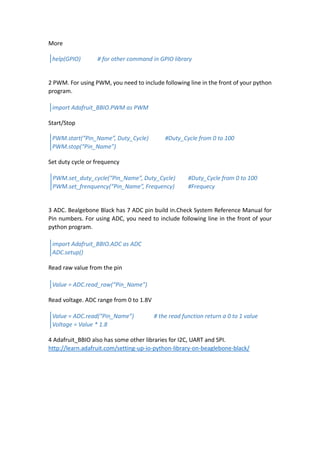

This document provides instructions for using Python to control the GPIO, PWM, ADC and other hardware functions on the Beaglebone Black. It explains how to set up the necessary Python libraries, and provides code examples to control outputs, read inputs, use pulse width modulation and analog to digital conversion.


![[5]投影片 futurewad樹莓派研習會 141218](https://cdn.slidesharecdn.com/ss_thumbnails/5futurewad141218-141219162301-conversion-gate02-thumbnail.jpg?width=640&height=640&fit=bounds)


