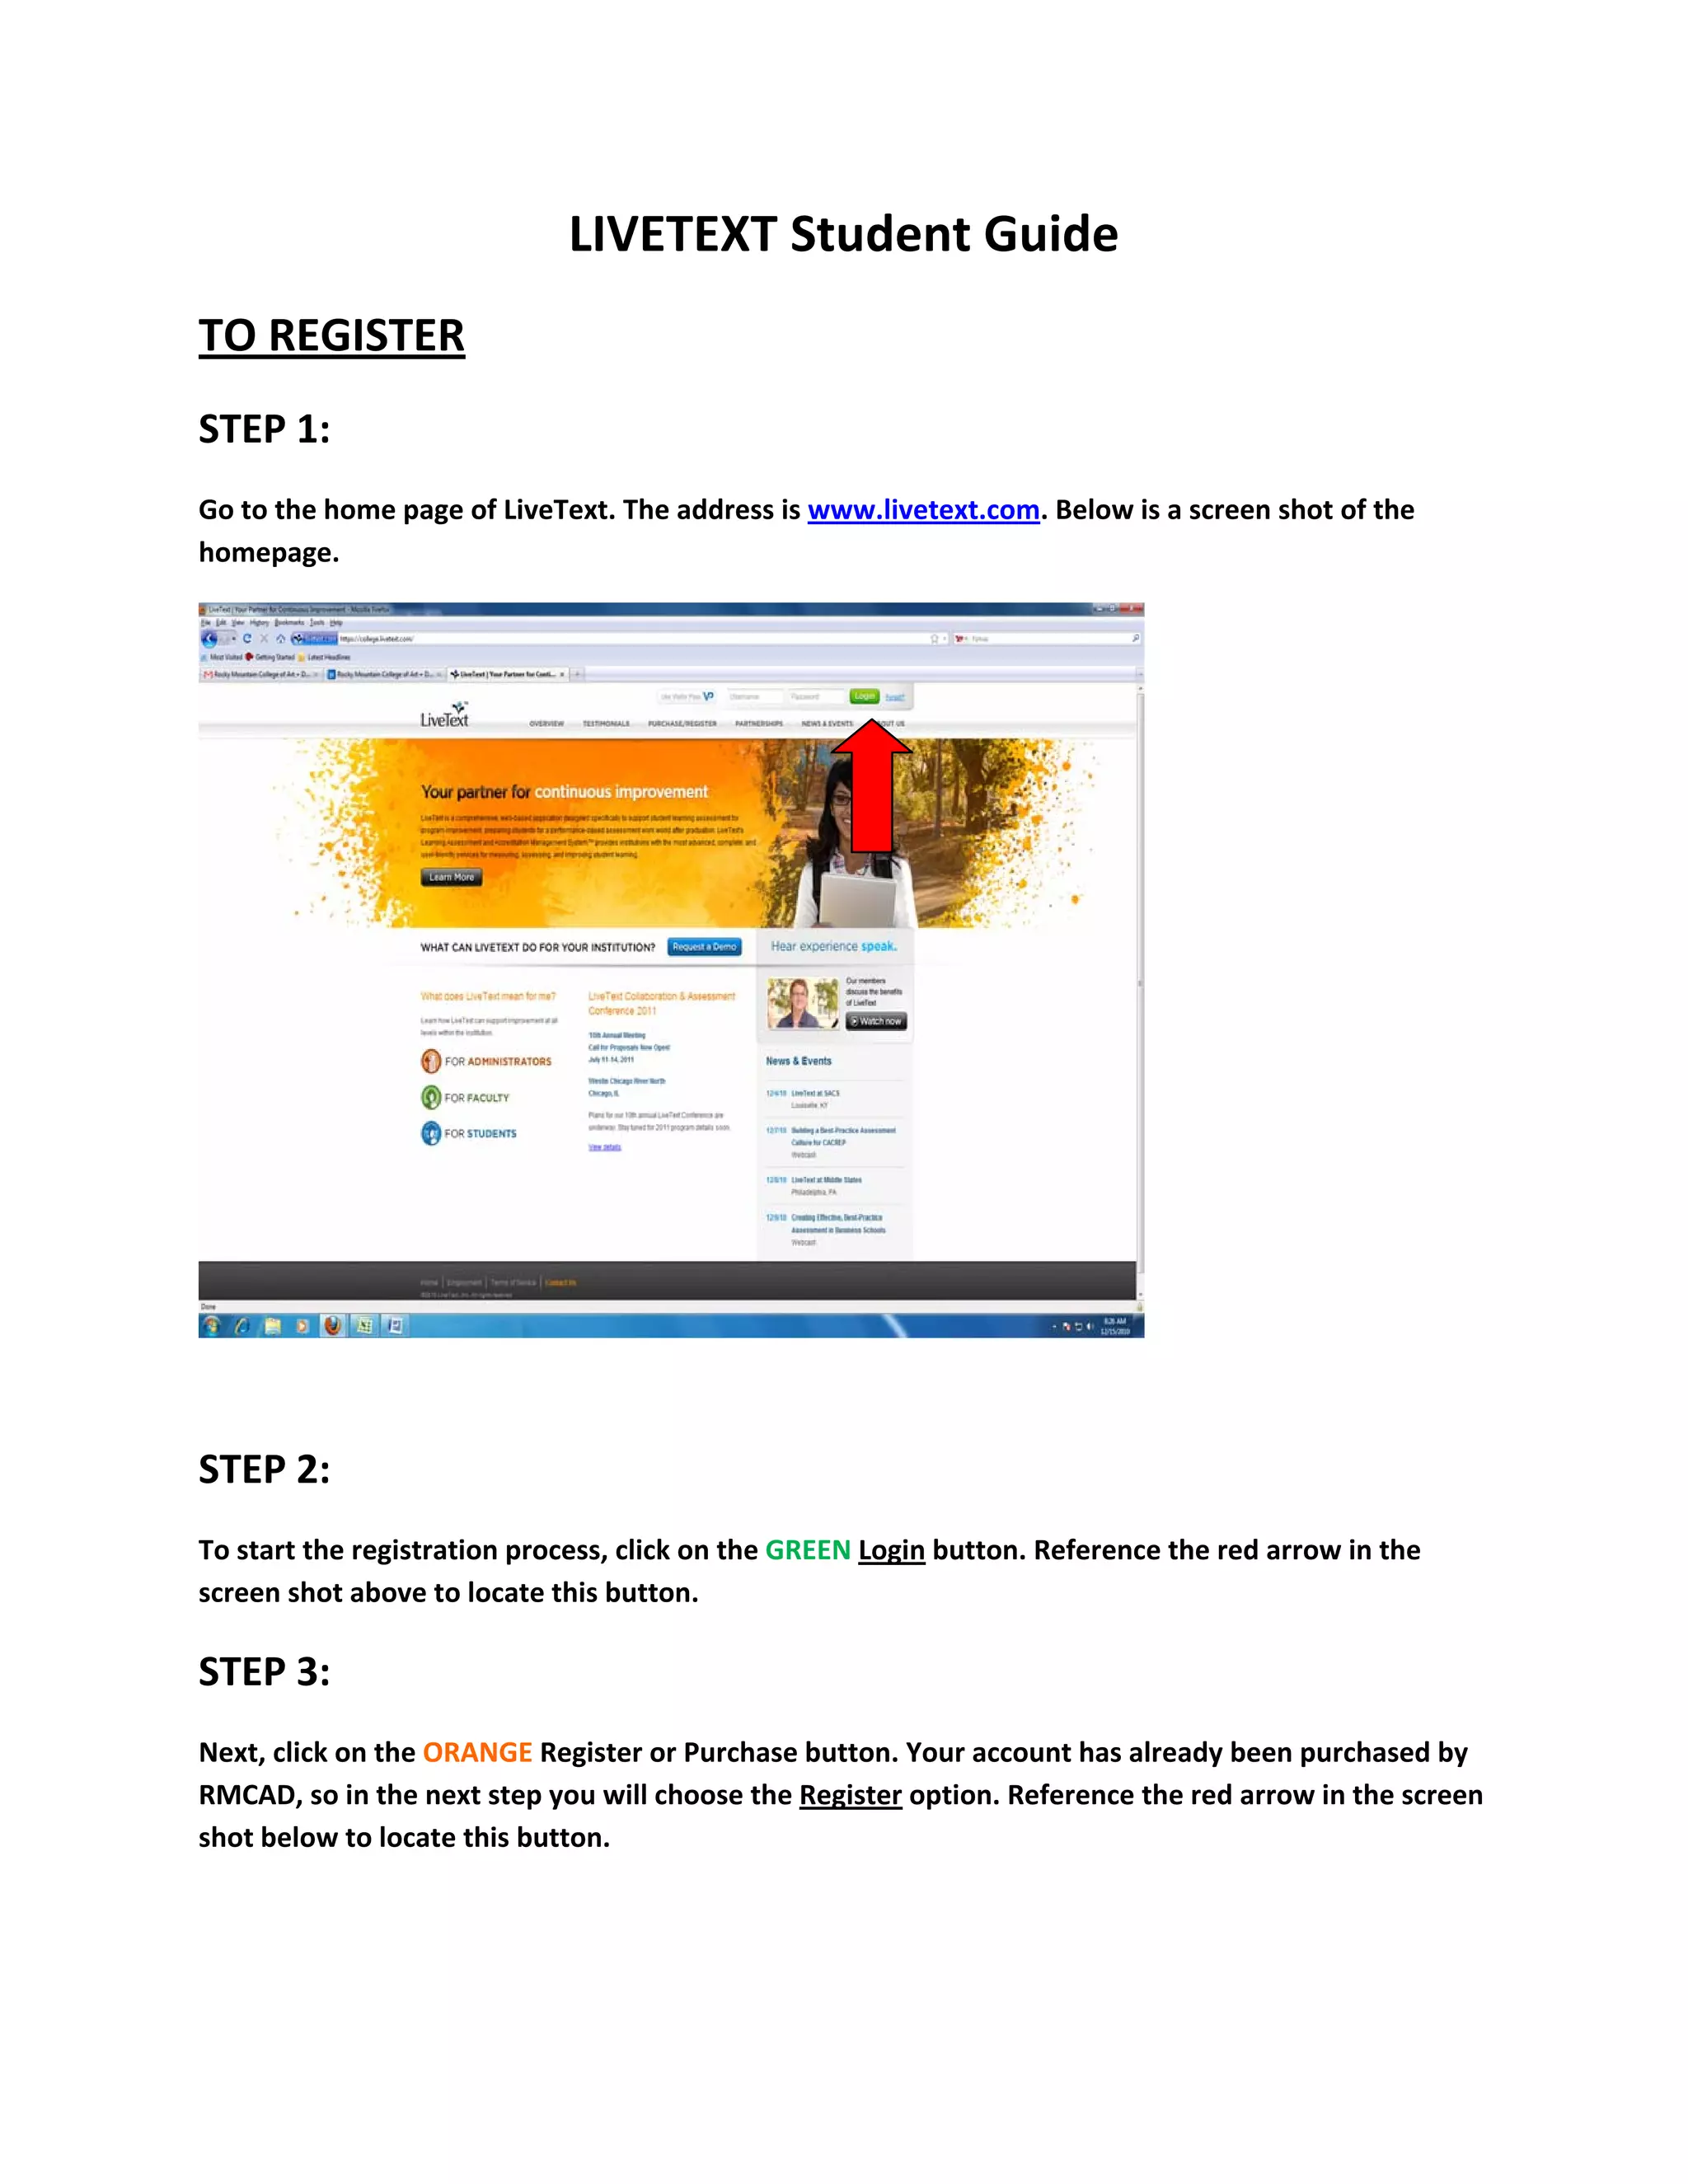
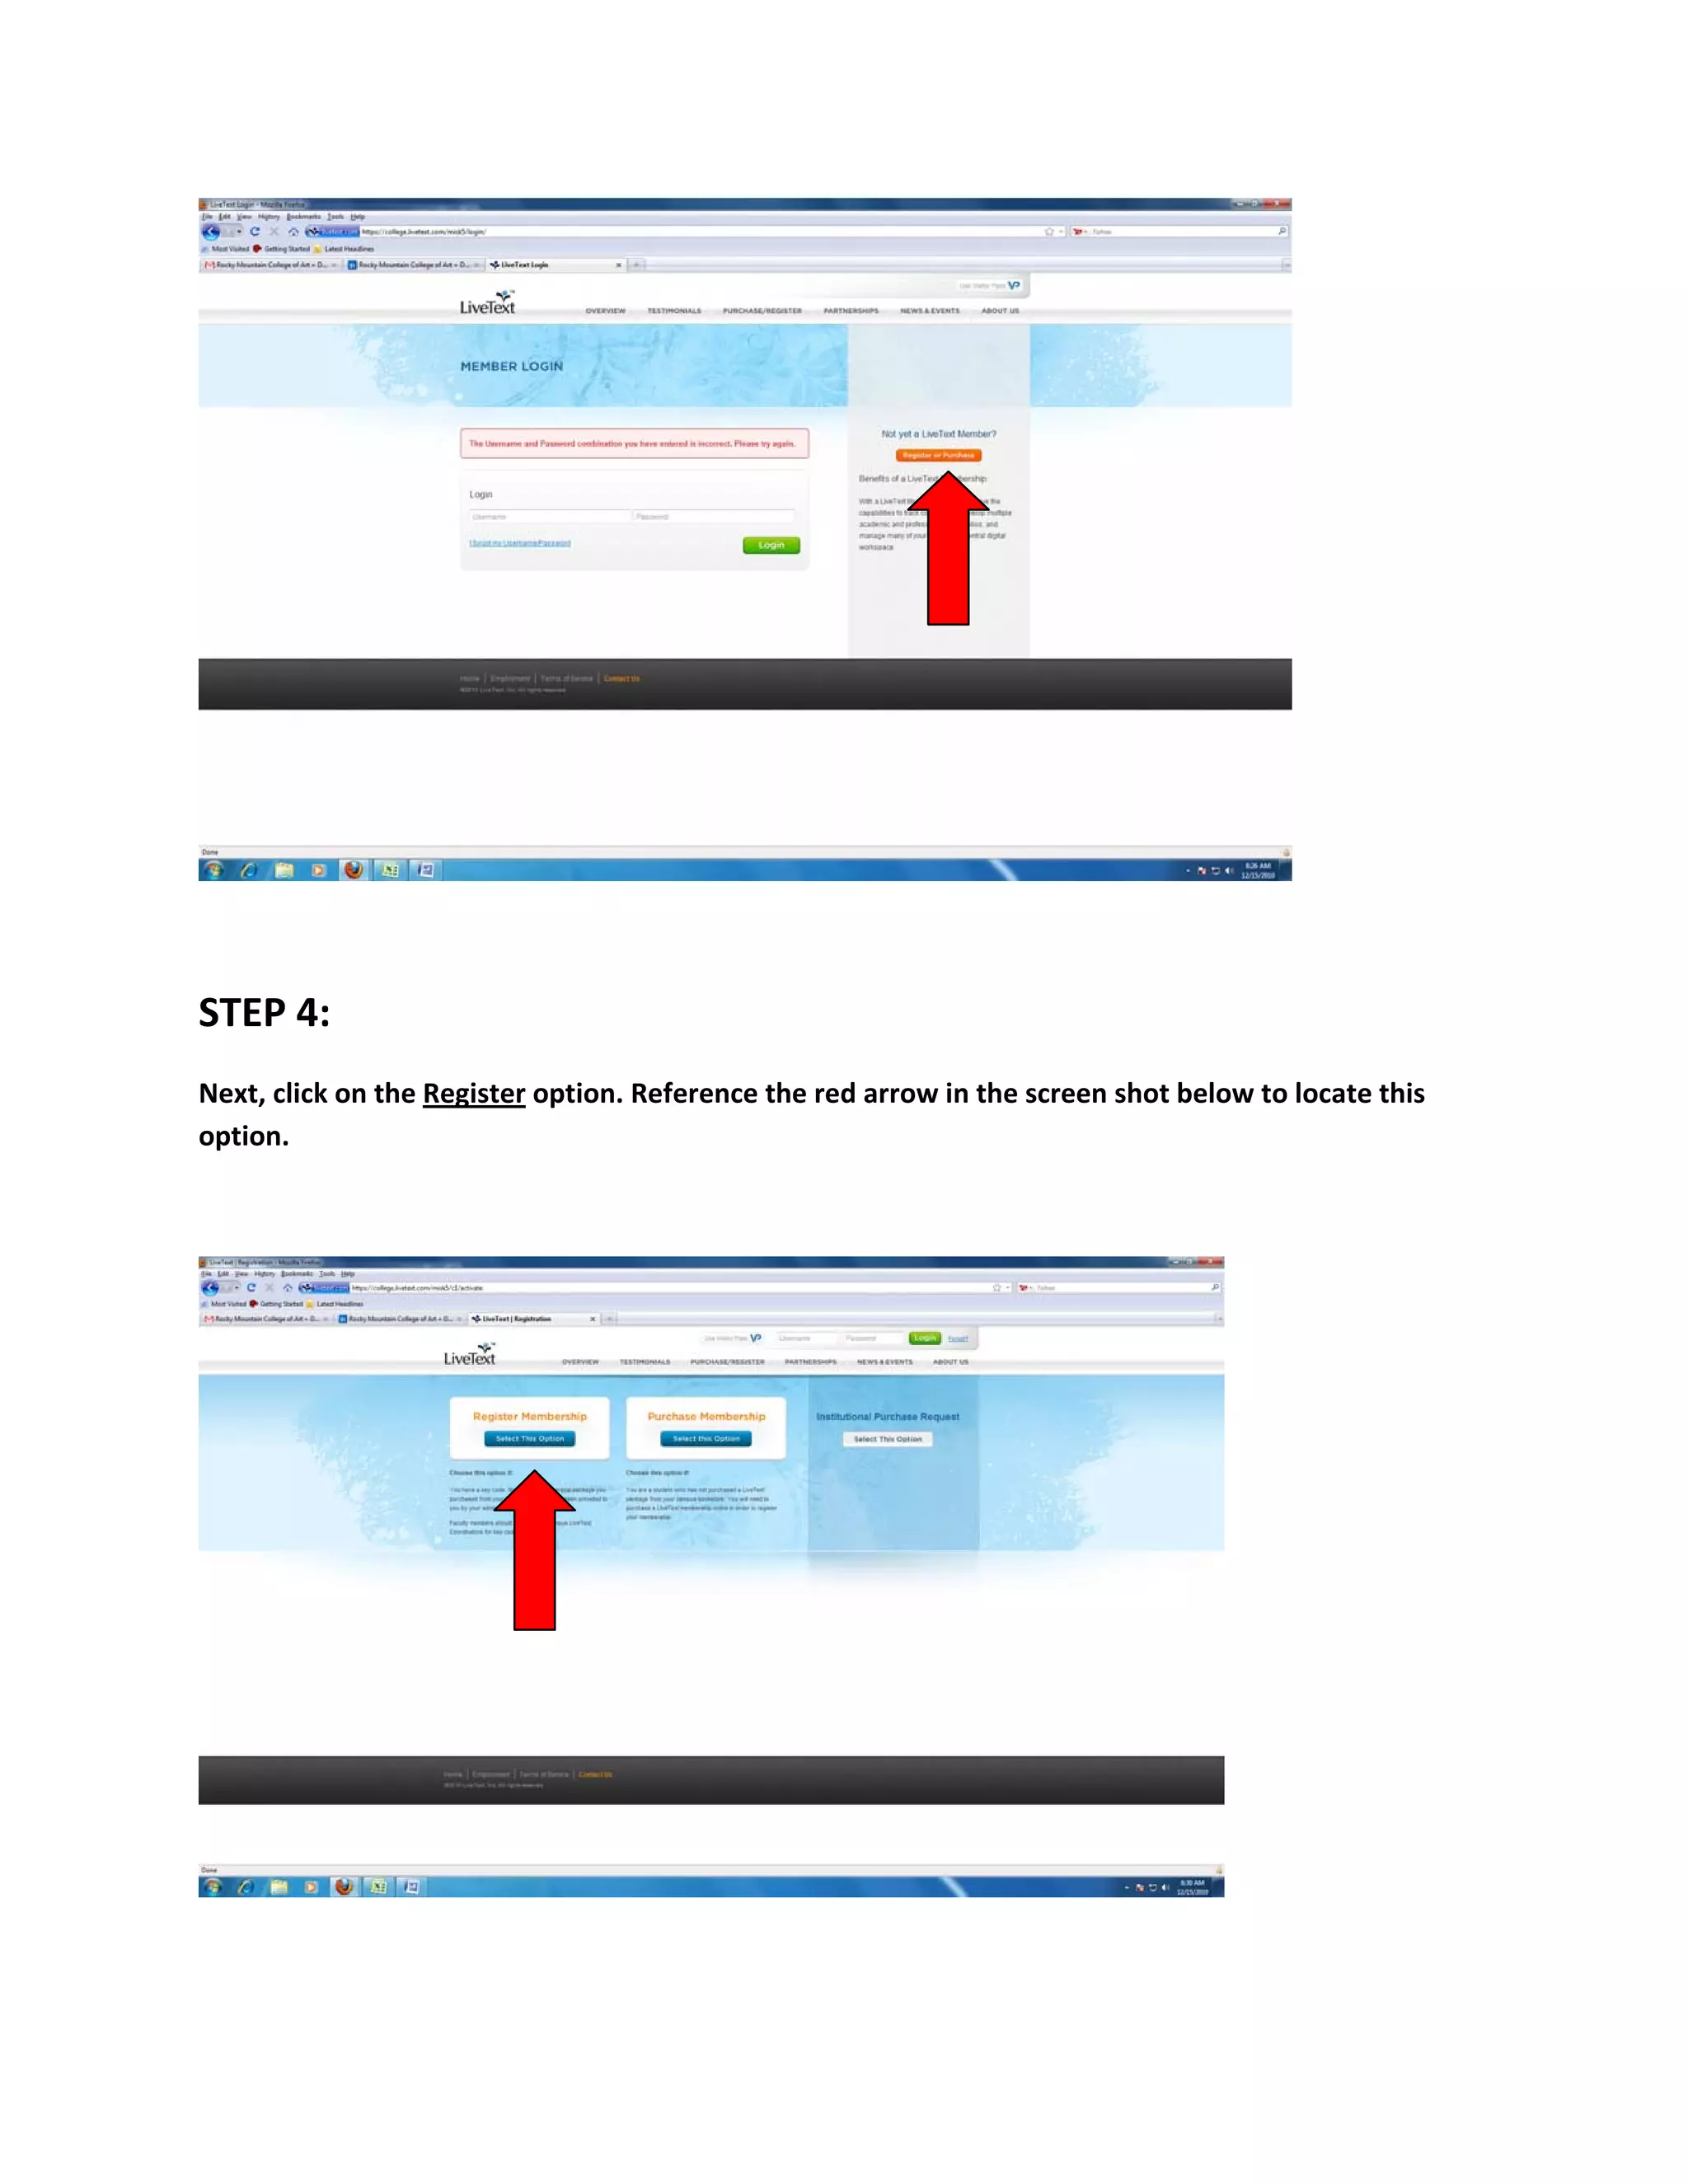
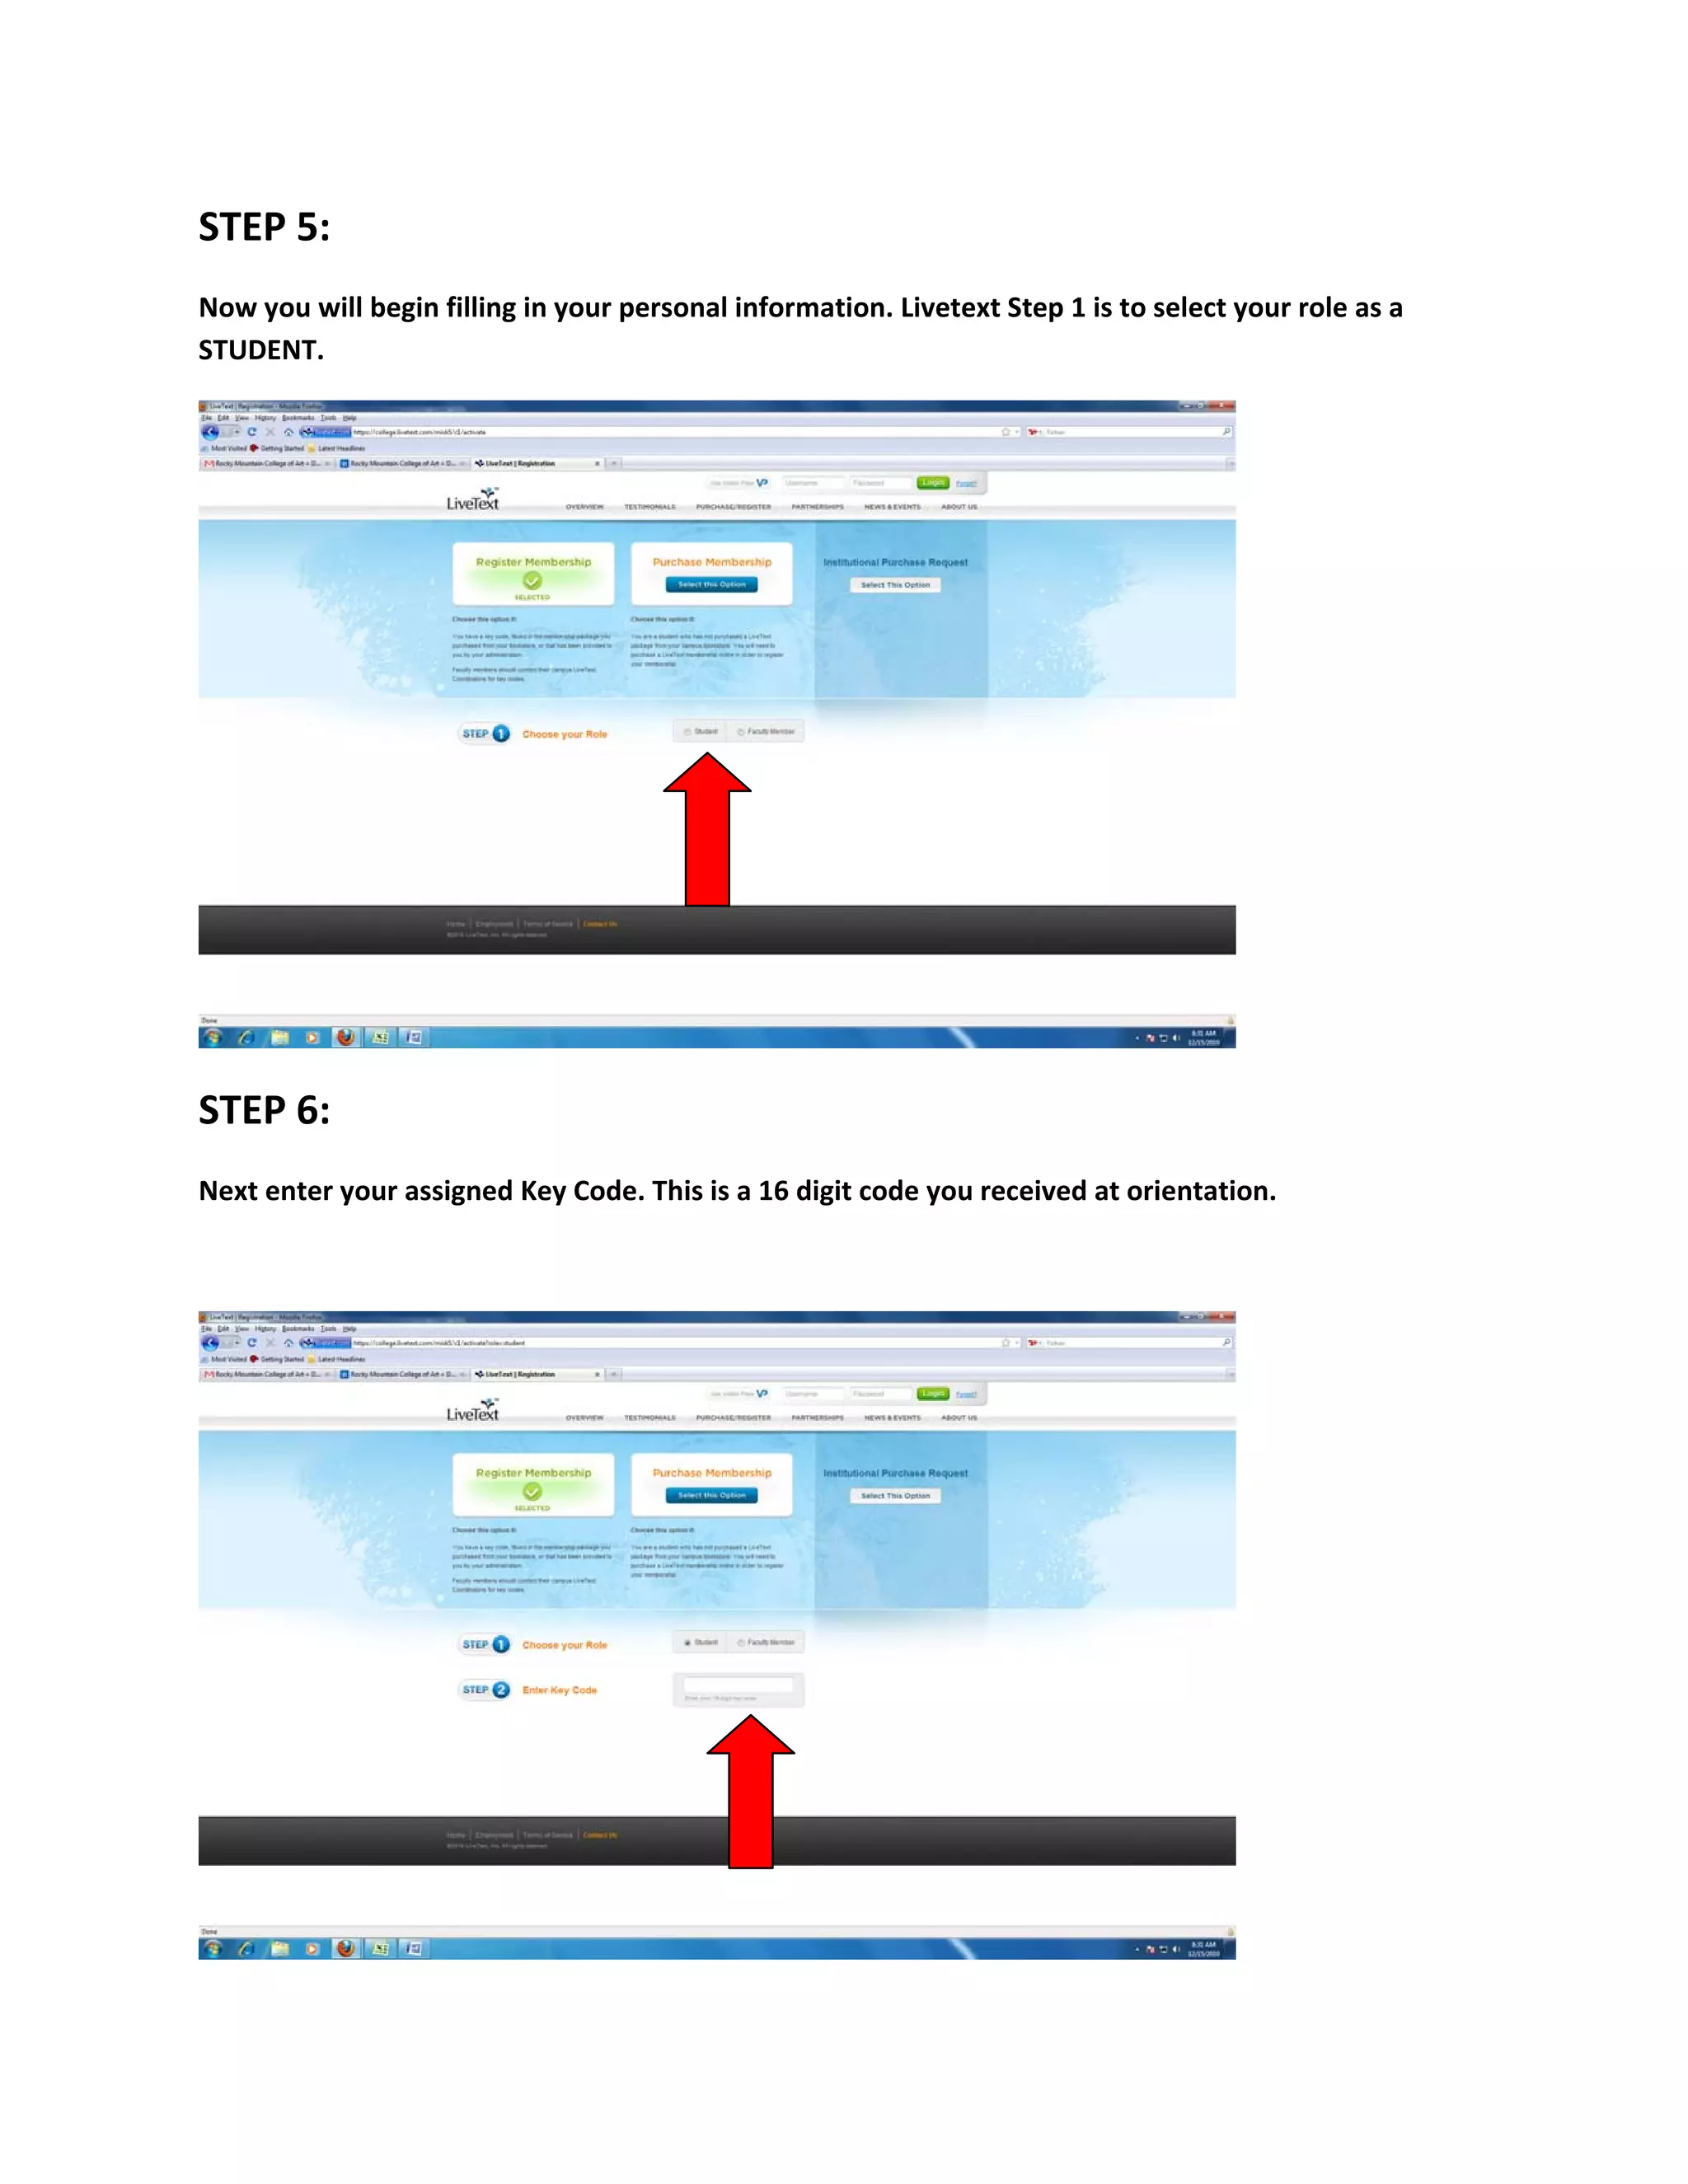
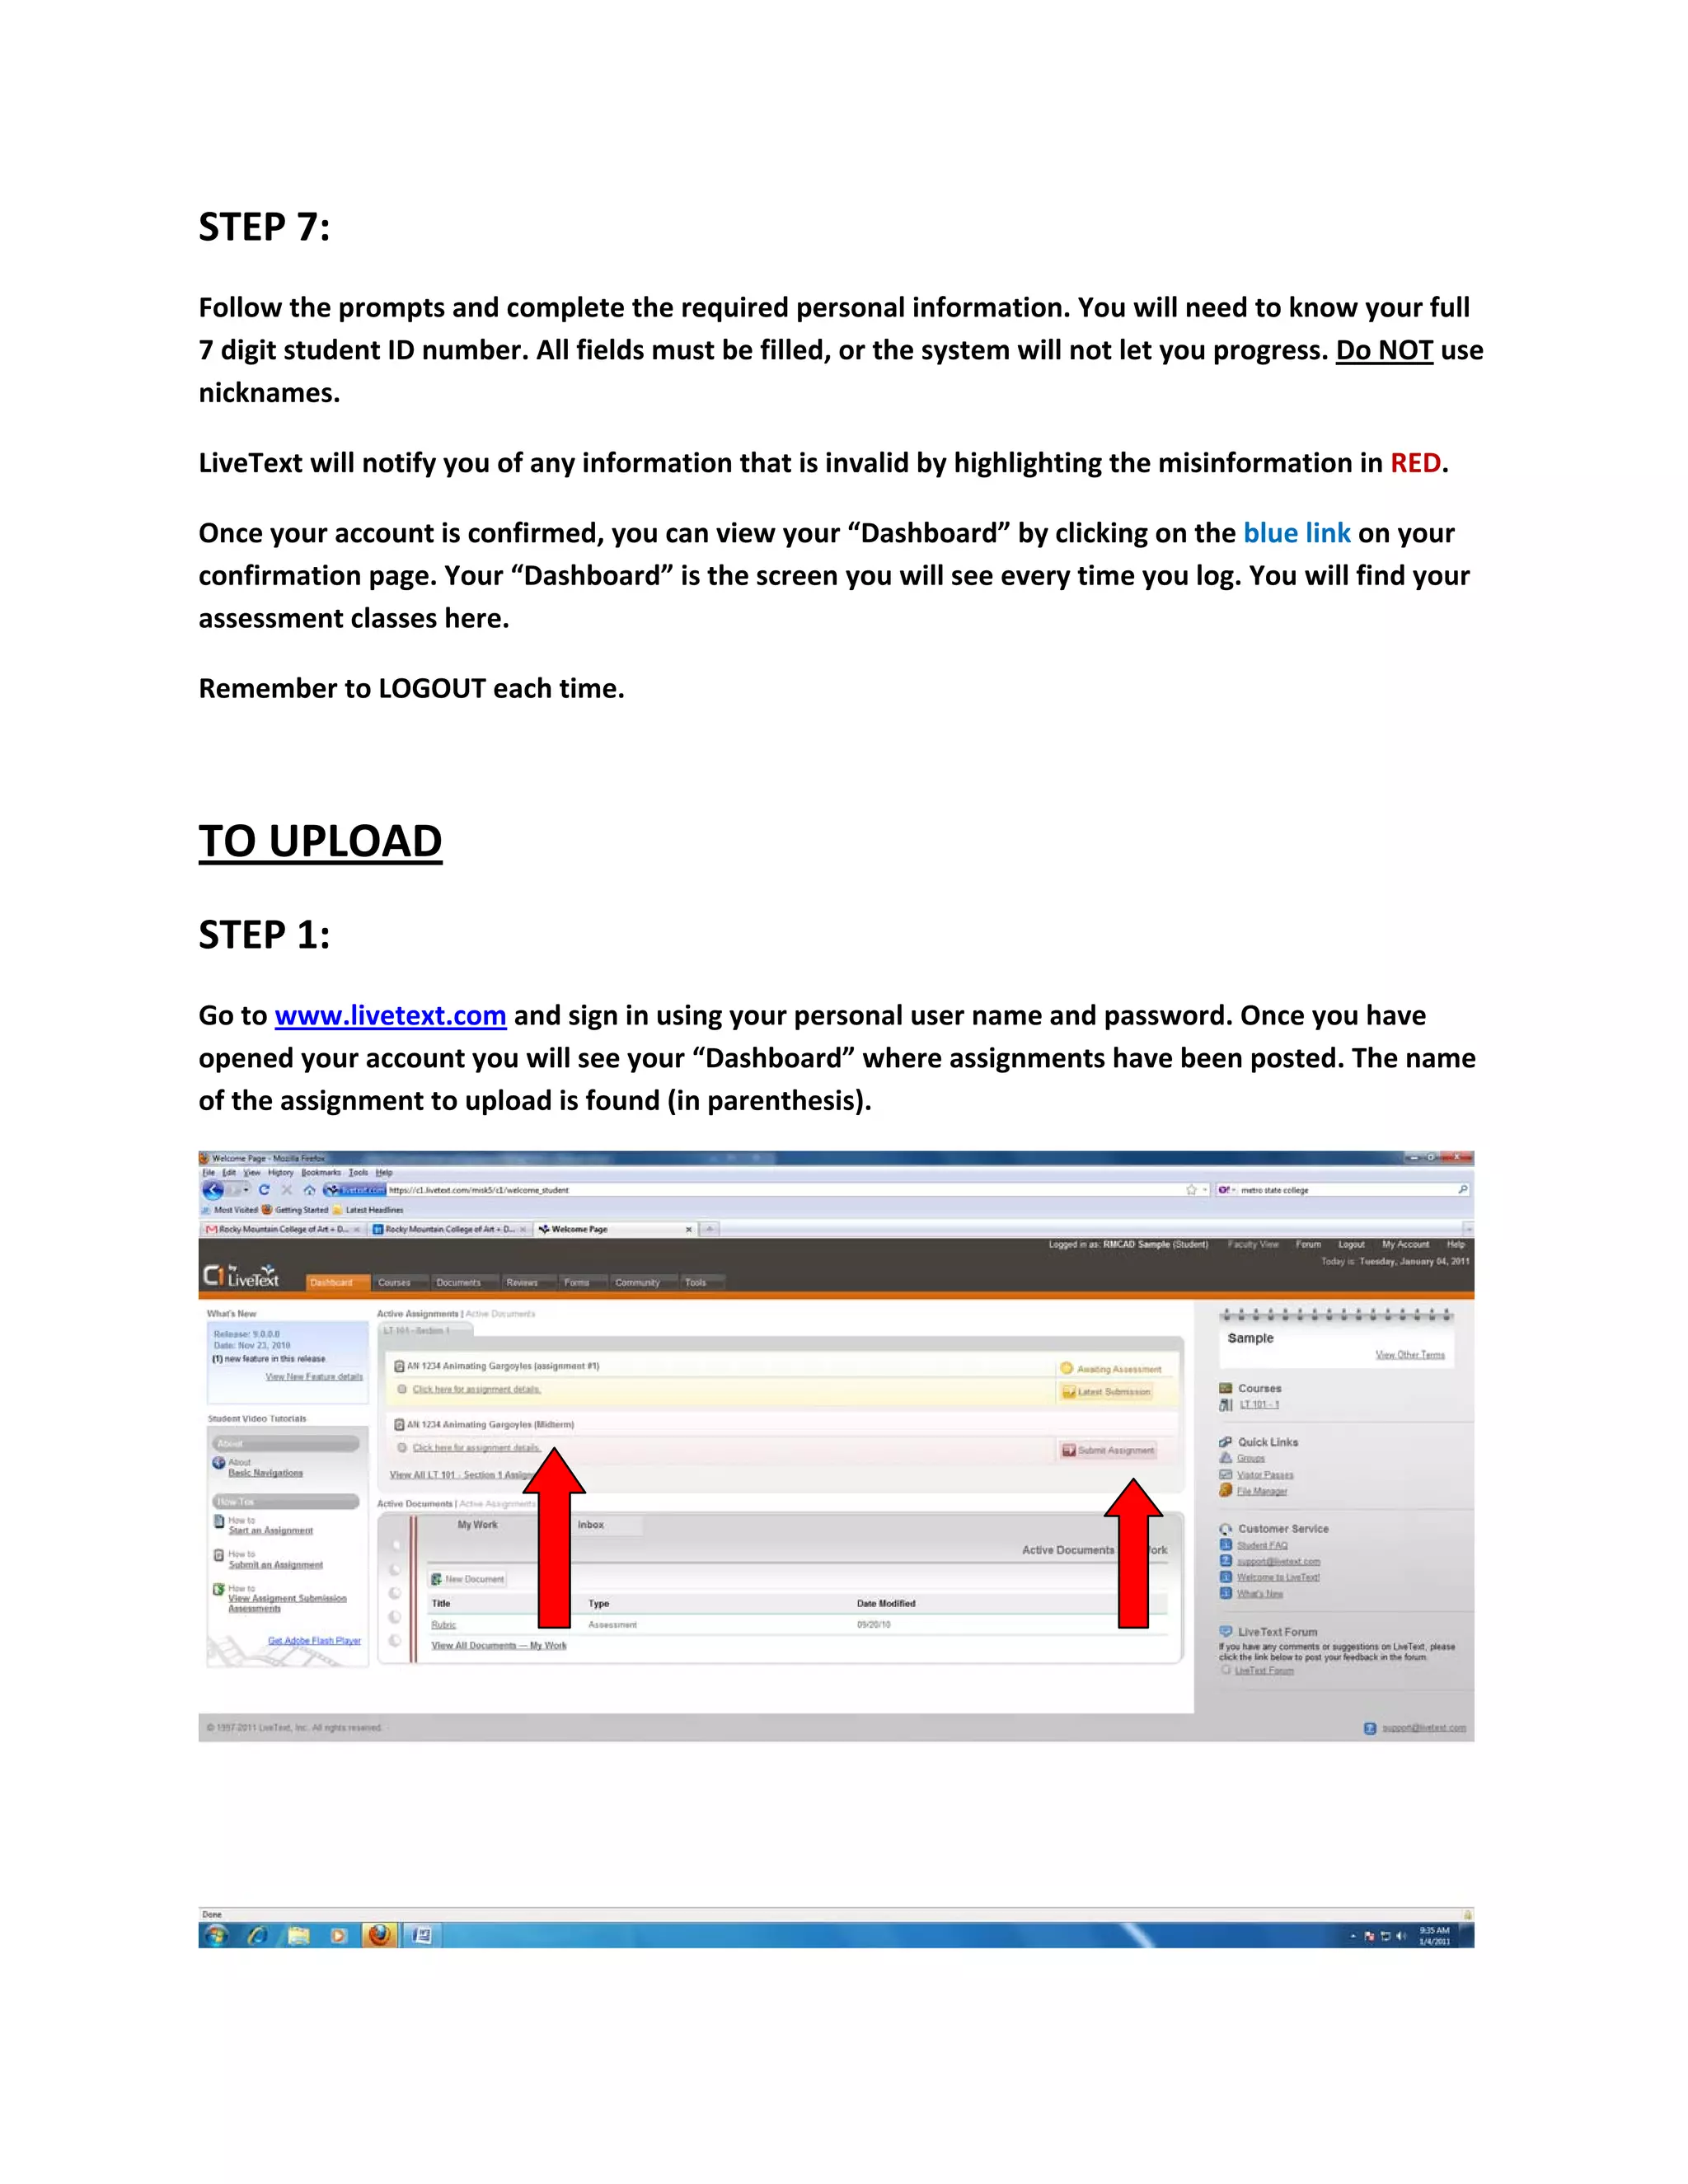
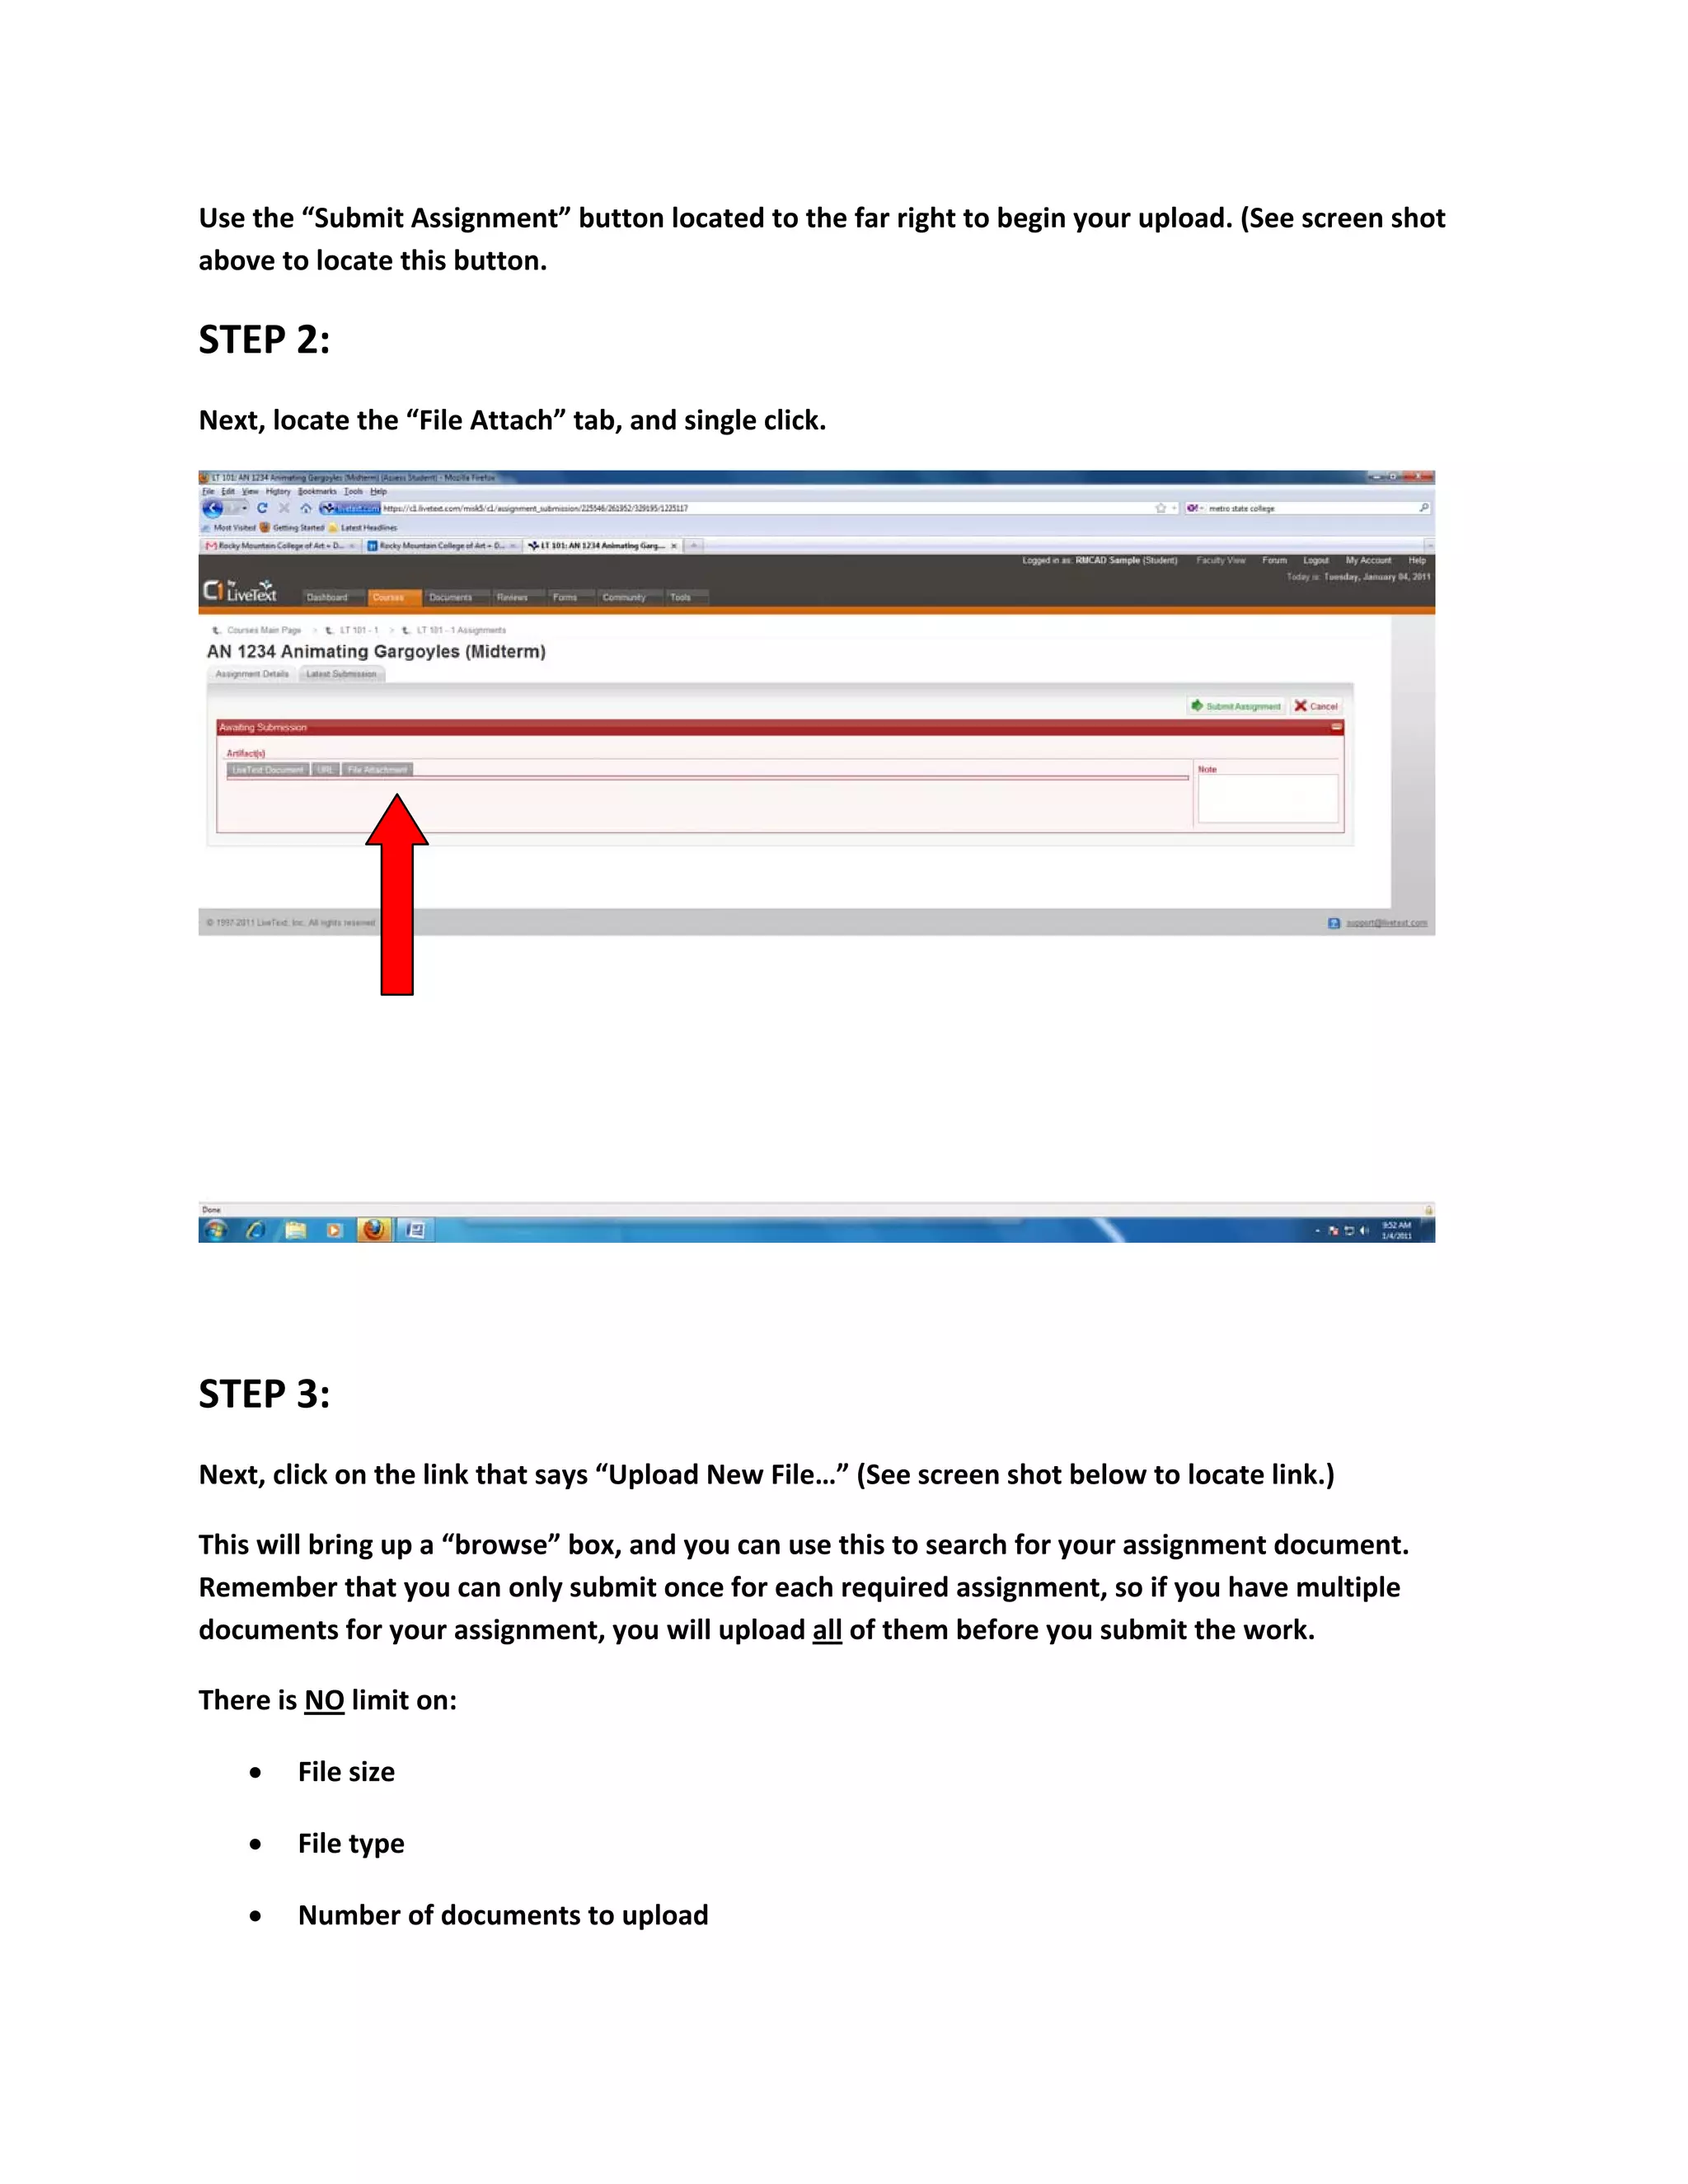
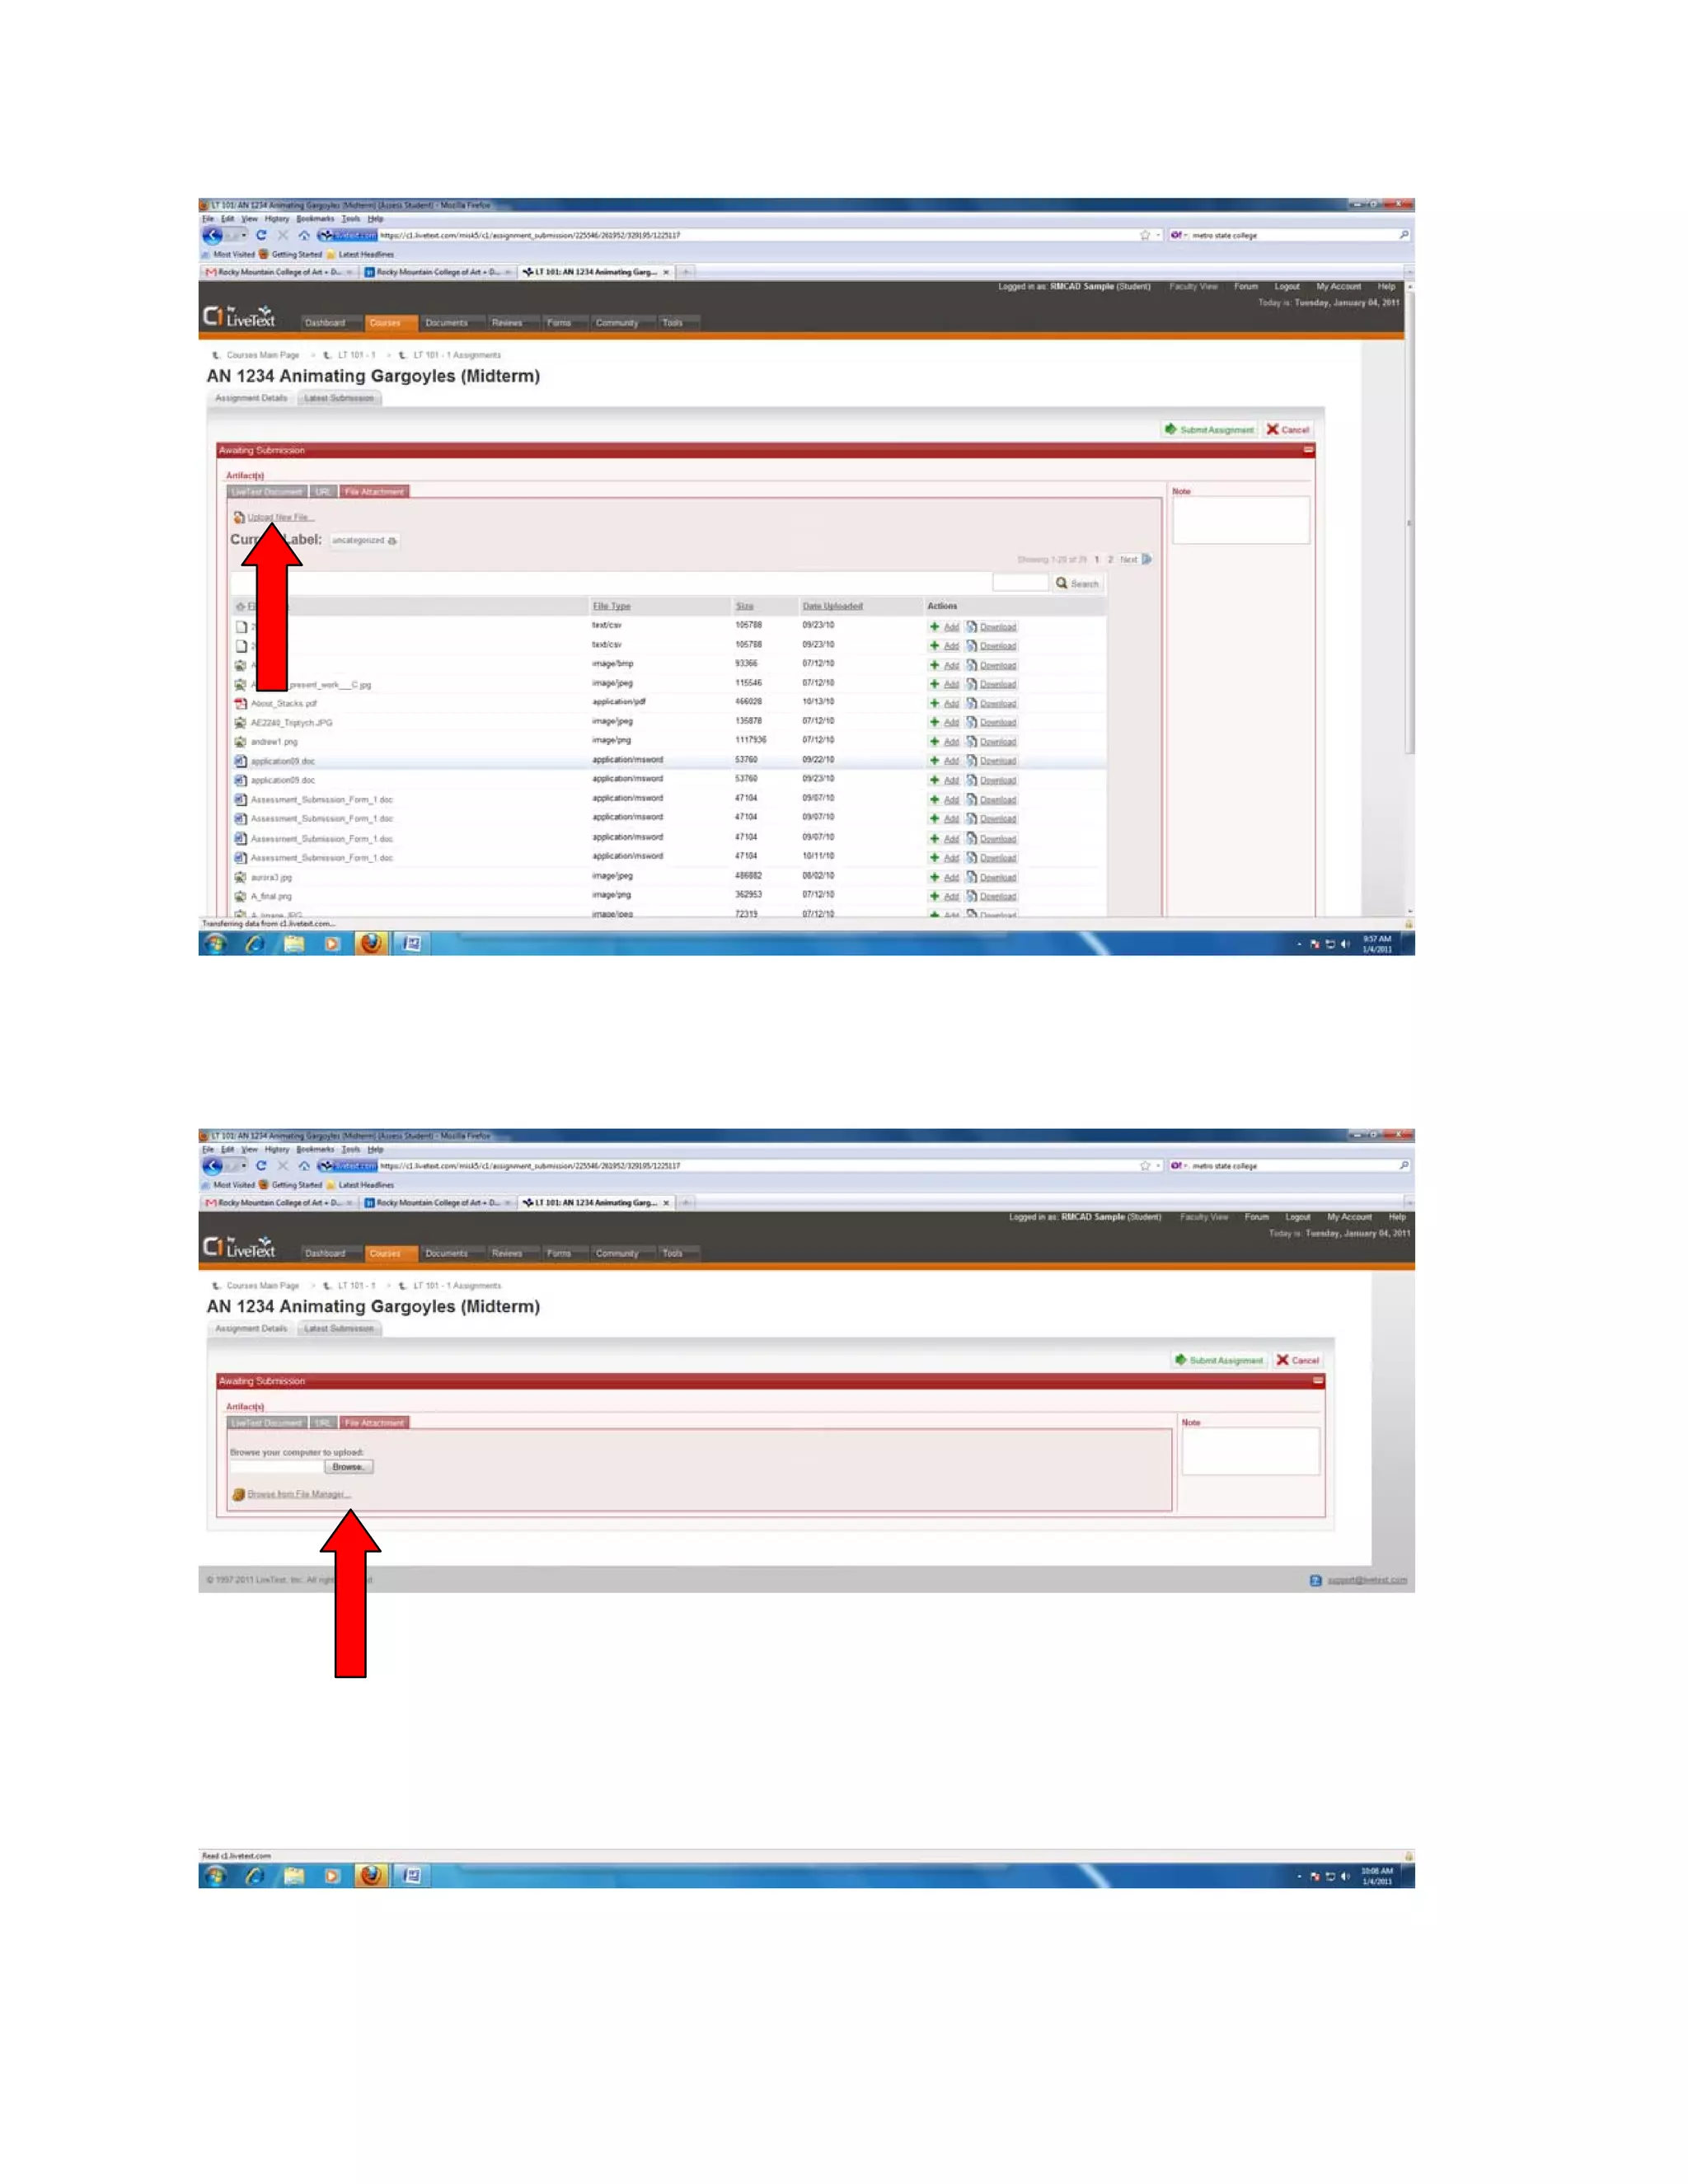
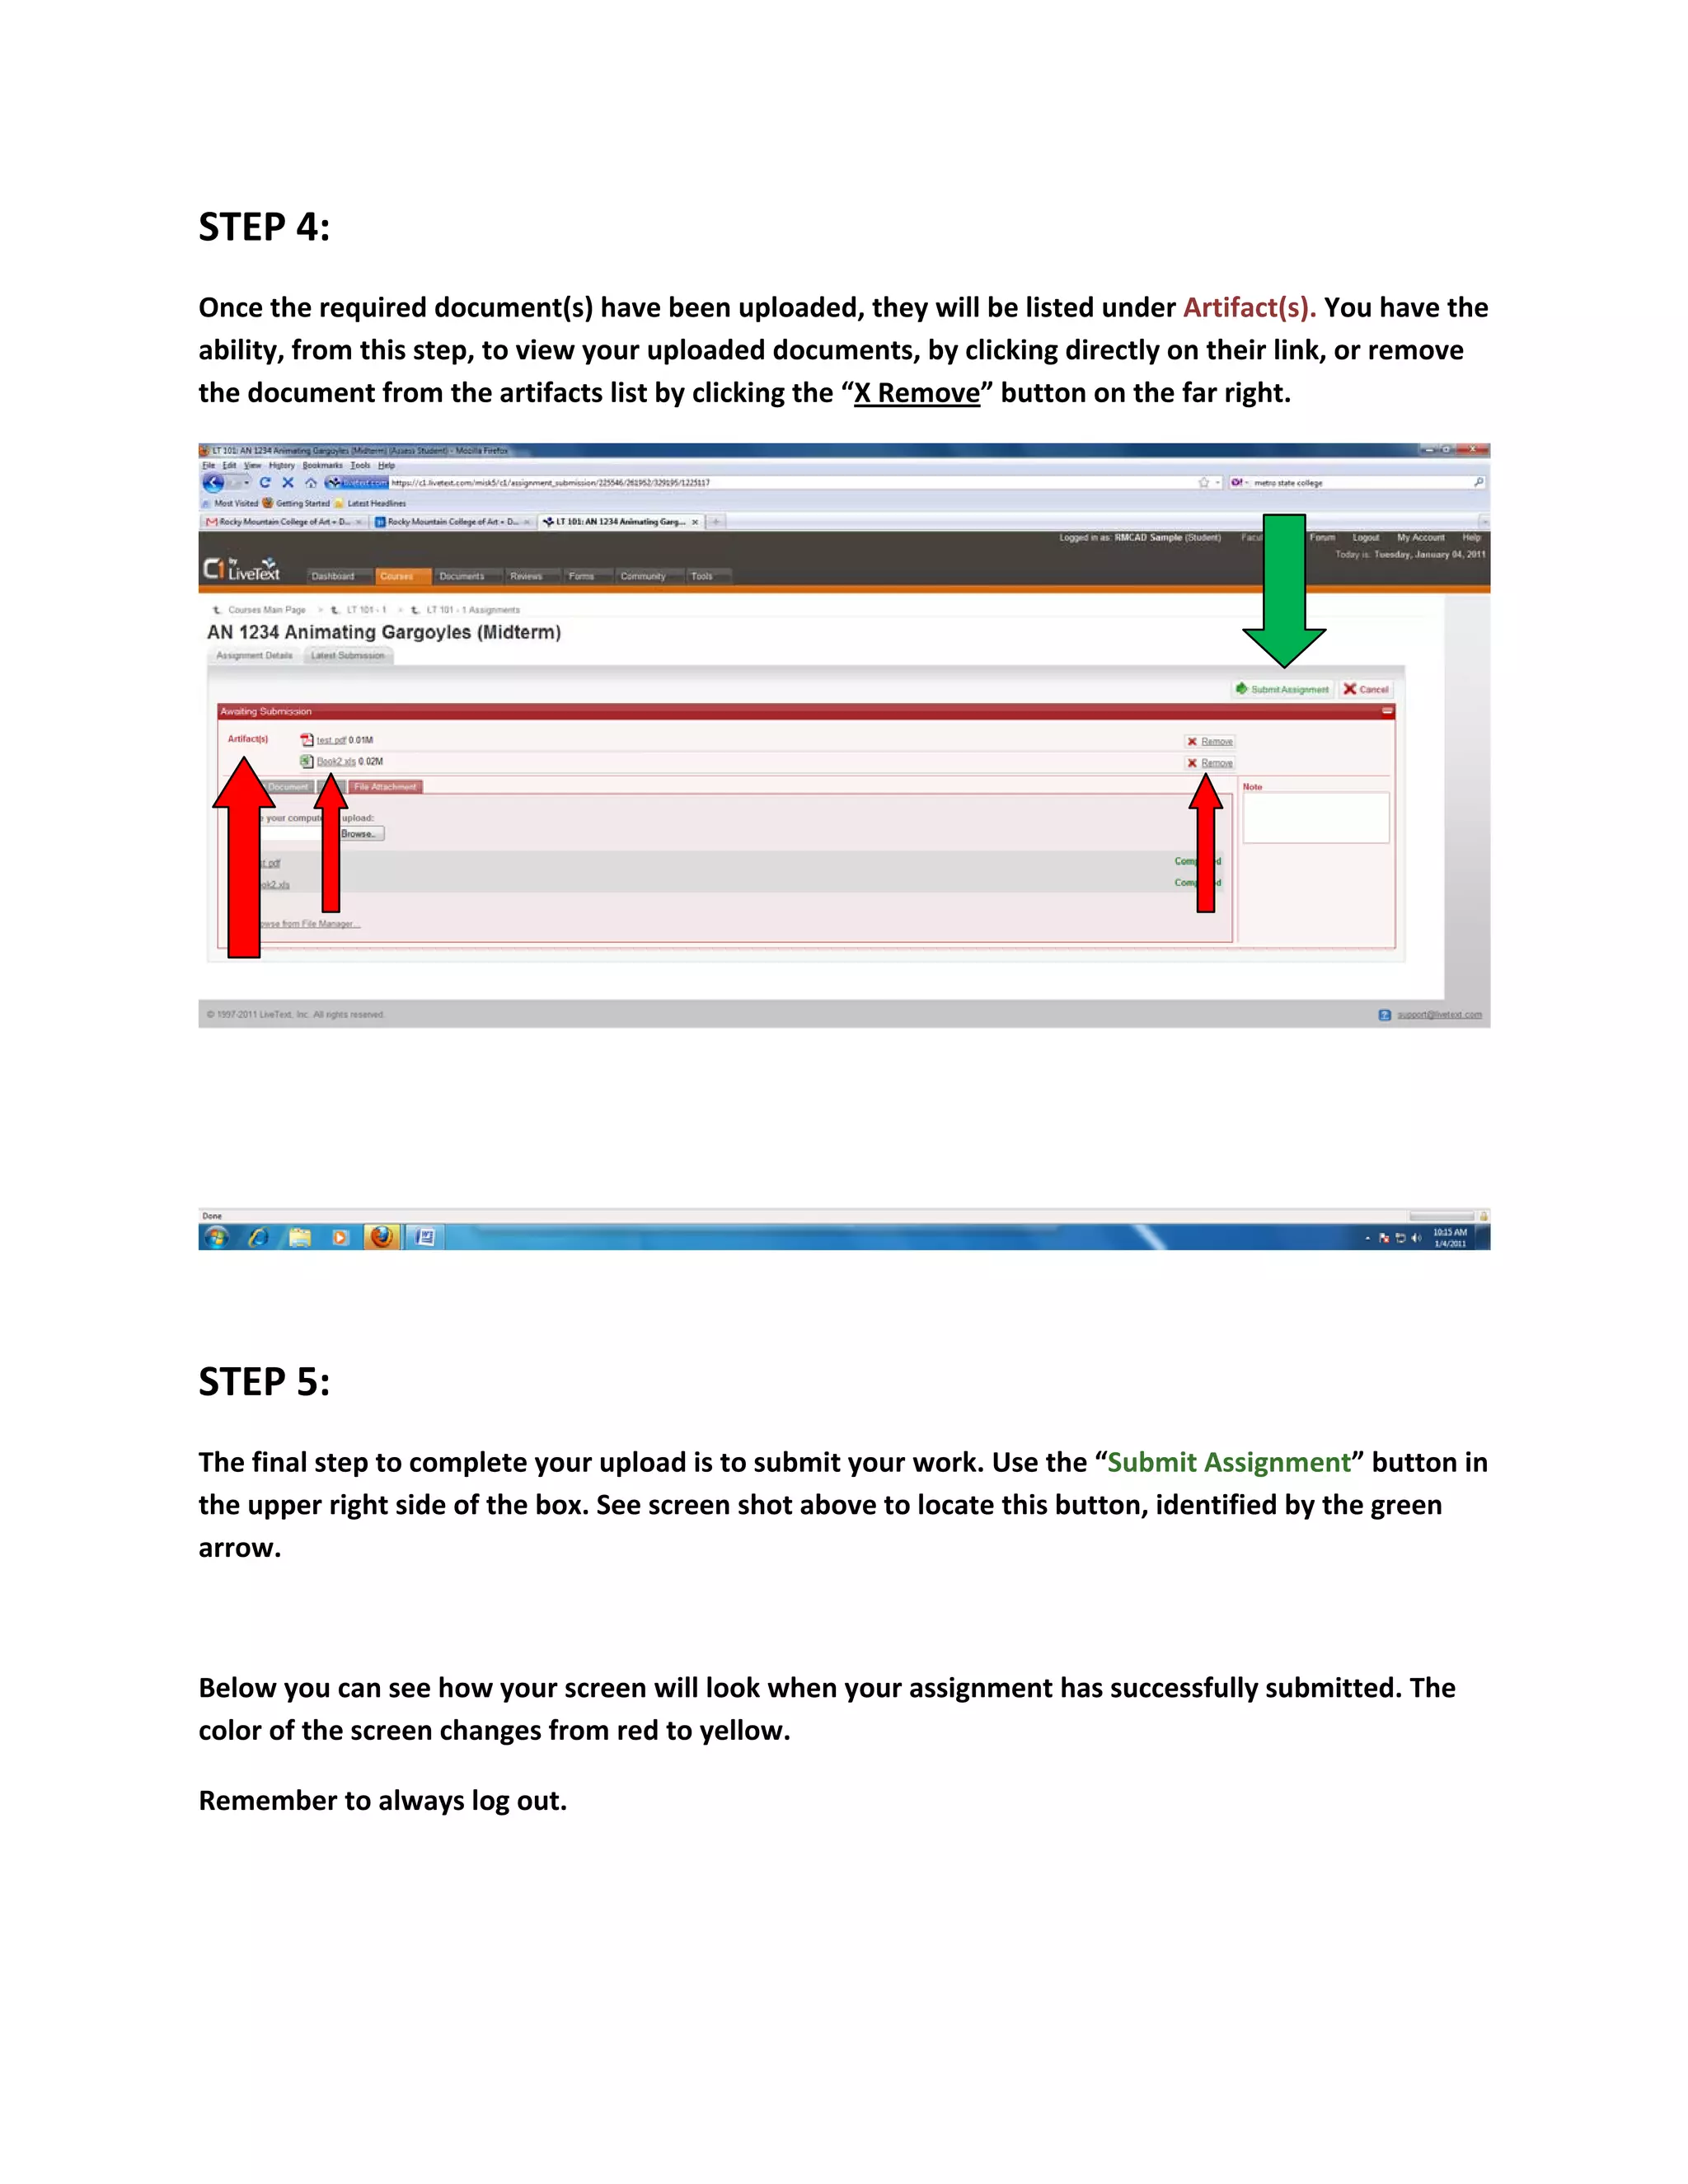
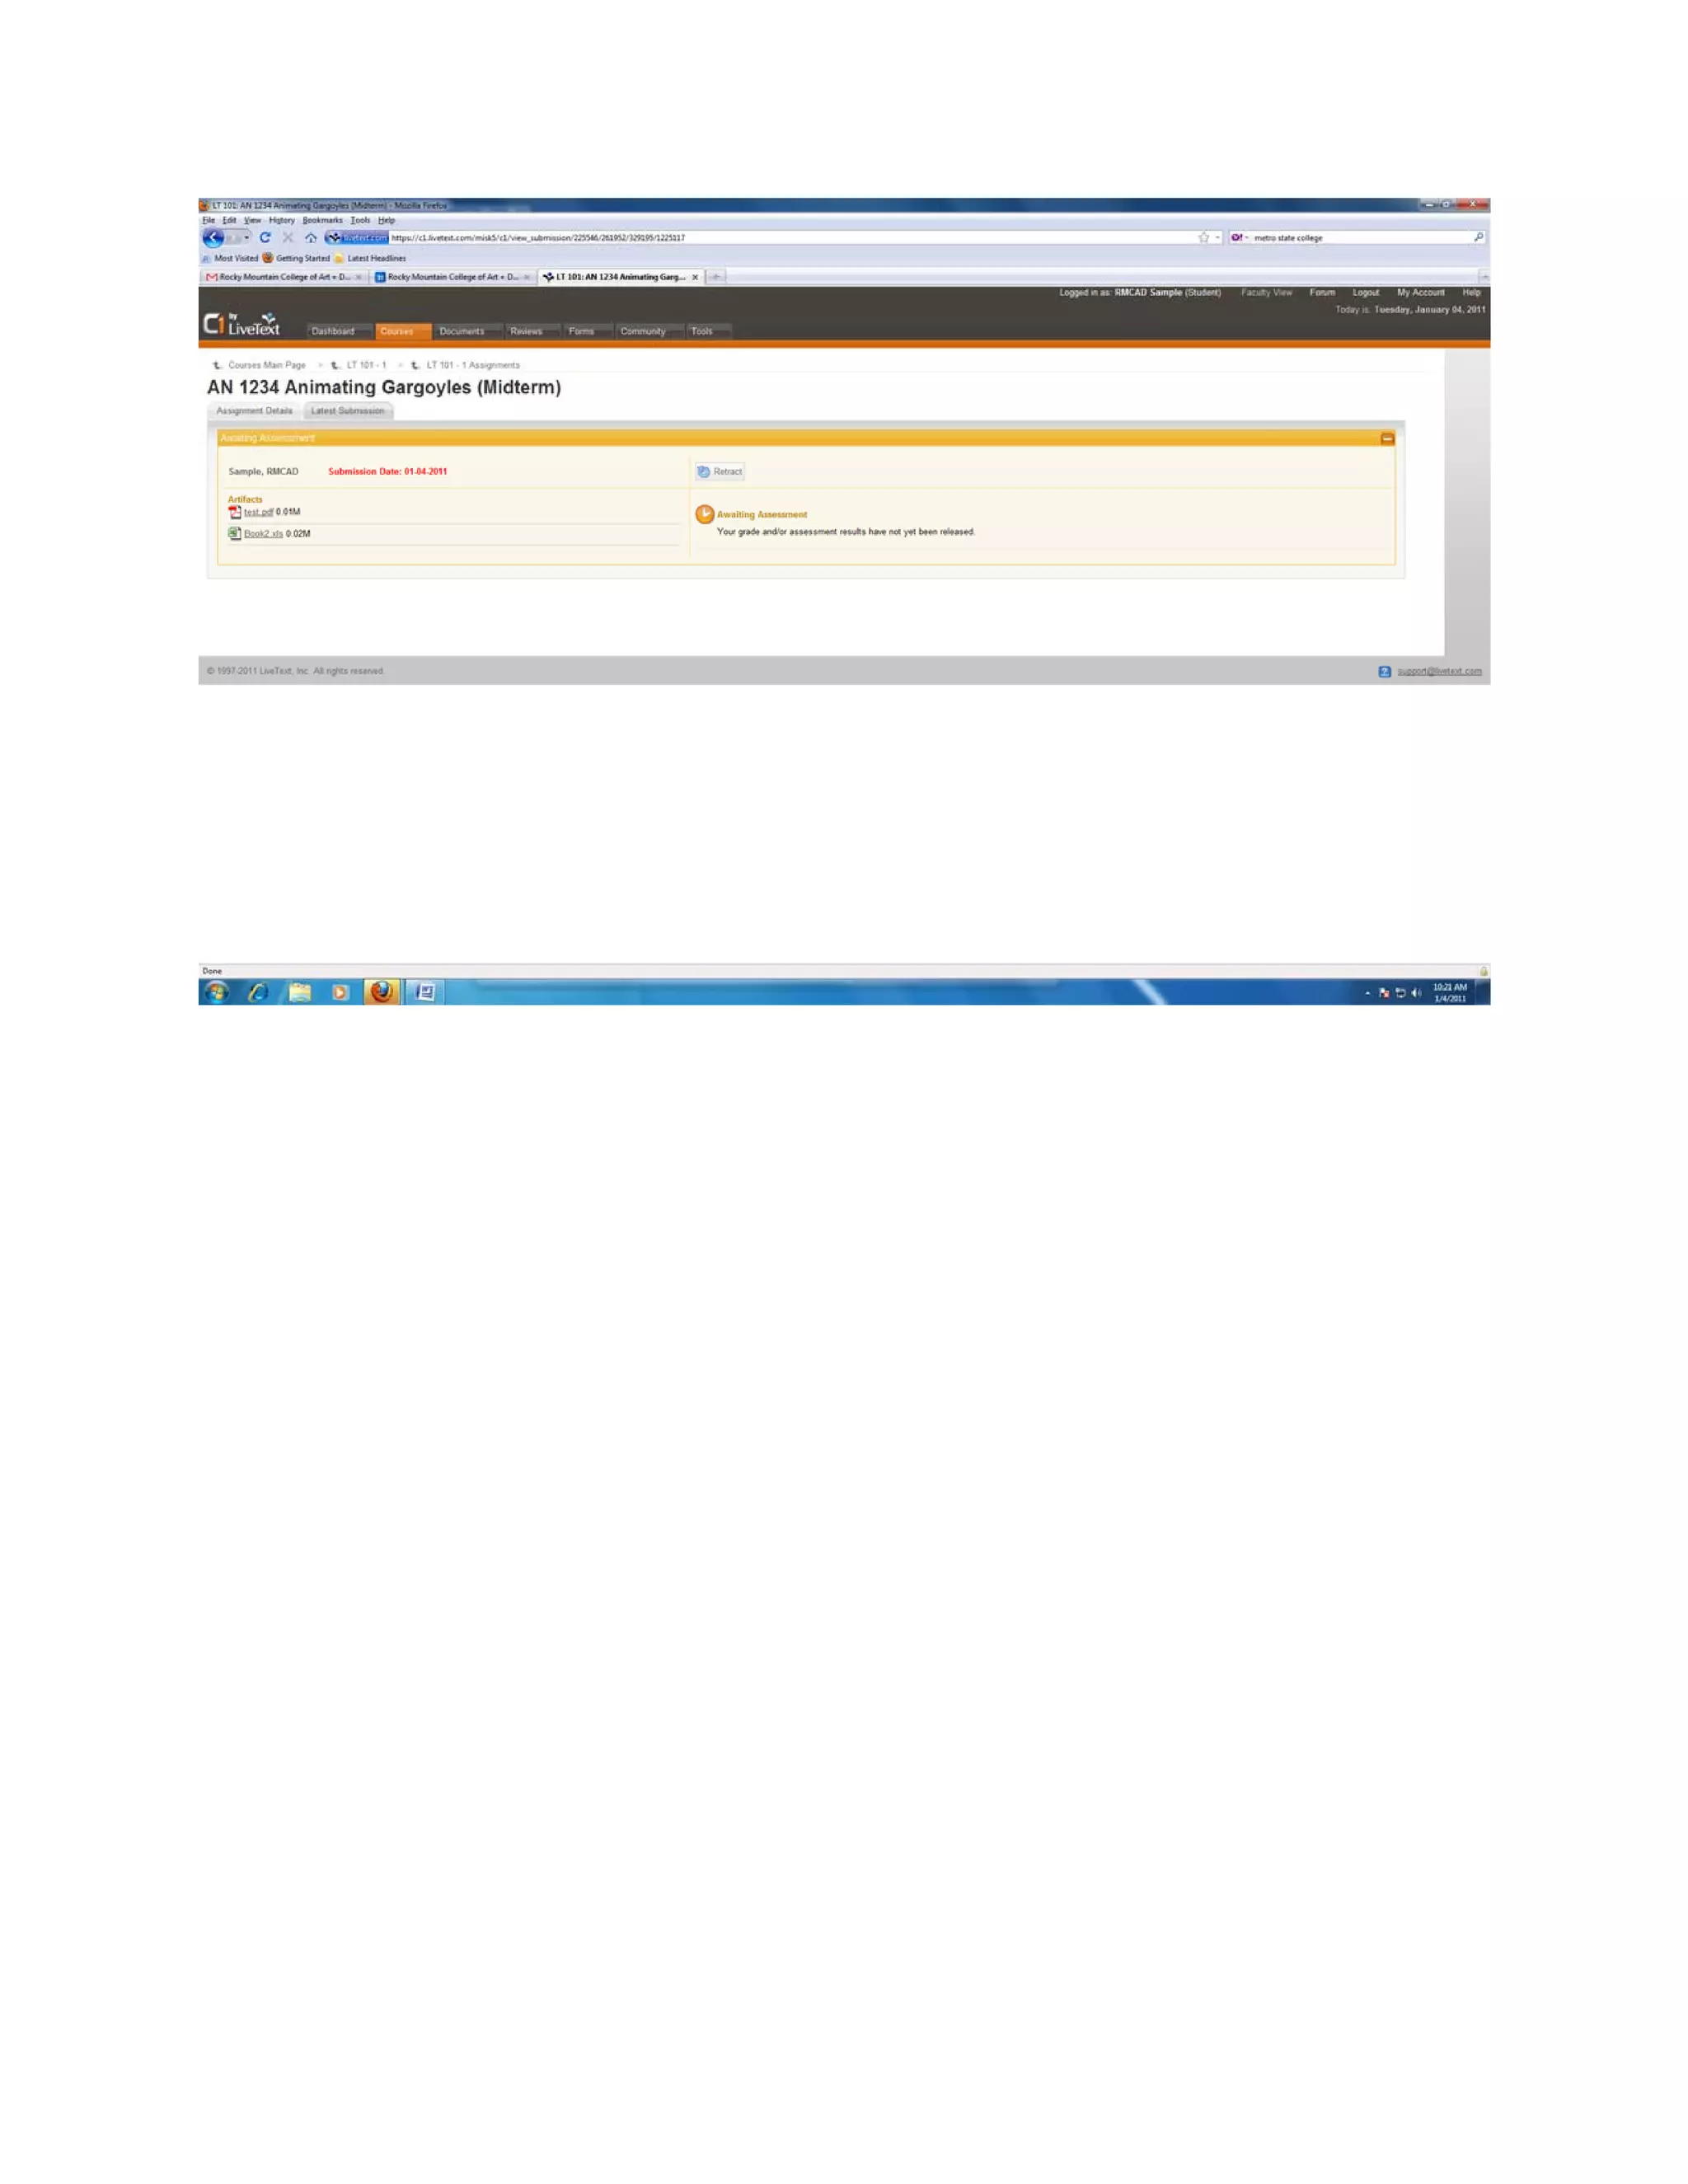
LIVETEXT Student Guide 
TO REGISTER 
STEP 1: 
Go to the home page of LiveText. The address is www.livetext.com. Below is a screen shot of the 
homepage. 


STEP 2: 
To start the registration process, click on the GREEN Login button. Reference the red arrow in the 
screen shot above to locate this button. 

STEP 3: 
Next, click on the ORANGE Register or Purchase button. Your account has already been purchased by 
RMCAD, so in the next step you will choose the Register option. Reference the red arrow in the screen 
shot below to locate this button. 


STEP 4: 
Next, click on the Register option. Reference the red arrow in the screen shot below to locate this 
option. 


STEP 5: 
Now you will begin filling in your personal information. Livetext Step 1 is to select your role as a 
STUDENT. 


STEP 6: 
Next enter your assigned Key Code. This is a 16 digit code you received at orientation. 


STEP 7: 
Follow the prompts and complete the required personal information. You will need to know your full 
7 digit student ID number. All fields must be filled, or the system will not let you progress. Do NOT use 
nicknames.  

LiveText will notify you of any information that is invalid by highlighting the misinformation in RED. 

Once your account is confirmed, you can view your “Dashboard” by clicking on the blue link on your 
confirmation page. Your “Dashboard” is the screen you will see every time you log. You will find your 
assessment classes here. 

Remember to LOGOUT each time. 


TO UPLOAD 
STEP 1: 
Go to www.livetext.com and sign in using your personal user name and password. Once you have 
opened your account you will see your “Dashboard” where assignments have been posted. The name 
of the assignment to upload is found (in parenthesis).  


Use the “Submit Assignment” button located to the far right to begin your upload. (See screen shot 
above to locate this button. 

STEP 2: 
Next, locate the “File Attach” tab, and single click. 


STEP 3: 
Next, click on the link that says “Upload New File…” (See screen shot below to locate link.) 

This will bring up a “browse” box, and you can use this to search for your assignment document. 
Remember that you can only submit once for each required assignment, so if you have multiple 
documents for your assignment, you will upload all of them before you submit the work.  

There is NO limit on: 

       File size 

       File type 

       Number of documents to upload 


STEP 4: 
Once the required document(s) have been uploaded, they will be listed under Artifact(s). You have the 
ability, from this step, to view your uploaded documents, by clicking directly on their link, or remove 
the document from the artifacts list by clicking the “X Remove” button on the far right. 


STEP 5: 
The final step to complete your upload is to submit your work. Use the “Submit Assignment” button in 
the upper right side of the box. See screen shot above to locate this button, identified by the green 
arrow. 


Below you can see how your screen will look when your assignment has successfully submitted. The 
color of the screen changes from red to yellow. 

Remember to always log out. 
 

Livetext student guide 2012 1