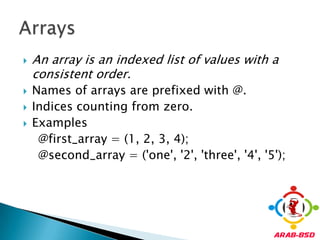


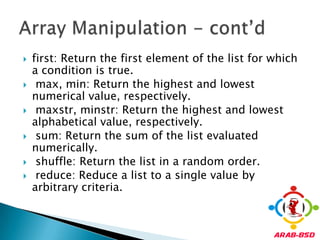
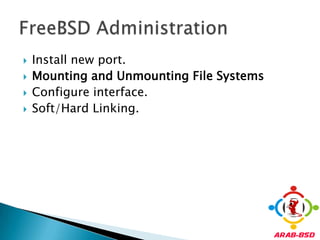
![The crypt function performs a one-way transform of the string passed; it is identical to (and implemented using) the C library crypt on Unix systems, which implements a variation of the Data Encryption Standard (DES) algorithm.@characters = (0..9, 'a'..'z' ,'A'..'Z', '.', '/');$encrypted = crypt($password, @characters[rand 64, rand 64]);Password Encryption: crypt](https://image.slidesharecdn.com/lecture3perlfreebsdadministration-110718172129-phpapp01/85/Lecture-3-Perl-FreeBSD-administration-12-320.jpg)
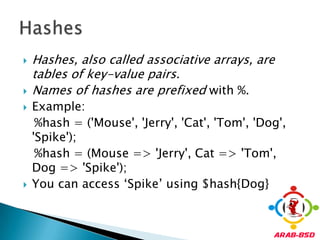
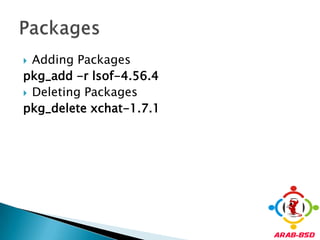
![Number of elements in an array using scalar $count = scalar(@array); Last index in an array using $#$highest = $#array; # $highest = scalar(@array)-1Append an element to the array$array[scalar(@array)] push @arrayInsert at the beginningunshift @arrayTruncating and resizing@array = @array[0..3];Array Manipulation](https://image.slidesharecdn.com/lecture3perlfreebsdadministration-110718172129-phpapp01/85/Lecture-3-Perl-FreeBSD-administration-20-320.jpg)

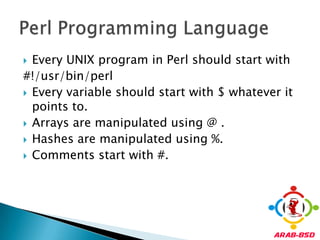
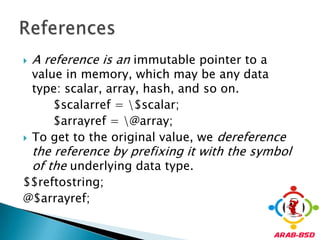
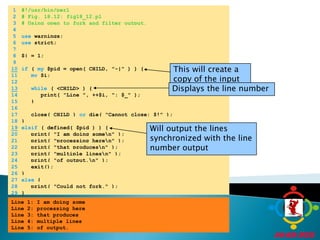
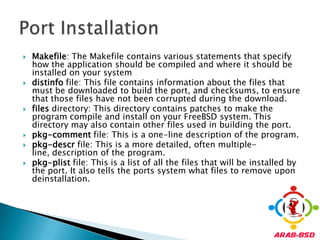
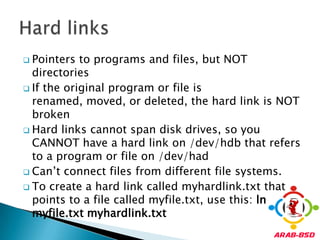
![Array Looping Example 1 #!/usr/bin/perl 2 # Fig. 4.3: fig04_03.pl 3 # Looping through an array with the for repetition structure. 4 5 @array = ( "Hello", 283, "there", 16.439 ); 6 7 # display every element of the array 8 for ( $i = 0; $i < 4; ++$i ) { 9 print "$i $array[ $i ]\n"; 10 }0 Hello1 2832 there3 16.439](https://image.slidesharecdn.com/lecture3perlfreebsdadministration-110718172129-phpapp01/85/Lecture-3-Perl-FreeBSD-administration-24-320.jpg)
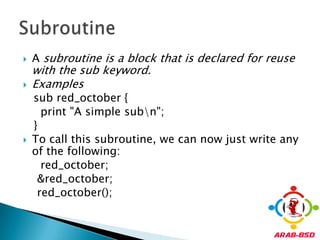
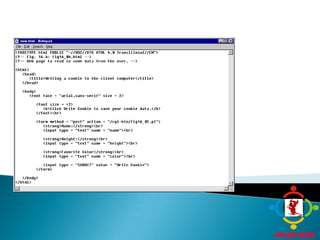
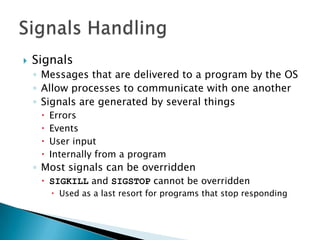
![Exclusive Locking Example 1 #!/usr/bin/perl 2 # Fig. 10.11: fig10_11.pl 3 # Logs visitors to web site. 4 5 use strict; 6 use warnings; 7 use CGI qw( :standard ); 8 use Fcntl qw( :flock ); 9 10 my @vars = 11 qw( REMOTE_ADDR REMOTE_PORT REQUEST_URI QUERY_STRING ); 12 my @stuff = @ENV{ @vars }; 13 my $info = join( " | ", @stuff ); 14 15 open( FILE, "+>>log.txt" ) 16 or die( "Could not open log.txt: $!" ); 17 flock( FILE, LOCK_EX ) 18 or die( "Could not get exclusive lock: $!" ); 19 print( FILE "$info\n\n" ); 20 flock( FILE, LOCK_UN ) or die( "Could not unlock file: $!" ); 21 22 close( FILE ); 23 24 if ( $stuff[3] ne "" ) { 25 print( header( -Refresh=> '5; URL=http://www.google.com' ) ); 26 print( start_html( "log.txt" ) ); 27 print( h1( "Welcome to Deitel & Associates, $stuff[3]!\n" ) ); 28 print( p( i( "You will now be redirected to our home page." ) ) ); 29 }](https://image.slidesharecdn.com/lecture3perlfreebsdadministration-110718172129-phpapp01/85/Lecture-3-Perl-FreeBSD-administration-30-320.jpg)

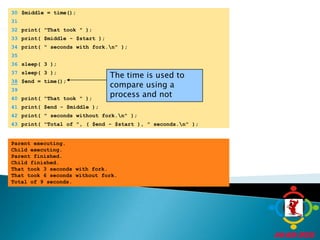
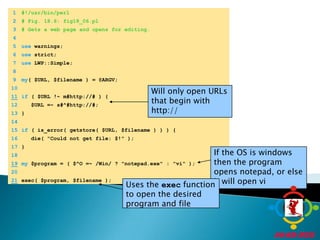
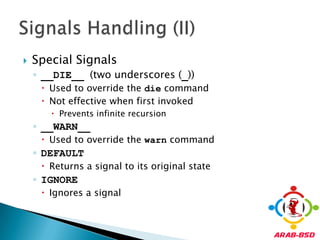
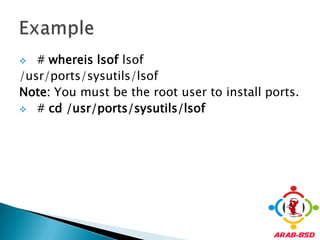
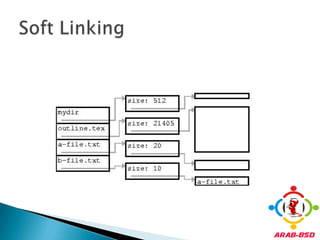
![1 #!/usr/bin/perl 2 # Fig. 11.2: fig11_02.pl 3 # A program that uses file tests 4 5 use strict; 6 use warnings; 7 8 foreachmy $file ( @ARGV ) { 9 print( "Checking $file: " ); 10 11 if ( -e $file ) { # does file exist? 12 print( "$file exists!\n" ); 13 14 if ( -f $file ) { # is the file a plain file? 15 print( "The file $file is:" ); 16 print( " executable" ) if ( -x $file ); # executable? 17 print( " readable" ) if ( -r $file ); # readable? 18 print( " writable" ) if ( -w $file ); # writable? 19 print( "\n" ); 20 print( "It is ", -s $file, " bytes.\n" ); # size 21 my @time = timeconv( -A $file ); # accessed 22 print( "Last accessed at $time[0] days, ", 23 "$time[1] hours, $time[2] minutes ", 24 "and $time[3] seconds.\n" ); 25 @time = timeconv( -M $file ); # modified 26 print( "Last modified at $time[0] days, ", 27 "$time[1] hours, $time[2] minutes, ", 28 "and $time[3] seconds ago.\n" ); 29 }](https://image.slidesharecdn.com/lecture3perlfreebsdadministration-110718172129-phpapp01/85/Lecture-3-Perl-FreeBSD-administration-34-320.jpg)
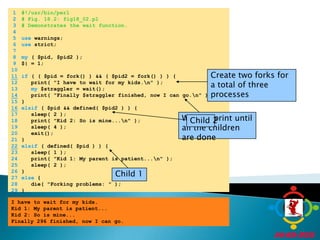
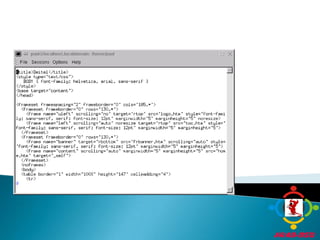
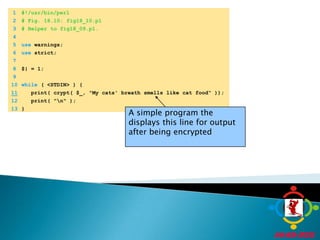
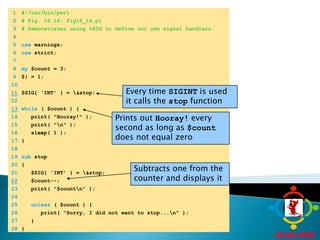
![1 #!/usr/bin/perl 2 # Fig. 18.8: fig18_08.pl 3 # Demonstrates using backticks. 4 5 use warnings; 6 use strict; 7 8 my $date; 9 my $version; 10 If the operating system is Windows then display the version and the date11if ( $^O =~ /Win/ ) { 12 $version = ( `ver` ); 13 $date = ( `date /t` ); 14 }15else {If the OS is not Windows then use a different method to display its version and date 16 $version = ( `uname -r -s` ); 17 $date = ( `date` ); 18 } 19 20 print( "The Operating system version is $version"); 21 print( "\n", $date );The Operating system version is Microsoft Windows 2000 [Version 5.00.2195] Tue 11/28/2000 The Operating system version is Linux 2.2.14-6.1.1 Tue Nov 28 06:26:43 EST 2000](https://image.slidesharecdn.com/lecture3perlfreebsdadministration-110718172129-phpapp01/85/Lecture-3-Perl-FreeBSD-administration-52-320.jpg)

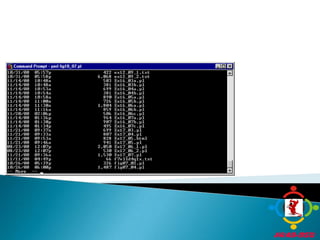
![make>> lsof_4.57D.freebsd.tar.gz doesn't seem to exist in /usr/ports/distfiles/. >> Attempting to fetch from file:/cdrom/ports/distfiles/.===> Extracting for lsof-4.57 ... [extraction output snipped] ... >> Checksum OK for lsof_4.57D.freebsd.tar.gz. ===> Patching for lsof-4.57 ===> Applying FreeBSD patches for lsof-4.57 ===> Configuring for lsof-4.57 ... [configure output snipped] ... ===> Building for lsof-4.57 ... [compilation snipped] ... #](https://image.slidesharecdn.com/lecture3perlfreebsdadministration-110718172129-phpapp01/85/Lecture-3-Perl-FreeBSD-administration-72-320.jpg)
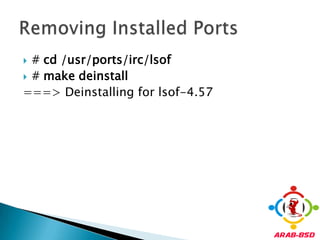
![# make install===> Installing for lsof-4.57 ... [install routines snipped] ... ===> Generating temporary packing list ===> Compressing manual pages for lsof-4.57 ===> Registering installation for lsof-4.57===> SECURITY NOTE: This port has installed the following binaries which execute with increased privileges.](https://image.slidesharecdn.com/lecture3perlfreebsdadministration-110718172129-phpapp01/85/Lecture-3-Perl-FreeBSD-administration-73-320.jpg)


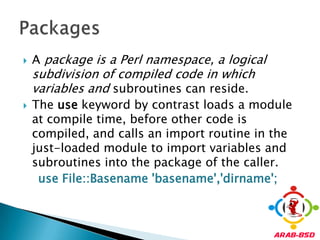
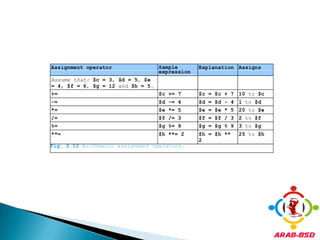
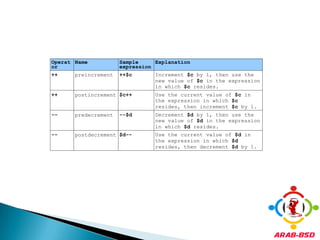
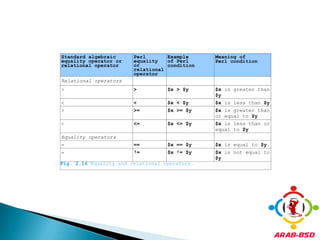
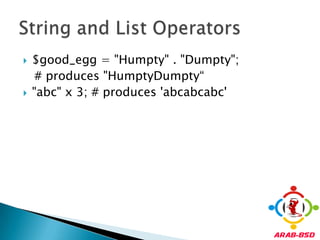
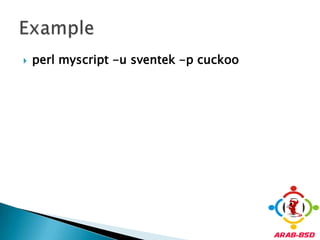
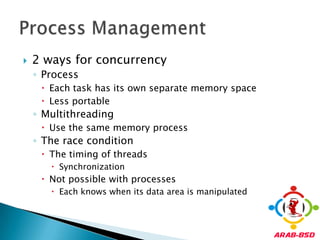
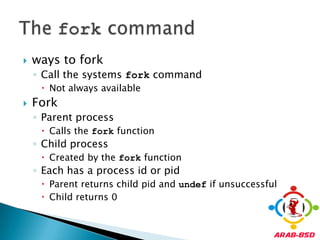
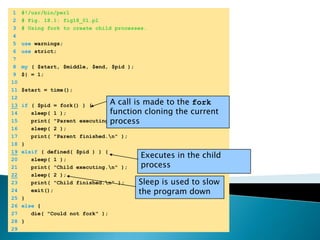
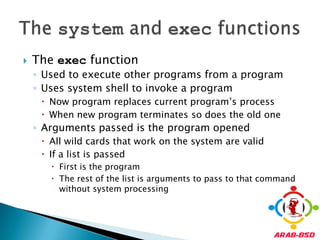
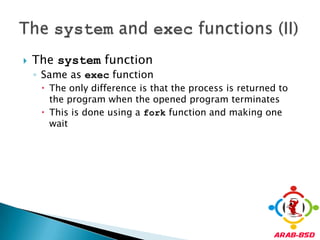
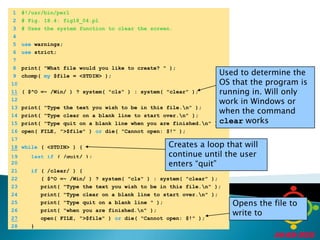
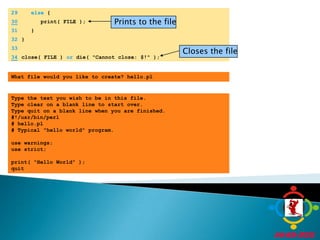
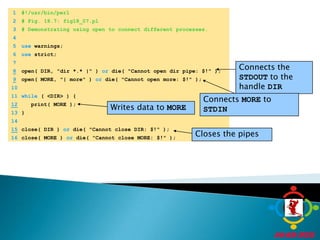
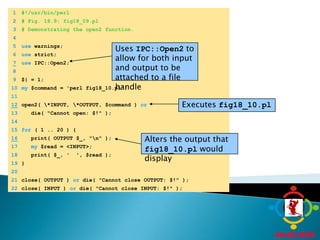
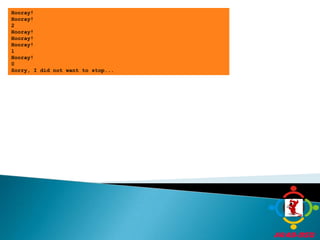
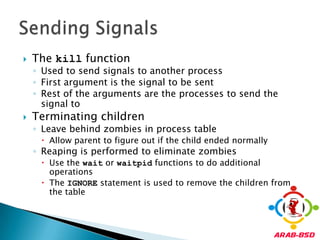
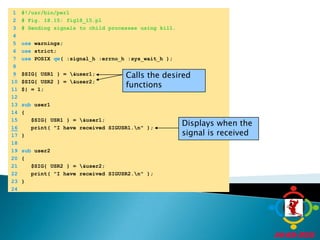
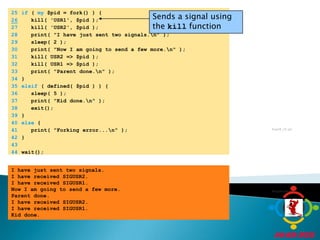
This document provides an overview of the Perl programming language. It discusses scalars, arrays, hashes, references, subroutines, packages, warnings, strictness, password encryption, file handling, command line arguments, and process management in Perl. Specific topics covered include using @ and $ prefixes for arrays and scalars, accessing elements of arrays and hashes, defining and calling subroutines, using crypt() for password hashing, opening/writing/reading files, and using fork() to create child processes. Examples of code are provided to demonstrate many of these Perl concepts.


![[ArabBSD] Unix Basics](https://cdn.slidesharecdn.com/ss_thumbnails/arabbsdchapter3-110809094416-phpapp01-thumbnail.jpg?width=640&height=640&fit=bounds)