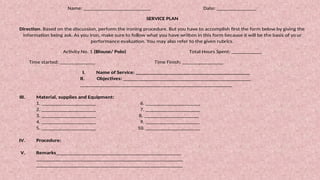
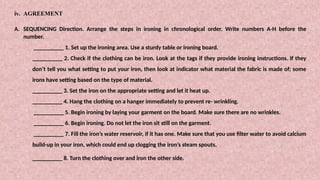
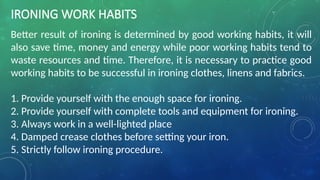
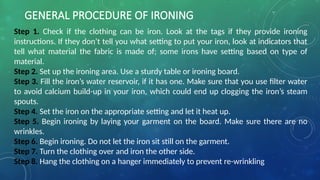
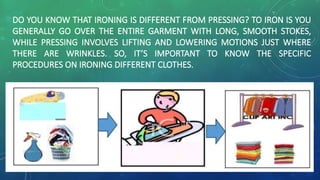
QUARTER IV
IRONING CLOTHES AND
LINENS
IRONING TOOLS,
SUPPLIES AND
EQUIPMENT FOR
CLOTHES AND LINENS
Lesson 4.1
OBJECTIVES:
• Enumerate different Supplies, materials and equipment
needed in ironing of Clothes and Linens.
• Discuss methods and techniques of ironing clothes and
linens.
• Perform ironing in accordance with standard operating
procedures and techniques.
ACTIVITY TITLE: “WORD HUNT”
• Direction: The puzzle below contains the
names of the different supplies, equipment used
in ironing etc. Look for the word. Encircle the
words, this may be arranged vertically or
horizontally. (10 pts.)
C L O T H E S X W P C B V N
R F L A T I N O A A G L H M
S A F Z X Q H G T N L O S C
S P R A Y E R V E T B U P W
F G Y T H U I S R S X S G A
G P P Q W D T R C B V E X L
T S O G H A N G E R Y O F I
F D L H T R U W Q D T U D N
D X O J Y E S D A G R G R E
I R O N B O A R D J W L Y N
VERY
GOOD!!!
Question and Answer! (Teacher-Student Interaction)
 How was our Activity today?
 Did you find it interesting? Why? Why Not?
 What would be your basis in finding the correct
answer every question/s imposed?
 Did ironing clothes is necessary to obtain or not?
 How relevant ironing clothes in our daily life?
Activity Title: Enlighten me!
• Direction: Name the Tools and Equipment below, give their specific
functions and uses. Your answer should consist of 3-5 sentences
every tools.
• Not following instructions will be deducted 2 points. 5 points
each.
Ironing board- A long, narrow
padded board, often with
collapsible supporting legs, used
as a working surface for ironing.
Flat Iron - Home appliance
consisting of a flat metal base
that is heated and used to
smooth cloth
Sprayer - A fine jet of liquid
discharged from a pressurized
container. To damp clothes.
Clothes hanger- is a device in
the shape of human shoulders
designed to facilitate the
hanging of
Traditional Dry Ironing
• The most conventional and oldest
method for flattening creased fabric is
with a dry iron.
• It is a very simple machine with not
many functionalities.
• You can only control the temperature
and very often you may need to use a
spray bottle if you are ironing more
delicate items or the creases are too
deep
Rotary Press
• Rotary ironing presses are used in
commercial settings.
• Those machines save time as they
can easily straighten larger pieces of
fabric like bed sheets, shirts,
dresses and other pieces of
clothing.
• They have an array of settings,
which require some in depth
knowledge, but do a great job.
Steam Ironing
• Most households use steam irons.
• They have much more functionalities than the
traditional dry hot iron and can be used on a lot
more fabrics.
• The superpower of those irons, of course, is the
steam which successfully flattens any creases on
both delicate and thick fabrics.
• Lace underwear would likely be ruined if ironed
on high temperature and without steam.
• Some professional ironing services also use steam
iron for shirts and other clothing items.
Mobile Steamers
• Mobile steamers are perfect for vertical ironing.
• In most cases, this could be extra thin and delicate
fabrics, such as silk, tulle, chiffon.
• Evening dresses and tuxedos, fine curtains, sheer
shirts and other garments love a mobile steamer. This
is also the favorite tool of fashion designers. They use
it to straighten any last-minute imperfections on their
creations, seconds before the models walk on the
runway.
IRONING WORK HABITS
Better result of ironing is determined by good working habits, it will
also save time, money and energy while poor working habits tend to
waste resources and time. Therefore, it is necessary to practice good
working habits to be successful in ironing clothes, linens and fabrics.
1. Provide yourself with the enough space for ironing.
2. Provide yourself with complete tools and equipment for ironing.
3. Always work in a well-lighted place
4. Damped crease clothes before setting your iron.
5. Strictly follow ironing procedure.
LESSON 4.2
IRONING METHODS
AND TECHNIQUES
• Using clean and well-ironed linens can add beauty and good
aura in our home that’s why we should know how to take
good care of our clothes and part of it is ironing.
• It is good that in this early stage you will learn and
experience how to iron clothes correctly. Proper ironing give
a lot of benefits, this could save money, time and effort.
• This lesson will provide you knowledge and skills in ironing
clothes, linen and fabrics.
GENERAL PROCEDURE OF IRONING
Step 1. Check if the clothing can be iron. Look at the tags if they provide ironing
instructions. If they don’t tell you what setting to put your iron, look at indicators that
tell what material the fabric is made of; some irons have setting based on type of
material.
Step 2. Set up the ironing area. Use a sturdy table or ironing board.
Step 3. Fill the iron’s water reservoir, if it has one. Make sure that you use filter water
to avoid calcium build-up in your iron, which could end up clogging the iron’s steam
spouts.
Step 4. Set the iron on the appropriate setting and let it heat up.
Step 5. Begin ironing by laying your garment on the board. Make sure there are no
wrinkles.
Step 6. Begin ironing. Do not let the iron sit still on the garment.
Step 7. Turn the clothing over and iron the other side.
Step 8. Hang the clothing on a hanger immediately to prevent re-wrinkling
DO YOU KNOW THAT IRONING IS DIFFERENT FROM PRESSING? TO IRON IS YOU
GENERALLY GO OVER THE ENTIRE GARMENT WITH LONG, SMOOTH STOKES,
WHILE PRESSING INVOLVES LIFTING AND LOWERING MOTIONS JUST WHERE
THERE ARE WRINKLES. SO, IT’S IMPORTANT TO KNOW THE SPECIFIC
PROCEDURES ON IRONING DIFFERENT CLOTHES.
SPECIFIC PROCEDURE OF IRONING
SHIRT/POLO
Step 1 Unbutton the shirt all the way; don't forget the sleeves and collar.
Step 2 Lay the shirt flat on the ironing board.
Step 3 Start by ironing the back of the shirt; lay it "face down".
Step 4 Move the iron up and down, working your way along the shirt. Don't
keep the surface of the iron on the fabric for more than a few seconds,
or else your shirt will burn.
Step 5 Once you're done ironing the back, work your way along each side of
the article, by gradually rotating the shirt to each side of the ironing
board.
Step 6 Now on to the sleeves. Lay the shirt on the ironing board so that the
sleeve you are ironing is parallel to the ironing board.
IRONING PANTS PROCEDURE:
Step 1: Check the tag of your pants to ensure you can iron the
material. Washing instructions are listed on the garment tag of your
pants. If it is unsafe to use an iron on your pants, it will list this with
the washing instructions. The garment tag also explains what heat
setting to use when ironing your pants.
Step 2:
Use an ironing board for best results. While you can iron on nearly any flat
surface, an ironing board makes it easy to smooth away any wrinkles. Adjust the
ironing board to a comfortable height, and make sure the legs are locked before
you start ironing.
For instance, you can place your pant leg around the narrow end to iron to
remove stubborn wrinkles.
Alternatively, use a table with a fire-resistant tablecloth if you don’t have an
ironing board handy.
Step 3: Choose your desired temperature setting. Most irons
indicate temperature based on the material of your pants. Turn on
the iron, and then adjust the dial or indicator to the temperature
you’d like to use.
For instance, wool pants should be ironed on a lower temperature
than cotton pants.
Denim pants require a high heat setting and steam.
Step 4: Start by ironing the pockets to prevent further wrinkles.
If your pockets are wrinkled and you iron over them, you can
easily create more wrinkles. To prevent this, pull the pocket inside
out, and press it flat with the iron. Do this for both of the front
and back pockets.
Step 4: Smooth out the waistband and top section.
Place your iron across the waistband, and let it sit for 2-5 seconds.
Then, lift up on the iron, rather than moving it across the top. This
helps your pants lay flat. Once the waistband is wrinkle-free, you
can tuck the pockets back inside your pants.
Do this for the front and back of the waistband.
Step 5: Lay your pants lengthwise across the ironing board to iron
the legs.
Move the iron back and forth across 1 pant leg at a time, starting
from top to bottom. Continually move the iron across the pant leg
until the fabric is free of wrinkles or creases. Your pants should be
parallel with the ironing board when you do this, and both legs
should face the same direction.
Don’t forget to iron the front and back of your pants!
Step 6: Fold your pants at the crease to easily iron it. Many classic
dress pants have a crease down the center of the leg. To create this
or follow your existing fold, lay 1 pant leg on the ironing board so
that the inseams are directly over each other. Press the iron down at
the top and bottom of the leg, and then fill in space by pressing the
rest of the crease between the 2 iron points.[5]
• Ensure the inseams are lined up as you do this to create a
smooth, straight crease.
• Your crease should stop approximately at the bottom of the
pockets on the front of the leg.
Step 7: Let your pants cool down for 2-5 minutes.
Before you hang or fold your pants, let them sit on your ironing
board for a few minutes until they are cool to the touch. If you fold
your pants before they cool, you can create additional creases or
wrinkles.
Step 8: Hang your pants to keep them wrinkle-free.
If you have a pants hanger, you can simply secure each side to the
waistband of your pants. If using a shirt hanger, fold the pants in half.
Then, drape the pants over top of the bottom of the hanger, and
place the hanger in your closet.
• If there is a crease, fold the pants along the crease.
• If there is not a crease, you can fold them in half long ways.
Step 9: Fold your pants to store them in a dresser or drawer.
Hanging is the best way to ensure your clothes don’t get wrinkled,
but you can also fold up your pants and store them elsewhere. Bring
the hem of the pants to the waistband to fold them in half. Then,
place them in your closet.[7]
Alternatively, fold your pants in thirds if you need to save space. Bring
the hem of the pants towards the crotch, then fold the waistband to
the folded edge you just made.
“ACTUAL DEMONSTRATION”
• The Students will be performing Iron Clothes in the School, they
need to demonstrate the proper way of Ironing Clothes such as the
Blouse/Dress and Pants for Girls, and Polo and Pants for Boys.
• The students are required to bring their Specific Clothes since that
would be their Materials to Accomplish the tasks.
• Student/s who did not bring any of this cannot perform the Final
Demonstration and will have NO GRADES.
• They will perform this INDIVIDUALLY. If they cannot execute this on
their Assigned Date, I will not give them another chance to comply.
SCORING RUBRICS FOR IRONING POLO AND PANTS
30% Highly Skilled (30-29) Skilled (28-27) Moderately Skilled (26-25) Unskilled (24-23) No attempt
Proper and effective use
of tools, equipment, and
materials
Appropriate and effective
selection, preparation and use of
materials and tools /equipment all
the time.
Appropriate and effective
selection, preparation and
use of materials and tools/
equipment most of the time
Appropriate and effective
selection, preparation and use
of materials and
tools/equipment some of the
time.
Never selects, prepares
and use appropriate
materials and tools/
equipment
No attempt to use
tools/ equipment to
task given
30% (30-29) (28-27) (26-25) (24-23) (22-21)
Work Application
Procedure
Systematic application of all work
procedure all the time even
without proper supervision
Systematic application of
work procedure most of
the time with minimum
supervision
Systematic application of work
procedure some of the time
with constant supervision
Never follows systematic
application of procedure
and highly development
on supervision
No attempt to apply
procedure to the task
given
25% (25-24) (23-22) (21-20) (19-18) (17-16)
Safety and security work
habits
Highly self-motivated and
observes all safety and security
precautions all the time
Self-motivated and
observes most safety and
security precautions most
of the time in work
Self- motivated and observes
sometimes some of the safety
and security precautions in
work
Needs to be motivated
and does not observe
safety and security
precaution in work
Not motivated and
totally disregards safety
and security
precautions in work
15% (15-14) (13-12) (11-10) (9-8) (7-6)
Speed/Time Finished the work ahead of time Finished the work on time Finished the work close to
given time
Finished the work beyond
the given time. No work at all
Name: _________________________ Date: _______________
SERVICE PLAN
Direction. Based on the discussion, perform the ironing procedure. But you have to accomplish first the form below by giving the
information being ask. As you iron, make sure to follow what you have written in this form because it will be the basis of yo ur
performance evaluation. You may also refer to the given rubrics.
Activity No. 1 (Blouse/ Polo) Total Hours Spent: ___________
Time started: _____________ Time Finish: _______________
I. Name of Service: __________________________________________
II. Objectives: _______________________________________________
________________________________________________________
III. Material, supplies and Equipment:
1. ____________________ 6. ____________________
2. ____________________ 7. ____________________
3. ____________________ 8. ____________________
4. ____________________ 9. ____________________
5. ____________________ 10. ____________________
IV. Procedure:
V. Remarks______________________________________________
______________________________________________________
______________________________________________________
Name: _________________________ Date: _______________
SERVICE PLAN
Direction. Based on the discussion, perform the ironing procedure. But you have to accomplish first the form below by giving the
information being ask. As you iron, make sure to follow what you have written in this form because it will be the basis of your
performance evaluation. You may also refer to the given rubrics.
Activity No. 2 (Pants) Total Hours Spent: ___________
Time started: _____________ Time Finish: _______________
I. Name of Service: __________________________________________
II. Objectives: _______________________________________________
III. Material, supplies and Equipment:
1. ____________________ 6. ____________________
2. ____________________ 7. ____________________
3. ____________________ 8. ____________________
4. ____________________ 9. ____________________
5. ____________________ 10. ____________________
IV. Procedure:
V. Remarks______________________________________________
______________________________________________________
iv. AGREEMENT
A. SEQUENCING Direction. Arrange the steps in ironing in chronological order. Write numbers A-H before the
number.
__________ 1. Set up the ironing area. Use a sturdy table or ironing board.
__________ 2. Check if the clothing can be iron. Look at the tags if they provide ironing instructions. If they
don’t tell you what setting to put your iron, then look at indicator what material the fabric is made of; some
irons have setting based on the type of material.
__________ 3. Set the iron on the appropriate setting and let it heat up.
__________ 4. Hang the clothing on a hanger immediately to prevent re- wrinkling.
__________ 5. Begin ironing by laying your garment on the board. Make sure there are no wrinkles.
__________ 6. Begin ironing. Do not let the iron sit still on the garment.
__________ 7. Fill the iron’s water reservoir, if it has one. Make sure that you use filter water to avoid calcium
build-up in your iron, which could end up clogging the iron’s steam spouts.
__________ 8. Turn the clothing over and iron the other side.

IRONING-Q4.pptx.com.grade10.foreducation

  • 1.
  • 2.
    IRONING TOOLS, SUPPLIES AND EQUIPMENTFOR CLOTHES AND LINENS Lesson 4.1
  • 3.
    OBJECTIVES: • Enumerate differentSupplies, materials and equipment needed in ironing of Clothes and Linens. • Discuss methods and techniques of ironing clothes and linens. • Perform ironing in accordance with standard operating procedures and techniques.
  • 4.
    ACTIVITY TITLE: “WORDHUNT” • Direction: The puzzle below contains the names of the different supplies, equipment used in ironing etc. Look for the word. Encircle the words, this may be arranged vertically or horizontally. (10 pts.)
  • 5.
    C L OT H E S X W P C B V N R F L A T I N O A A G L H M S A F Z X Q H G T N L O S C S P R A Y E R V E T B U P W F G Y T H U I S R S X S G A G P P Q W D T R C B V E X L T S O G H A N G E R Y O F I F D L H T R U W Q D T U D N D X O J Y E S D A G R G R E I R O N B O A R D J W L Y N
  • 6.
  • 7.
    Question and Answer!(Teacher-Student Interaction)  How was our Activity today?  Did you find it interesting? Why? Why Not?  What would be your basis in finding the correct answer every question/s imposed?  Did ironing clothes is necessary to obtain or not?  How relevant ironing clothes in our daily life?
  • 8.
    Activity Title: Enlightenme! • Direction: Name the Tools and Equipment below, give their specific functions and uses. Your answer should consist of 3-5 sentences every tools. • Not following instructions will be deducted 2 points. 5 points each.
  • 9.
    Ironing board- Along, narrow padded board, often with collapsible supporting legs, used as a working surface for ironing. Flat Iron - Home appliance consisting of a flat metal base that is heated and used to smooth cloth
  • 10.
    Sprayer - Afine jet of liquid discharged from a pressurized container. To damp clothes. Clothes hanger- is a device in the shape of human shoulders designed to facilitate the hanging of
  • 11.
    Traditional Dry Ironing •The most conventional and oldest method for flattening creased fabric is with a dry iron. • It is a very simple machine with not many functionalities. • You can only control the temperature and very often you may need to use a spray bottle if you are ironing more delicate items or the creases are too deep
  • 12.
    Rotary Press • Rotaryironing presses are used in commercial settings. • Those machines save time as they can easily straighten larger pieces of fabric like bed sheets, shirts, dresses and other pieces of clothing. • They have an array of settings, which require some in depth knowledge, but do a great job.
  • 13.
    Steam Ironing • Mosthouseholds use steam irons. • They have much more functionalities than the traditional dry hot iron and can be used on a lot more fabrics. • The superpower of those irons, of course, is the steam which successfully flattens any creases on both delicate and thick fabrics. • Lace underwear would likely be ruined if ironed on high temperature and without steam. • Some professional ironing services also use steam iron for shirts and other clothing items.
  • 14.
    Mobile Steamers • Mobilesteamers are perfect for vertical ironing. • In most cases, this could be extra thin and delicate fabrics, such as silk, tulle, chiffon. • Evening dresses and tuxedos, fine curtains, sheer shirts and other garments love a mobile steamer. This is also the favorite tool of fashion designers. They use it to straighten any last-minute imperfections on their creations, seconds before the models walk on the runway.
  • 15.
    IRONING WORK HABITS Betterresult of ironing is determined by good working habits, it will also save time, money and energy while poor working habits tend to waste resources and time. Therefore, it is necessary to practice good working habits to be successful in ironing clothes, linens and fabrics. 1. Provide yourself with the enough space for ironing. 2. Provide yourself with complete tools and equipment for ironing. 3. Always work in a well-lighted place 4. Damped crease clothes before setting your iron. 5. Strictly follow ironing procedure.
  • 16.
  • 17.
    • Using cleanand well-ironed linens can add beauty and good aura in our home that’s why we should know how to take good care of our clothes and part of it is ironing. • It is good that in this early stage you will learn and experience how to iron clothes correctly. Proper ironing give a lot of benefits, this could save money, time and effort. • This lesson will provide you knowledge and skills in ironing clothes, linen and fabrics.
  • 18.
    GENERAL PROCEDURE OFIRONING Step 1. Check if the clothing can be iron. Look at the tags if they provide ironing instructions. If they don’t tell you what setting to put your iron, look at indicators that tell what material the fabric is made of; some irons have setting based on type of material. Step 2. Set up the ironing area. Use a sturdy table or ironing board. Step 3. Fill the iron’s water reservoir, if it has one. Make sure that you use filter water to avoid calcium build-up in your iron, which could end up clogging the iron’s steam spouts. Step 4. Set the iron on the appropriate setting and let it heat up. Step 5. Begin ironing by laying your garment on the board. Make sure there are no wrinkles. Step 6. Begin ironing. Do not let the iron sit still on the garment. Step 7. Turn the clothing over and iron the other side. Step 8. Hang the clothing on a hanger immediately to prevent re-wrinkling
  • 19.
    DO YOU KNOWTHAT IRONING IS DIFFERENT FROM PRESSING? TO IRON IS YOU GENERALLY GO OVER THE ENTIRE GARMENT WITH LONG, SMOOTH STOKES, WHILE PRESSING INVOLVES LIFTING AND LOWERING MOTIONS JUST WHERE THERE ARE WRINKLES. SO, IT’S IMPORTANT TO KNOW THE SPECIFIC PROCEDURES ON IRONING DIFFERENT CLOTHES.
  • 20.
    SPECIFIC PROCEDURE OFIRONING SHIRT/POLO Step 1 Unbutton the shirt all the way; don't forget the sleeves and collar. Step 2 Lay the shirt flat on the ironing board. Step 3 Start by ironing the back of the shirt; lay it "face down". Step 4 Move the iron up and down, working your way along the shirt. Don't keep the surface of the iron on the fabric for more than a few seconds, or else your shirt will burn. Step 5 Once you're done ironing the back, work your way along each side of the article, by gradually rotating the shirt to each side of the ironing board. Step 6 Now on to the sleeves. Lay the shirt on the ironing board so that the sleeve you are ironing is parallel to the ironing board.
  • 21.
    IRONING PANTS PROCEDURE: Step1: Check the tag of your pants to ensure you can iron the material. Washing instructions are listed on the garment tag of your pants. If it is unsafe to use an iron on your pants, it will list this with the washing instructions. The garment tag also explains what heat setting to use when ironing your pants.
  • 22.
    Step 2: Use anironing board for best results. While you can iron on nearly any flat surface, an ironing board makes it easy to smooth away any wrinkles. Adjust the ironing board to a comfortable height, and make sure the legs are locked before you start ironing. For instance, you can place your pant leg around the narrow end to iron to remove stubborn wrinkles. Alternatively, use a table with a fire-resistant tablecloth if you don’t have an ironing board handy.
  • 23.
    Step 3: Chooseyour desired temperature setting. Most irons indicate temperature based on the material of your pants. Turn on the iron, and then adjust the dial or indicator to the temperature you’d like to use. For instance, wool pants should be ironed on a lower temperature than cotton pants. Denim pants require a high heat setting and steam.
  • 24.
    Step 4: Startby ironing the pockets to prevent further wrinkles. If your pockets are wrinkled and you iron over them, you can easily create more wrinkles. To prevent this, pull the pocket inside out, and press it flat with the iron. Do this for both of the front and back pockets.
  • 25.
    Step 4: Smoothout the waistband and top section. Place your iron across the waistband, and let it sit for 2-5 seconds. Then, lift up on the iron, rather than moving it across the top. This helps your pants lay flat. Once the waistband is wrinkle-free, you can tuck the pockets back inside your pants. Do this for the front and back of the waistband.
  • 26.
    Step 5: Layyour pants lengthwise across the ironing board to iron the legs. Move the iron back and forth across 1 pant leg at a time, starting from top to bottom. Continually move the iron across the pant leg until the fabric is free of wrinkles or creases. Your pants should be parallel with the ironing board when you do this, and both legs should face the same direction. Don’t forget to iron the front and back of your pants!
  • 27.
    Step 6: Foldyour pants at the crease to easily iron it. Many classic dress pants have a crease down the center of the leg. To create this or follow your existing fold, lay 1 pant leg on the ironing board so that the inseams are directly over each other. Press the iron down at the top and bottom of the leg, and then fill in space by pressing the rest of the crease between the 2 iron points.[5] • Ensure the inseams are lined up as you do this to create a smooth, straight crease. • Your crease should stop approximately at the bottom of the pockets on the front of the leg.
  • 28.
    Step 7: Letyour pants cool down for 2-5 minutes. Before you hang or fold your pants, let them sit on your ironing board for a few minutes until they are cool to the touch. If you fold your pants before they cool, you can create additional creases or wrinkles.
  • 29.
    Step 8: Hangyour pants to keep them wrinkle-free. If you have a pants hanger, you can simply secure each side to the waistband of your pants. If using a shirt hanger, fold the pants in half. Then, drape the pants over top of the bottom of the hanger, and place the hanger in your closet. • If there is a crease, fold the pants along the crease. • If there is not a crease, you can fold them in half long ways.
  • 31.
    Step 9: Foldyour pants to store them in a dresser or drawer. Hanging is the best way to ensure your clothes don’t get wrinkled, but you can also fold up your pants and store them elsewhere. Bring the hem of the pants to the waistband to fold them in half. Then, place them in your closet.[7] Alternatively, fold your pants in thirds if you need to save space. Bring the hem of the pants towards the crotch, then fold the waistband to the folded edge you just made.
  • 32.
    “ACTUAL DEMONSTRATION” • TheStudents will be performing Iron Clothes in the School, they need to demonstrate the proper way of Ironing Clothes such as the Blouse/Dress and Pants for Girls, and Polo and Pants for Boys. • The students are required to bring their Specific Clothes since that would be their Materials to Accomplish the tasks. • Student/s who did not bring any of this cannot perform the Final Demonstration and will have NO GRADES. • They will perform this INDIVIDUALLY. If they cannot execute this on their Assigned Date, I will not give them another chance to comply.
  • 33.
    SCORING RUBRICS FORIRONING POLO AND PANTS 30% Highly Skilled (30-29) Skilled (28-27) Moderately Skilled (26-25) Unskilled (24-23) No attempt Proper and effective use of tools, equipment, and materials Appropriate and effective selection, preparation and use of materials and tools /equipment all the time. Appropriate and effective selection, preparation and use of materials and tools/ equipment most of the time Appropriate and effective selection, preparation and use of materials and tools/equipment some of the time. Never selects, prepares and use appropriate materials and tools/ equipment No attempt to use tools/ equipment to task given 30% (30-29) (28-27) (26-25) (24-23) (22-21) Work Application Procedure Systematic application of all work procedure all the time even without proper supervision Systematic application of work procedure most of the time with minimum supervision Systematic application of work procedure some of the time with constant supervision Never follows systematic application of procedure and highly development on supervision No attempt to apply procedure to the task given 25% (25-24) (23-22) (21-20) (19-18) (17-16) Safety and security work habits Highly self-motivated and observes all safety and security precautions all the time Self-motivated and observes most safety and security precautions most of the time in work Self- motivated and observes sometimes some of the safety and security precautions in work Needs to be motivated and does not observe safety and security precaution in work Not motivated and totally disregards safety and security precautions in work 15% (15-14) (13-12) (11-10) (9-8) (7-6) Speed/Time Finished the work ahead of time Finished the work on time Finished the work close to given time Finished the work beyond the given time. No work at all
  • 34.
    Name: _________________________ Date:_______________ SERVICE PLAN Direction. Based on the discussion, perform the ironing procedure. But you have to accomplish first the form below by giving the information being ask. As you iron, make sure to follow what you have written in this form because it will be the basis of yo ur performance evaluation. You may also refer to the given rubrics. Activity No. 1 (Blouse/ Polo) Total Hours Spent: ___________ Time started: _____________ Time Finish: _______________ I. Name of Service: __________________________________________ II. Objectives: _______________________________________________ ________________________________________________________ III. Material, supplies and Equipment: 1. ____________________ 6. ____________________ 2. ____________________ 7. ____________________ 3. ____________________ 8. ____________________ 4. ____________________ 9. ____________________ 5. ____________________ 10. ____________________ IV. Procedure: V. Remarks______________________________________________ ______________________________________________________ ______________________________________________________
  • 35.
    Name: _________________________ Date:_______________ SERVICE PLAN Direction. Based on the discussion, perform the ironing procedure. But you have to accomplish first the form below by giving the information being ask. As you iron, make sure to follow what you have written in this form because it will be the basis of your performance evaluation. You may also refer to the given rubrics. Activity No. 2 (Pants) Total Hours Spent: ___________ Time started: _____________ Time Finish: _______________ I. Name of Service: __________________________________________ II. Objectives: _______________________________________________ III. Material, supplies and Equipment: 1. ____________________ 6. ____________________ 2. ____________________ 7. ____________________ 3. ____________________ 8. ____________________ 4. ____________________ 9. ____________________ 5. ____________________ 10. ____________________ IV. Procedure: V. Remarks______________________________________________ ______________________________________________________
  • 36.
    iv. AGREEMENT A. SEQUENCINGDirection. Arrange the steps in ironing in chronological order. Write numbers A-H before the number. __________ 1. Set up the ironing area. Use a sturdy table or ironing board. __________ 2. Check if the clothing can be iron. Look at the tags if they provide ironing instructions. If they don’t tell you what setting to put your iron, then look at indicator what material the fabric is made of; some irons have setting based on the type of material. __________ 3. Set the iron on the appropriate setting and let it heat up. __________ 4. Hang the clothing on a hanger immediately to prevent re- wrinkling. __________ 5. Begin ironing by laying your garment on the board. Make sure there are no wrinkles. __________ 6. Begin ironing. Do not let the iron sit still on the garment. __________ 7. Fill the iron’s water reservoir, if it has one. Make sure that you use filter water to avoid calcium build-up in your iron, which could end up clogging the iron’s steam spouts. __________ 8. Turn the clothing over and iron the other side.