Download as PDF, PPTX


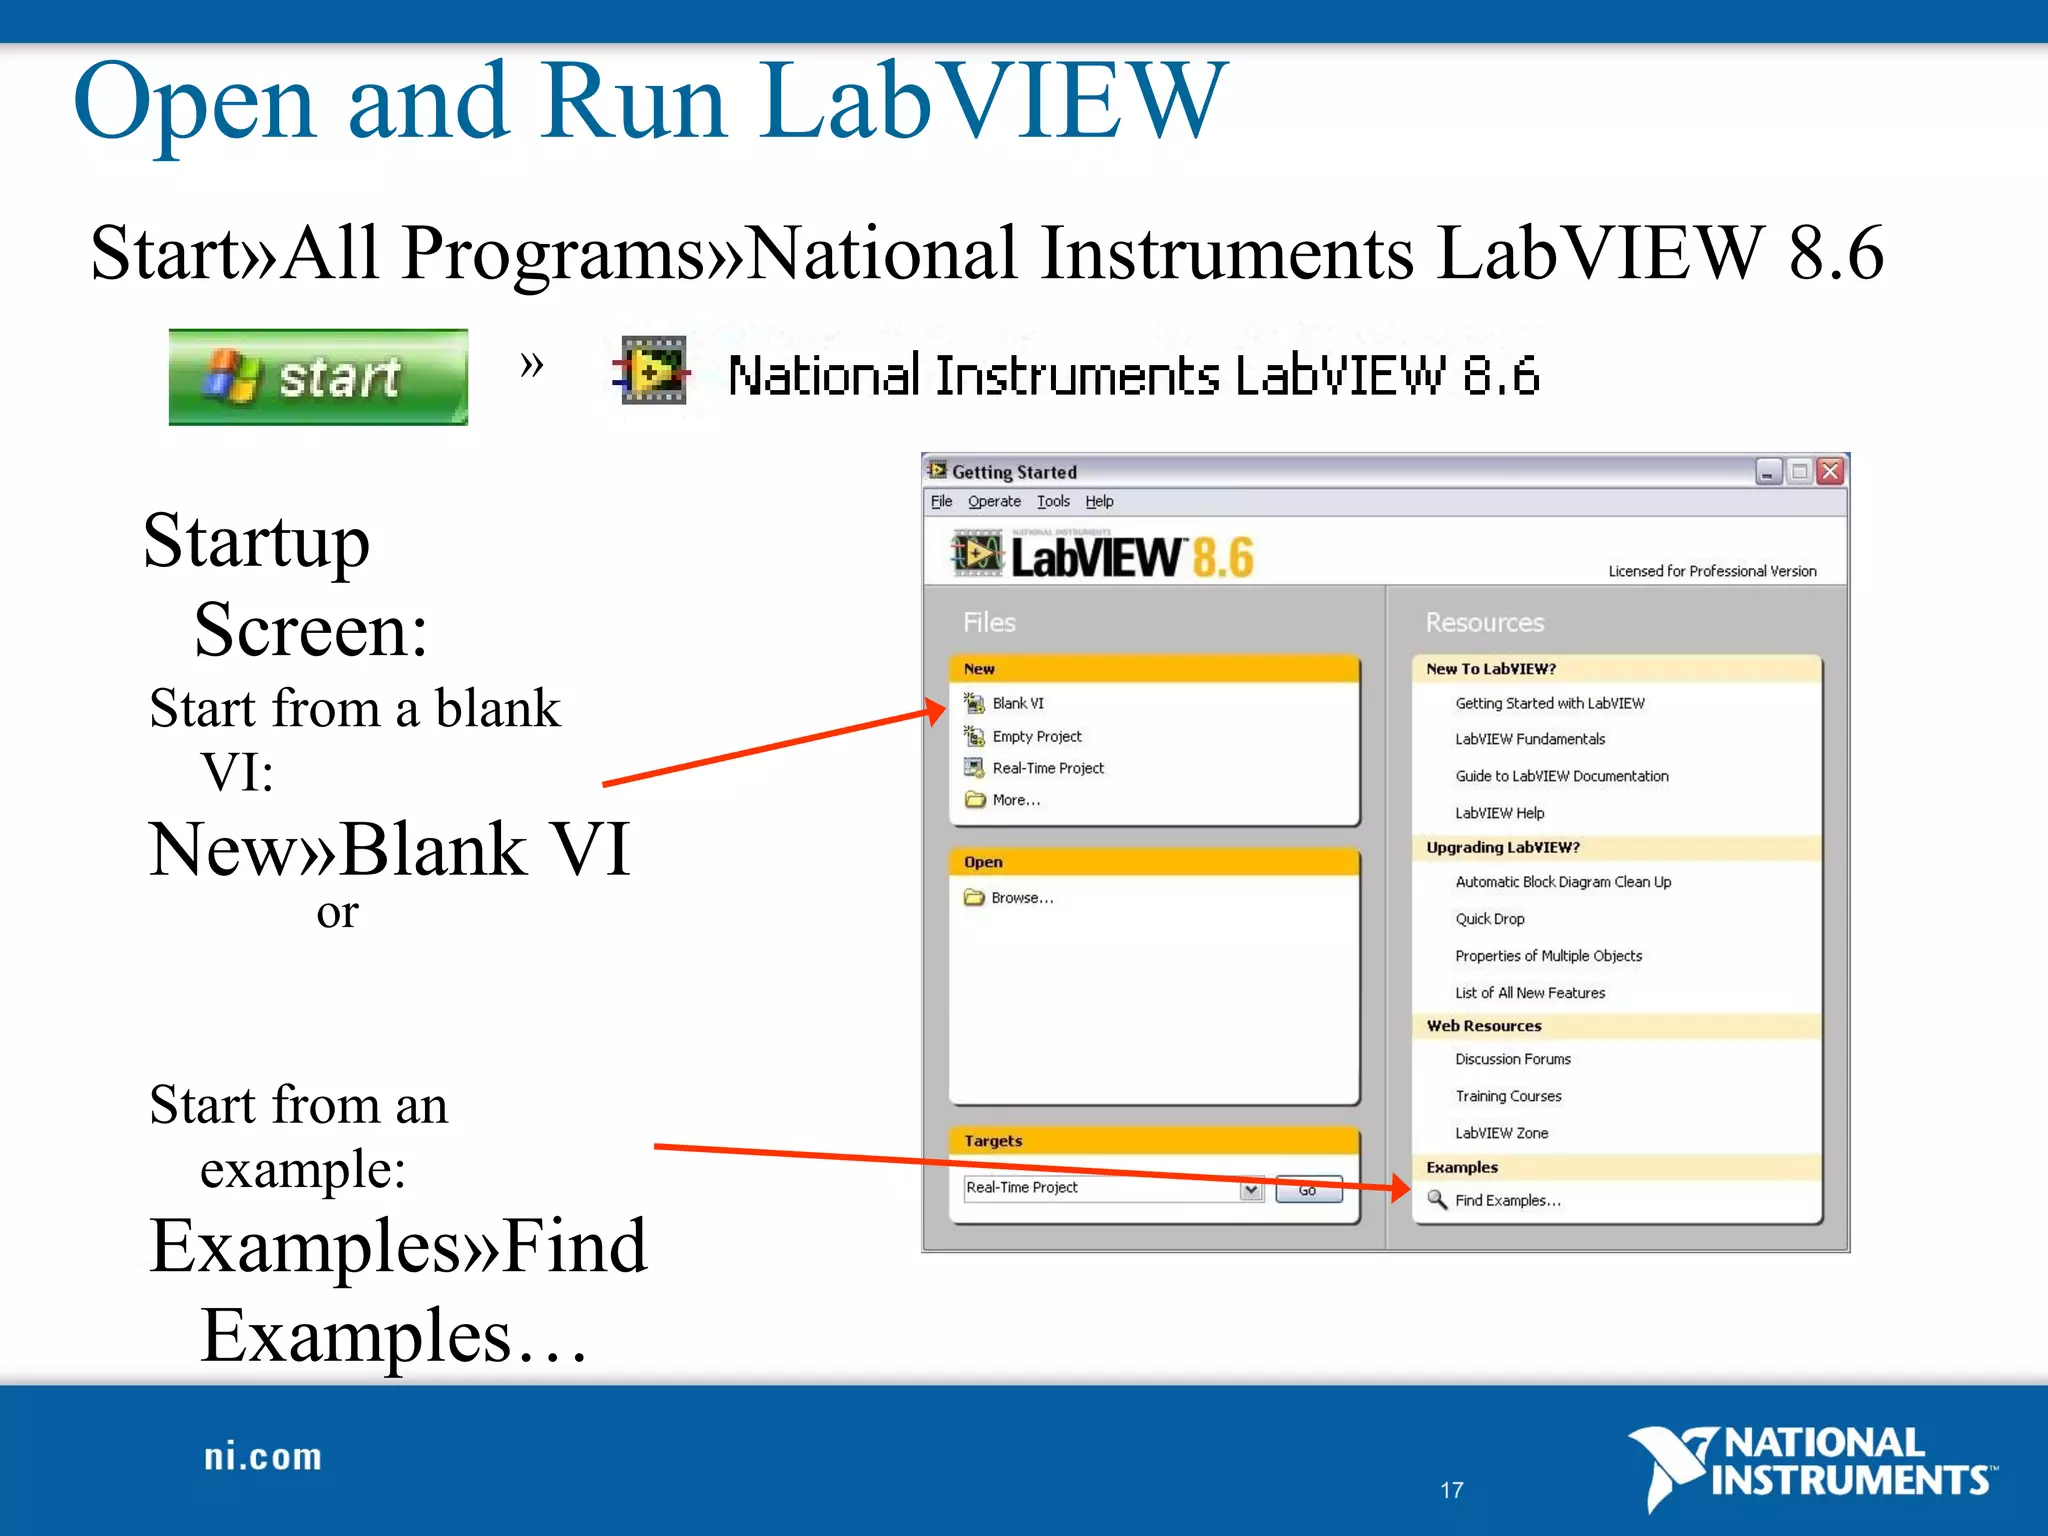

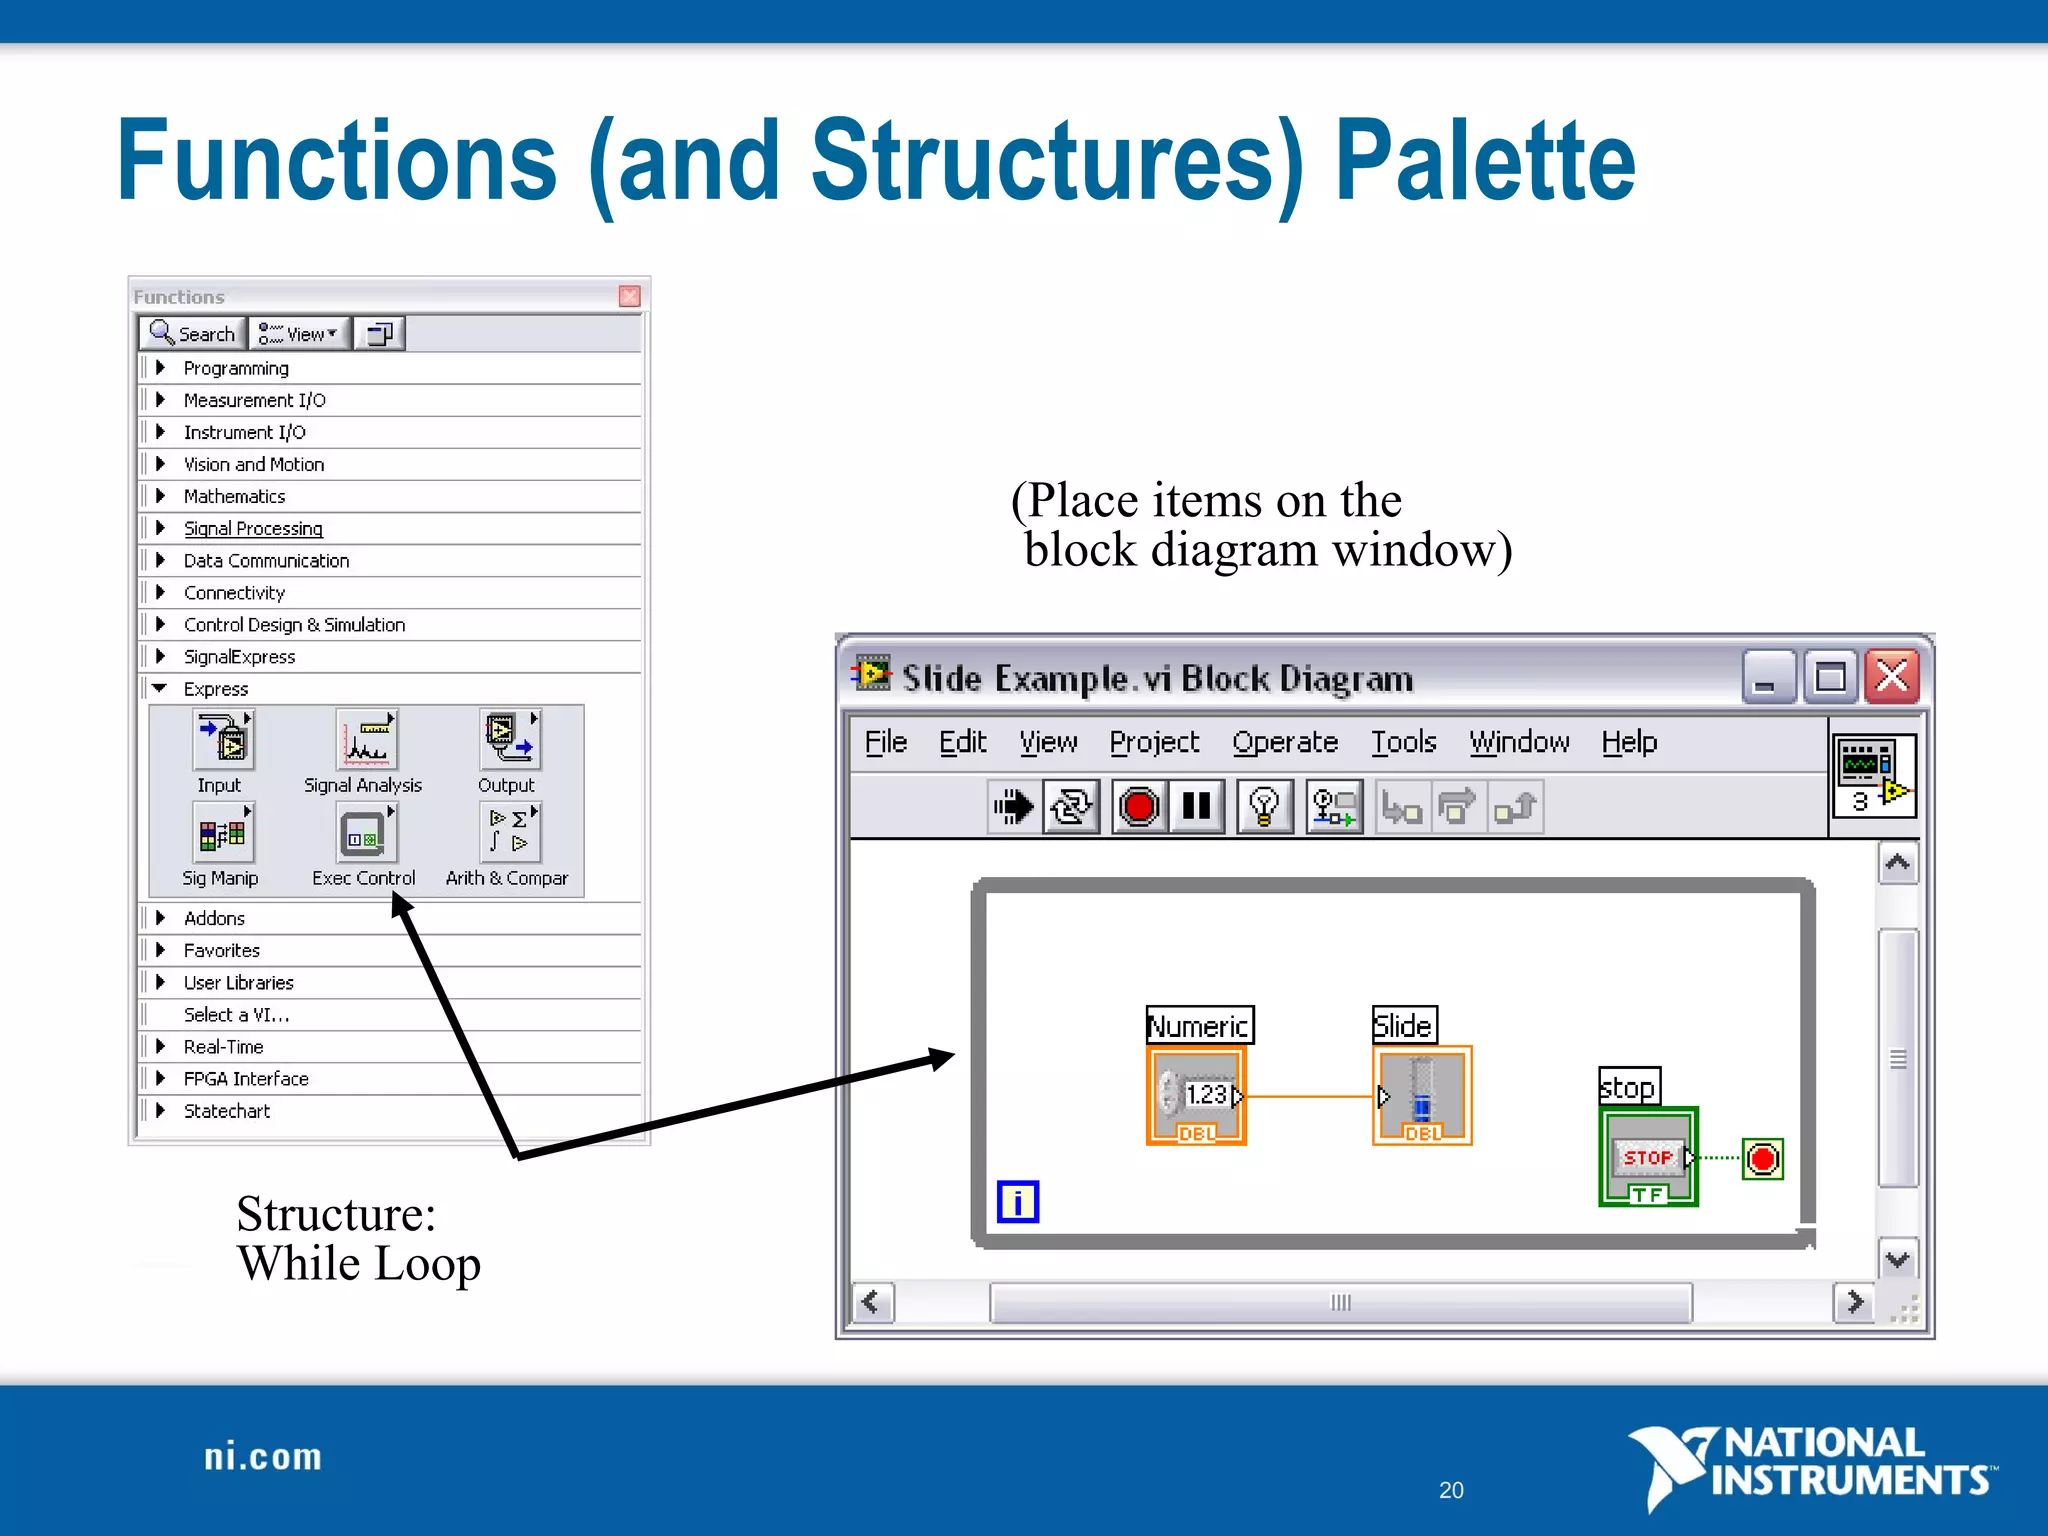
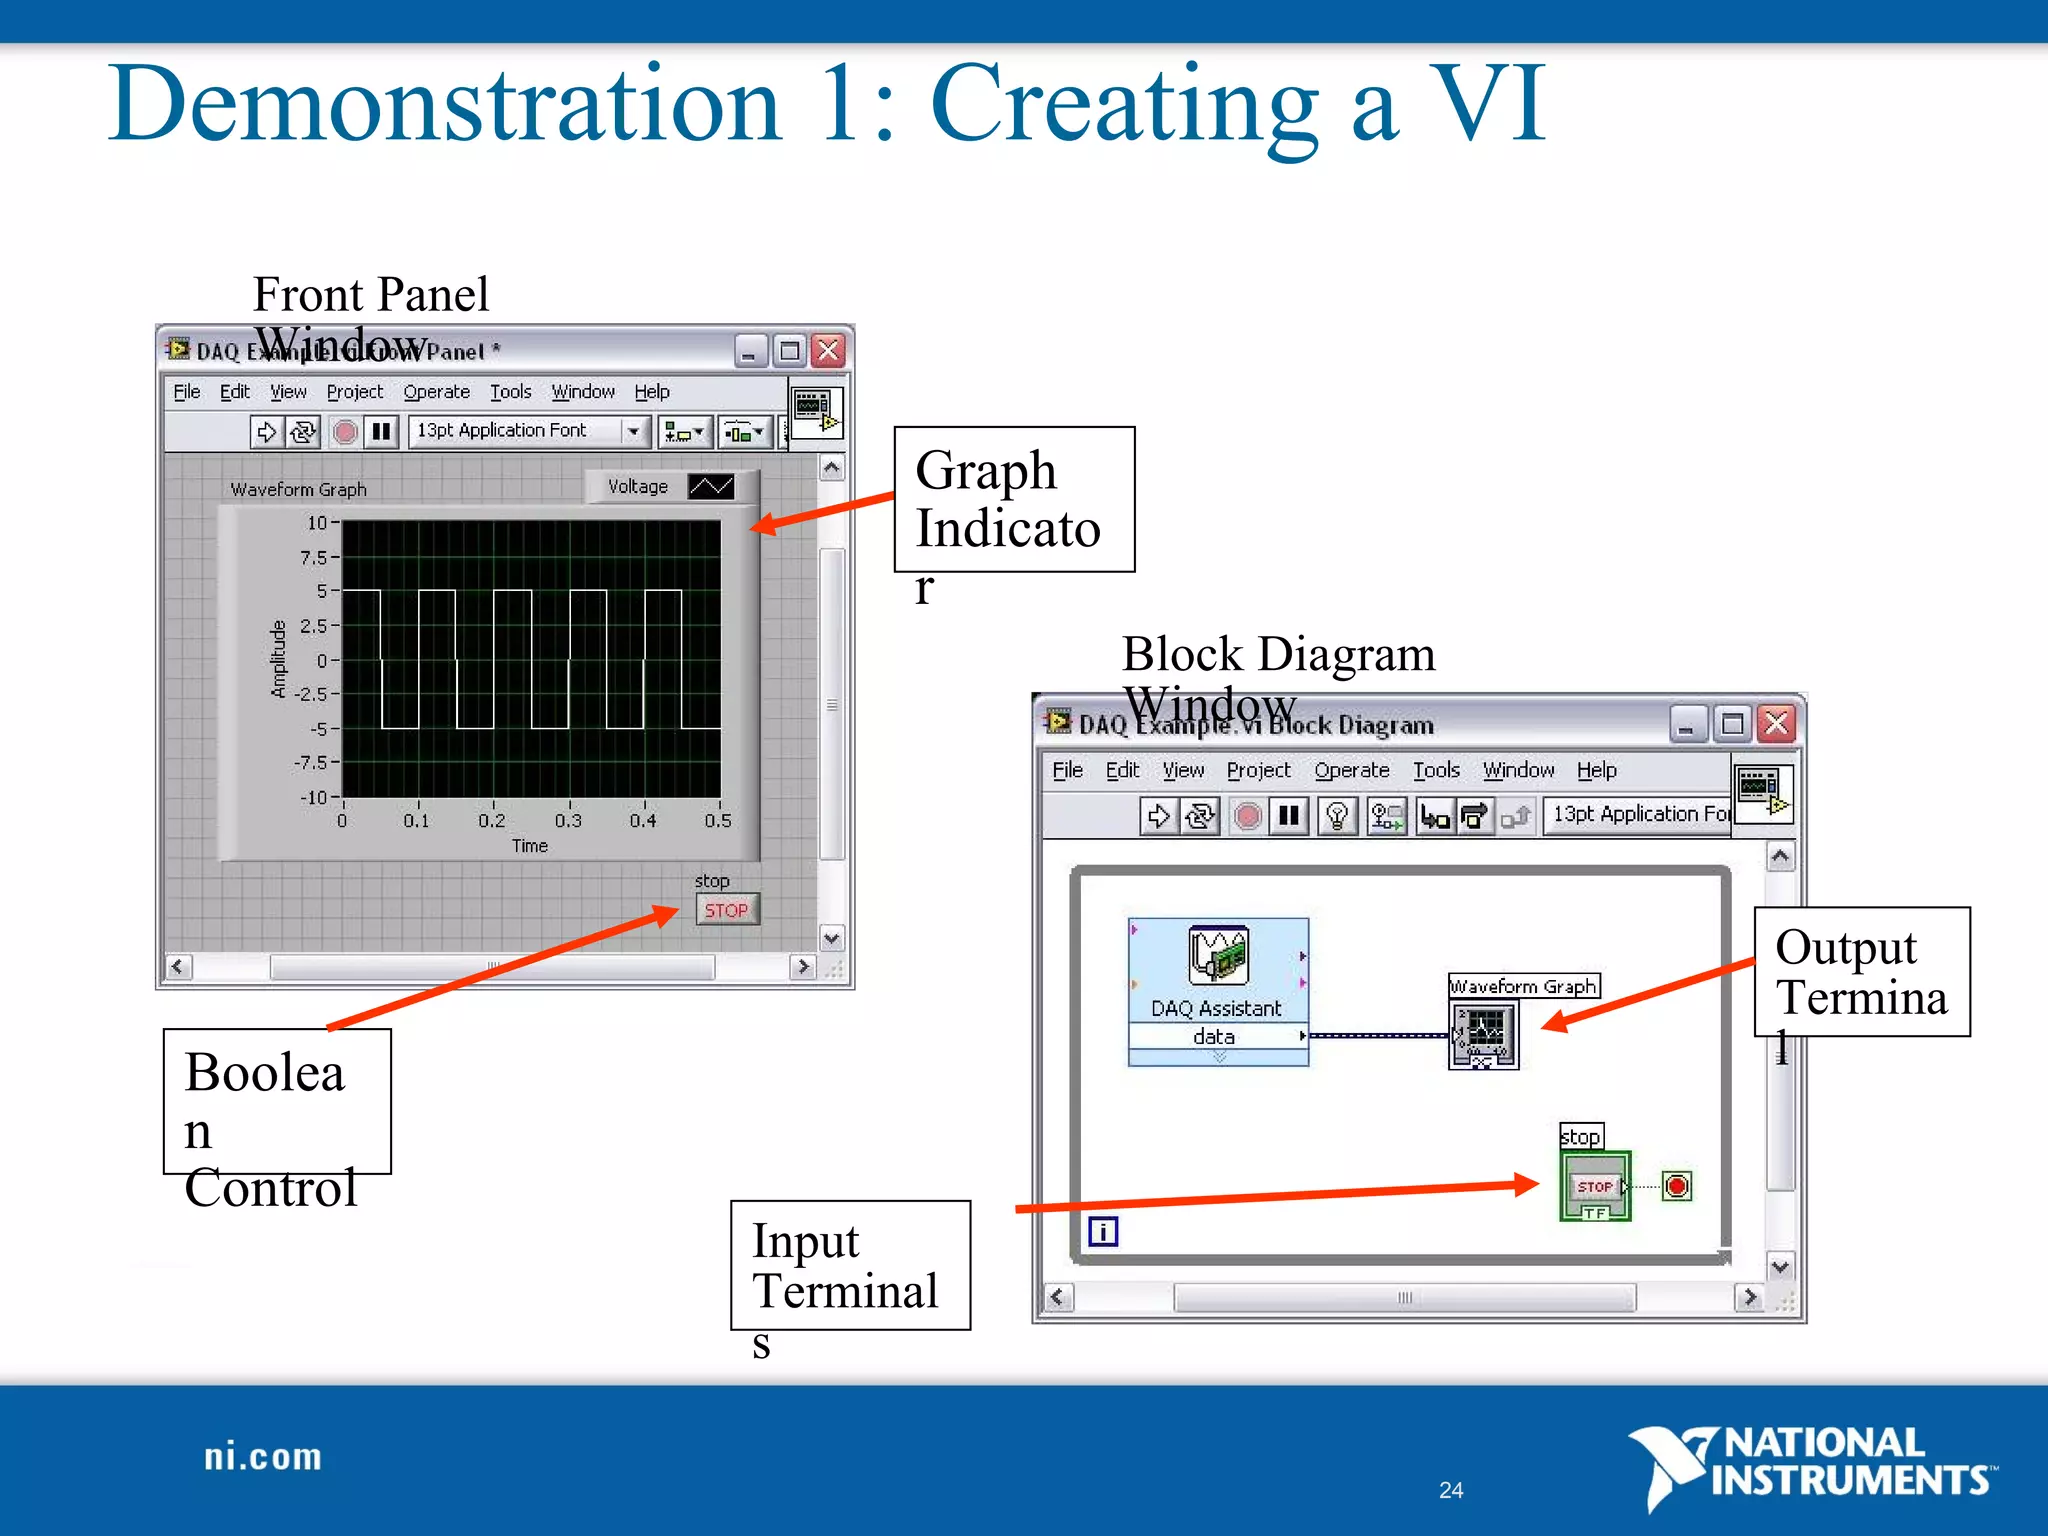

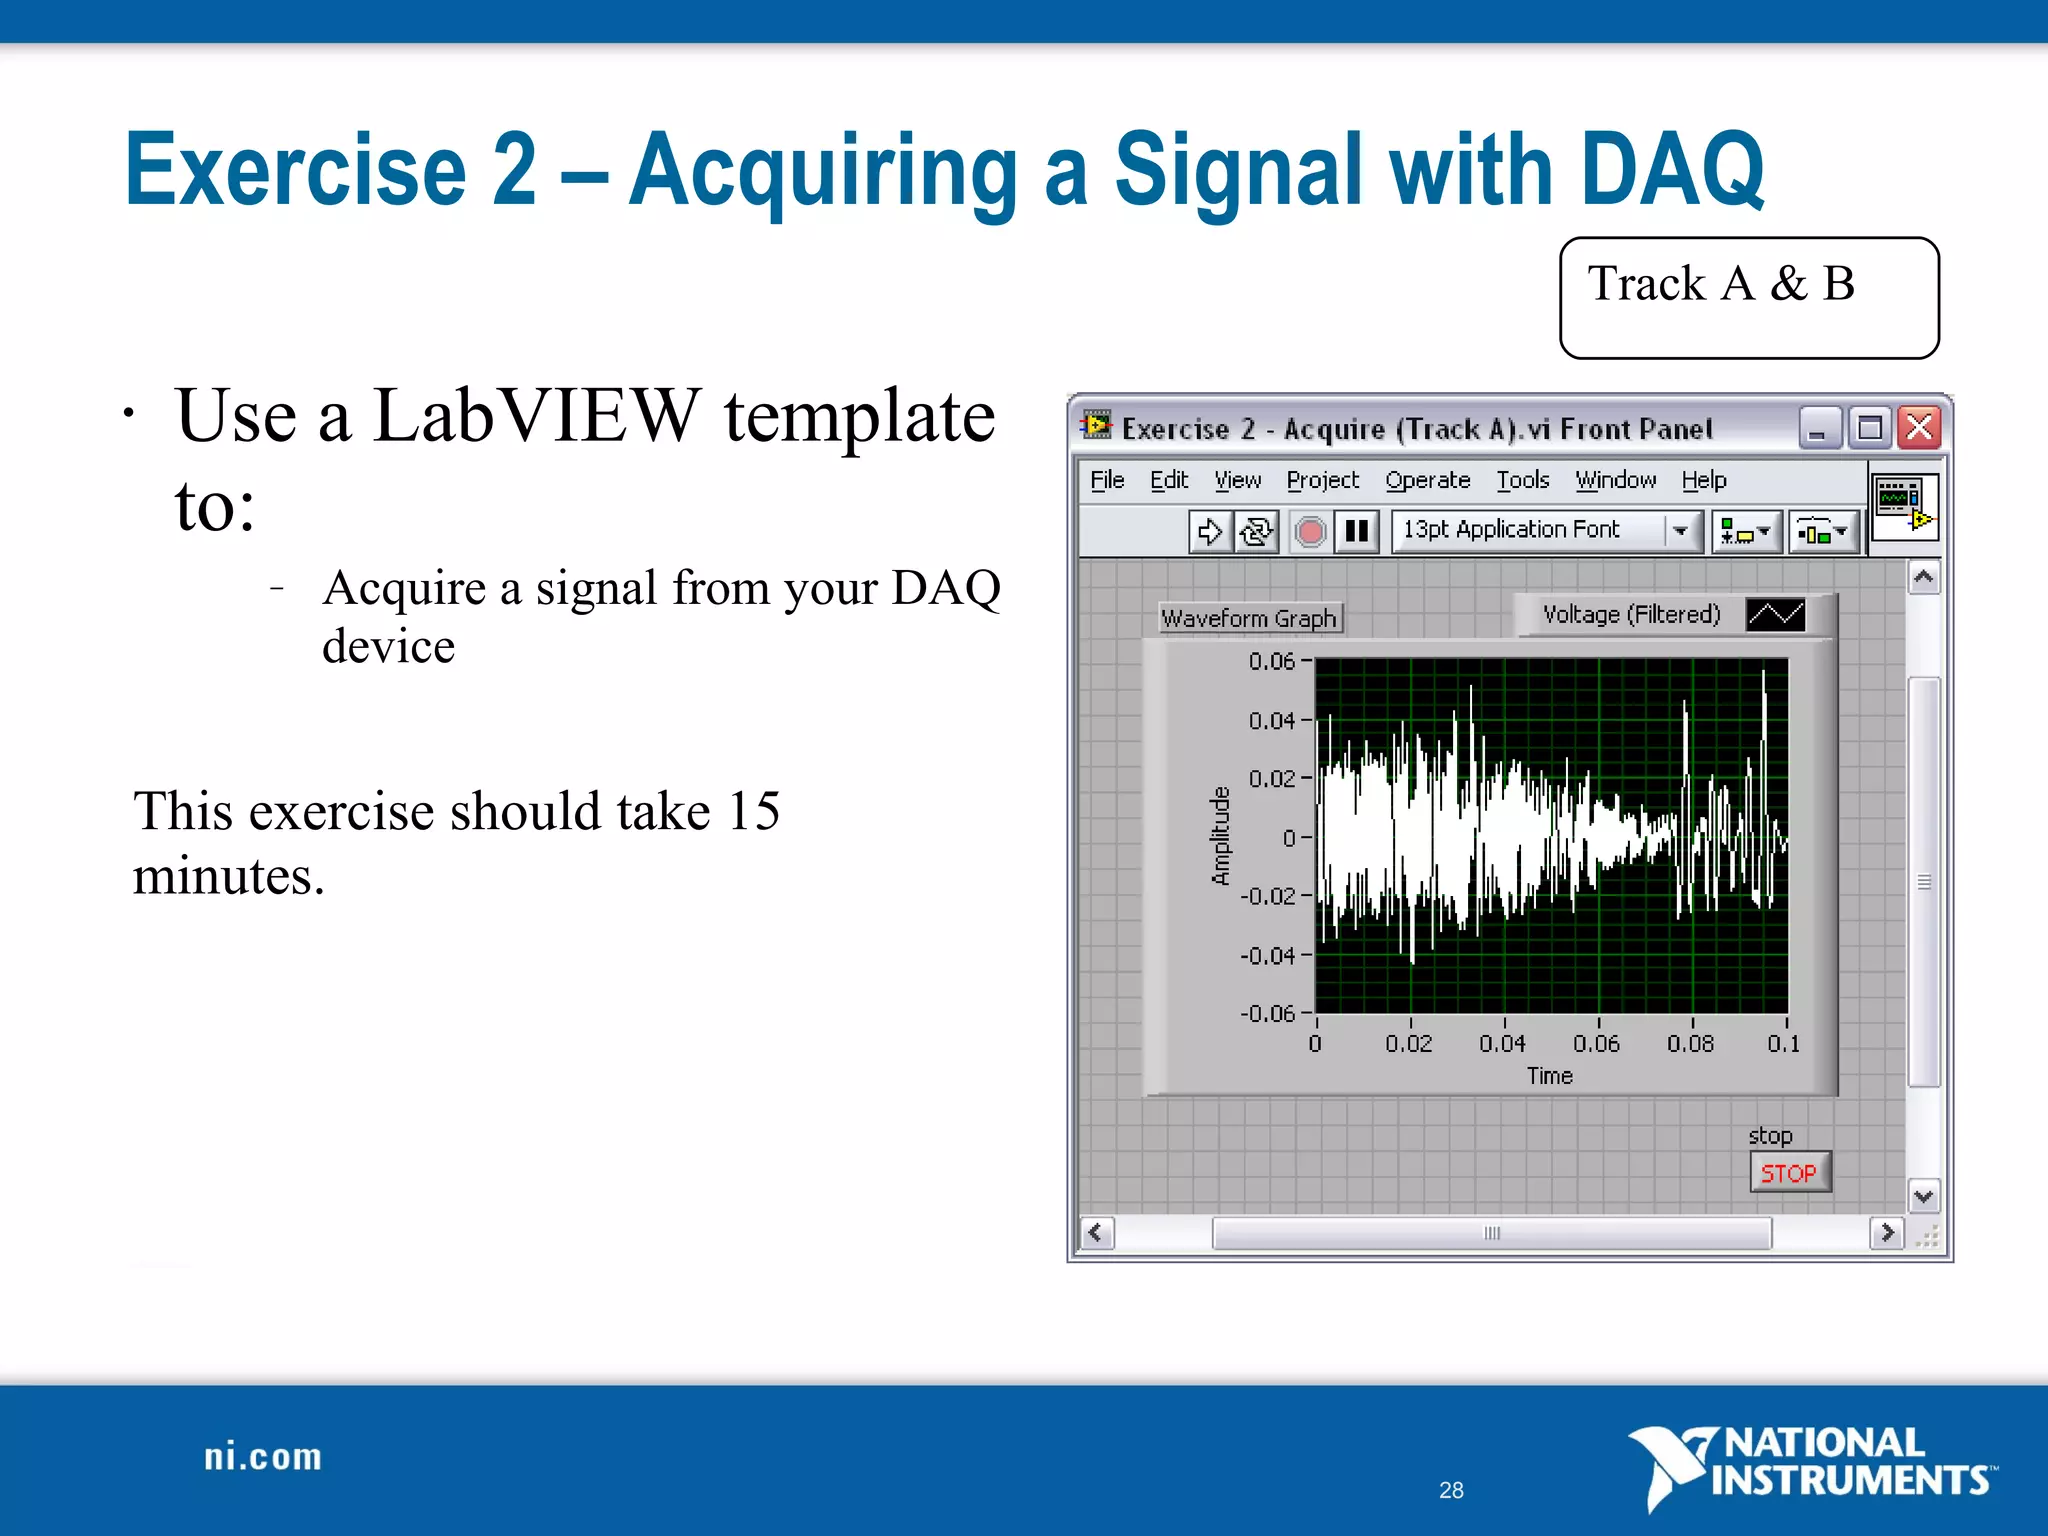


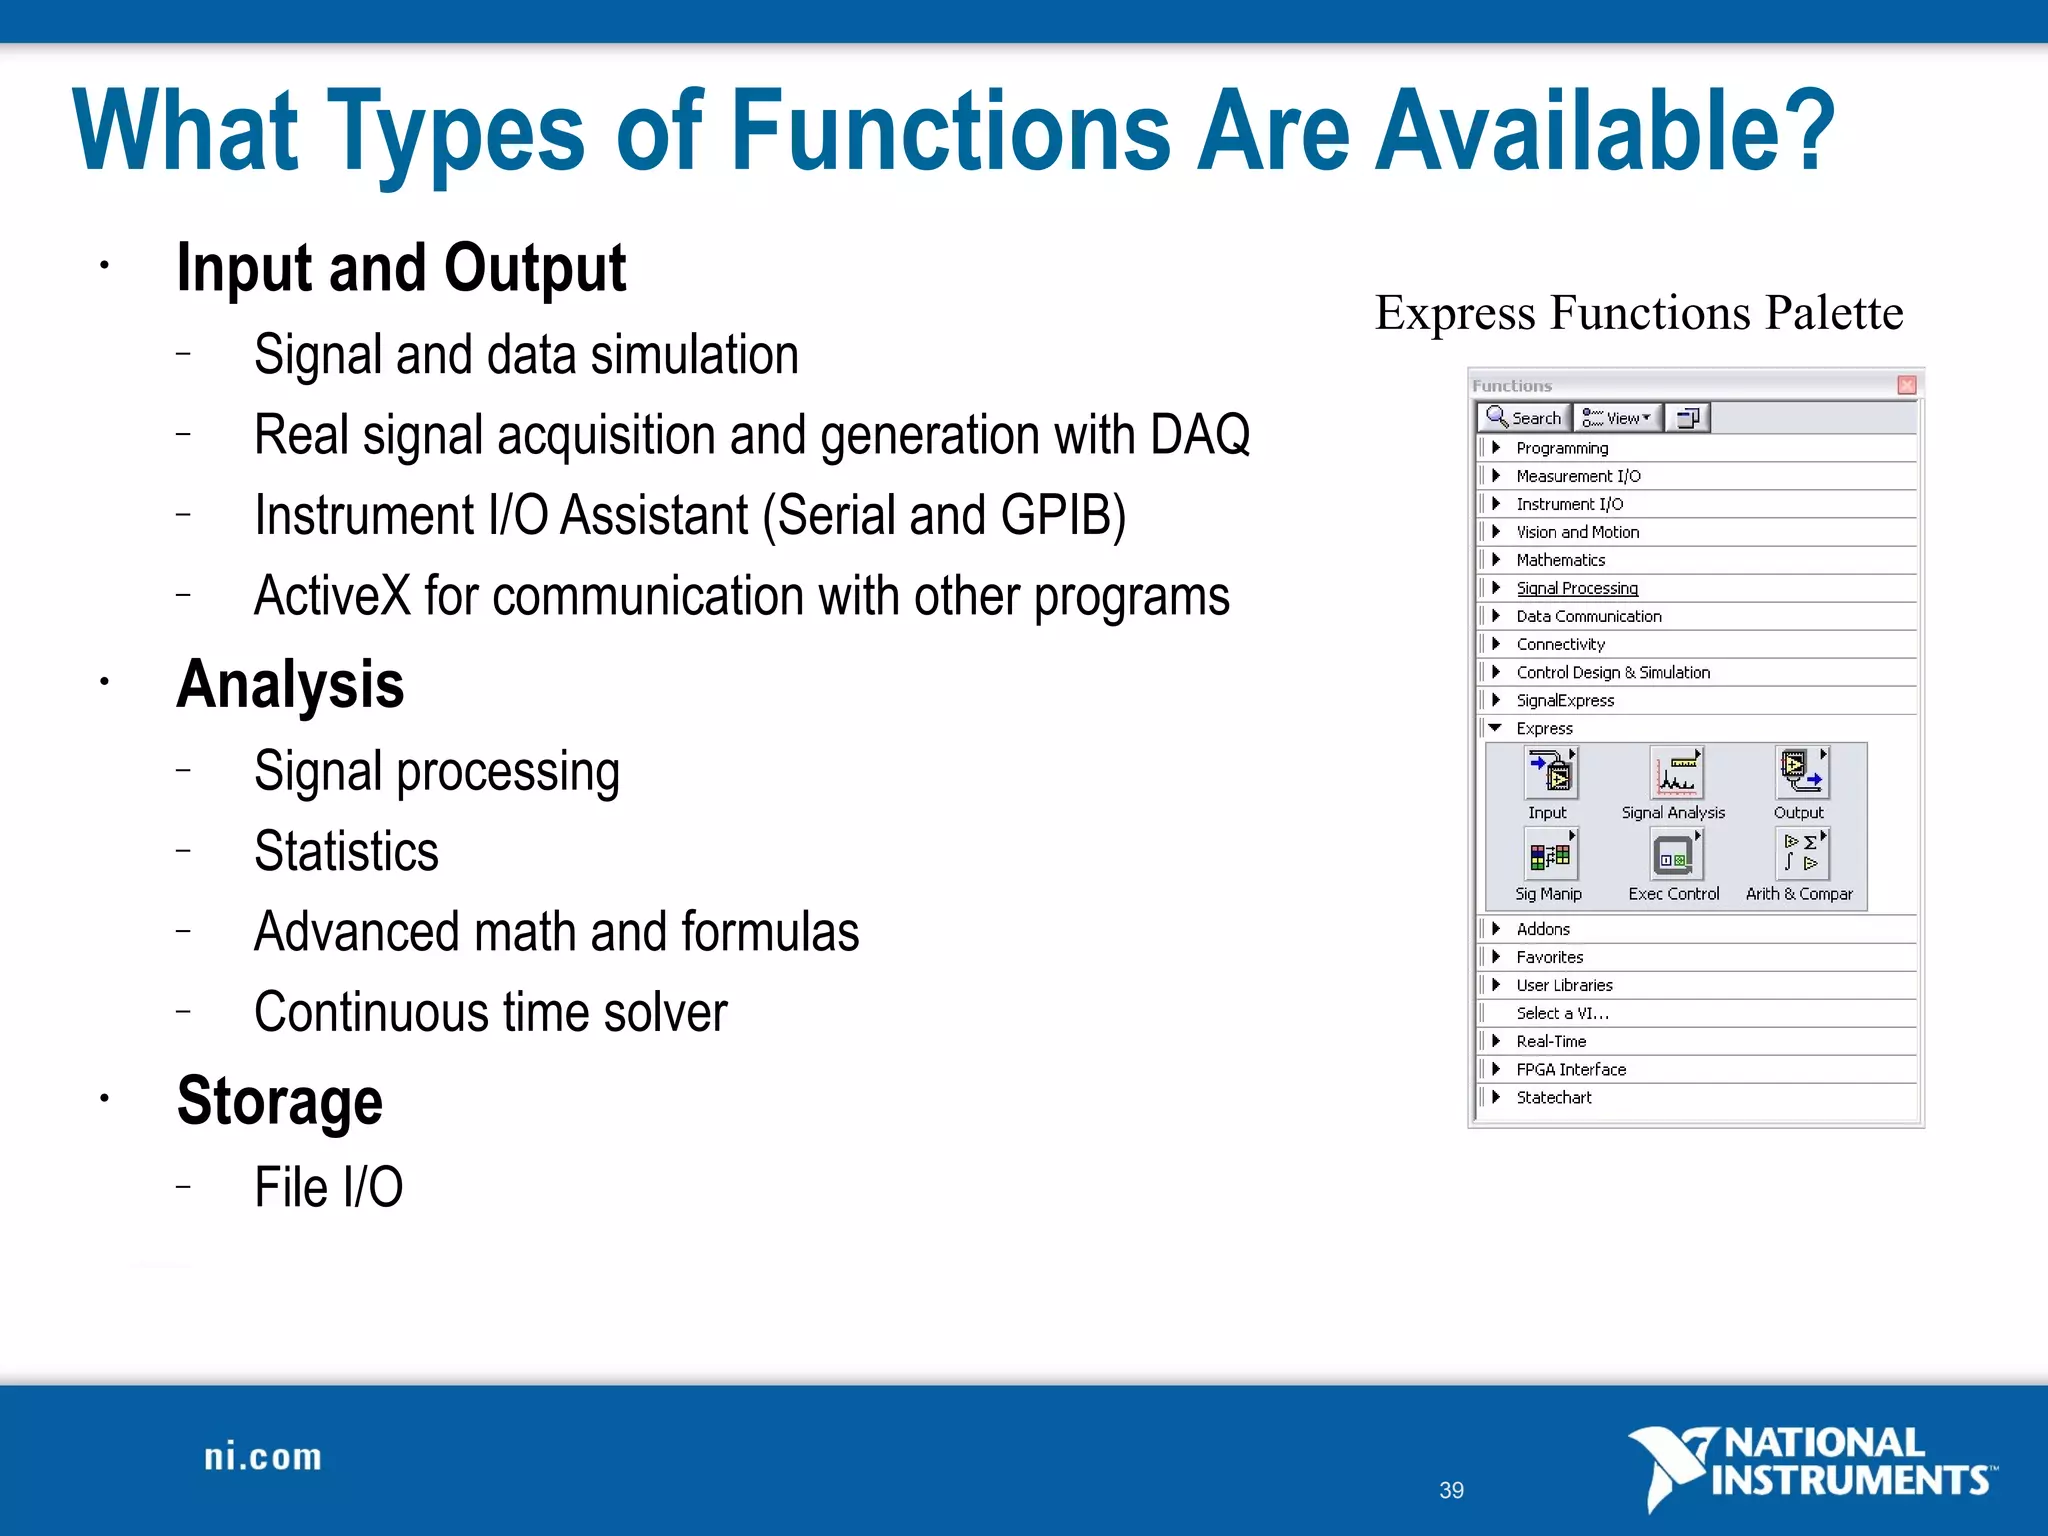
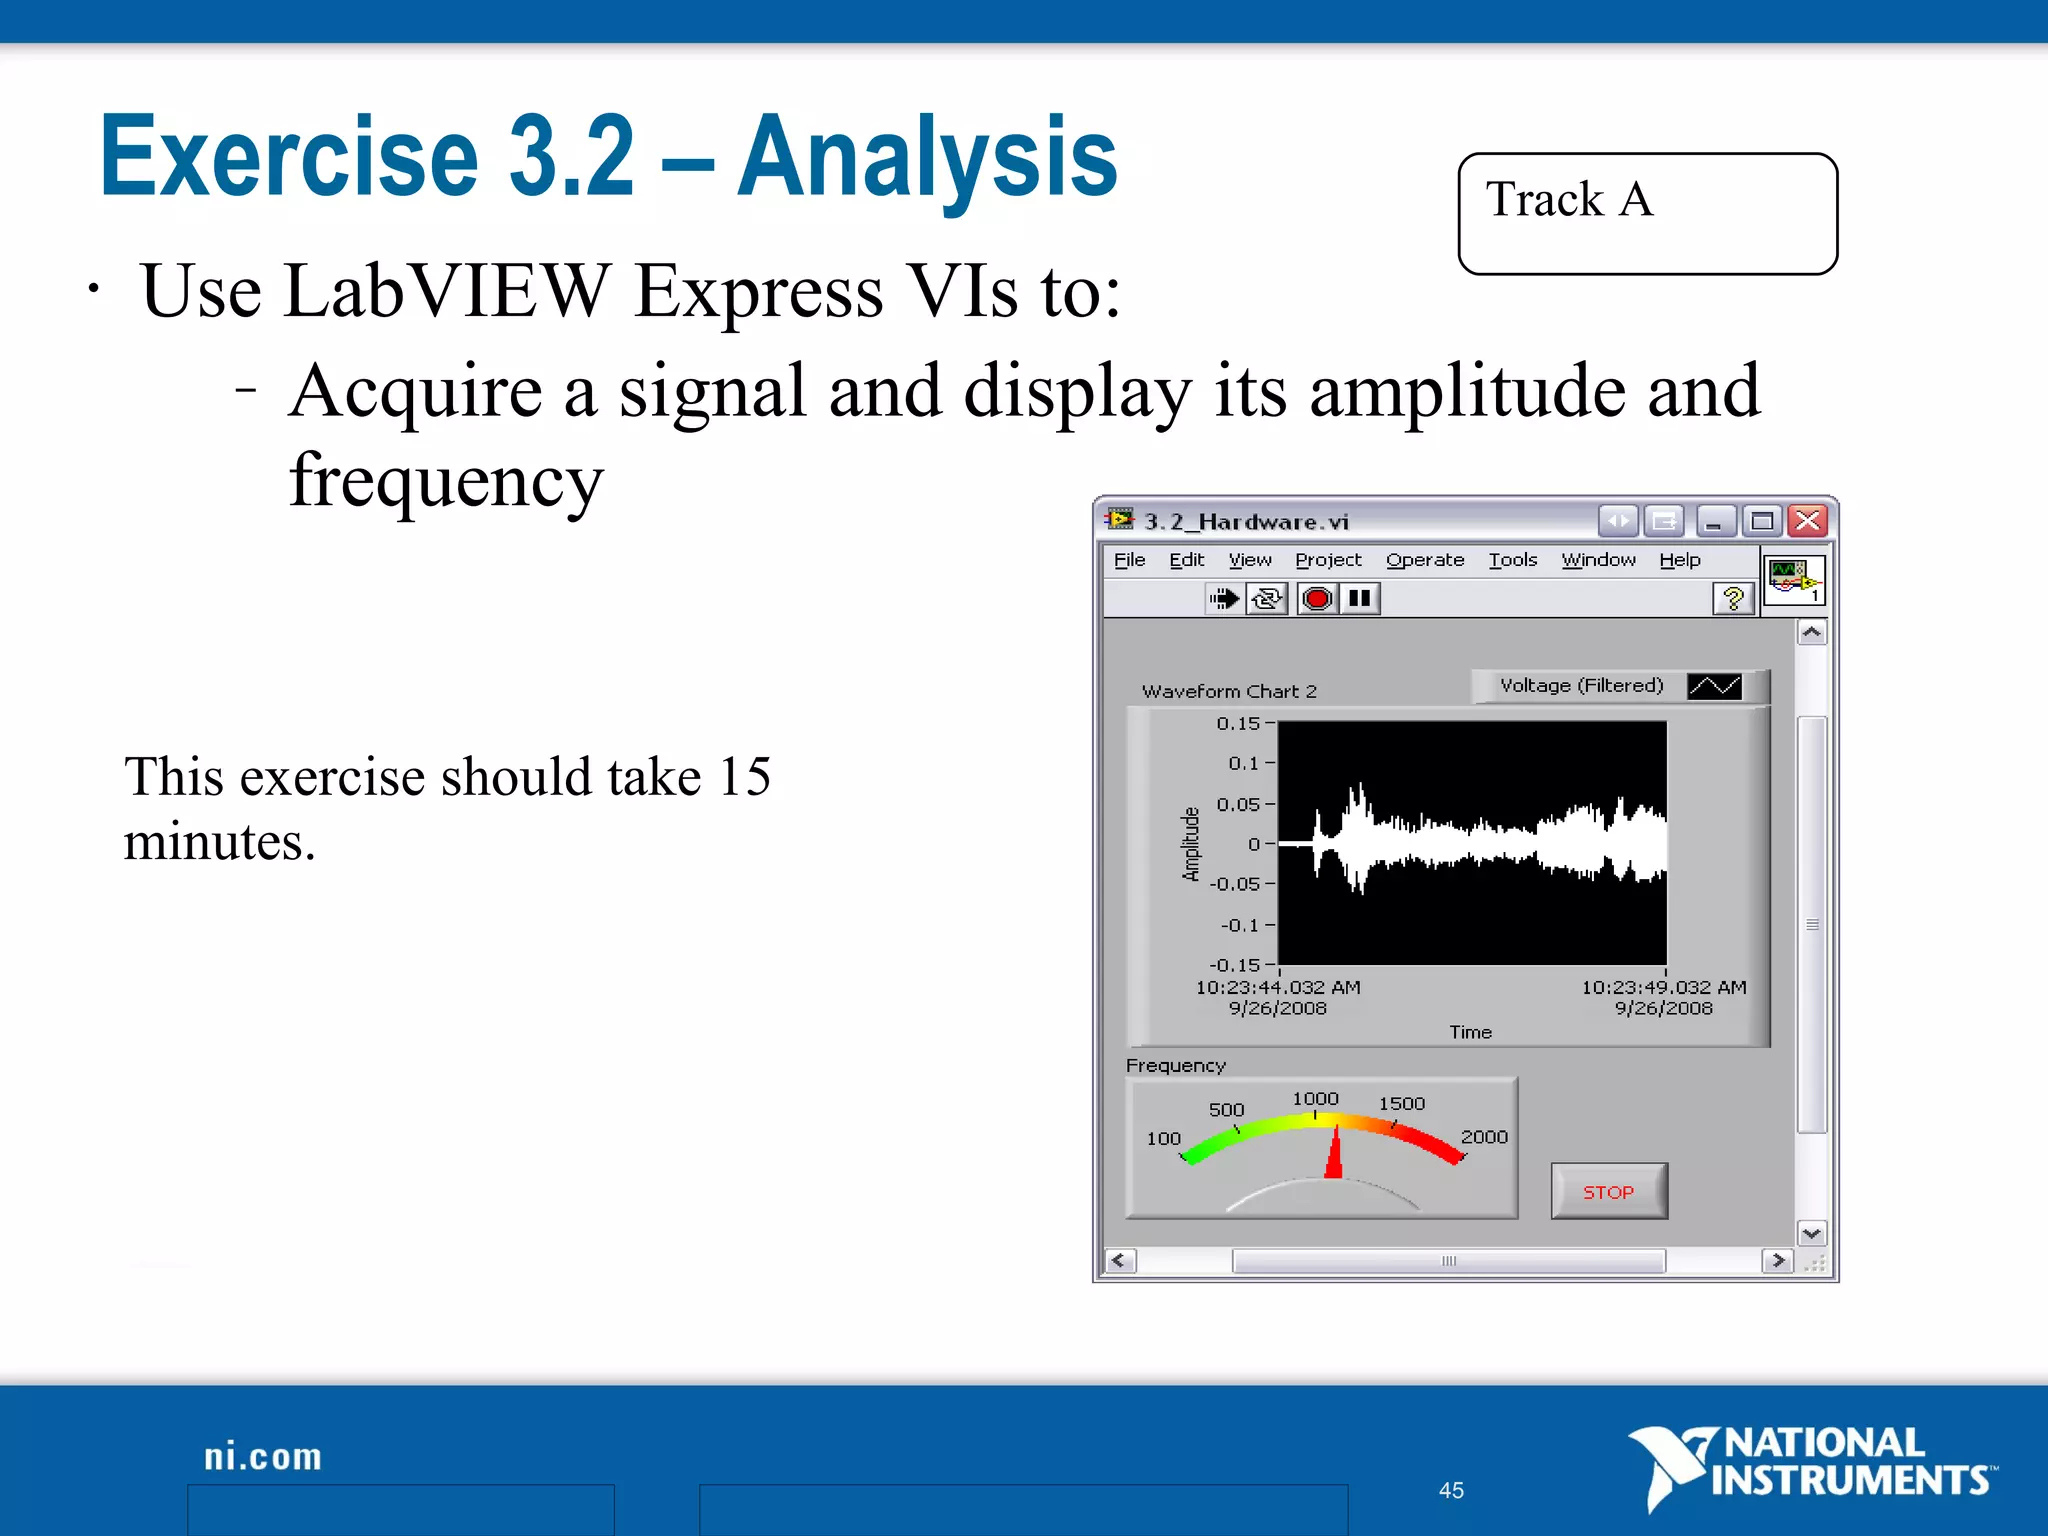


Here are the steps to acquire a signal with DAQ in LabVIEW: 1. Open a new VI and add a DAQ Assistant from Functions»Measurement I/O»NI-DAQmx»DAQ Assistant. 2. Configure the type of device, channels, and sampling rate in the DAQ Assistant. 3. Add indicators to display the acquired data on the front panel (such as a waveform graph). 4. Connect the output of the DAQ Assistant to the indicators to display the acquired data. 5. Run the VI to acquire data from the DAQ device in real-time and view it on the front panel indicators. The DAQ Assistant handles all the setup and communication with the DAQ device so you can