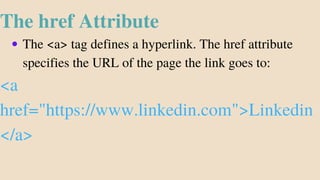
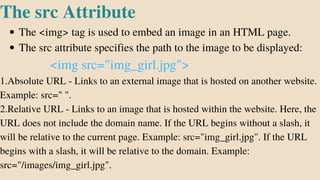
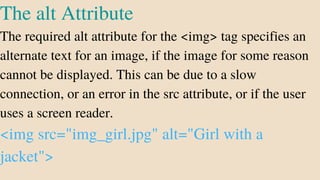
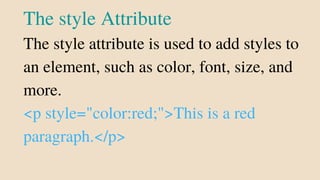
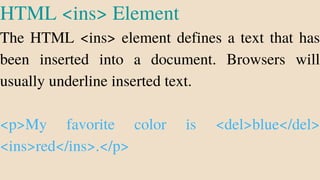
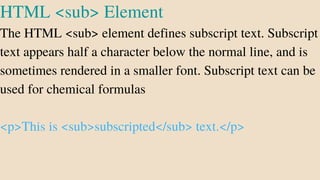
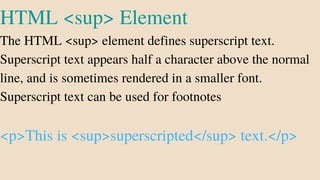
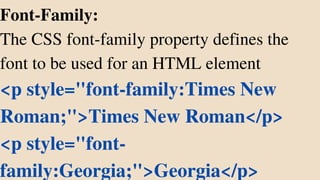
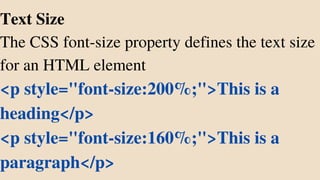
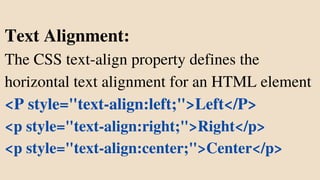
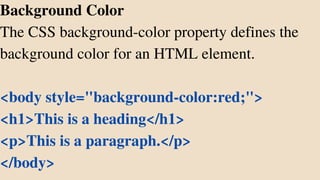
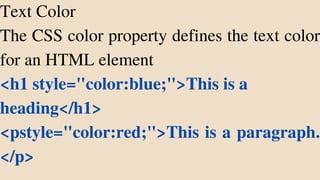
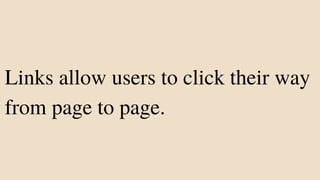
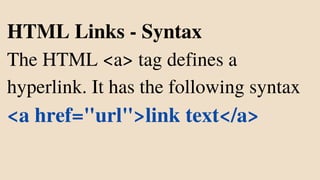
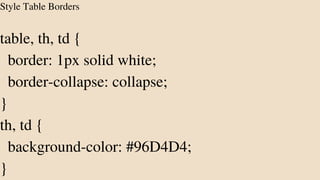
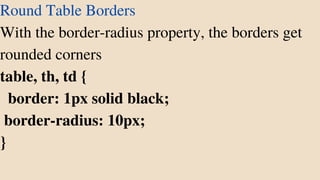
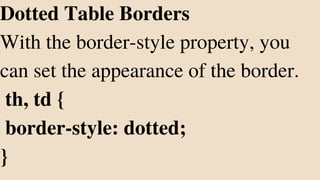
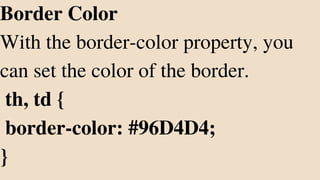
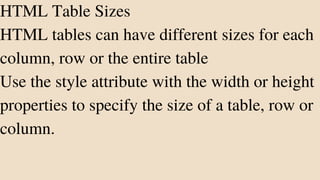
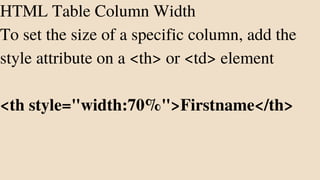
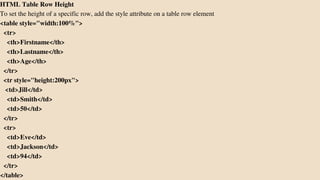
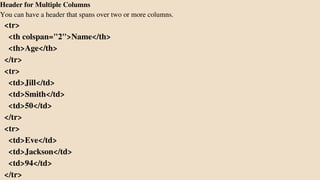
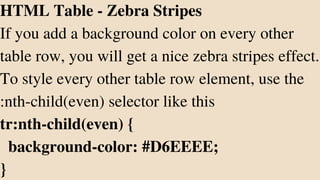
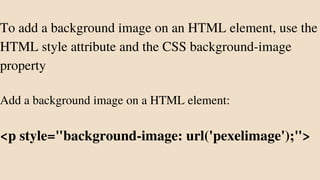
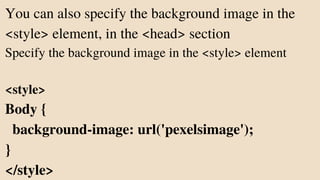
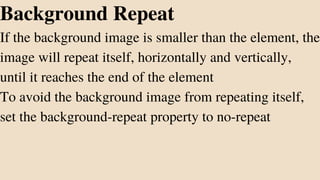
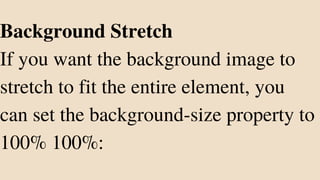
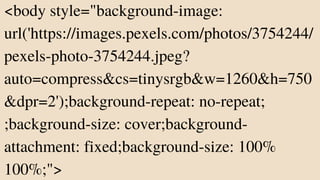
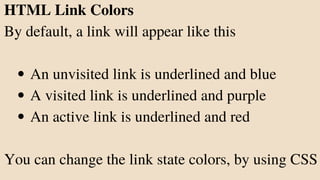
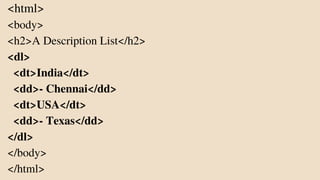
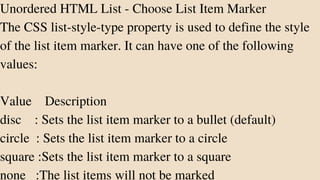
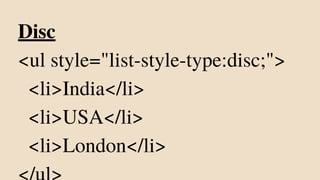
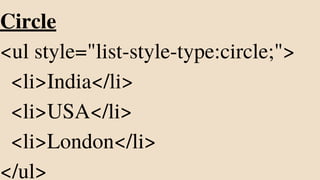
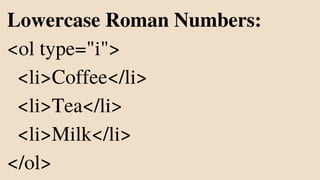
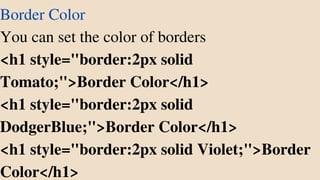
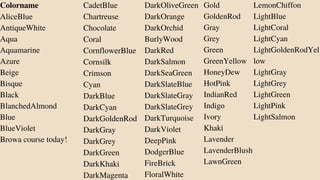
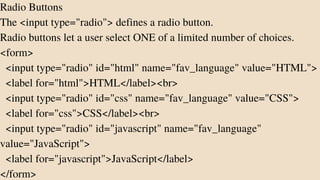
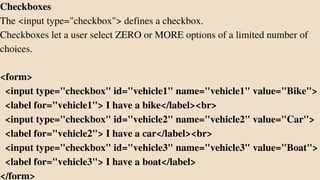
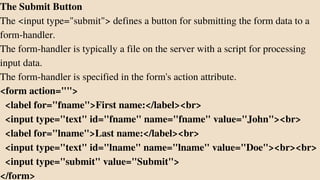
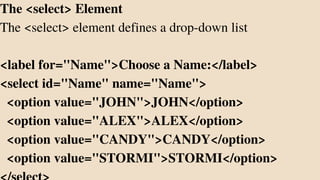
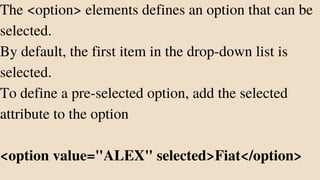
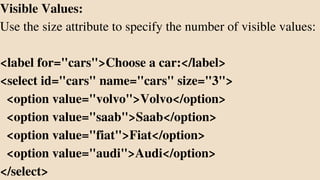
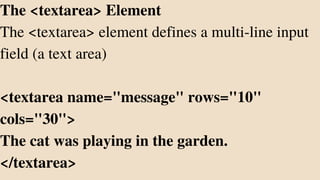
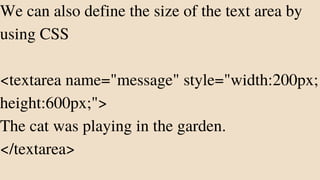
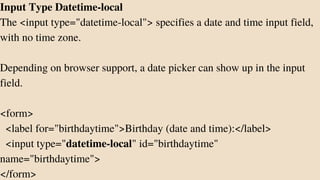
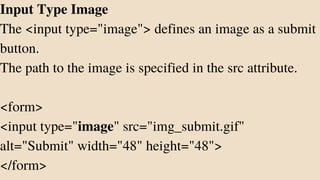
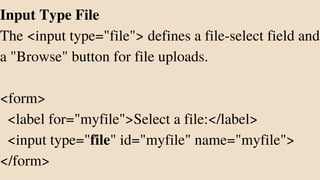
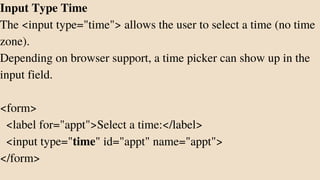
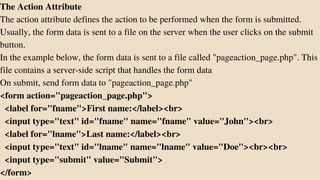
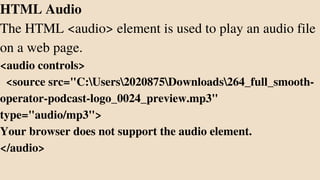
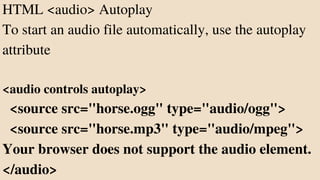
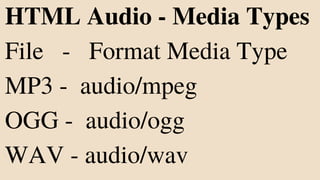
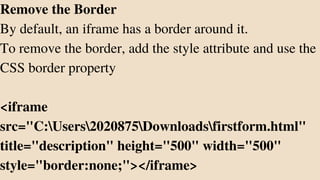
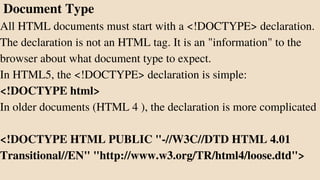
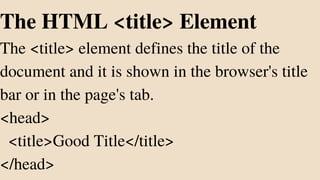
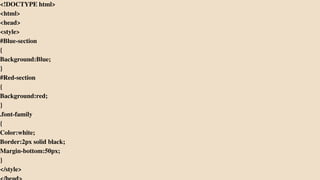
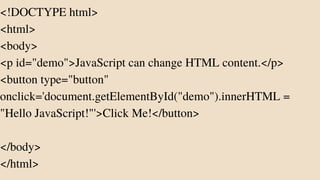
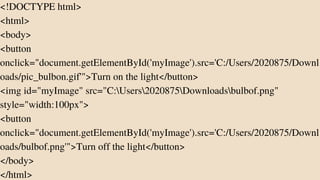
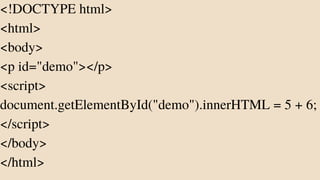
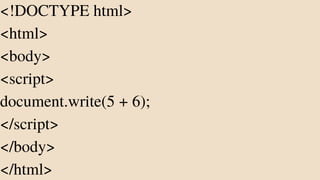
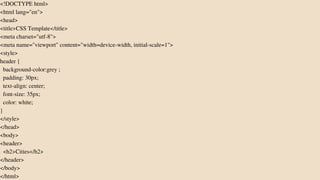
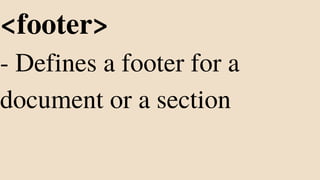
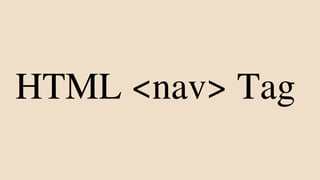
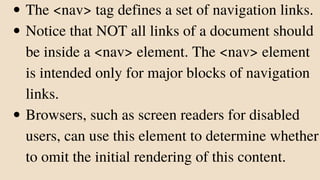
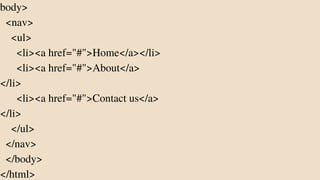
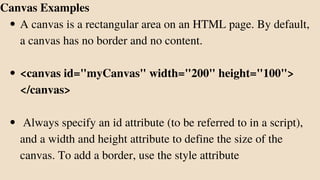
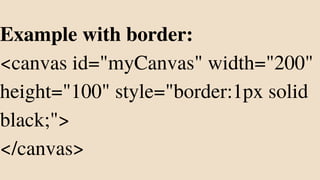
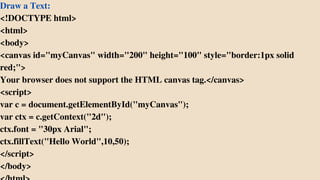
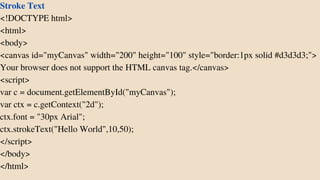
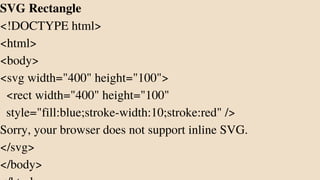
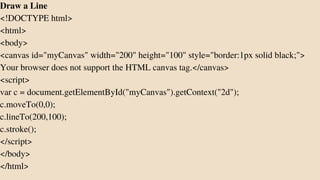
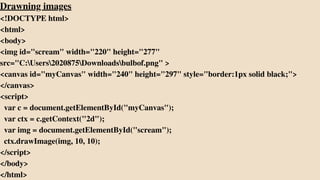
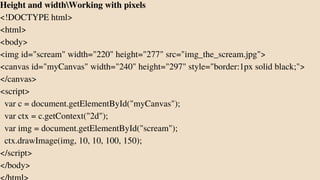
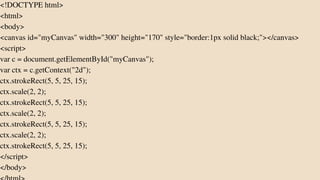
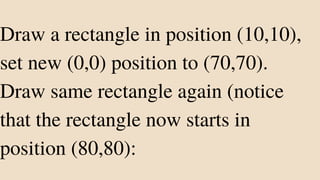
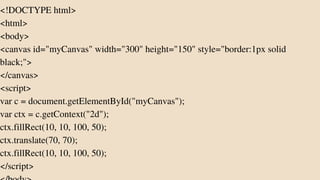
The document outlines key differences between HTML 4 and HTML 5, particularly in terms of doctype declaration and element attributes. It covers various HTML elements such as <img>, <a>, and <table>, including their attributes, formatting options, and examples of usage. Additionally, it details CSS properties for styling these elements, such as background color, text alignment, and link functionality.


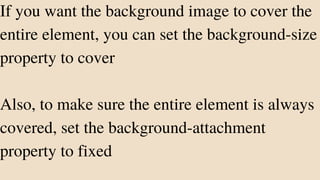


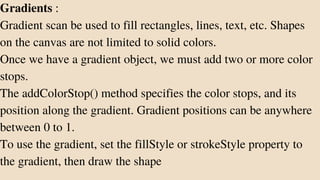


![Day 2 - Web_Development [basic HTML tags and their functionalities].pptx](https://cdn.slidesharecdn.com/ss_thumbnails/day2-webdevelopmentbasichtmltagsandtheirfunctionalities-240906194136-26a4ba6f-thumbnail.jpg?width=640&height=640&fit=bounds)


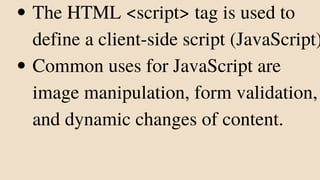
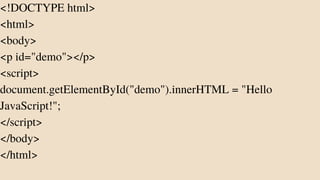
![谷歌留痕技术教程[ 𝙩𝙤𝙥 𝟮𝟯𝟯. 𝙘 𝙤𝙢 ]](https://cdn.slidesharecdn.com/ss_thumbnails/top233-260130173900-2eb784f9-thumbnail.jpg?width=640&height=640&fit=bounds)


