VIP Model Call Girls Kothrud ( Pune ) Call ON 8005736733 Starting From 5K to ...
How_to_blockMesh using OpenFOAM good mateiral
1. blockMesh
1
Mesh generation using blockMesh
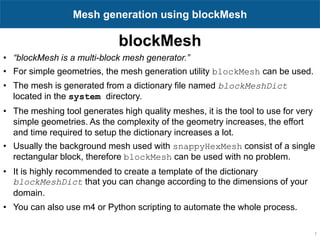
• “blockMesh is a multi-block mesh generator.”
• For simple geometries, the mesh generation utility blockMesh can be used.
• The mesh is generated from a dictionary file named blockMeshDict
located in the system directory.
• The meshing tool generates high quality meshes, it is the tool to use for very
simple geometries. As the complexity of the geometry increases, the effort
and time required to setup the dictionary increases a lot.
• Usually the background mesh used with snappyHexMesh consist of a single
rectangular block, therefore blockMesh can be used with no problem.
• It is highly recommended to create a template of the dictionary
blockMeshDict that you can change according to the dimensions of your
domain.
• You can also use m4 or Python scripting to automate the whole process.
3. blockMesh workflow
3
Mesh generation using blockMesh
• To generate a mesh with blockMesh, you will need to define the vertices, block
connectivity and number of cells in each direction.
• To assign boundary patches, you will need to define the faces connectivity
4. 4
blockMesh guided tutorials
• Let us take a close look to a blockMeshDict dictionary.
• We will use the square cavity case.
• You will find this case in the directory:
• From this point on, please follow me.
• We are all going to work at the same pace.
• Remember, $PTOFC is pointing to the path where you
unpacked the tutorials.
101BLOCKMESH/C1
5. 5
blockMesh guided tutorials
What are we going to do?
• We will use this simple case to take a close look at a blockMeshDict dictionary.
• We will study all sections in the blockMeshDict dictionary.
• We will introduce two features useful for parameterization, namely, macro syntax and
inline calculations.
• You can use this dictionary as a blockMeshDict template that you can change
automatically according to the dimensions of your domain and the desired cell
spacing.
6. 6
blockMesh guided tutorials
17 convertToMeters 1;
18
19 xmin 0;
20 xmax 1;
21 ymin 0;
22 ymax 1;
23 zmin 0;
24 zmax 1;
25
30 deltax 0.05;
31 deltay 0.05;
32 deltaz 0.05;
33
34 lx #calc "$xmax - $xmin";
35 ly #calc "$ymax - $ymin";
36 lz #calc "$zmax – $zmin";
37
38 xcells #calc "round($lx/$deltax)";
39 ycells #calc "round($ly/$deltay)";
40 zcells #calc "round($lz/$deltaz)";
41
44 vertices
45 (
46 //BLOCK 0
47 ($xmin $ymin $zmin) //0
48 ($xmax $ymin $zmin) //1
49 ($xmax $ymax $zmin) //2
50 ($xmin $ymax $zmin) //3
51 ($xmin $ymin $zmax) //4
52 ($xmax $ymin $zmax) //5
53 ($xmax $ymax $zmax) //6
54 ($xmin $ymax $zmax) //7
66 );
The blockMeshDict dictionary.
• The keyword convertToMeters (line 17), is a scaling
factor. In this case we do not scale the dimensions.
• In lines 19-24 we declare some variables using macro
syntax notation. With macro syntax, we first declare the
variables and their values (lines 19-24), and then we can
use the variables by adding the symbol $ to the variable
name (lines 47-54).
• In lines 30-32 we use macro syntax to declare another
set of variables that will be used later.
• Macro syntax is a very convenient way to parameterize
dictionaries.
7. 7
blockMesh guided tutorials
17 convertToMeters 1;
18
19 xmin 0;
20 xmax 1;
21 ymin 0;
22 ymax 1;
23 zmin 0;
24 zmax 1;
25
30 deltax 0.05;
31 deltay 0.05;
32 deltaz 0.05;
33
34 lx #calc "$xmax - $xmin";
35 ly #calc "$ymax - $ymin";
36 lz #calc "$zmax – $zmin";
37
38 xcells #calc "round($lx/$deltax)";
39 ycells #calc "round($ly/$deltay)";
40 zcells #calc "round($lz/$deltaz)";
41
44 vertices
45 (
46 //BLOCK 0
47 ($xmin $ymin $zmin) //0
48 ($xmax $ymin $zmin) //1
49 ($xmax $ymax $zmin) //2
50 ($xmin $ymax $zmin) //3
51 ($xmin $ymin $zmax) //4
52 ($xmax $ymin $zmax) //5
53 ($xmax $ymax $zmax) //6
54 ($xmin $ymax $zmax) //7
66 );
The blockMeshDict dictionary.
• In lines 34-40 we are doing inline calculations using the
directive #calc.
• Basically we are programming directly in the dictionary.
OpenFOAM® will compile this function as it reads it.
• With inline calculations and codeStream you can access
many OpenFOAM® functions from the dictionaries.
• Inline calculations and codeStream are very convenient
ways to parameterize dictionaries and program directly
on the dictionaries.
8. 8
blockMesh guided tutorials
17 convertToMeters 1;
18
19 xmin 0;
20 xmax 1;
21 ymin 0;
22 ymax 1;
23 zmin 0;
24 zmax 1;
25
30 deltax 0.05;
31 deltay 0.05;
32 deltaz 0.05;
33
34 lx #calc "$xmax - $xmin";
35 ly #calc "$ymax - $ymin";
36 lz #calc "$zmax – $zmin";
37
38 xcells #calc "round($lx/$deltax)";
39 ycells #calc "round($ly/$deltay)";
40 zcells #calc "round($lz/$deltaz)";
41
44 vertices
45 (
46 //BLOCK 0
47 ($xmin $ymin $zmin) //0
48 ($xmax $ymin $zmin) //1
49 ($xmax $ymax $zmin) //2
50 ($xmin $ymax $zmin) //3
51 ($xmin $ymin $zmax) //4
52 ($xmax $ymin $zmax) //5
53 ($xmax $ymax $zmax) //6
54 ($xmin $ymax $zmax) //7
66 );
The blockMeshDict dictionary.
• To do inline calculations using the directive #calc, we
proceed as follows (we will use line 35 as example):
ly #calc "$ymax - $ymin";
• We first give a name to the new variable (ly), we then tell
OpenFOAM® that we want to do an inline calculation
(#calc), and then we do the inline calculation ("$ymax-
$ymin";). Notice that the operation must be between
double quotation marks.
9. 9
blockMesh guided tutorials
17 convertToMeters 1;
18
19 xmin 0;
20 xmax 1;
21 ymin 0;
22 ymax 1;
23 zmin 0;
24 zmax 1;
25
30 deltax 0.05;
31 deltay 0.05;
32 deltaz 0.05;
33
34 lx #calc "$xmax - $xmin";
35 ly #calc "$ymax - $ymin";
36 lz #calc "$zmax – $zmin";
37
38 xcells #calc "round($lx/$deltax)";
39 ycells #calc "round($ly/$deltay)";
40 zcells #calc "round($lz/$deltaz)";
41
44 vertices
45 (
46 //BLOCK 0
47 ($xmin $ymin $zmin) //0
48 ($xmax $ymin $zmin) //1
49 ($xmax $ymax $zmin) //2
50 ($xmin $ymax $zmin) //3
51 ($xmin $ymin $zmax) //4
52 ($xmax $ymin $zmax) //5
53 ($xmax $ymax $zmax) //6
54 ($xmin $ymax $zmax) //7
66 );
The blockMeshDict dictionary.
• In lines lines 34-36, we use inline calculations to
compute the length in each direction.
• Then we compute the number of cells to be used in each
direction (lines 38-40).
• To compute the number of cells we use as cell spacing
the values declared in lines 30-32.
• By proceeding in this way, we can compute automatically
the number of cells needed in each direction according to
the desired cell spacing.
10. 10
blockMesh guided tutorials
17 convertToMeters 1;
18
19 xmin 0;
20 xmax 1;
21 ymin 0;
22 ymax 1;
23 zmin 0;
24 zmax 1;
25
30 deltax 0.05;
31 deltay 0.05;
32 deltaz 0.05;
33
34 lx #calc "$xmax - $xmin";
35 ly #calc "$ymax - $ymin";
36 lz #calc "$zmax – $zmin";
37
38 xcells #calc "round($lx/$deltax)";
39 ycells #calc "round($ly/$deltay)";
40 zcells #calc "round($lz/$deltaz)";
41
44 vertices
45 (
46 //BLOCK 0
47 ($xmin $ymin $zmin) //0
48 ($xmax $ymin $zmin) //1
49 ($xmax $ymax $zmin) //2
50 ($xmin $ymax $zmin) //3
51 ($xmin $ymin $zmax) //4
52 ($xmax $ymin $zmax) //5
53 ($xmax $ymax $zmax) //6
54 ($xmin $ymax $zmax) //7
66 );
The blockMeshDict dictionary.
• By the way, as this dictionary is designed for blocks with
positive vertices coordinates, there is a small catch in the
way we compute the length (lines 34-36) and the number
of cells (lines 38-40).
• What will happen if xmin is negative?
• What will happen if xcells is negative?
• What will happen if xcells is a float with decimals?
• Can you find a solution to these small problems?
11. 11
blockMesh guided tutorials
17 convertToMeters 1;
18
19 xmin 0;
20 xmax 1;
21 ymin 0;
22 ymax 1;
23 zmin 0;
24 zmax 1;
25
30 deltax 0.05;
31 deltay 0.05;
32 deltaz 0.05;
33
34 lx #calc "$xmax - $xmin";
35 ly #calc "$ymax - $ymin";
36 lz #calc "$zmax – $zmin";
37
38 xcells #calc "round($lx/$deltax)";
39 ycells #calc "round($ly/$deltay)";
40 zcells #calc "round($lz/$deltaz)";
41
44 vertices
45 (
46 //BLOCK 0
47 ($xmin $ymin $zmin) //0
48 ($xmax $ymin $zmin) //1
49 ($xmax $ymax $zmin) //2
50 ($xmin $ymax $zmin) //3
51 ($xmin $ymin $zmax) //4
52 ($xmax $ymin $zmax) //5
53 ($xmax $ymax $zmax) //6
54 ($xmin $ymax $zmax) //7
66 );
The blockMeshDict dictionary.
• In the vertices section (lines 44-66), we define the vertex
coordinates of the geometry.
• In this case, there are eight vertices defining a 3D block.
• Remember, OpenFOAM® always uses 3D meshes, even
if the simulation is 2D. For 2D meshes, you only add one
cell in the third dimension.
• Notice that the vertex numbering starts from 0 (as the
counters in c++). This numbering applies for blocks as
well.
12. 12
blockMesh guided tutorials
68 blocks
69 (
70 hex (0 1 2 3 4 5 6 7) ($xcells $ycells $zcells) simpleGrading (1 1 1)
71 );
72
73 edges
74 (
75
76 );
The blockMeshDict dictionary.
• In lines 68-71, we define the block topology, hex means that it is a structured hexahedral block. In this case,
we are generating a rectangular mesh.
• In line 70, (0 1 2 3 4 5 6 7) are the vertices used to define the block (and yes, the order is important). Each
hex block is defined by eight vertices, in sequential order. Where the first vertex in the list represents the
origin of the coordinate system (vertex 0 in this case).
• ($xcells $ycells $zcells) is the number of mesh cells in each direction (X Y Z). Notice that we are using
macro syntax, and we compute the values using inline calculations.
• simpleGrading (1 1 1) is the grading or mesh stretching in each direction (X Y Z), in this case the mesh is
uniform. We will deal with mesh grading/stretching in the next case.
13. 13
blockMesh guided tutorials
68 blocks
69 (
70 hex (0 1 2 3 4 5 6 7) ($xcells $ycells $zcells) simpleGrading (1 1 1)
71 );
72
73 edges
74 (
75
76 );
The blockMeshDict dictionary.
• Let us talk about the block ordering hex (0 1 2 3 4 5 6 7), which is extremely important.
• hex blocks are defined by eight vertices in sequential order. Where the first vertex in the list represents the
origin of the coordinate system (vertex 0 in this case).
• Starting from this vertex, we construct the block topology. So in this case, the first part of the block is made up
by vertices 0 1 2 3 and the second part of the block is made up by vertices 4 5 6 7 (notice that we start from
vertex 4 which is the projection in the Z-direction of vertex 0).
• In this case, the vertices are ordered in such a way that if we look at the screen/paper (-z direction), the
vertices rotate counter-clockwise.
• If you add a second block, you must identify the first vertex and starting from it, you should construct the block
topology. In this case, you might need to merges faces, we will address this later.
14. 14
blockMesh guided tutorials
68 blocks
69 (
70 hex (0 1 2 3 4 5 6 7) ($xcells $ycells $zcells) simpleGrading (1 1 1)
71 );
72
73 edges
74 (
75
76 );
The blockMeshDict dictionary.
• Edges, are constructed from the vertices definition.
• Each edge joining two vertices is assumed to be straight by default.
• The user can specified any edge to be curved by entries in the section edges.
• Possible options are: arc, spline, polyline, BSpline, line.
• For example, to define an arc we first define the vertices to be connected to form an edge and then we give an
interpolation point.
• To define a polyline we first define the vertices to be connected to form an edge and then we give a list of the
coordinates of the interpolation points.
• In this case and as we do not specified anything, all edges are assumed to be straight lines.
15. 15
blockMesh guided tutorials
78 boundary
79 (
80 top
81 {
82 type wall;
83 faces
84 (
85 (3 7 6 2)
86 );
87 }
88 left
89 {
90 type wall;
91 faces
92 (
93 (0 4 7 3)
94 );
95 }
96 right
97 {
98 type wall;
99 faces
100 (
101 (2 6 5 1)
102 );
103 }
104 bottom
105 {
106 type wall;
107 faces
108 (
109 (0 1 5 4)
110 );
111 }
The blockMeshDict dictionary.
• In the section boundary, we define all the patches where
we want to apply boundary conditions.
• This step is of paramount importance, because if we do
not define the surface patches we will not be able to
apply the boundary conditions to individual surface
patches.
16. 16
blockMesh guided tutorials
78 boundary
79 (
80 top
81 {
82 type wall;
83 faces
84 (
85 (3 7 6 2)
86 );
87 }
88 left
89 {
90 type wall;
91 faces
92 (
93 (0 4 7 3)
94 );
95 }
96 right
97 {
98 type wall;
99 faces
100 (
101 (2 6 5 1)
102 );
103 }
104 bottom
105 {
106 type wall;
107 faces
108 (
109 (0 1 5 4)
110 );
111 }
The blockMeshDict dictionary.
• In lines 80-87 we define a boundary patch.
• In line 80 we define the patch name top (the name is
given by the user).
• In line 82 we give a base type to the surface patch. In
this case wall (do not worry we are going to talk about
this later).
• In line 85 we give the connectivity list of the vertices that
made up the surface patch or face, that is, (3 7 6 2).
• Have in mind that the vertices need to be neighbors and
it does not matter if the ordering is clockwise or counter
clockwise.
17. 17
blockMesh guided tutorials
78 boundary
79 (
80 top
81 {
82 type wall;
83 faces
84 (
85 (3 7 6 2)
86 );
87 }
88 left
89 {
90 type wall;
91 faces
92 (
93 (0 4 7 3)
94 );
95 }
96 right
97 {
98 type wall;
99 faces
100 (
101 (2 6 5 1)
102 );
103 }
104 bottom
105 {
106 type wall;
107 faces
108 (
109 (0 1 5 4)
110 );
111 }
The blockMeshDict dictionary.
• Have in mind that the vertices need to be neighbors and
it does not matter if the ordering is clockwise or counter
clockwise.
• Remember, faces are defined by a list of 4 vertex
numbers, e.g., (3 7 6 2).
• In lines 88-95 we define the patch left.
• In lines 96-103 we define the patch right.
• In lines 104-11 we define the patch bottom.
18. 18
blockMesh guided tutorials
112 front
113 {
114 type wall;
115 faces
116 (
117 (4 5 6 7)
118 );
119 }
120 back
121 {
122 type wall;
123 faces
124 (
125 (0 3 2 1)
126 );
127 }
128 );
129
130 mergePatchPairs
131 (
132
133 );
The blockMeshDict dictionary.
• In lines 112-119 we define the patch front.
• In lines 120-127 we define the patch back.
• You can also group many faces into one patch, for
example, instead of creating the patches front and back,
you can group them into a single patch named
backAndFront, as follows,
backAndFront
{
type wall;
faces
(
(4 5 6 7)
(0 3 2 1)
);
}
19. 19
blockMesh guided tutorials
112 front
113 {
114 type wall;
115 faces
116 (
117 (4 5 6 7)
118 );
119 }
120 back
121 {
122 type wall;
123 faces
124 (
125 (0 3 2 1)
126 );
127 }
128 );
129
130 mergePatchPairs
131 (
132
133 );
The blockMeshDict dictionary.
• We can merge blocks in the section mergePatchPairs
(lines 130-133).
• The block patches to be merged must be first defined in
the boundary list, blockMesh then connect the two
blocks.
• In this case, as we have one single block there is no
need to merge patches.
20. 20
blockMesh guided tutorials
The blockMeshDict dictionary.
• To sum up, the blockMeshDict dictionary
generates a single block with:
• X/Y/Z dimensions: 1.0/1.0/1.0
• As the cell spacing in all directions is
defined as 0.05, it will use the following
number of cells in the X, Y and Z directions:
20 x 20 x 20 cells.
• One single hex block with straight lines.
• Six patches of base type wall, namely, left,
right, top, bottom, front and back.
• The information regarding the patch base type
and patch name is saved in the file boundary.
Feel free to modify this file to fit your needs.
• Remember to use the utility checkMesh to check
the quality of the mesh and look for topological
errors.
• Topological errors must be repaired.
21. 21
blockMesh guided tutorials
The constant/polyMesh/boundary dictionary
18 6
19 (
20 top
21 {
22 type wall;
23 inGroups 1(wall);
24 nFaces 400;
25 startFace 22800;
26 }
27 left
28 {
29 type wall;
30 inGroups 1(wall);
31 nFaces 400;
32 startFace 23200;
33 }
34 right
35 {
36 type empty;
37 inGroups 1(wall);
38 nFaces 400;
39 startFace 23600;
40 }
41 bottom
42 {
43 type wall;
44 inGroups 1(wall);
45 nFaces 400;
46 startFace 24000;
47 }
48 front
49 {
50 type wall;
51 inGroups 1(wall);
52 nFaces 400;
53 startFace 24400;
54 }
55 back
56 {
57 type empty;
58 inGroups 1(wall);
59 nFaces 400;
60 startFace 24800;
61 }
62 )
• First at all, this file is automatically generated after you
create the mesh or you convert it from a third party format.
• In this file, the geometrical information related to the base
type patch of each boundary of the domain is specified.
• The base type boundary condition is the actual surface
patch where we are going to apply a primitive type
boundary condition (or numerical boundary condition).
• The primitive type boundary condition assign a field value
to the surface patch (base type).
• You define the numerical type patch (or the value of the
boundary condition), in the directory 0 or time directories.
• The name and base type of the patches was defined in the
dictionary blockMeshDict in the section boundary.
• You can change the name if you do not like it. Do not use
strange symbols or white spaces.
• You can also change the base type. For instance, you can
change the type of the patch top from wall to patch.
22. 22
blockMesh guided tutorials
The constant/polyMesh/boundary dictionary
18 6
19 (
20 top
21 {
22 type wall;
23 inGroups 1(wall);
24 nFaces 400;
25 startFace 22800;
26 }
27 left
28 {
29 type wall;
30 inGroups 1(wall);
31 nFaces 400;
32 startFace 23200;
33 }
34 right
35 {
36 type empty;
37 inGroups 1(wall);
38 nFaces 400;
39 startFace 23600;
40 }
41 bottom
42 {
43 type wall;
44 inGroups 1(wall);
45 nFaces 400;
46 startFace 24000;
47 }
48 front
49 {
50 type wall;
51 inGroups 1(wall);
52 nFaces 400;
53 startFace 24400;
54 }
55 back
56 {
57 type empty;
58 inGroups 1(wall);
59 nFaces 400;
60 startFace 24800;
61 }
62 )
• If you do not define the boundary patches in the dictionary
blockMeshDict, they are grouped automatically in a default
group named defaultFaces of type empty.
• For instance, if you do not assign a base type to the patch
front, it will be grouped as follows:
defaultFaces
{
type empty;
inGroups 1(empty);
nFaces 400;
startFace 24800;
}
• Remember, you can manually change the name and type.
23. 23
blockMesh guided tutorials
The constant/polyMesh/boundary dictionary
18 6
19 (
20 top
21 {
22 type wall;
23 inGroups 1(wall);
24 nFaces 400;
25 startFace 22800;
26 }
27 left
28 {
29 type wall;
30 inGroups 1(wall);
31 nFaces 400;
32 startFace 23200;
33 }
34 right
35 {
36 type empty;
37 inGroups 1(wall);
38 nFaces 400;
39 startFace 23600;
40 }
41 bottom
42 {
43 type wall;
44 inGroups 1(wall);
45 nFaces 400;
46 startFace 24000;
47 }
48 front
49 {
50 type wall;
51 inGroups 1(wall);
52 nFaces 400;
53 startFace 24400;
54 }
55 back
56 {
57 type empty;
58 inGroups 1(wall);
59 nFaces 400;
60 startFace 24800;
61 }
62 )
Number of surface patches
In the list bellow there must be 6 patches
definition.
bottom
left
back
top
right
front
24. 24
blockMesh guided tutorials
The constant/polyMesh/boundary dictionary
18 6
19 (
20 top
21 {
22 type wall;
23 inGroups 1(wall);
24 nFaces 400;
25 startFace 22800;
26 }
27 left
28 {
29 type wall;
30 inGroups 1(wall);
31 nFaces 400;
32 startFace 23200;
33 }
34 right
35 {
36 type wall;
37 inGroups 1(wall);
38 nFaces 400;
39 startFace 23600;
40 }
41 bottom
42 {
43 type wall;
44 inGroups 1(wall);
45 nFaces 400;
46 startFace 24000;
47 }
48 front
49 {
50 type wall;
51 inGroups 1(wall);
52 nFaces 400;
53 startFace 24400;
54 }
55 back
56 {
57 type wall;
58 inGroups 1(wall);
59 nFaces 400;
60 startFace 24800;
61 }
62 )
Name and type of the surface patches
• The name and base type of the patch is given
by the user.
• In this case the name and base type was
assigned in the dictionary blockMeshDict.
• You can change the name if you do not like it.
Do not use strange symbols or white spaces.
• You can also change the base type. For
instance, you can change the type of the
patch top from wall to patch.
25. 25
blockMesh guided tutorials
The constant/polyMesh/boundary dictionary
18 6
19 (
20 top
21 {
22 type wall;
23 inGroups 1(wall);
24 nFaces 400;
25 startFace 22800;
26 }
27 left
28 {
29 type wall;
30 inGroups 1(wall);
31 nFaces 400;
32 startFace 23200;
33 }
34 right
35 {
36 type wall;
37 inGroups 1(wall);
38 nFaces 400;
39 startFace 23600;
40 }
41 bottom
42 {
43 type wall;
44 inGroups 1(wall);
45 nFaces 400;
46 startFace 24000;
47 }
48 front
49 {
50 type wall;
51 inGroups 1(wall);
52 nFaces 400;
53 startFace 24400;
54 }
55 back
56 {
57 type wall;
58 inGroups 1(wall);
59 nFaces 400;
60 startFace 24800;
61 }
62 )
inGroups keyword
• This is optional.
• You can erase this information safely.
• It is used to group patches during visualization
in ParaView/paraFoam. If you open this mesh
in paraFoam you will see that there are two
groups, namely: wall and empty.
• As usual, you can change the name.
• If you want to put a surface patch in two
groups, you can proceed as follows:
2(wall wall1)
In this case the surface patch belongs to the
group wall (which can have another patch)
and the group wall1
26. 26
blockMesh guided tutorials
The constant/polyMesh/boundary dictionary
18 6
19 (
20 top
21 {
22 type wall;
23 inGroups 1(wall);
24 nFaces 400;
25 startFace 22800;
26 }
27 left
28 {
29 type wall;
30 inGroups 1(wall);
31 nFaces 400;
32 startFace 23200;
33 }
34 right
35 {
36 type wall;
37 inGroups 1(wall);
38 nFaces 400;
39 startFace 23600;
40 }
41 bottom
42 {
43 type wall;
44 inGroups 1(wall);
45 nFaces 400;
46 startFace 24000;
47 }
48 front
49 {
50 type wall;
51 inGroups 1(wall);
52 nFaces 400;
53 startFace 24400;
54 }
55 back
56 {
57 type wall;
58 inGroups 1(wall);
59 nFaces 400;
60 startFace 24800;
61 }
62 )
nFaces and startFace keywords
• Unless you know what you are doing, you do
not need to change this information.
• Basically, this is telling you the starting face
and ending face of the patch.
• This information is created automatically when
generating the mesh or converting the mesh.
27. 27
blockMesh guided tutorials
Running the case
• To generate the mesh, in the terminal window type:
1. $> foamCleanTutorials
2. $> blockMesh
4. $> checkMesh
5. $> paraFoam
28. 28
blockMesh guided tutorials
• Let us take a close look to a blockMeshDict dictionary to
study how to use mesh grading.
• We will use the square cavity case.
• You will find this case in the directory:
• From this point on, please follow me.
• We are all going to work at the same pace.
• Remember, $PTOFC is pointing to the path where you
unpacked the tutorials.
101BLOCKMESH/C2
29. 29
blockMesh guided tutorials
What are we going to do?
• We will use this case to study how to change mesh grading (growth rate).
• You can use this dictionary as a blockMeshDict template that you can change
automatically according to the dimensions of your domain and the desired cell
spacing and growth rate.
30. 30
blockMesh guided tutorials
The blockMeshDict dictionary.
61 blocks
62 (
63 hex (0 1 2 3 4 5 6 7) ($xcells $ycells $zcells) simpleGrading (1 1 1)
88 );
No grading
Mesh grading
• To control mesh grading, we use the simpleGrading keyword.
• Setting the values to (1 1 1) means no grading (uniform mesh).
• A value different from 1 will add grading to the edge, that is, it will cluster more cells
towards one extreme of the block.
• Let us take a look at a 2D mesh.
31. 31
blockMesh guided tutorials
The blockMeshDict dictionary.
61 blocks
62 (
63 hex (0 1 2 3 4 5 6 7) ($xcells $ycells $zcells) simpleGrading (0.125 8 1)
88 );
Unidirectional grading
Unidirectional grading
61 blocks
62 (
63 hex (0 1 2 3 4 5 6 7) ($xcells $ycells $zcells) simpleGrading (8 8 1)
88 );
Stretching in the X direction (edge 0-1)
Stretching in the Y direction (edge 0-3)
Stretching in the X direction (edge 0-1)
Stretching in the Y direction (edge 0-3)
32. 32
blockMesh guided tutorials
The blockMeshDict dictionary.
61 blocks
62 (
63 hex (0 1 2 3 4 5 6 7) ($xcells $ycells $zcells) simpleGrading (0.125 0.125 1)
88 );
Unidirectional grading
Unidirectional grading
61 blocks
62 (
63 hex (0 1 2 3 4 5 6 7) ($xcells $ycells $zcells) simpleGrading (8 0.125 1)
88 );
Stretching in the X direction (edge 0-1)
Stretching in the Y direction (edge 0-3)
Stretching in the X direction (edge 0-1)
Stretching in the Y direction (edge 0-3)
33. 33
blockMesh guided tutorials
BLOCK 0 BLOCK 1
BLOCK 3 BLOCK 2
The blockMeshDict dictionary.
Multi-grading of a block
• Using a single grading to describe mesh
grading permits only one-way grading of
the block.
• For example, to mesh the square cavity
with grading towards all the walls requires
four blocks, each one with different
grading.
• To reduce complexity and effort we can
use multi-grading to control grading within
separate divisions of a single block, rather
than have to define several blocks with
one grading per block.
34. 34
blockMesh guided tutorials
The blockMeshDict dictionary.
61 blocks
62 (
64
65 hex (0 1 2 3 4 5 6 7) ($xcells $ycells $zcells)
66 simpleGrading
67 (
68 // x-direction expansion ratio
70 (
71 (0.2 0.25 8) //Division 1
72 (0.6 0.50 1) //Division 2
73 (0.2 0.25 0.125) //Division 3
74 )
75
76 // y-direction expansion ratio
78 (
79 (0.2 0.25 8)
80 (0.6 0.5 1)
81 (0.2 0.25 0.125)
82 )
83
84 // z-direction expansion ratio
85 1 //no expansion ratio
86 )
87
88 );
Multi-grading of a block
• Let us use multi-grading in the X-direction (lines 70-
74).
• First, we split the block into 3 divisions in the X-
direction representing 20% or 0.2 (division 1), 60% or
0.6 (division 2), and 20% or 0.2 (division 3) of the
block length.
• Then, we assign 25% (0.25) of the total cells in the X-
direction in divisions 1 and 3, and the remaining 50%
(0.50) in division 2.
• Finally, we apply a grading of 8 in division 1, a grading
of 1 (uniform mesh) in division 2, and a grading of(1/8)
in division 3.
35. 35
blockMesh guided tutorials
The blockMeshDict dictionary.
61 blocks
62 (
64
65 hex (0 1 2 3 4 5 6 7) ($xcells $ycells $zcells)
66 simpleGrading
67 (
68 // x-direction expansion ratio
70 (
71 (0.2 0.25 8)
72 (0.6 0.50 1)
73 (0.2 0.25 0.125)
74 )
75
76 // y-direction expansion ratio
78 (
79 (0.2 0.25 8) //Division 1
80 (0.6 0.5 1) //Division 2
81 (0.2 0.25 0.125) //Division 3
82 )
83
84 // z-direction expansion ratio
85 1 //no expansion ratio
86 )
87
88 );
Multi-grading of a block
• Let us use multi-grading in the Y-direction (lines 78-
82).
• First, we split the block into 3 divisions in the Y-
direction representing 20% or 0.2 (division 1), 60% or
0.6 (division 2), and 20% or 0.2 (division 3) of the
block length.
• Then, we assign 25% (0.25) of the total cells in the Y-
direction in divisions 1 and 3, and the remaining 50%
(0.50) in division 2.
• Finally, we apply a grading of 8 in division 1, a grading
of 1 (uniform mesh) in division 2, and a grading of(1/8)
in division 3.
36. 36
blockMesh guided tutorials
The blockMeshDict dictionary.
61 blocks
62 (
64
65 hex (0 1 2 3 4 5 6 7) ($xcells $ycells $zcells)
66 simpleGrading
67 (
68 // x-direction expansion ratio
70 (
71 (0.2 0.25 8)
72 (0.6 0.50 1)
73 (0.2 0.25 0.125)
74 )
75
76 // y-direction expansion ratio
78 (
79 (0.2 0.25 8)
80 (0.6 0.5 1)
81 (0.2 0.25 0.125)
82 )
83
84 // z-direction expansion ratio
85 1
86 )
87
88 );
Multi-grading of a block
• Finally, as the mesh is 2D, we do not need to add
grading in the Z-direction (line 85).
37. 37
blockMesh guided tutorials
Running the case
• To generate the mesh, in the terminal window type:
1. $> foamCleanTutorials
2. $> blockMesh
3. $> checkMesh
4. $> paraFoam
38. 38
blockMesh guided tutorials
• Let us take a close look to a blockMeshDict dictionary to
study how to create multiple blocks.
• We will use the square cavity case.
• You will find this case in the directory:
• From this point on, please follow me.
• We are all going to work at the same pace.
• Remember, $PTOFC is pointing to the path where you
unpacked the tutorials.
101BLOCKMESH/C3
39. 39
blockMesh guided tutorials
What are we going to do?
• We will use this case to take a close look at a blockMeshDict dictionary.
• We will study how to work with multiple blocks.
• When working with multiples blocks, we need to deal with the common face between
blocks. If we do not connect these blocks, blockMesh will create a boundary patch
and we will need to assign a boundary condition to this patch.
• When we connect the blocks, blockMesh will create an internal face (therefore we
do not need to assign a boundary condition to the face).
• There are two ways to connect blocks, using face matching and face merging.
Hereafter we are going to study face merging.
40. 40
blockMesh guided tutorials
The blockMeshDict dictionary.
19 xmin 0;
20 xmax 1;
21 ymin 0.5;
22 ymax 1;
23 zmin 0;
24 zmax 1;
25
26 ymin2 0;
27 ymax2 0.5;
28
29 xcells 20;
30 ycells 10;
31 zcells 1;
39
40 vertices
41 (
42 //BLOCK 0
43 ($xmin $ymin $zmin) //0
44 ($xmax $ymin $zmin) //1
45 ($xmax $ymax $zmin) //2
46 ($xmin $ymax $zmin) //3
47 ($xmin $ymin $zmax) //4
48 ($xmax $ymin $zmax) //5
49 ($xmax $ymax $zmax) //6
50 ($xmin $ymax $zmax) //7
51
52 //BLOCK 1
53 ($xmin $ymin2 $zmin) //8
54 ($xmax $ymin2 $zmin) //9
55 ($xmax $ymax2 $zmin) //10
56 ($xmin $ymax2 $zmin) //11
57 ($xmin $ymin2 $zmax) //12
58 ($xmax $ymin2 $zmax) //13
59 ($xmax $ymax2 $zmax) //14
60 ($xmin $ymax2 $zmax) //15
71 );
Multiple blocks – Face merging
• To do a mesh with multiple blocks we proceed in the
same as we have done so far.
• When using face merging we need to define all the
vertices that made up each block.
• In lines 19-27 we use macro syntax to declare the
variables that we will use to define the vertices.
• In lines 29-31 we use macro syntax to define the
number of cells in each direction. As this is a 2D case
there is only one cell in the Z-direction.
• In lines 40-71 we use macro syntax to define the
vertices that made up each block.
41. 41
blockMesh guided tutorials
The blockMeshDict dictionary.
73 blocks
74 (
75 hex (0 1 2 3 4 5 6 7) ($xcells $ycells $zcells) simpleGrading (1 1 1) //BLOCK 0
76 hex (8 9 10 11 12 13 14 15) ($xcells $ycells $zcells) simpleGrading (1 1 1) //BLOCK 1
77 //hex (8 9 10 11 12 13 14 15) (40 $ycells $zcells) simpleGrading (1 1 1)
78 );
Multiple blocks – Face merging
• In lines 73-78, we define the blocks.
• In line 75, (0 1 2 3 4 5 6 7) are the vertices used to define
block 0 (the top block).
• Remember, the first vertex in the list represents the origin of
the coordinate system (vertex 0 in this case). Starting from
this vertex, we construct the block topology. So in this case,
the first part of the block is made up by vertices 0 1 2 3 and
the second part of the block is made up by vertices 4 5 6 7
(notice that we start from vertex 4 which is the projection in
the Z-direction of vertex 0).
• ($xcells $ycells $zcells) is the number of mesh cells in each
direction (X Y Z). Notice that we are using macro syntax.
• simpleGrading (1 1 1) is the grading or mesh stretching in
each direction (X Y Z), in this case the mesh is uniform.
42. 42
blockMesh guided tutorials
The blockMeshDict dictionary.
73 blocks
74 (
75 hex (0 1 2 3 4 5 6 7) ($xcells $ycells $zcells) simpleGrading (1 1 1) //BLOCK 0
76 hex (8 9 10 11 12 13 14 15) ($xcells $ycells $zcells) simpleGrading (1 1 1) //BLOCK 1
77 //hex (8 9 10 11 12 13 14 15) (40 $ycells $zcells) simpleGrading (1 1 1)
78 );
Multiple blocks – Face merging
• In line 76, (8 9 10 11 12 13 14 15) are the vertices used to
define block 1 (the bottom block).
• The first vertex in the list represents the origin of the
coordinate system (vertex 8 in this case). Starting from this
vertex, we construct the block topology. So in this case, the
first part of the block is made up by vertices 8 9 10 11 and the
second part of the block is made up by vertices 12 13 14 15
(notice that we start from vertex 12 which is the projection in
the Z-direction of vertex 8).
• ($xcells $ycells $zcells) is the number of mesh cells in each
direction (X Y Z). Notice that we are using macro syntax.
• simpleGrading (1 1 1) is the grading or mesh stretching in
each direction (X Y Z), in this case the mesh is uniform.
43. 43
blockMesh guided tutorials
The blockMeshDict dictionary.
86 boundary
87 (
88 movingWall
89 {
90 type wall;
91 faces
92 (
93 (3 7 6 2)
94 );
95 }
96 fixedWalls
97 {
98 type wall;
99 faces
100 (
101 (0 4 7 3)
102 (2 6 5 1)
104 (11 15 12 8)
105 (10 14 13 9)
106 (8 9 13 12)
107 );
108 }
131 back
132 {
133 type empty;
134 faces
135 (
136 (0 3 2 1)
137 (8 11 10 9)
138 );
139 }
Multiple blocks – Face merging
• In lines 88-139 we define the boundary patches of the
domain.
• We are defining the external patches.
44. 44
blockMesh guided tutorials
The blockMeshDict dictionary.
141 interface1
142 {
143 type wall;
144 faces
145 (
146 (0 1 5 4)
147 );
148 }
149
150 interface2
151 {
152 type wall;
153 faces
154 (
155 (11 10 14 15)
156 );
157 }
158 );
159
160 mergePatchPairs
161 (
162 (interface1 interface2)
163 );
Multiple blocks – Face merging
• In lines 141-157 we define the boundary patches
common to each block.
• In this case we need to use mergePatchPairs to
create an internal face, otherwise OpenFOAM® will
see this patch as an boundary patch.
• To merge patches we need to define them in the
section boundary of the blockMeshDict dictionary.
• In line 162 we merge the patches. The first entry
corresponds to the master patch and the second entry
is the slave patch.
Master Slave
45. 45
blockMesh guided tutorials
The blockMeshDict dictionary.
Multiple blocks – Face merging
• The advantage of using face merging instead of face matching, is that we can use blocks with different
grading and number of cells.
• If the blocks are different, blockMesh will modify the block that owns the slave patch in order to have a
conforming mesh.
• The block that owns the master patch remains unchanged.
46. 46
blockMesh guided tutorials
Running the case
• To generate the mesh, in the terminal window type:
1. $> foamCleanTutorials
2. $> blockMesh
3. $> checkMesh
4. $> paraFoam
47. 47
blockMesh guided tutorials
The blockMeshDict dictionary.
73 blocks
74 (
75 hex (0 1 2 3 4 5 6 7) ($xcells $ycells $zcells) simpleGrading (1 1 1) //BLOCK 0
76 //hex (8 9 10 11 12 13 14 15) ($xcells $ycells $zcells) simpleGrading (1 1 1)
77 hex (8 9 10 11 12 13 14 15) (40 $ycells $zcells) simpleGrading (1 1 1) //BLOCK 1
78 );
Multiple blocks – Face merging
• To have different blocks, we changed the number of
cells in the X-direction of the bottom block (line 77).
• The definition of the block topology remains unchanged,
i.e., (8 9 10 11 12 13 14 15).
• Also, the grading does not change. If you want you can
use a non-uniform grading.
• Have in mind that the mesh will no longer be 2D
because blockMesh will add cells to make the blocks
conforming. To get the 2D mesh, you will need to use
the utility extrudeMesh, which reads the
extrudeMeshDict dictionary.
• Type in the terminal,
• $> extrudeMesh
48. 48
blockMesh guided tutorials
The extrudeMeshDict dictionary.
18 constructFrom patch;
19
20 sourceCase “.”
21 sourcePatches (back);
22
23 exposedPatchName front;
24
27 extrudeModel linearNormal
28
29 nLayers 1;
30
31 linearNormalCoeffs
32 {
33 thickness 1;
34 }
35
39 mergeFaces false;
• The utility extrudeMesh will create a 2D mesh by projecting the source patch into the exposed
patch.
• To create the 2D mesh, you will need to use 1 layer (nLayers).
• It is also recommended to set the extrusion thickness to 1.
Name of source patch
Name of the mirror patch
Number of layers to use in the linear extrusion.
As this is a 2D case we must use 1 layer
Thickness of the extrusion.
It is highly recommended to use a value of 1
49. 49
blockMesh guided tutorials
• Let us take a close look to a blockMeshDict dictionary to
study how to create multiple blocks.
• We will use the square cavity case.
• You will find this case in the directory:
• From this point on, please follow me.
• We are all going to work at the same pace.
• Remember, $PTOFC is pointing to the path where you
unpacked the tutorials.
101BLOCKMESH/C4
50. 50
blockMesh guided tutorials
What are we going to do?
• We will use this case to take a close look at a blockMeshDict dictionary.
• We will study how to work with multiple blocks.
• When working with multiples blocks, we need to deal with the common face between
blocks. If we do not connect these blocks, blockMesh will create a boundary patch
and we will need to assign a boundary condition.
• When we connect the blocks, blockMesh will create an internal face (therefore we
do not need to assign a boundary condition to the face).
• There are two ways to connect blocks, using face matching and face merging.
Hereafter we are going to study face matching.
51. 51
blockMesh guided tutorials
The blockMeshDict dictionary.
19 xmin 0;
20 xmax 1;
21 ymin 0.5;
22 ymax 1;
23 zmin 0;
24 zmax 1;
25
26 ymin2 0;
27 ymax2 0.5;
28
29 xcells 20;
30 ycells 10;
31 zcells 1;
39
40 vertices
41 (
42 //BLOCK 0
43 ($xmin $ymin $zmin) //0
44 ($xmax $ymin $zmin) //1
45 ($xmax $ymax $zmin) //2
46 ($xmin $ymax $zmin) //3
47 ($xmin $ymin $zmax) //4
48 ($xmax $ymin $zmax) //5
49 ($xmax $ymax $zmax) //6
50 ($xmin $ymax $zmax) //7
51
52 //BLOCK 1
53 ($xmin $ymin2 $zmin) //8
54 ($xmax $ymin2 $zmin) //9
55 ($xmin $ymin2 $zmax) //10
56 ($xmax $ymin2 $zmax) //11
68 );
138 mergePatchPairs
139 (
140
141 );
Multiple blocks – Face matching
• To do a mesh with multiple blocks we proceed in the
same way as we have done so far.
• When using face matching we do not need to define
all the vertices that made up each block.
• For the common face between blocks, we only need to
define one set of vertices.
• In lines 19-27 we use macro syntax to declare the
variables that we will use to define the vertices.
• In lines 29-31 we use macro syntax to define the
number of cells in each direction. As this is a 2D case
there is only one cell in the Z-direction.
52. 52
blockMesh guided tutorials
The blockMeshDict dictionary.
19 xmin 0;
20 xmax 1;
21 ymin 0.5;
22 ymax 1;
23 zmin 0;
24 zmax 1;
25
26 ymin2 0;
27 ymax2 0.5;
28
29 xcells 20;
30 ycells 10;
31 zcells 1;
39
40 vertices
41 (
42 //BLOCK 0
43 ($xmin $ymin $zmin) //0
44 ($xmax $ymin $zmin) //1
45 ($xmax $ymax $zmin) //2
46 ($xmin $ymax $zmin) //3
47 ($xmin $ymin $zmax) //4
48 ($xmax $ymin $zmax) //5
49 ($xmax $ymax $zmax) //6
50 ($xmin $ymax $zmax) //7
51
52 //BLOCK 1
53 ($xmin $ymin2 $zmin) //8
54 ($xmax $ymin2 $zmin) //9
55 ($xmin $ymin2 $zmax) //10
56 ($xmax $ymin2 $zmax) //11
68 );
138 mergePatchPairs
139 (
140
141 );
Multiple blocks – Face matching
• In lines 40-68 we use macro syntax to define the
vertices that made up each block.
• In lines 43-50 we define the vertices that made up the
top block.
• In lines 53-56 we define the vertices that made up the
bottom block. Notice that we are only defining the new
vertices (8 9 10 11).
• The vertices (0 1 4 5), that are common between the
block are not redefined.
53. 53
blockMesh guided tutorials
The blockMeshDict dictionary.
Multiple blocks – Face matching
• Have in mind that the blocks need to be identical, that is,
same number of cells and same grading.
• If the blocks are different, blockMesh will not generate
the mesh.
• You do not need to define the common patches in the
section boundary of the blockMeshDict dictionary.
• Finally, we do not need to define the patches in the
keyword mergePatchPairs as blockMesh will
automatically merge the common faces.
54. 54
blockMesh guided tutorials
Running the case
• To generate the mesh, in the terminal window type:
1. $> foamCleanTutorials
2. $> blockMesh
3. $> checkMesh
4. $> paraFoam
55. 55
blockMesh guided tutorials
• Let us take a close look to a blockMeshDict dictionary to
study how to create non-straight edges.
• We will use the square cavity case.
• You will find this case in the directory:
• From this point on, please follow me.
• We are all going to work at the same pace.
• Remember, $PTOFC is pointing to the path where you
unpacked the tutorials.
101BLOCKMESH/C5
56. 56
blockMesh guided tutorials
What are we going to do?
• We will use this case to take a close look at a blockMeshDict dictionary.
• We will study how to create non straight edges.
• Possible options are: arc, spline, polyline, Bspline, line.
• Edges are constructed from the vertices definition.
• Each edge joining two vertices is assumed to be straight by default.
• The user can specified any edge to be curved by entries in the section edges.
• For example, to define an arc we first define the vertices to be connected to form an
edge and then we give an interpolation point.
• To define a polyline we first define the vertices to be connected to form an edge and
then we give a list of the coordinates of the interpolation points.
• Let us study how to create curved edges using the square cavity case with face
merging.
57. 57
blockMesh guided tutorials
The blockMeshDict dictionary.
70 edges
71 (
107 spline 0 1
108 (
109 (0.25 0.4 0)
110 (0.5 0.6 0)
111 (0.75 0.4 0)
112 )
113 spline 4 5
114 (
115 (0.25 0.4 1)
116 (0.5 0.6 1)
117 (0.75 0.4 1)
118 )
119 spline 11 10
120 (
121 (0.25 0.4 0)
122 (0.5 0.6 0)
123 (0.75 0.4 0)
124 )
125 spline 15 14
126 (
127 (0.25 0.4 1)
128 (0.5 0.6 1)
129 (0.75 0.4 1)
130 )
133 );
• In lines 70-133 we define spline edges.
• As we are using face merging, we need to define the splines
in each common patch.
• To define a spline we first define the vertices to be connected
to form an edge and then we give a list of the coordinates of
the interpolation points.
• In lines 107-118 we define the splines belonging to block 0.
• In lines 119-130 we define the splines belonging to block 1.
Interpolation
points
Interpolation method
Vertices to connect
58. 58
blockMesh guided tutorials
The blockMeshDict dictionary.
70 edges
71 (
73 arc 0 1 (0.5 0.3 0)
74 arc 4 5 (0.5 0.3 1)
75 arc 11 10 (0.5 0.3 0)
76 arc 15 14 (0.5 0.3 1)
133 );
• In lines 70-133 we define arc edges.
• As we are using face merging, we need to define the arcs in
each common patch.
• To define an arc we first define the vertices to be connected to
form an edge and then we give an interpolation point.
• In lines 73-74 we define the arcs belonging to block 0.
• In lines 75-76 we define the arcs belonging to block 1.
Interpolation points
Vertices to connect
Interpolation method
59. 59
blockMesh guided tutorials
Running the case
• Choose any of the previous cases.
• To generate the mesh, in the terminal window type:
1. $> foamCleanTutorials
2. $> blockMesh
3. $> checkMesh
4. $> paraFoam
60. 60
blockMesh guided tutorials
• Let us take a close look to a blockMeshDict dictionary to
study how to create an O-grid mesh.
• We will use the square cavity case.
• You will find this case in the directory:
• From this point on, please follow me.
• We are all going to work at the same pace.
• Remember, $PTOFC is pointing to the path where you
unpacked the tutorials.
101BLOCKMESH/C6
61. 61
blockMesh guided tutorials
What are we going to do?
• We will use this case to take a close look at a blockMeshDict dictionary.
• We will create a 3D pipe using an O-grid topology.
• To create the O-grid topology we will use five blocks.
• At a first glance, this seems to be an easy task but it requires some work to layout the
topology.
• We will use face matching.
62. 62
blockMesh guided tutorials
The blockMeshDict dictionary.
17 convertToMeters 0.025;
18
19 vertices
20 (
21 //block0 vertices
22 (-0.25 0.25 0) //0
23 (-0.707106 0.707106 0) //1
24 (0.707106 0.707106 0) //2
25 (0.25 0.25 0) //3
26 (-0.25 0.25 100) //4
27 (-0.707106 0.707106 100) //5
28 (0.707106 0.707106 100) //6
29 (0.25 0.25 100) //7
30
31 //block1 new vertices
32 (0.25 -0.25 0) //8
33 (0.707106 -0.707106 0) //9
34 (0.25 -0.25 100) //10
35 (0.707106 -0.707106 100) //11
36
37 //block3 new vertices
38 (-0.25 -0.25 0) //12
39 (-0.707106 -0.707106 0) //13
40 (-0.25 -0.25 100) //14
41 (-0.707106 -0.707106 100) //15
42 );
43
44
45 xcells 20;
46 ycells 40;
47 zcells 60;
48
49 xcells1 20;
50 ycells1 20;
51 zcells1 60;
52
53 stretch 0.25;
• In this case we use and scaling factor of 0.025 (line 17).
• We can also scale the mesh using the mesh utility
transformPoints.
• In lines 19-42 we define the coordinates of all the vertices.
Remember, we are using face matching.
• In lines 45-53 we use macro syntax to declare a set of
variables that will be used later.
63. 63
blockMesh guided tutorials
The blockMeshDict dictionary.
54
55 blocks
56 (
57 //block0
58 hex (0 3 2 1 4 7 6 5) ($xcells $ycells $zcells) simpleGrading (1 $stretch 1)
59 //block1
60 hex (3 8 9 2 7 10 11 6) ($xcells $ycells $zcells) simpleGrading (1 $stretch 1)
61 //block2
62 hex (8 12 13 9 10 14 15 11) ($xcells $ycells $zcells) simpleGrading (1 $stretch 1)
63 //block3
64 hex (12 0 1 13 14 4 5 15) ($xcells $ycells $zcells) simpleGrading (1 $stretch 1)
65 //block4
66 hex (0 12 8 3 4 14 10 7) ($xcells1 $ycells1 $zcells1) simpleGrading (1 1 1)
67 );
• In lines 55-67, we define all the blocks that made up the
O-grid topology.
• Notice that we are creating five blocks.
• We also define the number of cells of each block and
the grading.
• As we are using face matching, the grading and
number of cells in the common faces need to be the
same.