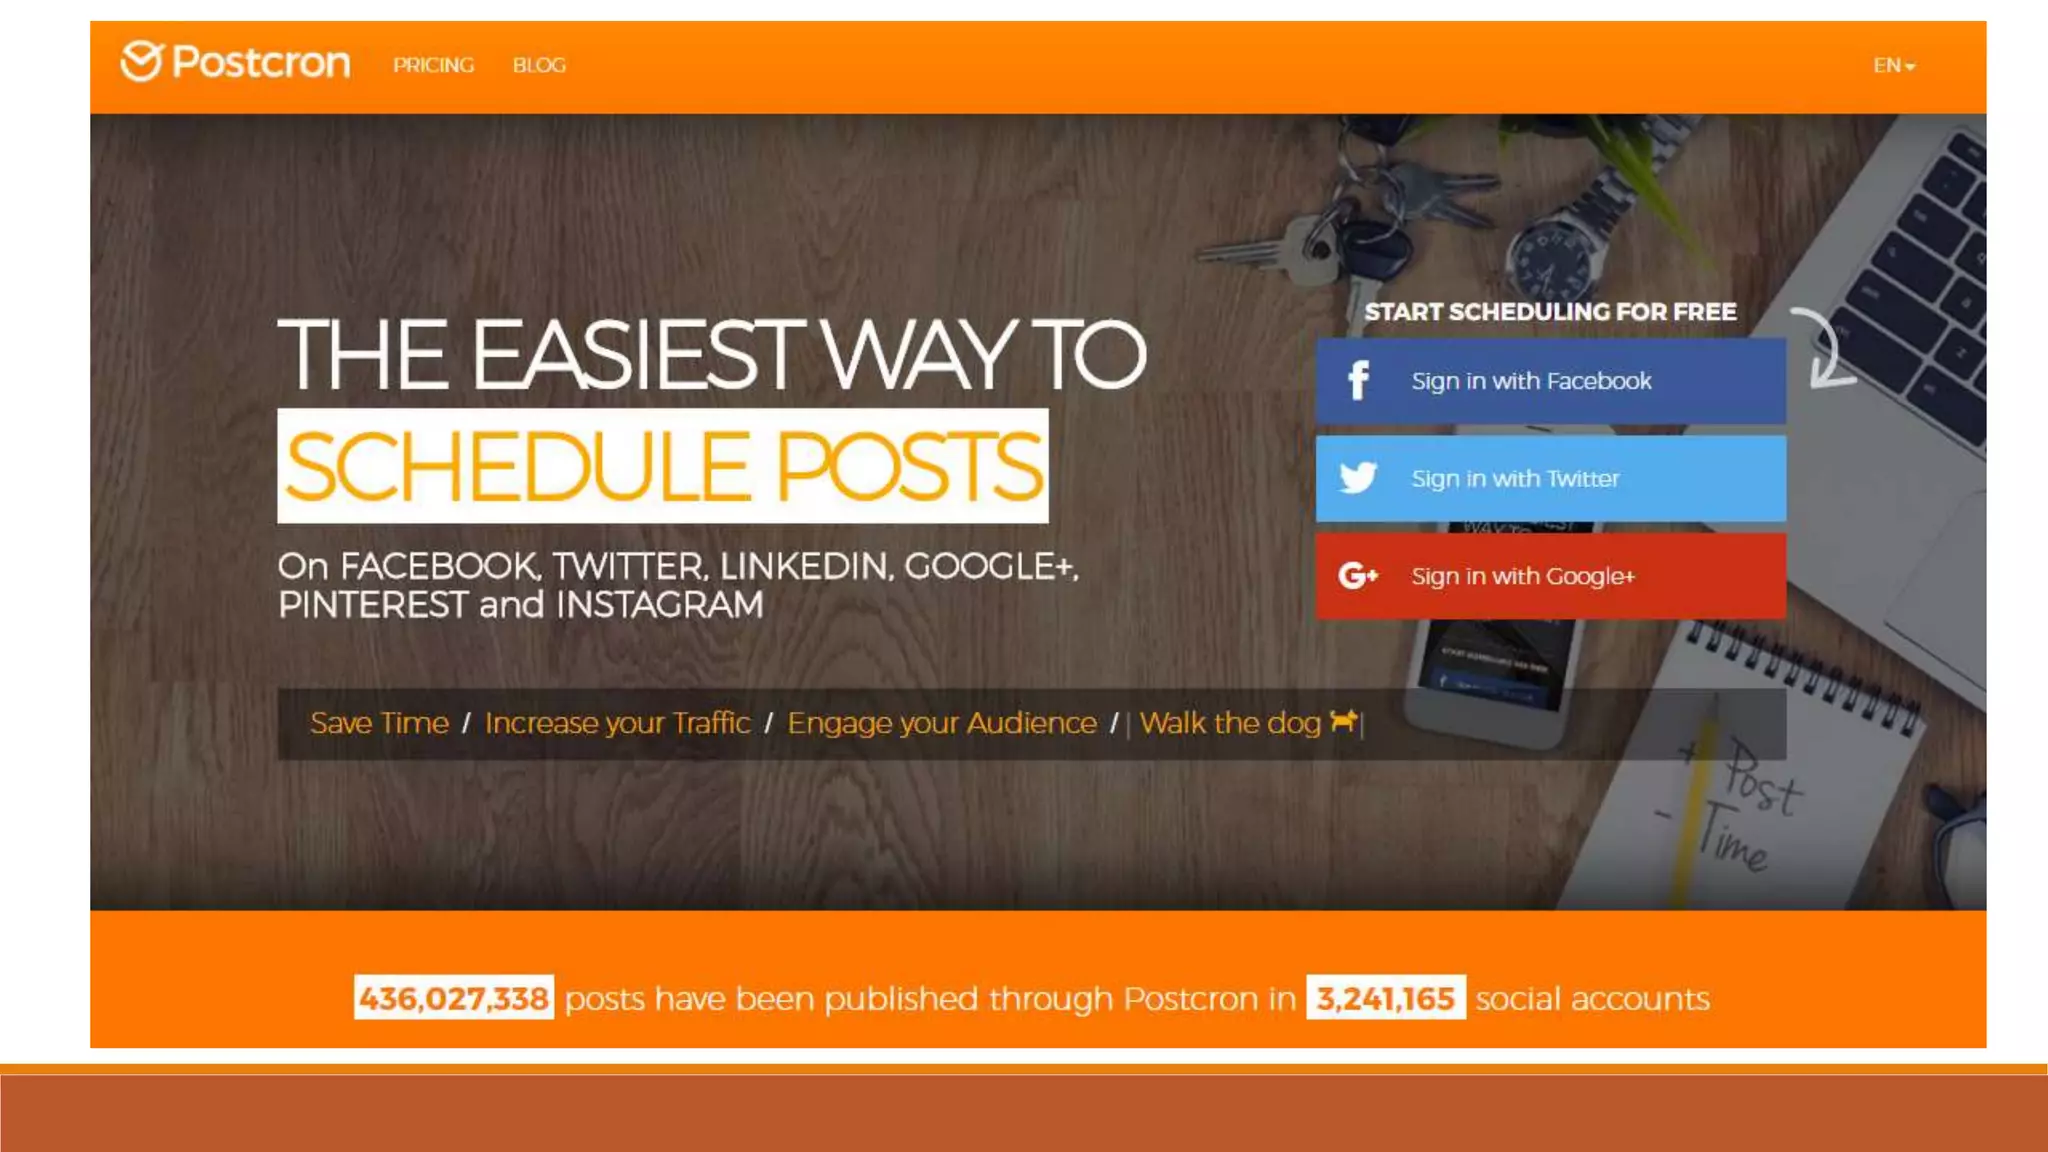
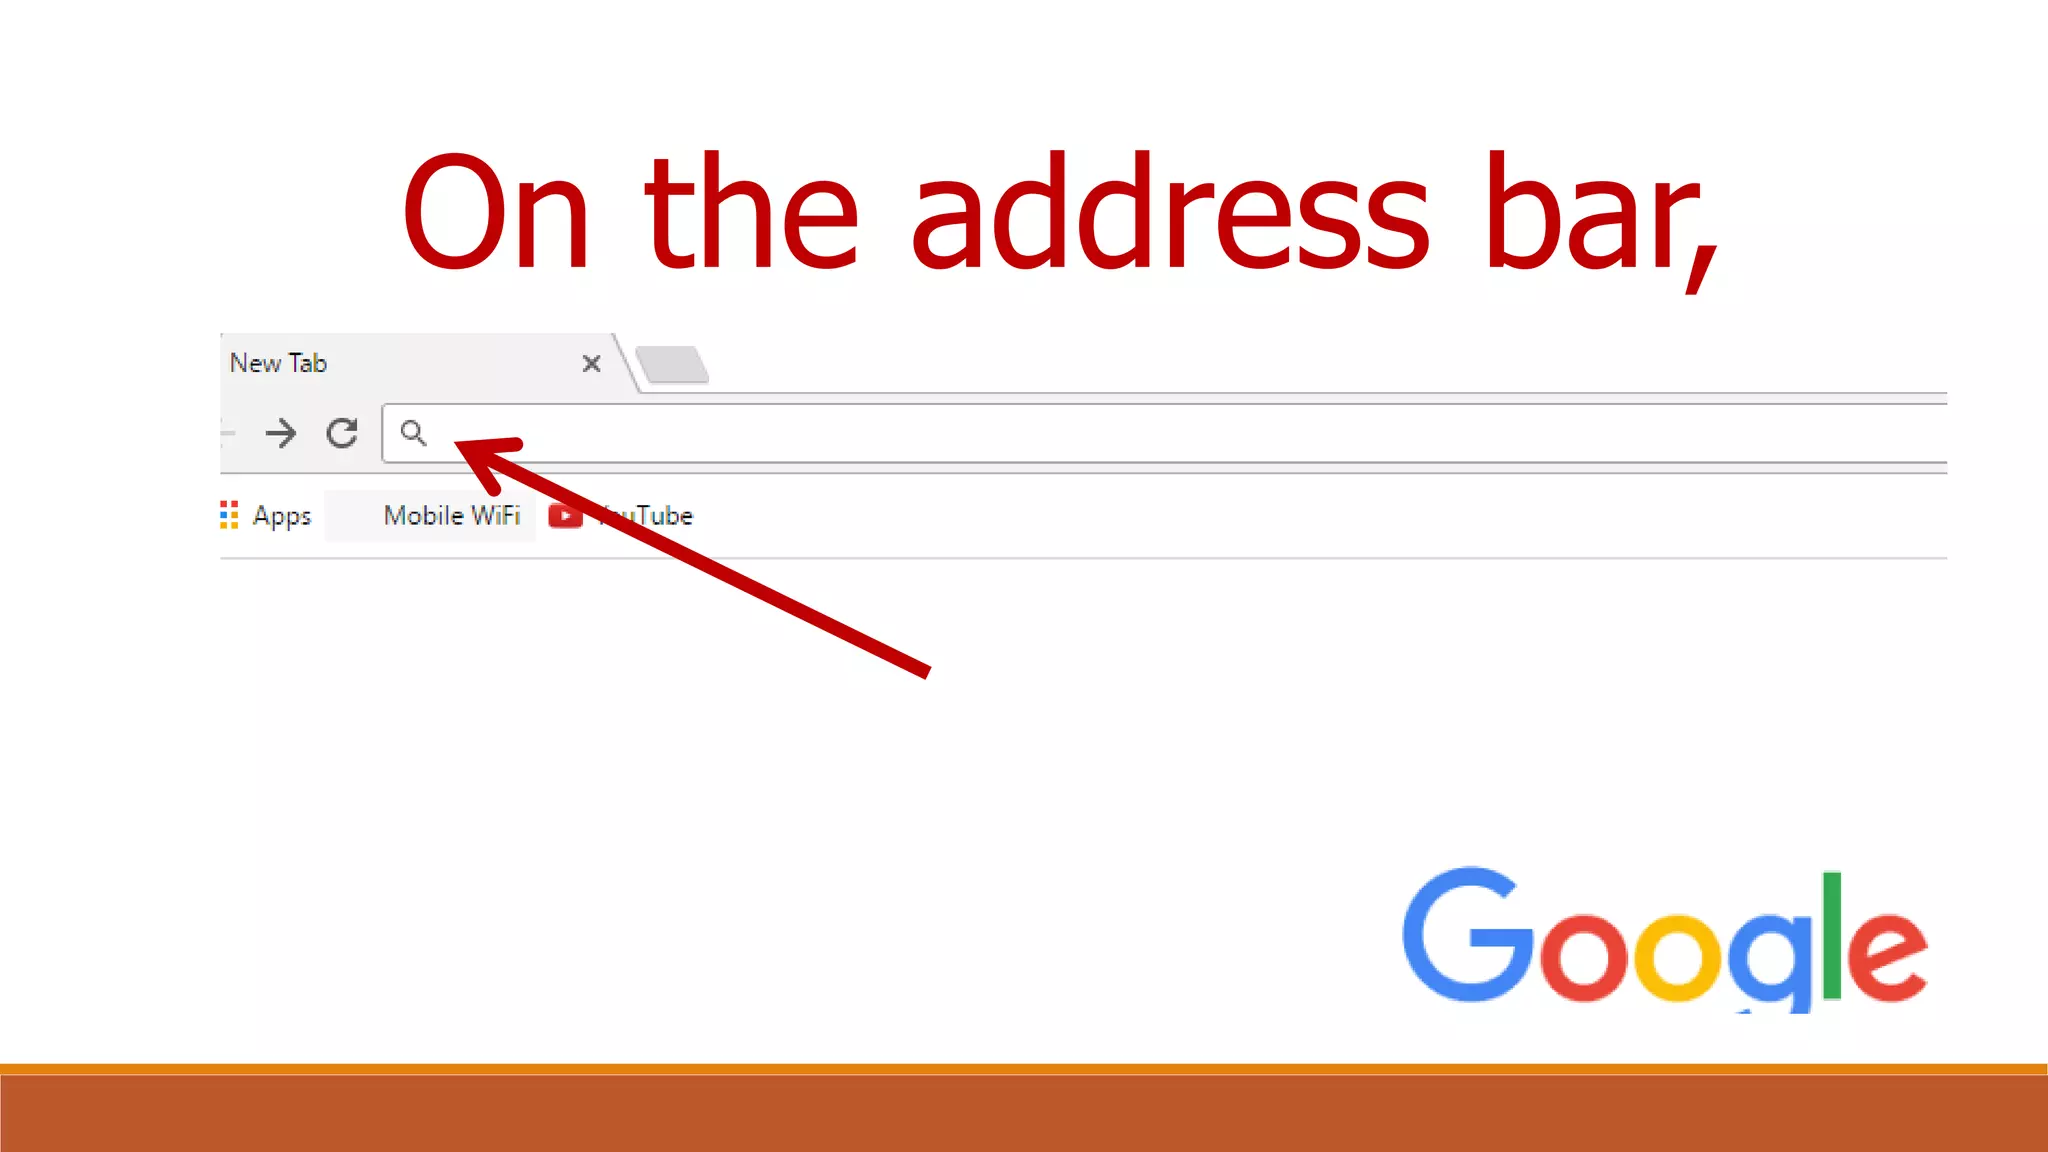
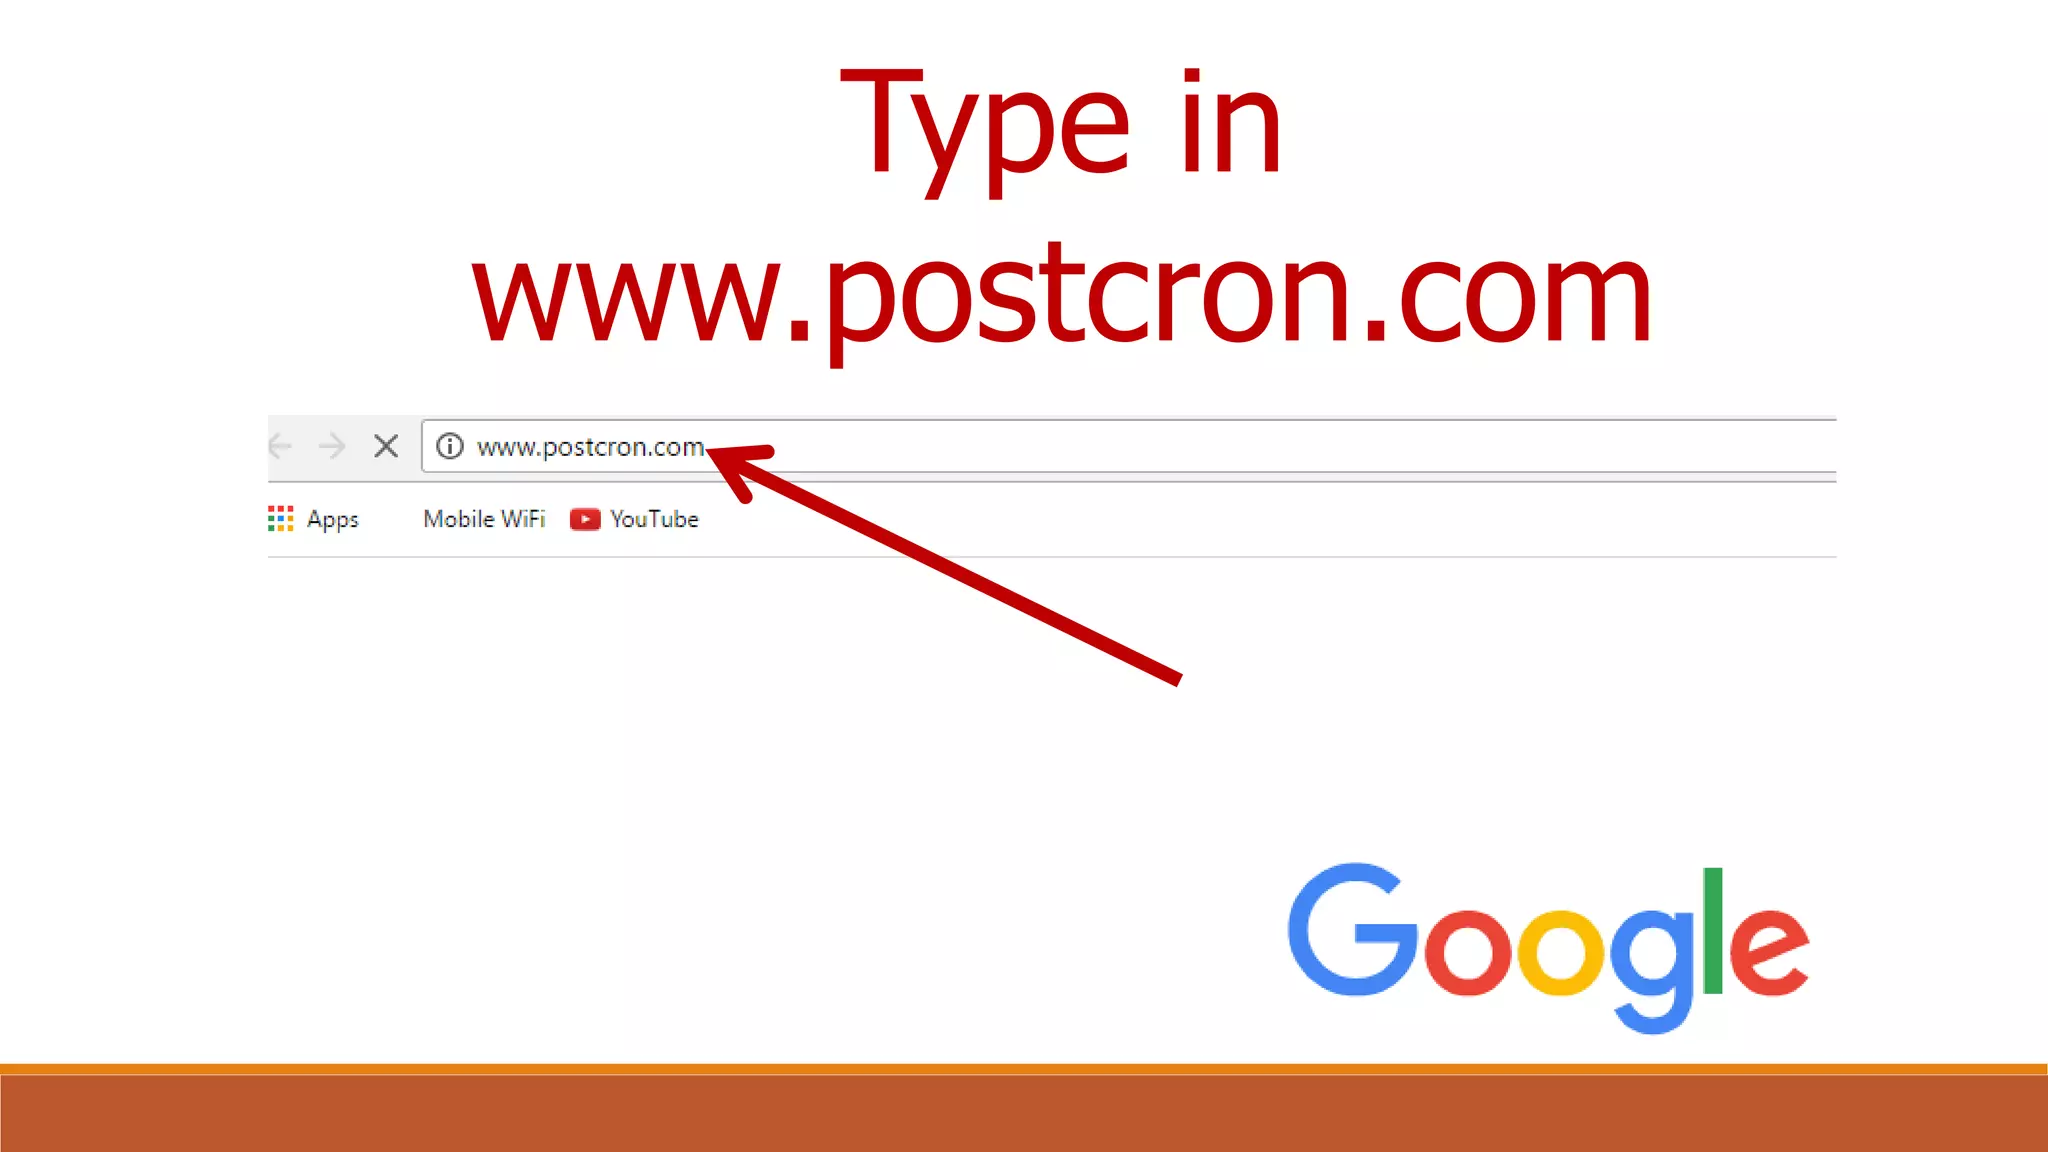
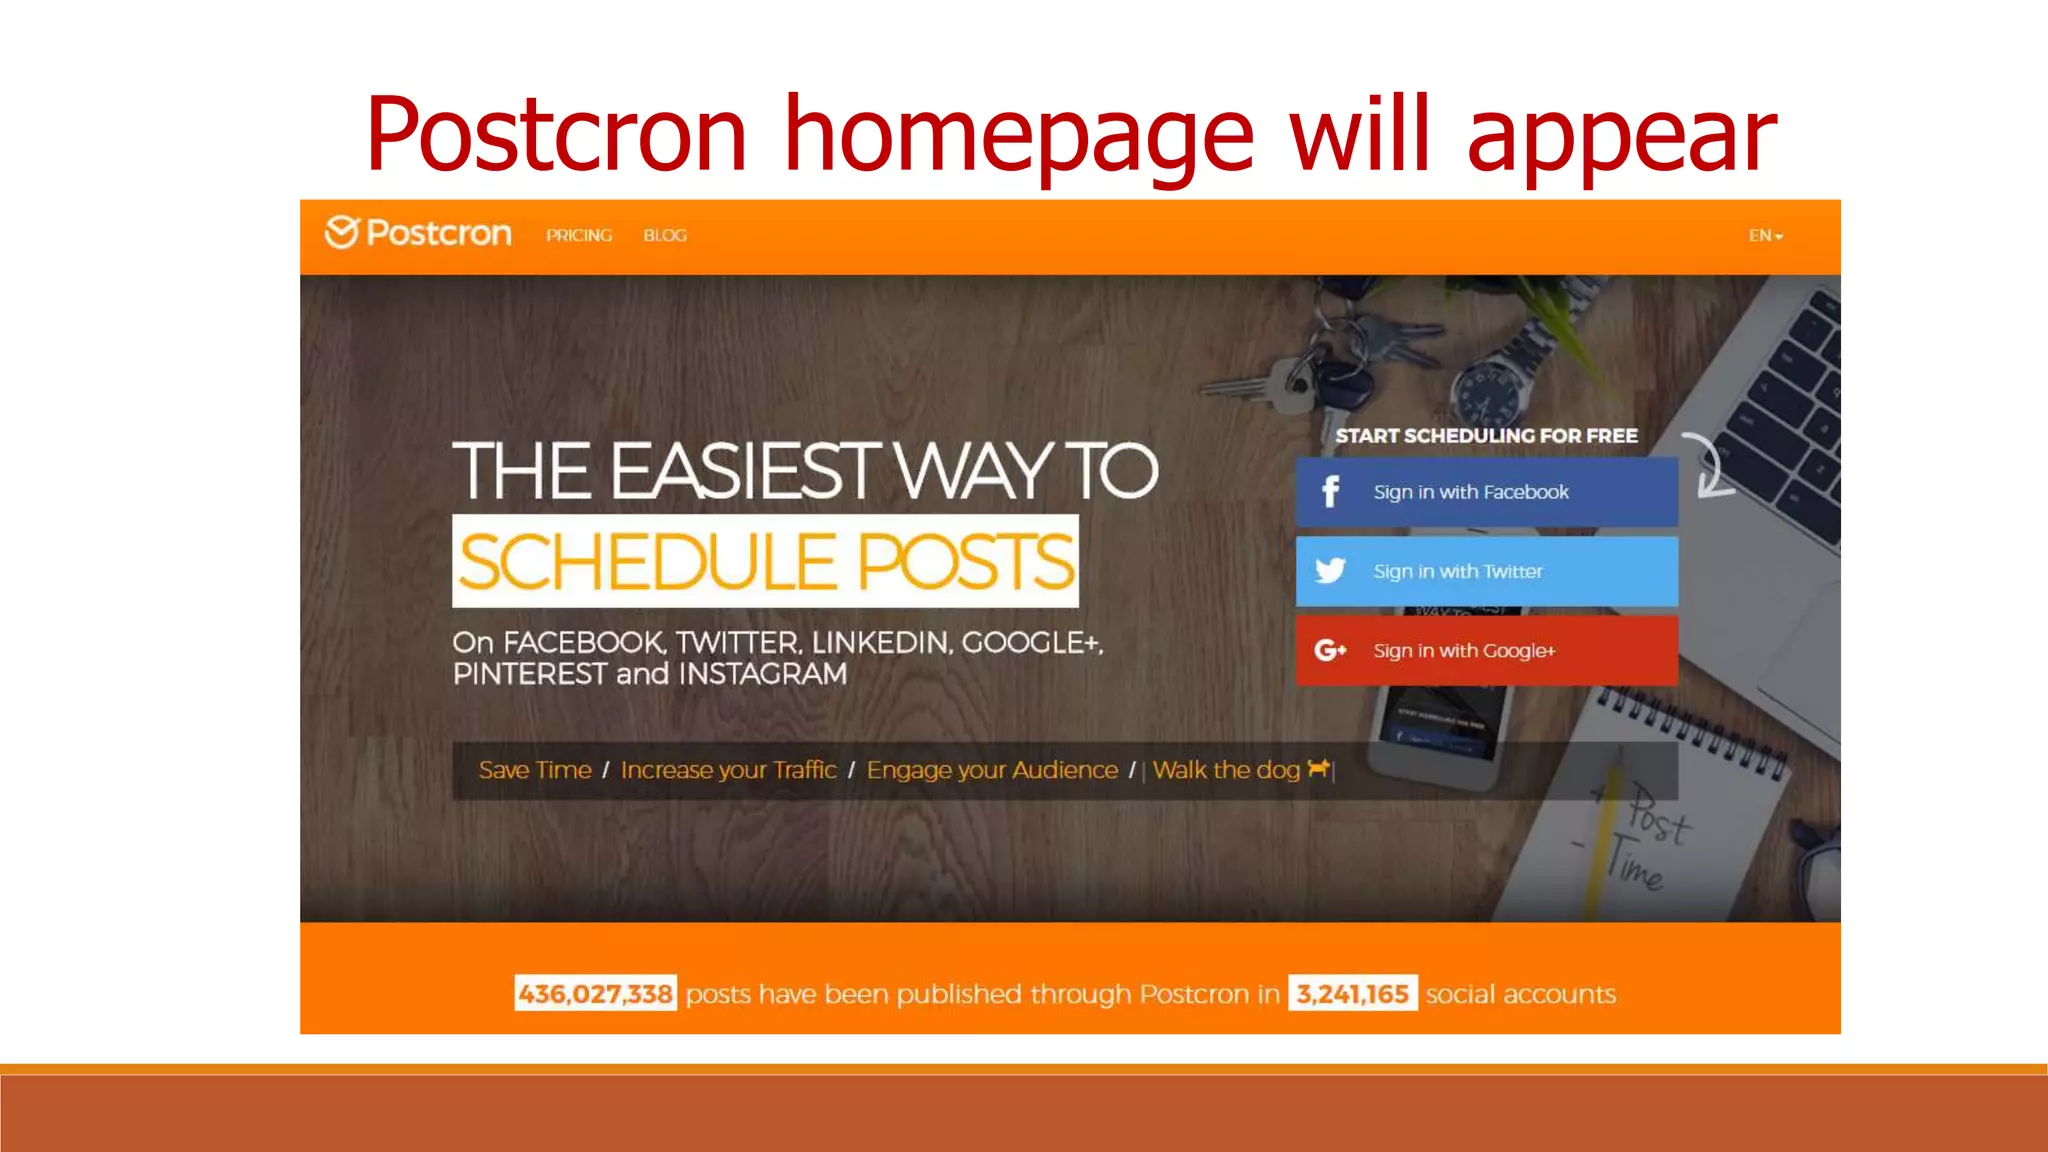
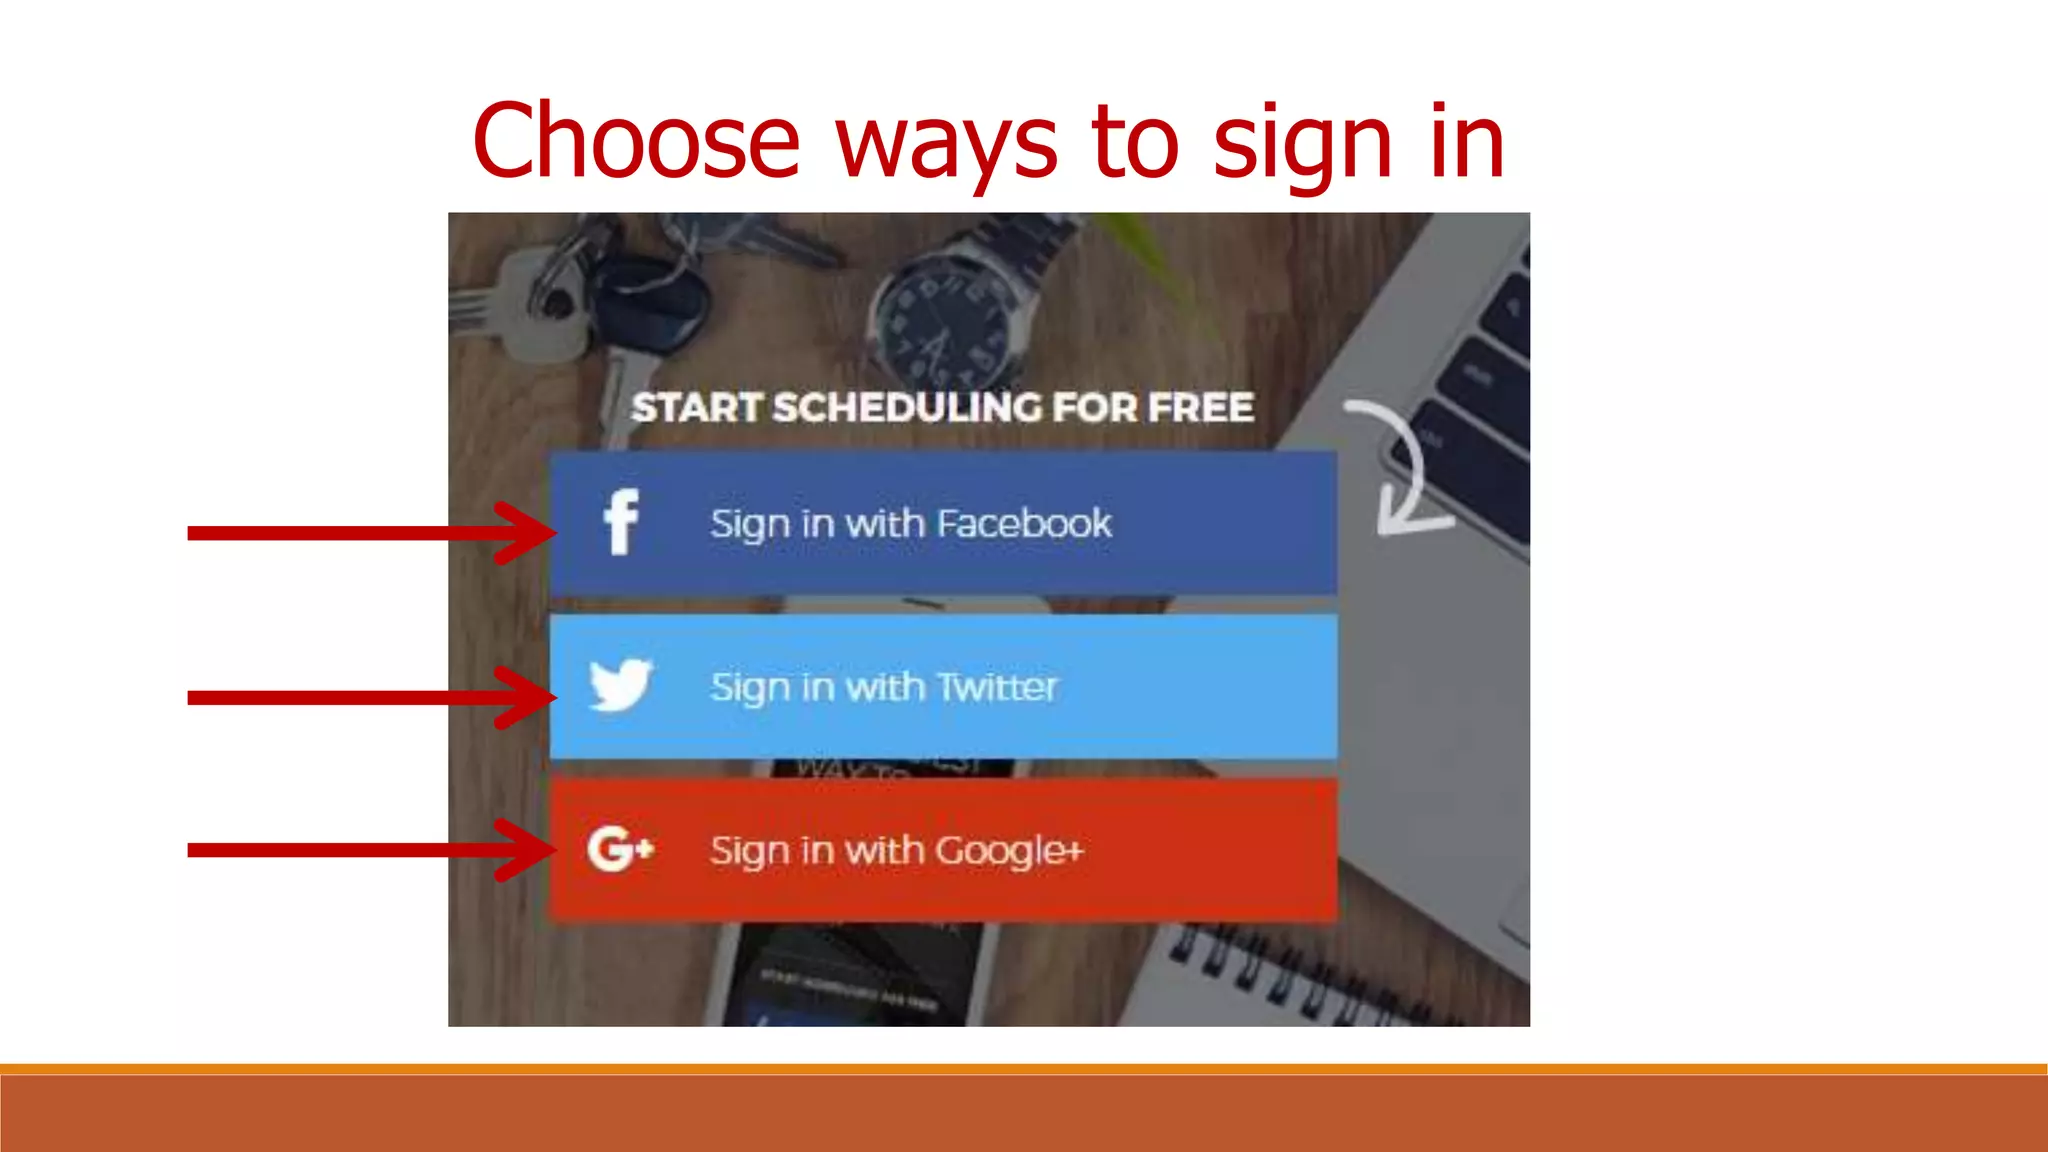
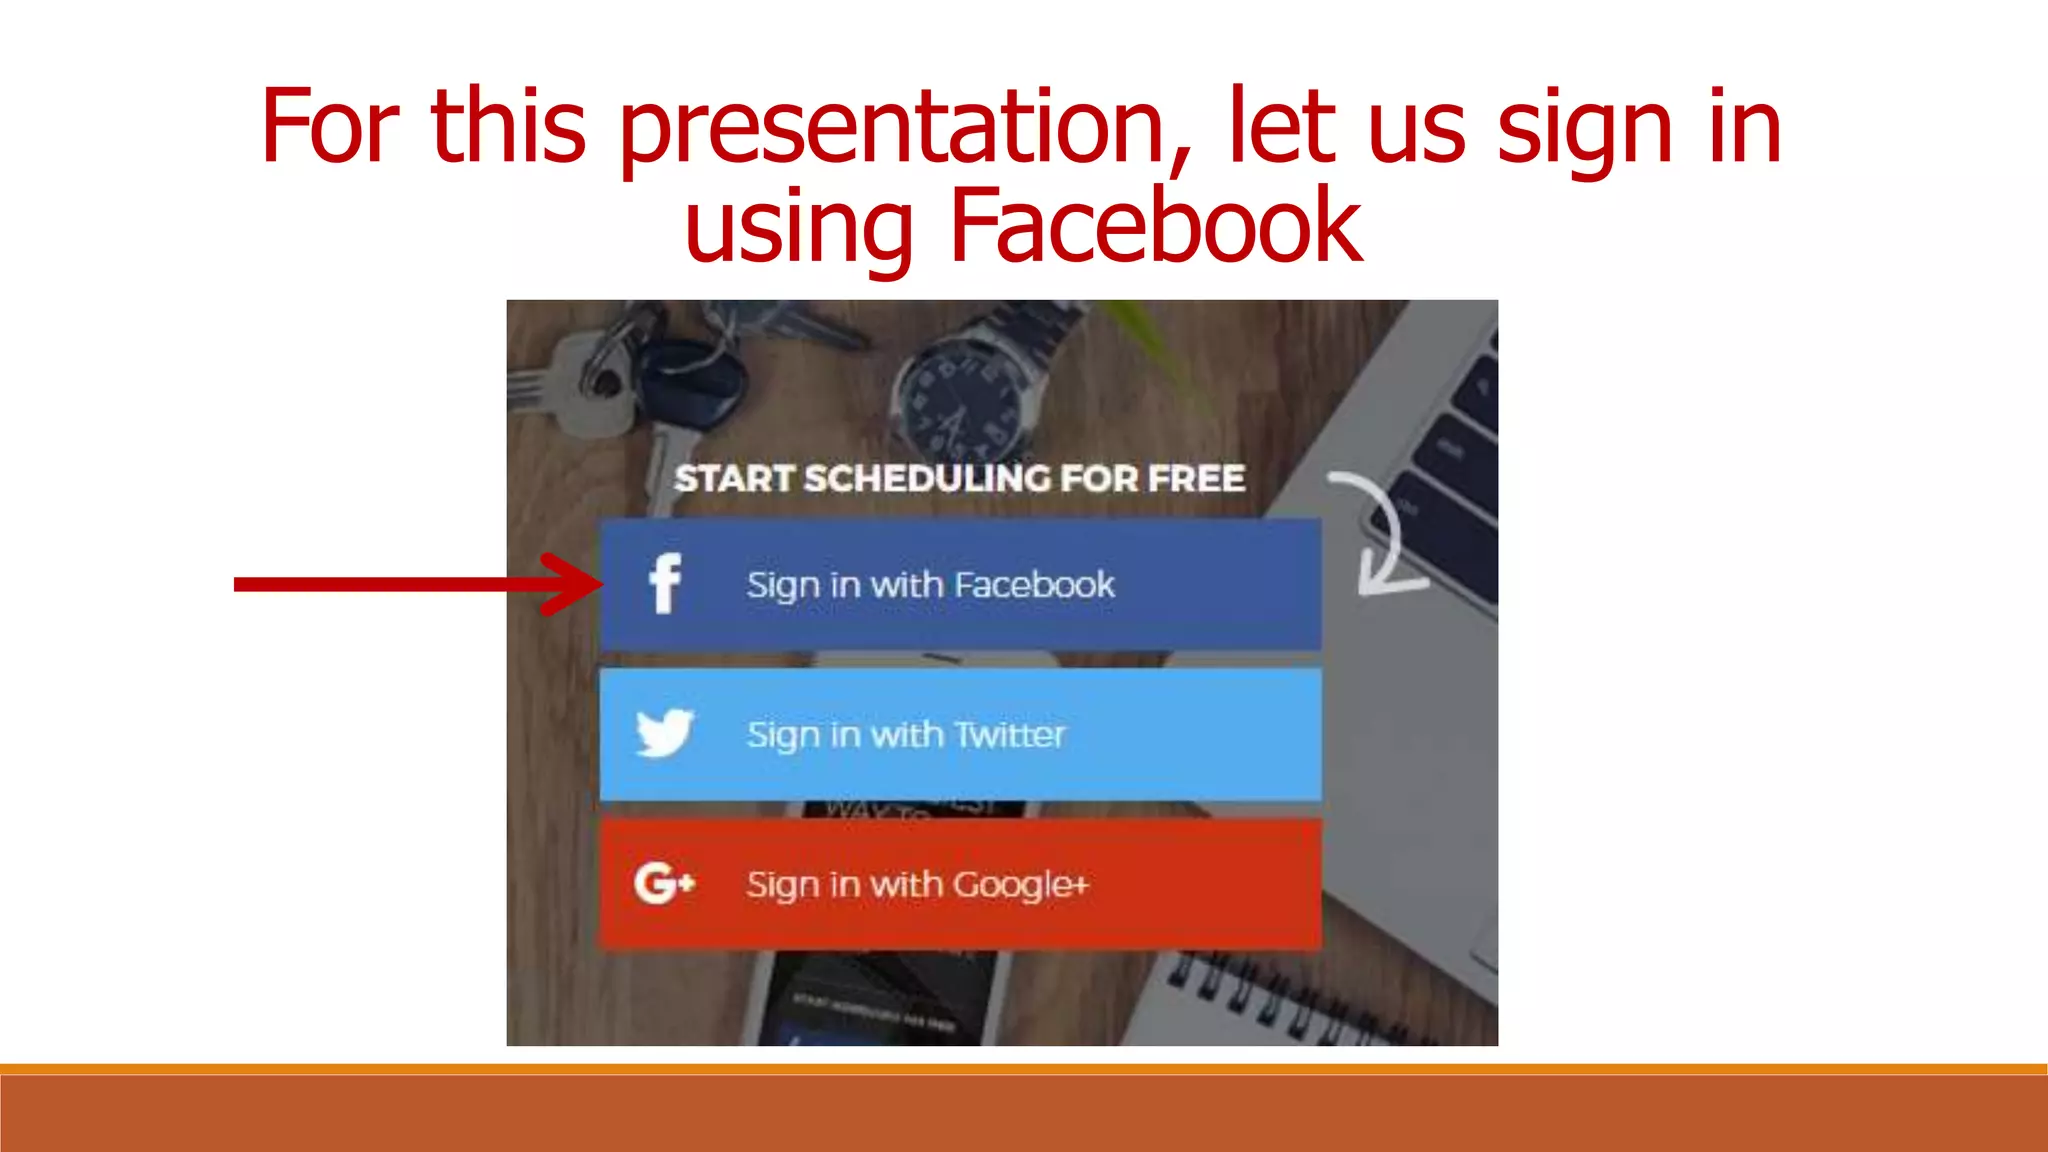
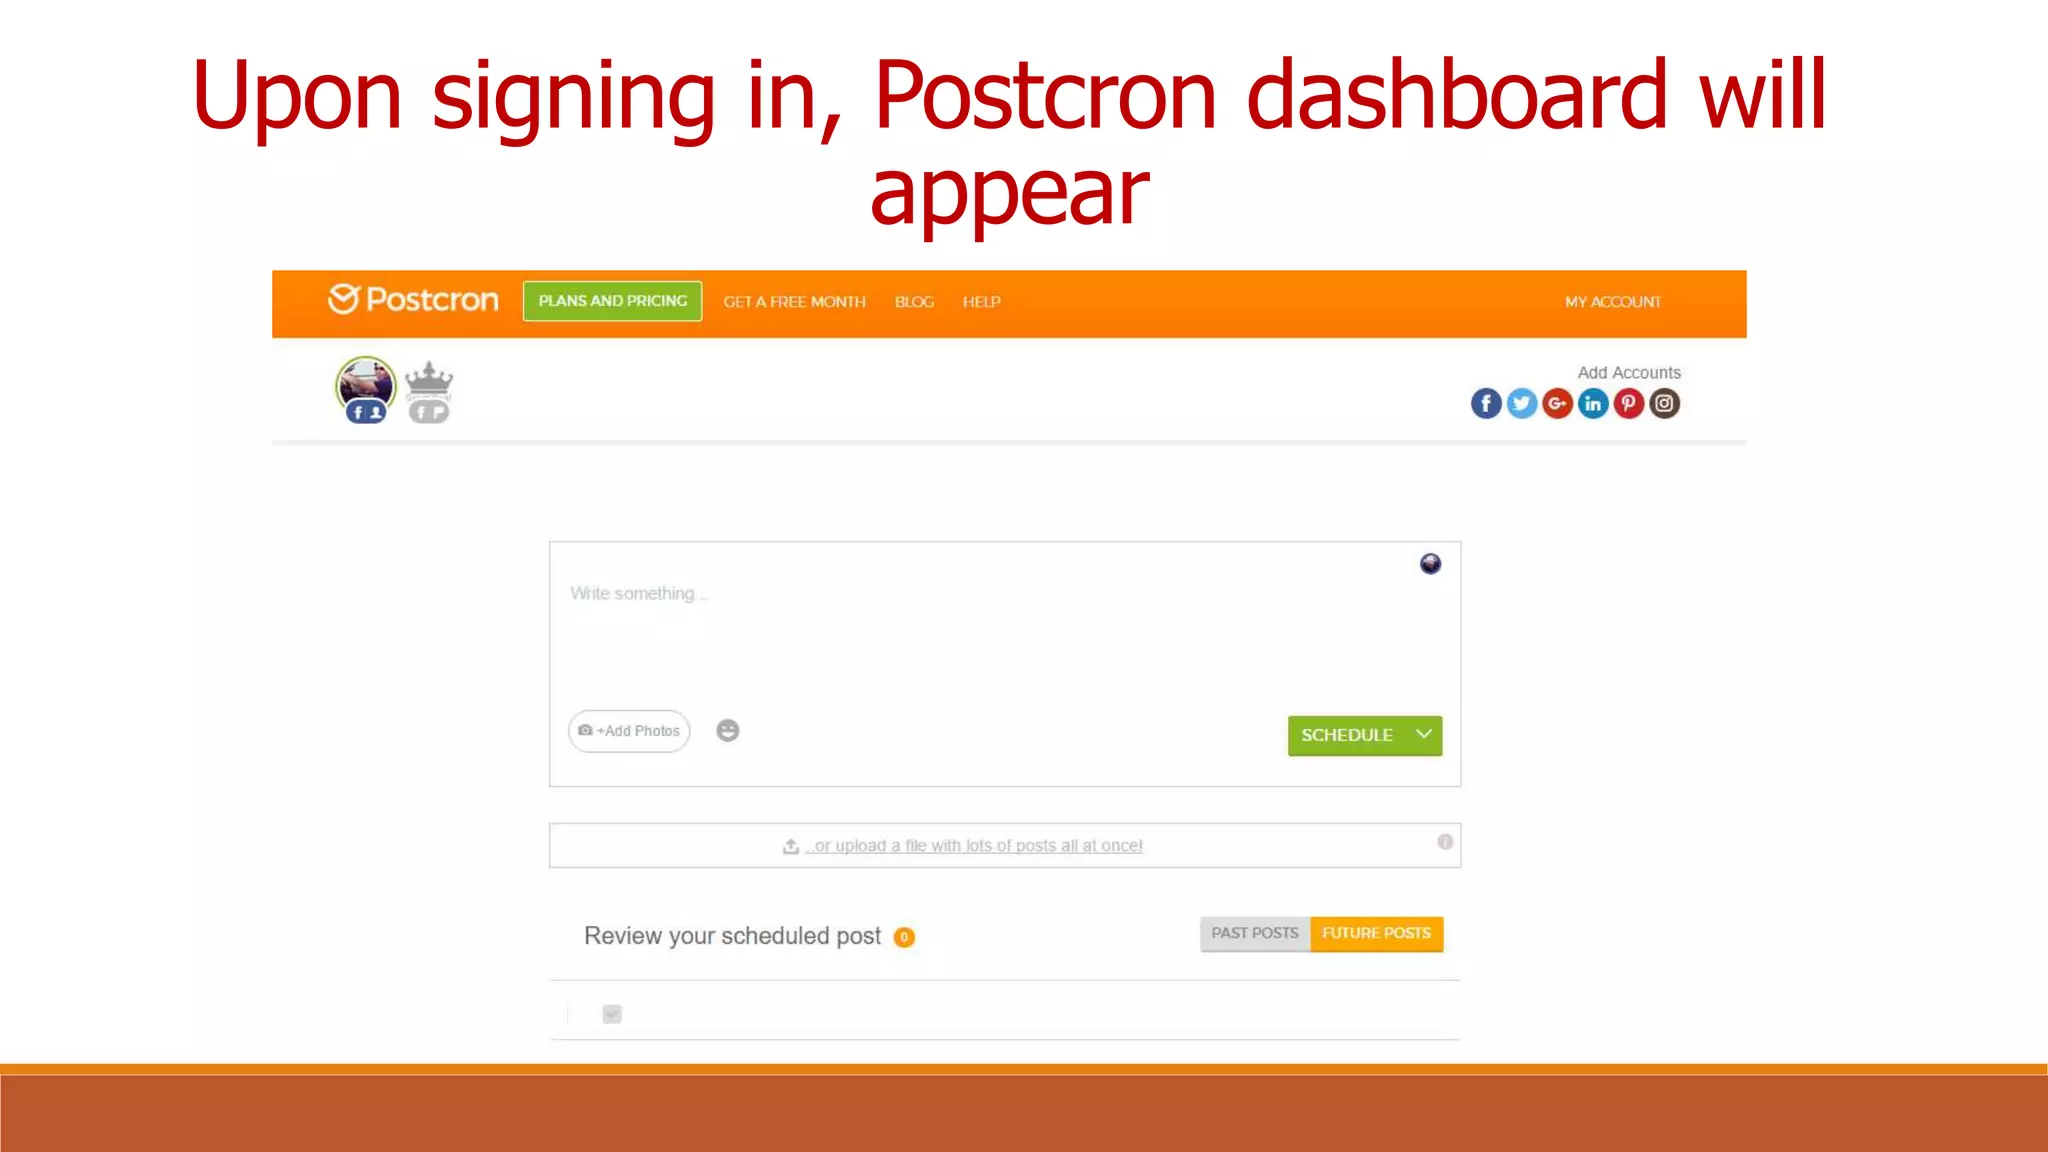
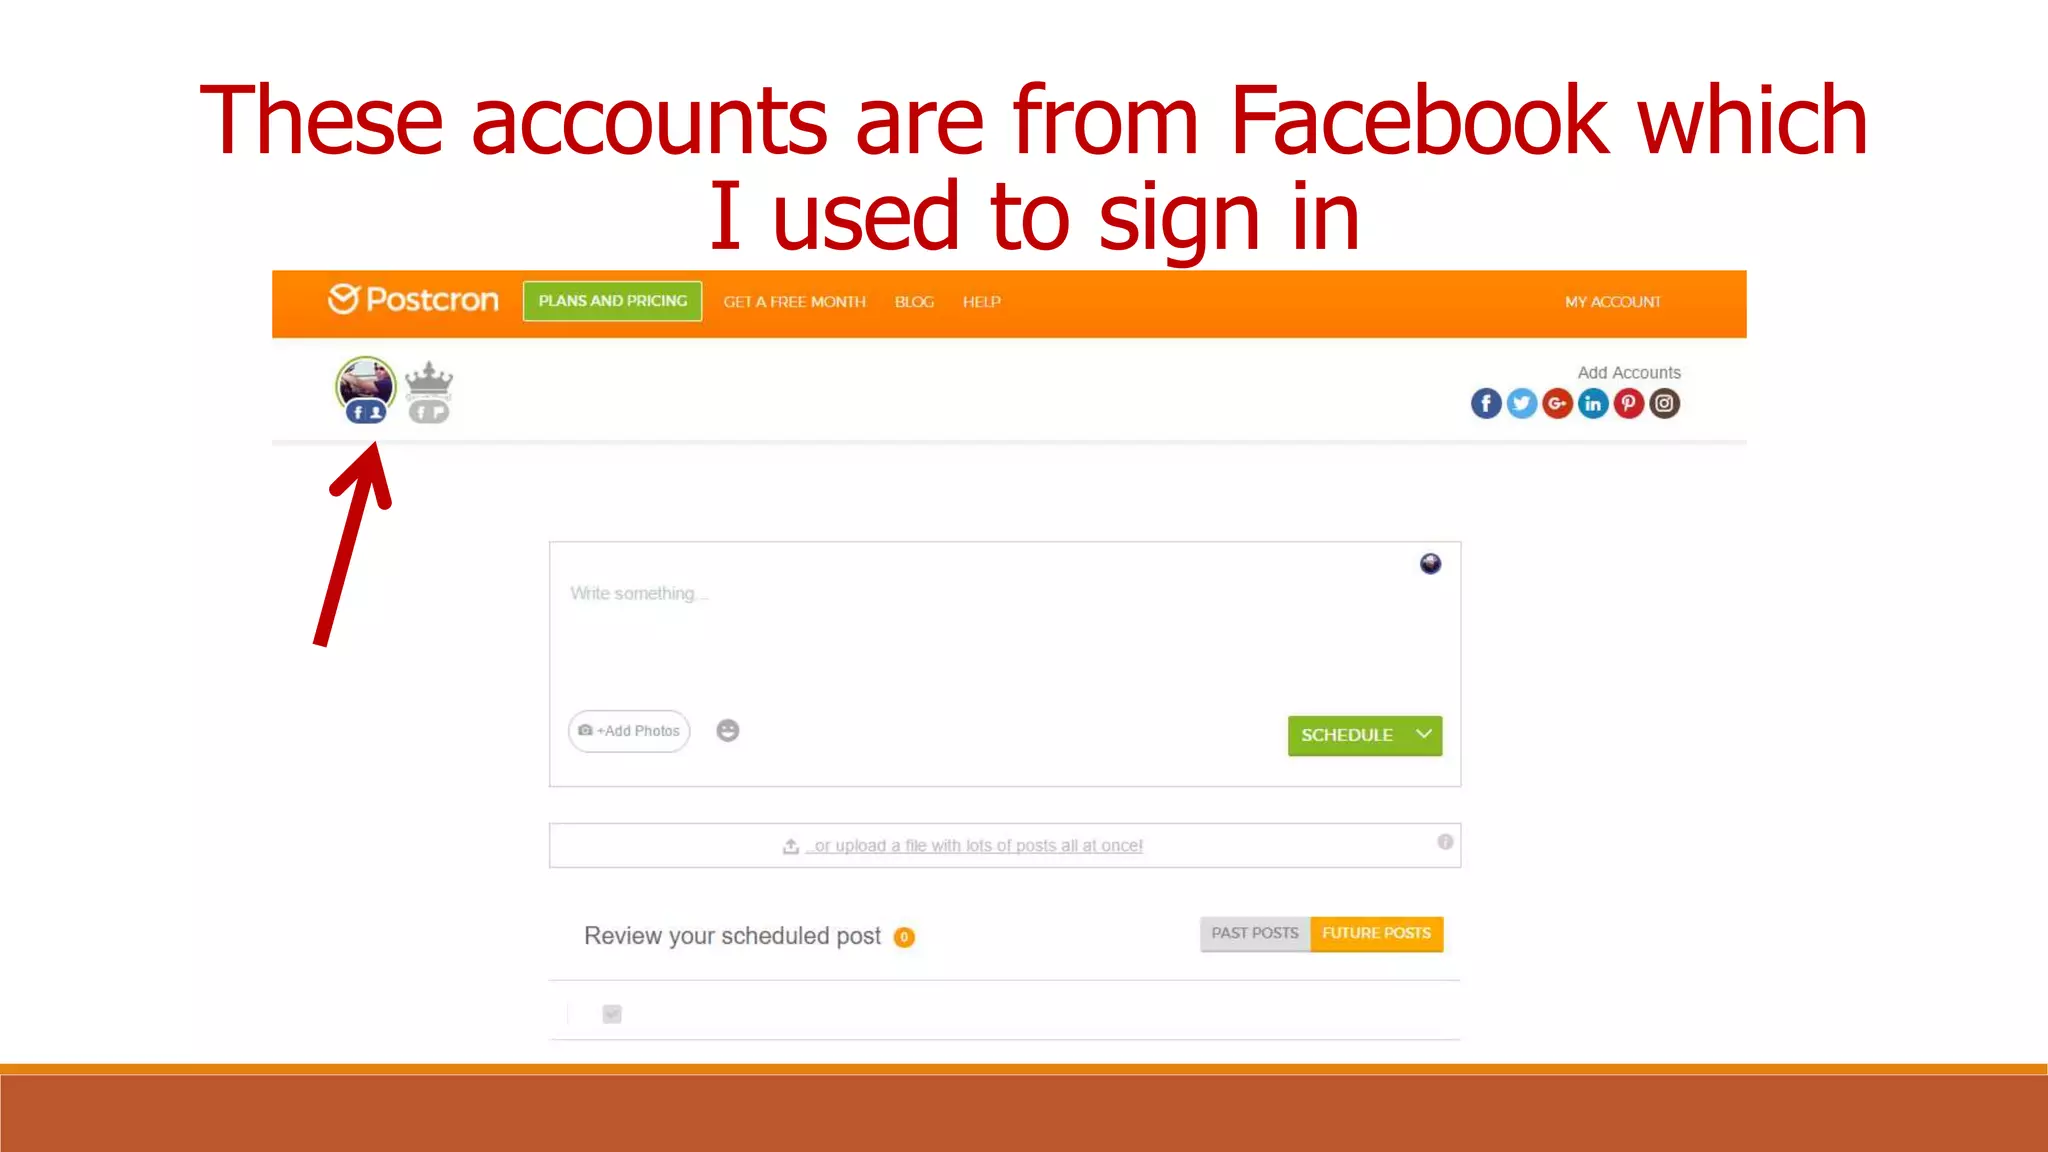
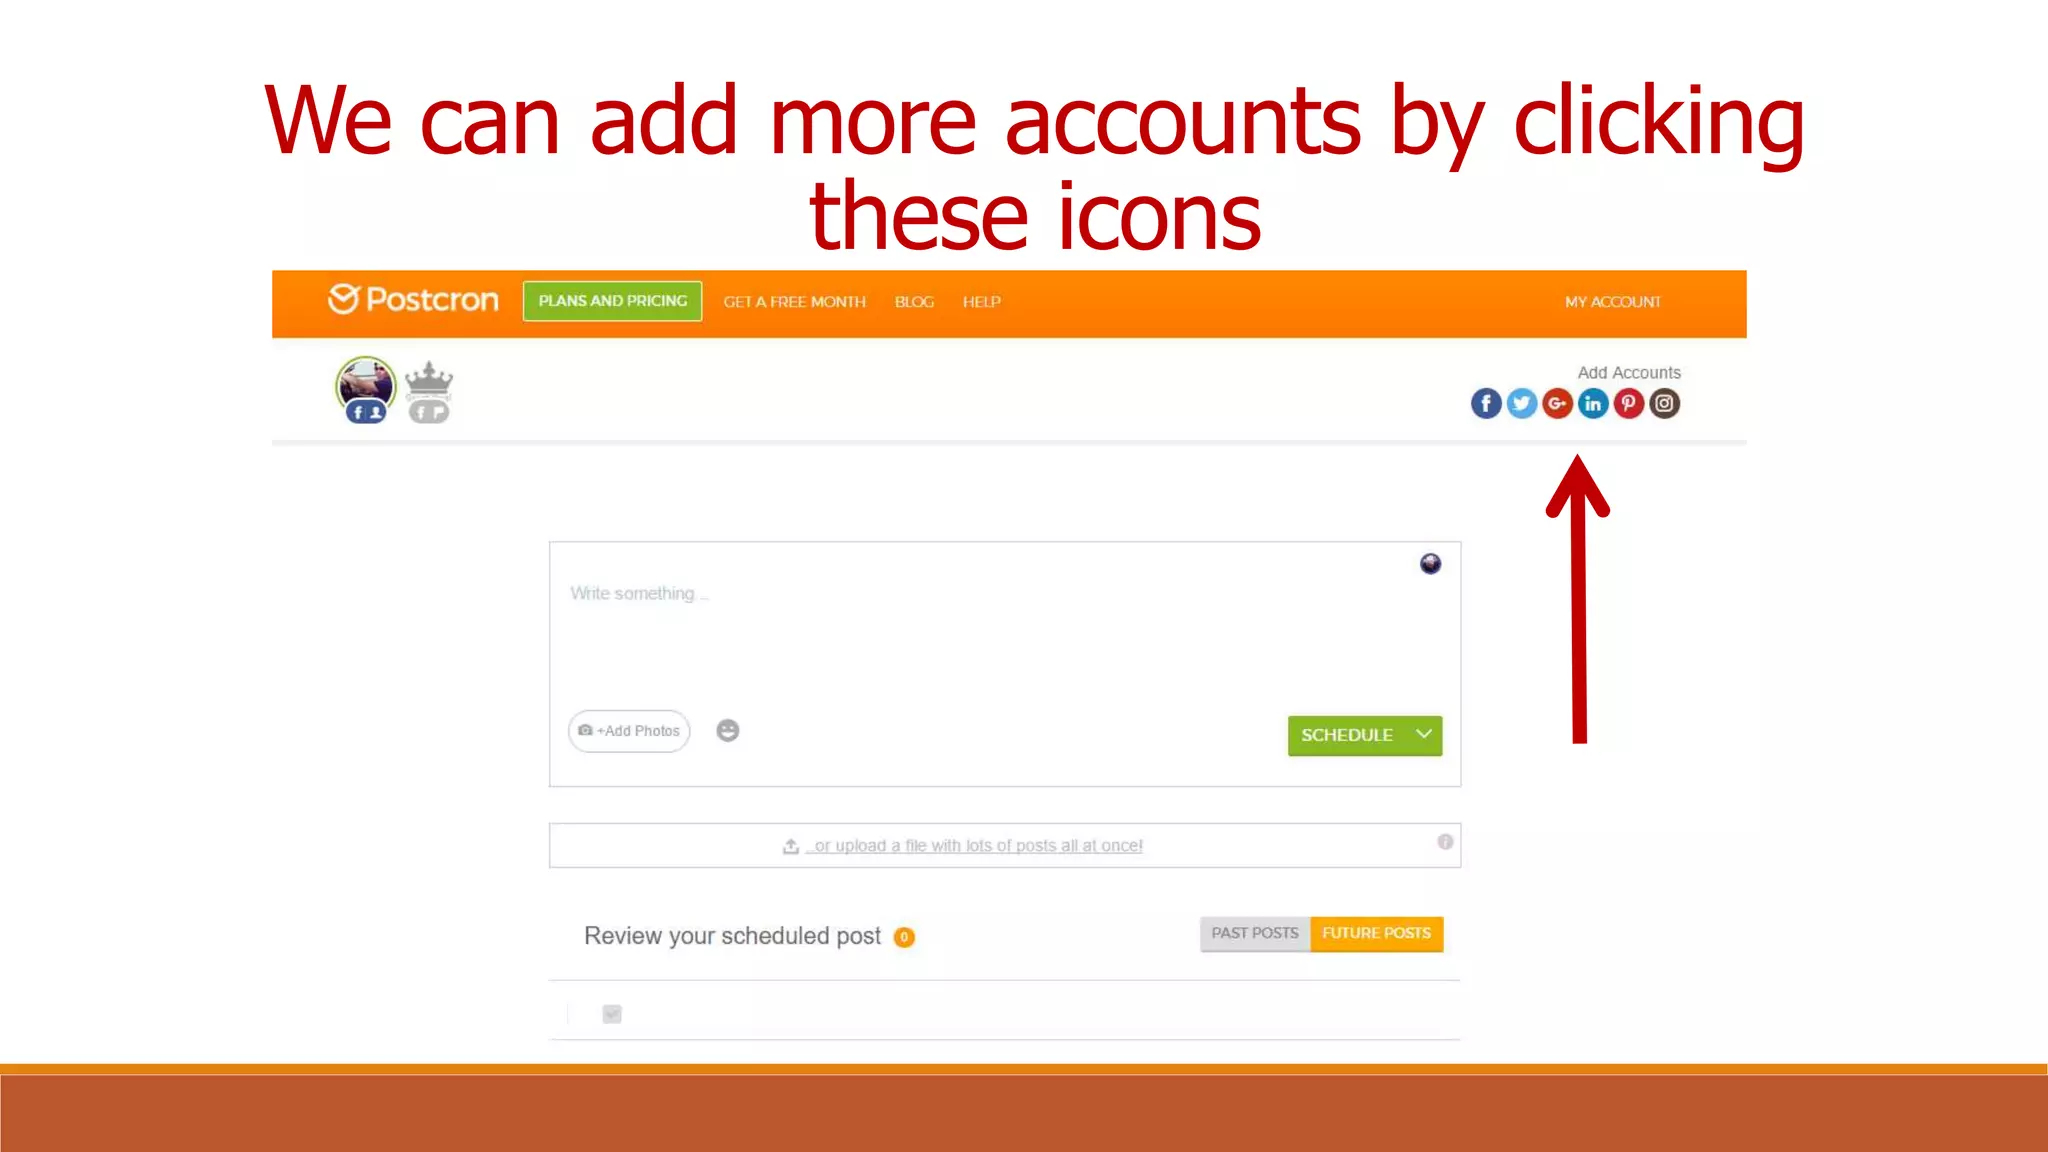
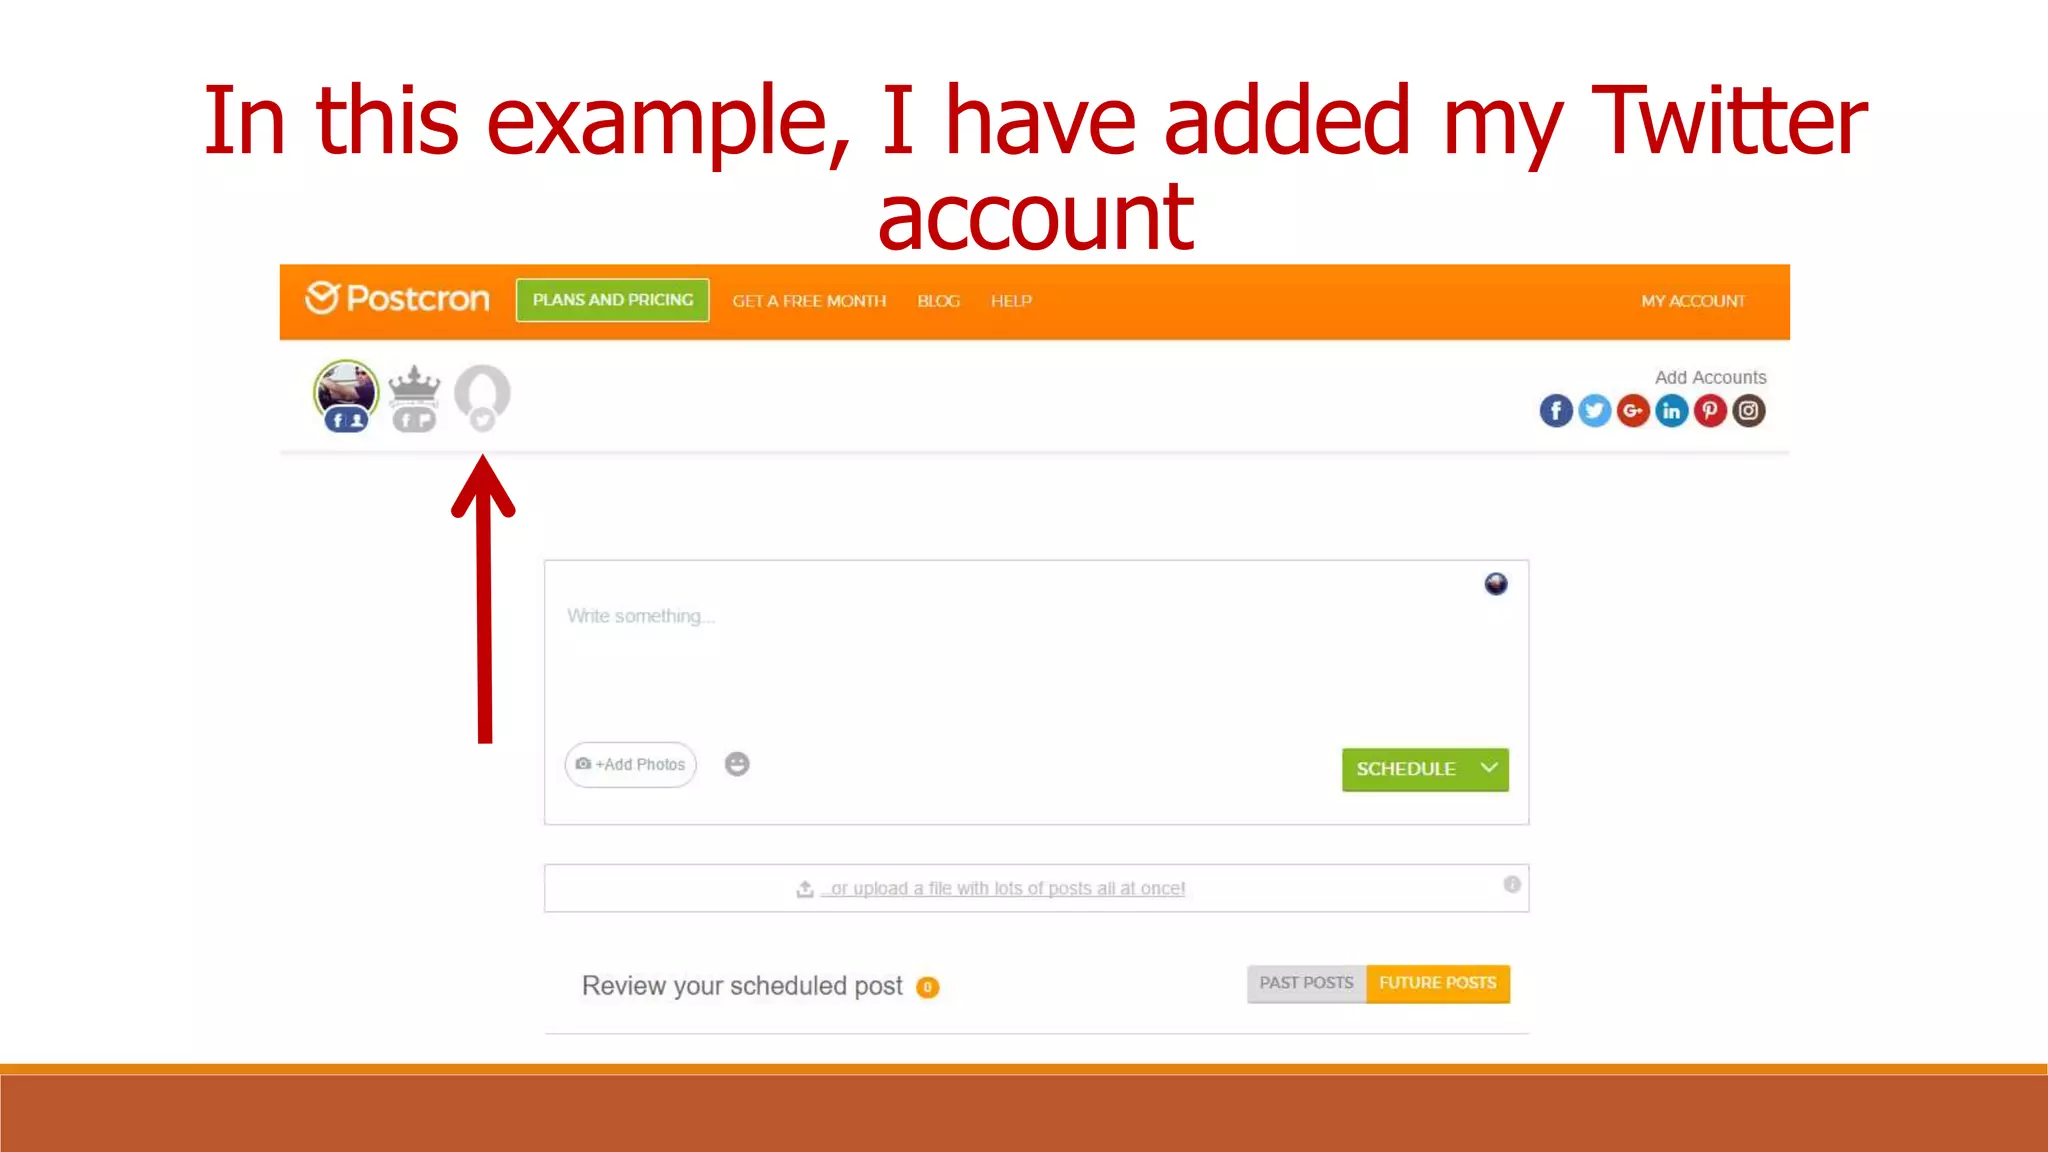
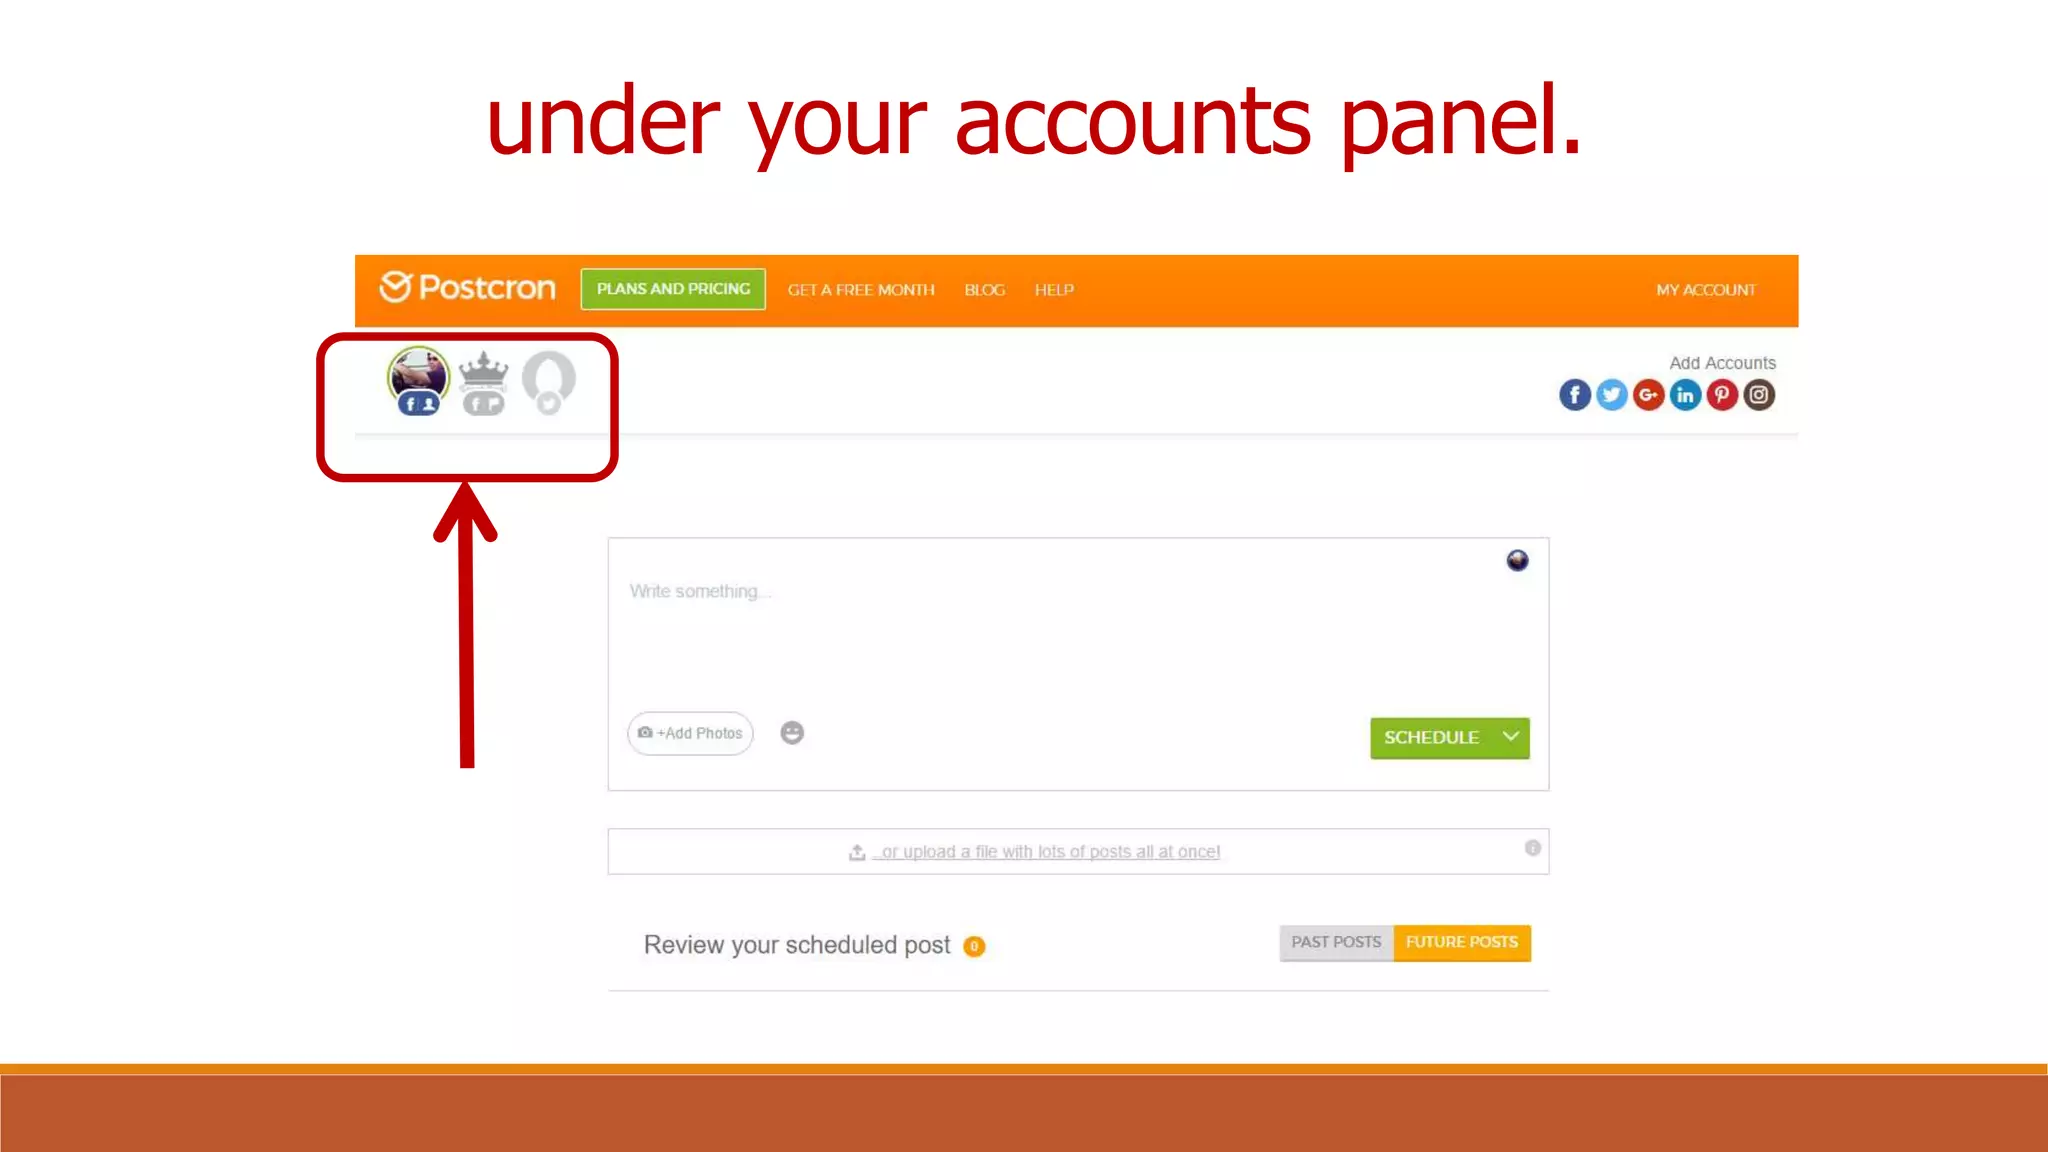
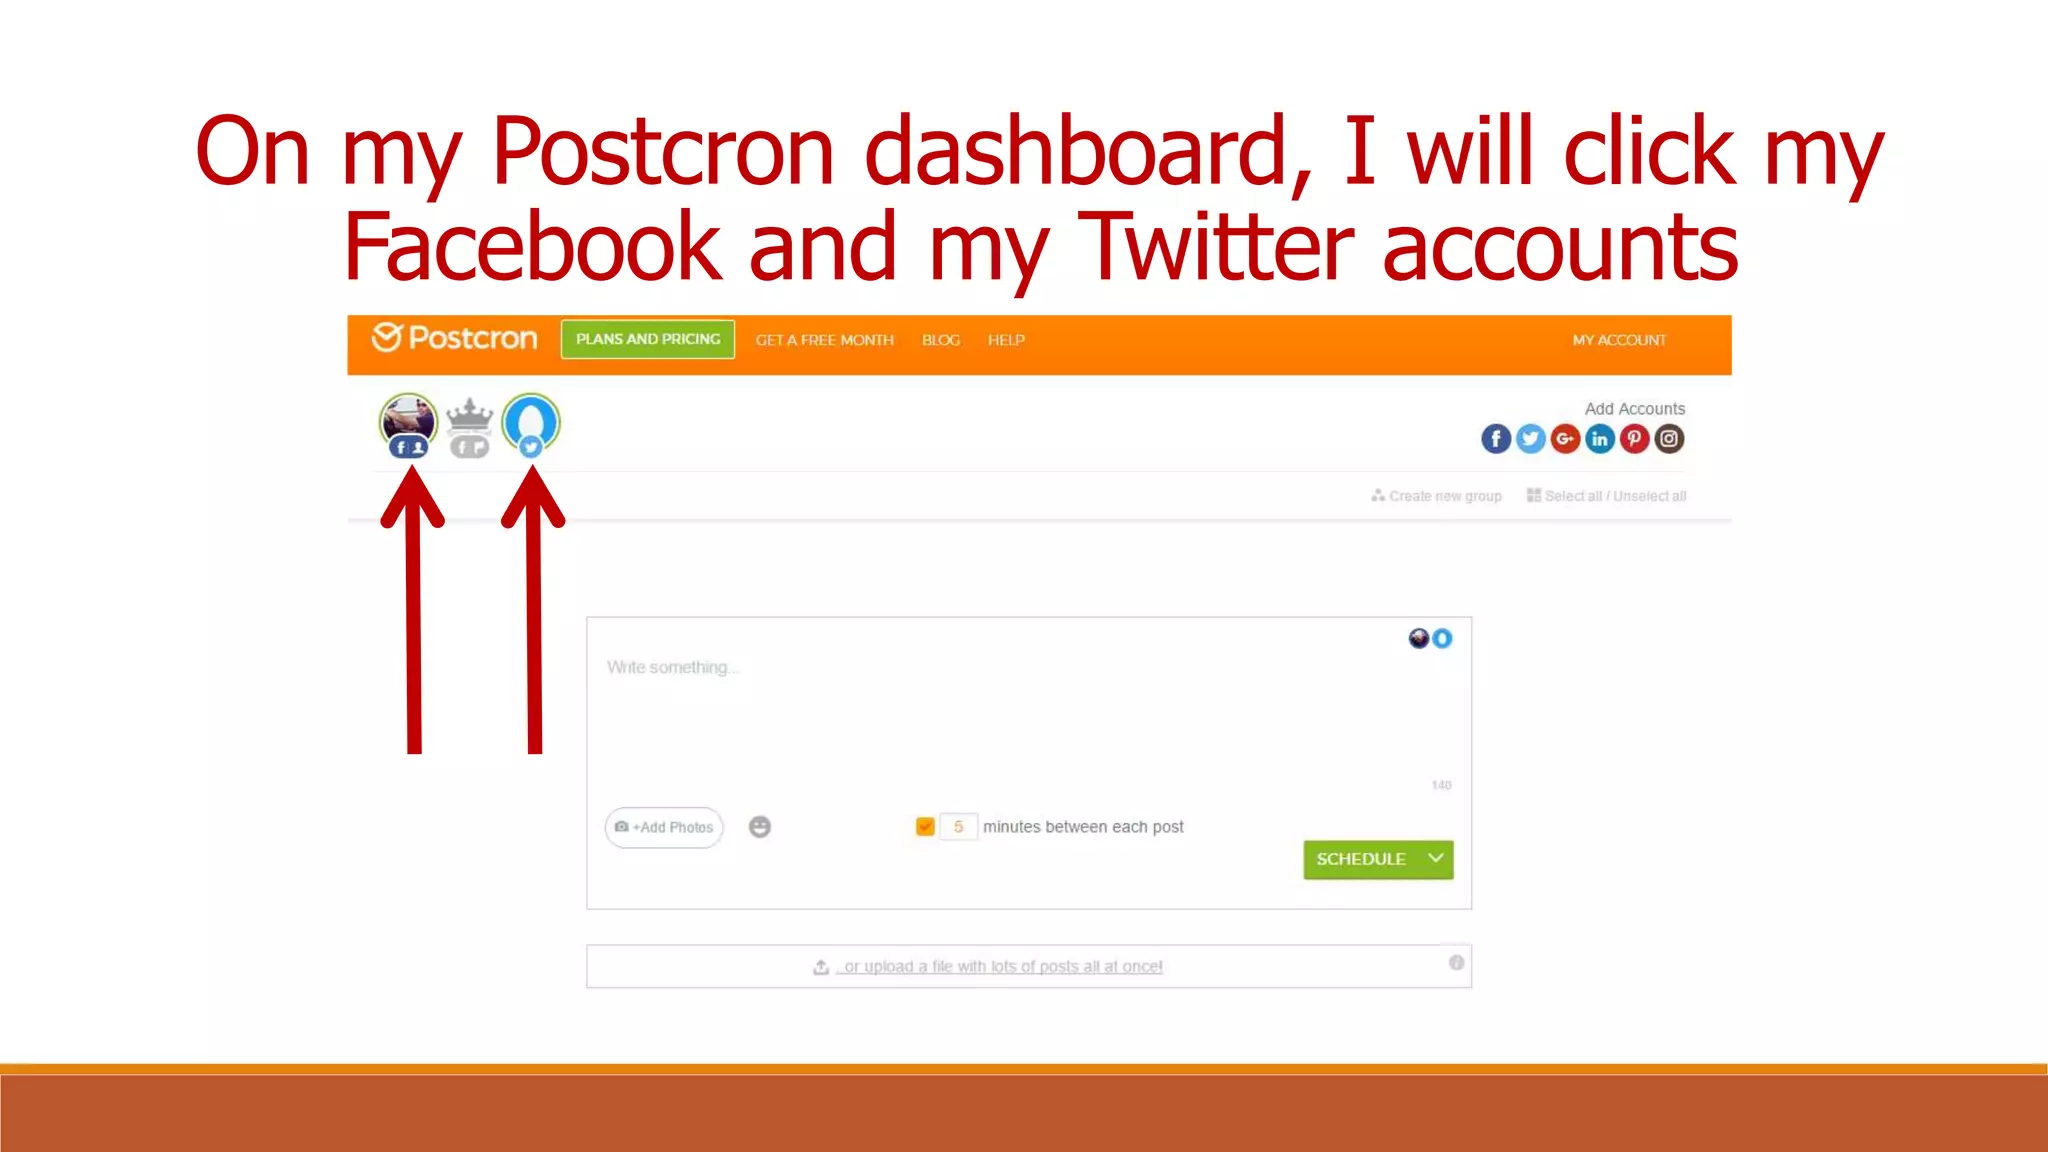
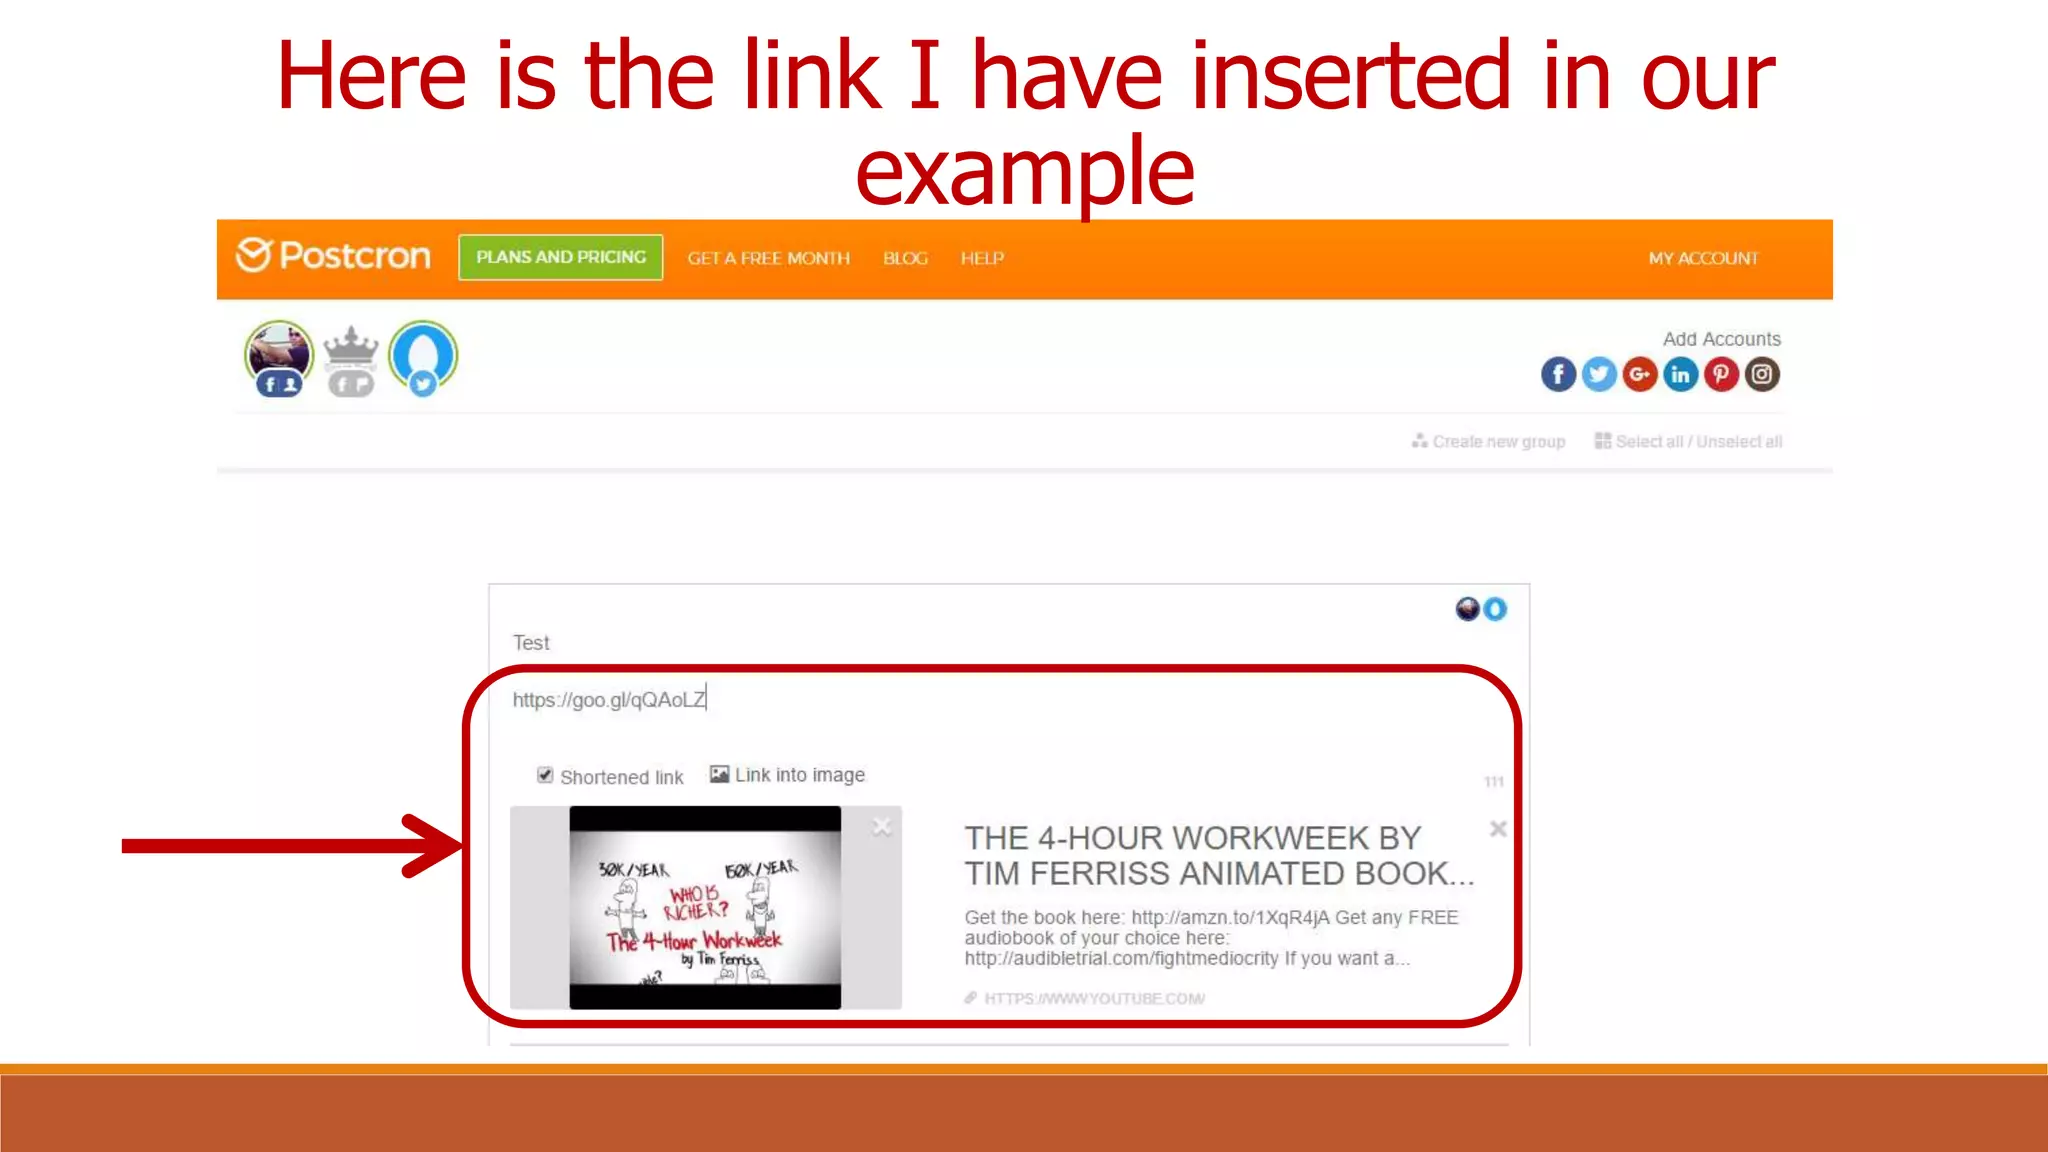
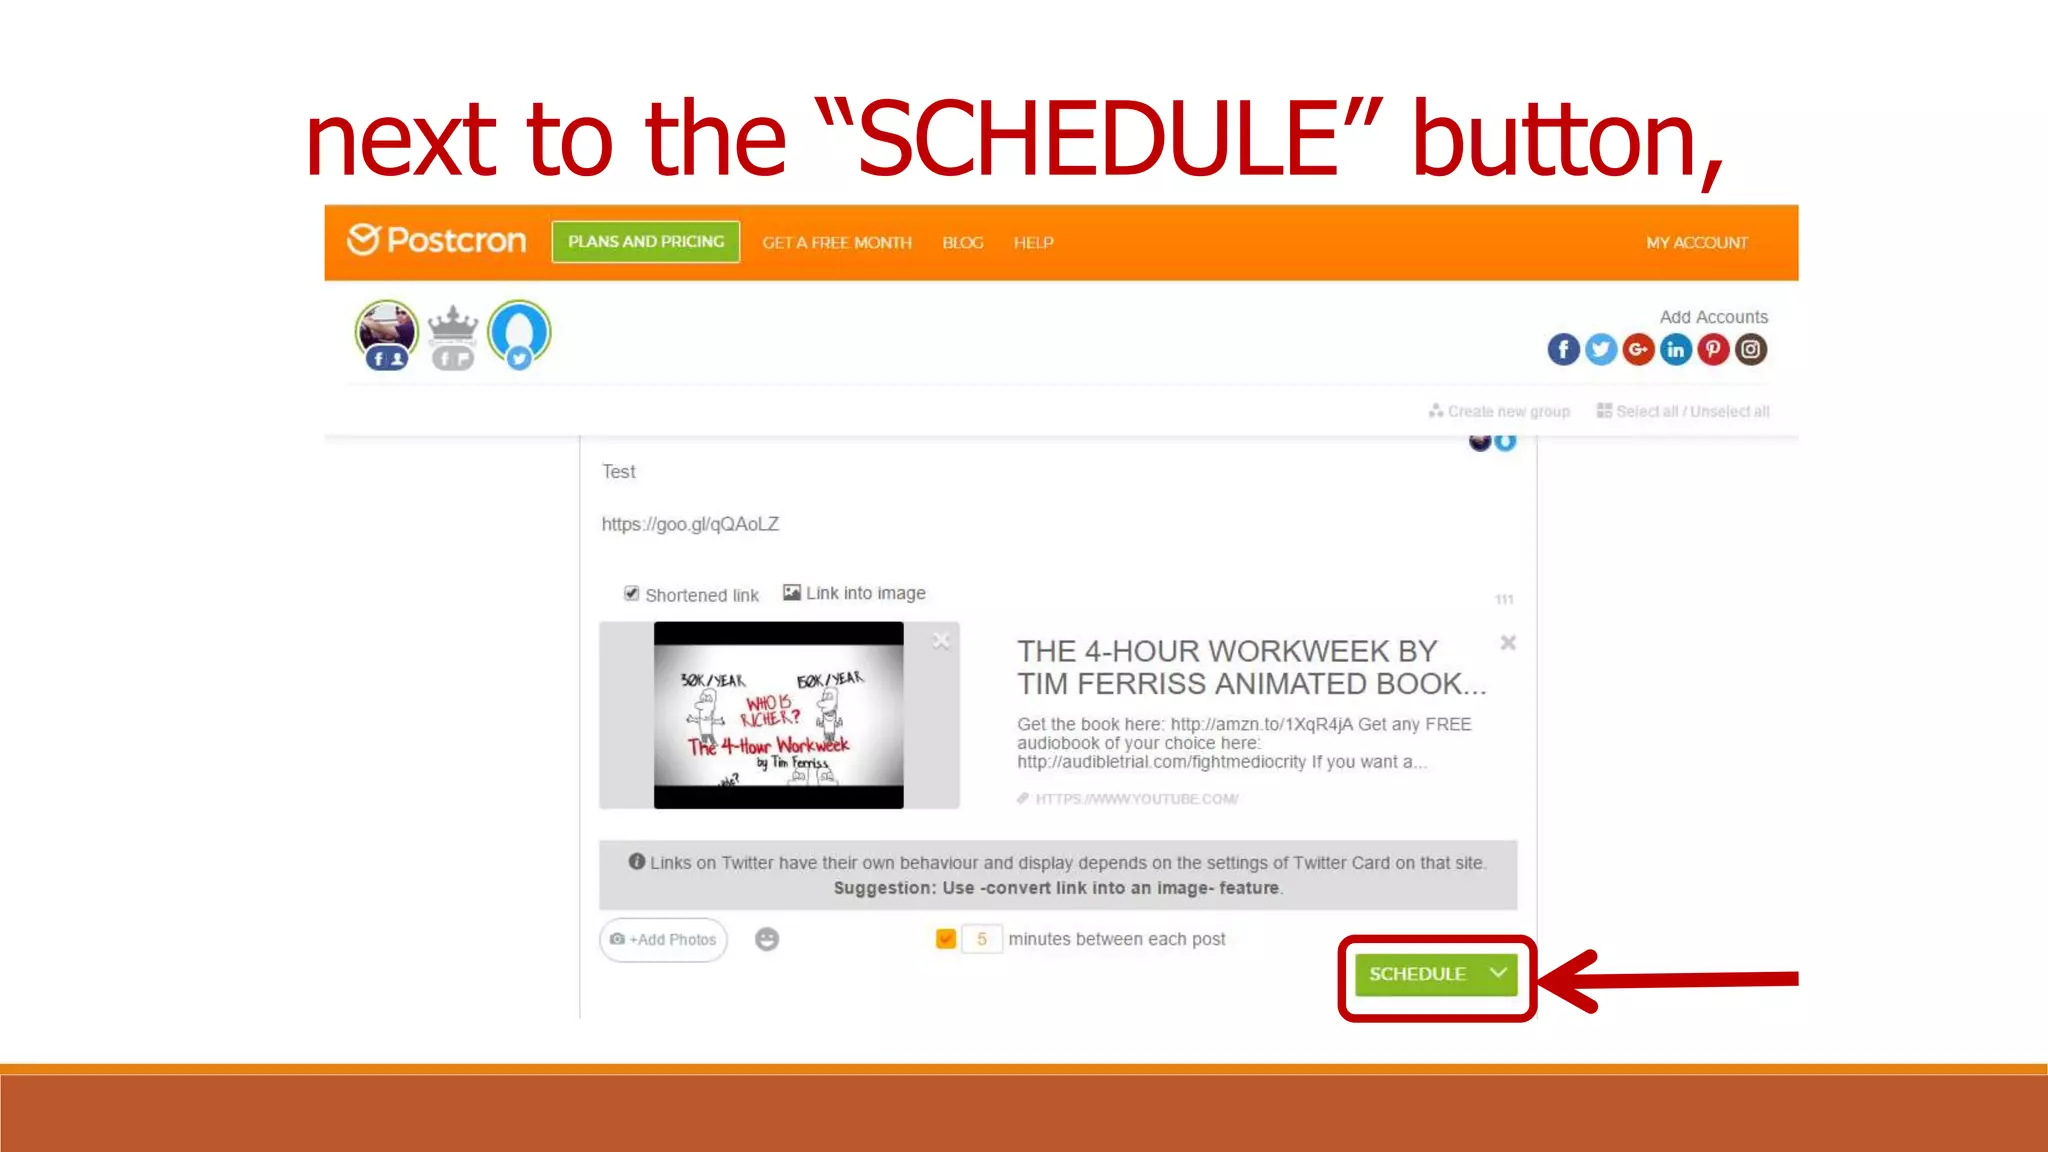
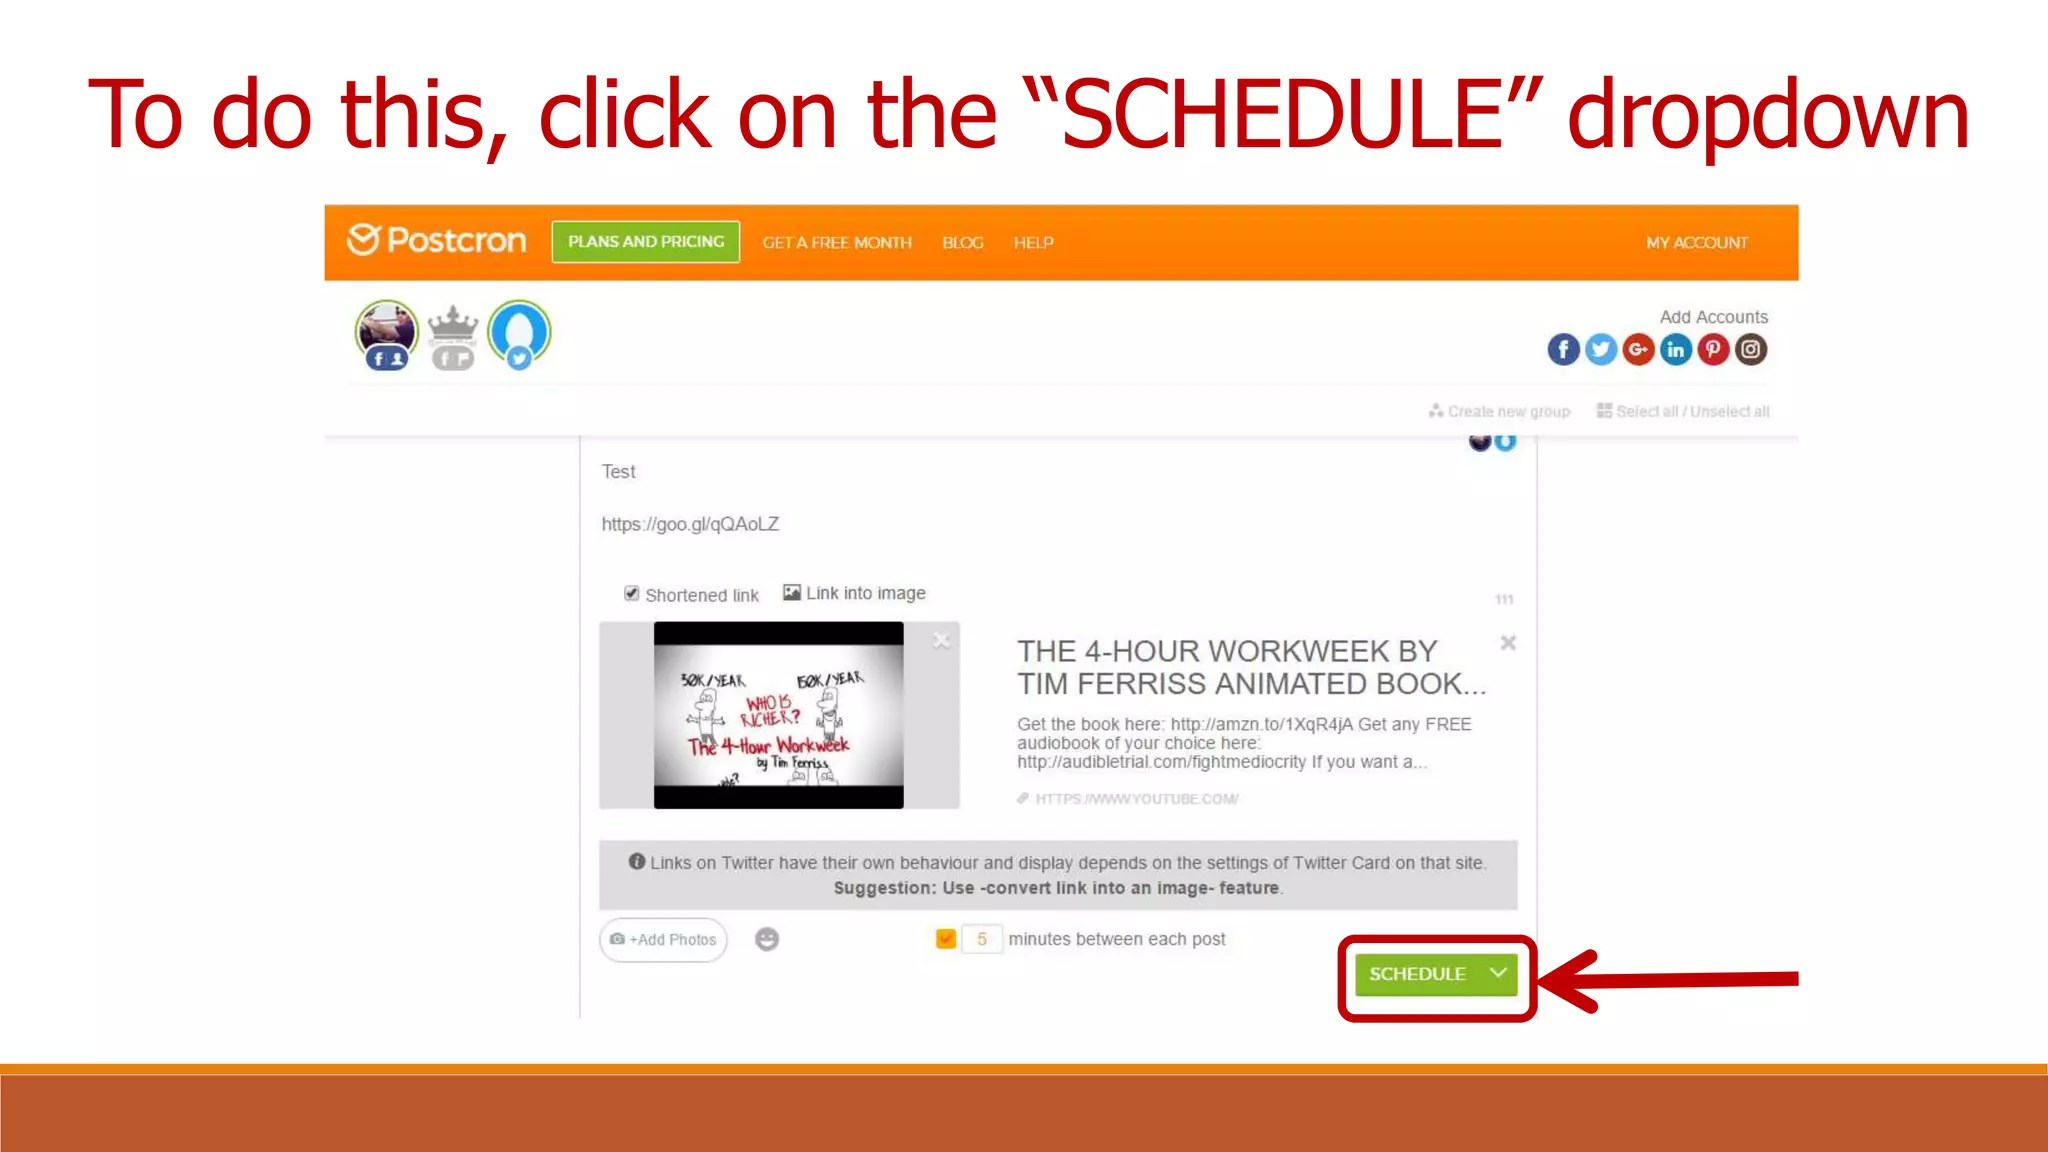
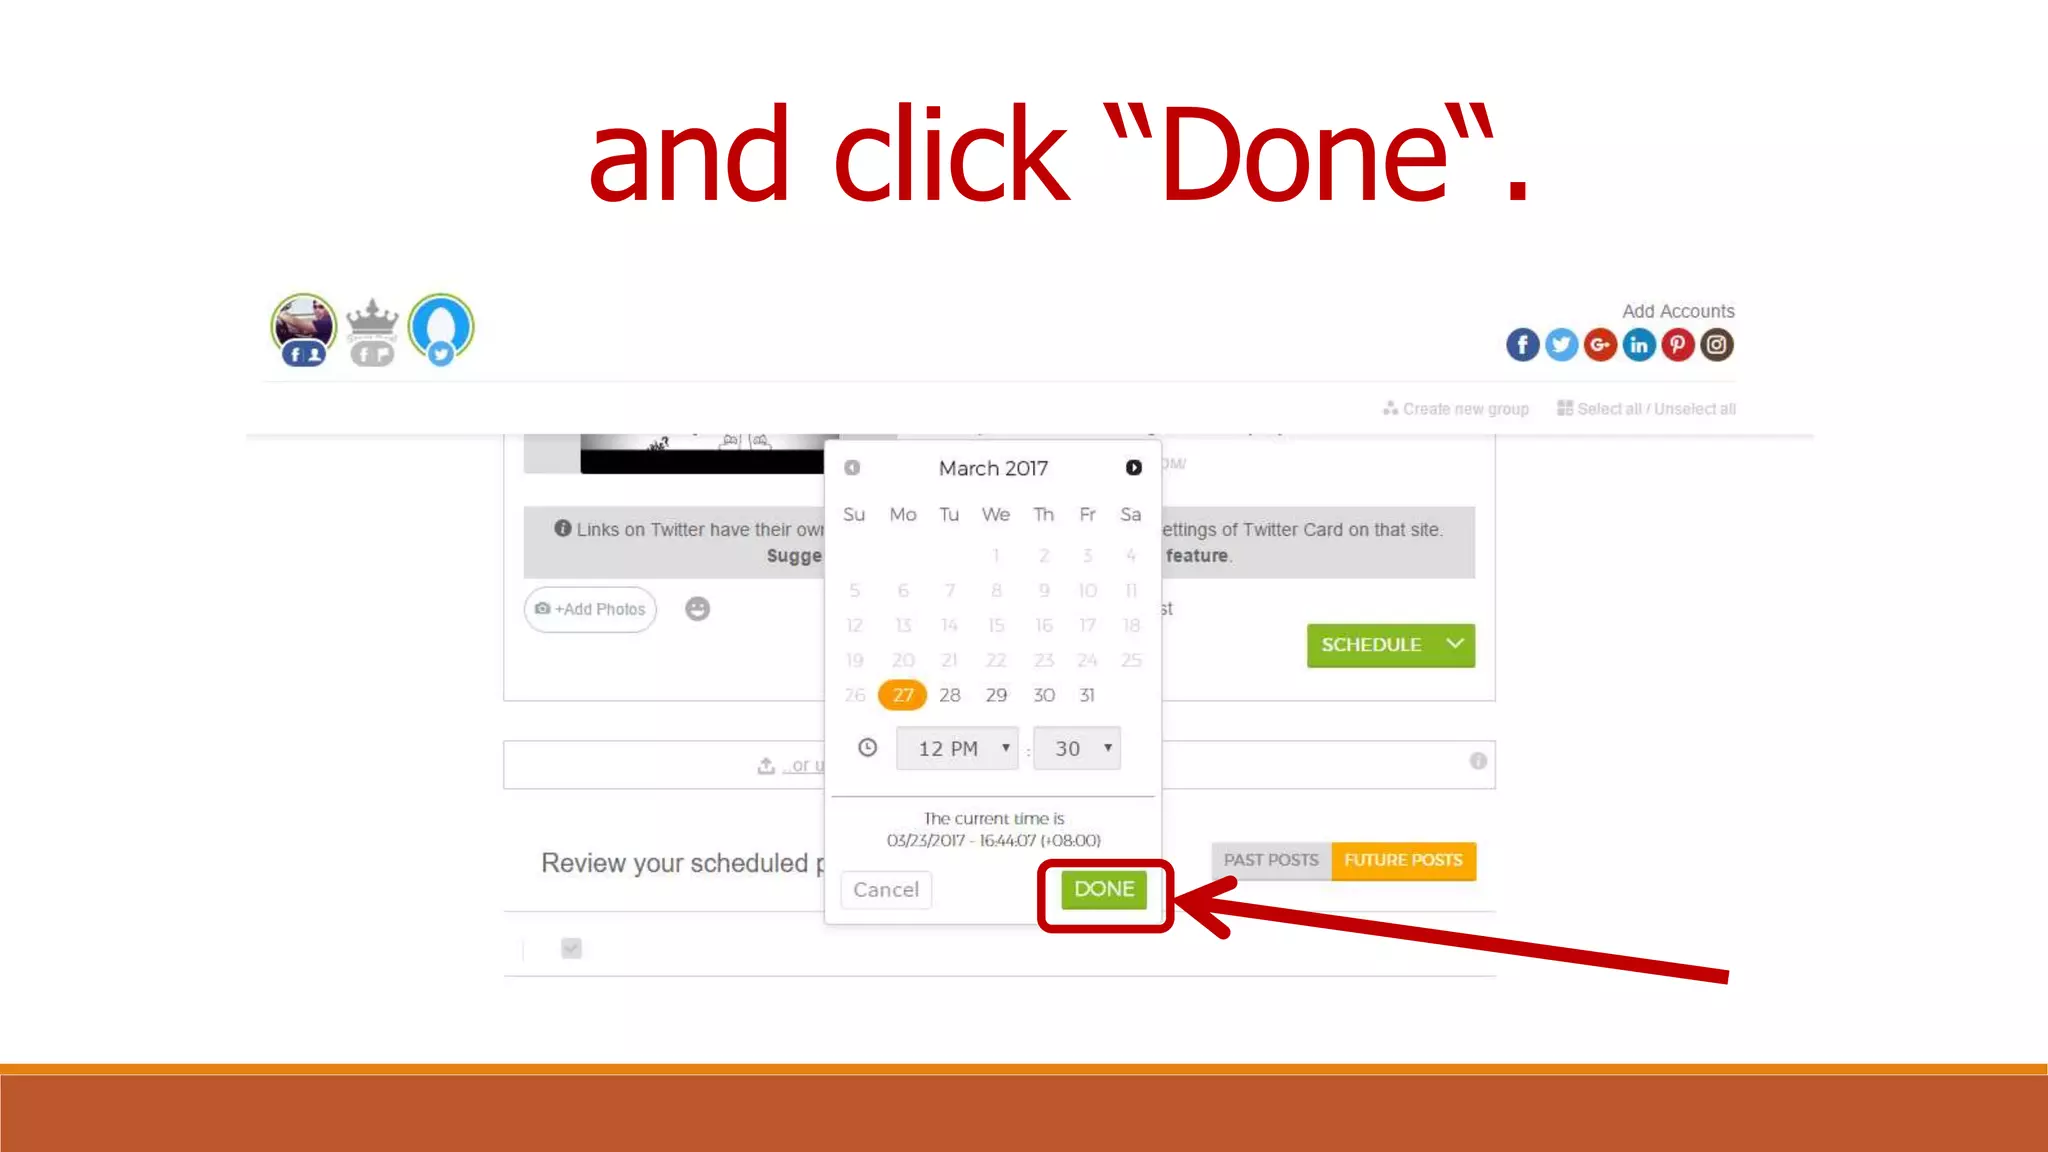
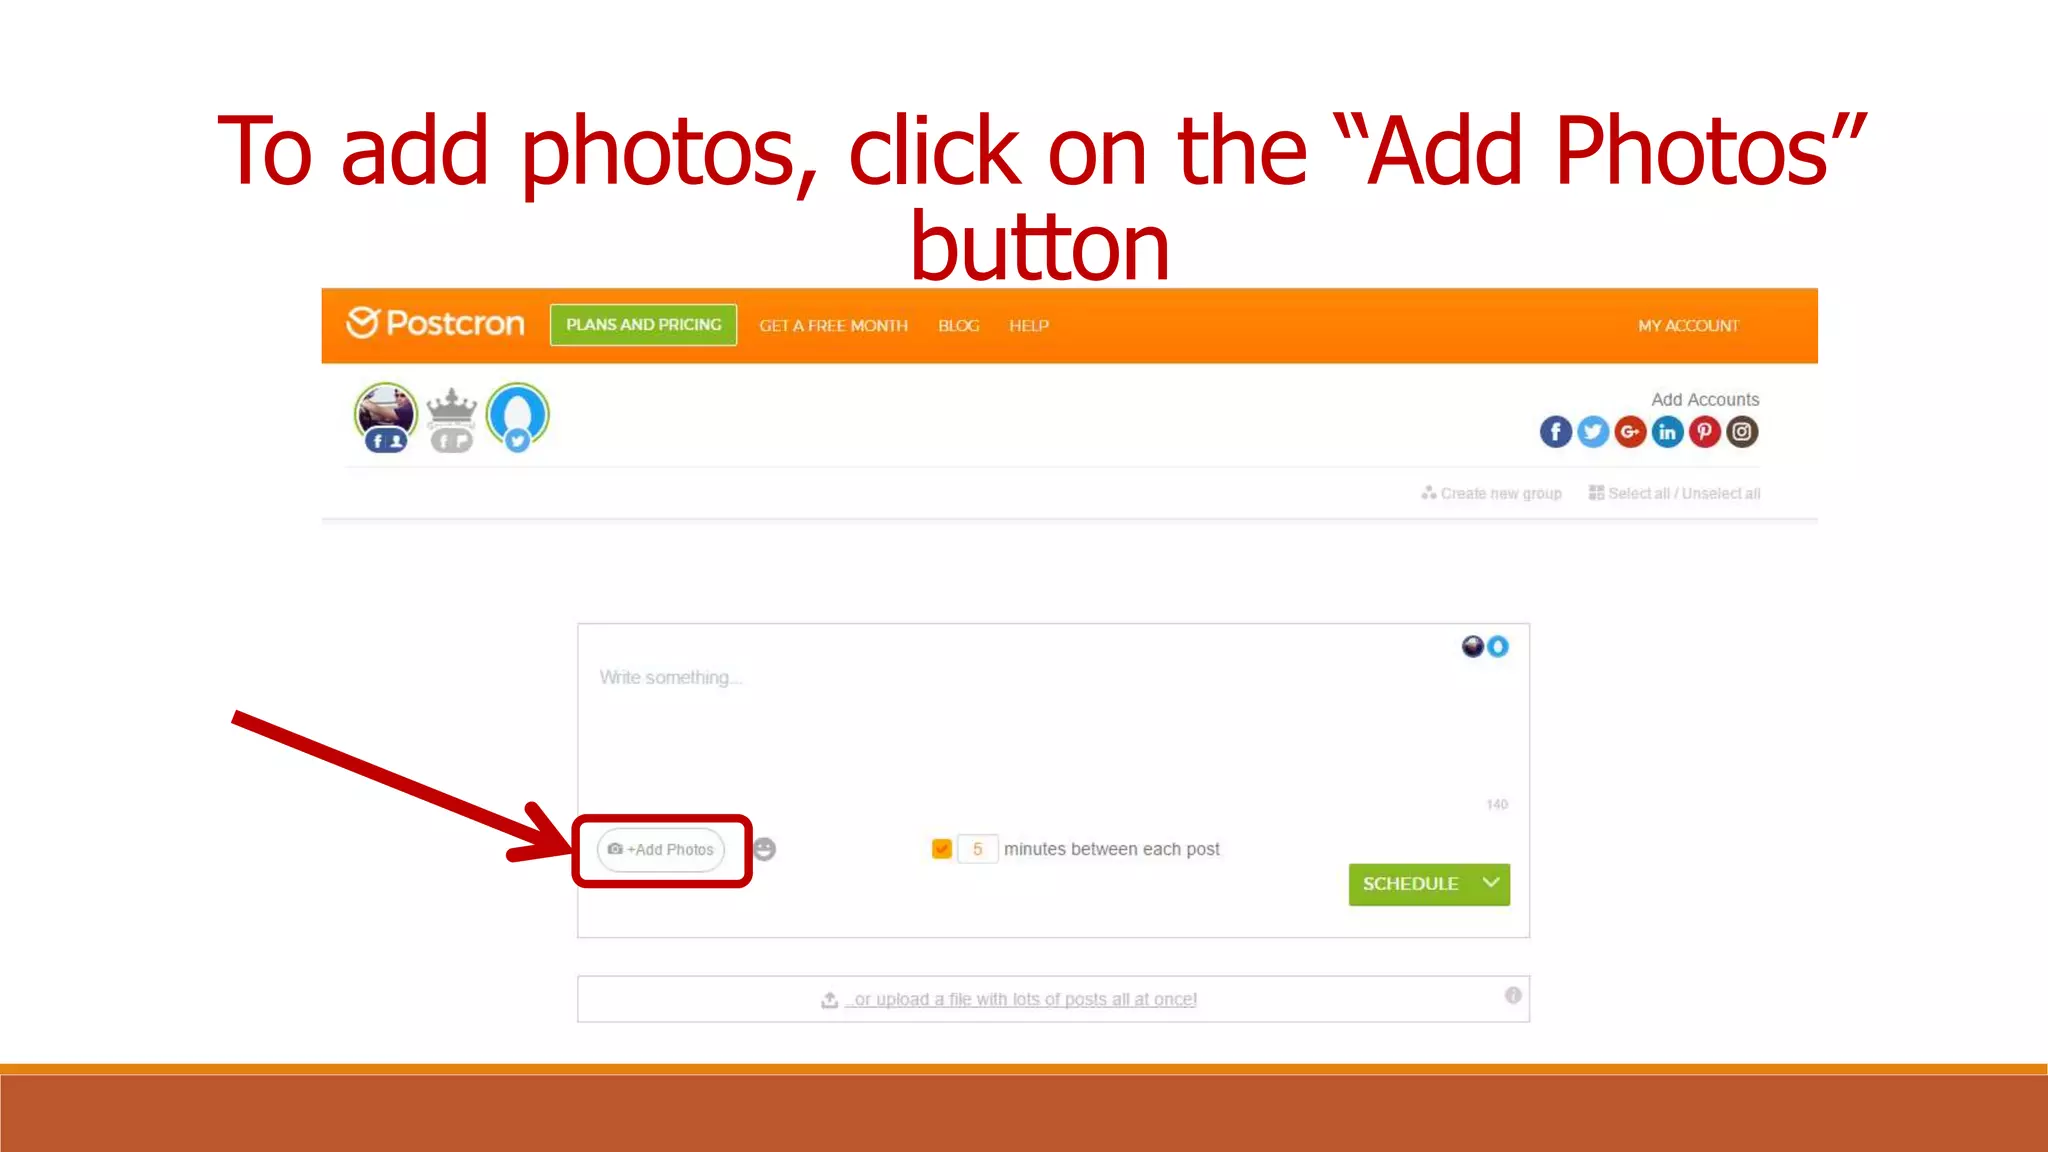
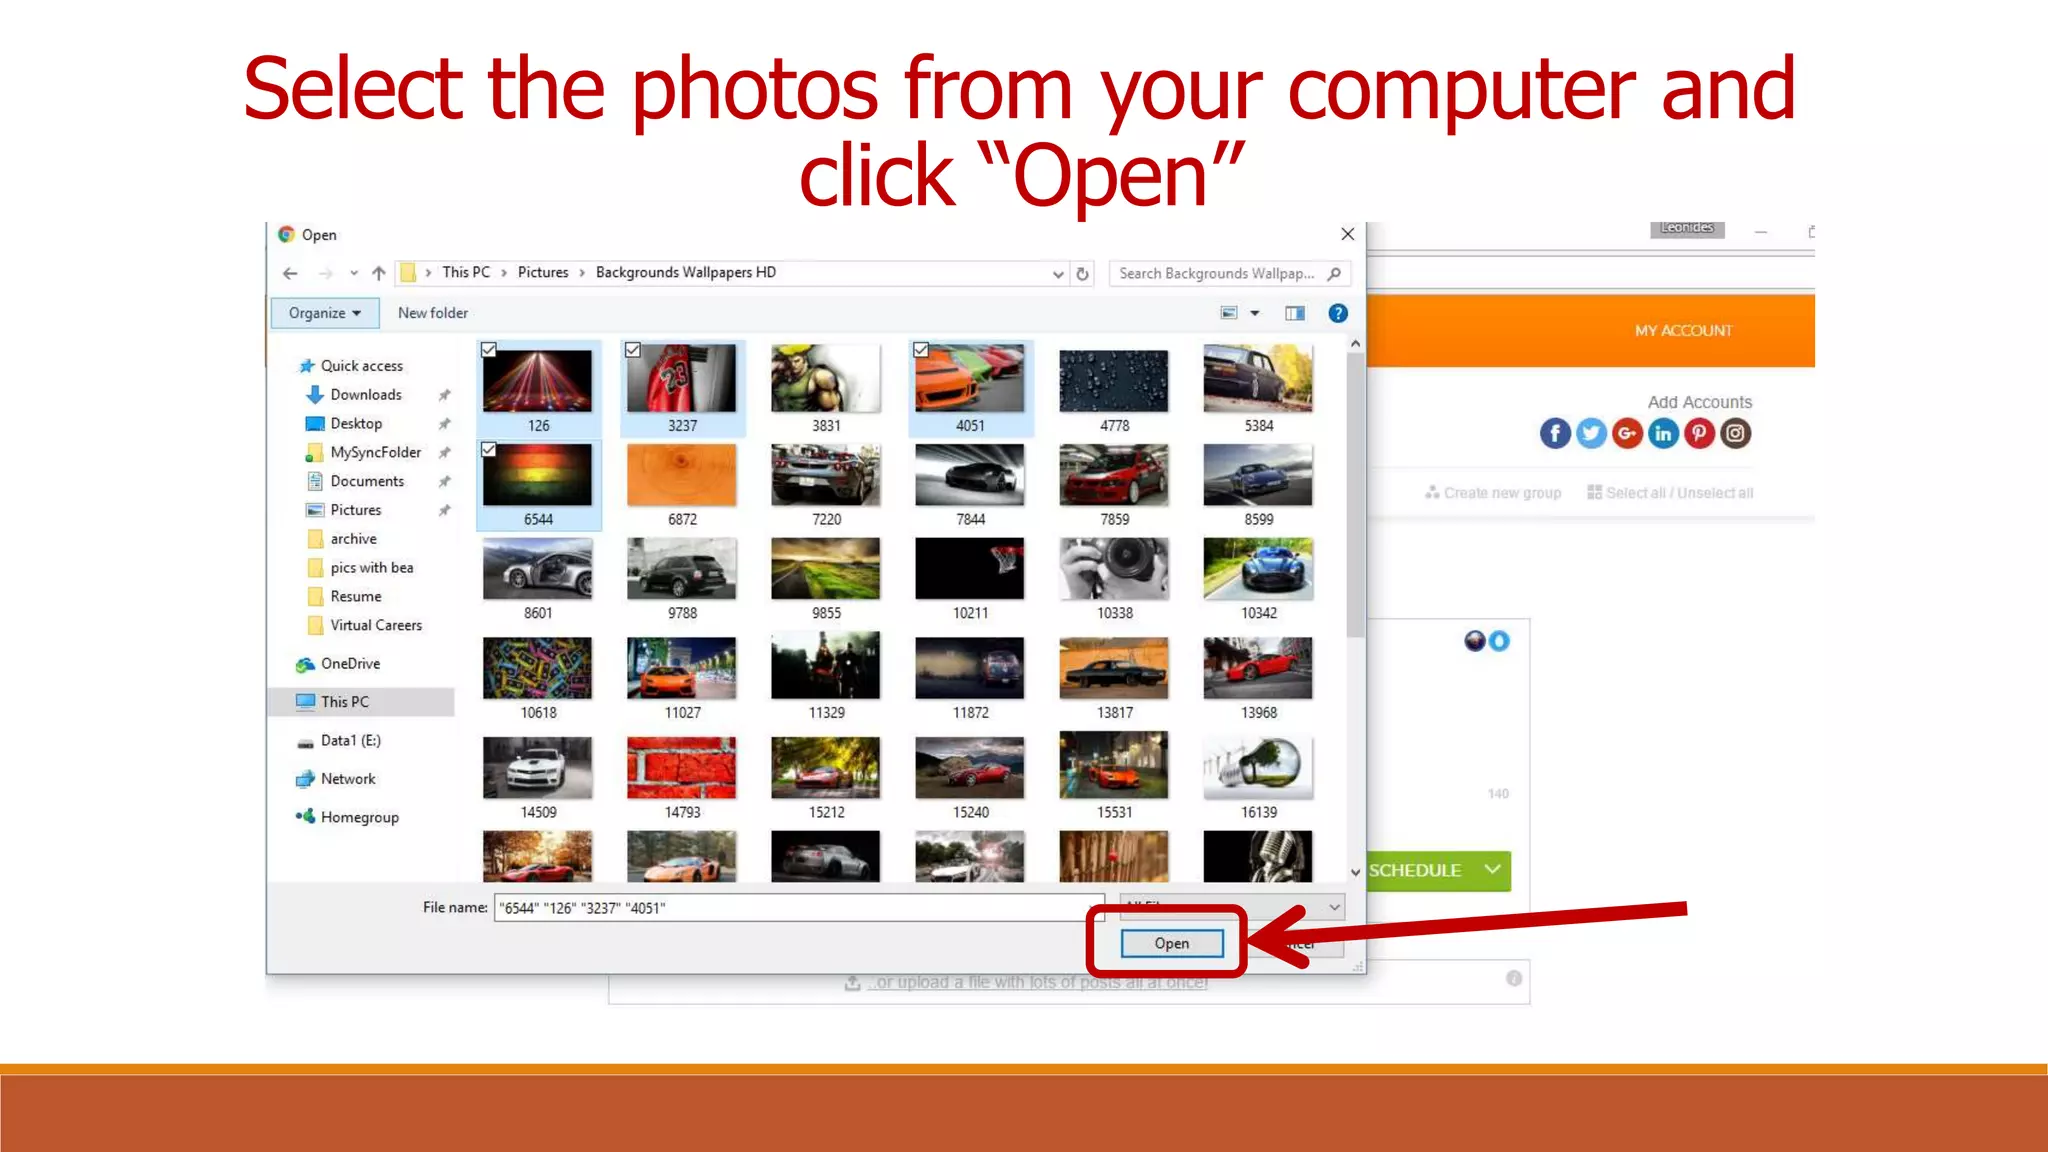
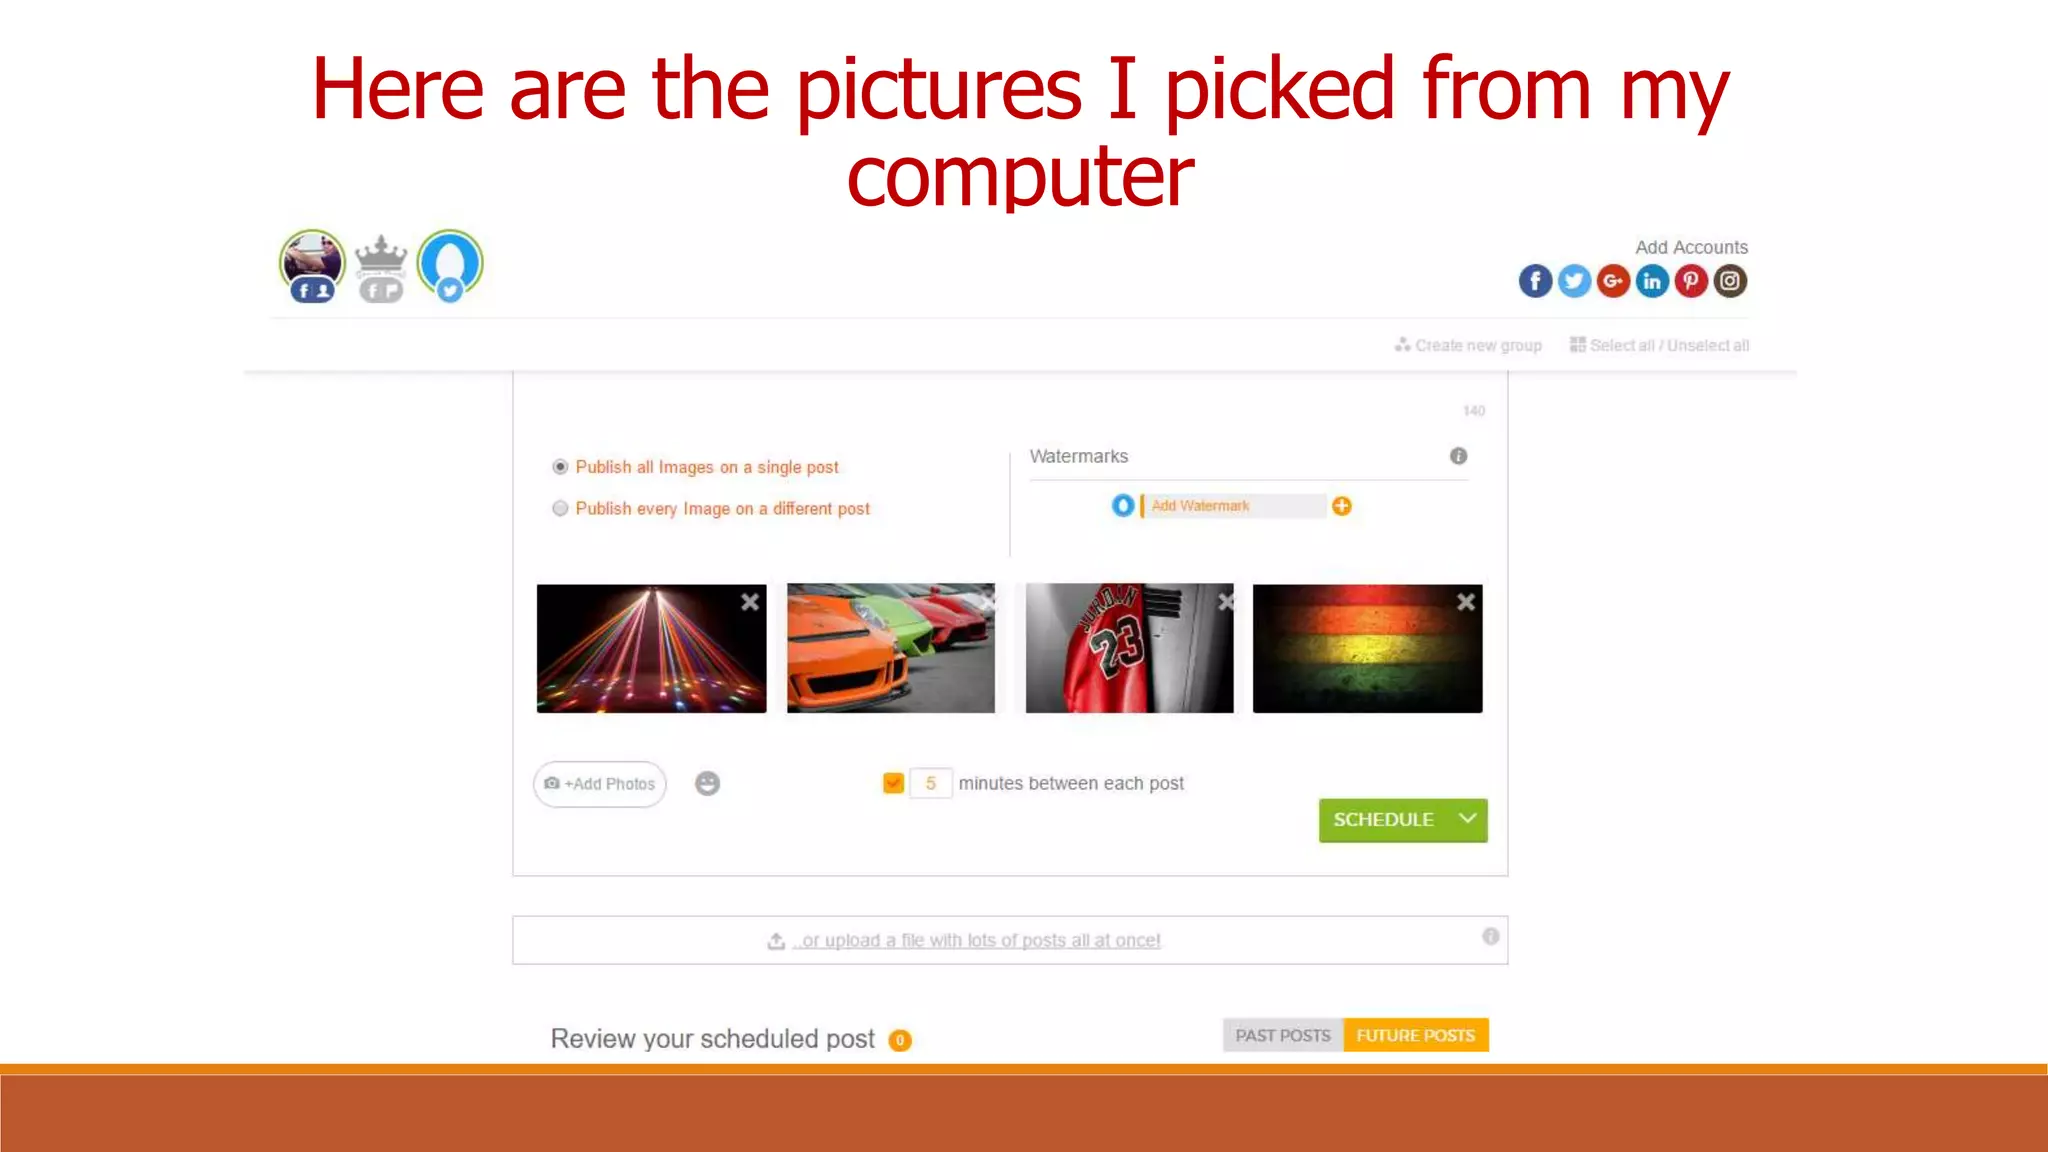
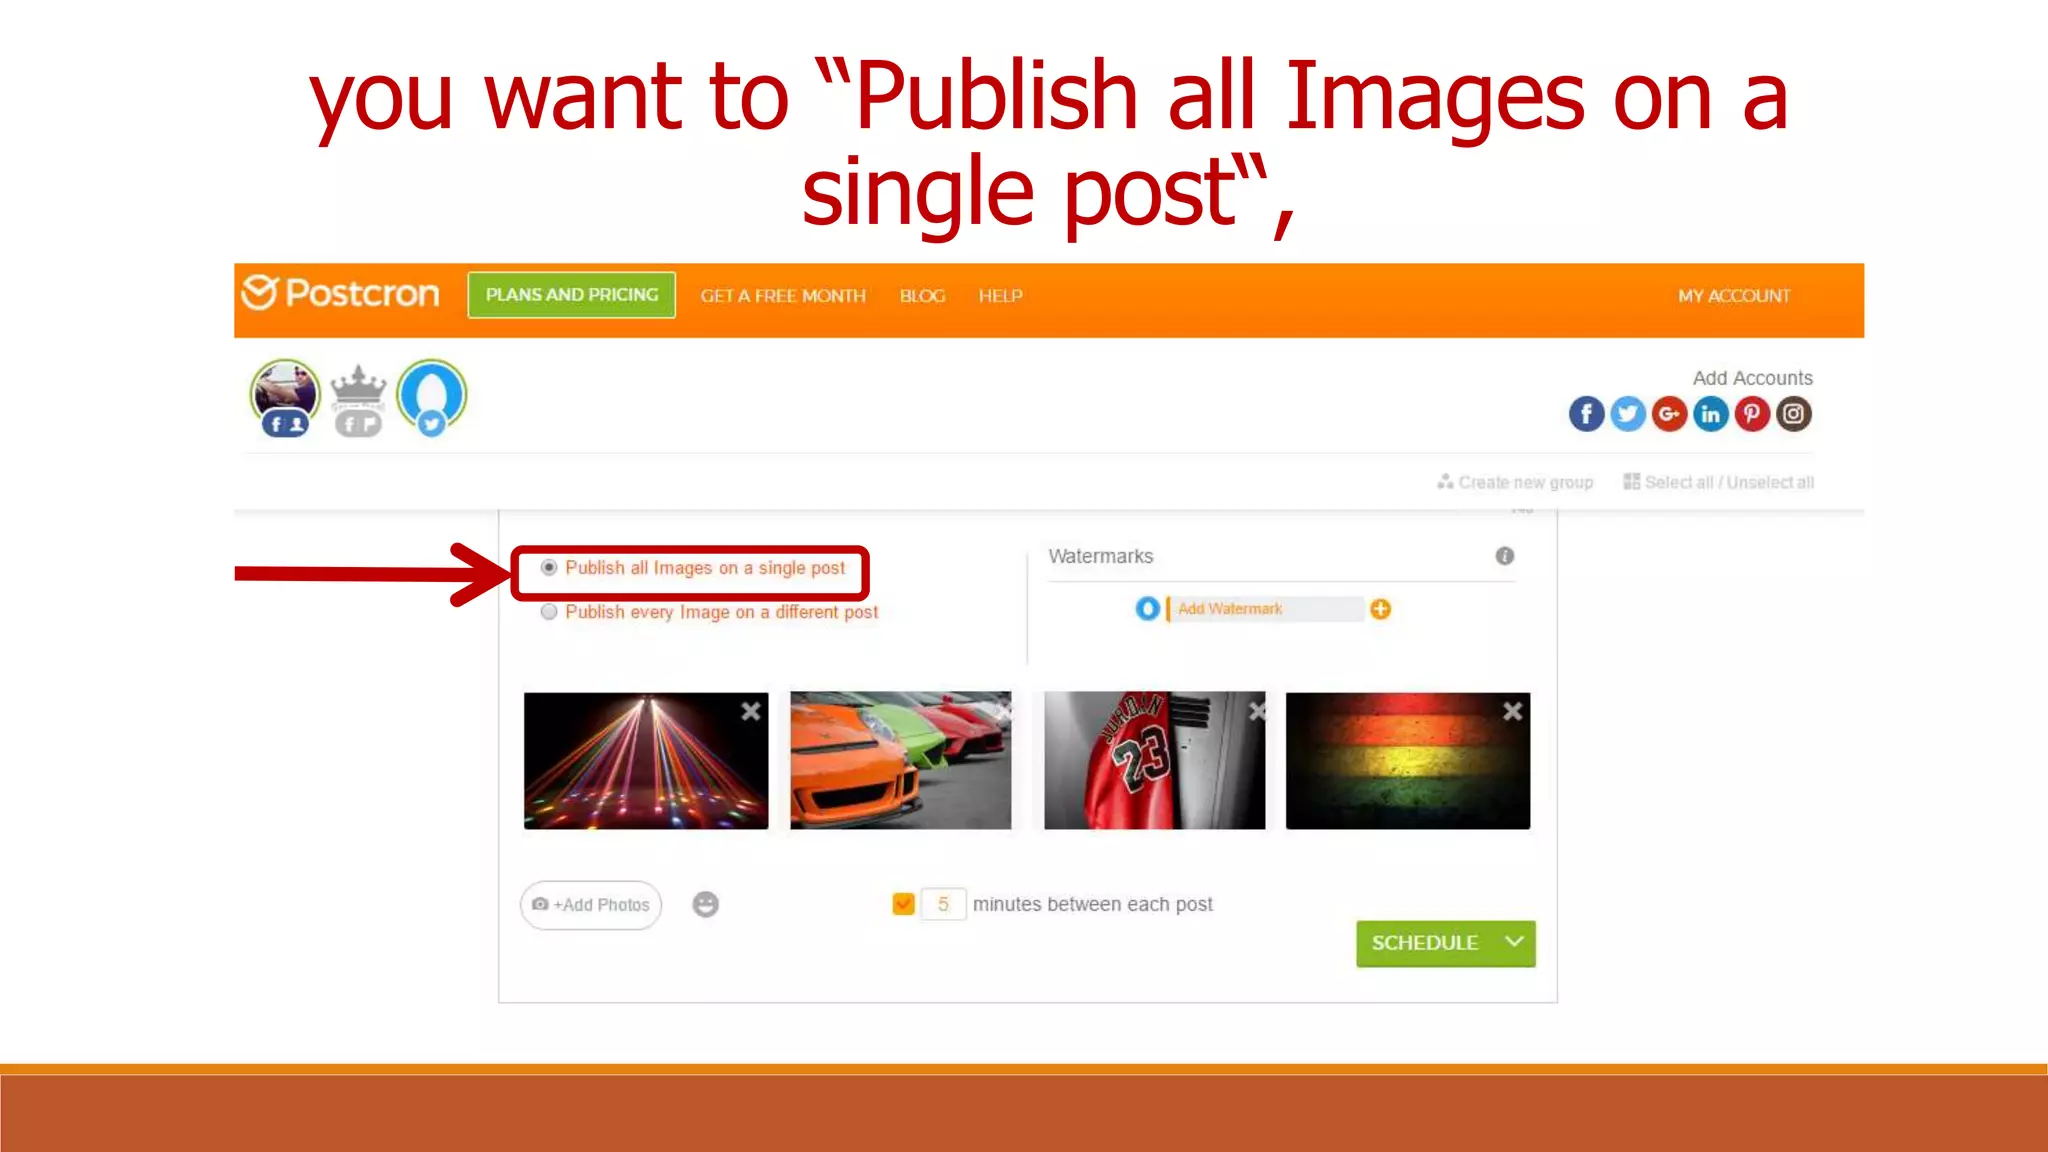
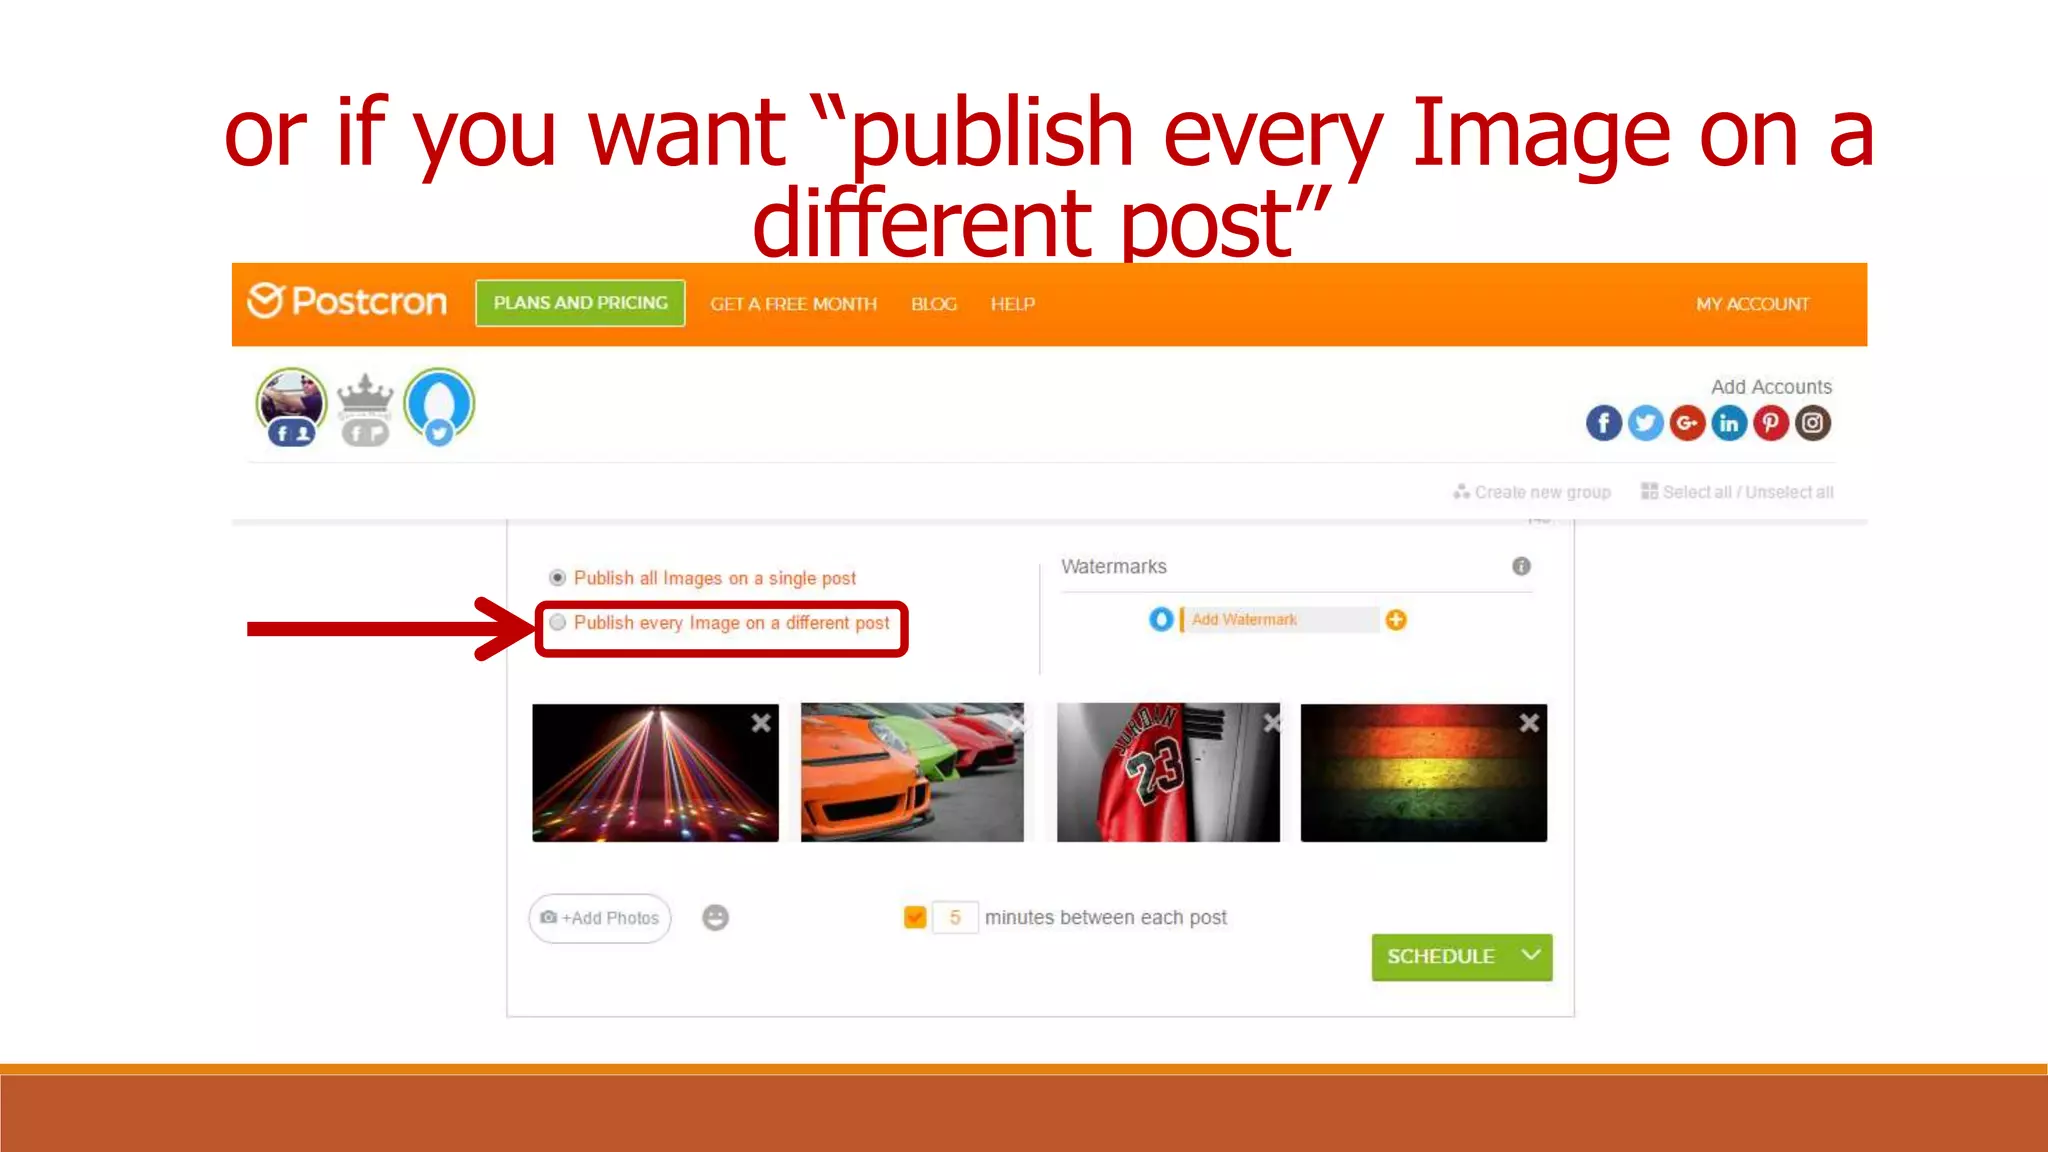
How to Use Postcron
To Schedule Your Posts in Social
Media
What is
Postcron?
Postcron is a web
based tool
That lets you
publish posts
To different Social
Media
In just one
platform.
Postcron is the
easiest way
To schedule
posts
On your social
media accounts.
How to schedule your
posts on social
networks using
Postcron?
First, open your browser
On the address bar,
Type in
www.postcron.com
Press Enter
Postcron homepage will appear
Choose ways to sign in
For this presentation, let us sign in
using Facebook
Note: If this is the first
time you’re accessing
Postcron,
You need to accept all
the permissions.
And when you login to
Facebook,
You’ll be asked about
the visibility of your
posts.
Select “public” so that
all your contacts can
see your posts.
Upon signing in, Postcron dashboard will
appear
These accounts are from Facebook which
I used to sign in
We can add more accounts by clicking
these icons
You can add
multiple accounts:
Facebook profiles,
pages, groups,
and events.
Twitter accounts,
Google+ Pages,
LinkedIn profiles
and pages,
and even Pinterest
boards.
In this example, I have added my Twitter
account
You’ll see that as
you add accounts,
they will appear
on the dashboard
under your accounts panel.
After you’ve added
all your social
accounts,
select the
account(s) where
you’re going to
publish your post
by clicking on the
icons for each
network.
Then you can start
writing your post.
Let’s try posting a
message on my
Facebook and
Twitter account.
Let us use the
word “Test”
On my Postcron dashboard, I will click my
Facebook and my Twitter accounts
And write the word “Test” on the
message box
Aside from posting
texts, you can also
share links
by typing or just
pasting the
URL you want to
share.
Postcron will
automatically
attach the link info
to your post, and
shorten the link
so that it occupies
less space.
Let’s try inserting
a link in our
example.
Here is the link I have inserted in our
example
When you have
finished
composing your
post,
it’s time to publish
it.
To do so, you have
several options:
First, you can
share it
immediately
by clicking the
drop-down menu
next to the “SCHEDULE” button,
and click the “Post Now” option.
You can also
schedule your post
to be published
within days,
weeks, or months,
from now
at any specific
time you decide
on.
To do this, click on the “SCHEDULE” dropdown
then click “Schedule” button
then pick the day and time you want it to be
posted
and click “Done“.
You can post
pictures too.
To add photos, click on the “Add Photos”
button
and select the
images you want
to share.
Select the photos from your computer and
click “Open”
Note that now it’s
possible
to upload multiple
images
to one single post.
Here are the pictures I picked from my
computer
In the case of
including multiple
photos:
when the images
are done
uploading,
you have to decide
whether
you want to “Publish all Images on a
single post“,
or if you want “publish every Image on a
different post”
If you select the
second option,
you will be able to
schedule the posts
in your Predefined
Publishing Times.
I hope this tutorial
helps
Have a great day
ahead!

How to Use Postcron to Schedule Your Posts in Social Media