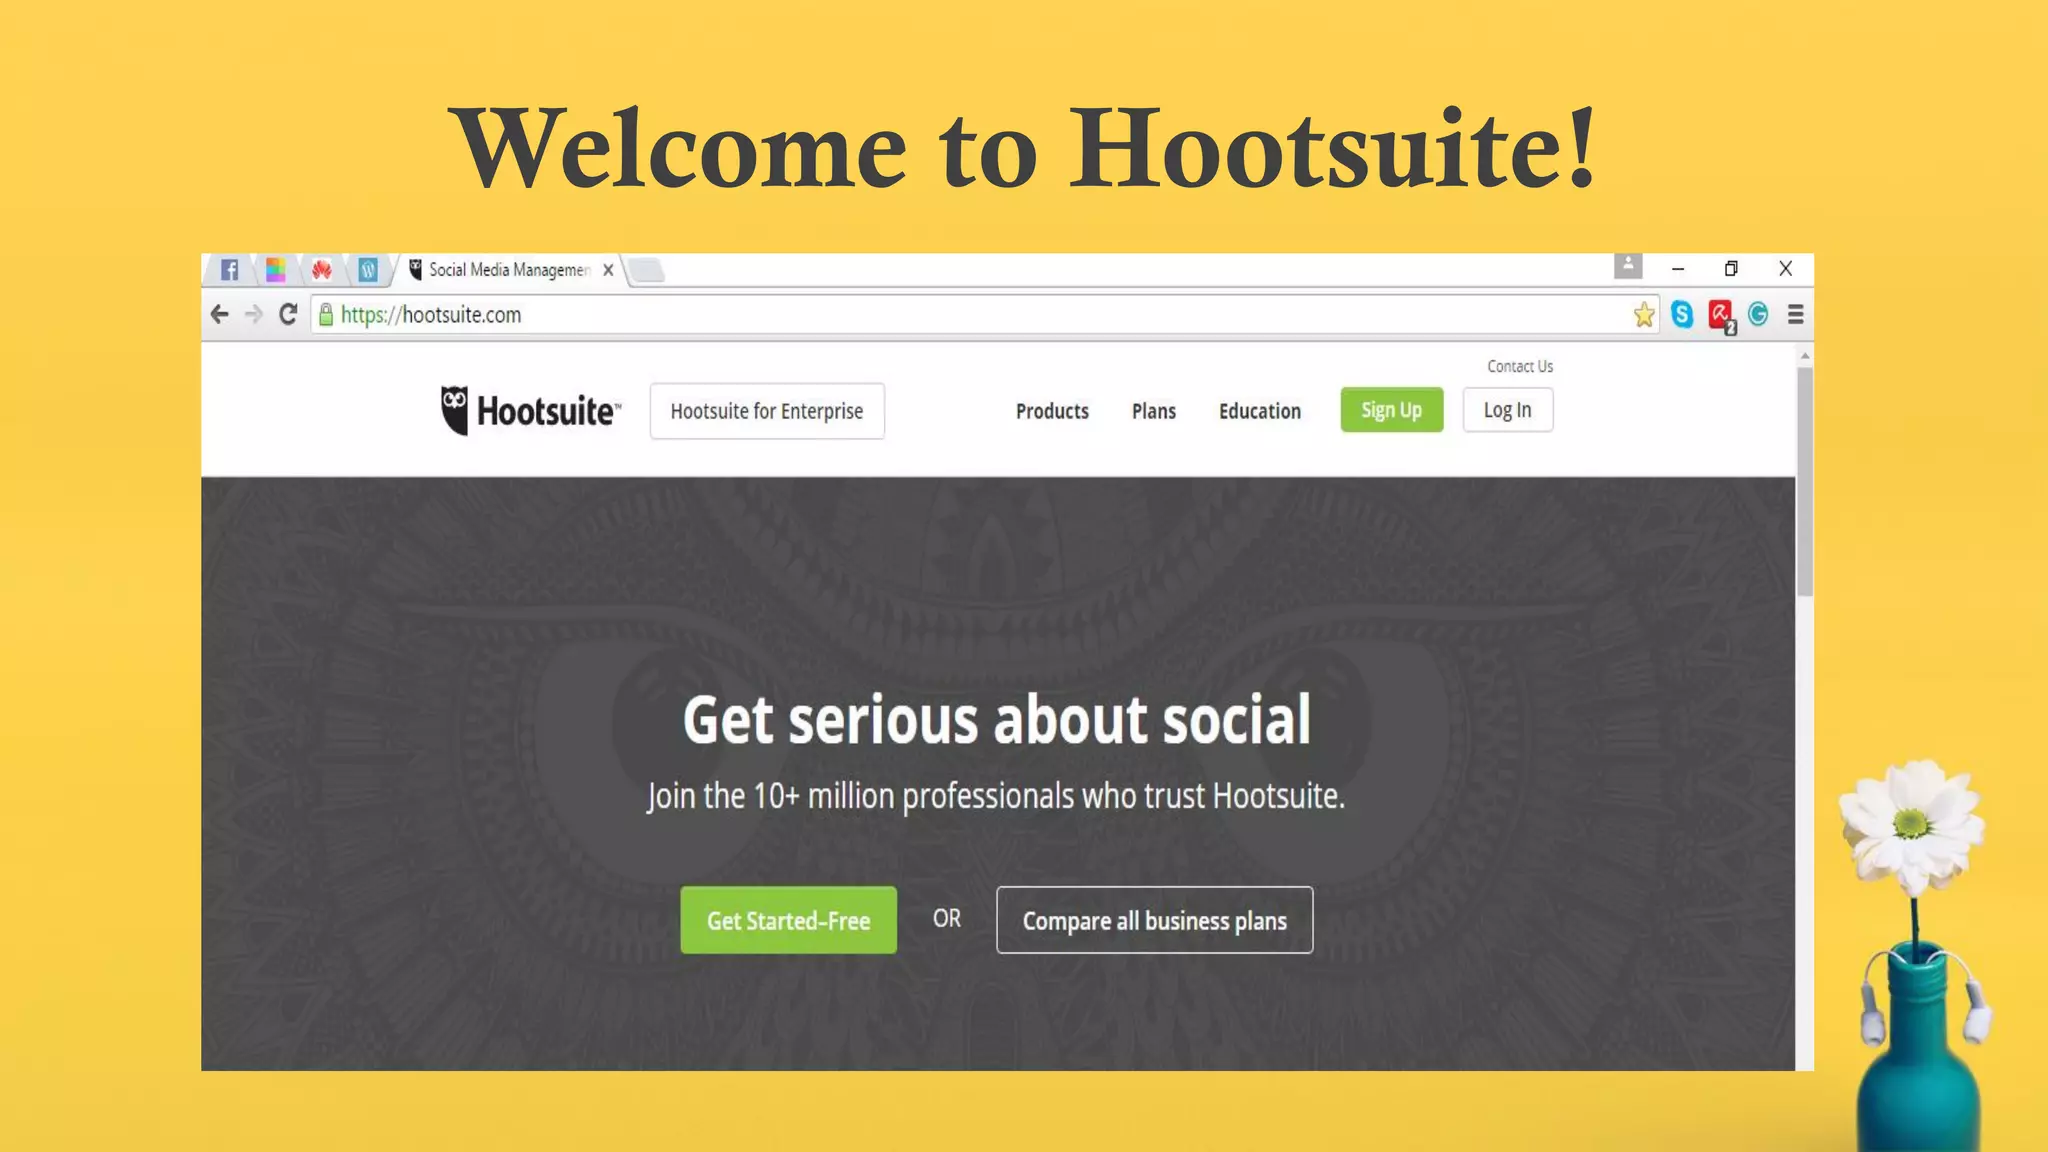
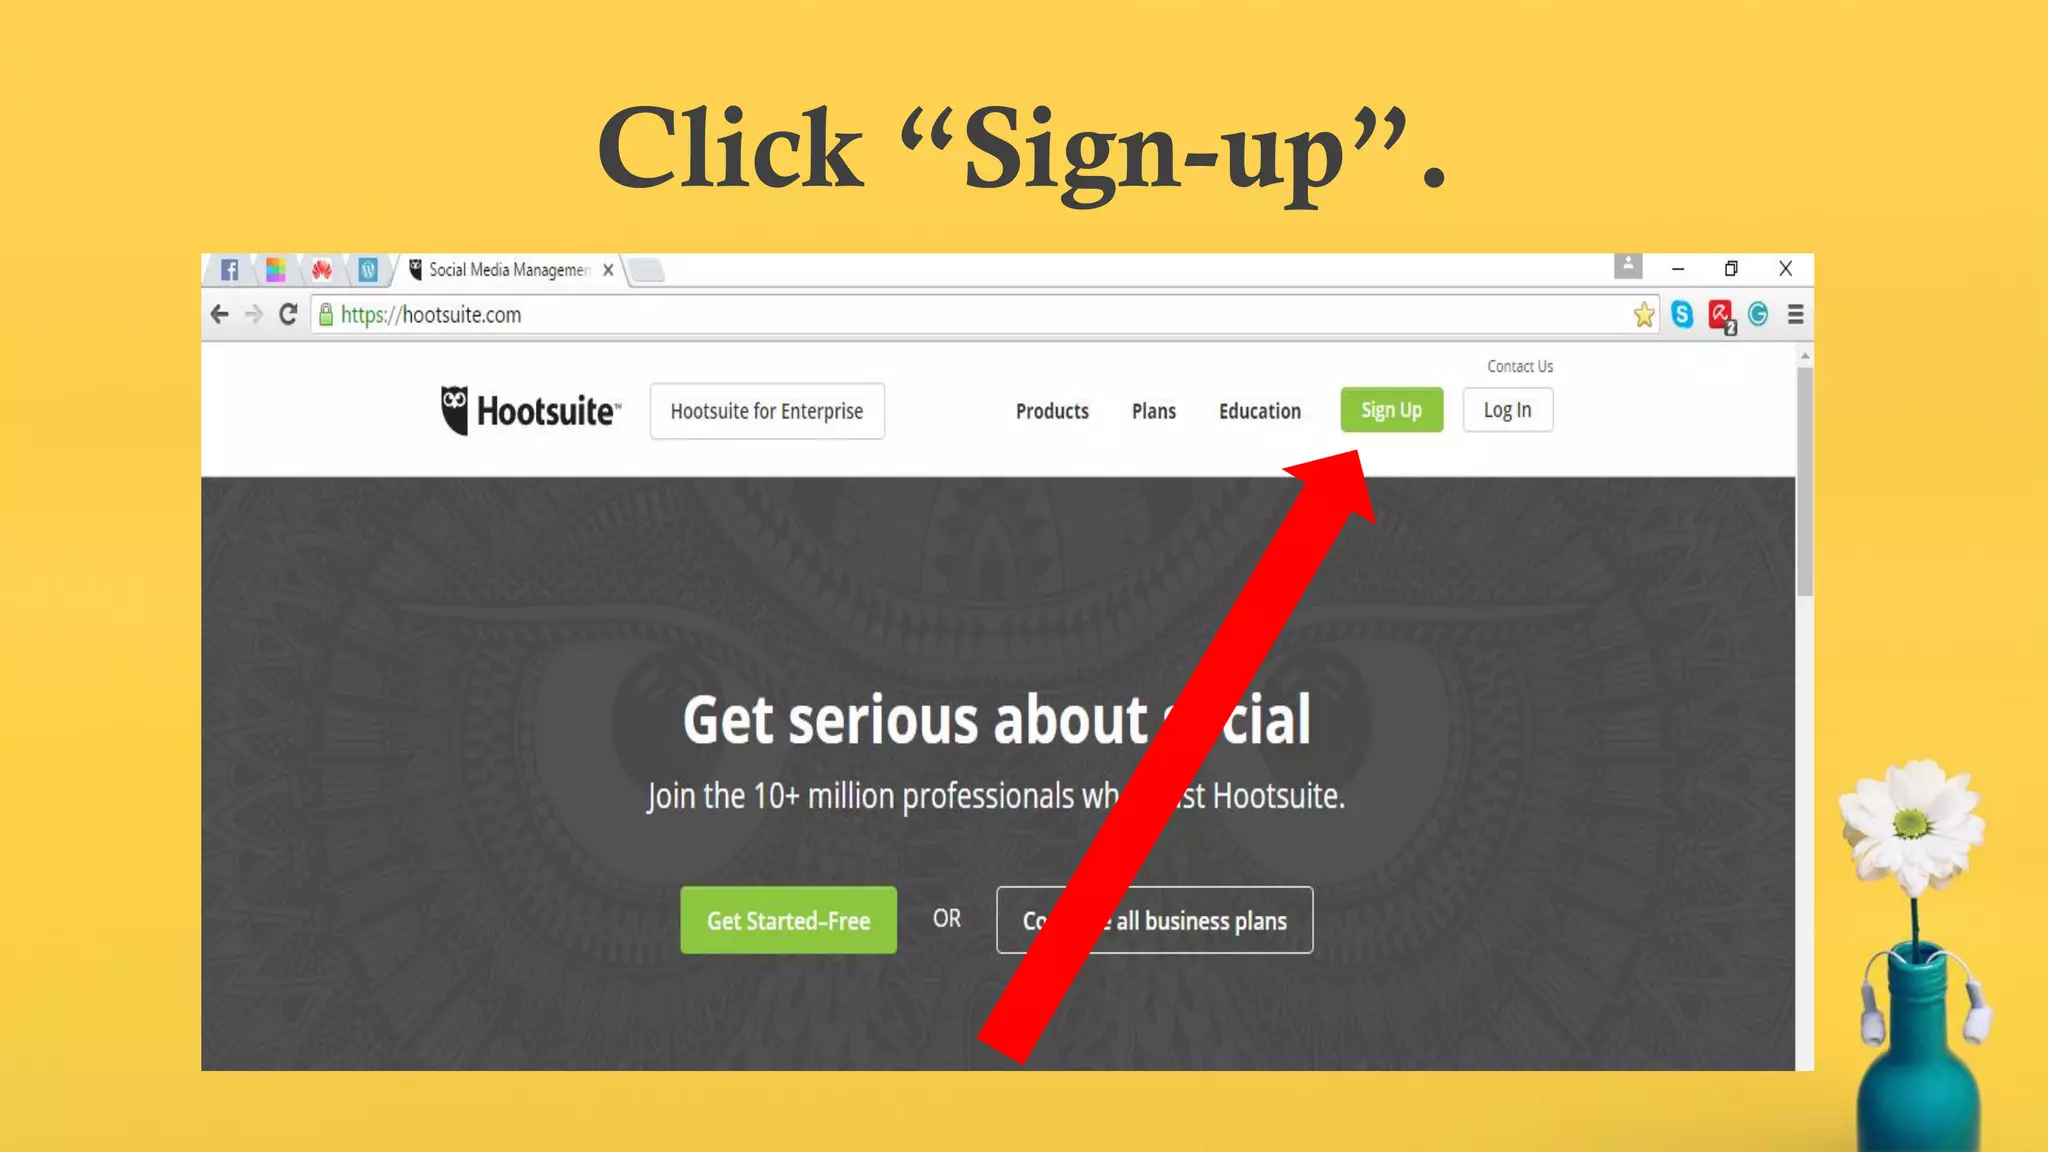
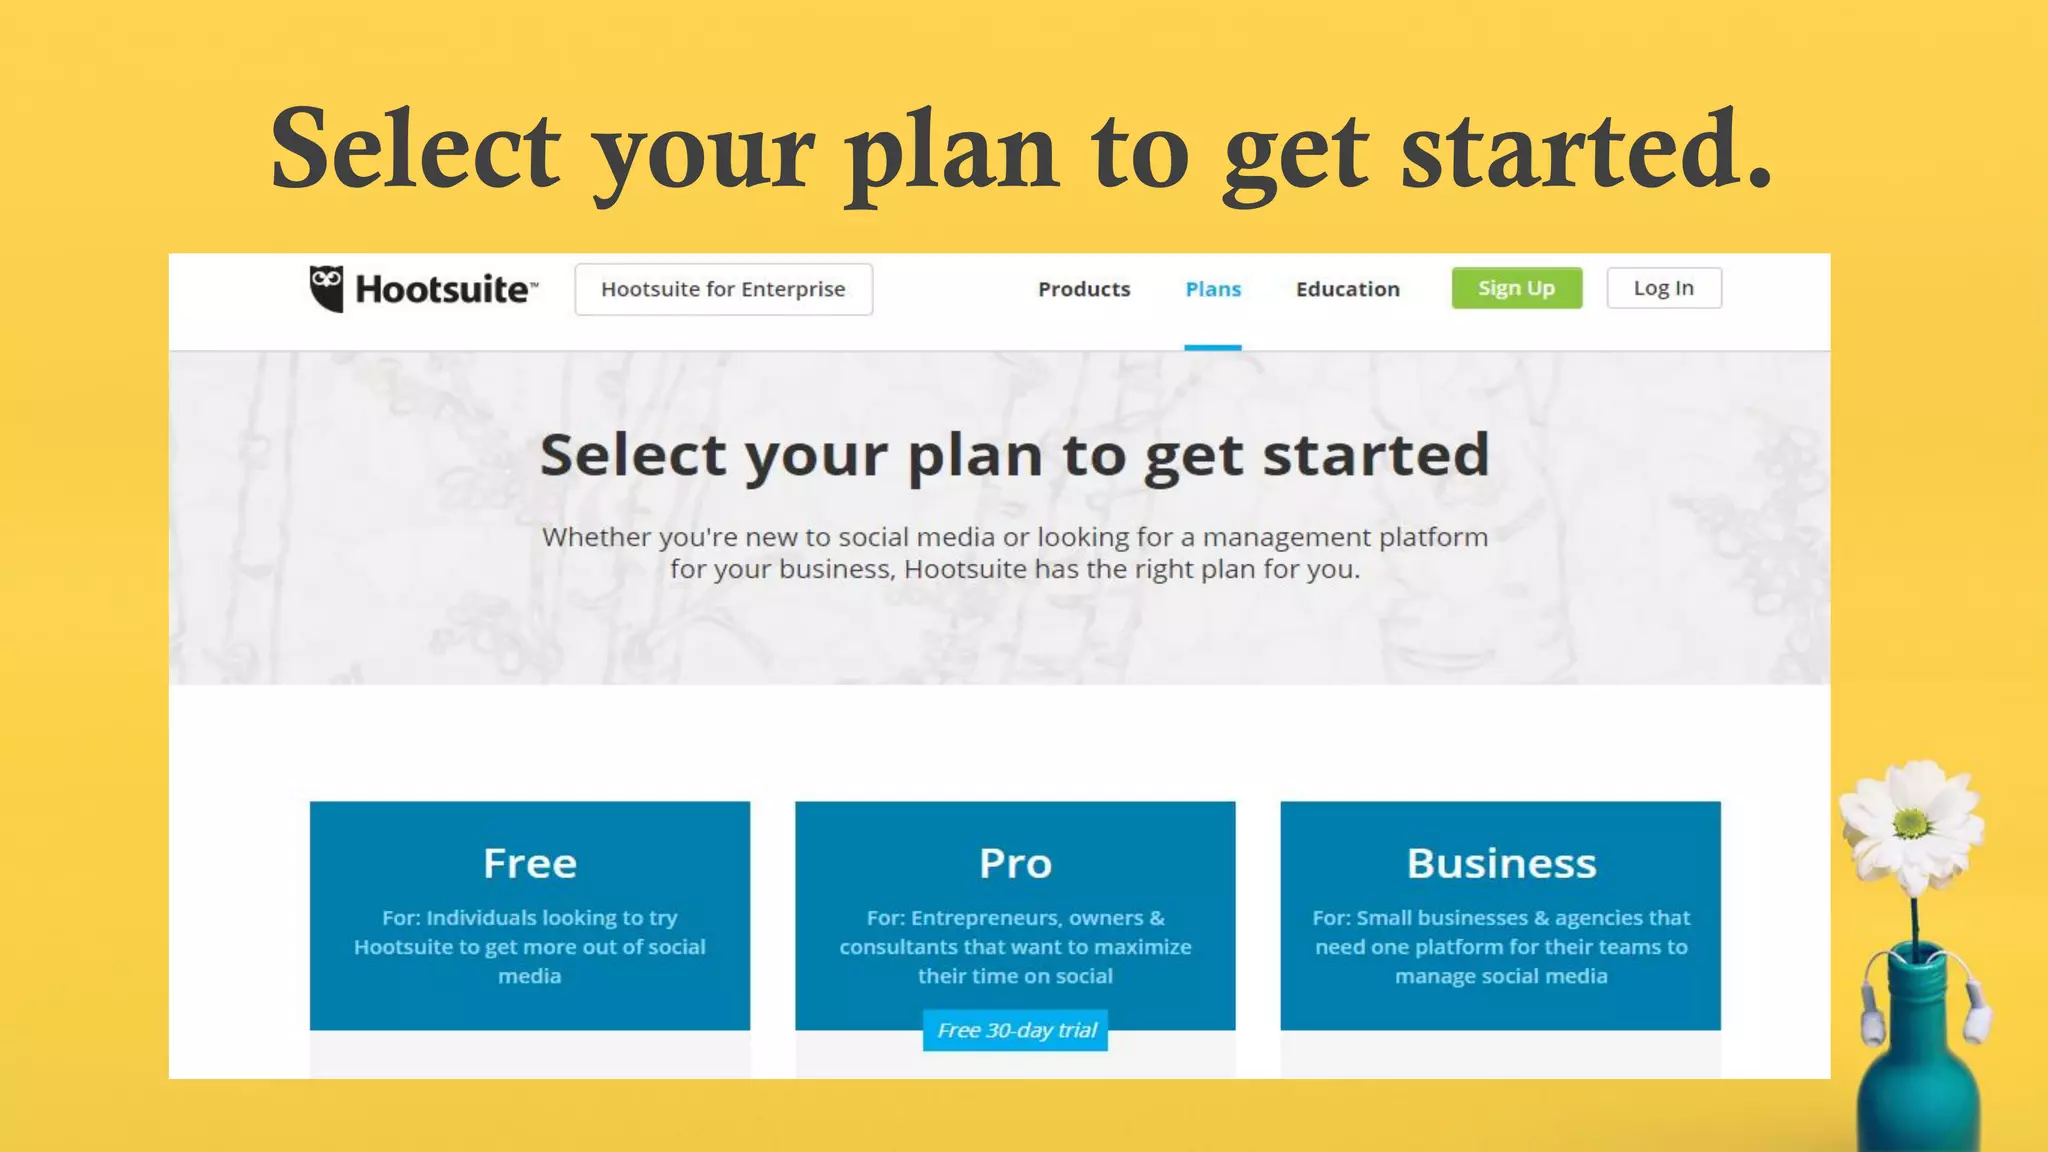
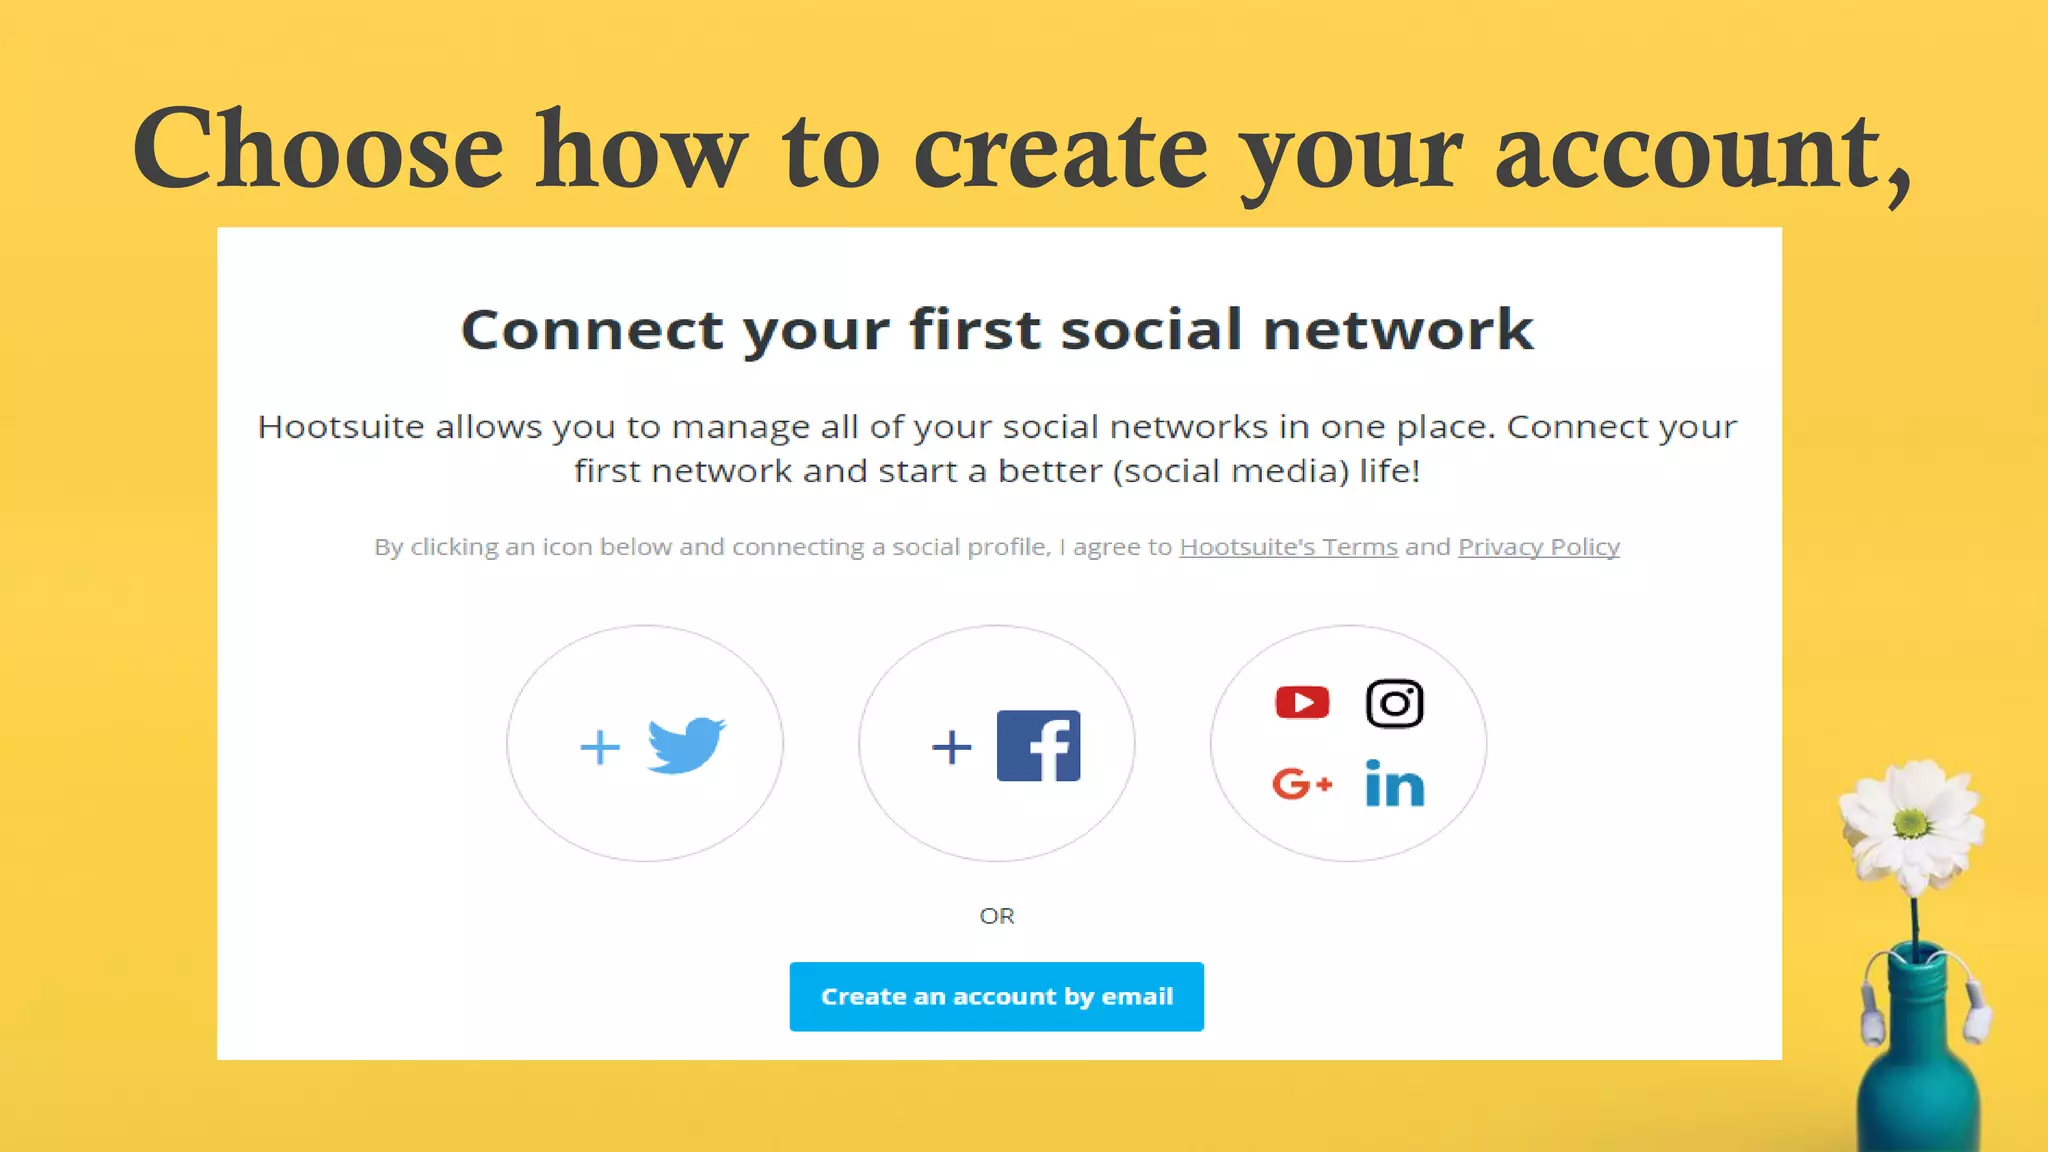
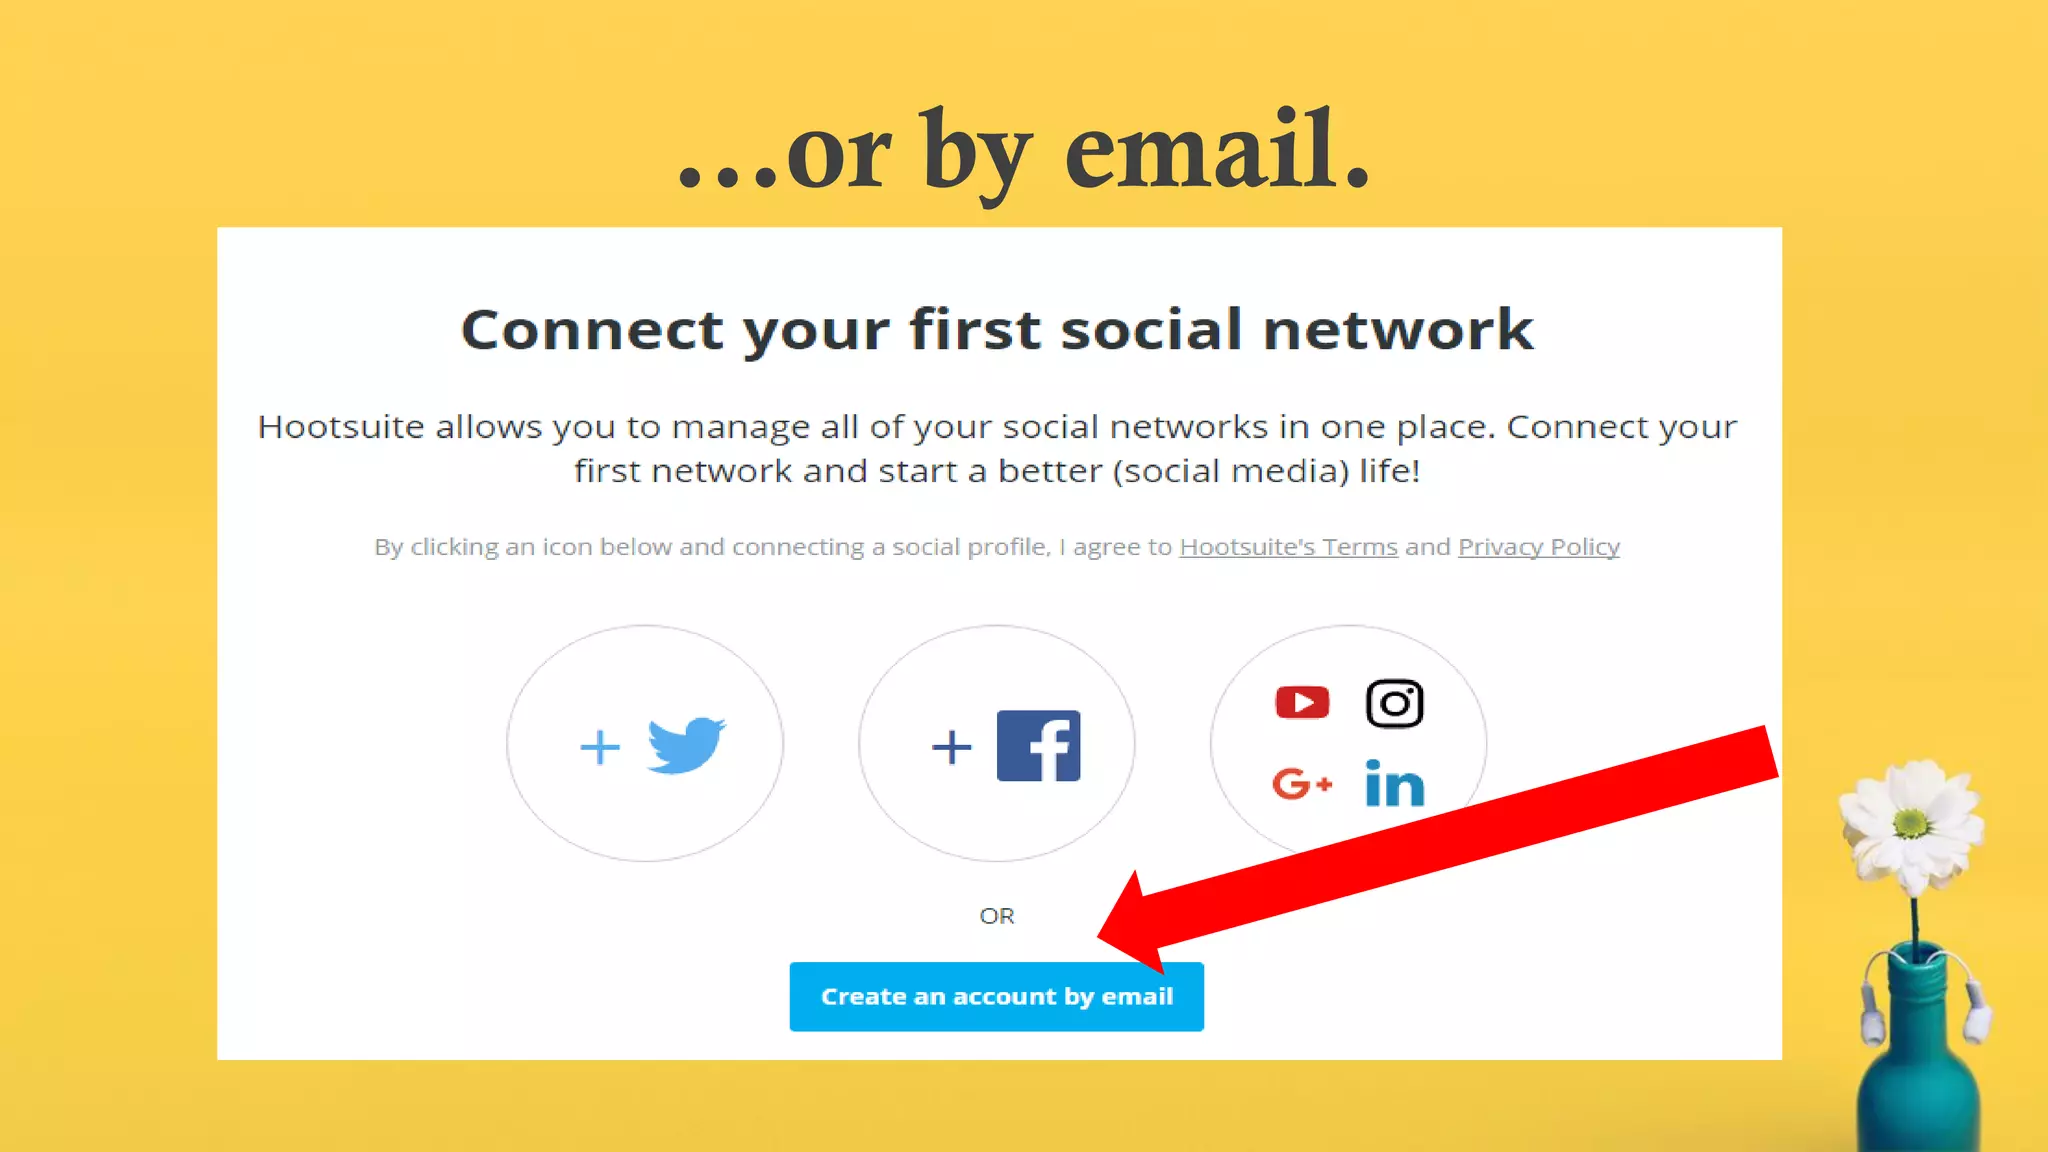
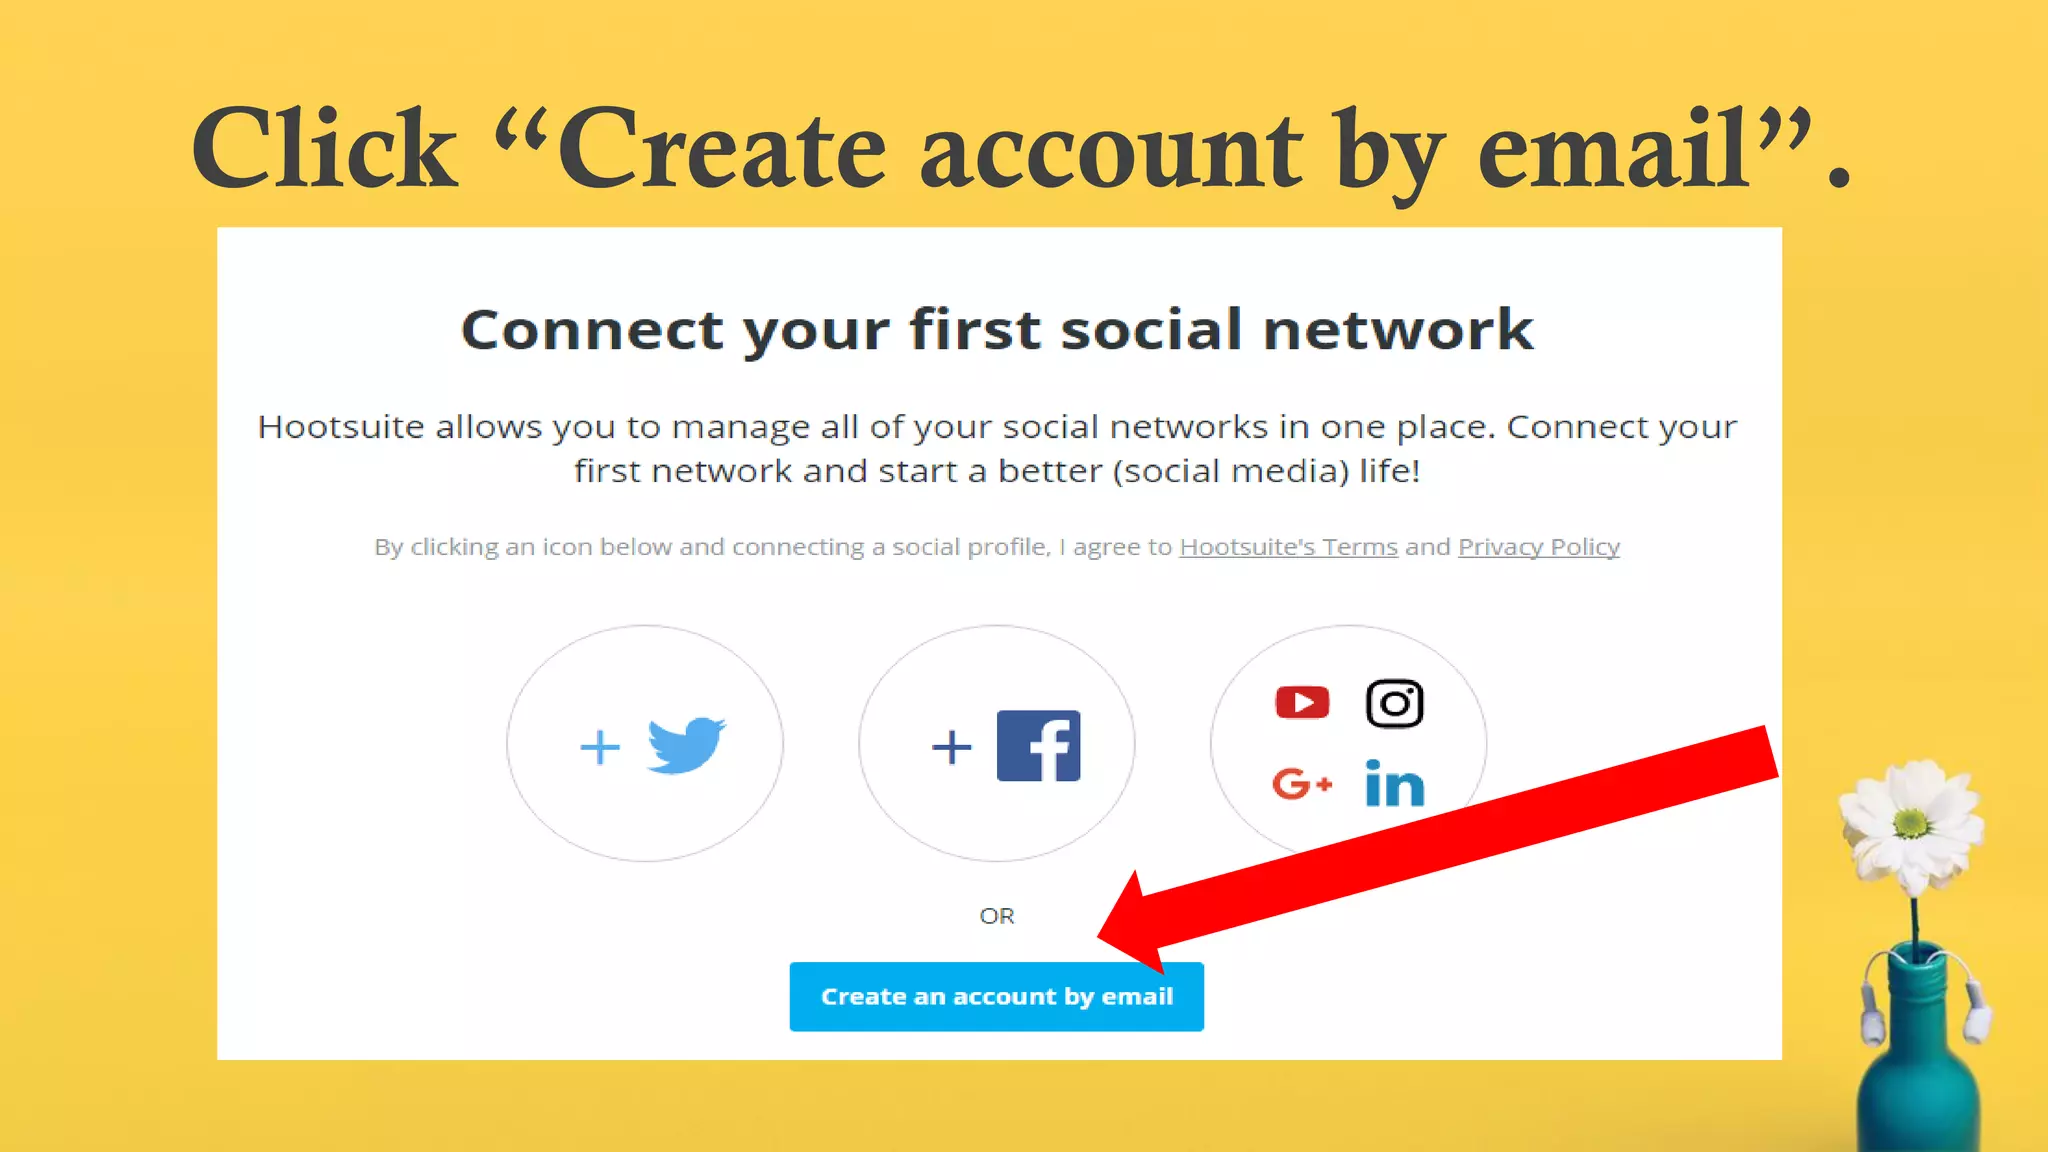
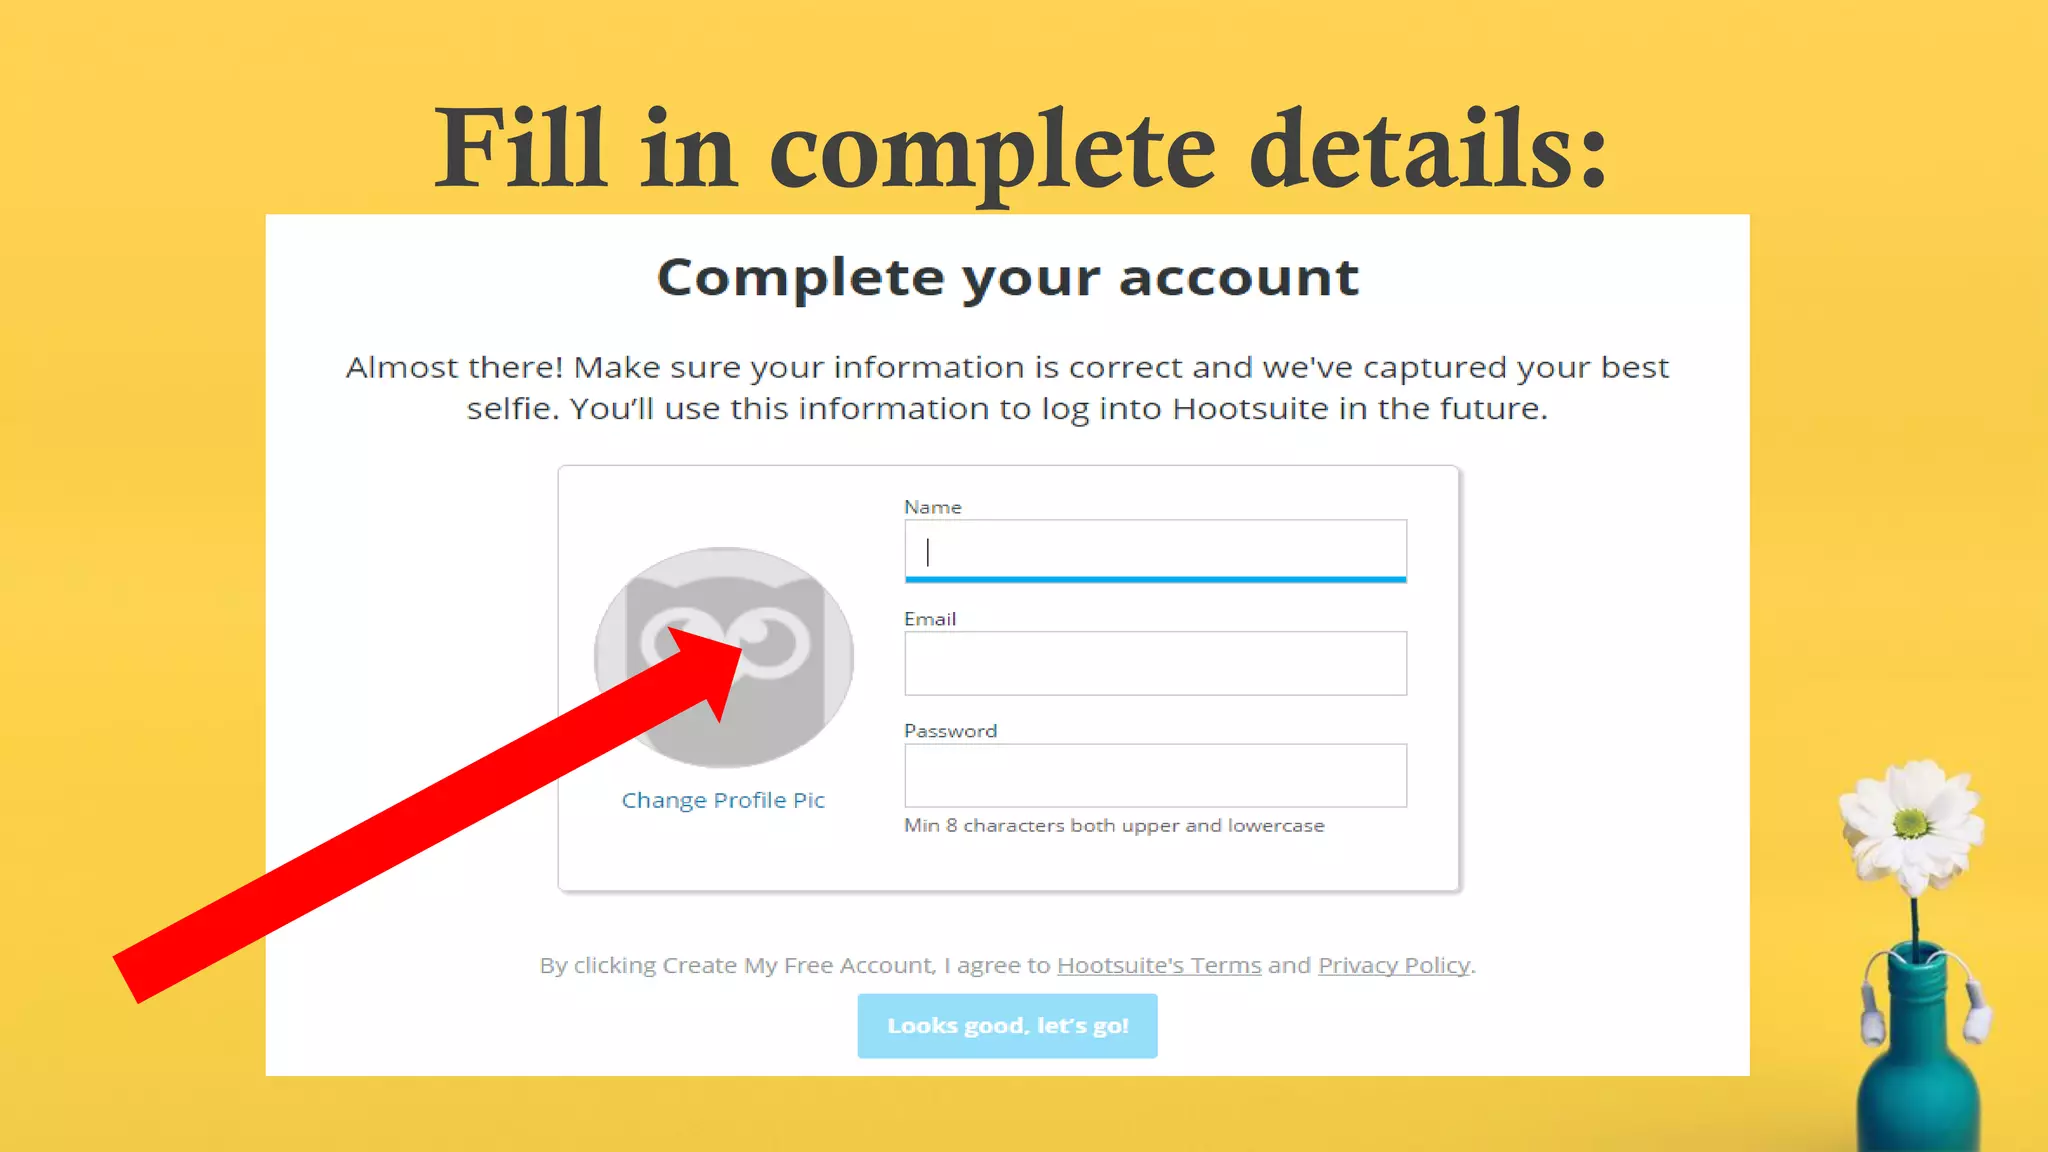
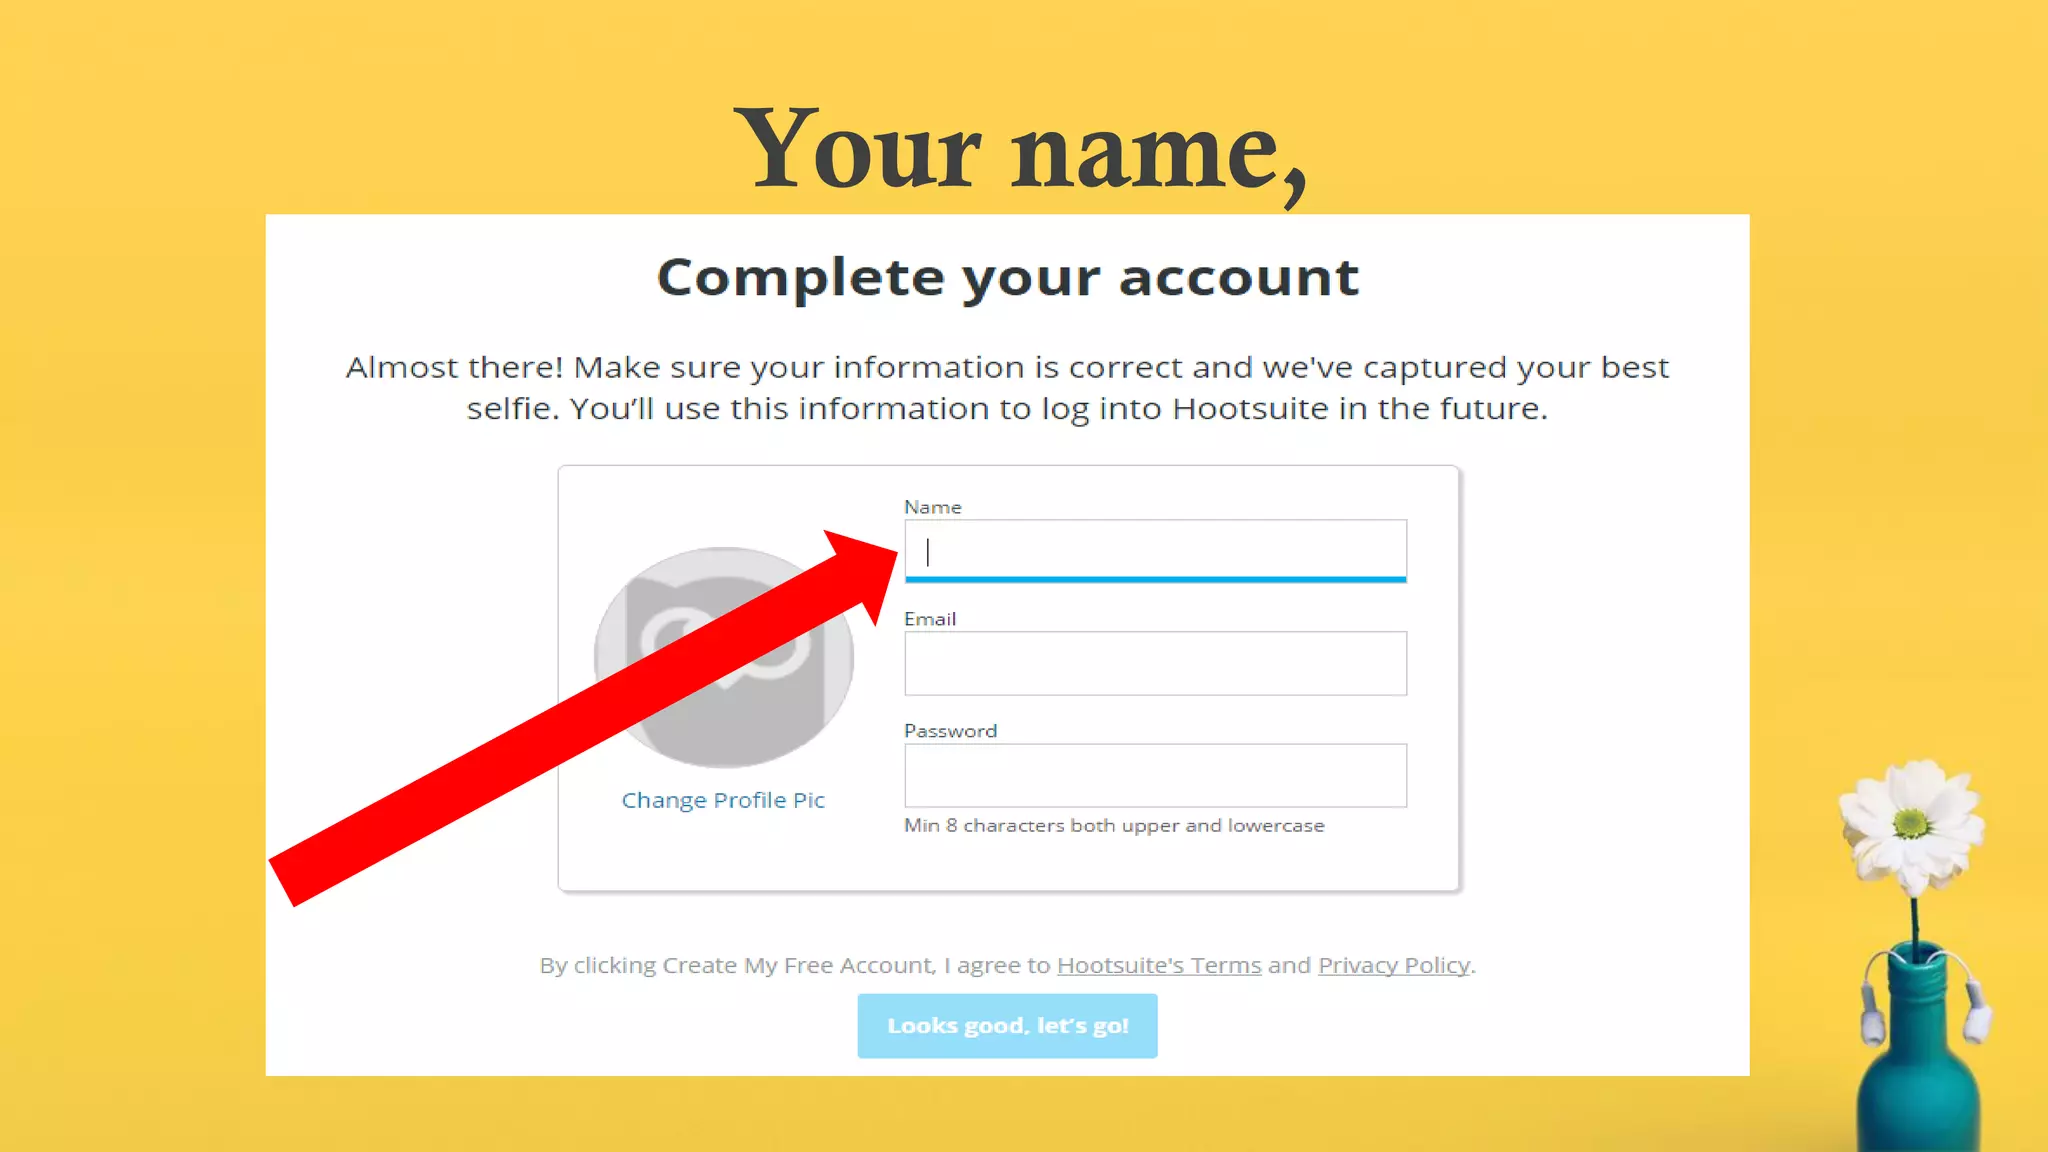
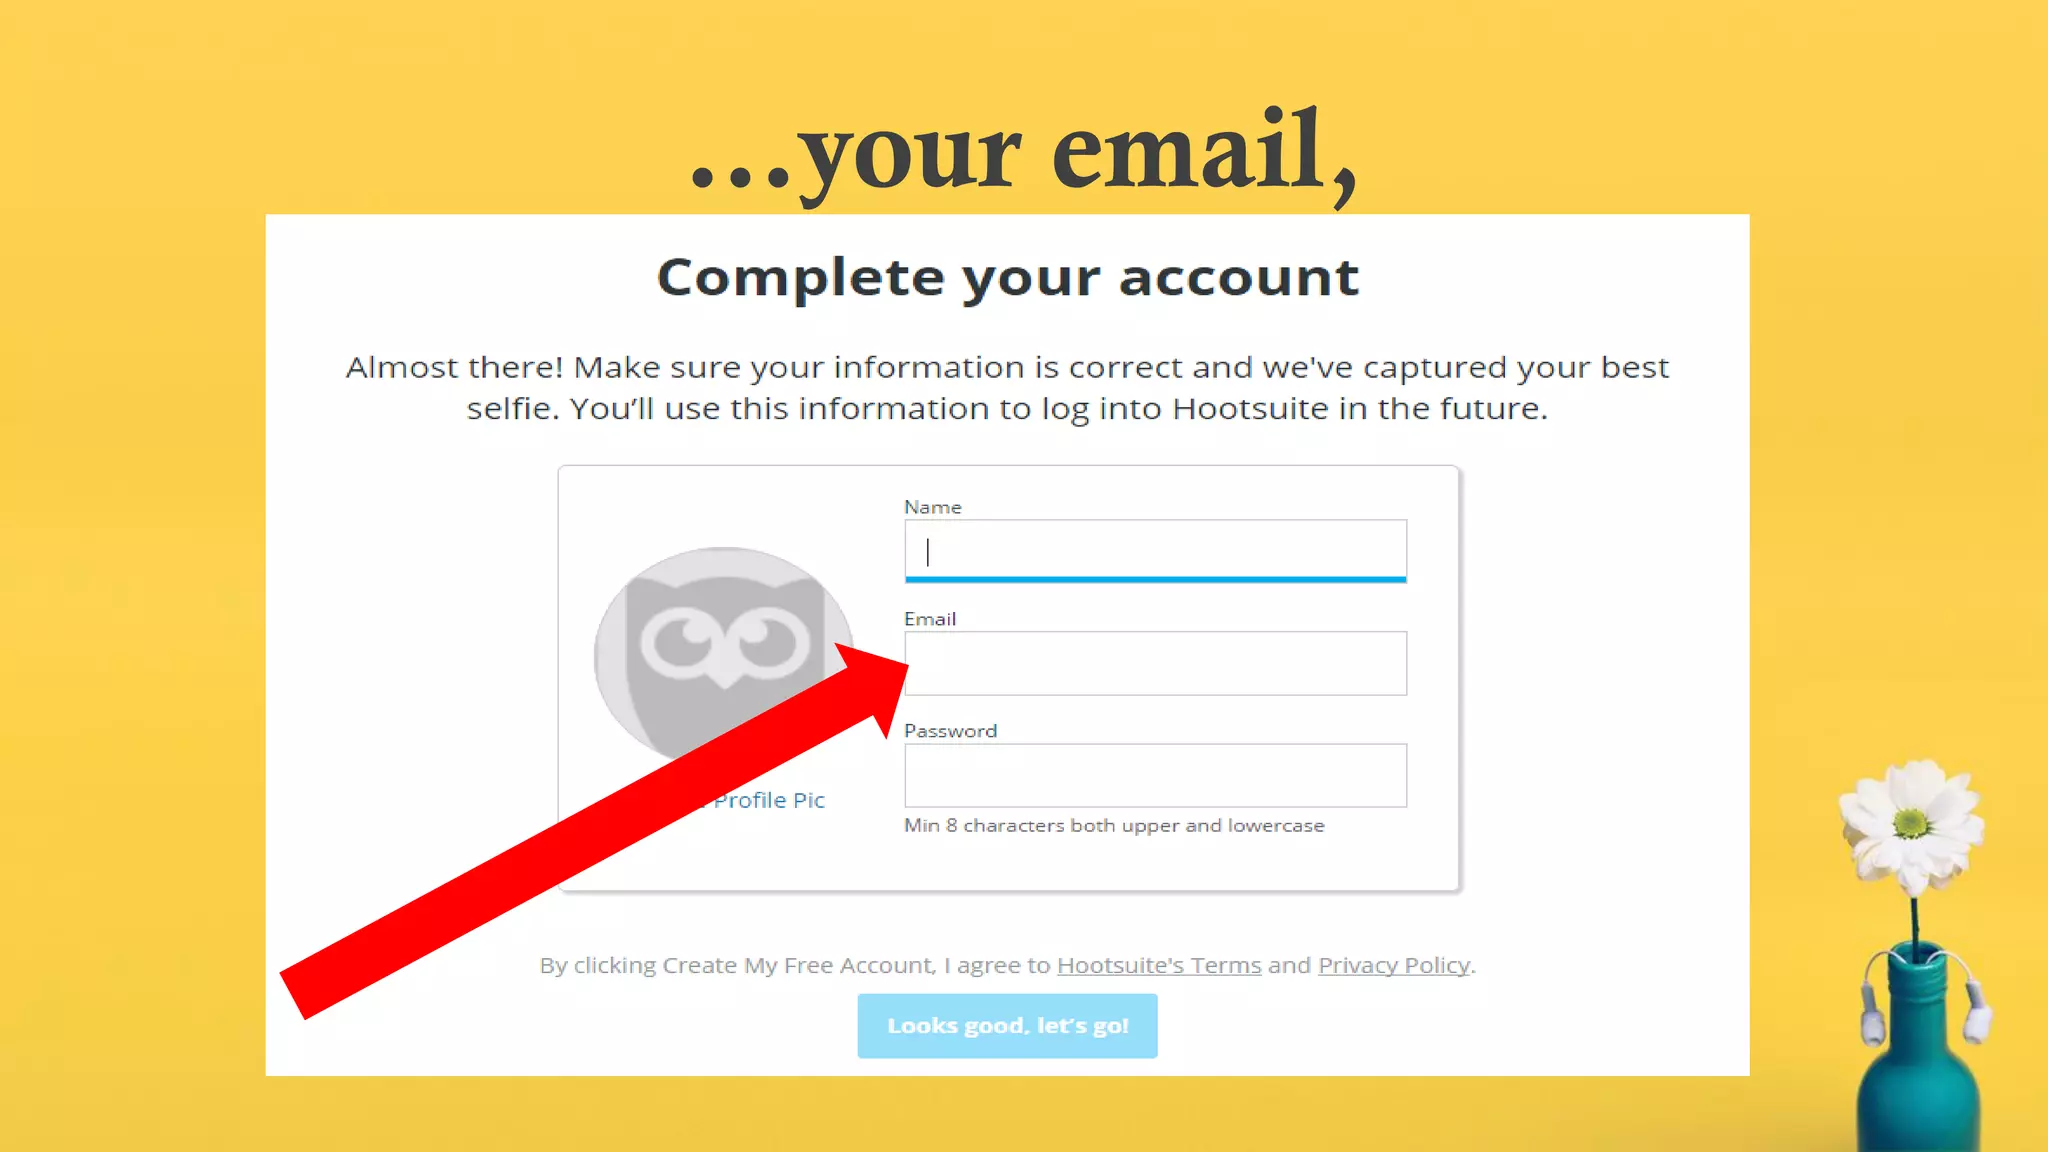
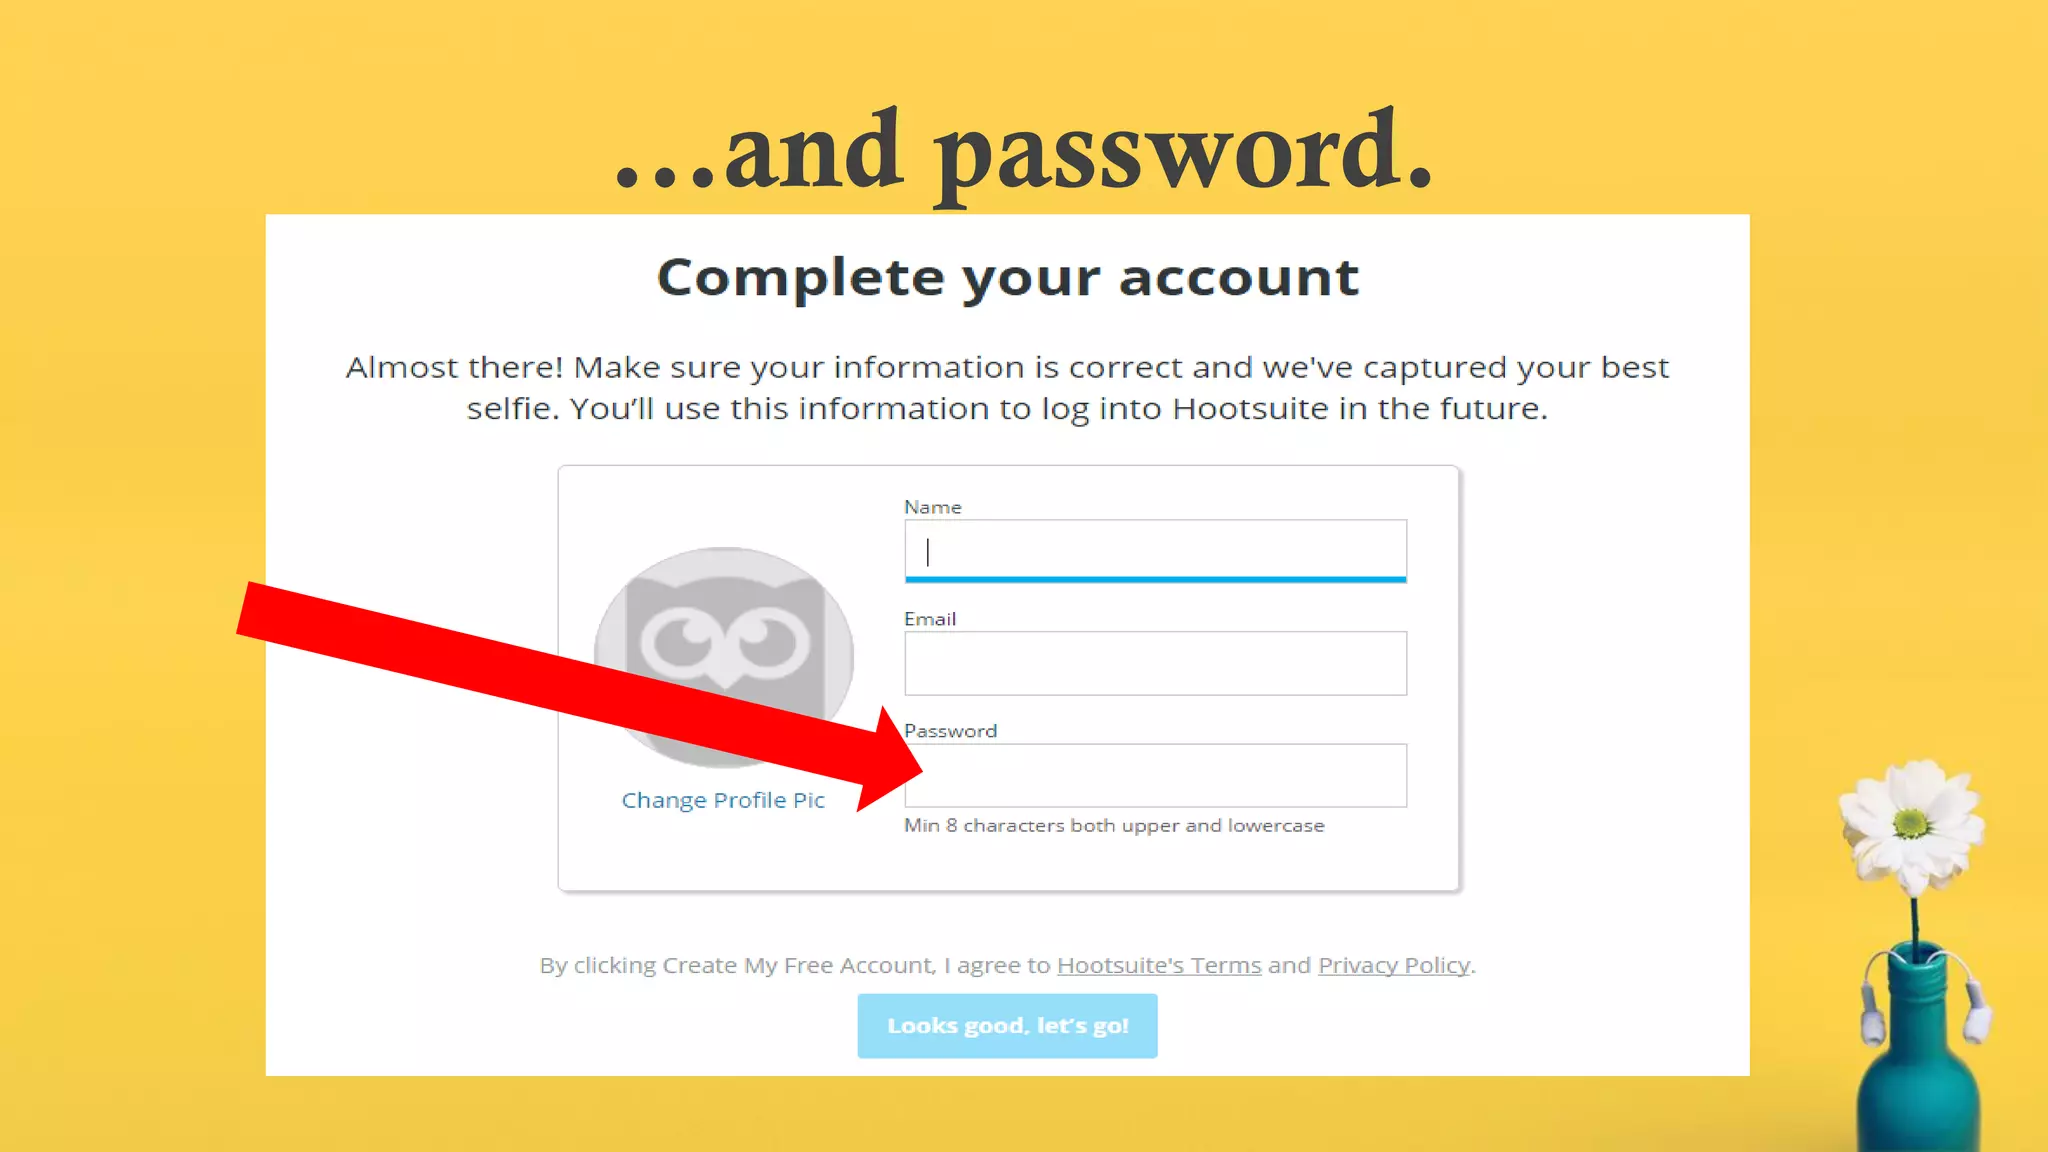
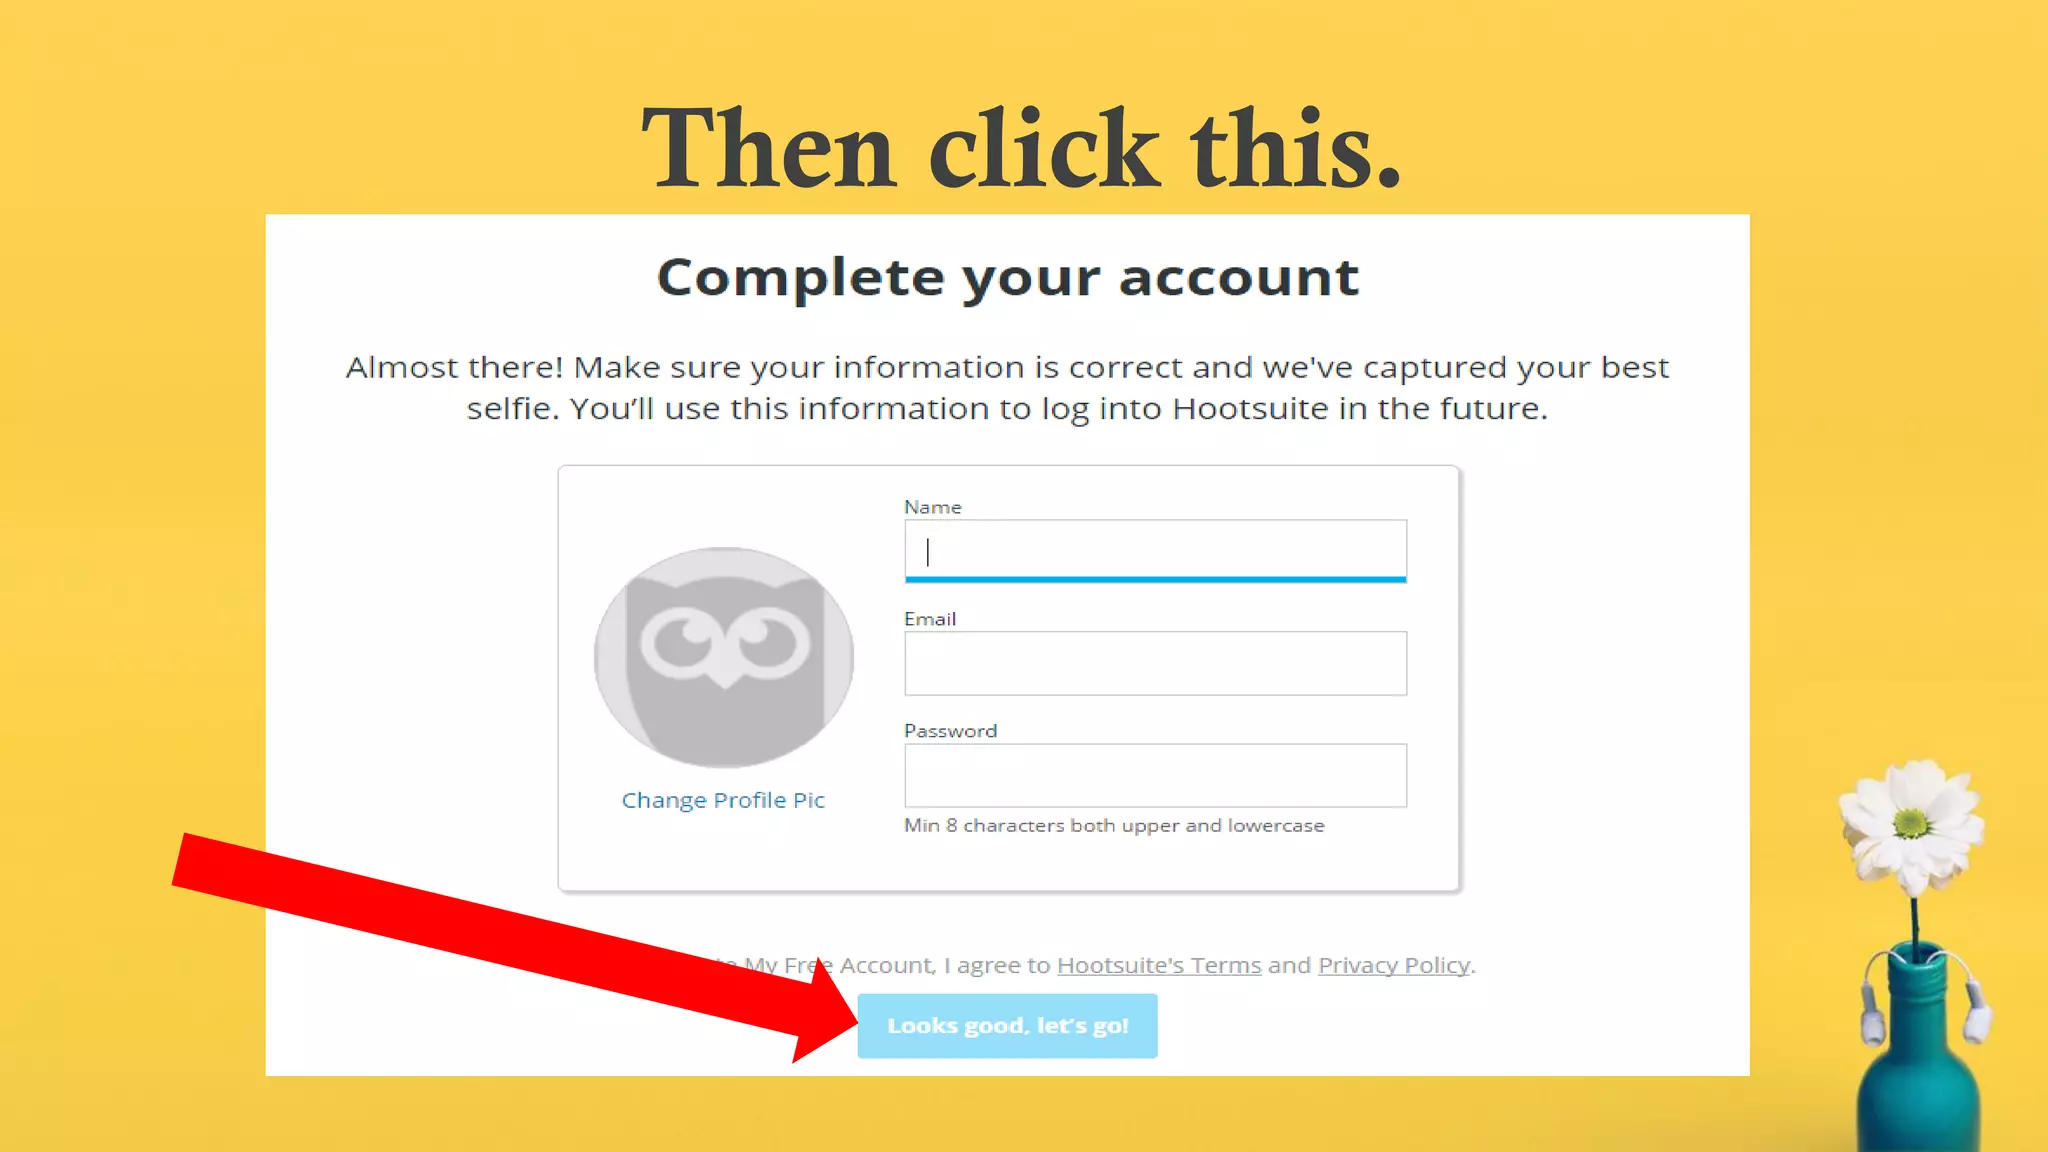
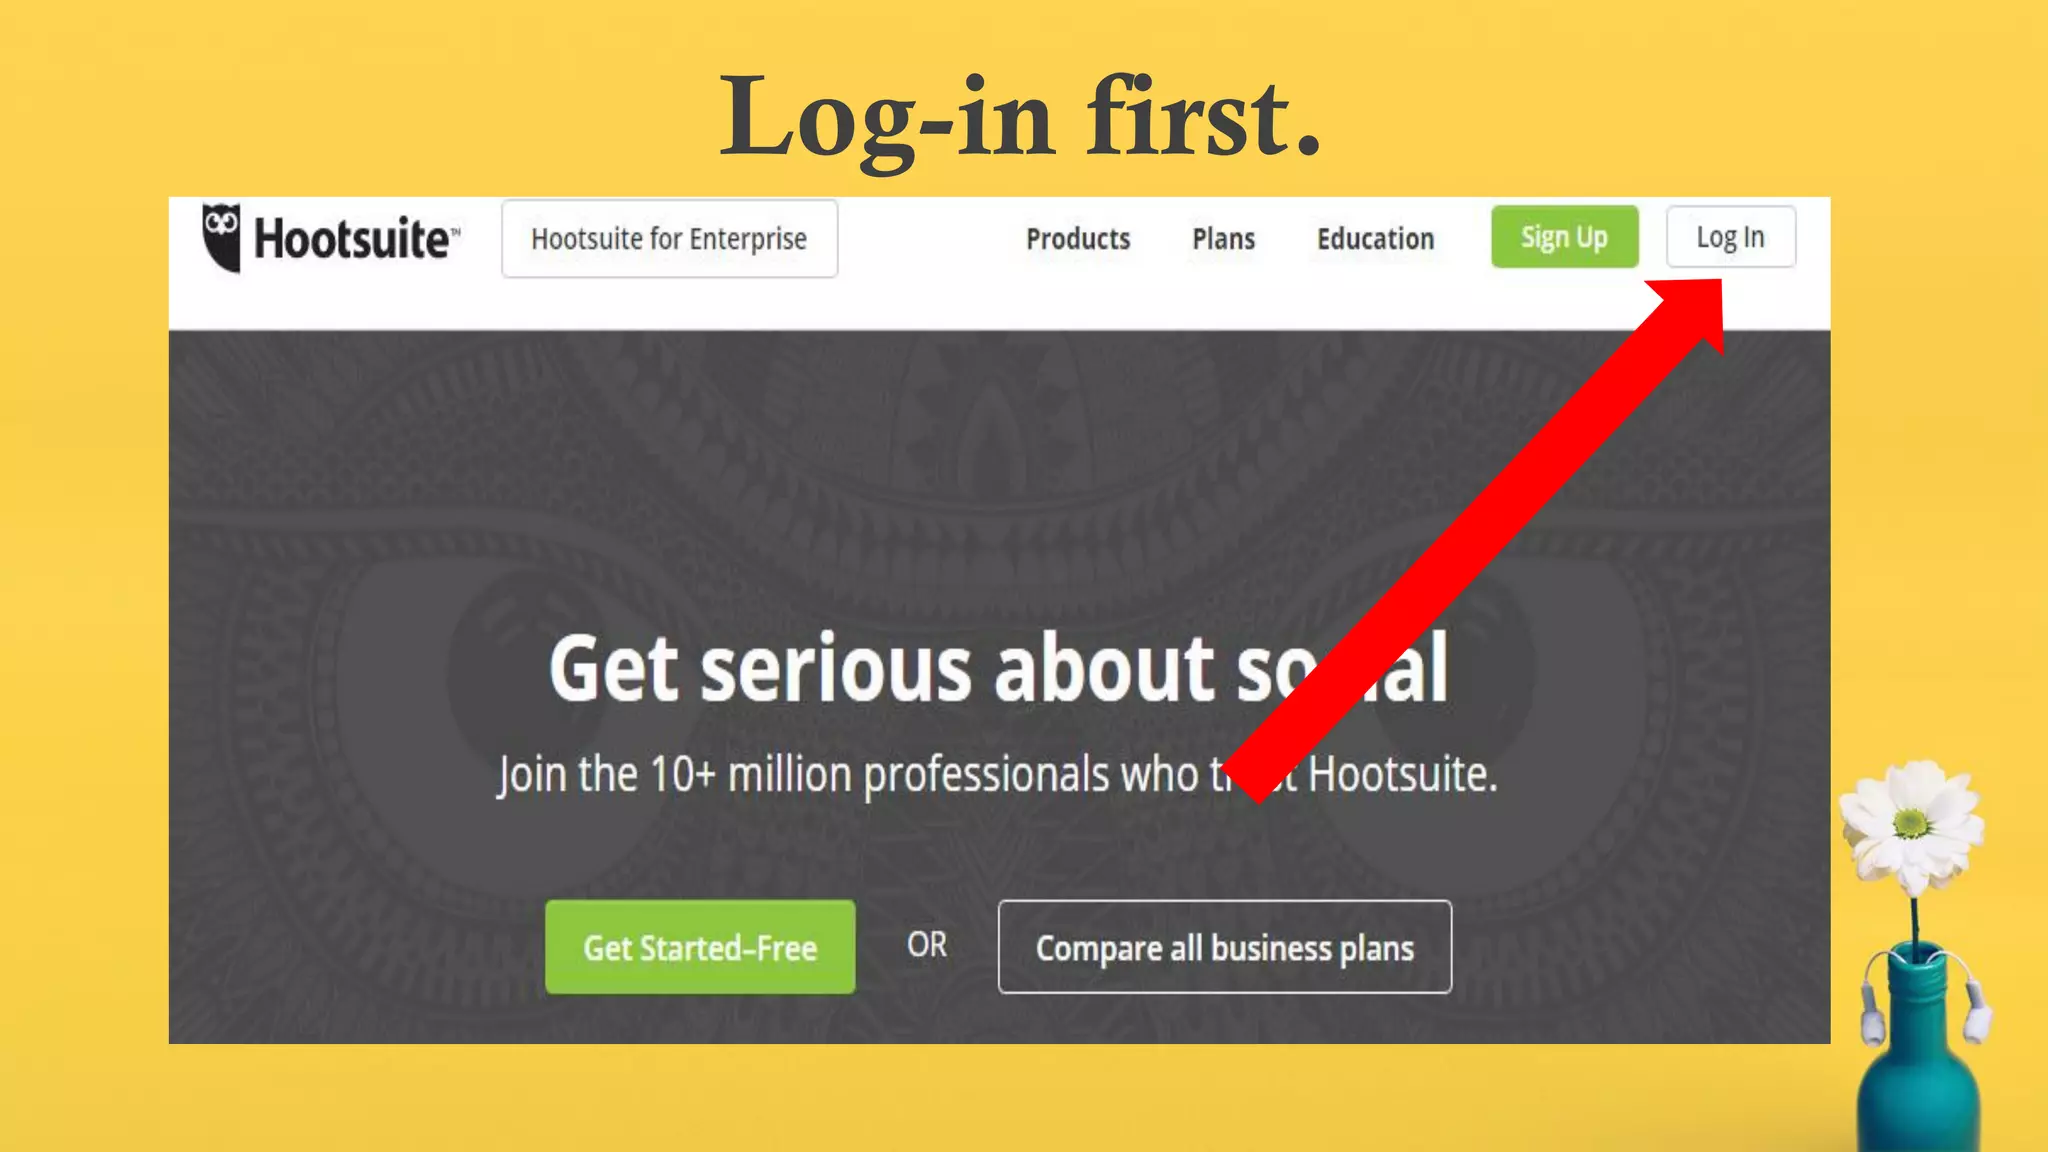
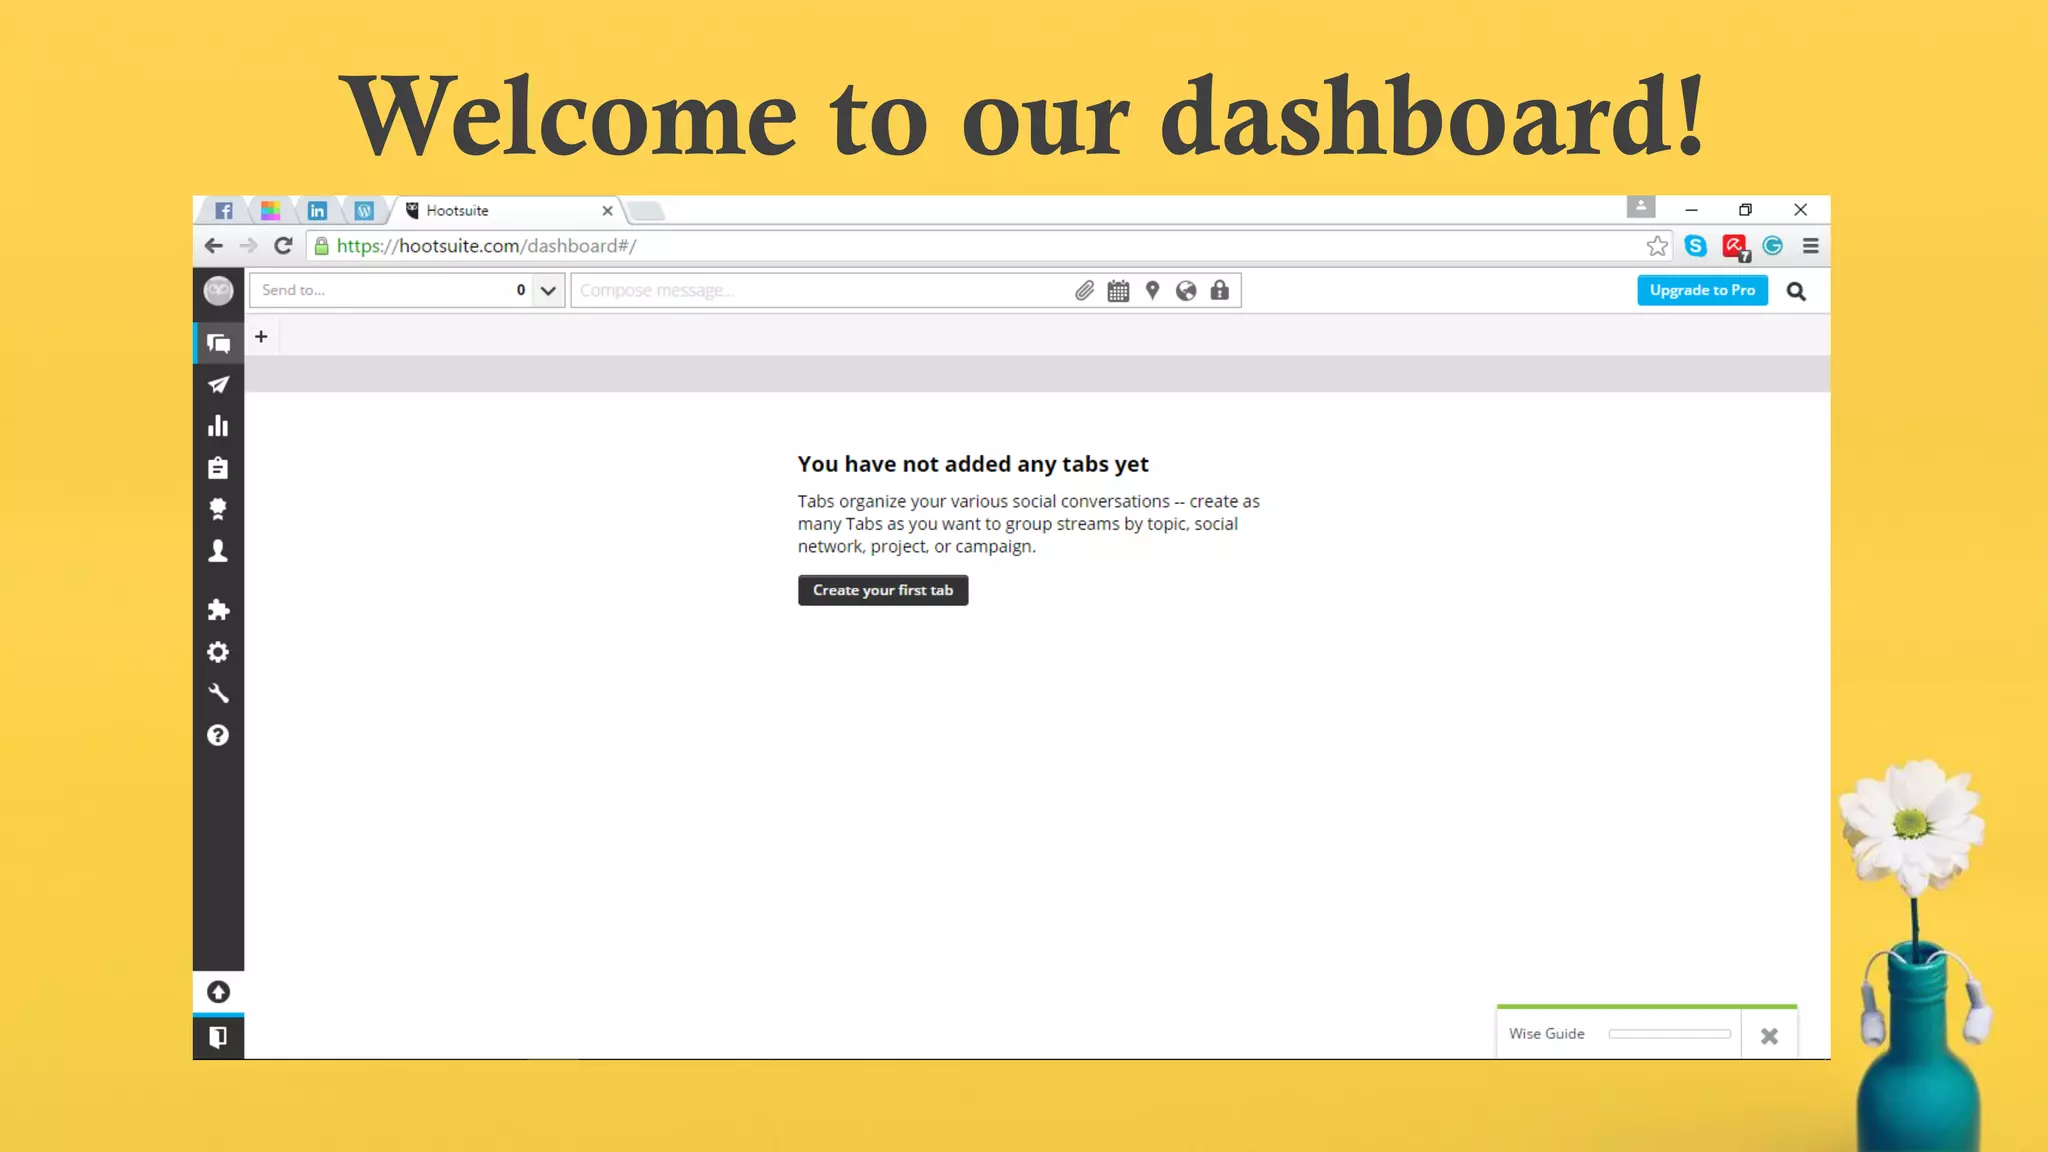
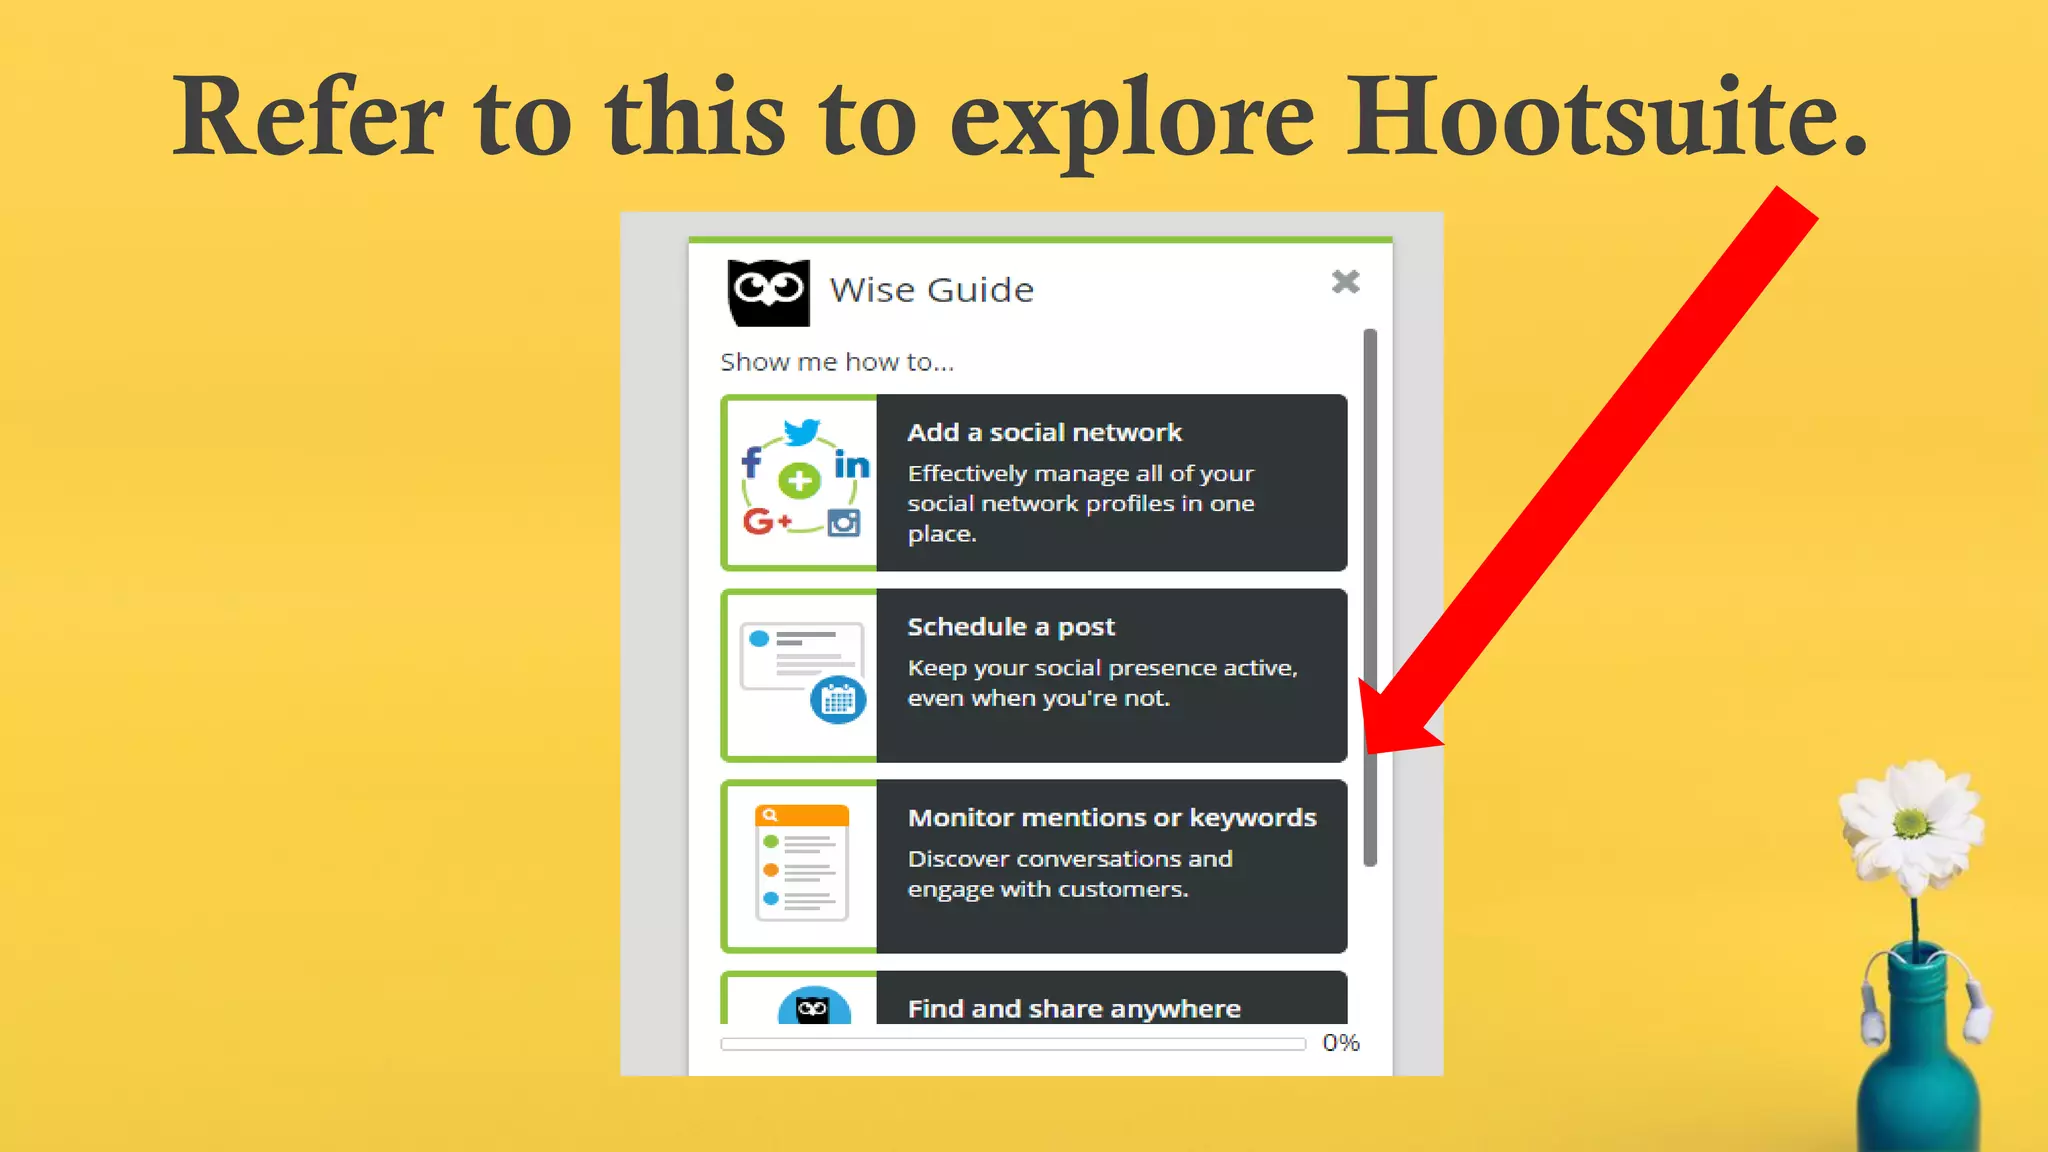
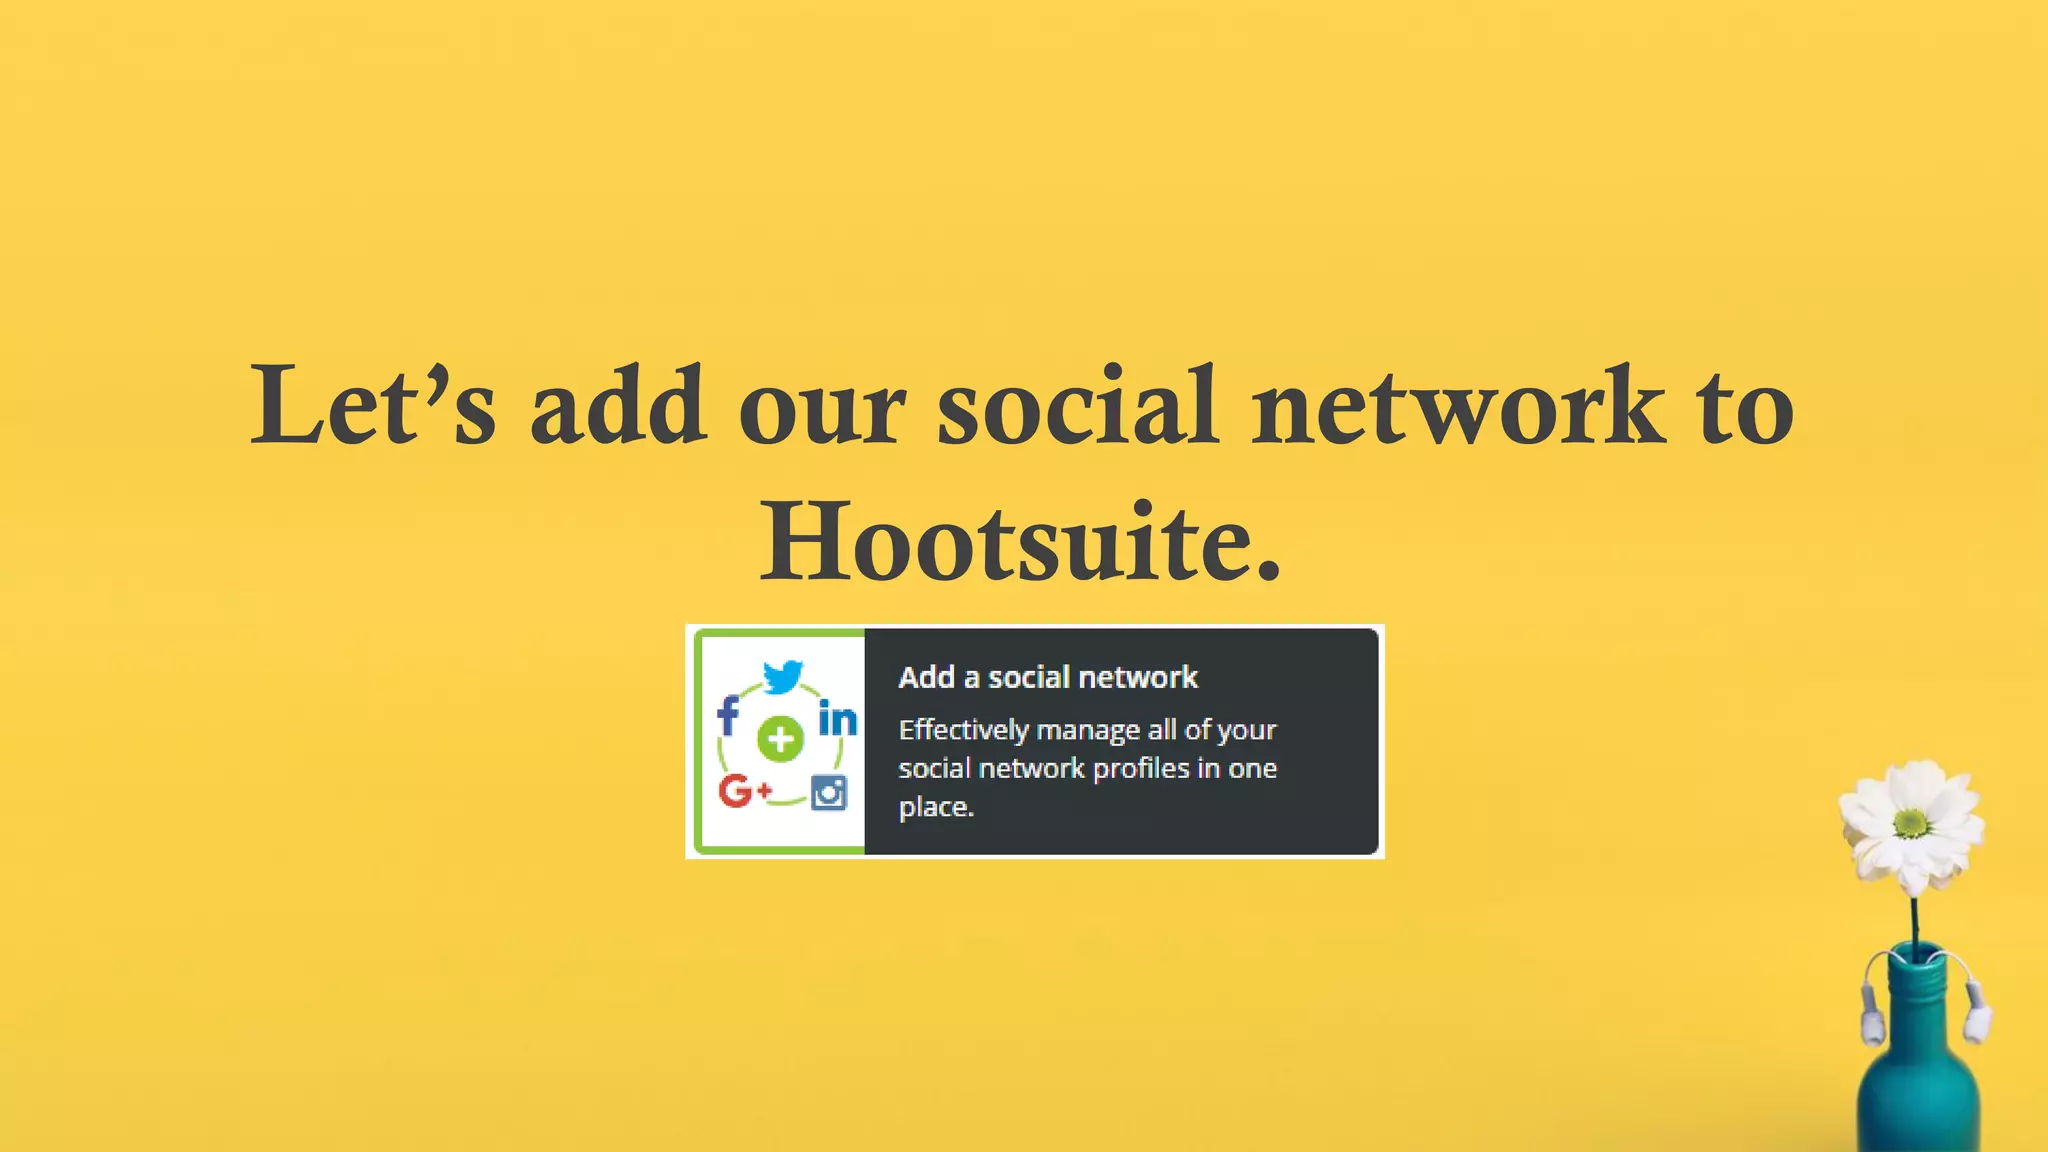
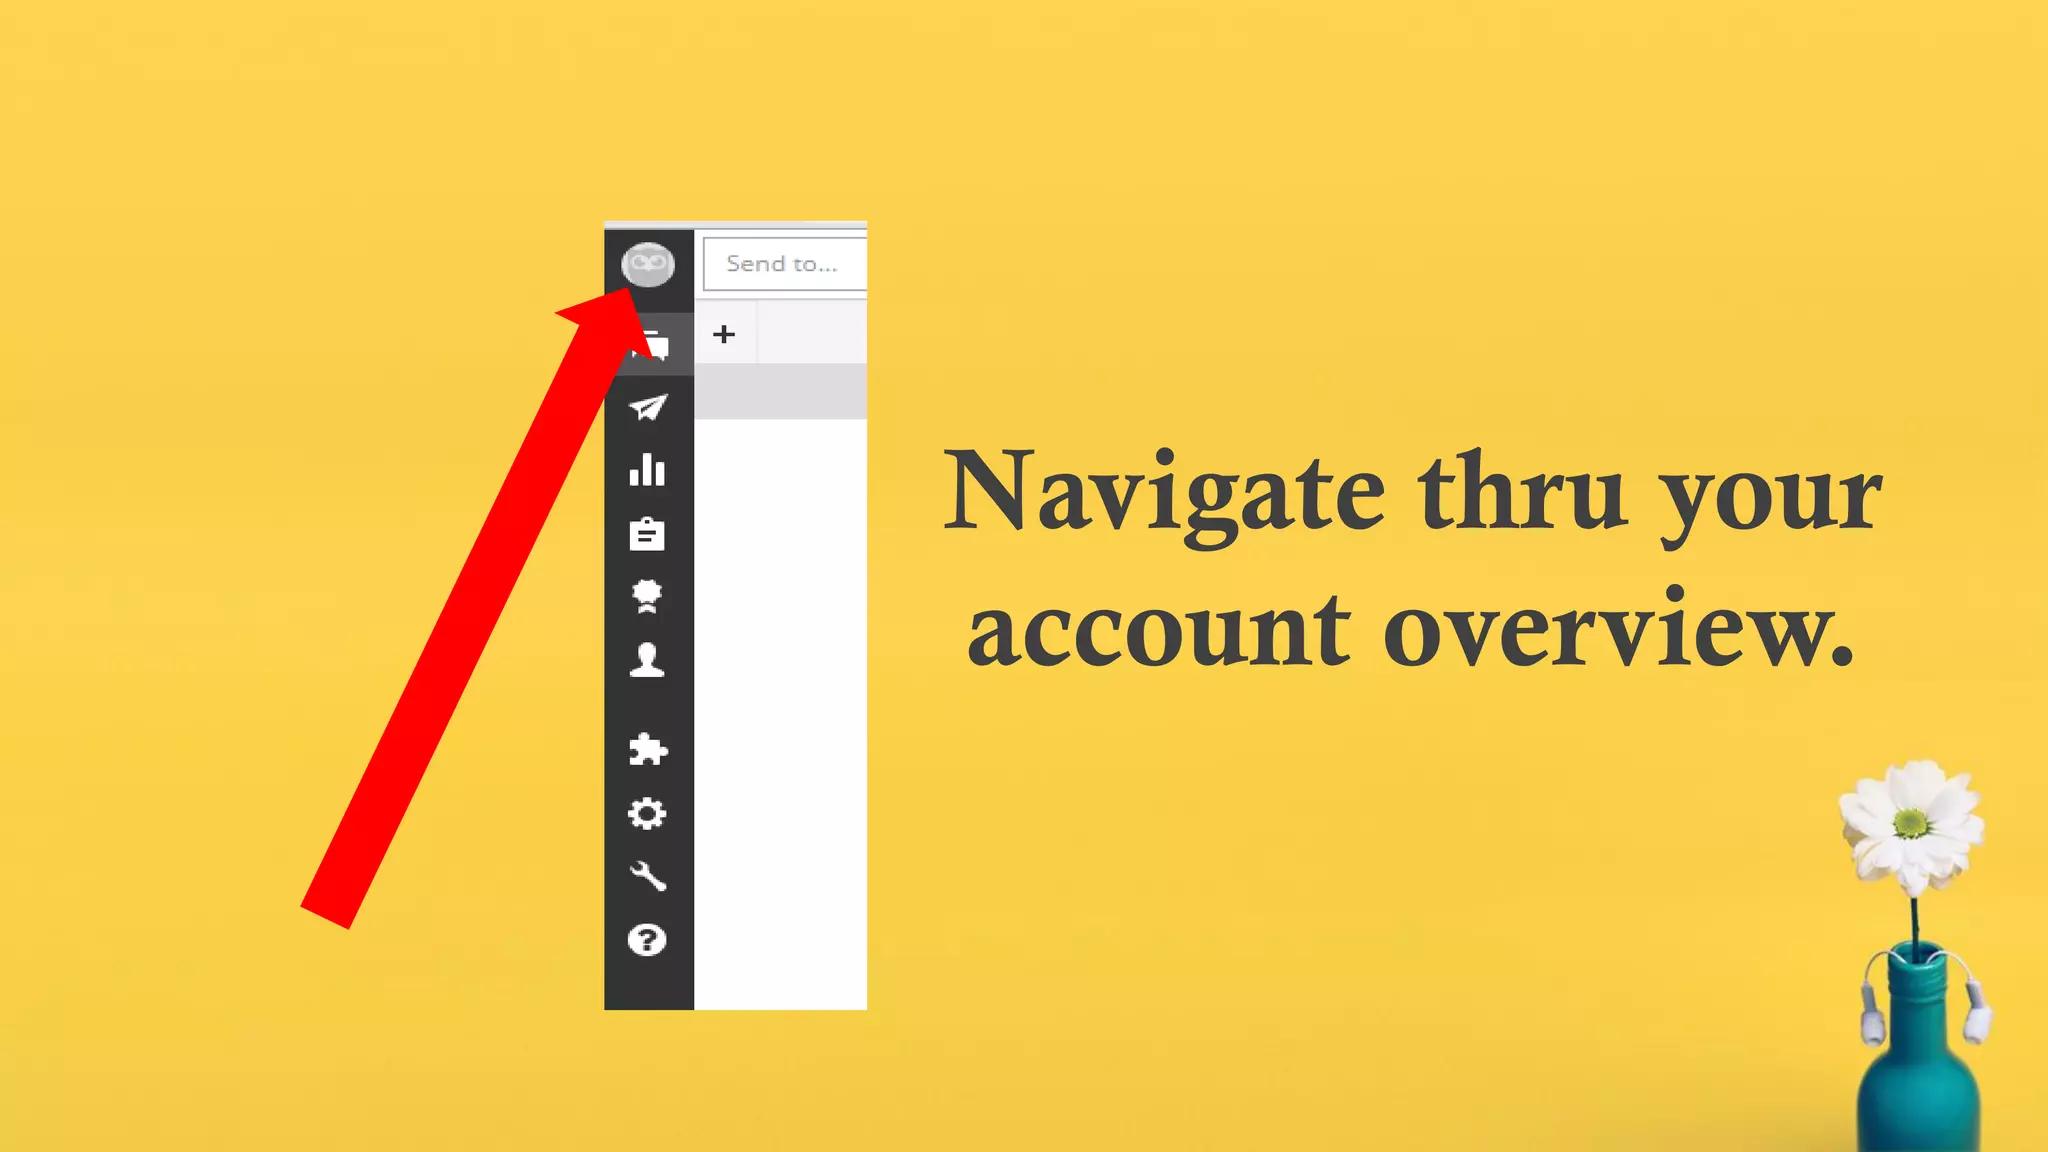
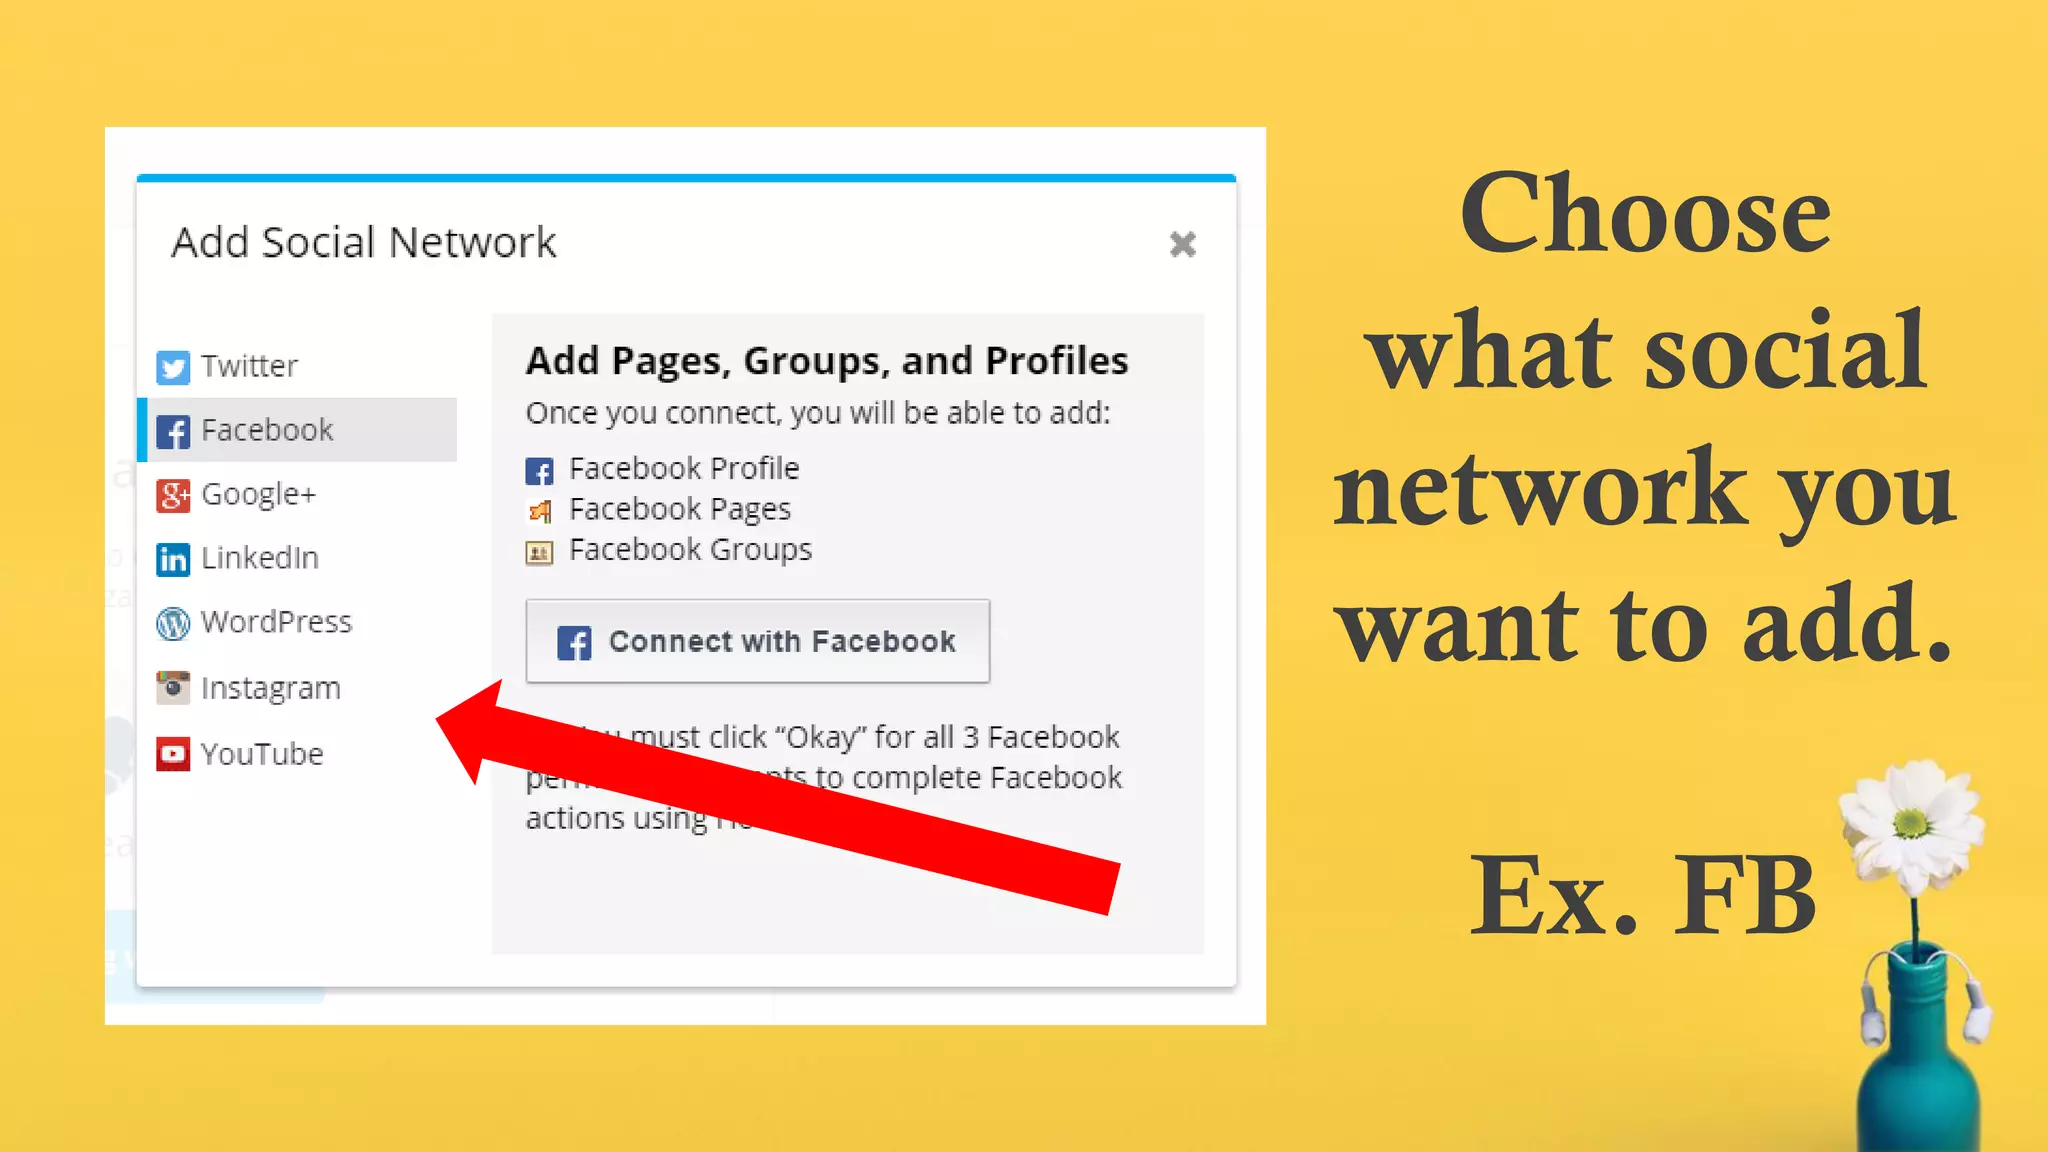
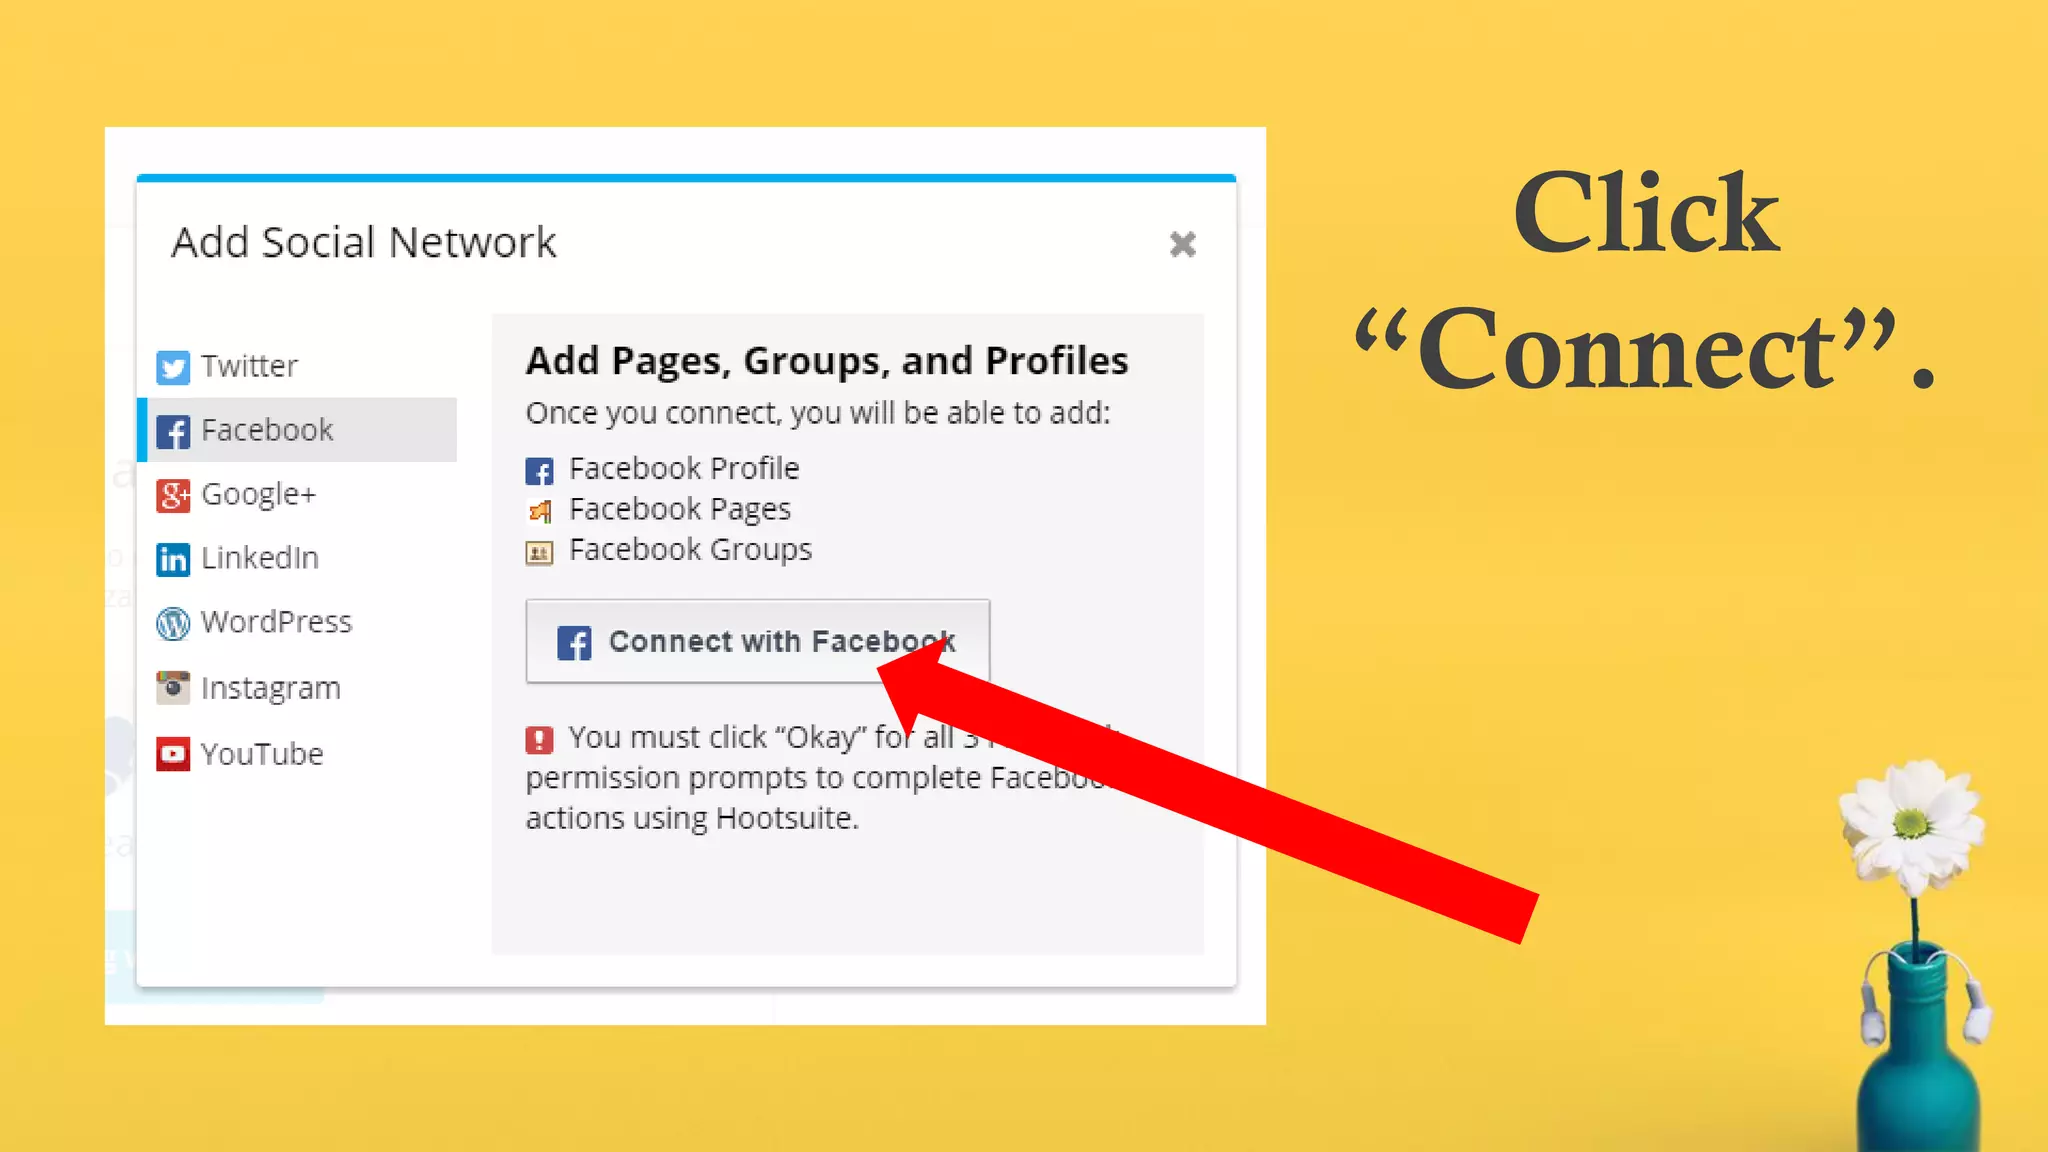
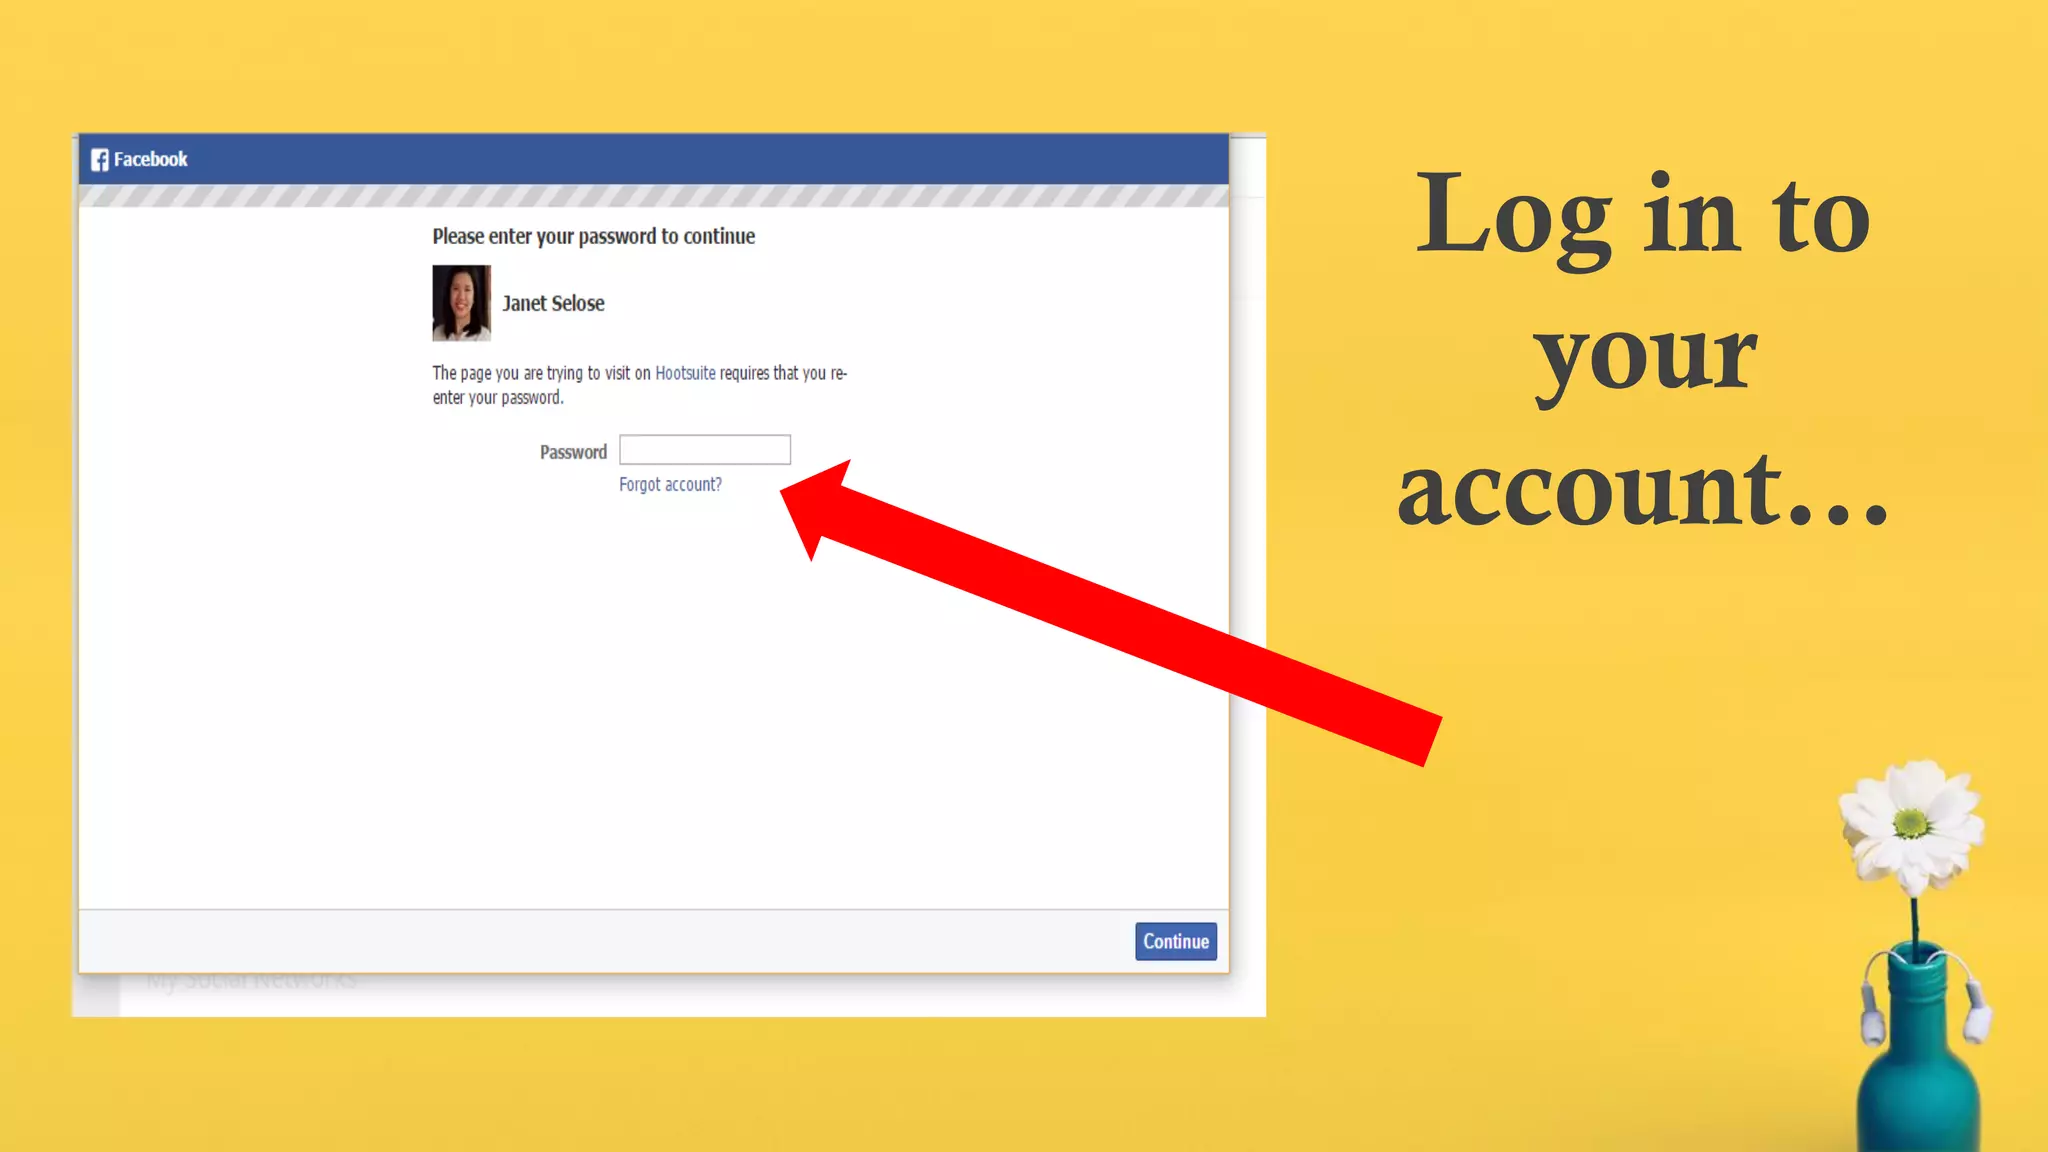
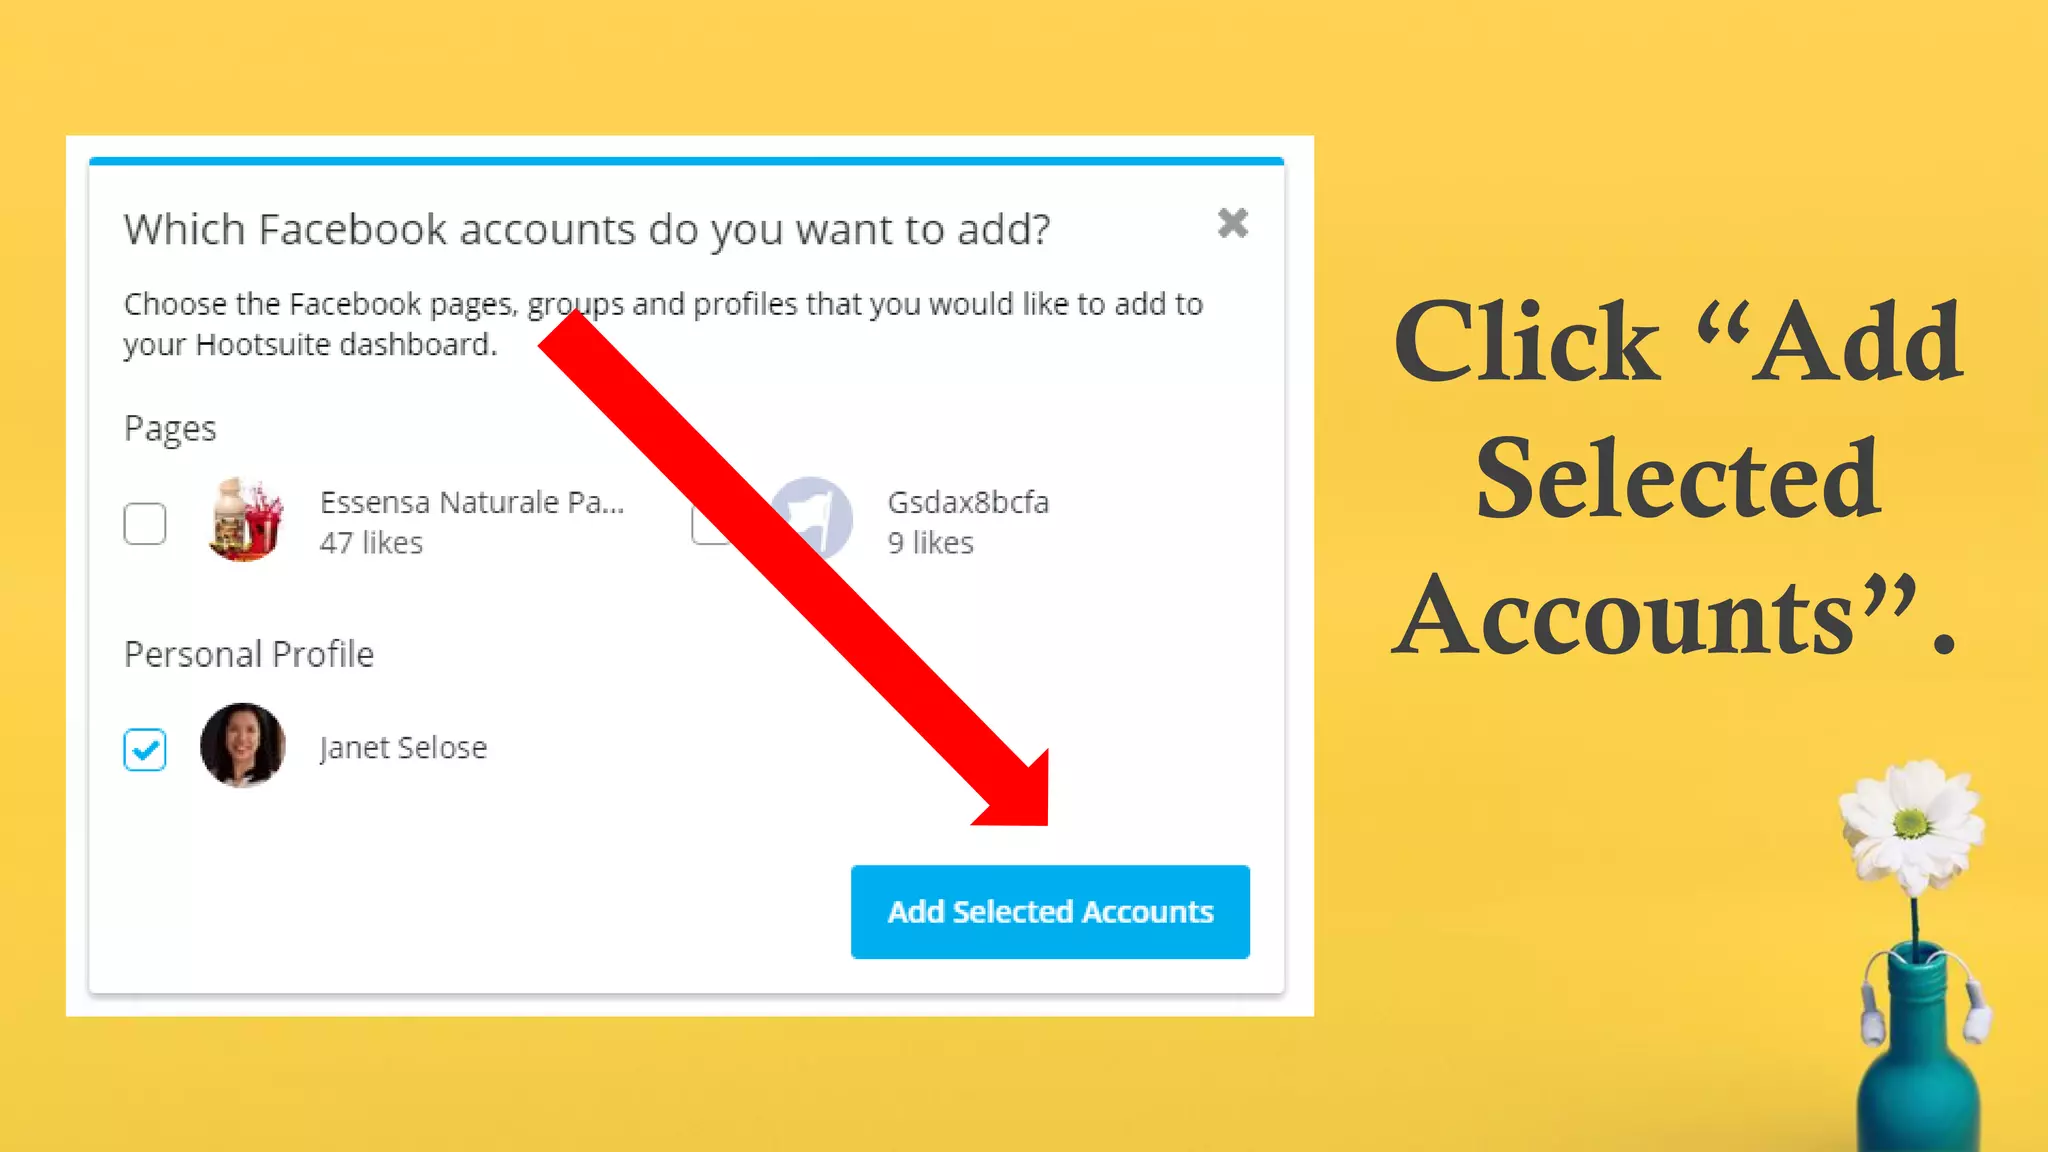
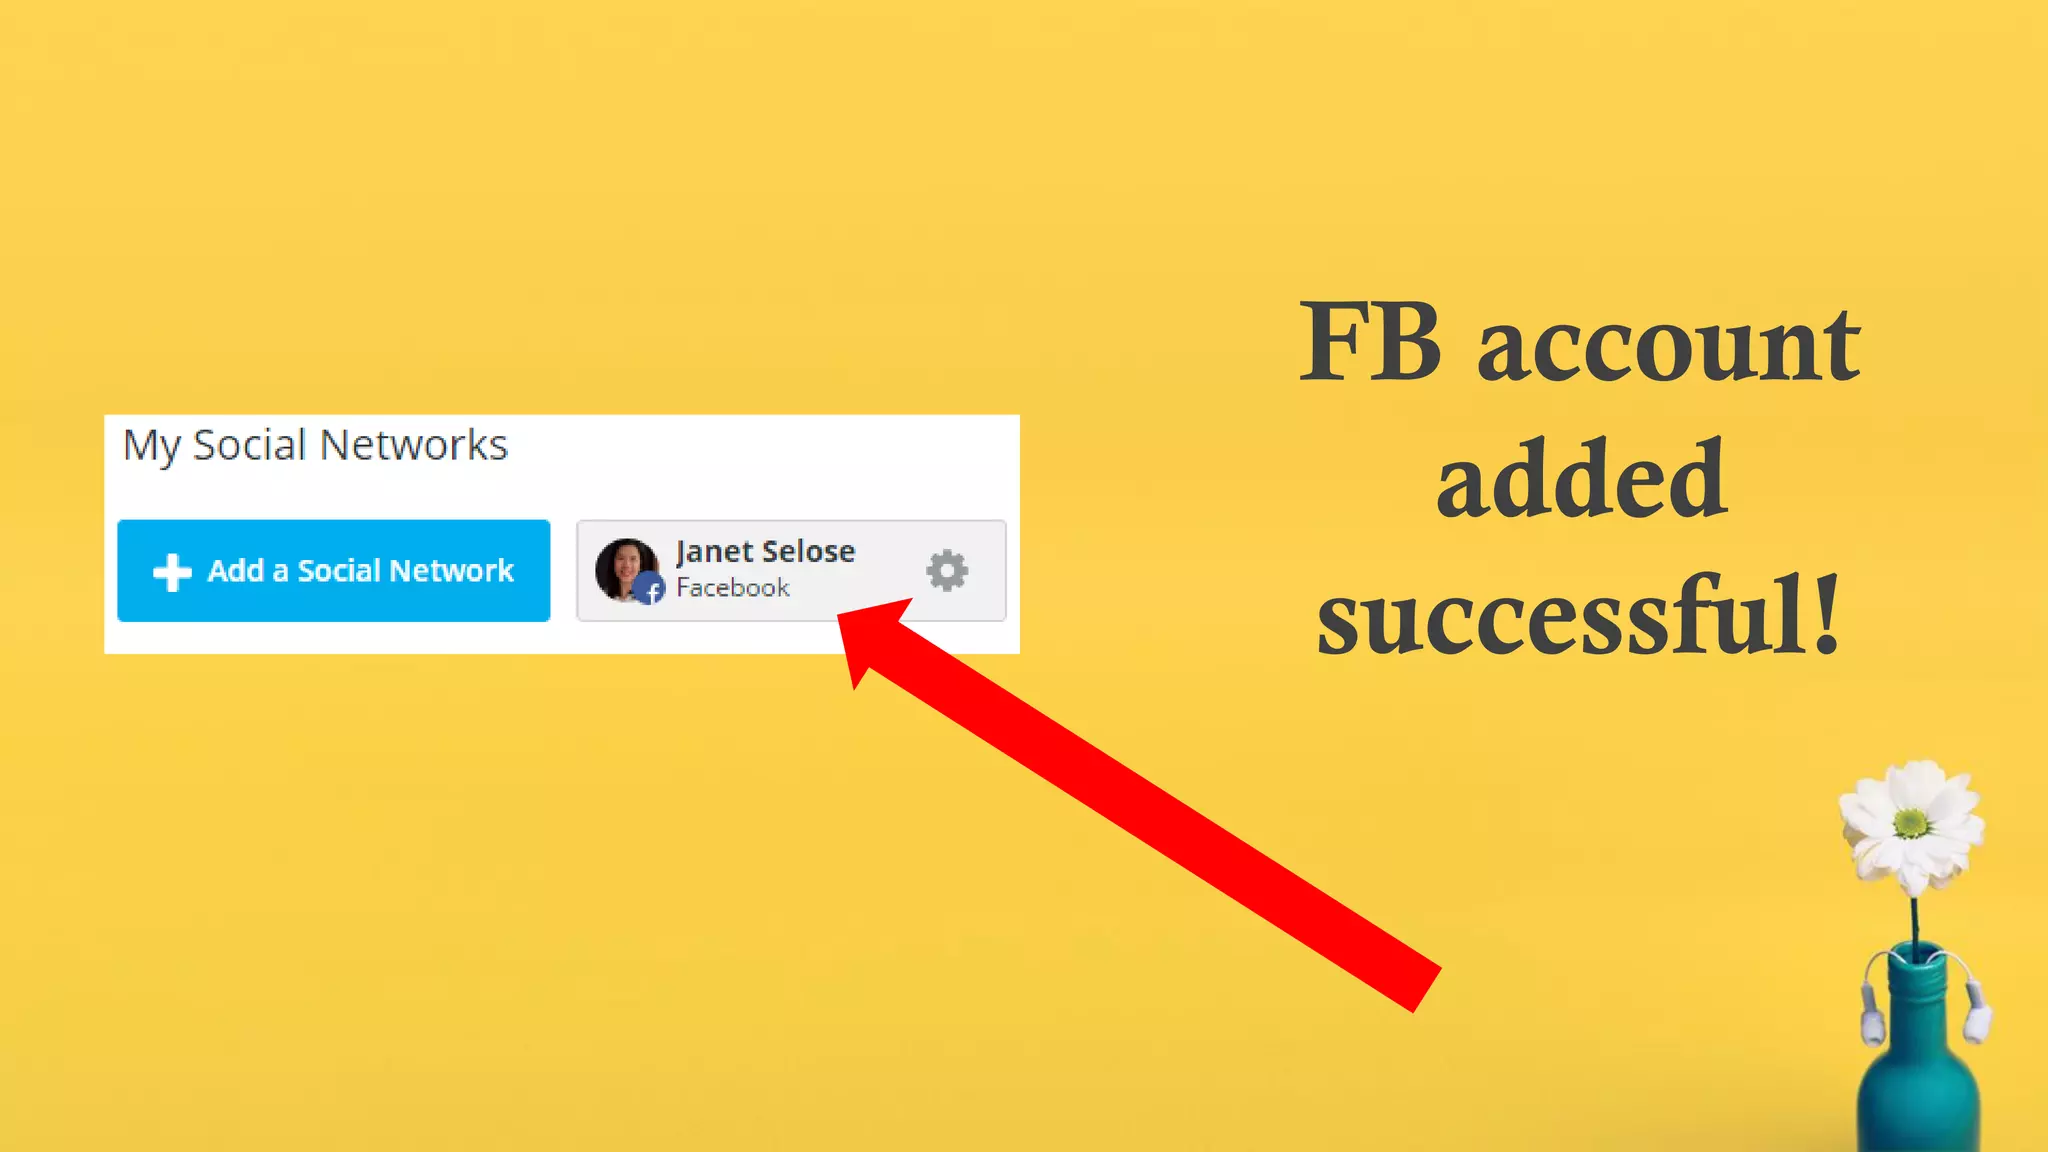
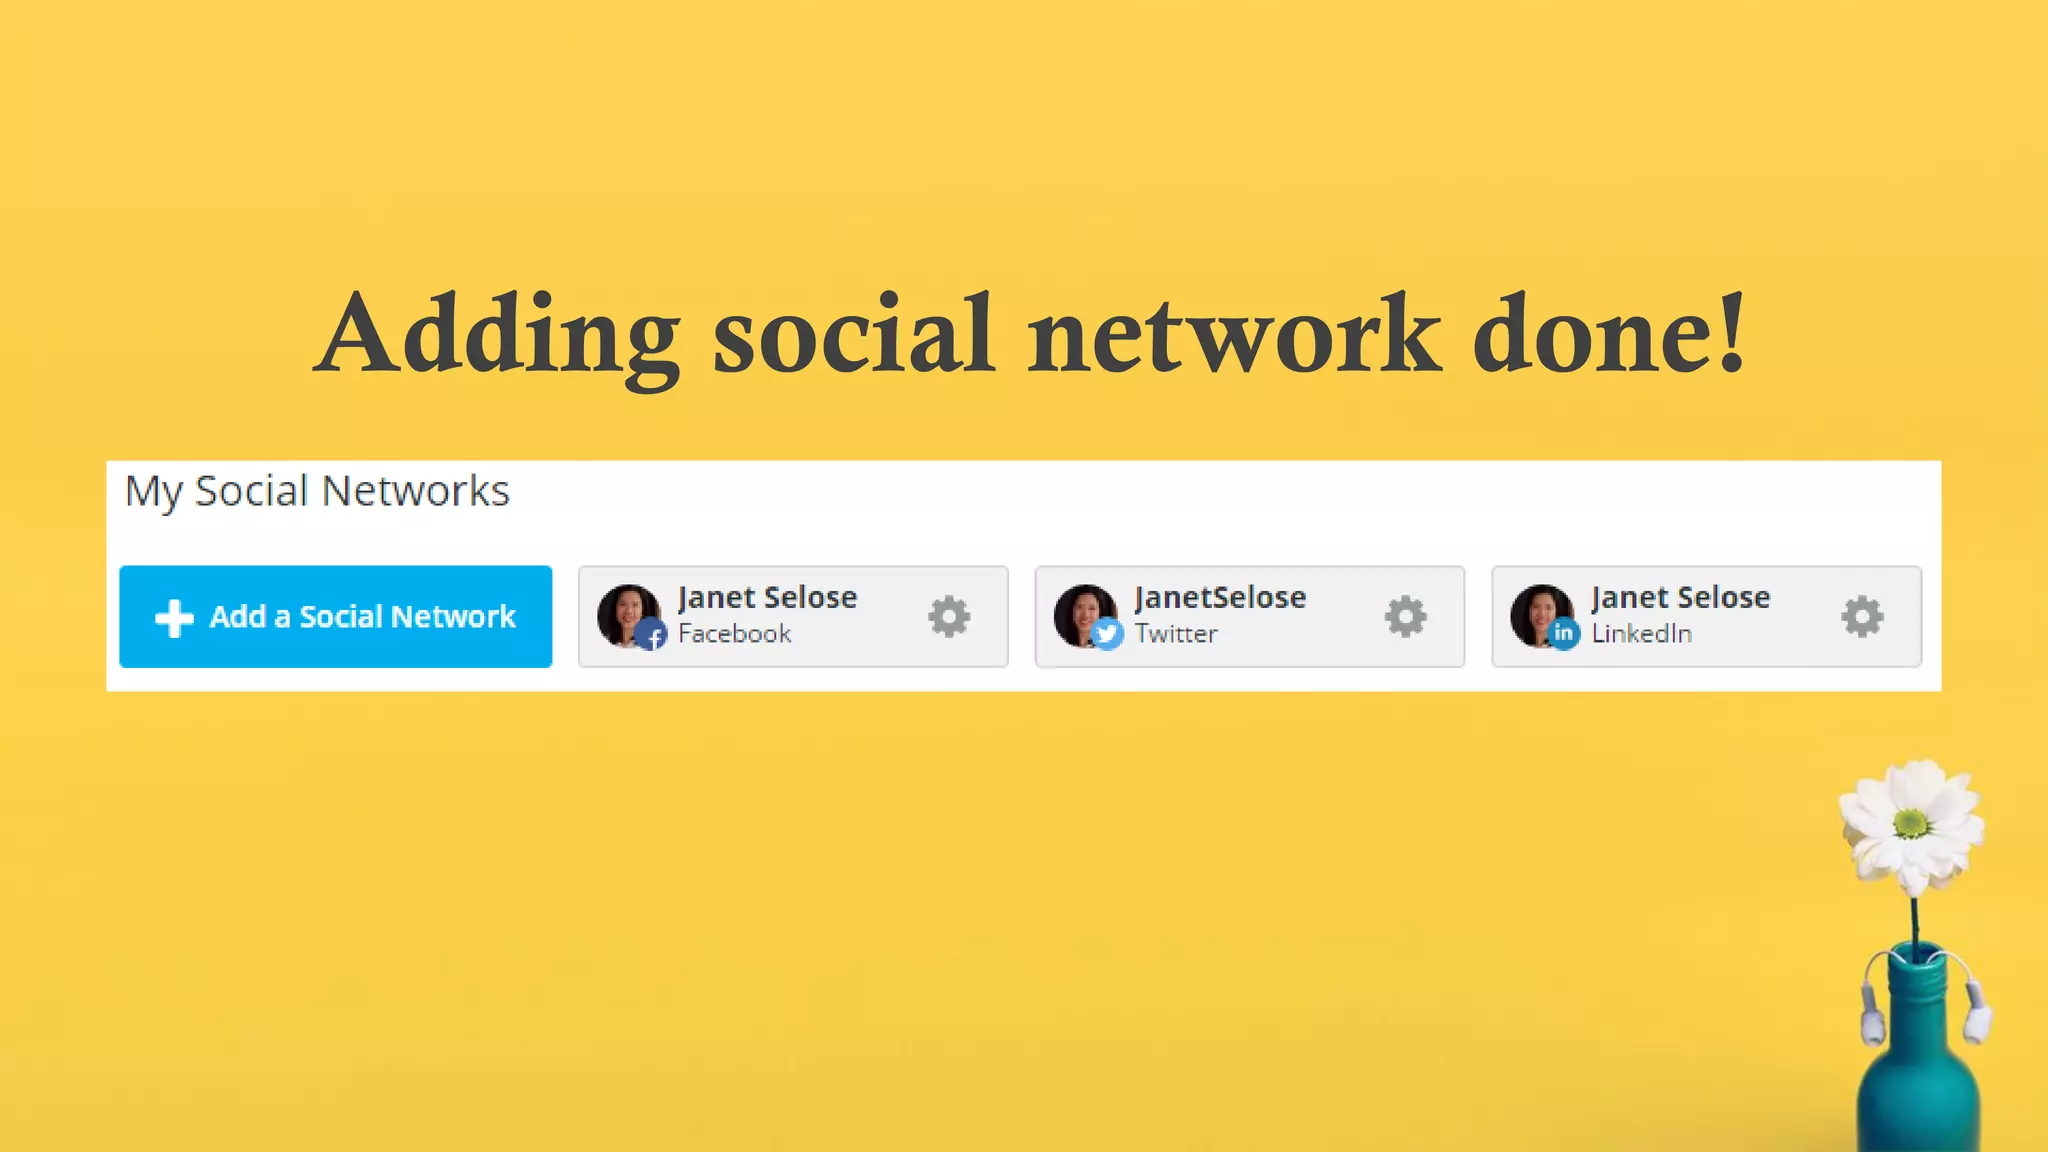
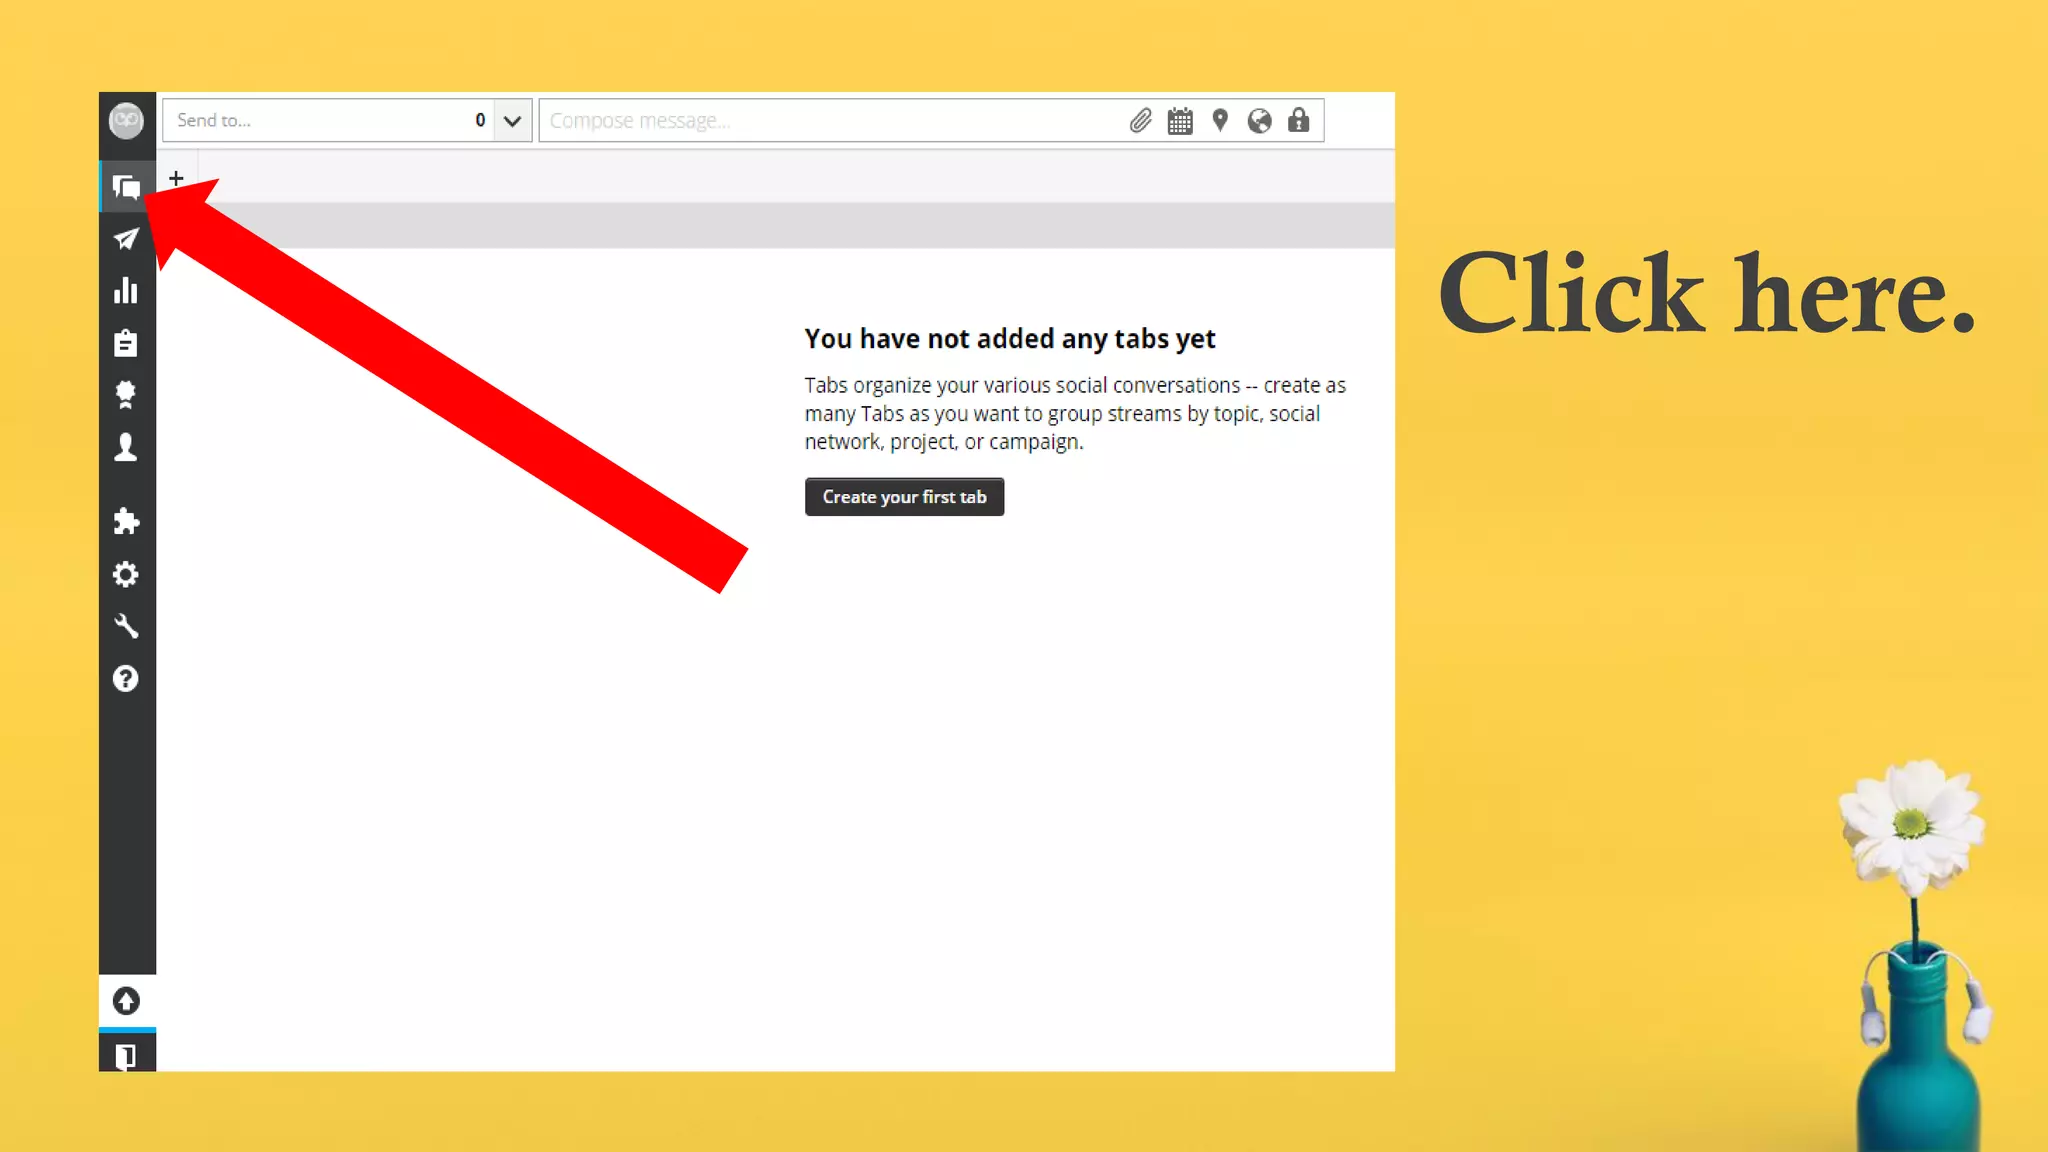
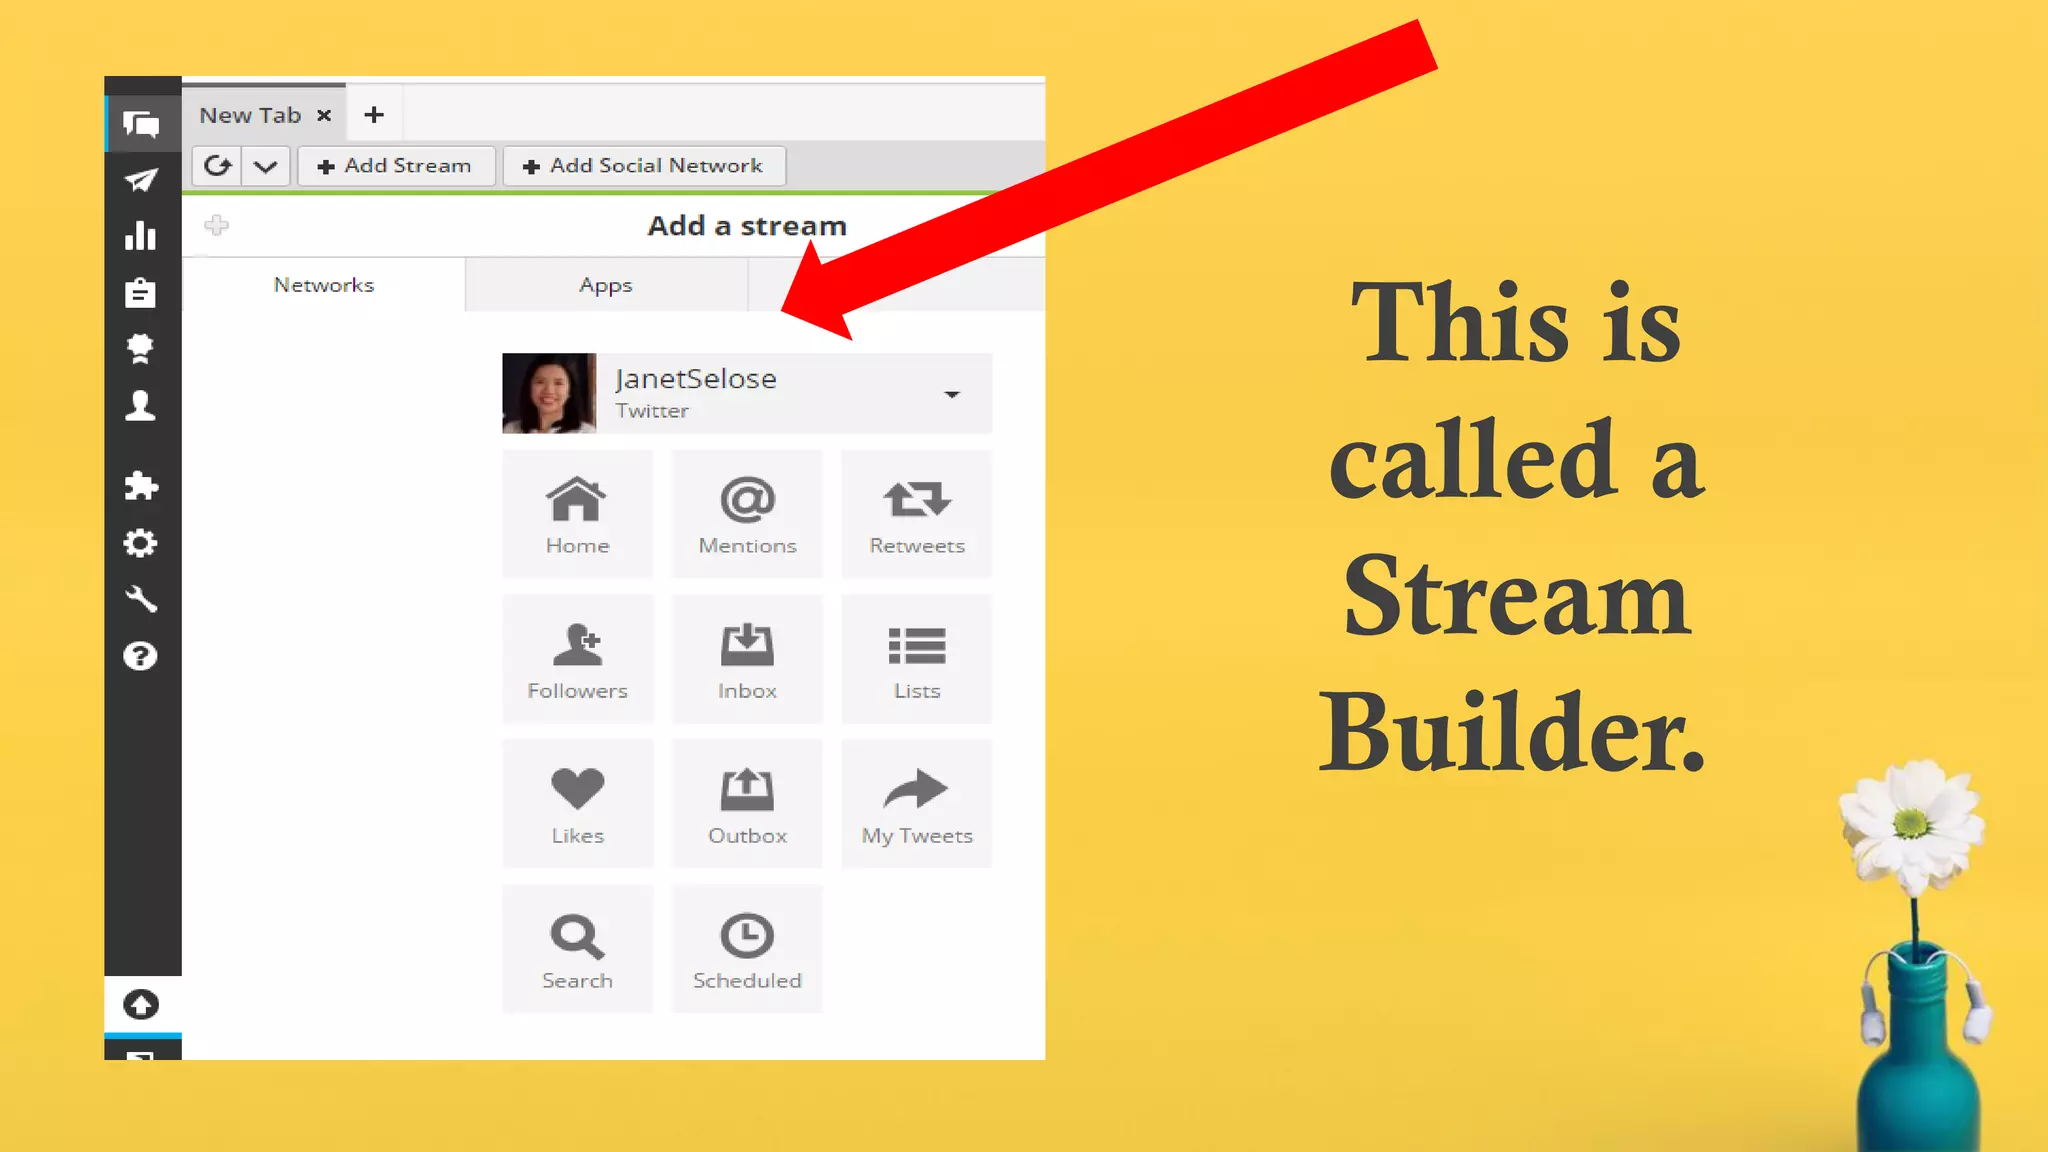
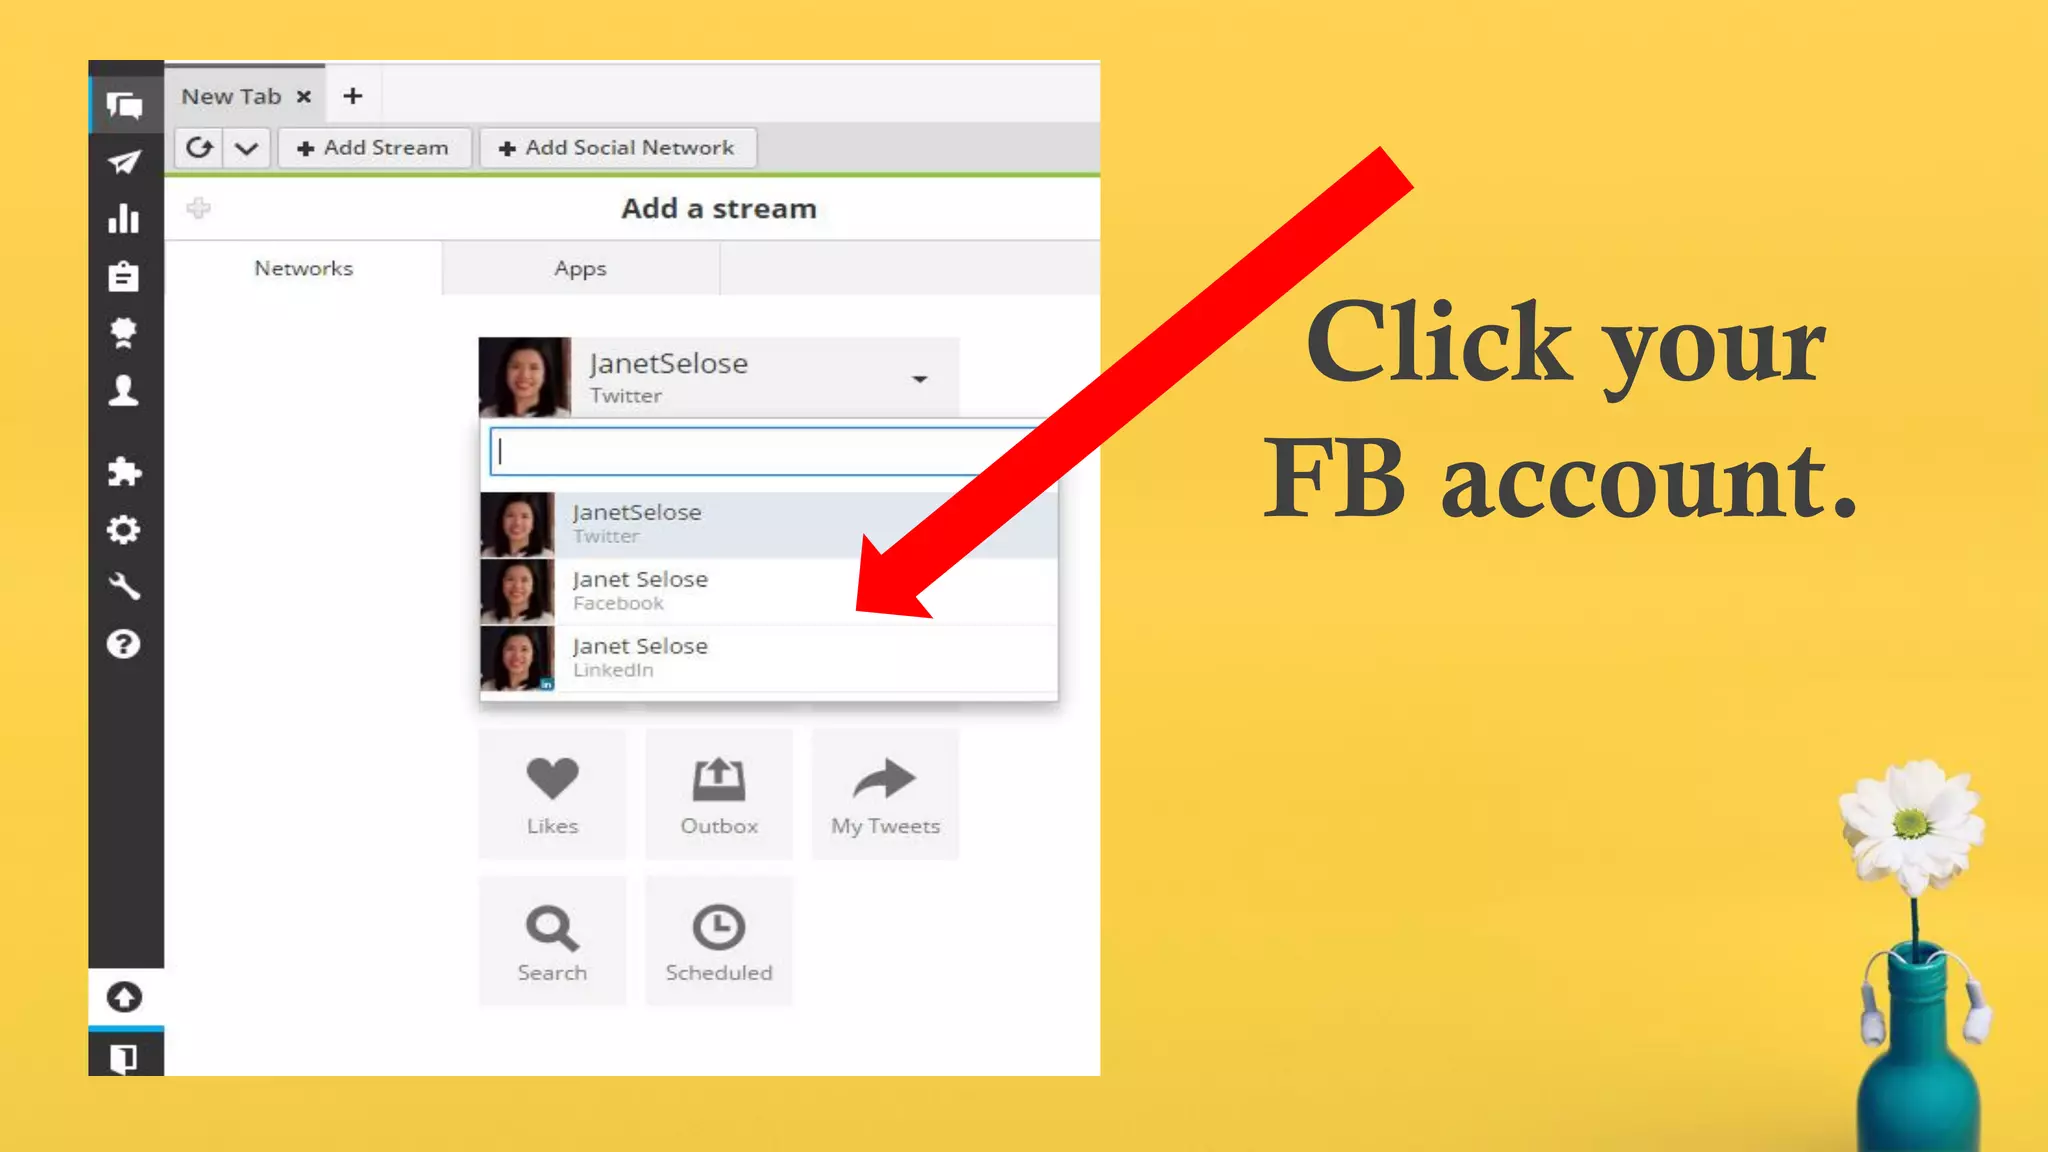
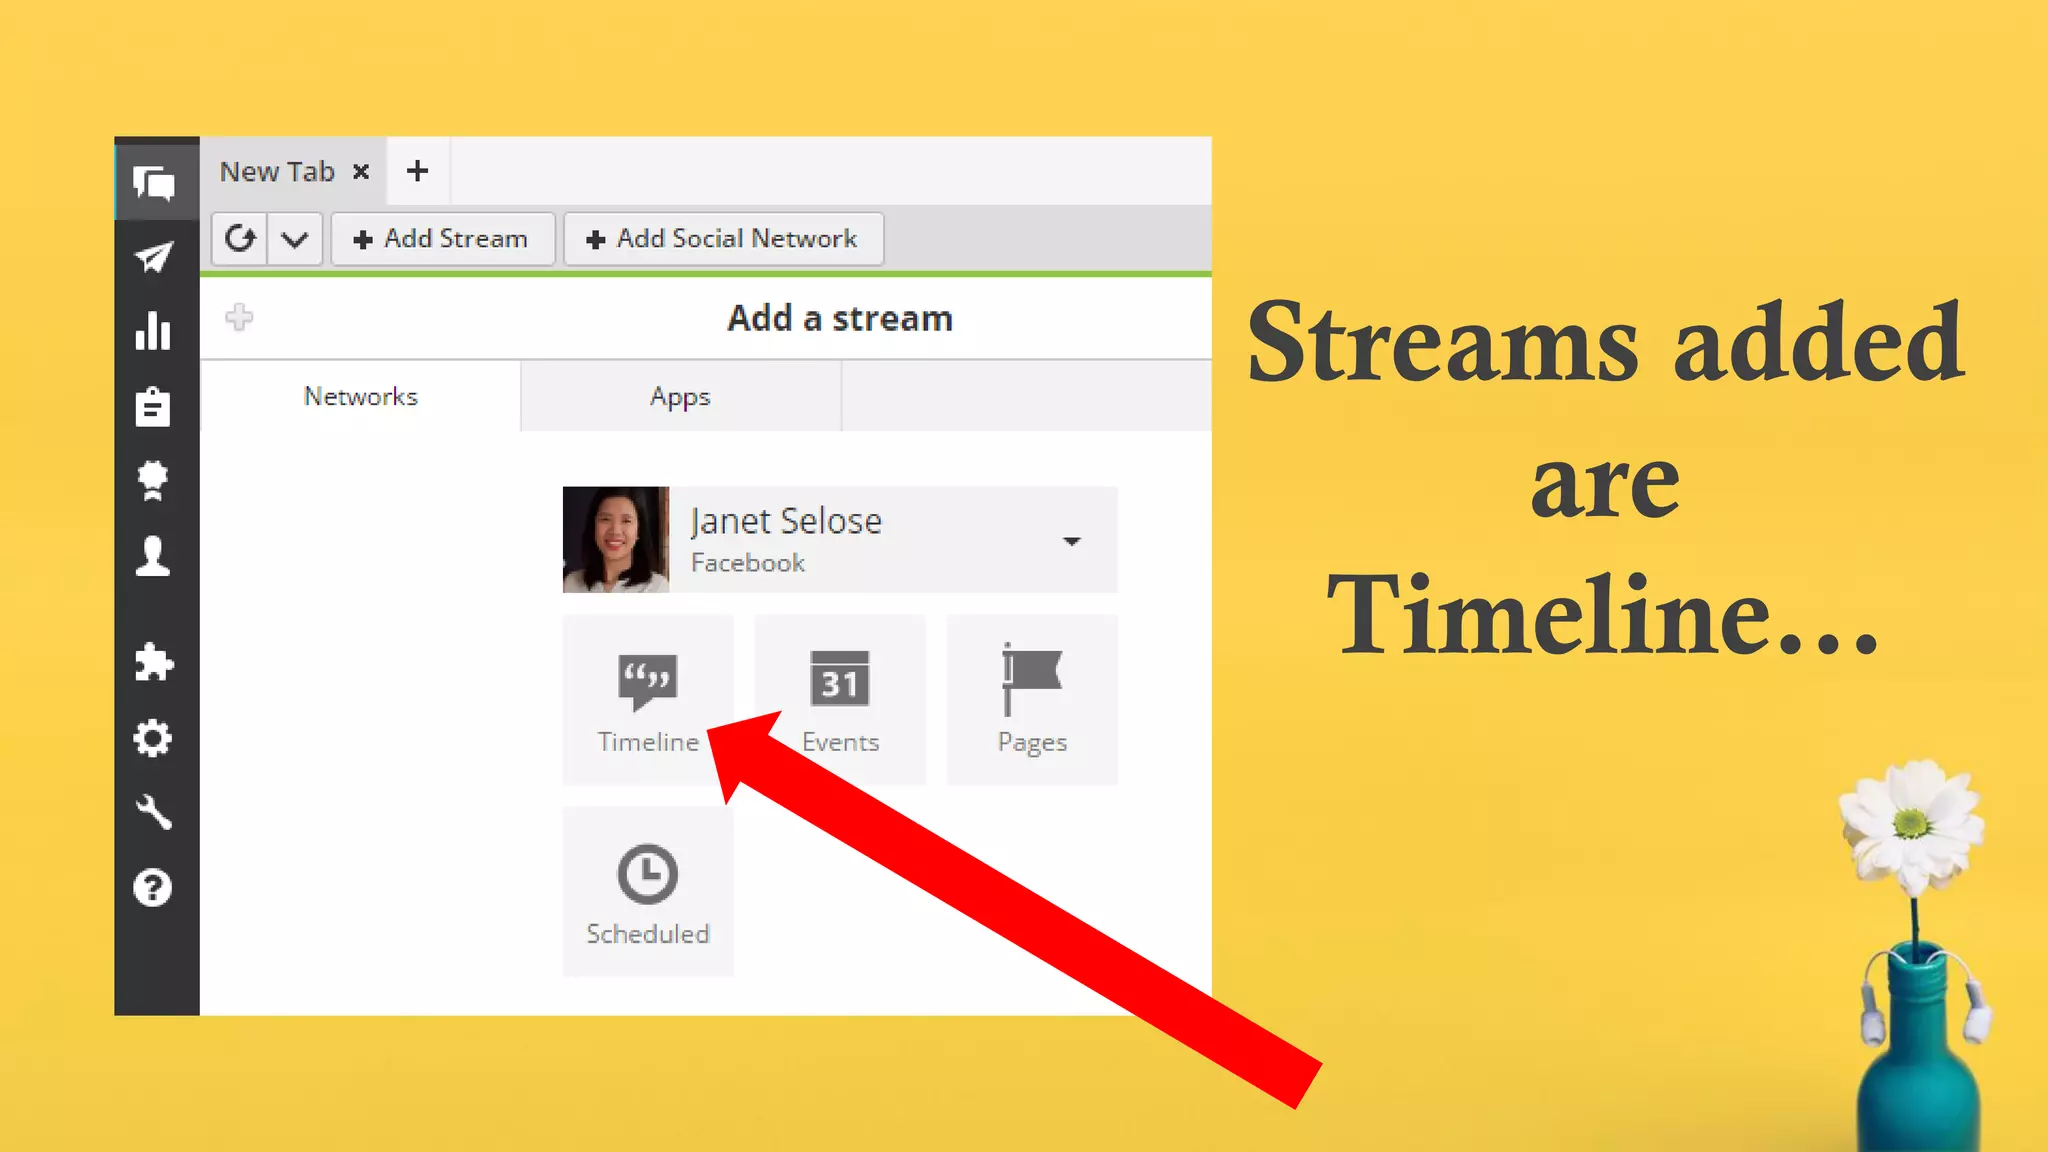
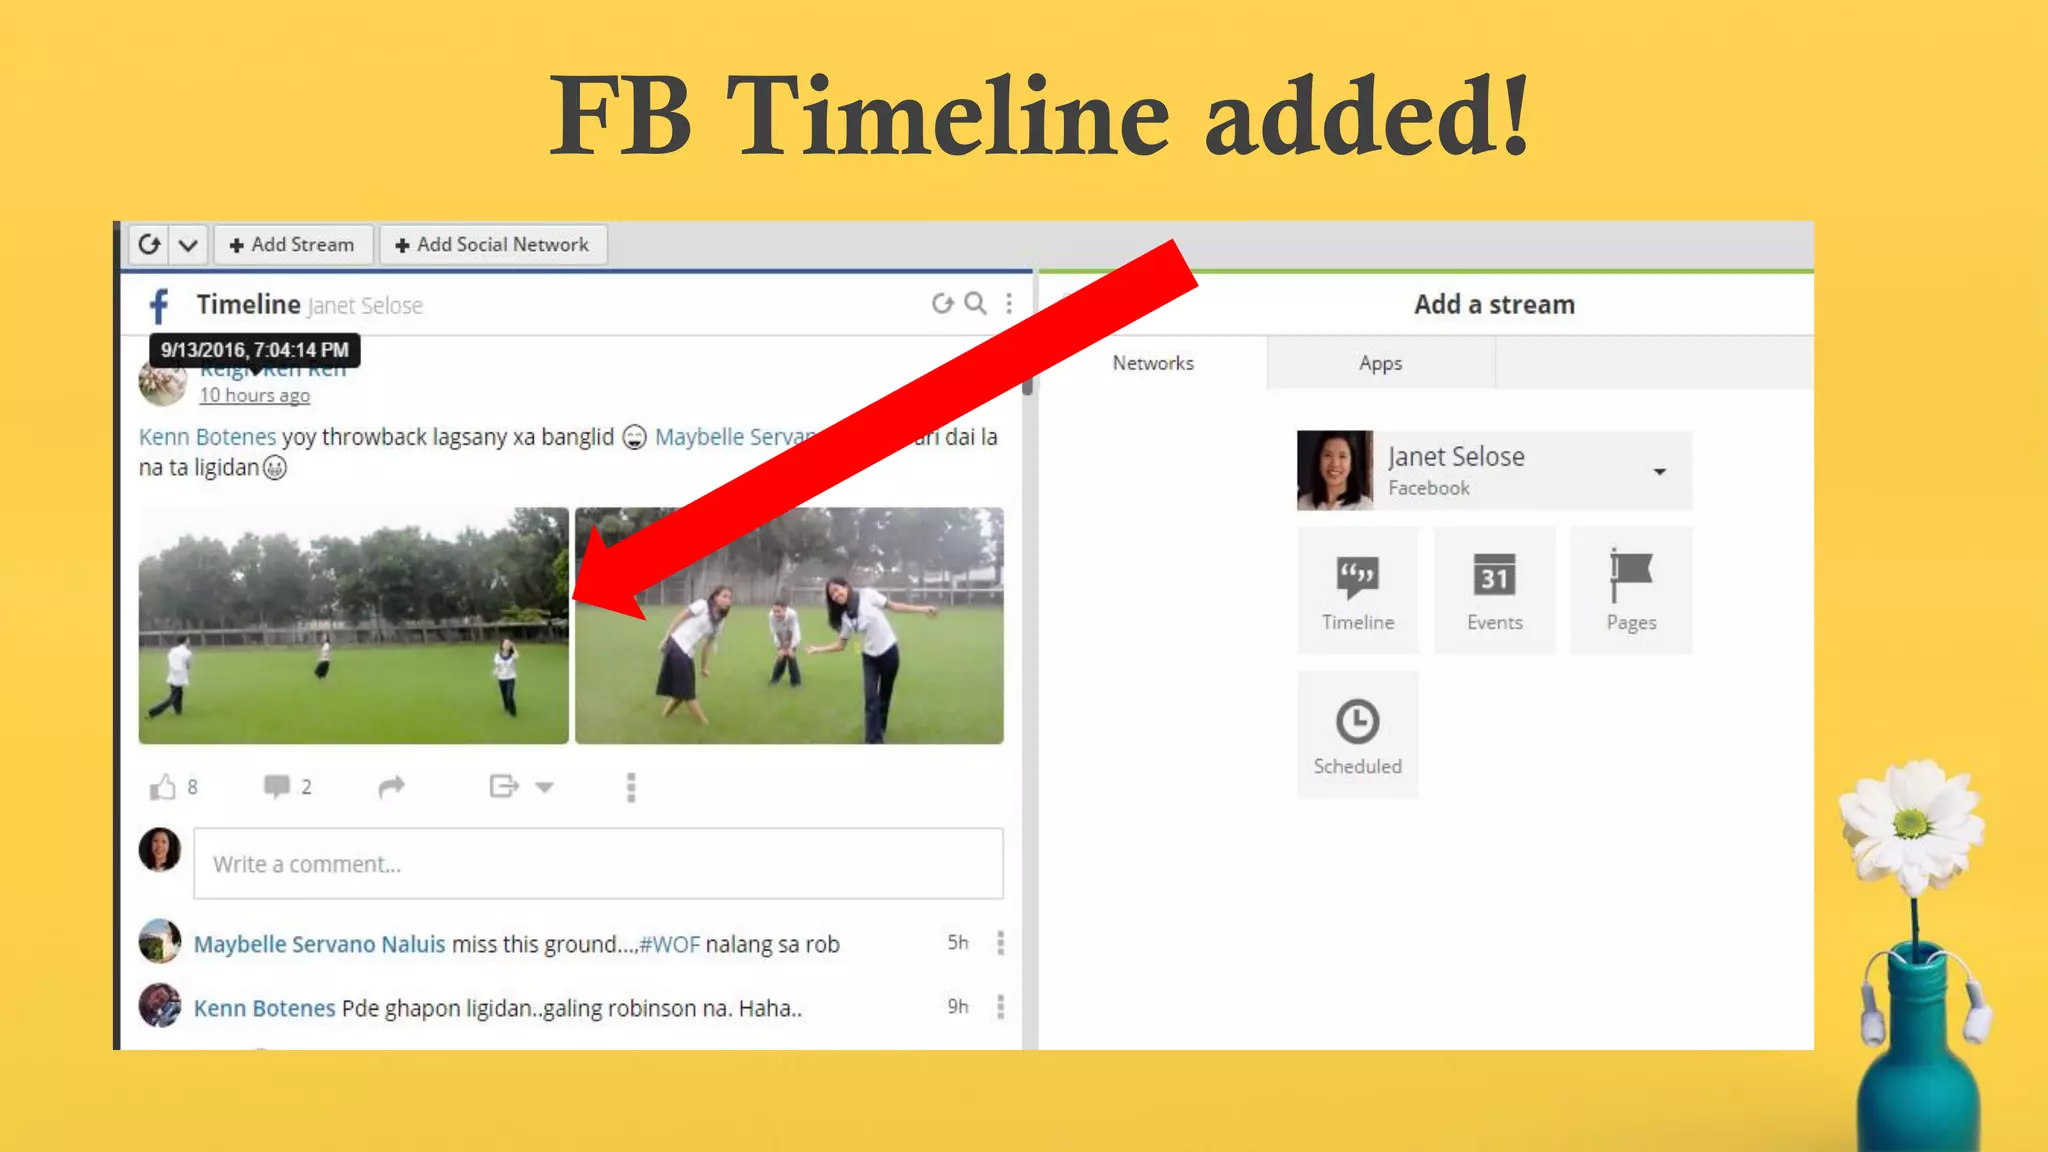
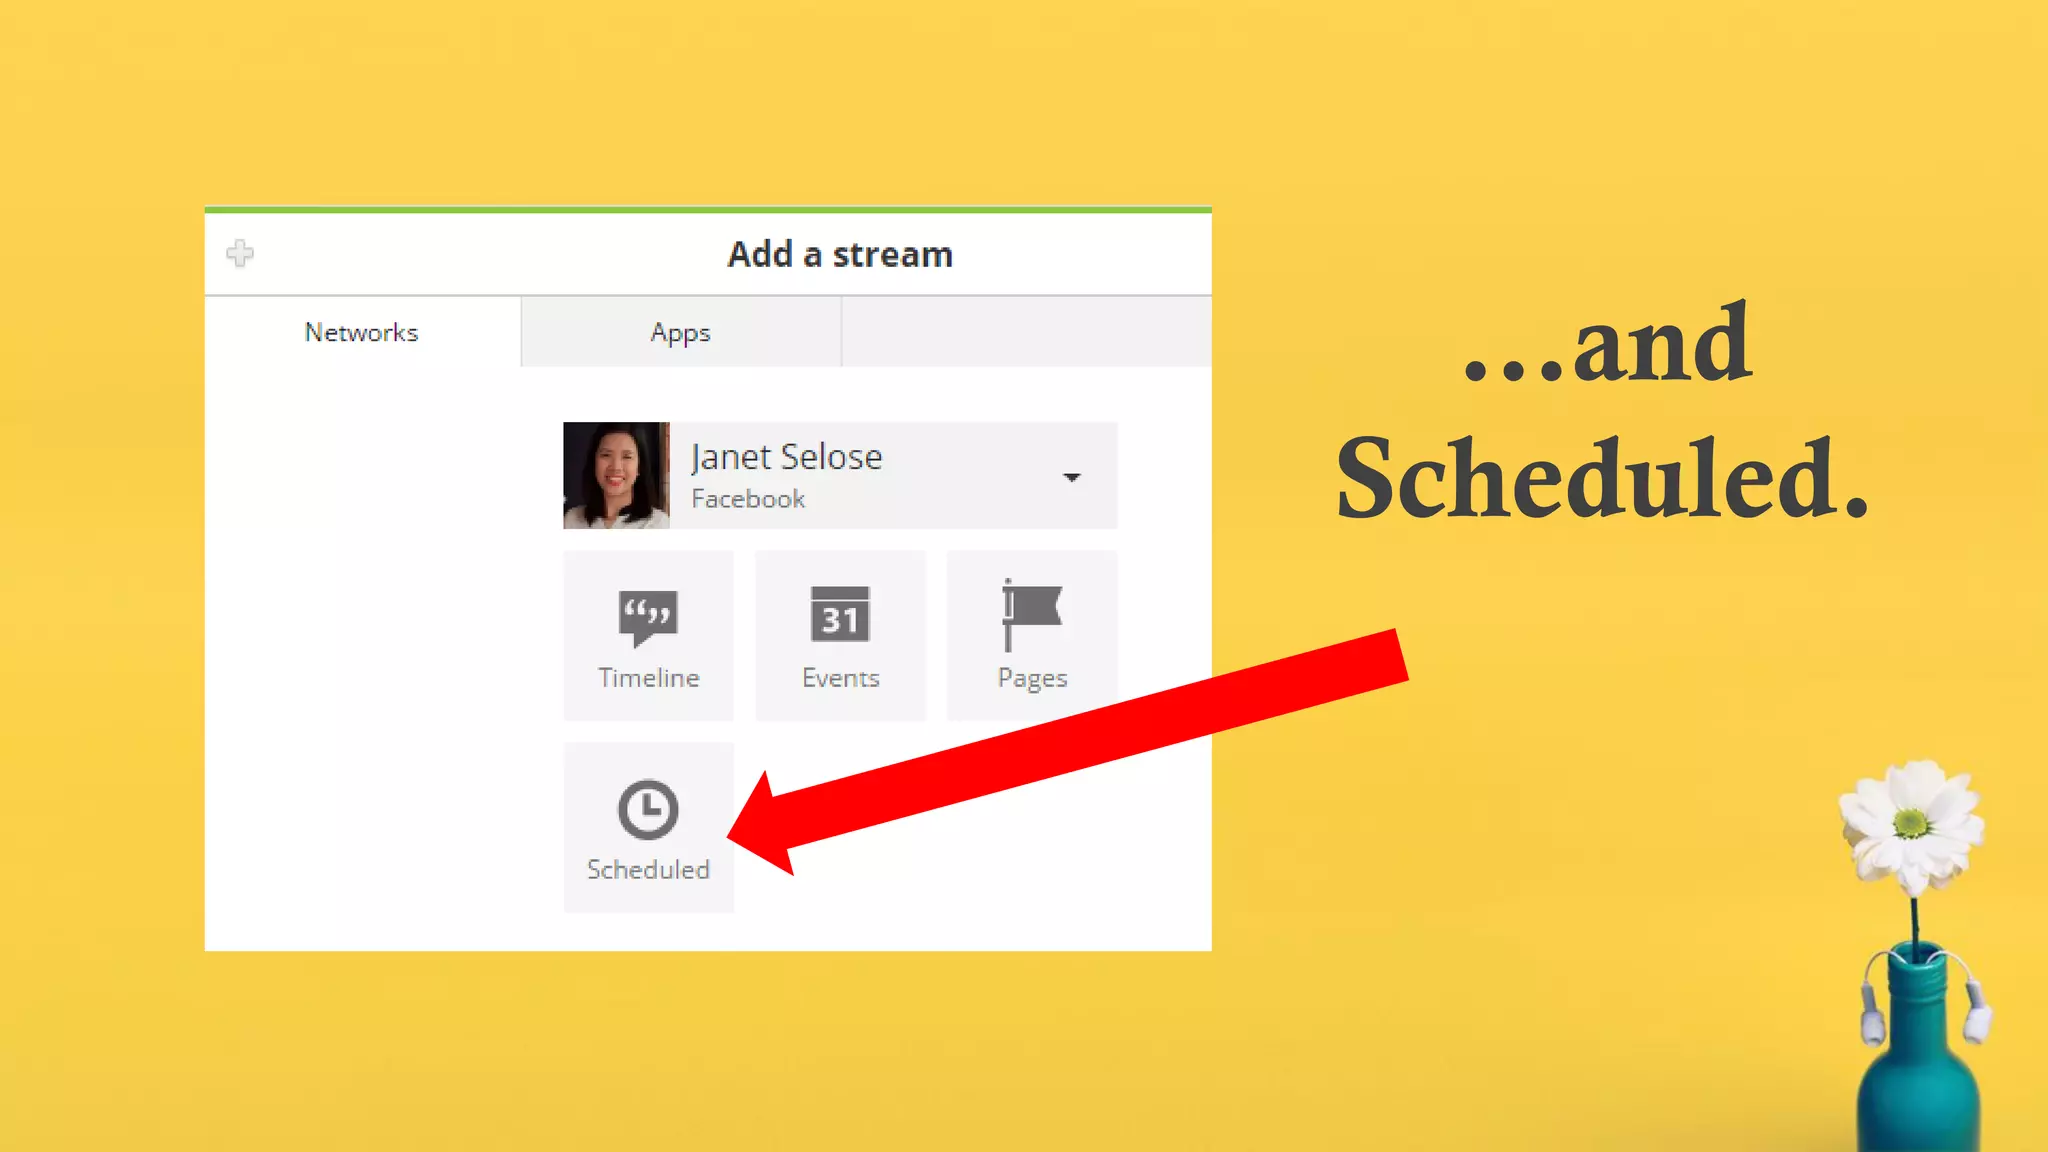
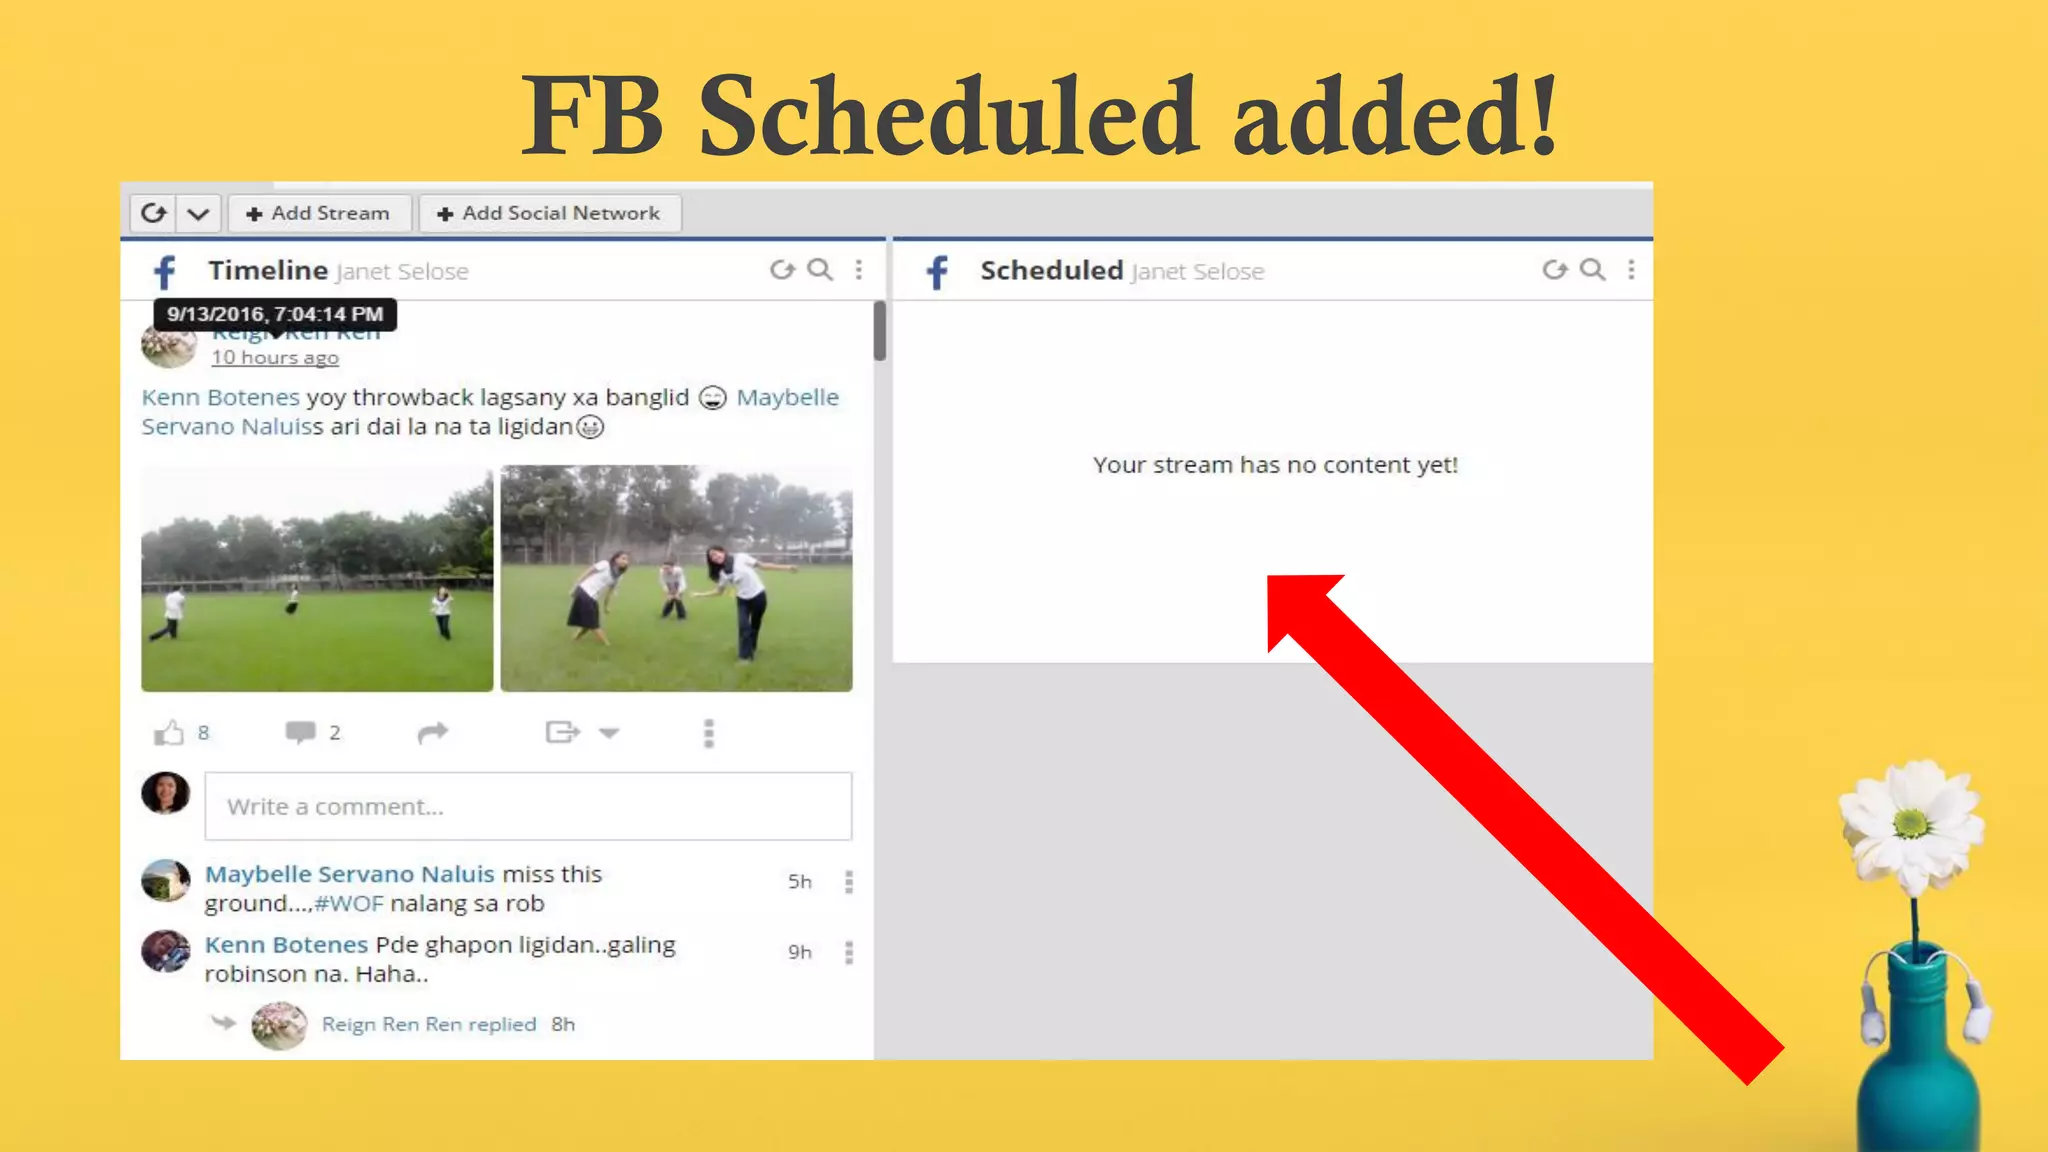
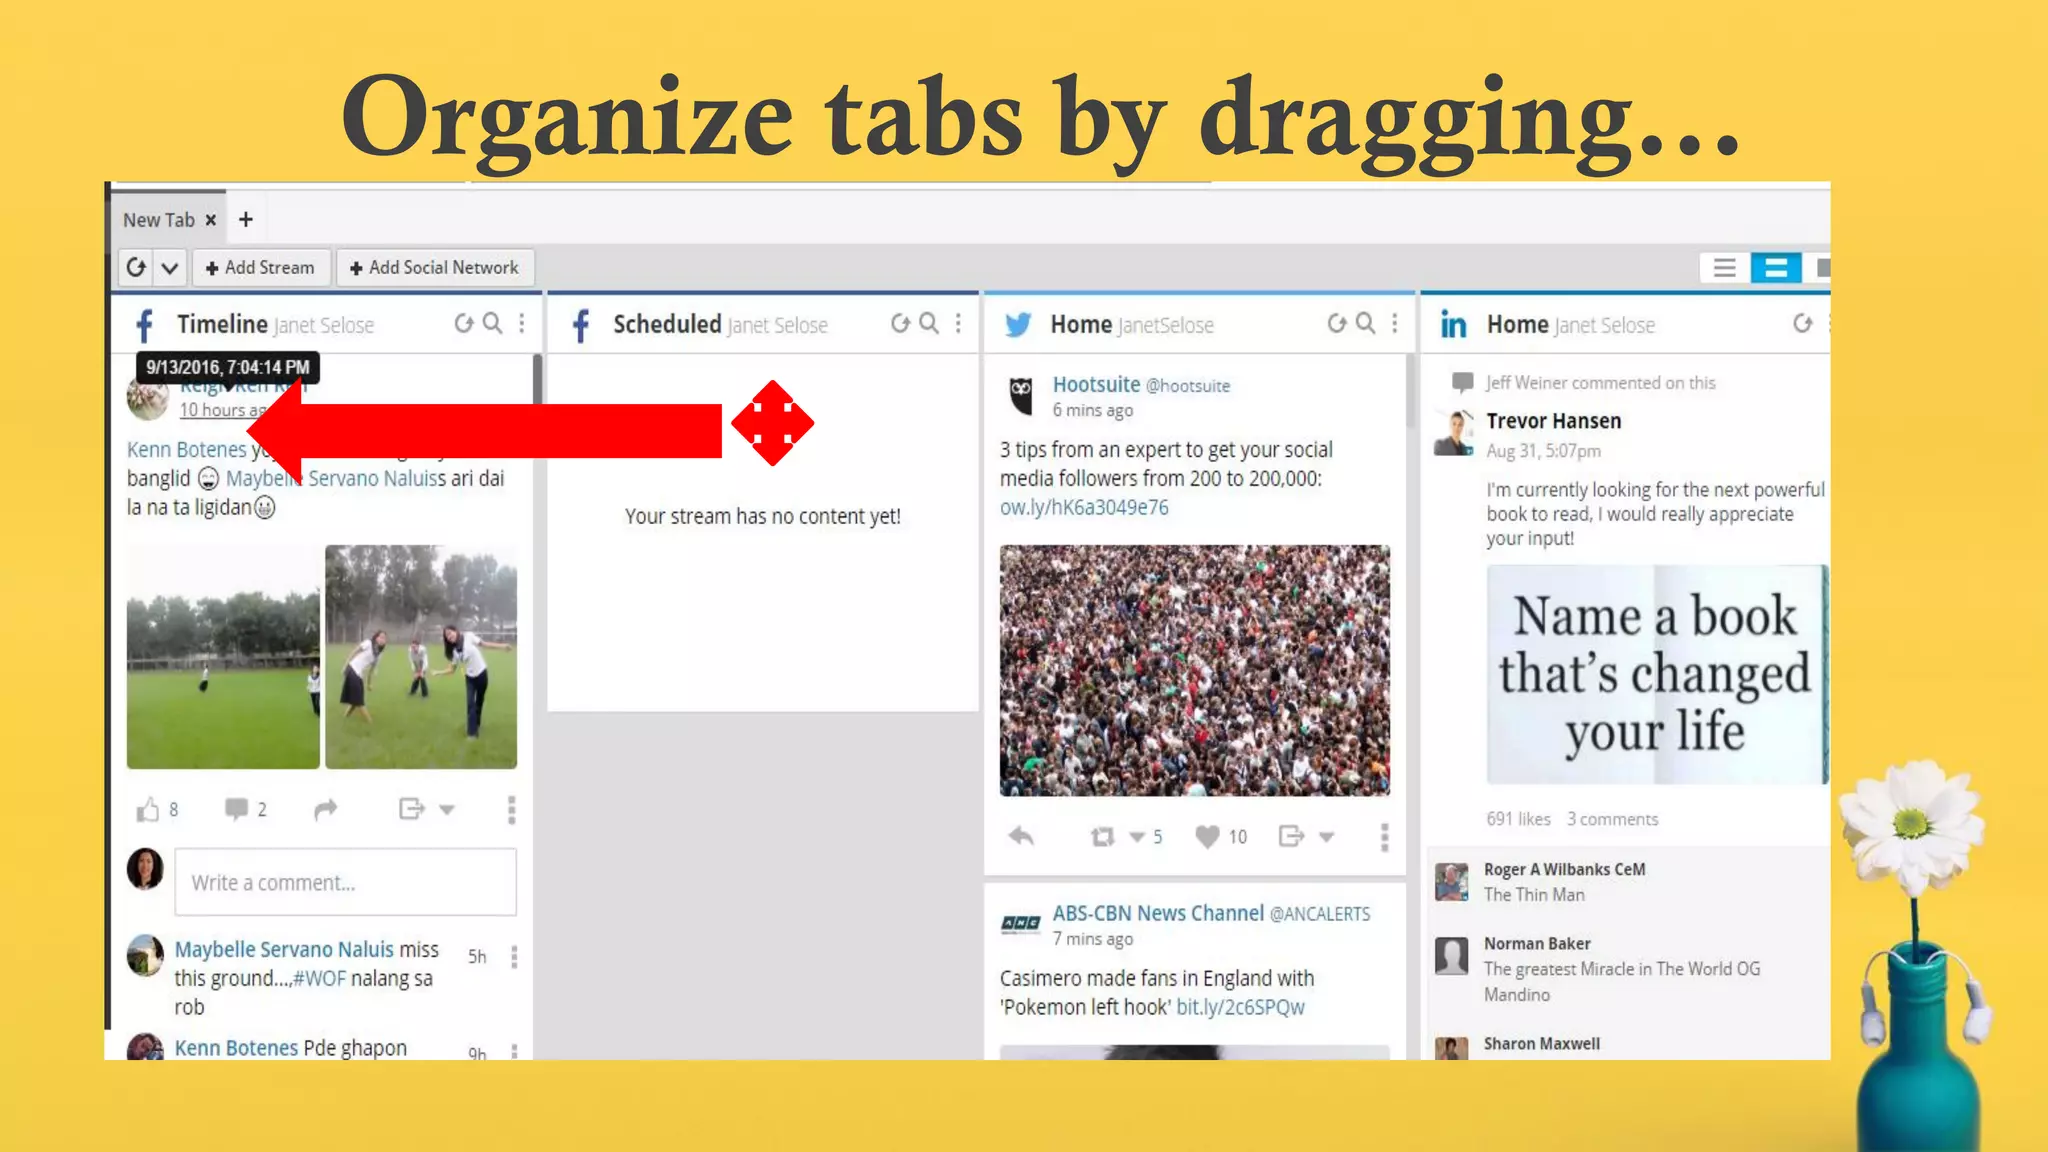
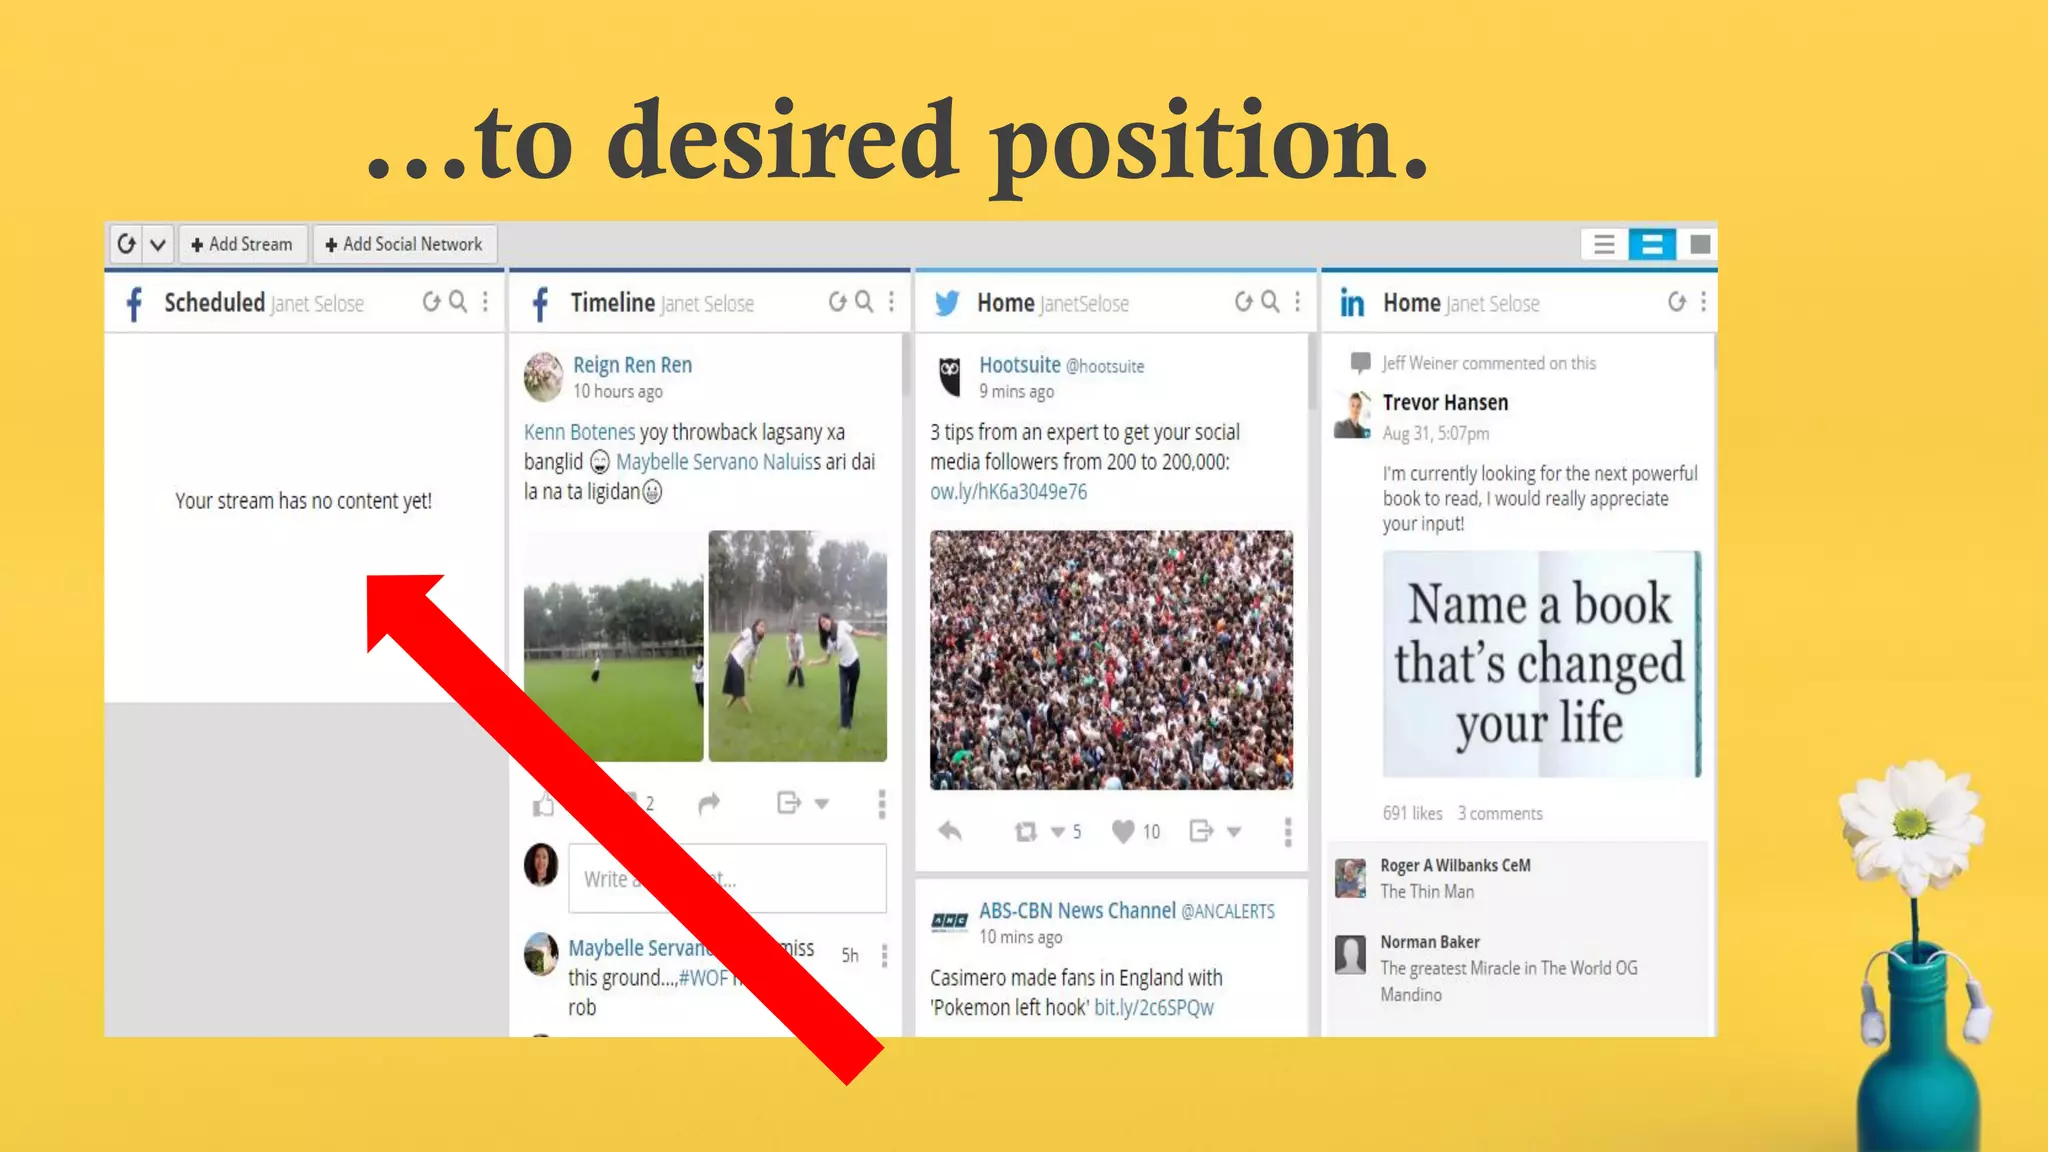
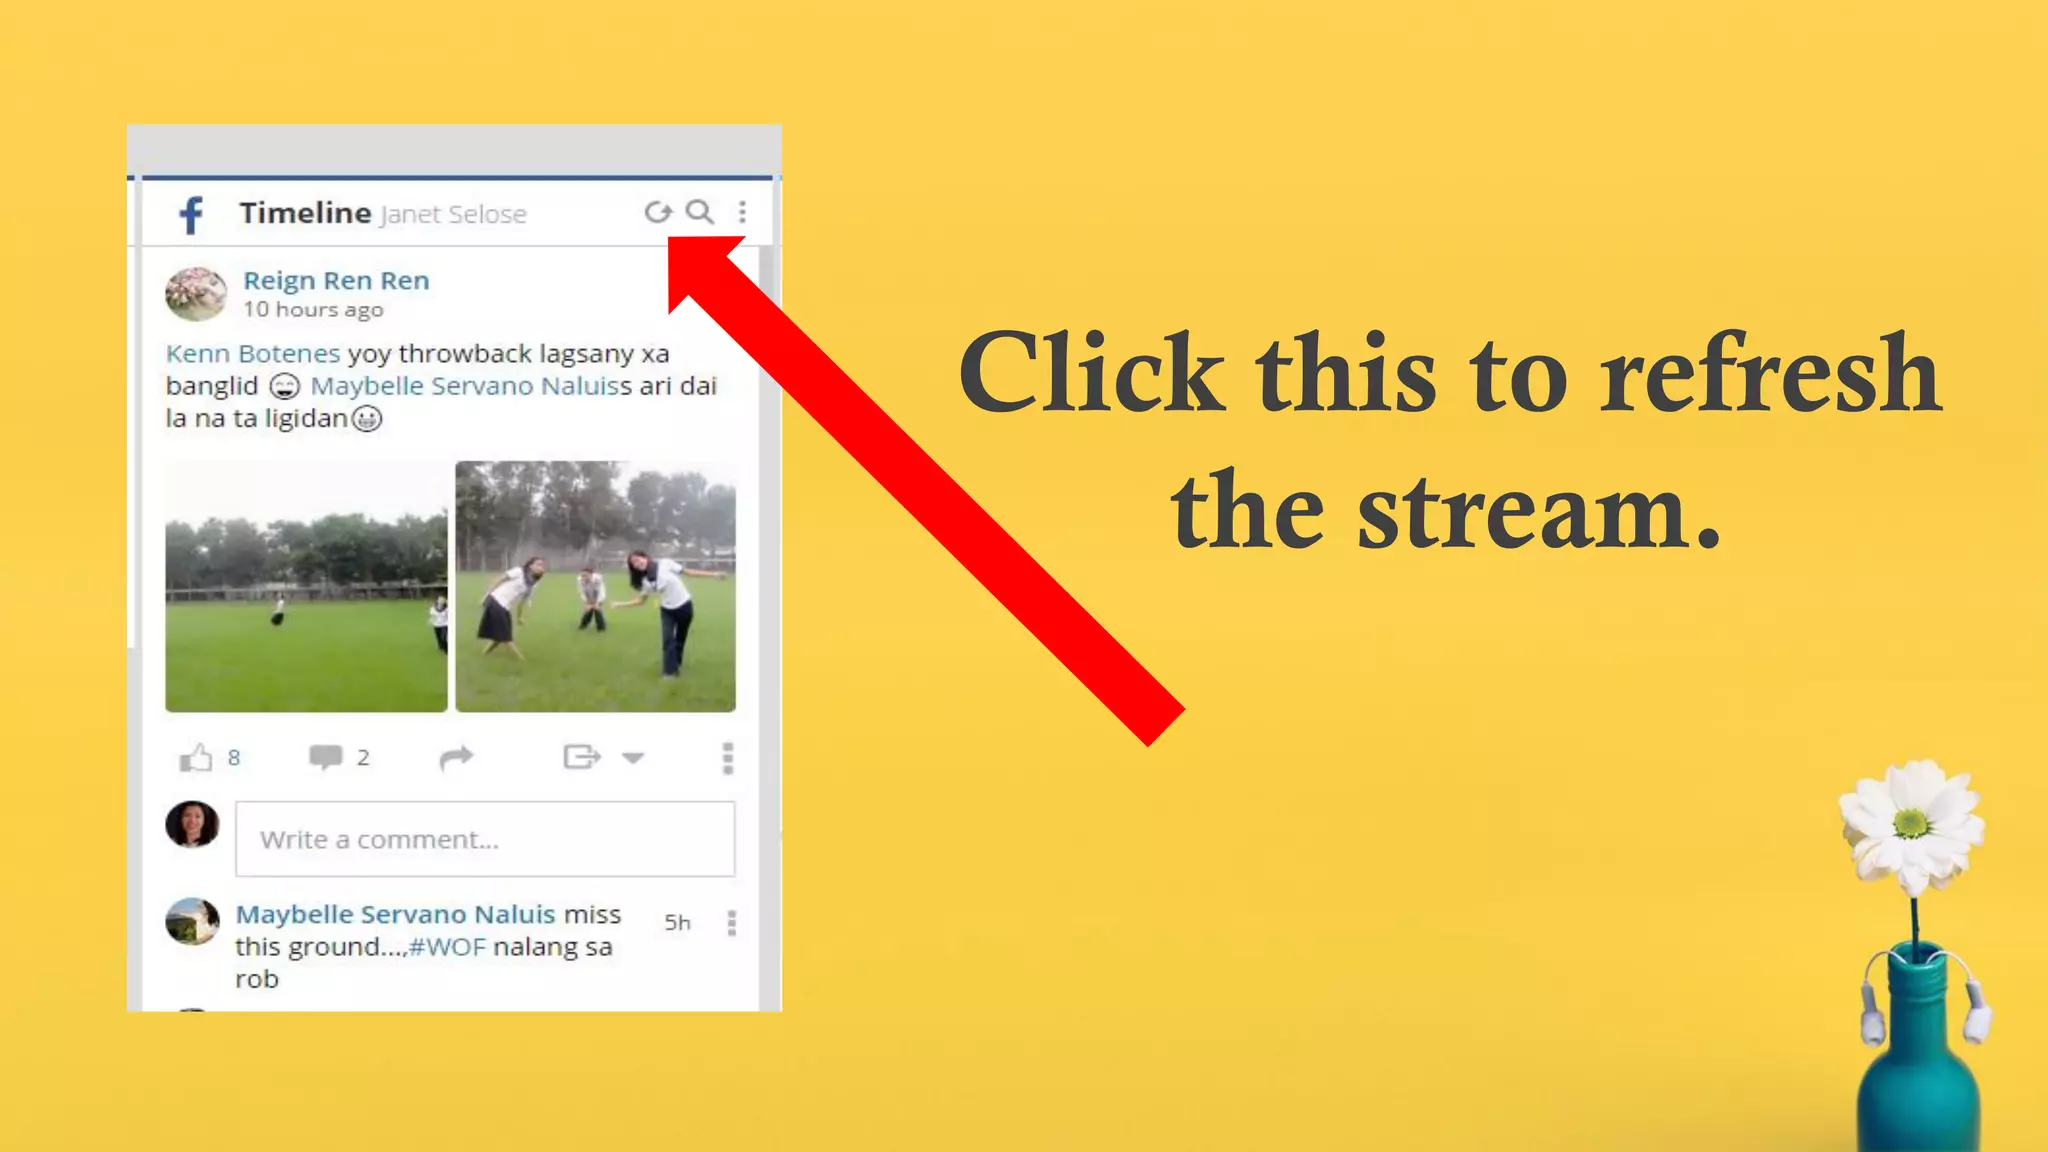
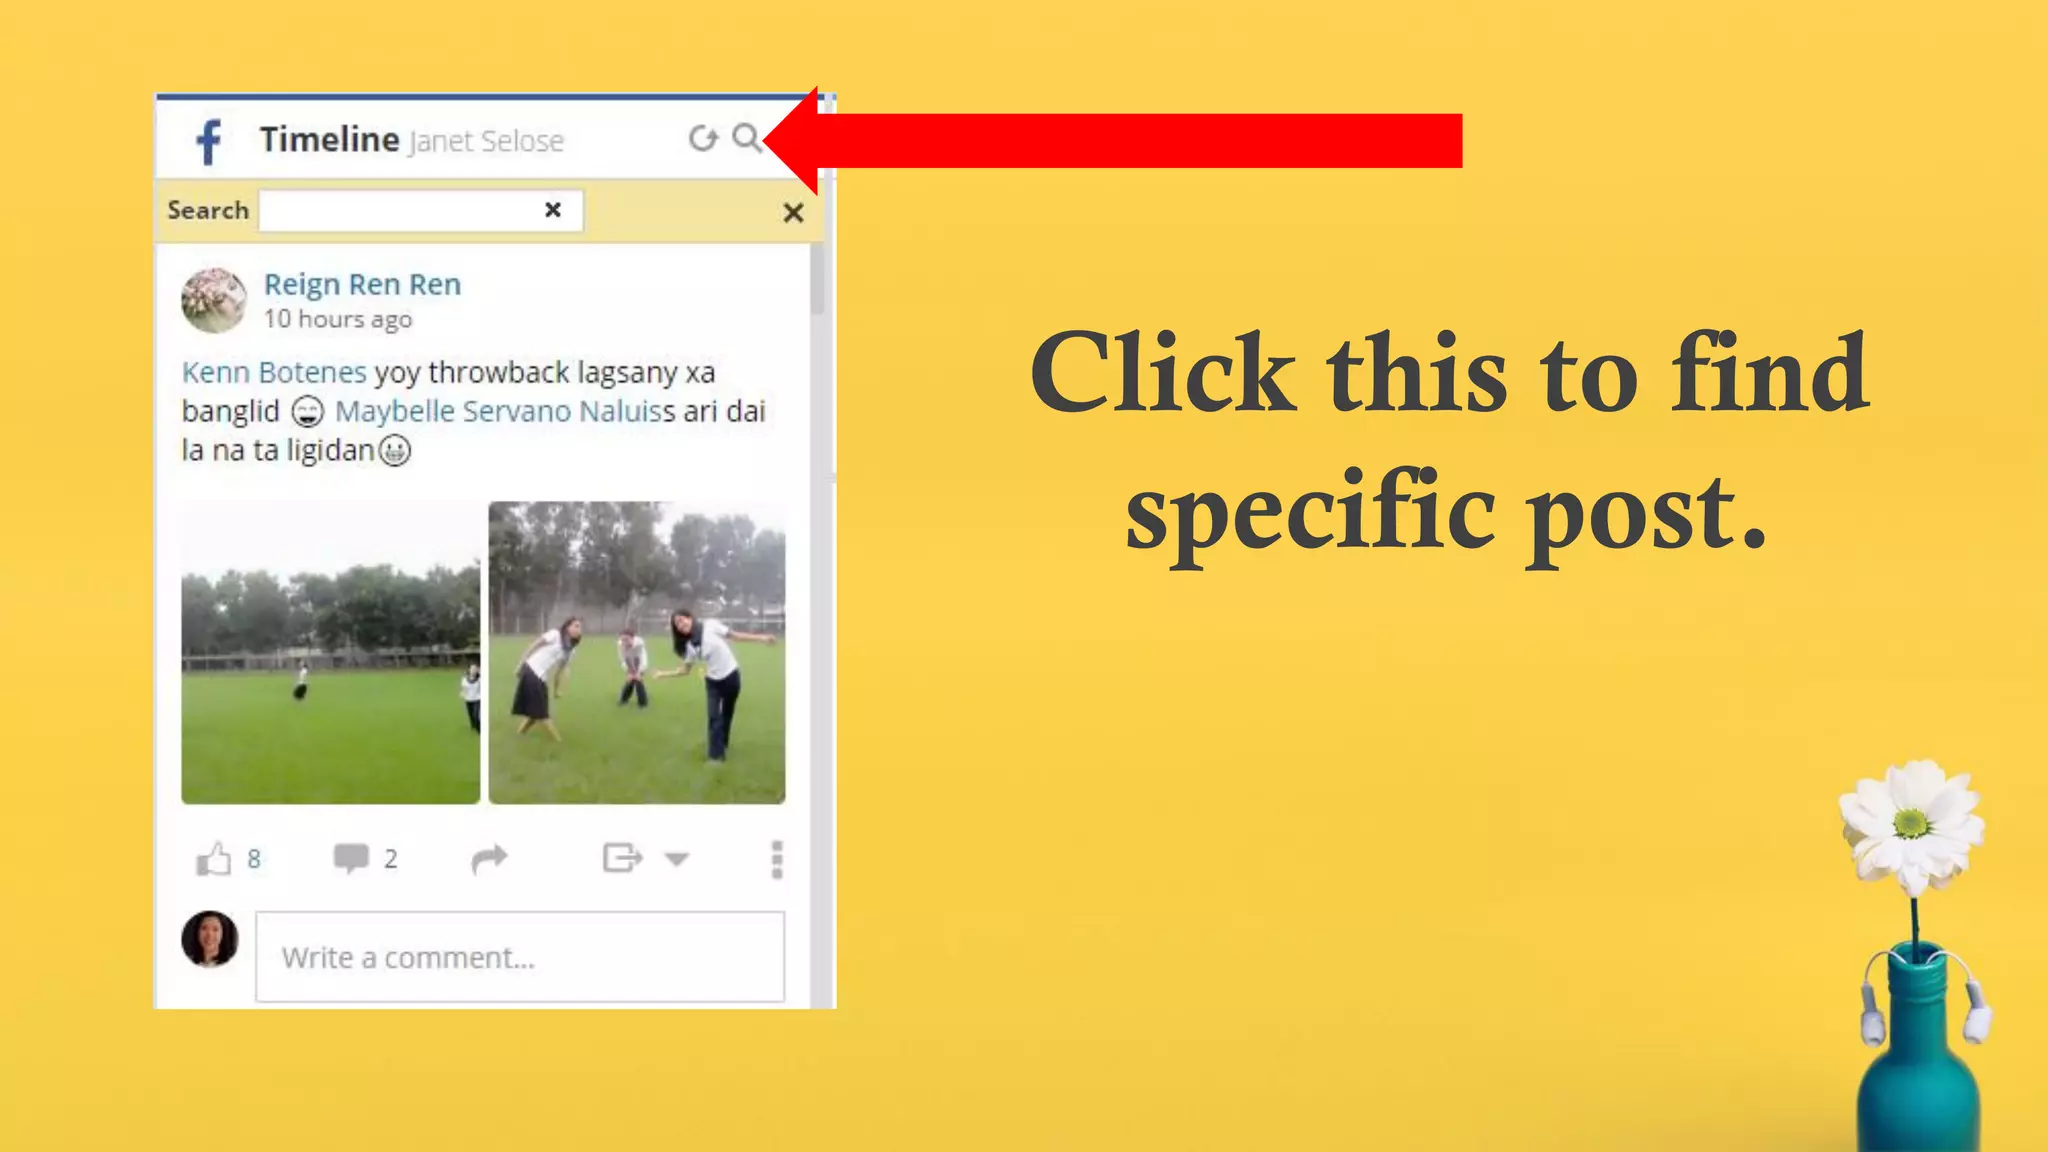
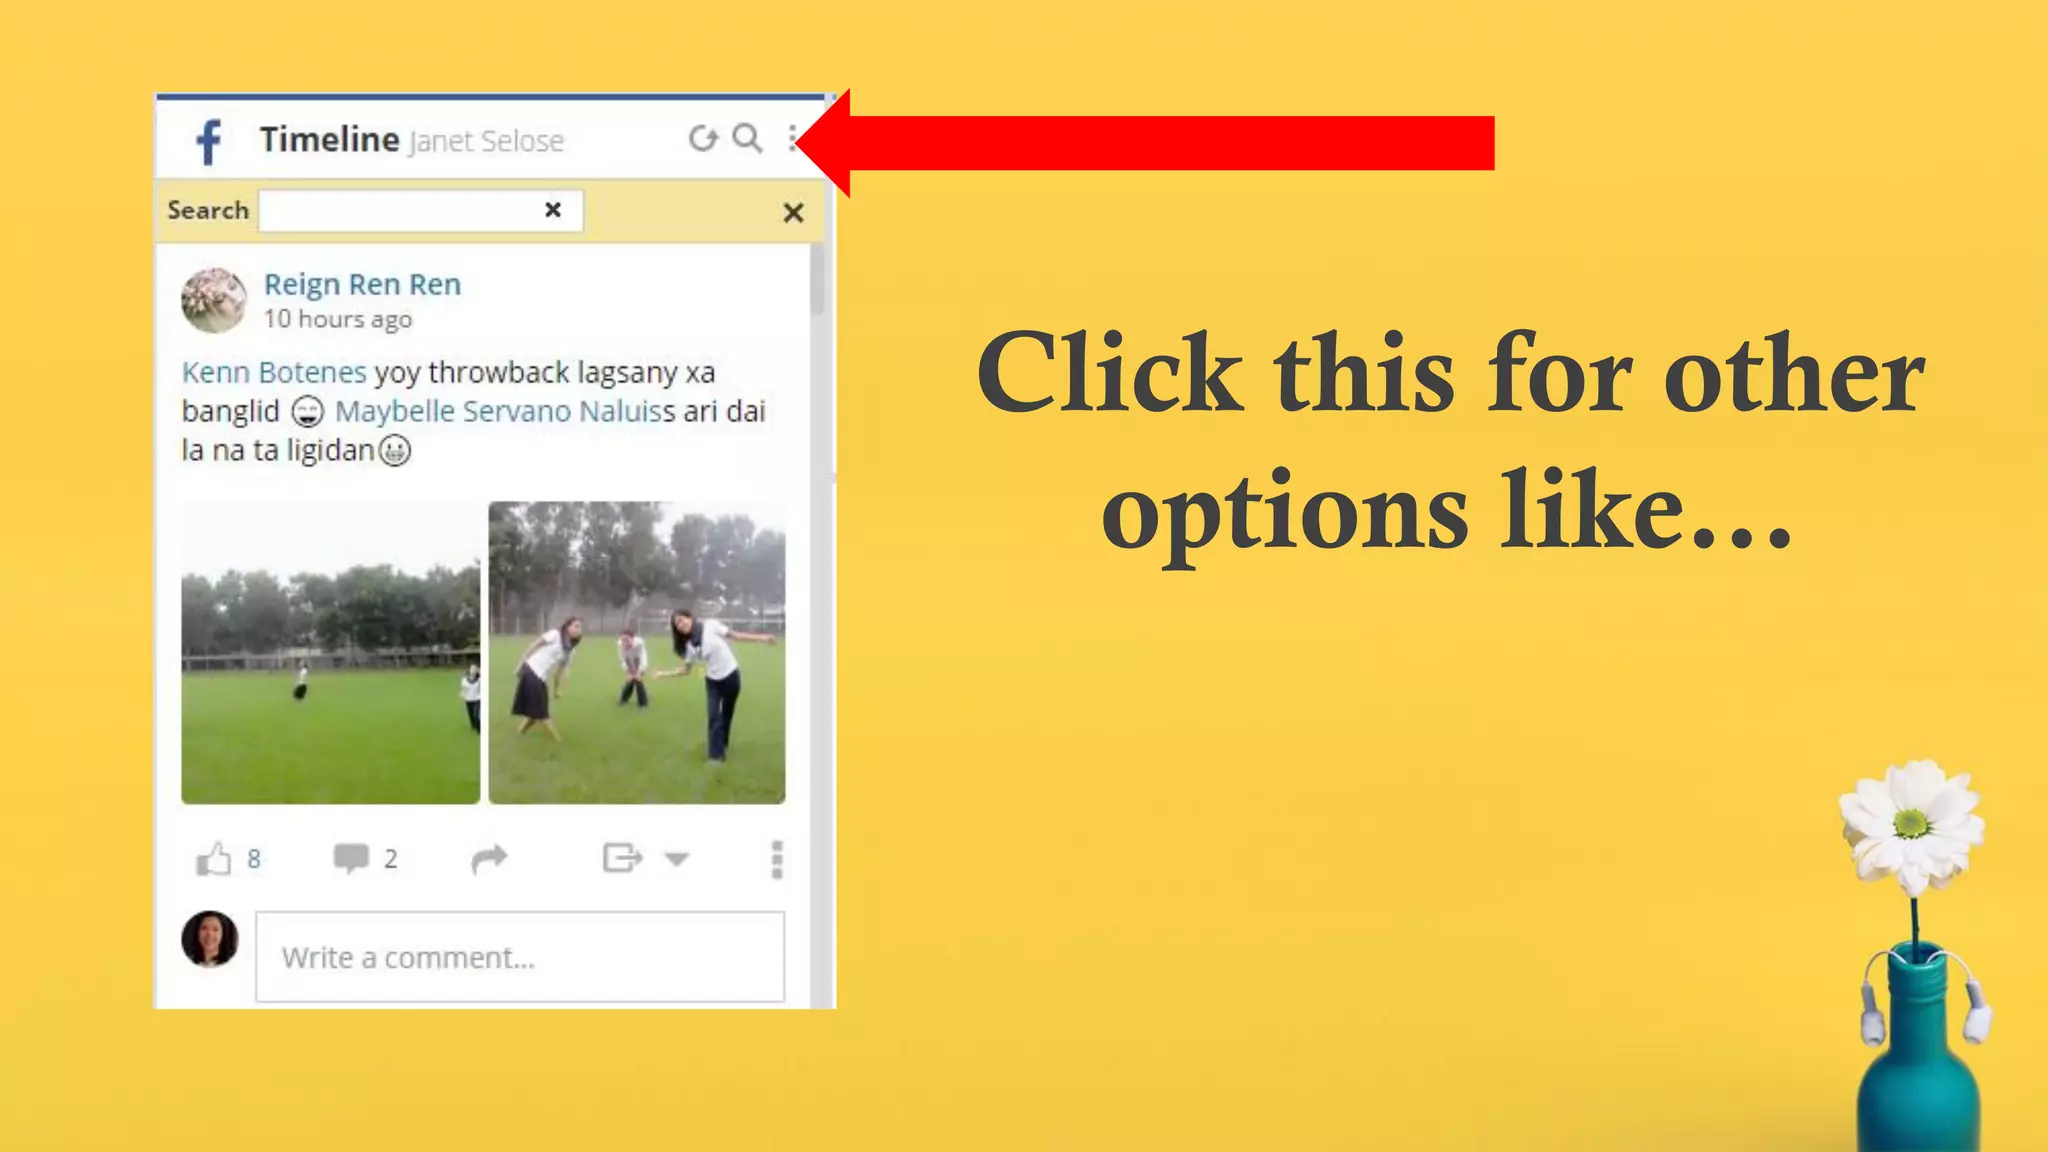
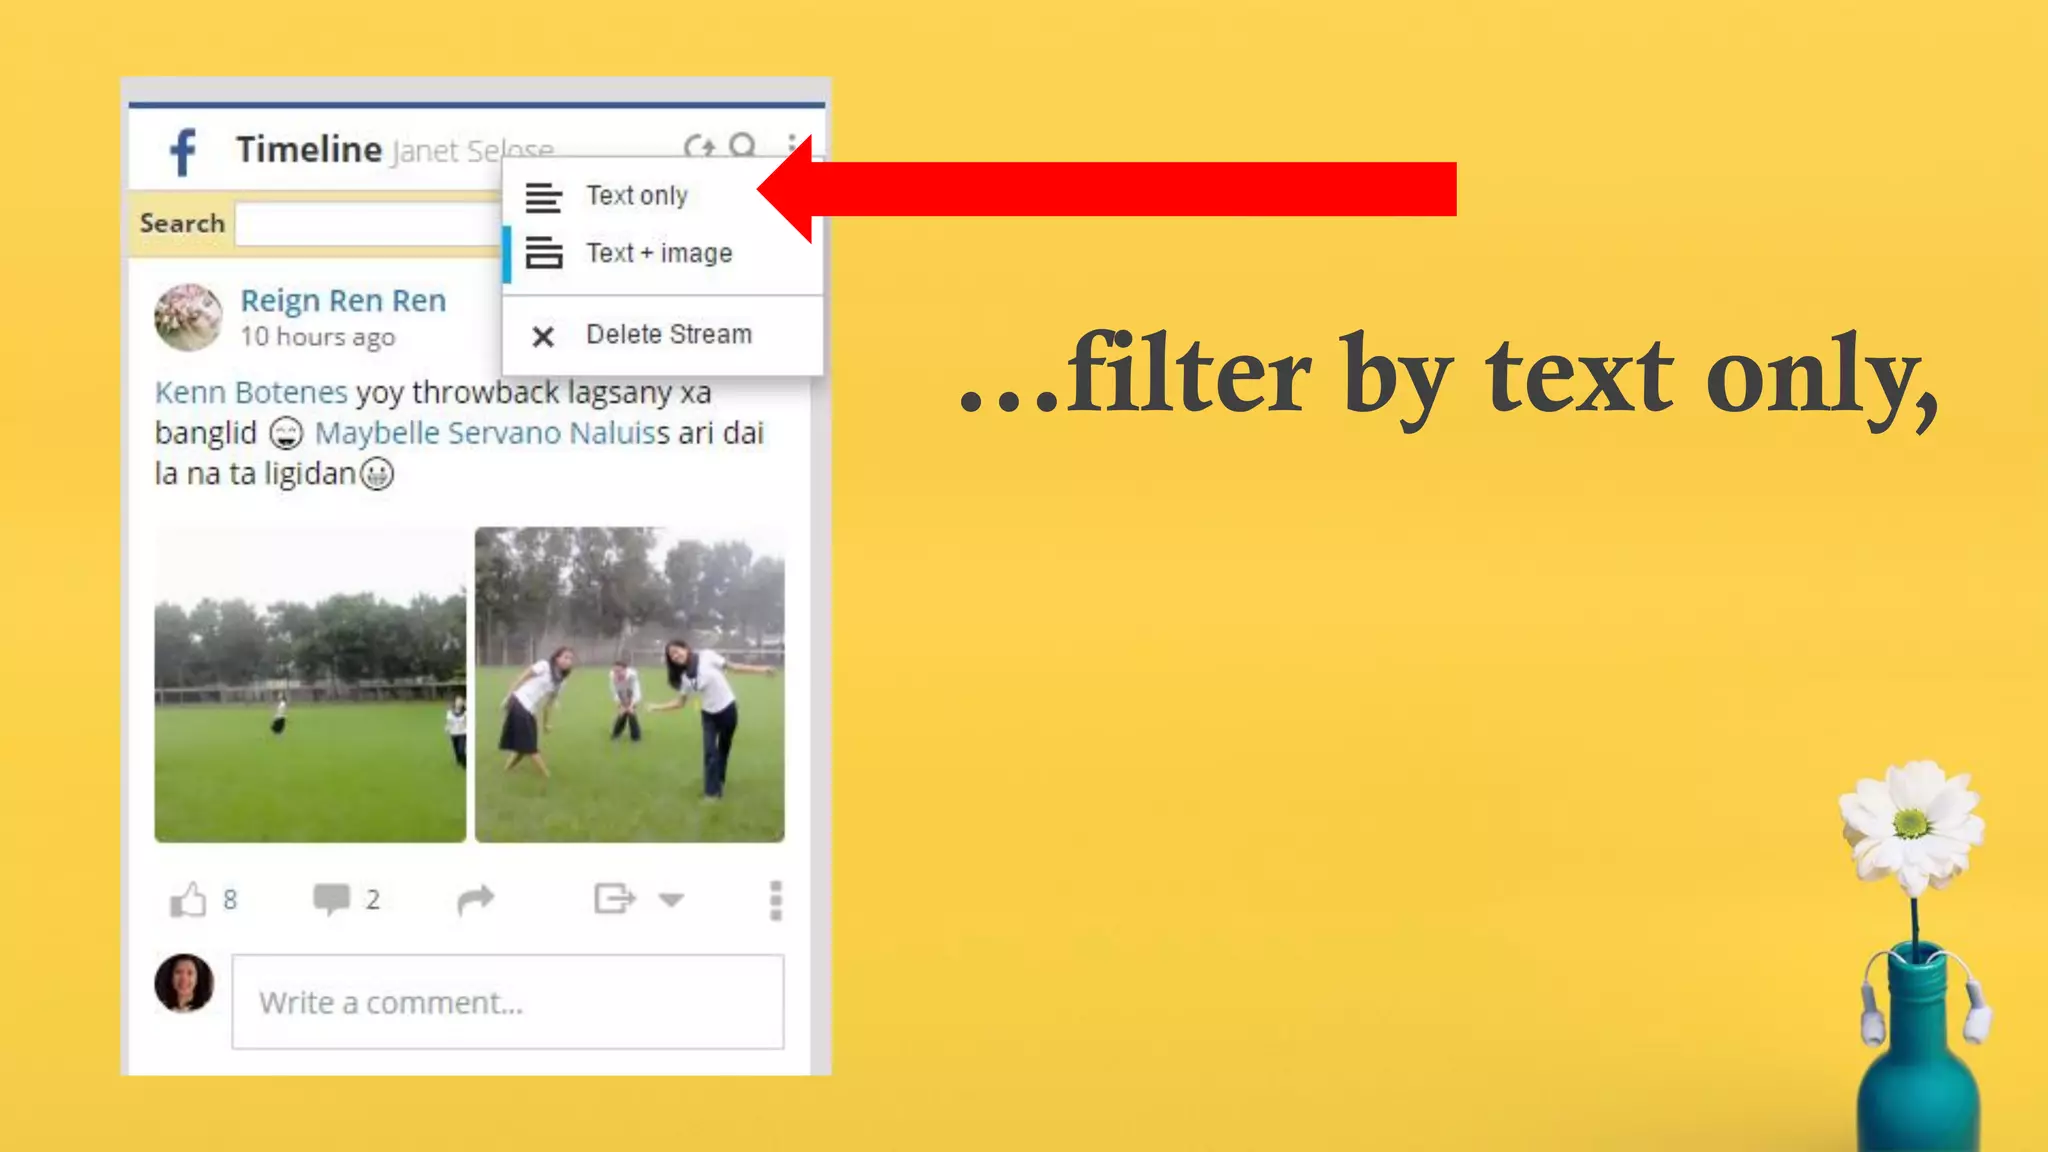
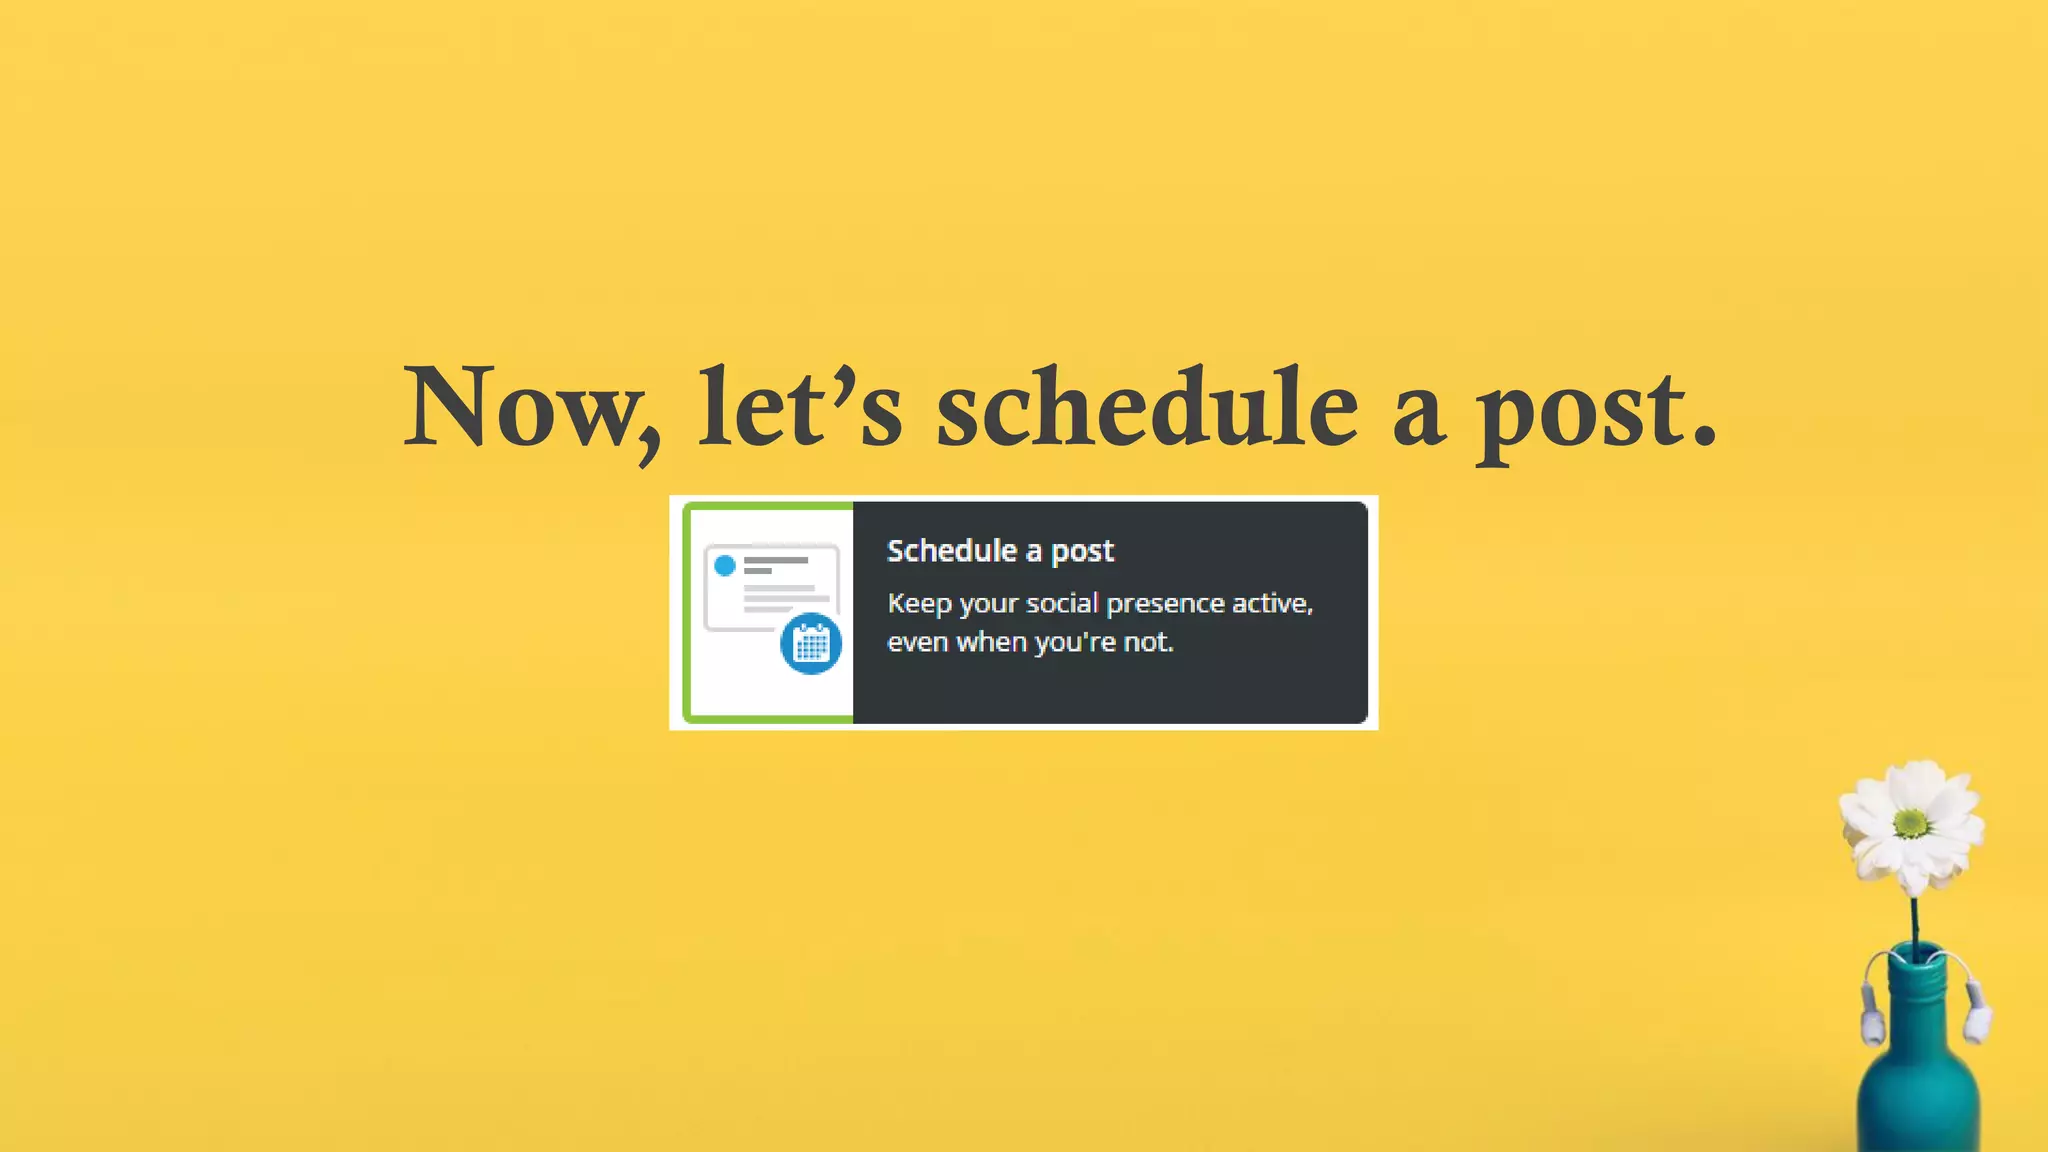
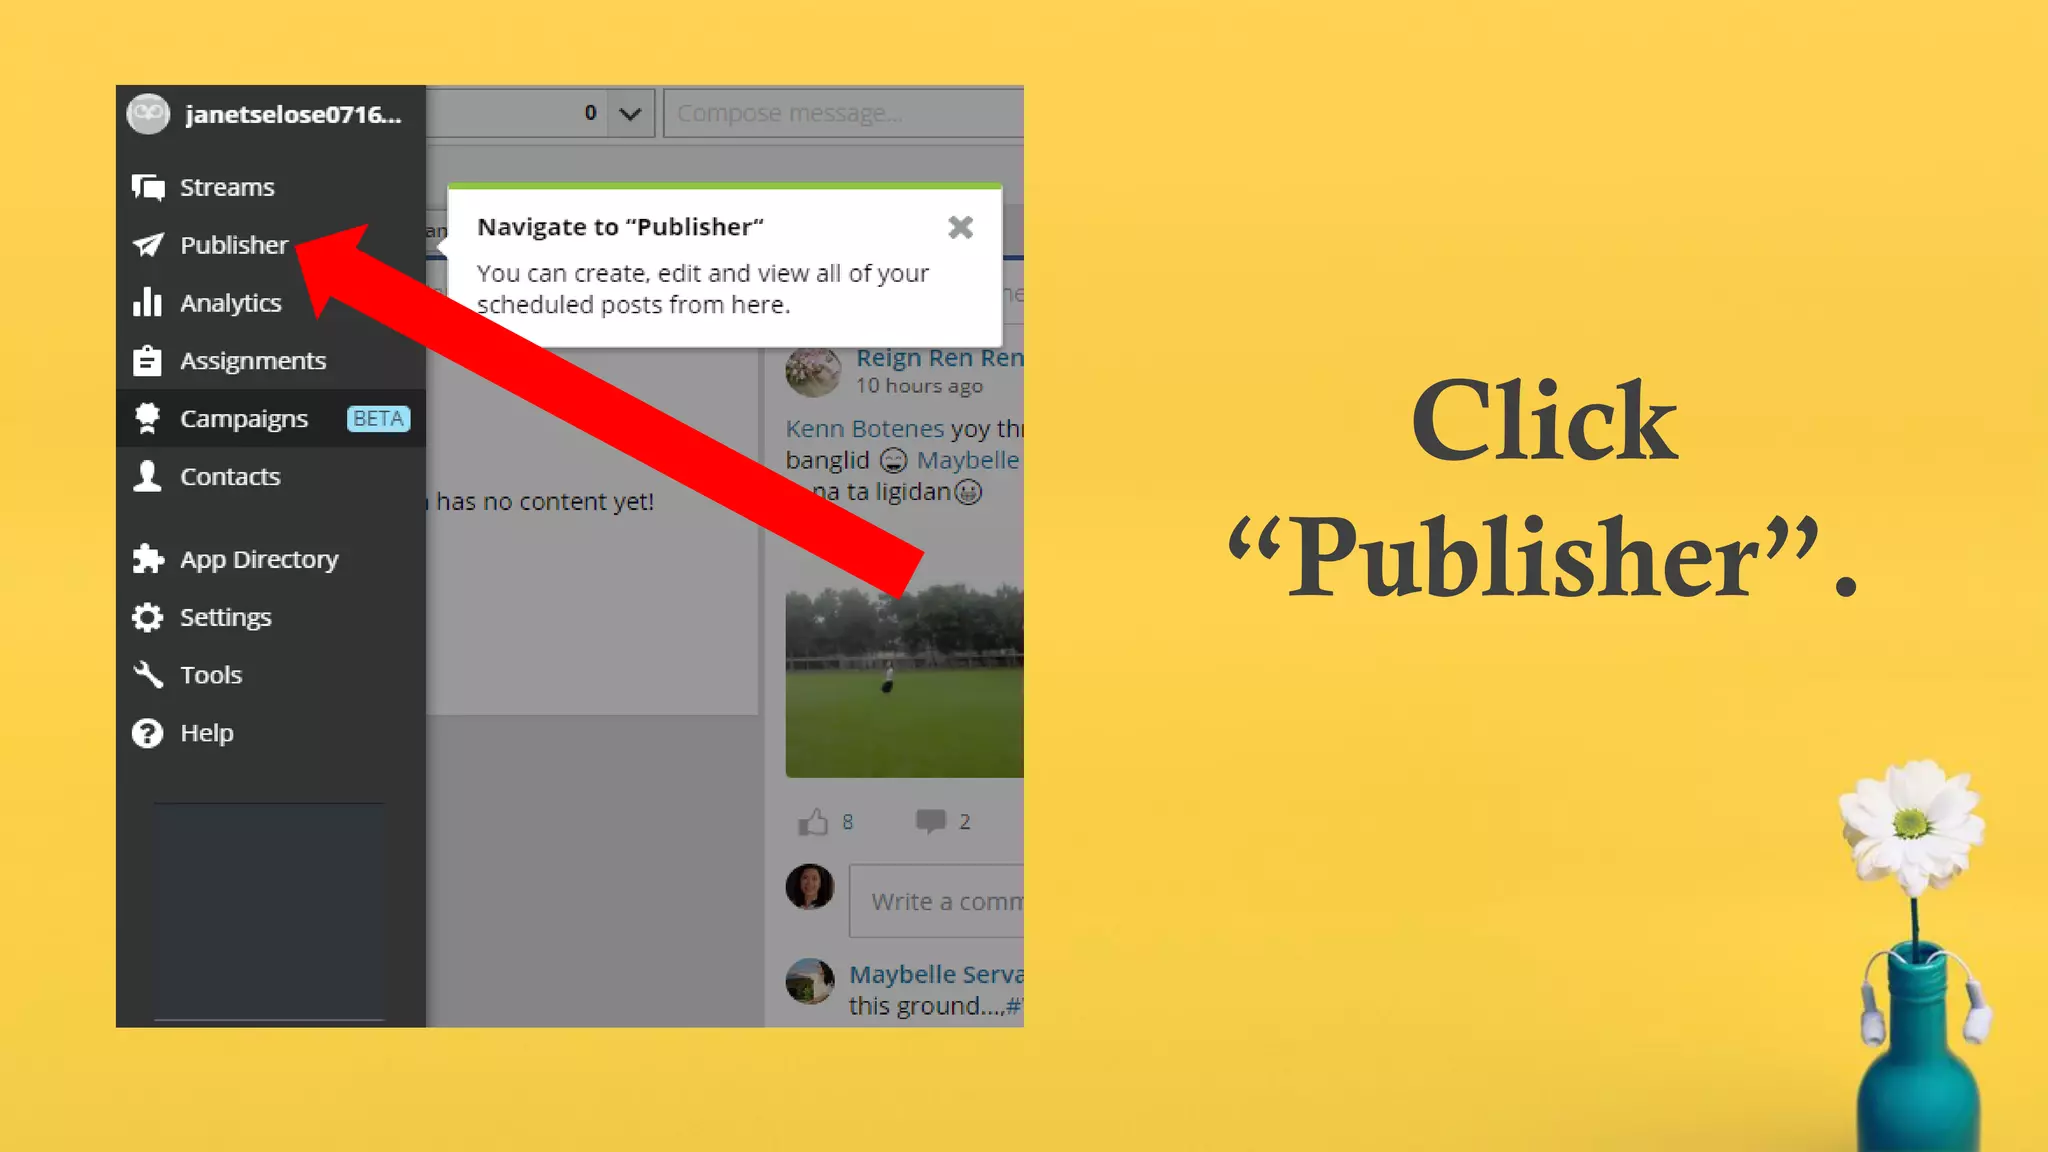
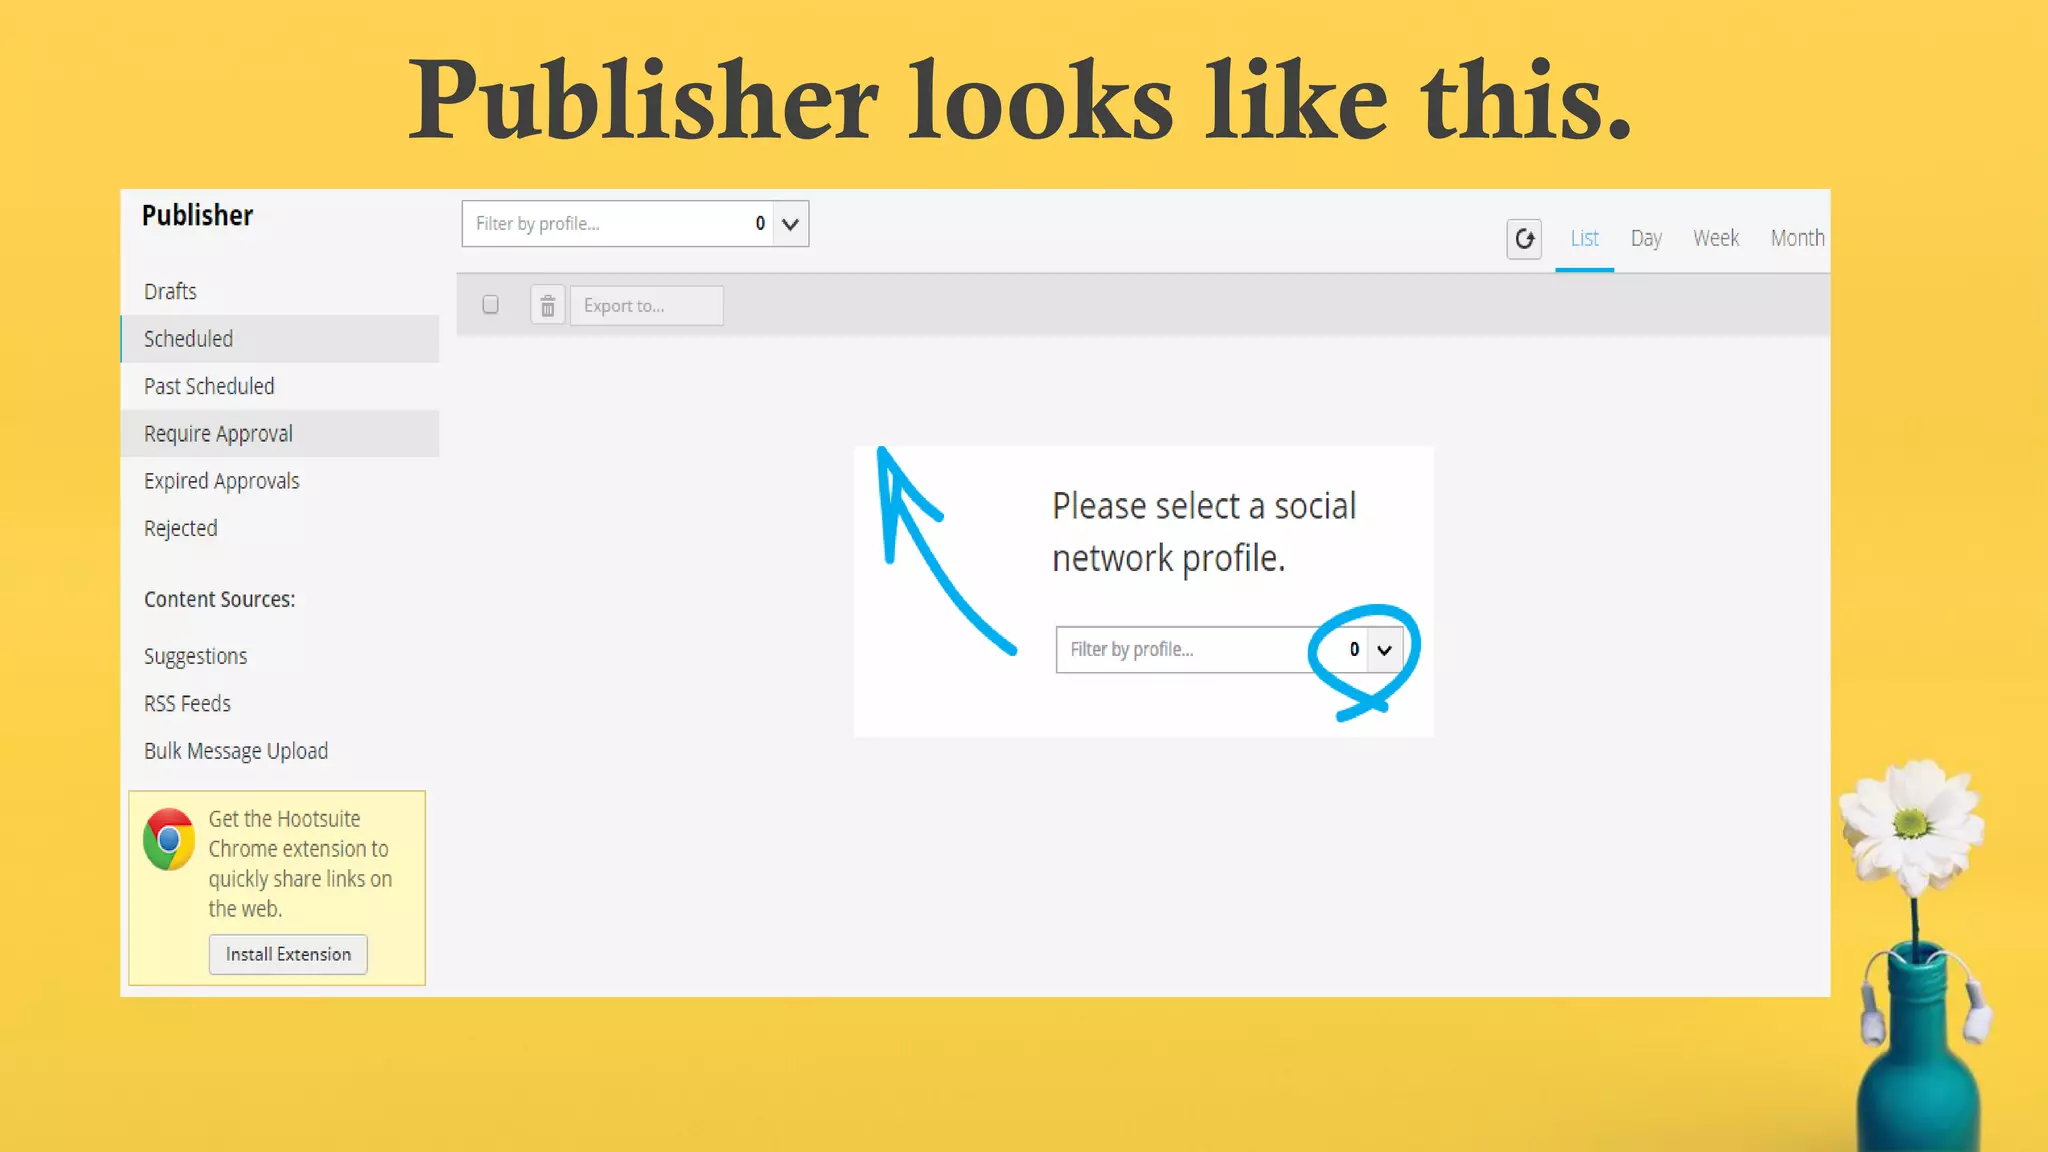
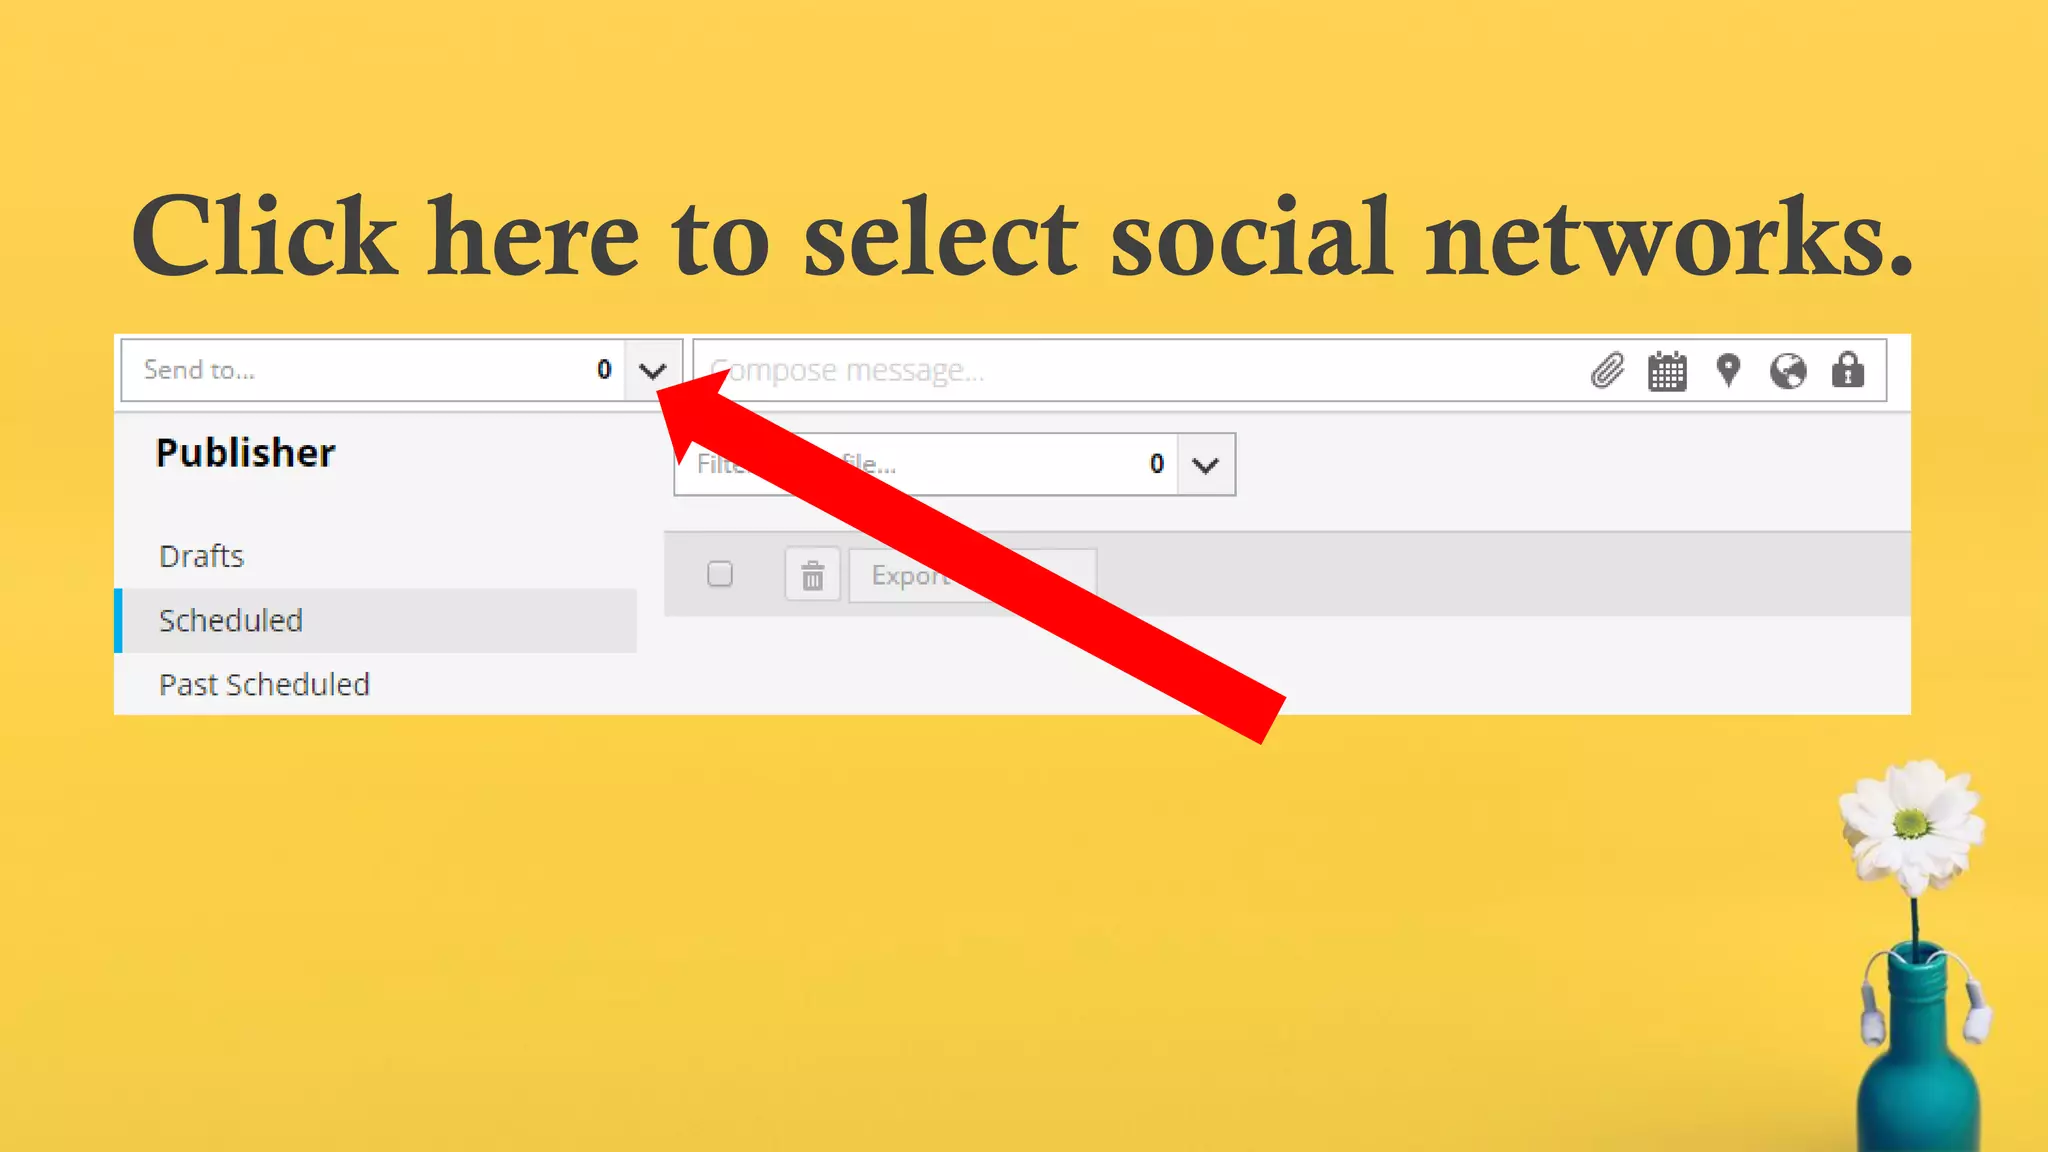
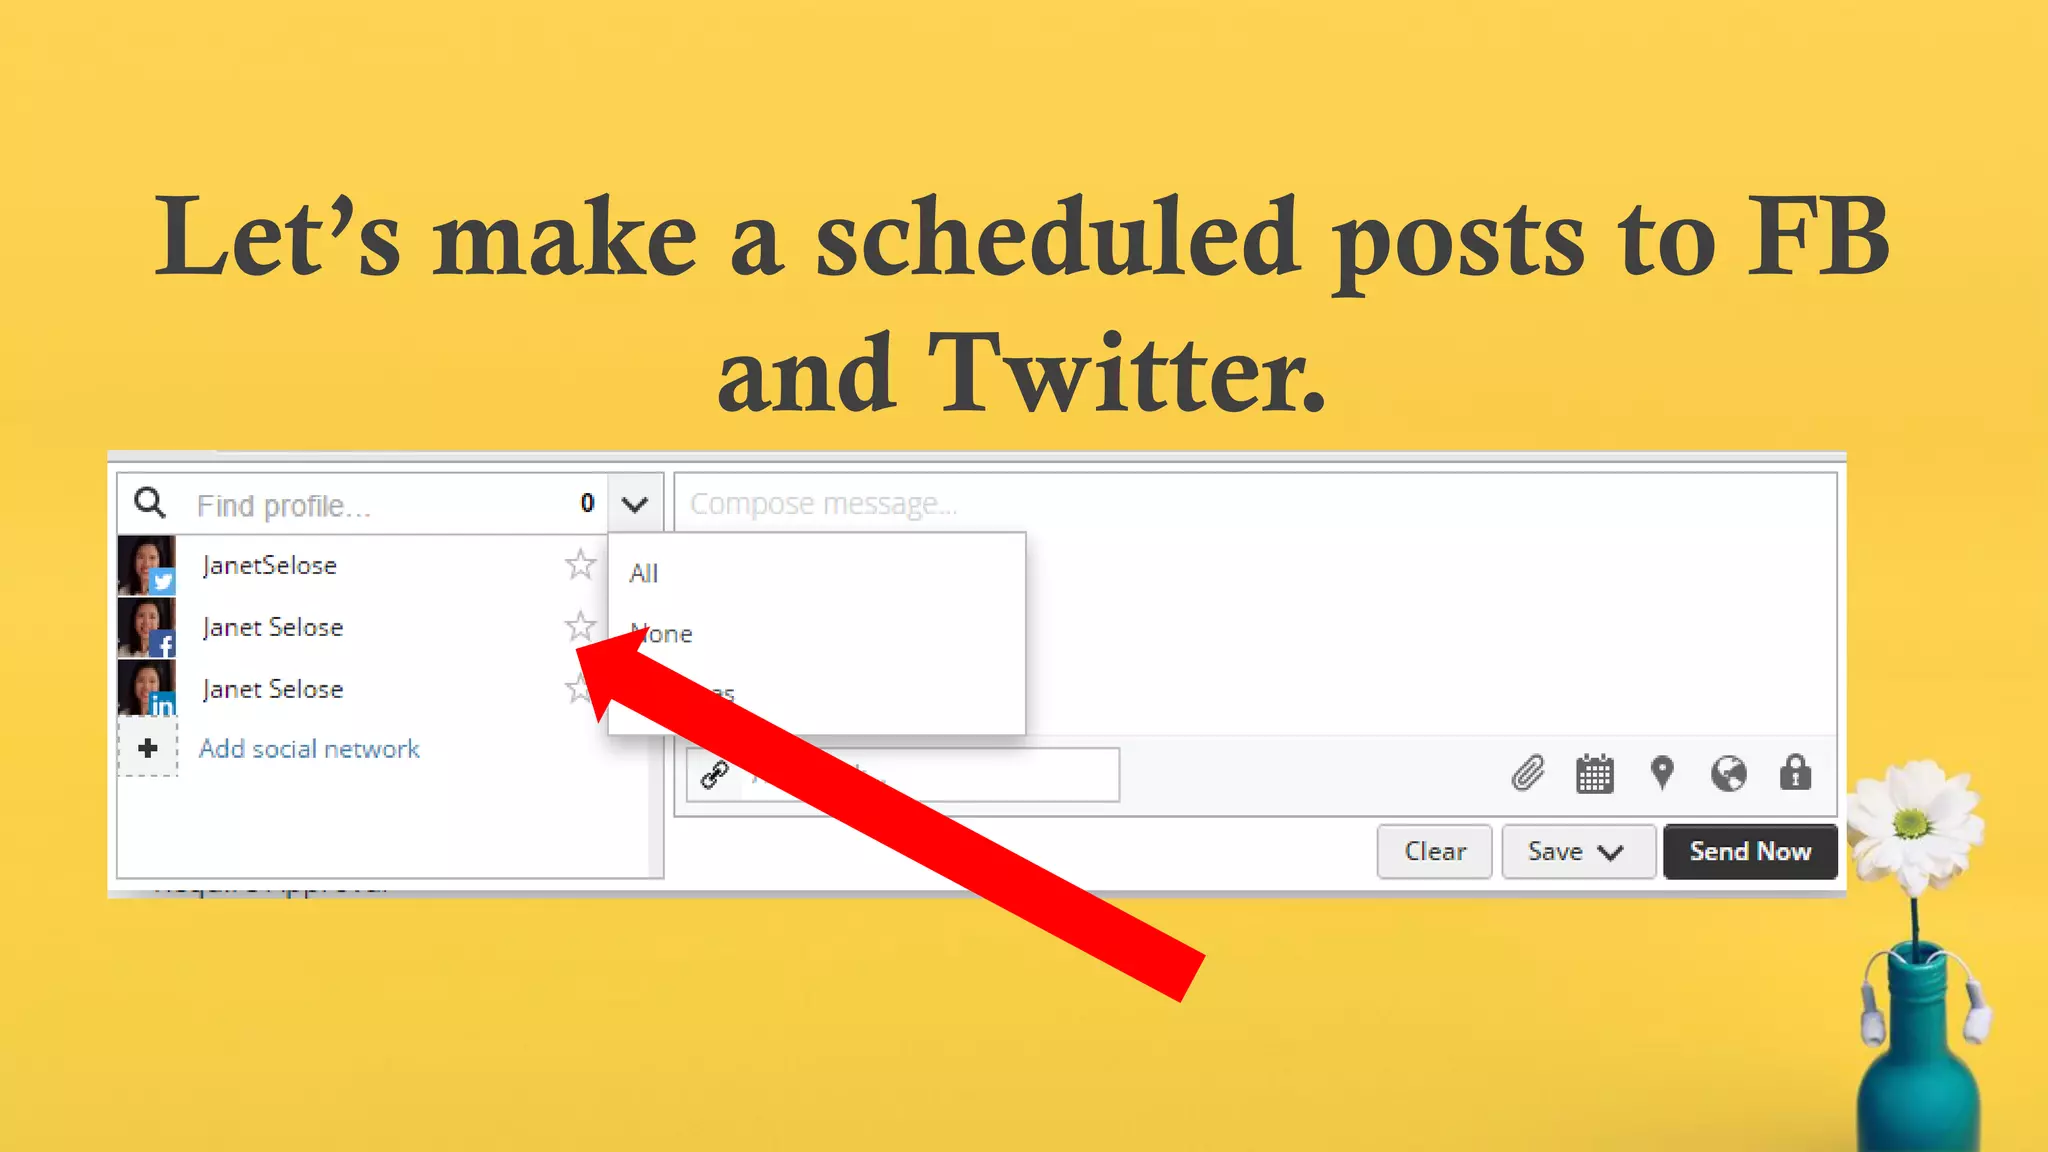
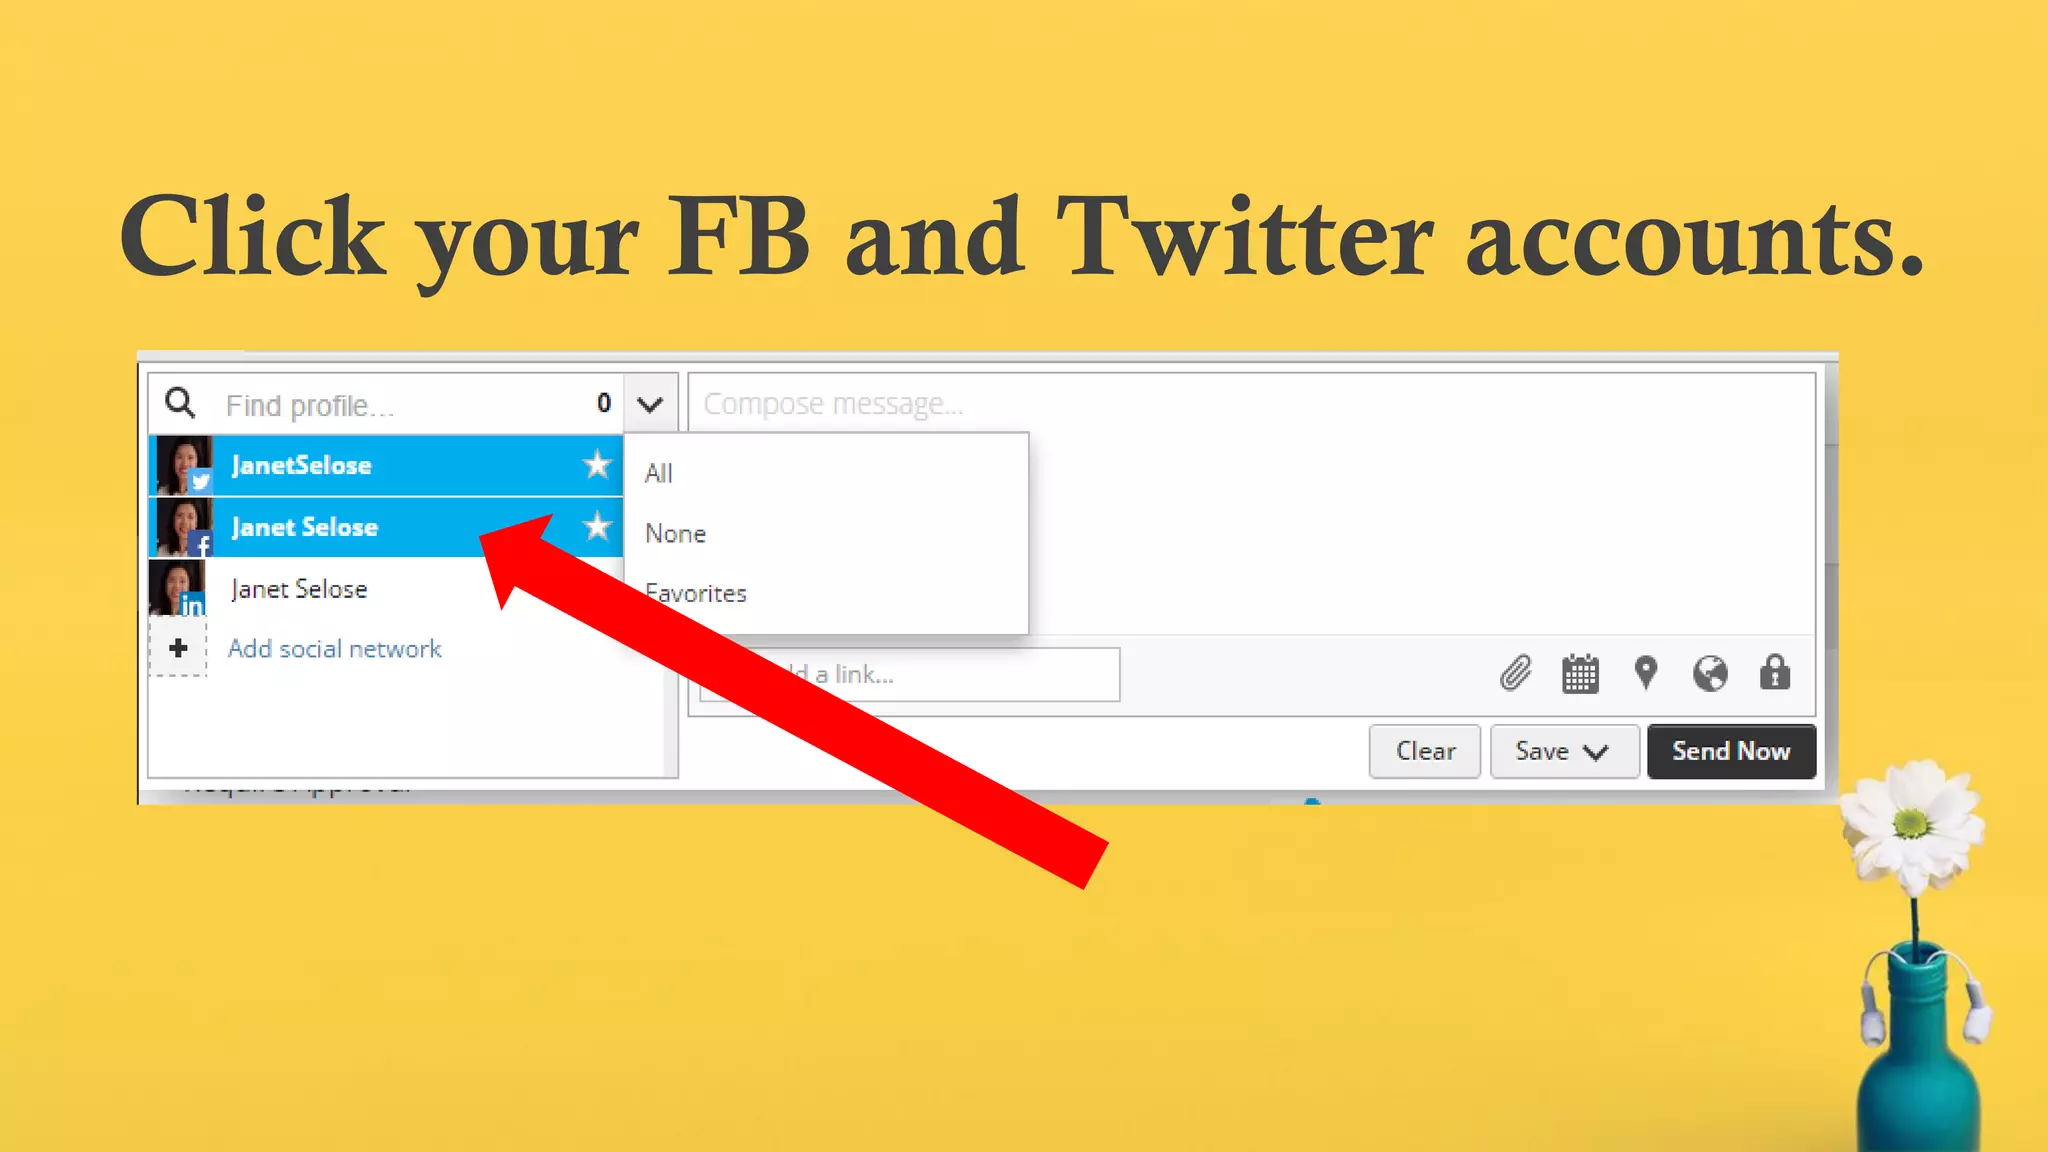
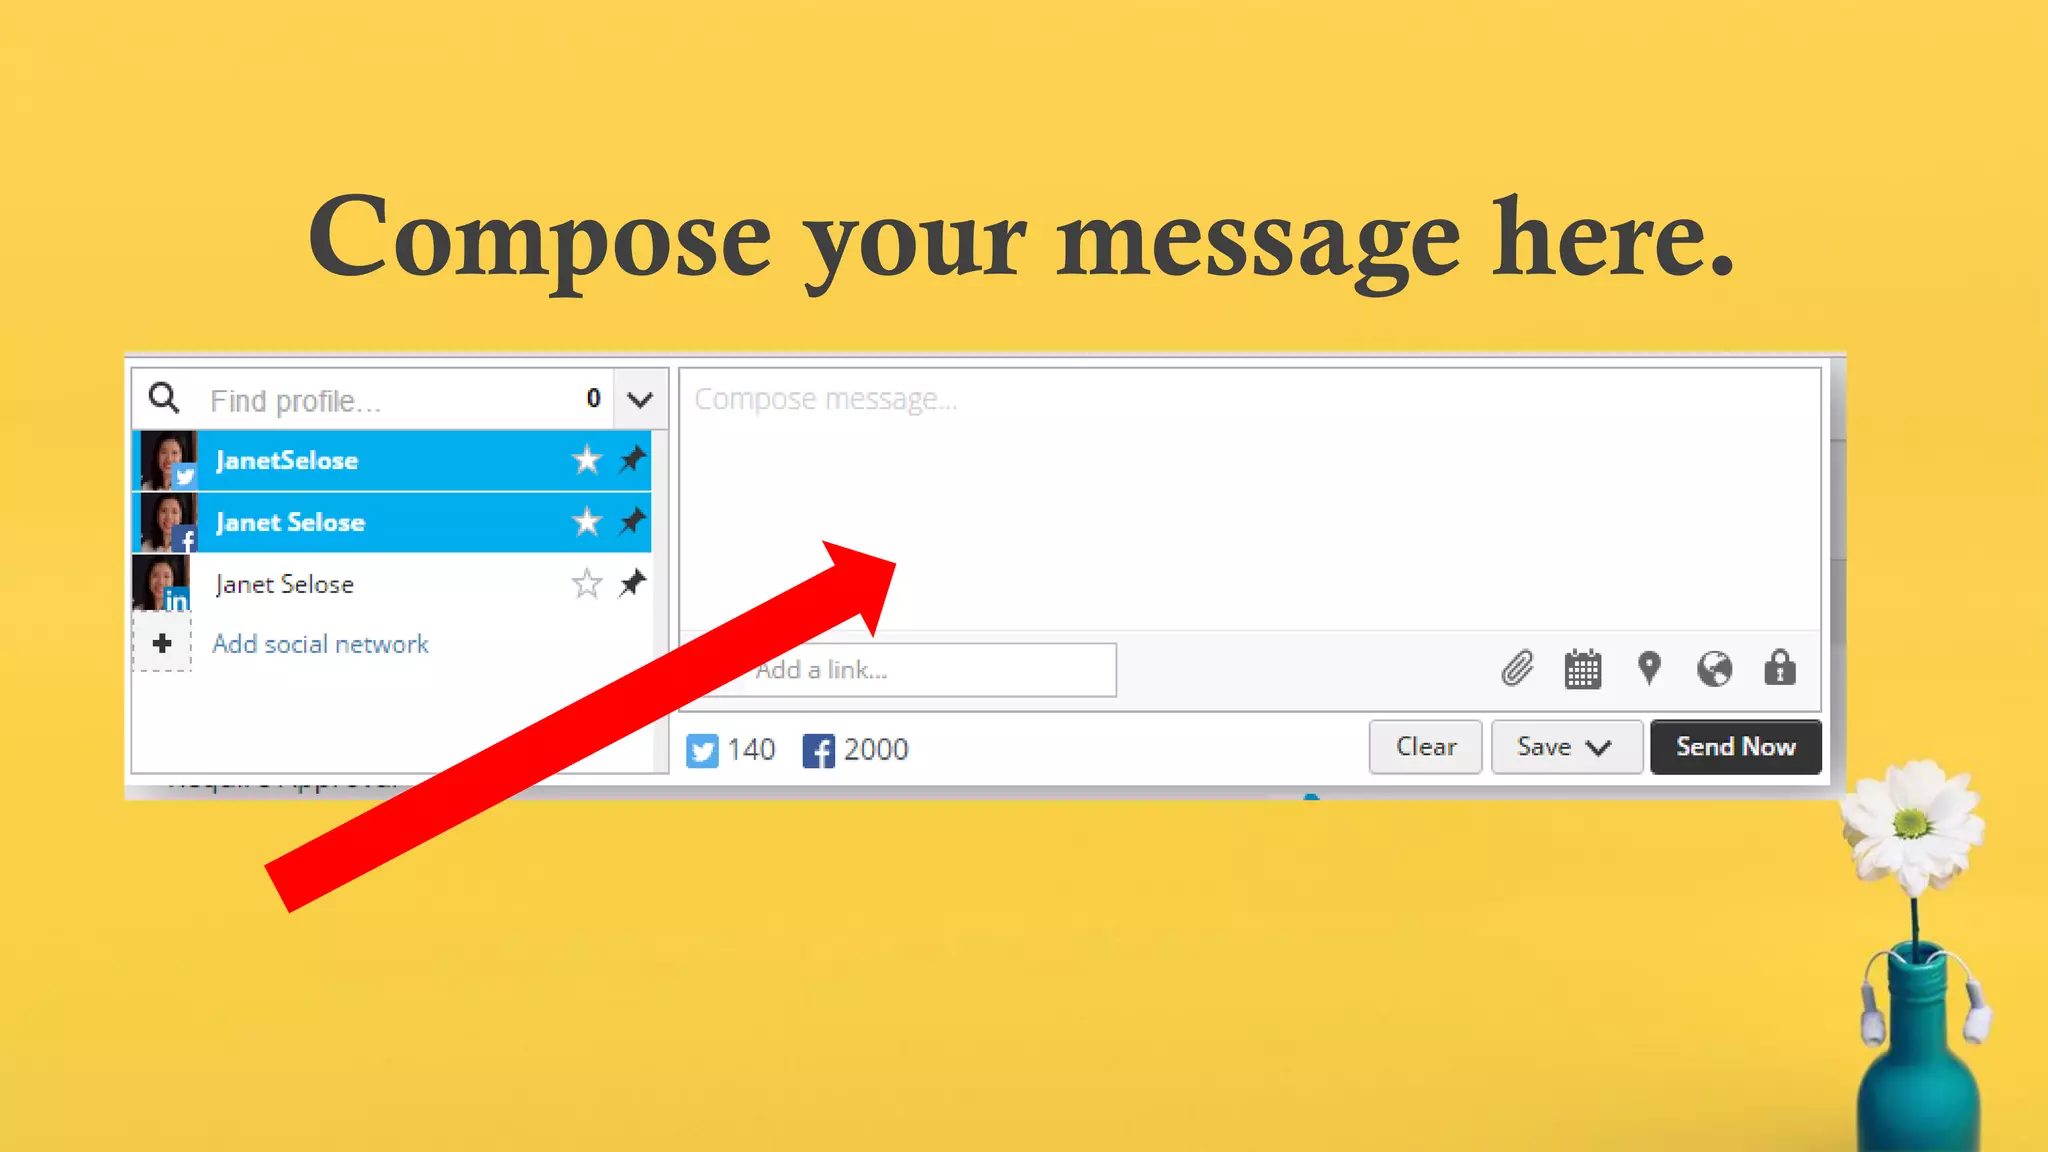
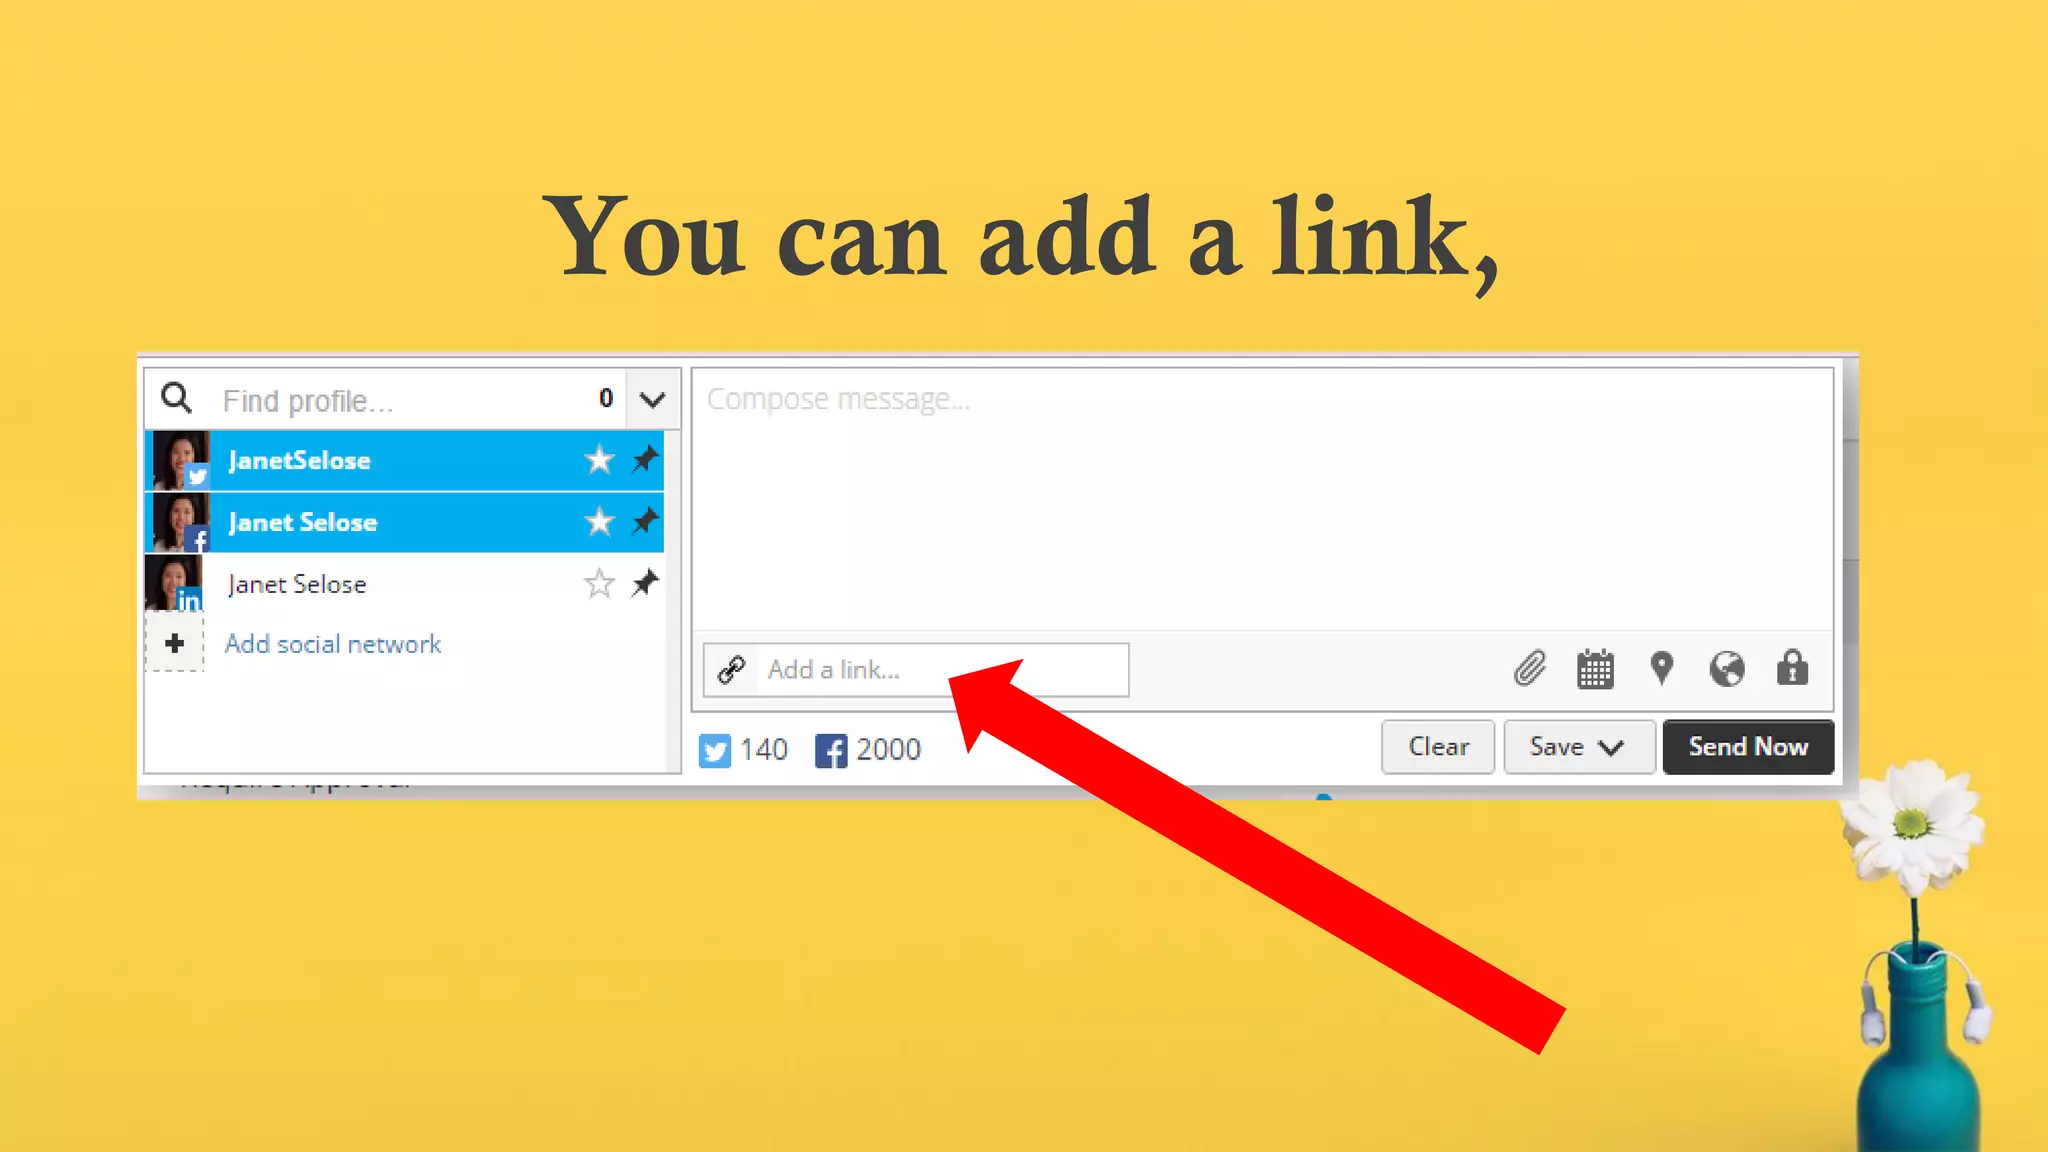
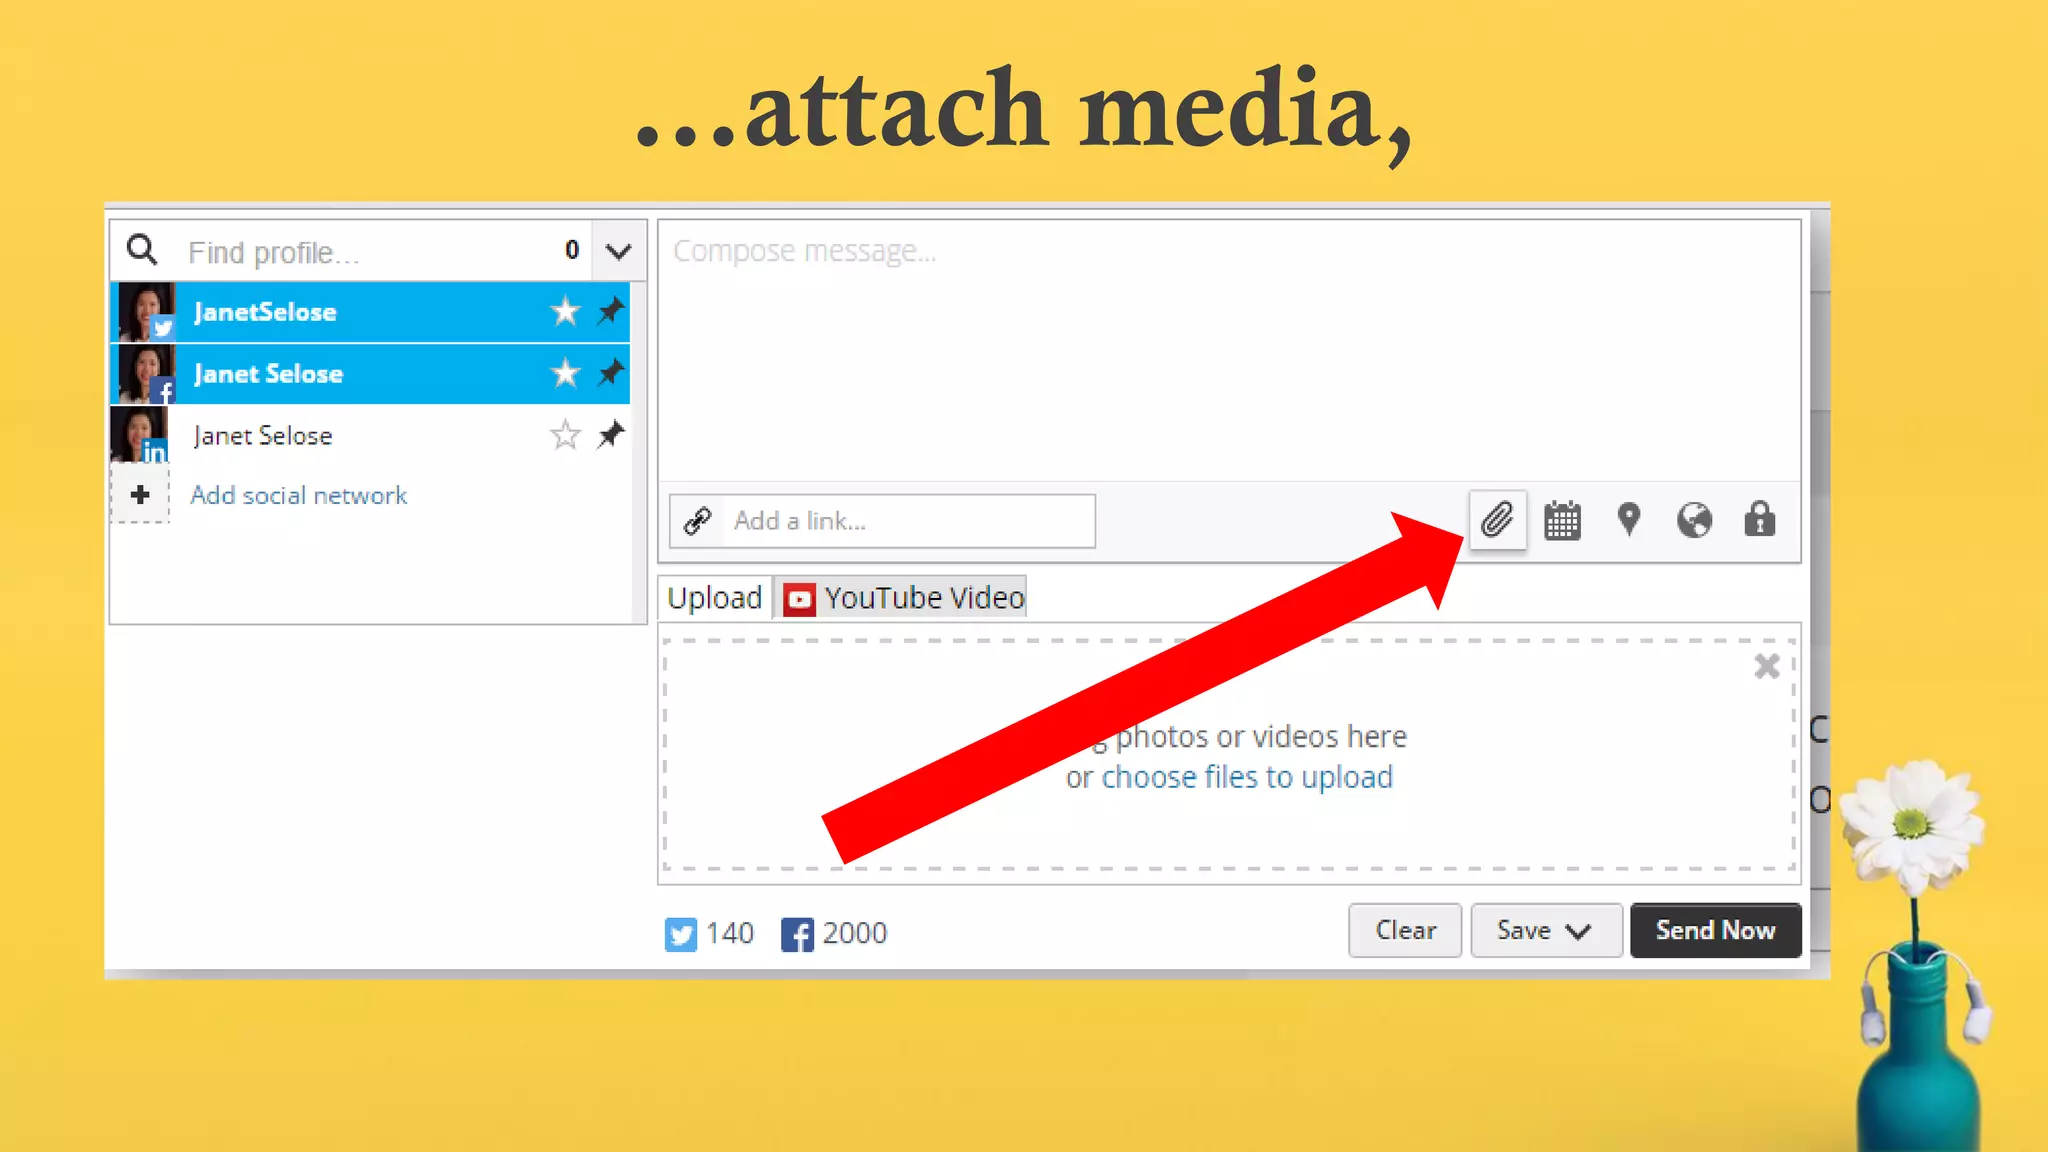
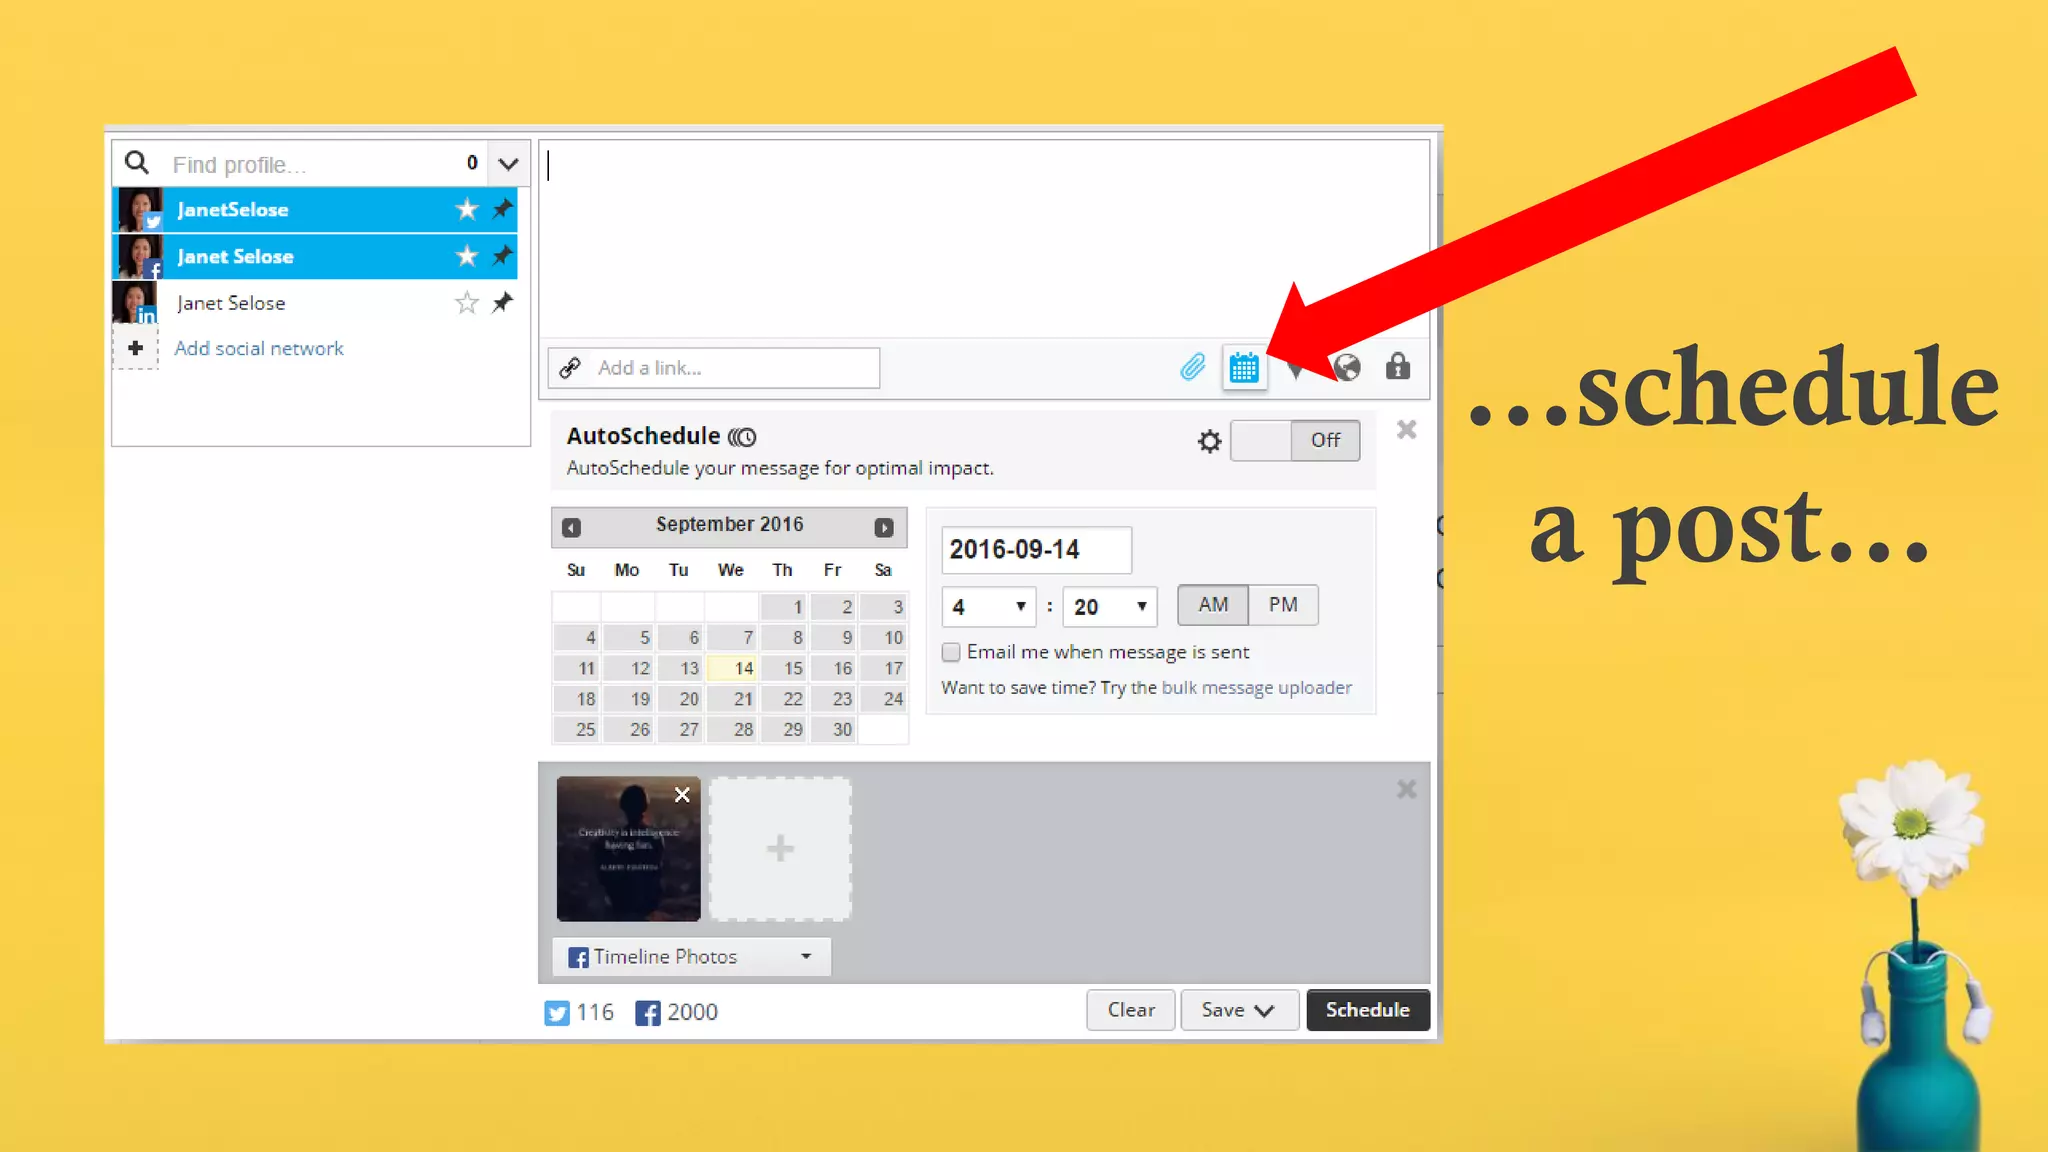
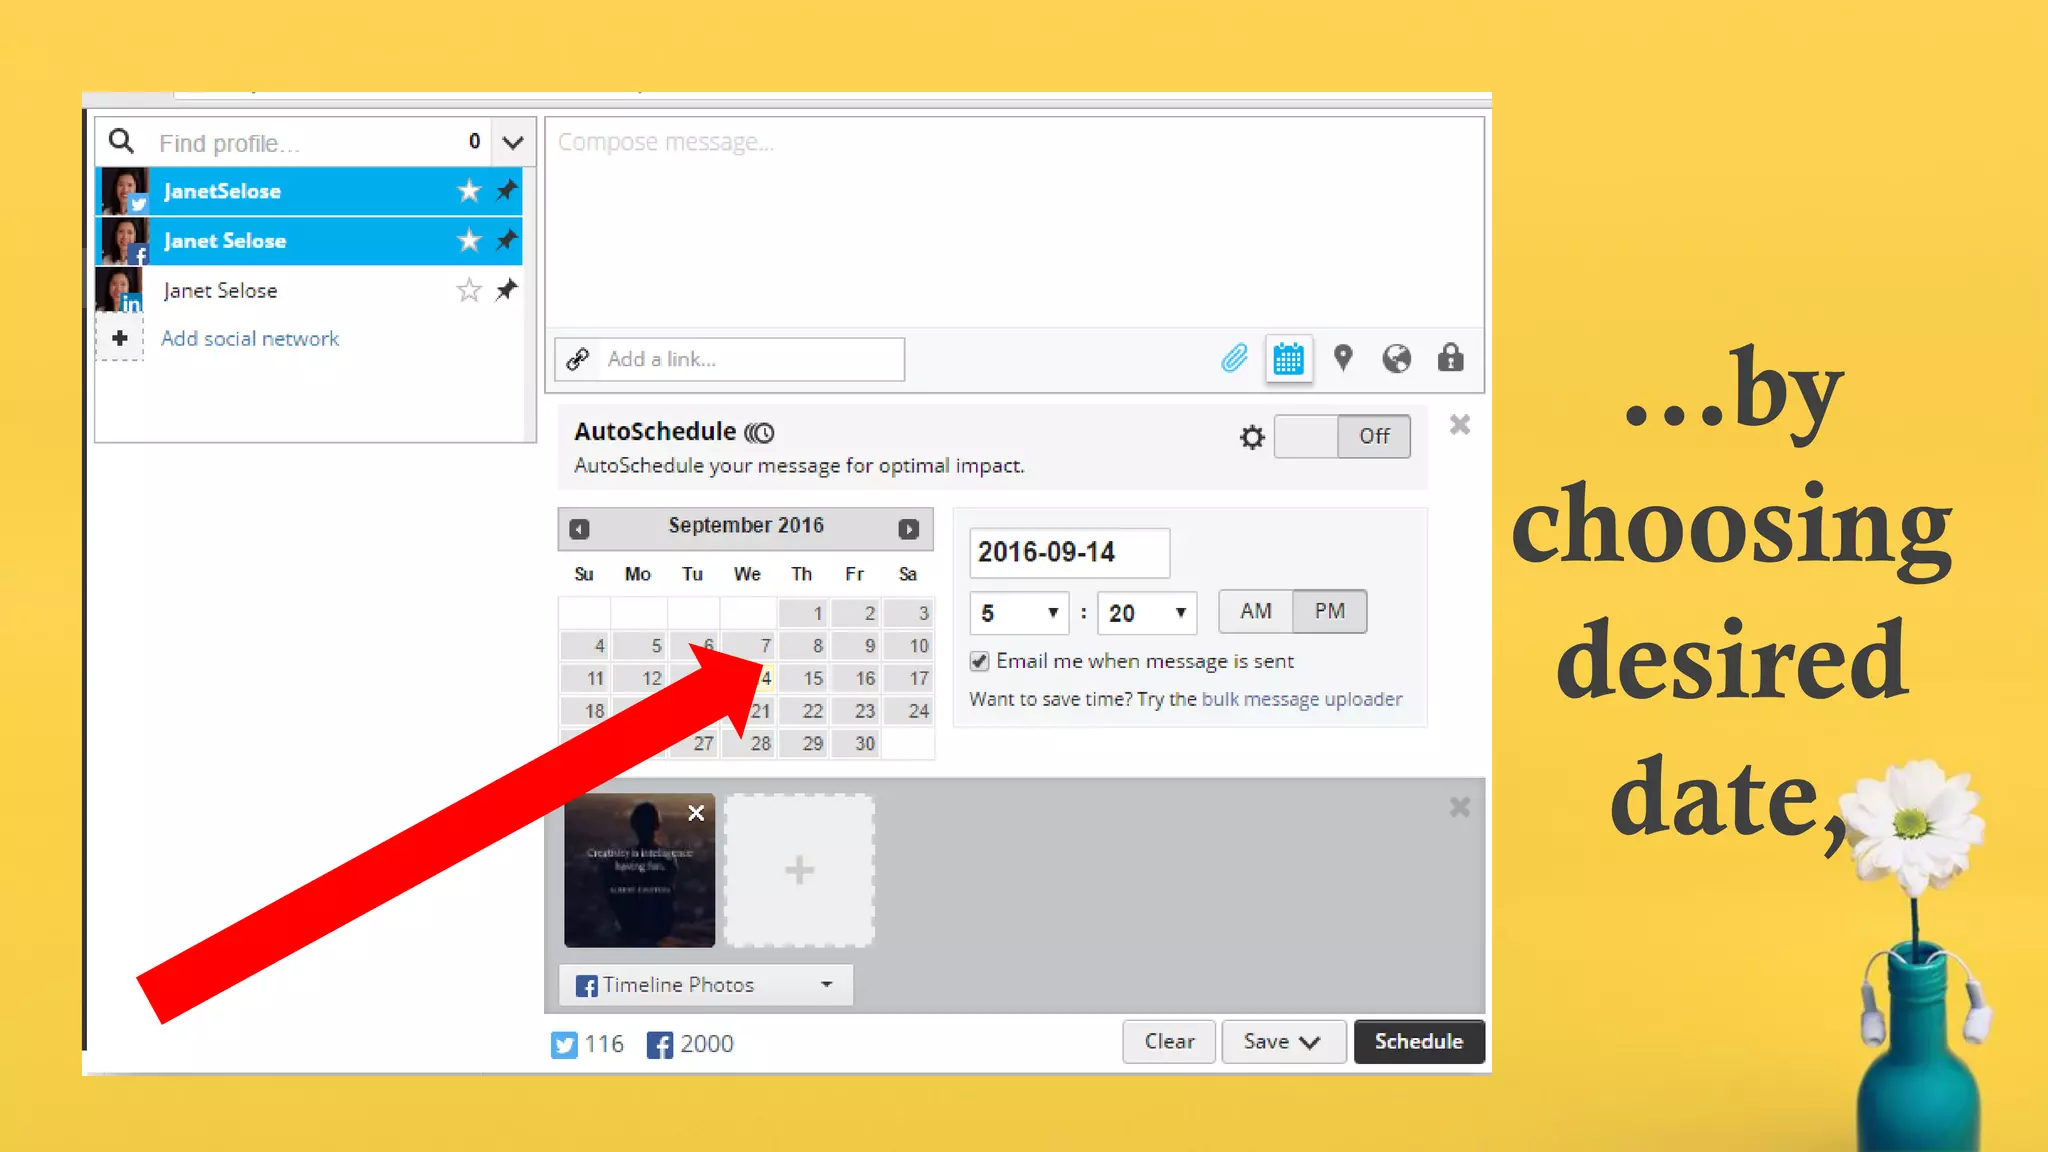
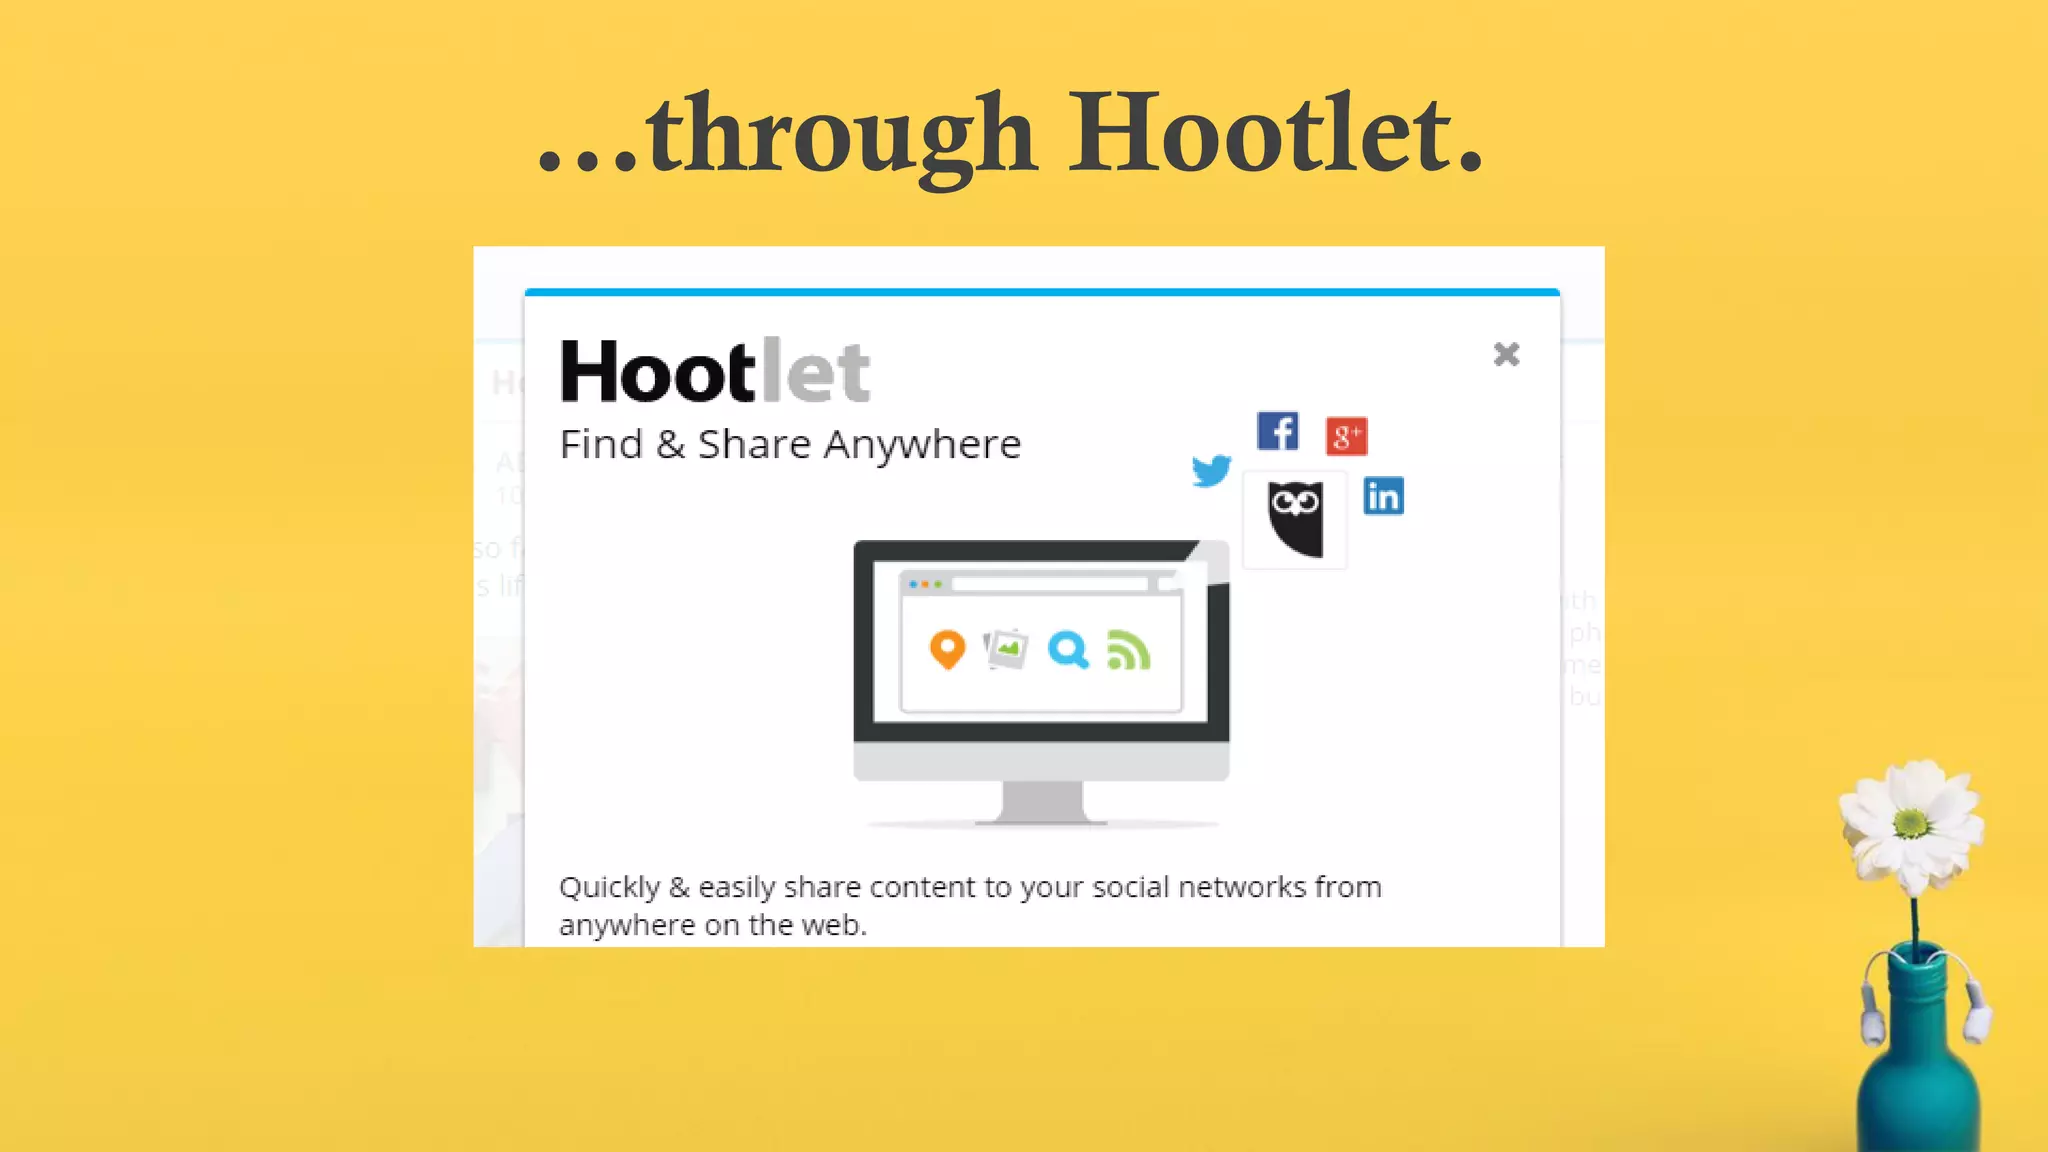
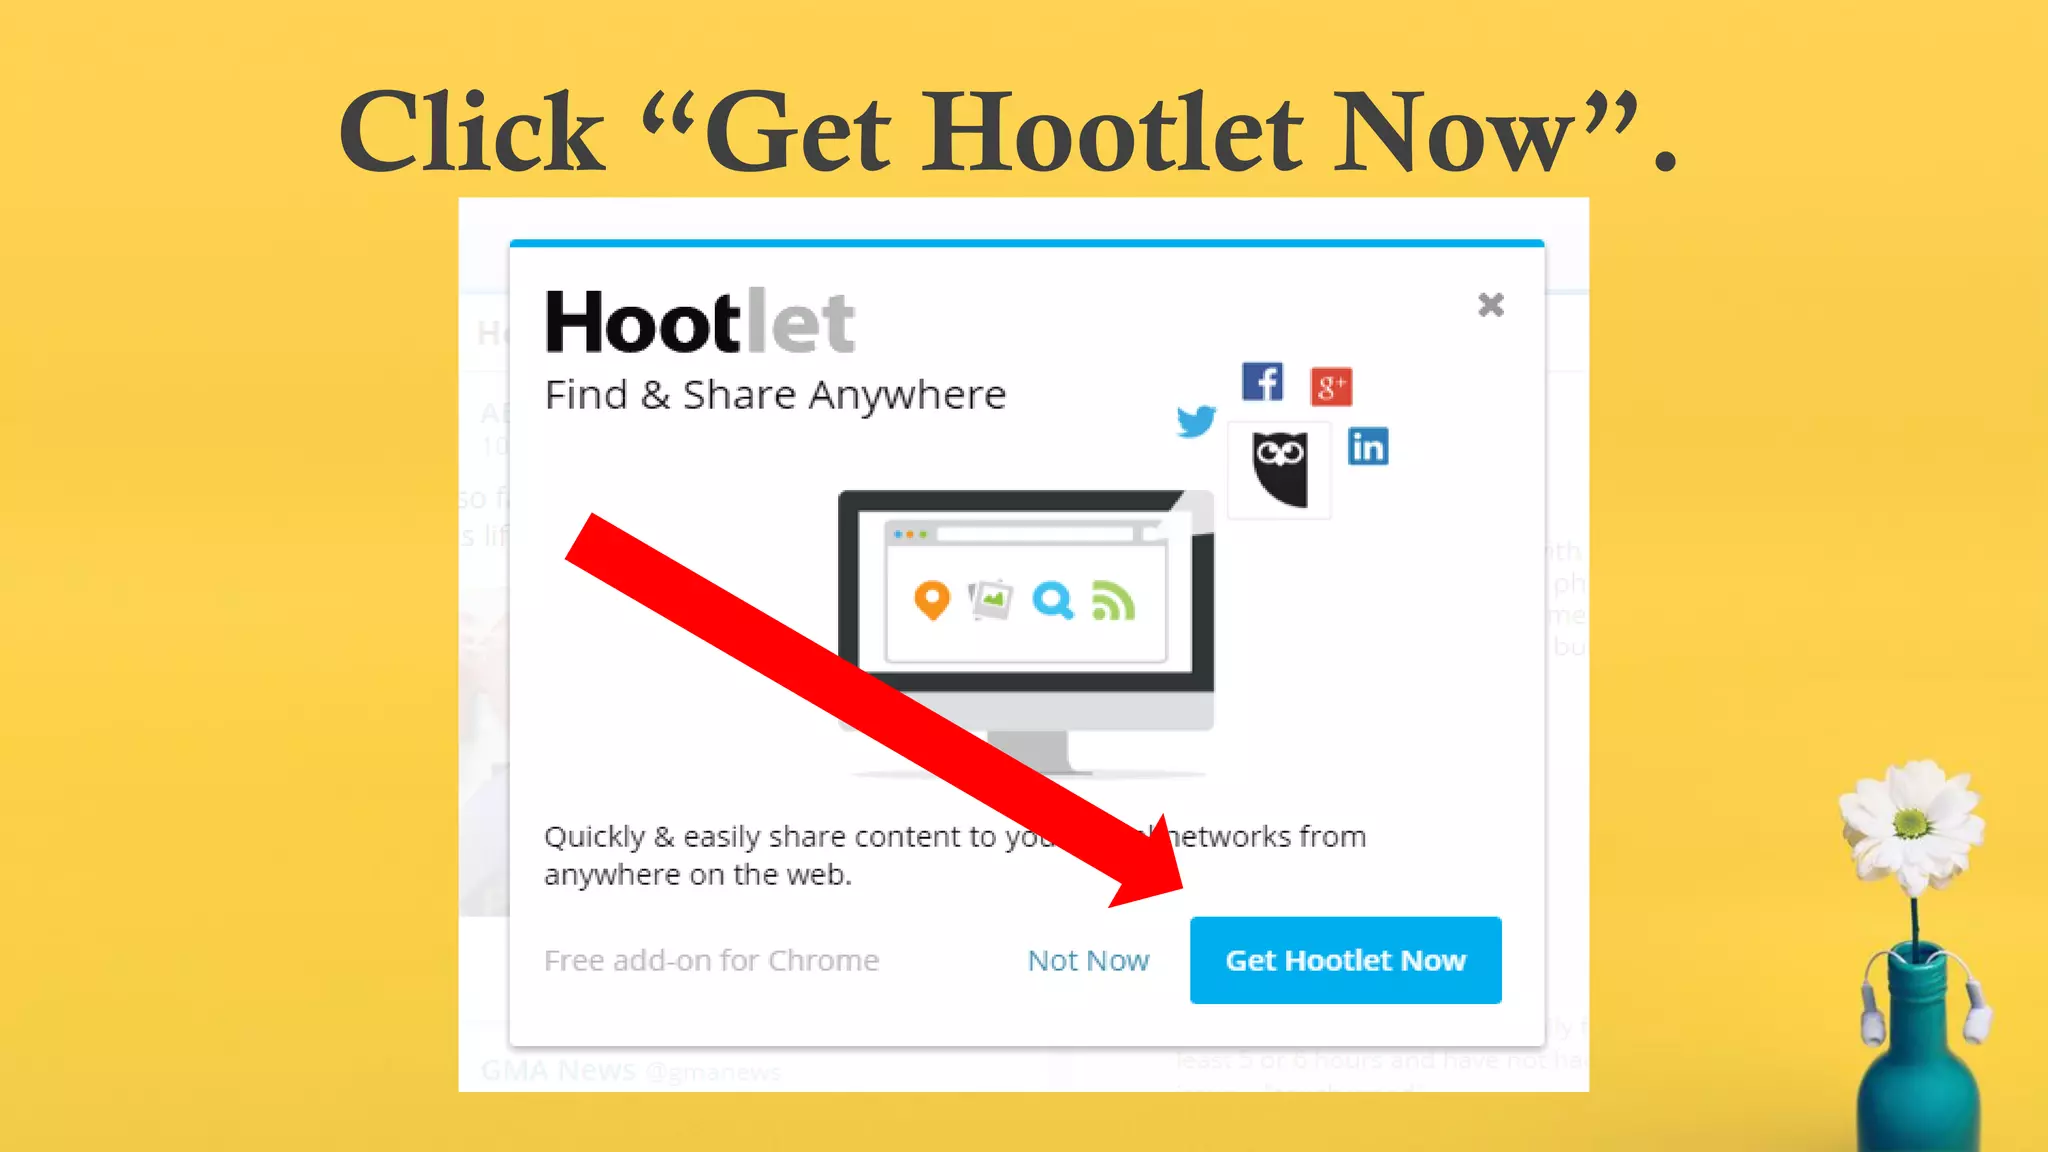
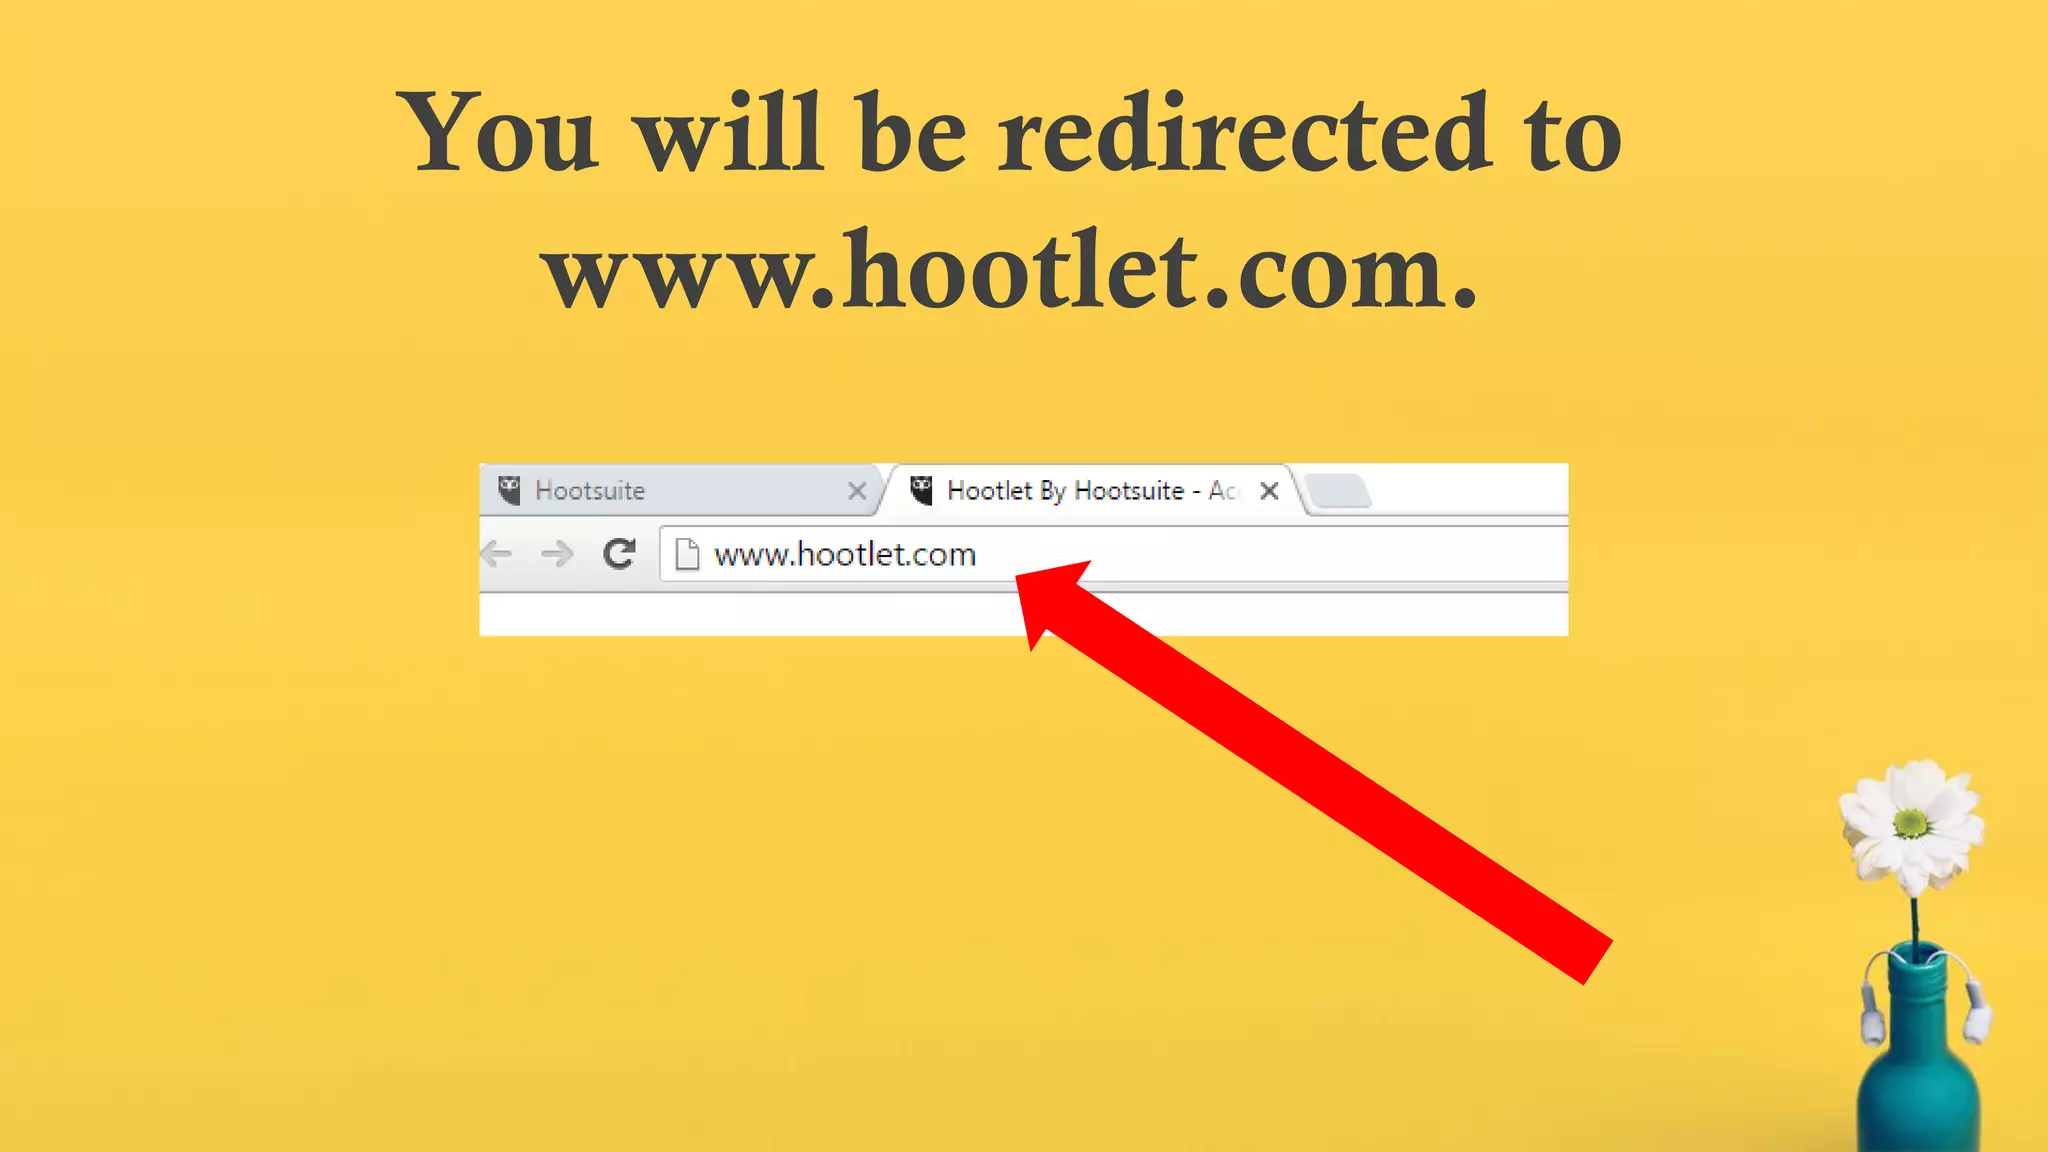
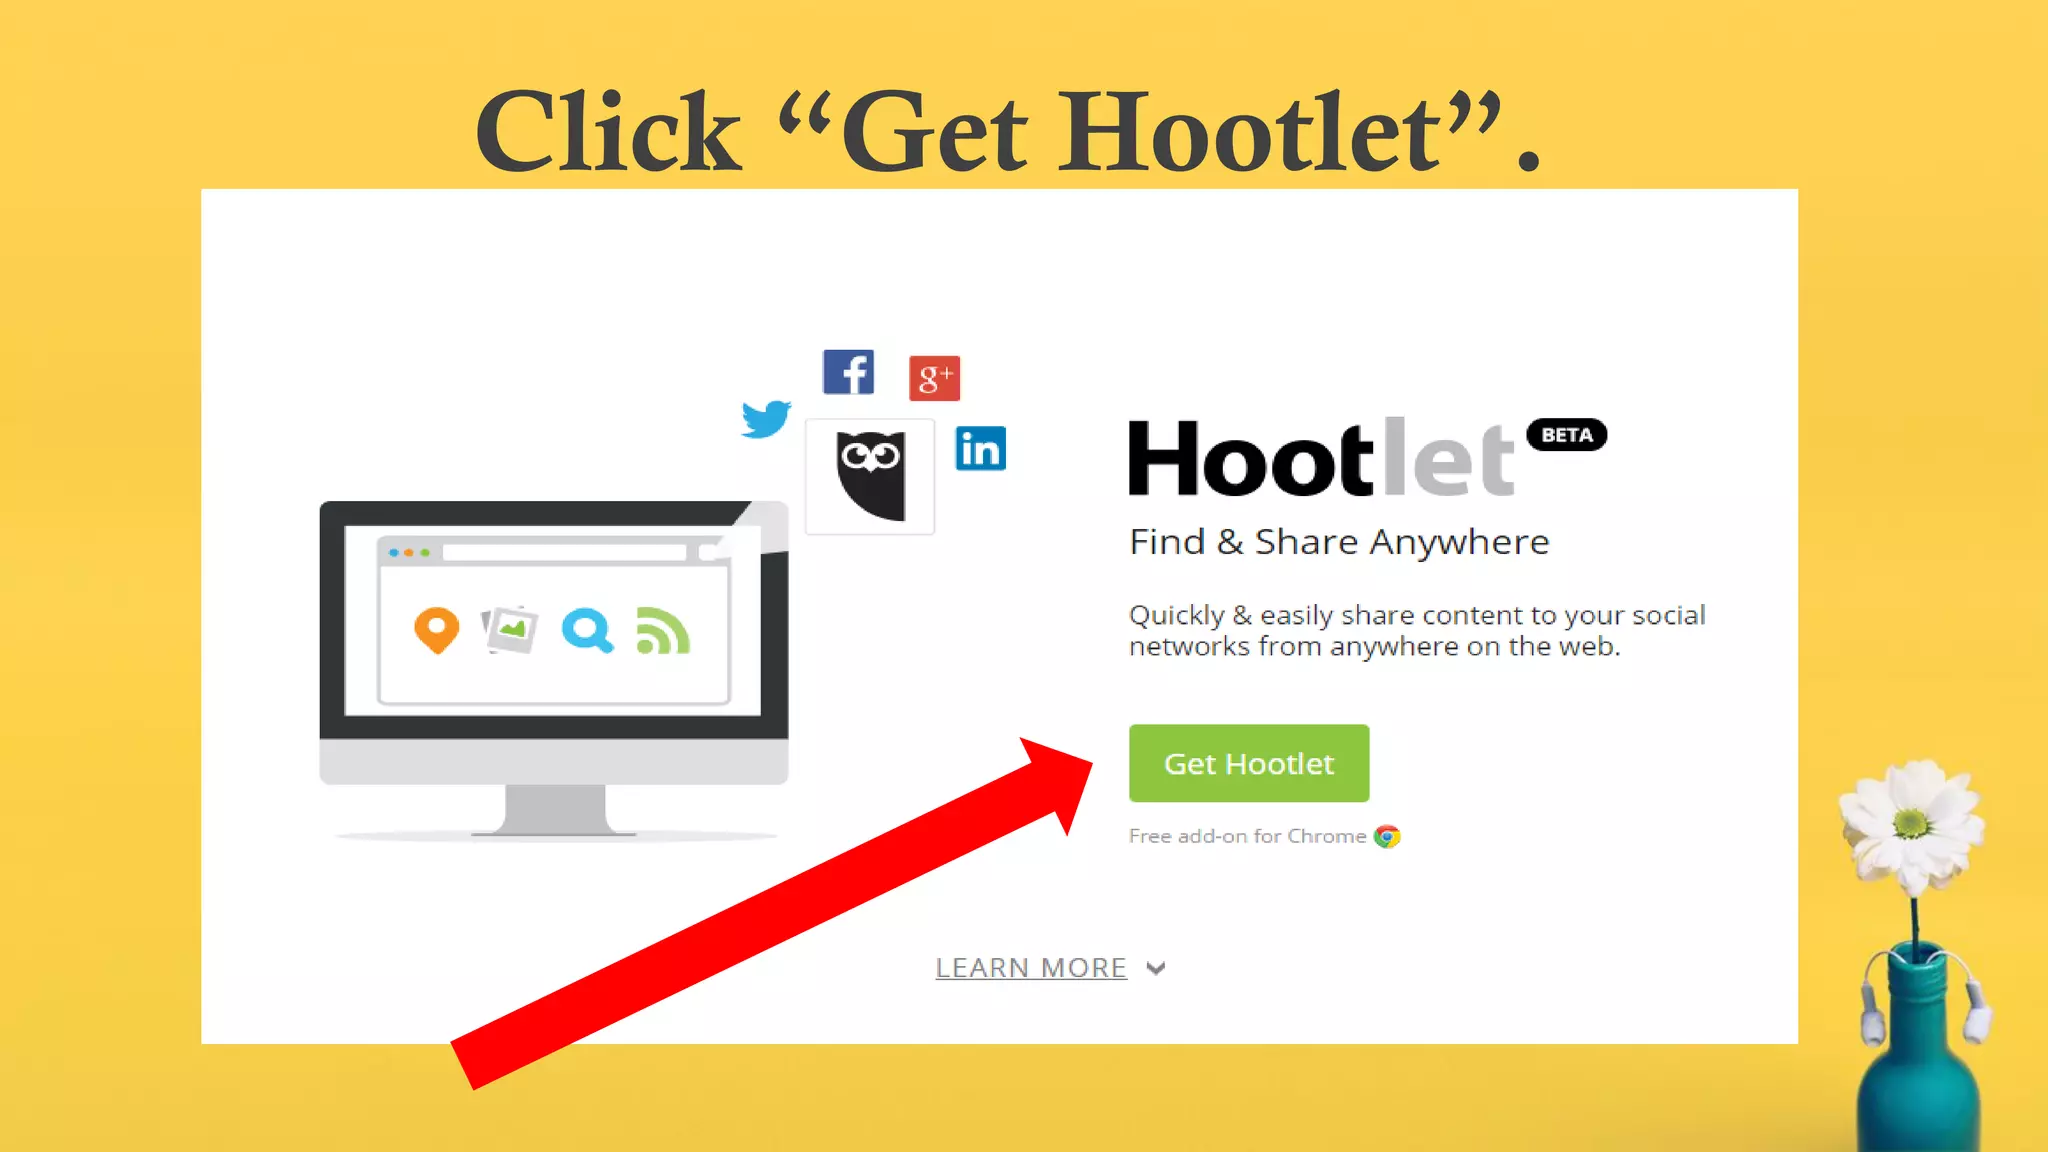
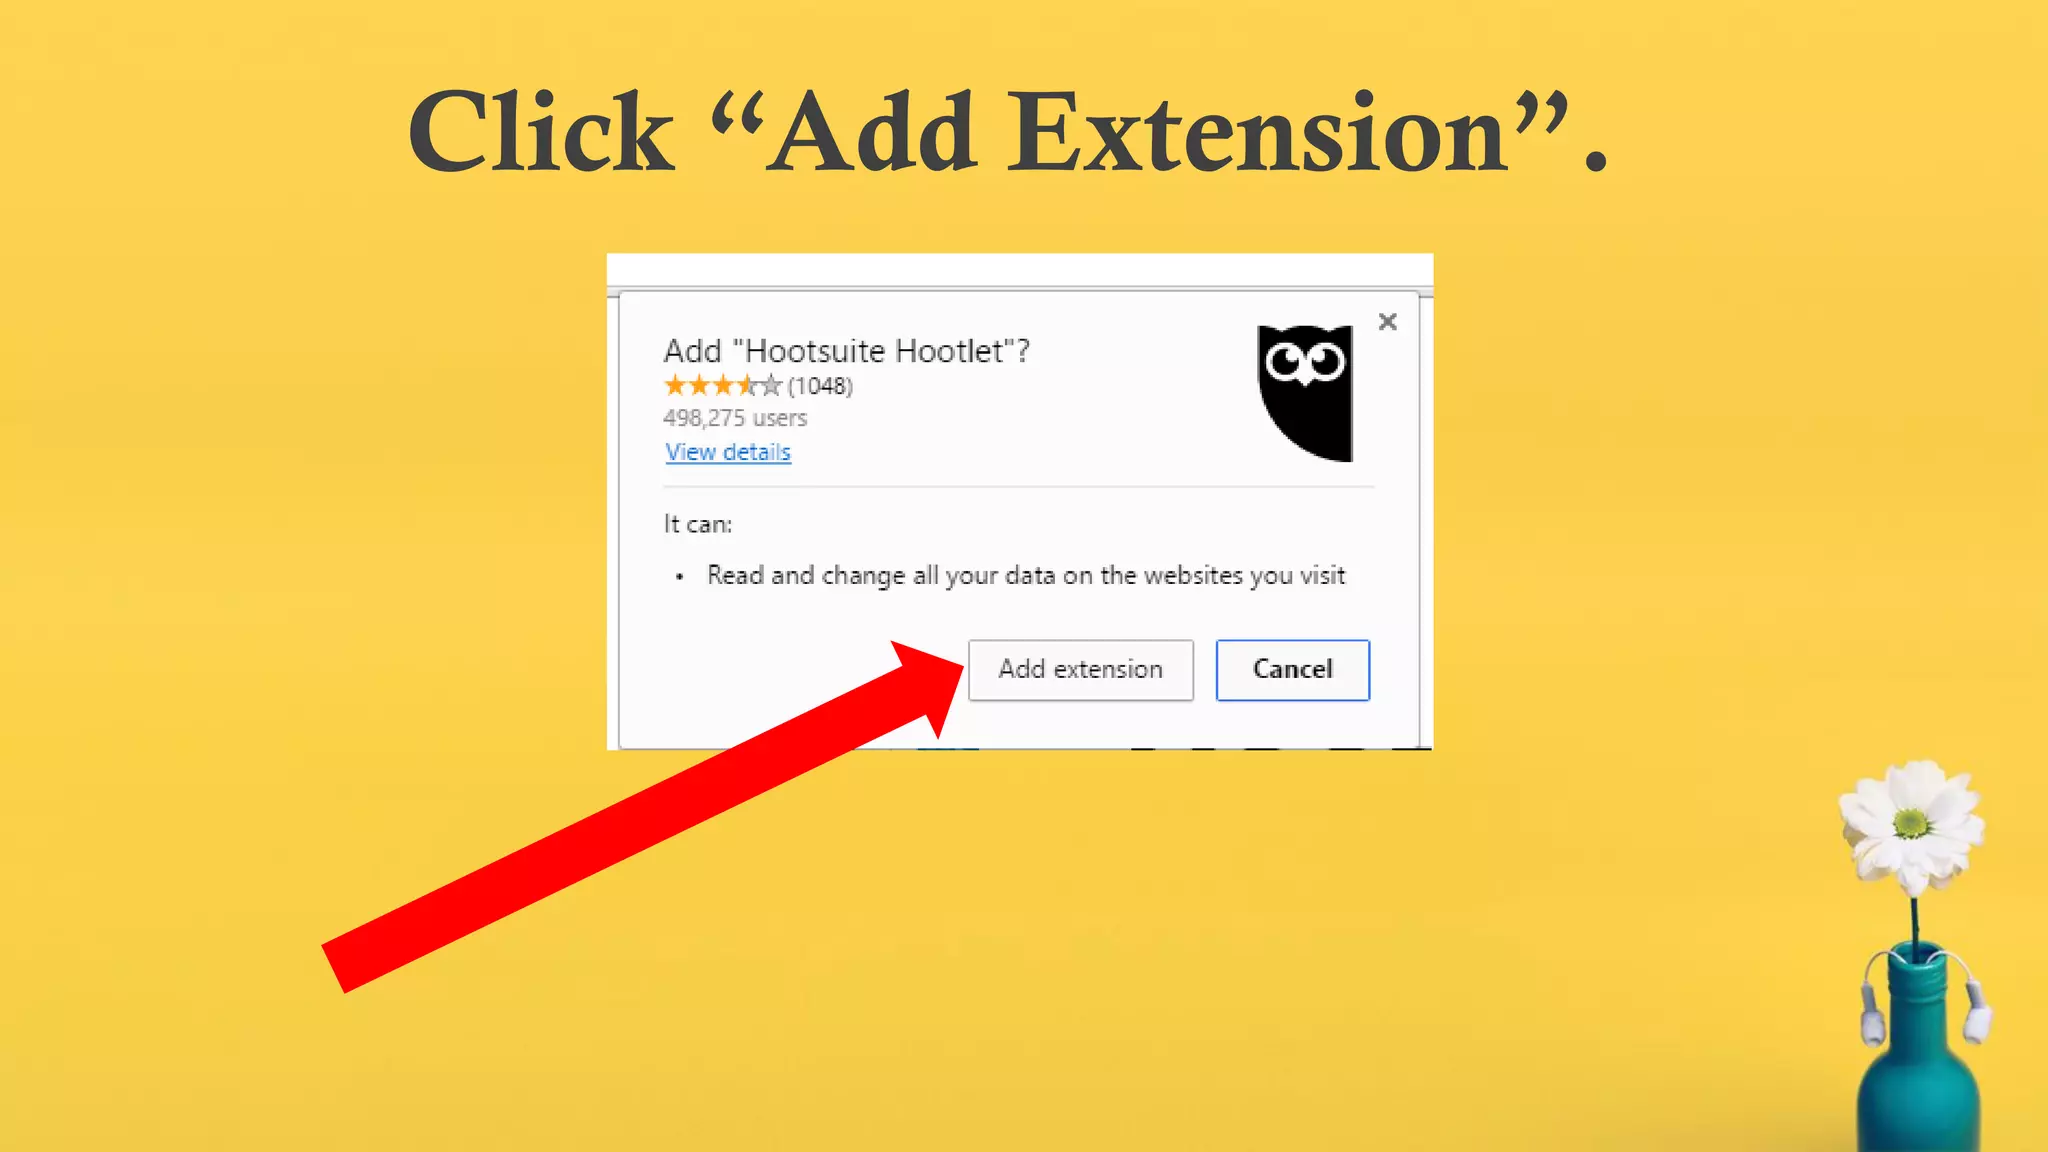
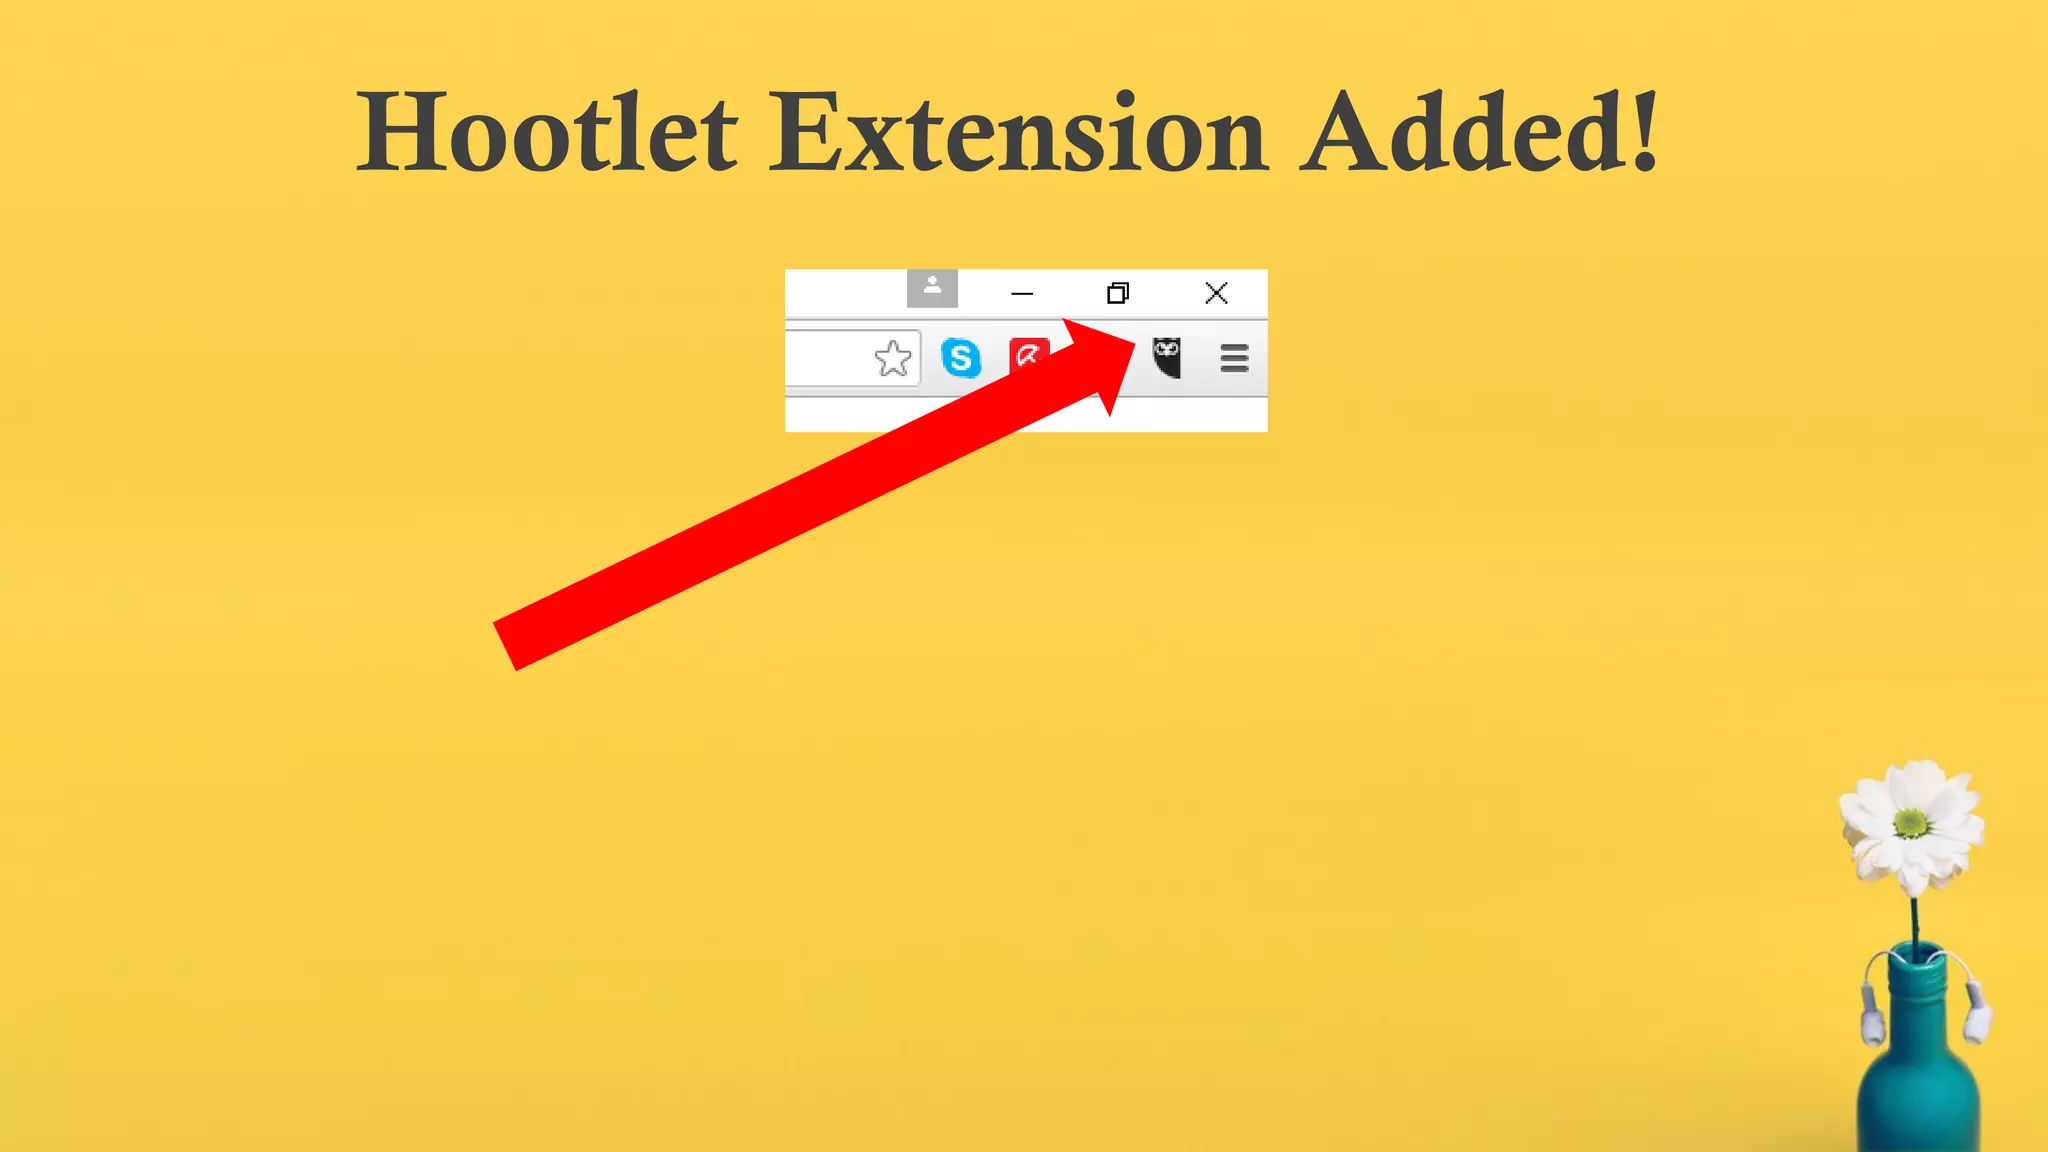
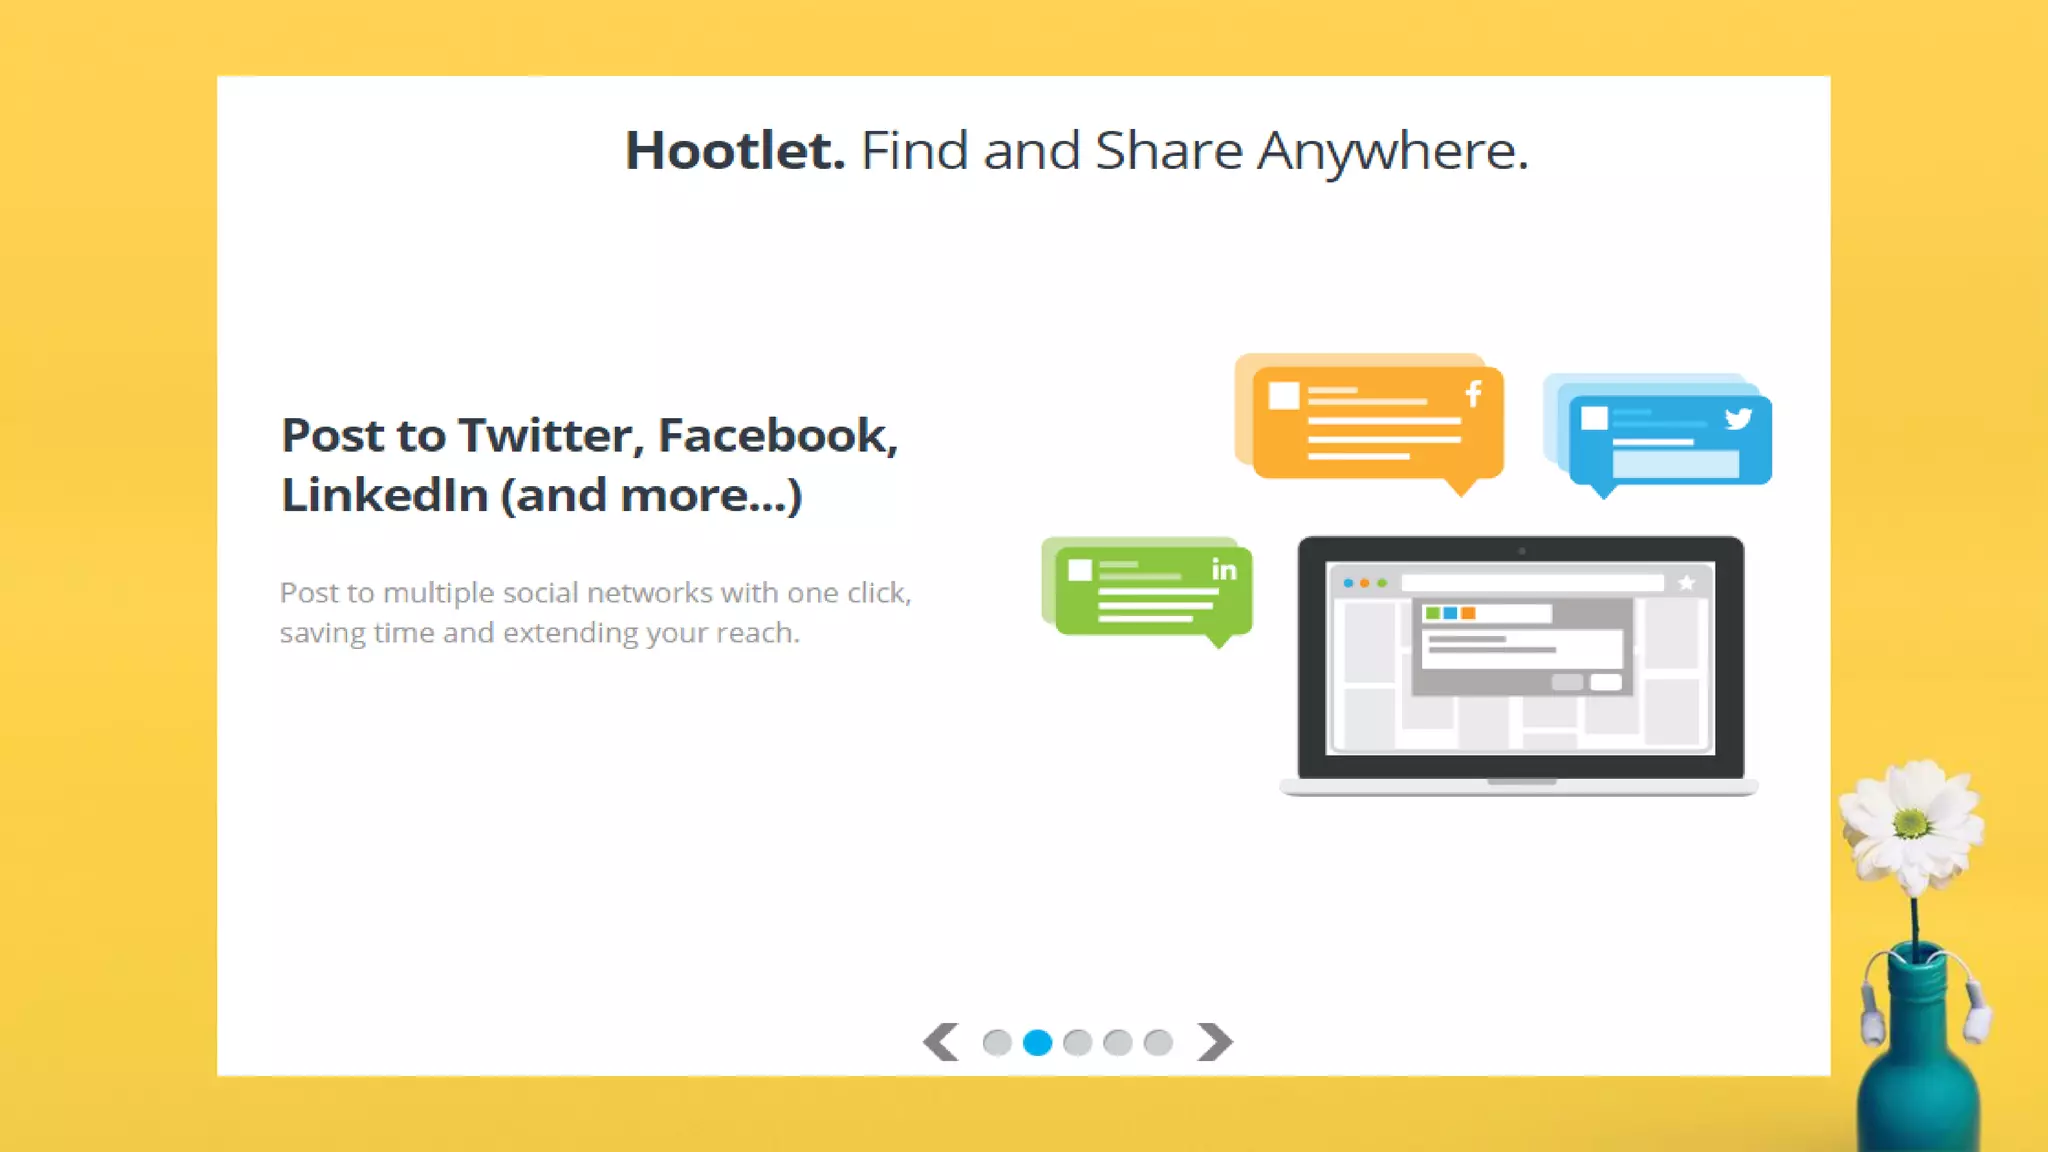
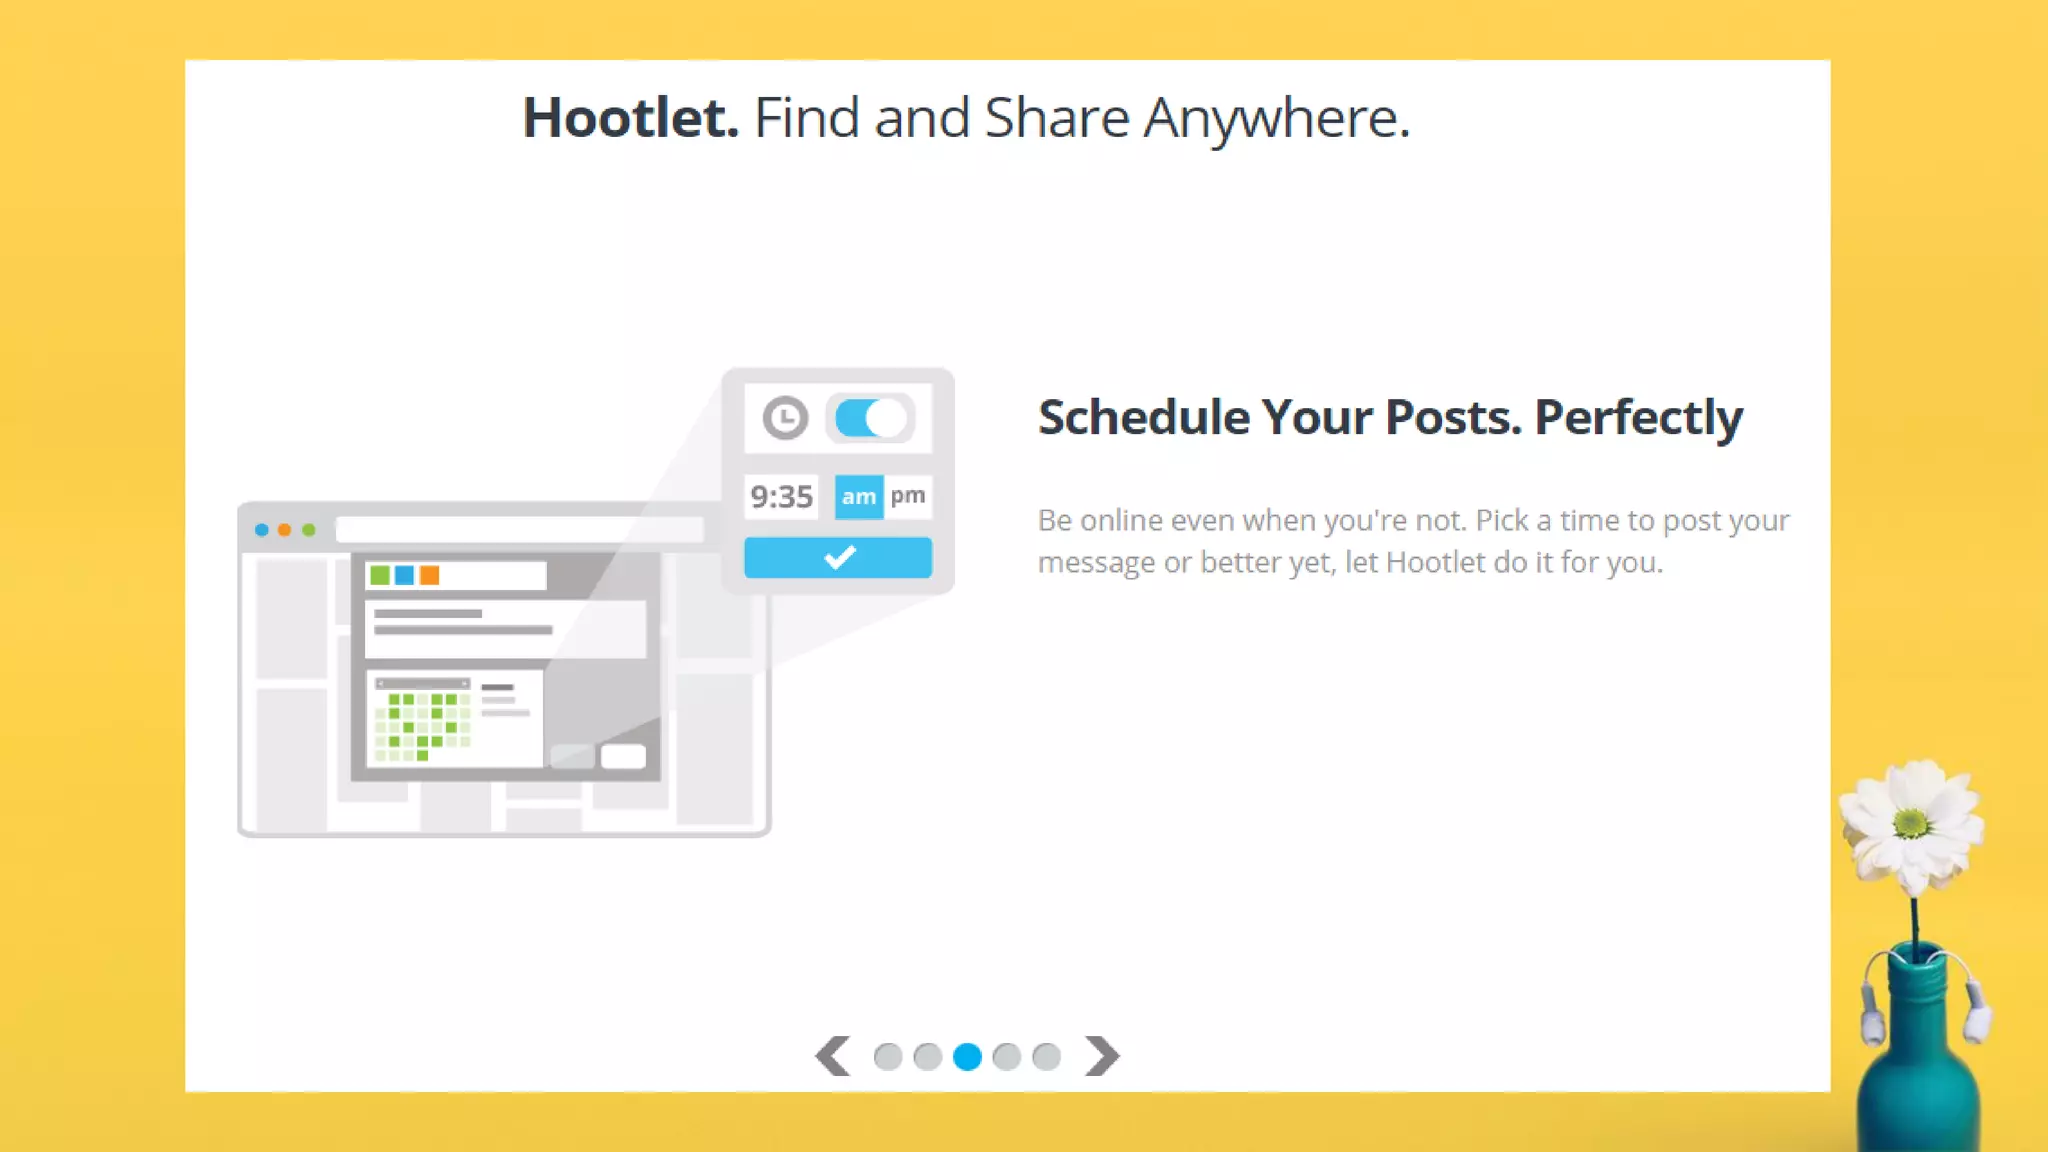
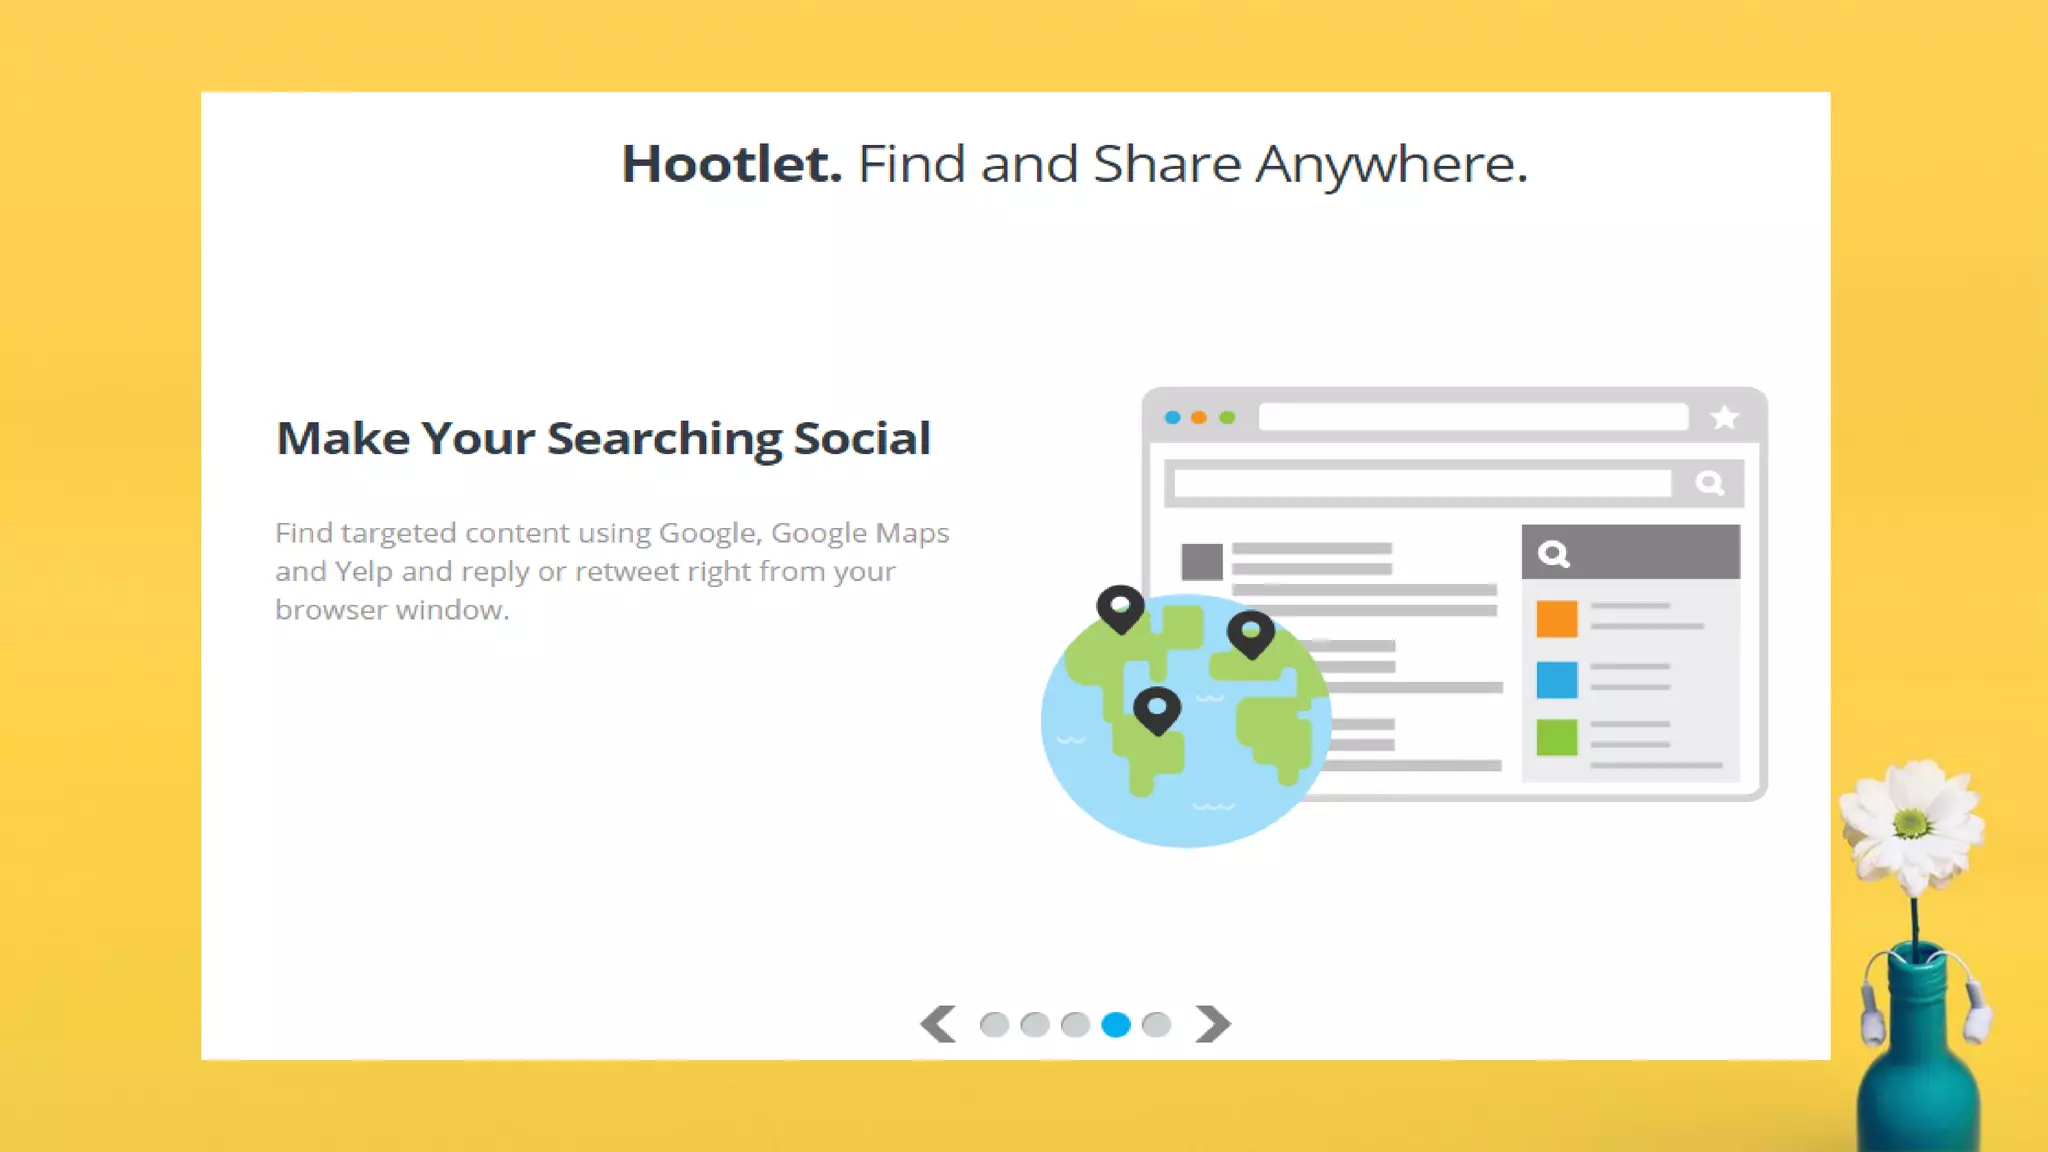
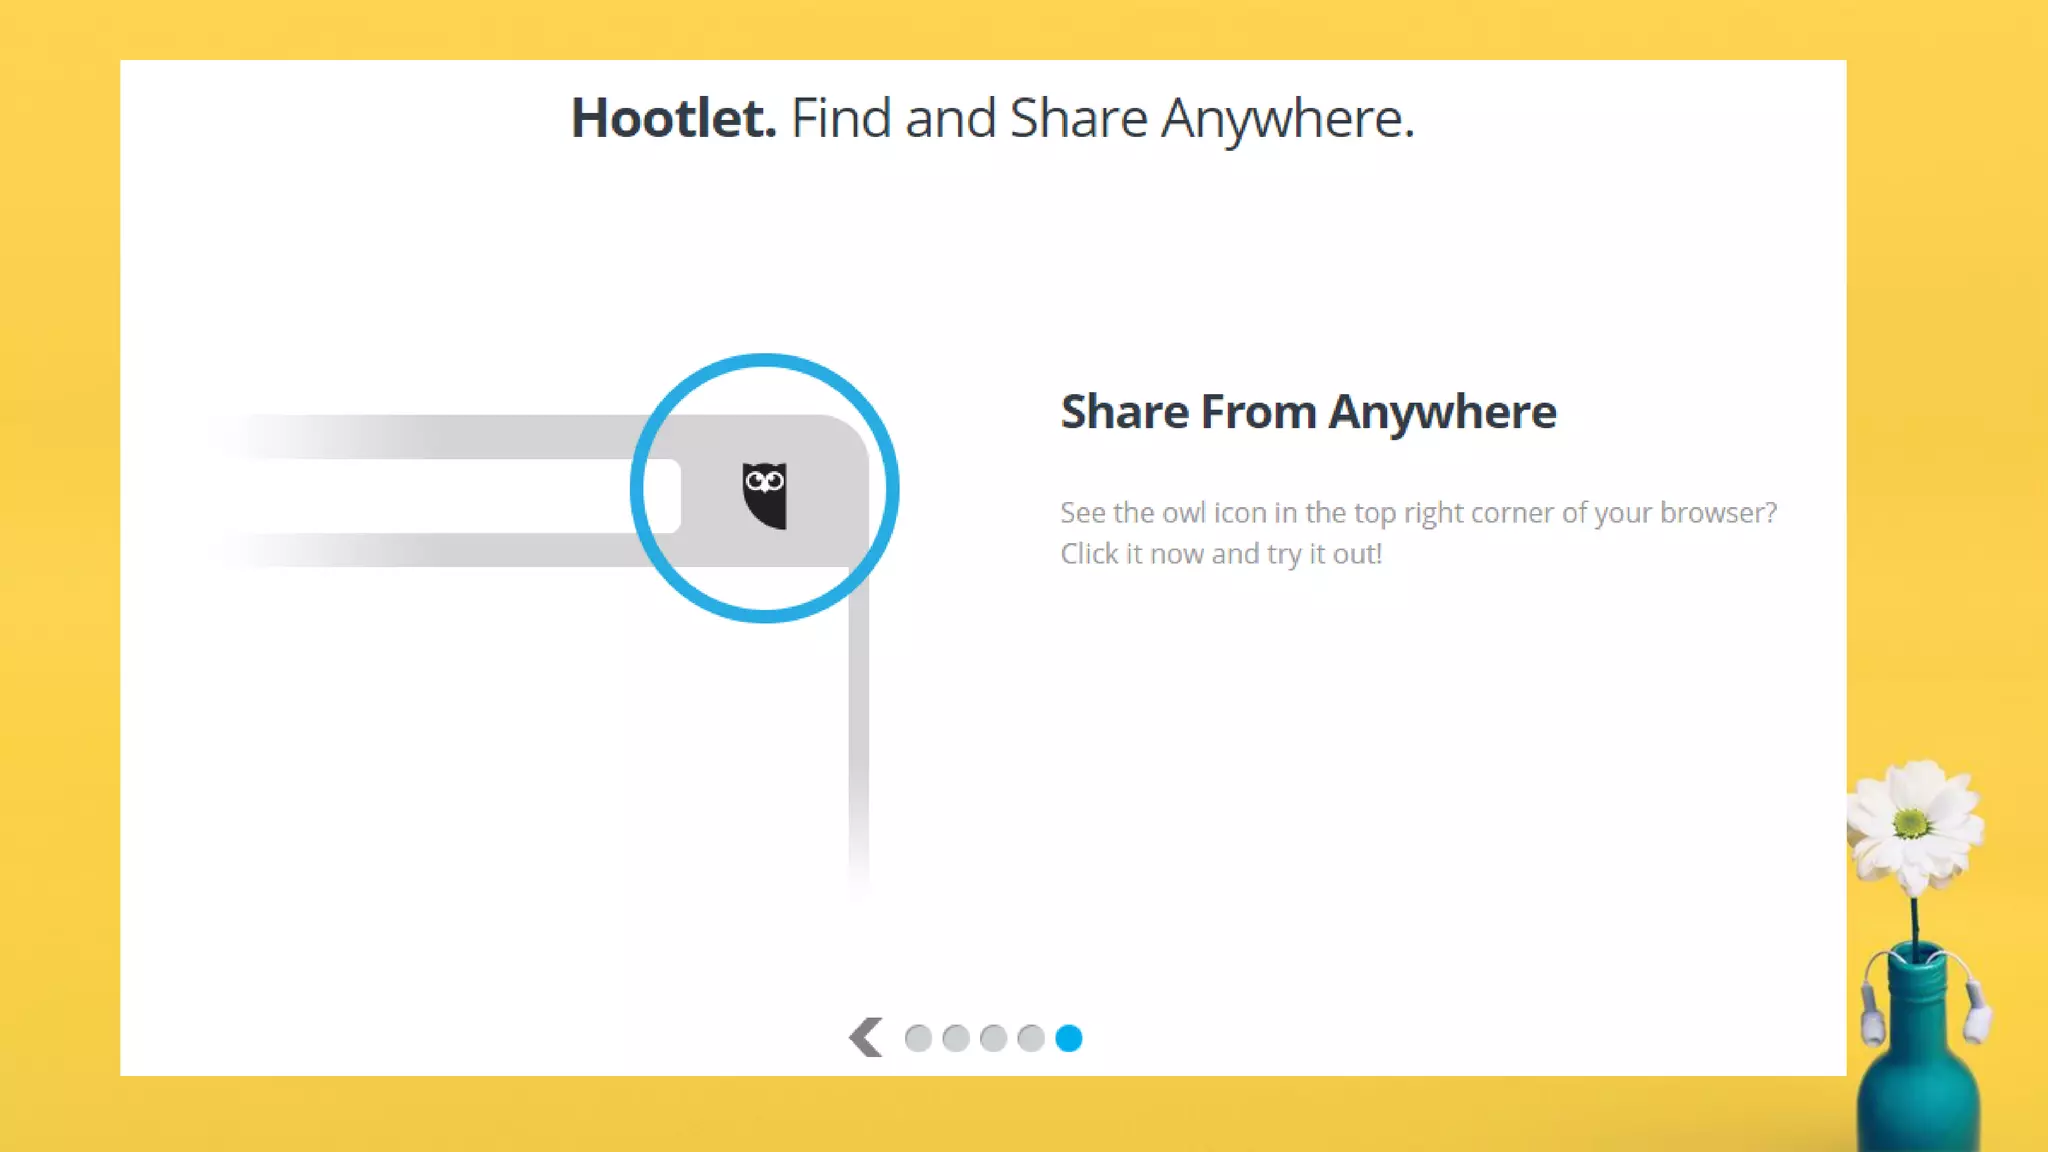
MANAGE MULTIPLE SOCIAL NETWORKS AND
SCHEDULE YOUR POSTS
HOW TO USE
HOOTSUITE
For questions and suggestions about this tutorial, please email me at
janetselose@gmail.com.
Open www.hootsuite.com in
your browser.
Welcome to Hootsuite!
Click “Sign-up”.
Select your plan to get started.
Choose how to create your account,
…either any of your social media
…or by email.
For this tutorial, let’s sign up thru
email.
Click “Create account by email”.
Fill in complete details:
Your name,
…your email,
…and password.
Then click this.
Don’t forget to confirm it in your
email.
Log-in first.
Welcome to our dashboard!
As a newbie, you can use the Wise
Guide…
…found here.
Refer to this to explore Hootsuite.
Let’s add our social network to
Hootsuite.
Navigate thru your
account overview.
Click
“Add a
Social
Network.”
Choose
what social
network you
want to add.
Ex. FB
Click
“Connect”.
Log in to
your
account…
And click
“Continue”.
You can
choose what
you allow.
Click “OK”.
Choose
which FB
account you
can add.
Click “Add
Selected
Accounts”.
FB account
added
successful!
Repeat same process connecting
other social networks.
Adding social network done!
Go back to dashboard to see your
first tab.
Click here.
Click
“Create first
Tab”.
This is
called a
Stream
Builder.
You can create streams to monitor
hashtags,
…brand mentions,
keywords and more.
Let’s try to make a stream on
Facebook.
Click your
FB account.
Streams added
are
Timeline…
FB Timeline added!
…and
Scheduled.
FB Scheduled added!
Follow same process for other
social networks.
Our dashboard now looks like this.
Organize tabs by dragging…
…to desired position.
Take note: You can discover
conversations…
…and engage with anyone on
your dashboard.
Click this to refresh
the stream.
Click this to find
specific post.
Click this for other
options like…
…filter by text only,
…filter by text +
image,
…and to delete
stream.
…and to delete
stream.
Now, let’s schedule a post.
Click
“Publisher”.
Publisher looks like this.
Click here to select social networks.
Let’s make a scheduled posts to FB
and Twitter.
Click your FB and Twitter accounts.
Compose your message here.
You can add a link,
…attach media,
…schedule
a post…
…by
choosing
desired
date,
…desired
time,
…and
clicking
this.
You can
add
location.
Click
“Allow.
Set
targeting
options...
…like this.
Click this for privacy settings.
Choose privacy options.
Click “Schedule”.
Here’s our Scheduled Dashboard.
Click here to delete it.
Click here to export it to CSV file.
Scheduled post as seen on dashboard:
Let’s quickly share content to all our
social networks…
…through Hootlet.
Click “Get Hootlet Now”.
You will be redirected to
www.hootlet.com.
Click “Get Hootlet”.
Click “Add Extension”.
Hootlet Extension Added!
A little exploration on Hootlet:
We’re done with Hootsuite!
Now, go and explore it yourself!
How To Use Hootsuite

How To Use Hootsuite