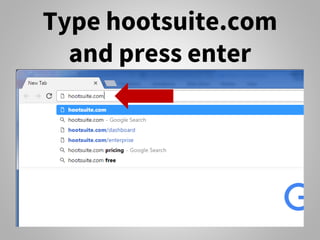
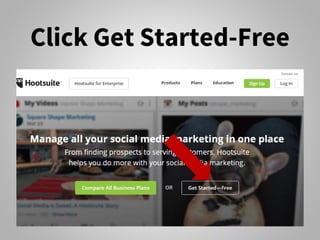
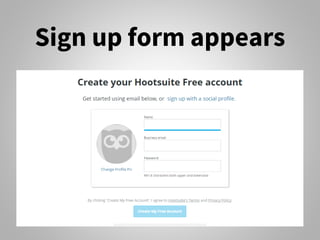
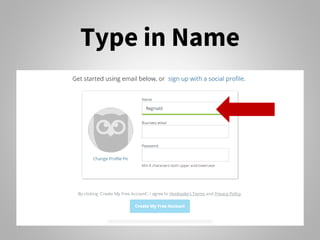
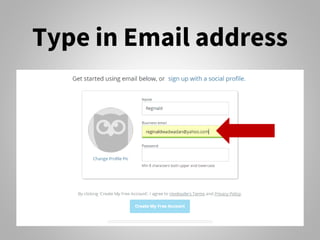
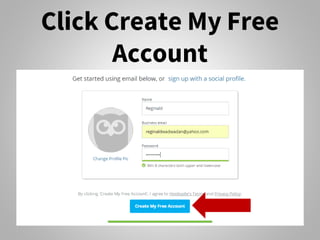
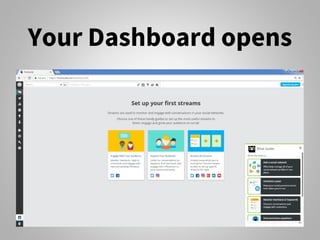
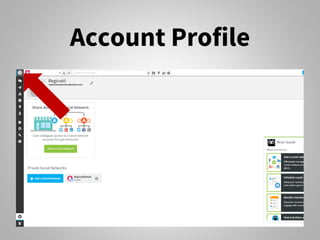
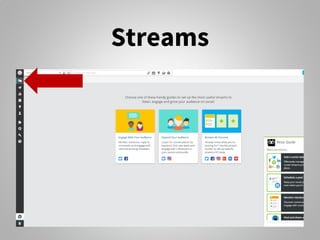
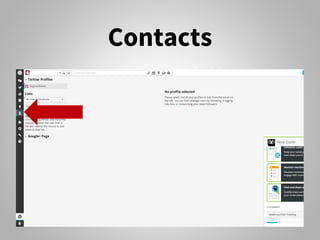
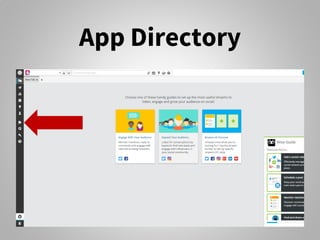
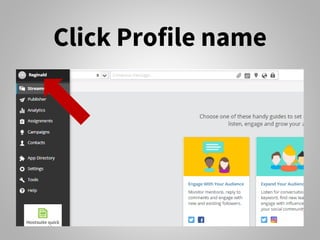
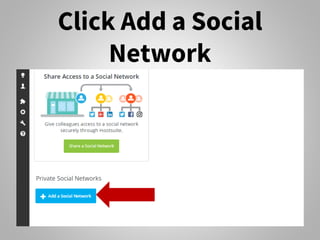
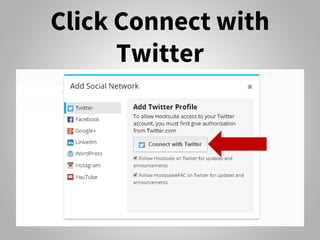
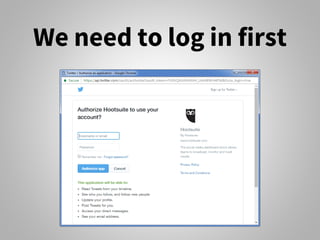
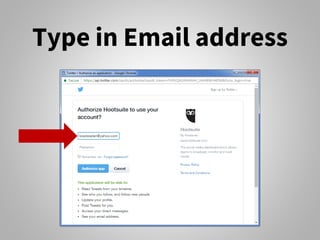
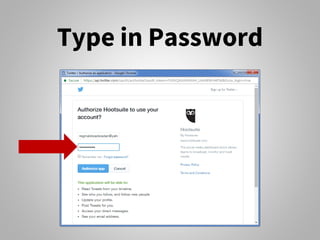
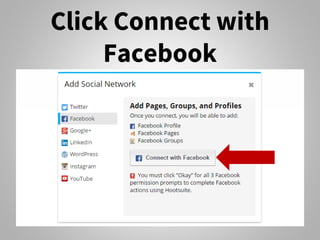
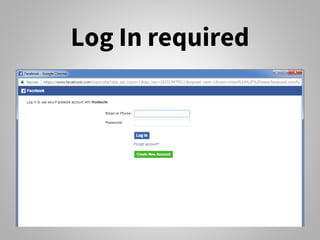
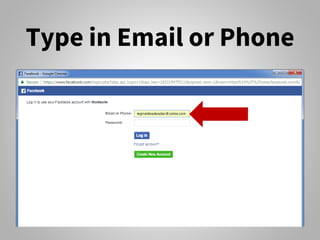
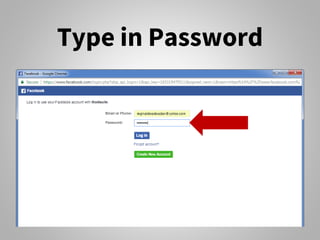
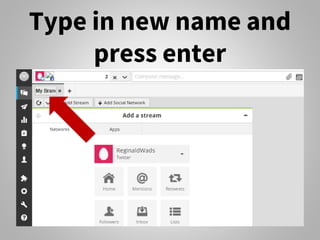
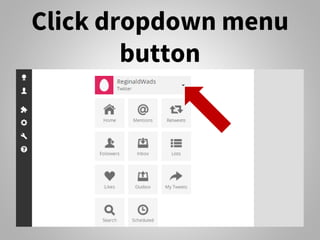
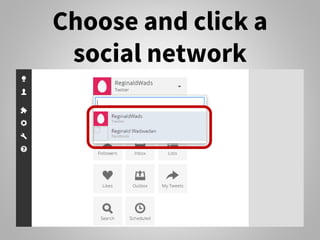
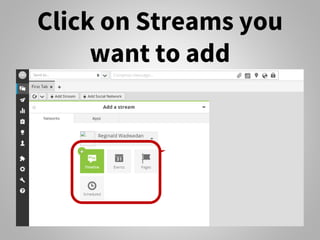
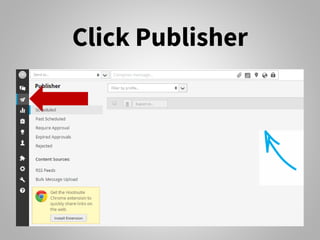
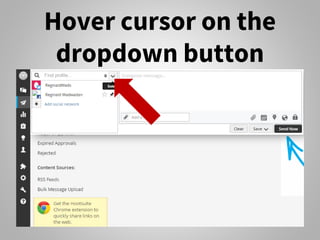
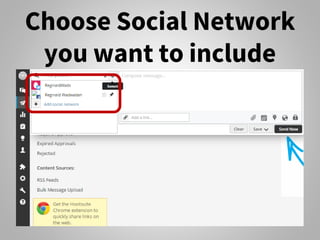
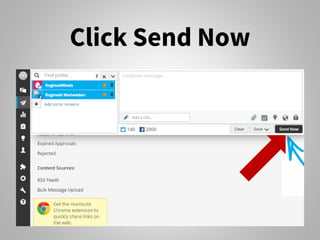
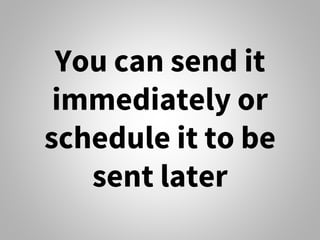
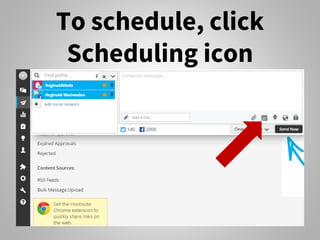
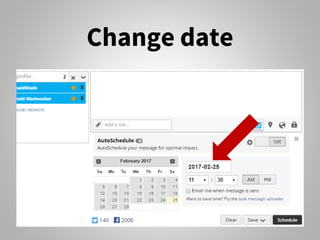
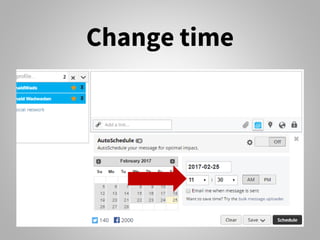
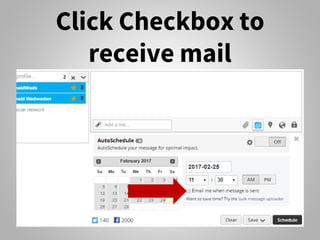
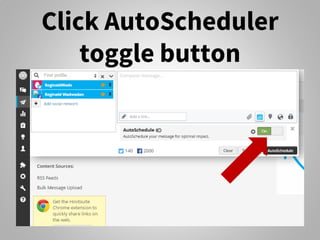
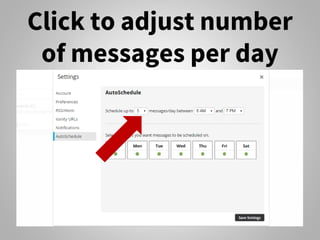
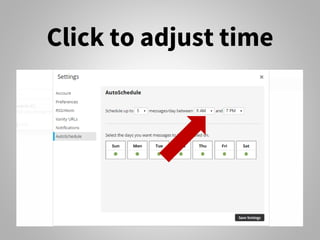
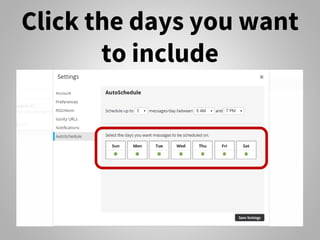
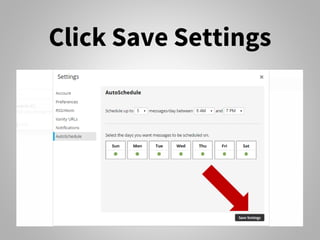
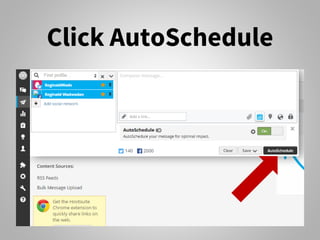
HOW TO USE
Created by: Reginald Wadwadan
Email: reginaldwadwadan@yahoo.com
Hootsuite
Let’s first create a
Hootsuite account
Open your favorite
browser
Type hootsuite.com
and press enter
Hootsuite main page
opens
If you’re using
Hootsuite for
business, check
business plans
Click Compare All
Business Plans
Select the best plan
for you
For this tutorial,
we’ll use free
account
Click Get Started-Free
Sign up form appears
Type in Name
Type in Email address
Type in Password
Click Create My Free
Account
Your Dashboard opens
Let’s go over the
Dashboard menu
Account Profile
Account Profile is
where you add a
social network and
share access
Streams
Streams is where
you easily monitor
your social
networks
Publisher
Publisher is where
you create, edit and
view all scheduled
posts.
Analytics
Analytics is where
you monitor your
success and create
reports
Assignments
Assignments is
where you assign
or be assigned
Campaigns
Campaigns is
where you create
sweepstakes,
galleries, and
contests
Contacts
Contacts is where
you see your social
media connections
App Directory
App directory is
where you search
additional useful
apps
Settings
Settings is where
you add or change
your account info
and settings
Tools
Tools is where you
get training and
certifications
Help
Help is where you
find answers for
any Hootsuite
queries
Let’s start adding
social networks
Click Profile name
Click Add a Social
Network
Let’s add Twitter
Click Connect with
Twitter
We need to log in first
Type in Email address
Type in Password
Click Authorize app
Twitter is now added
Let’s add Facebook
Click Add a Social
Network
Click Facebook
Click Connect with
Facebook
Log In required
Type in Email or Phone
Type in Password
Click Log In
Click Continue
Click OK
Click Choose what you
allow
Choose what you allow
Click Ok
Click account to add
Click Done
Facebook account is
now added
Free account can
let you manage 3
Social Networks
only
Let’s set up tabs
and streams
Click Streams
Click Browse All
Streams
Click tab to rename
Type in new name and
press enter
Click dropdown menu
button
Choose and click a
social network
Click on Streams you
want to add
Streams look like this
Now let’s schedule
and publish
Click Publisher
Hover cursor on the
dropdown button
Choose Social Network
you want to include
Click star or pin icon to
select
Click and Compose
message
Add a link
Attach media
Click Send Now
You can send it
immediately or
schedule it to be
sent later
To schedule, click
Scheduling icon
Change date
Change time
Click Checkbox to
receive mail
Click Schedule
You can
automatically
queue posts for
optimal times
Using the
AutoScheduler
Click AutoScheduler
toggle button
Click Settings
Click to adjust number
of messages per day
Click to adjust time
Click the days you want
to include
Click Save Settings
Click AutoSchedule
Congratulations!
Do more in lesser time
using

How to Use Hootsuite