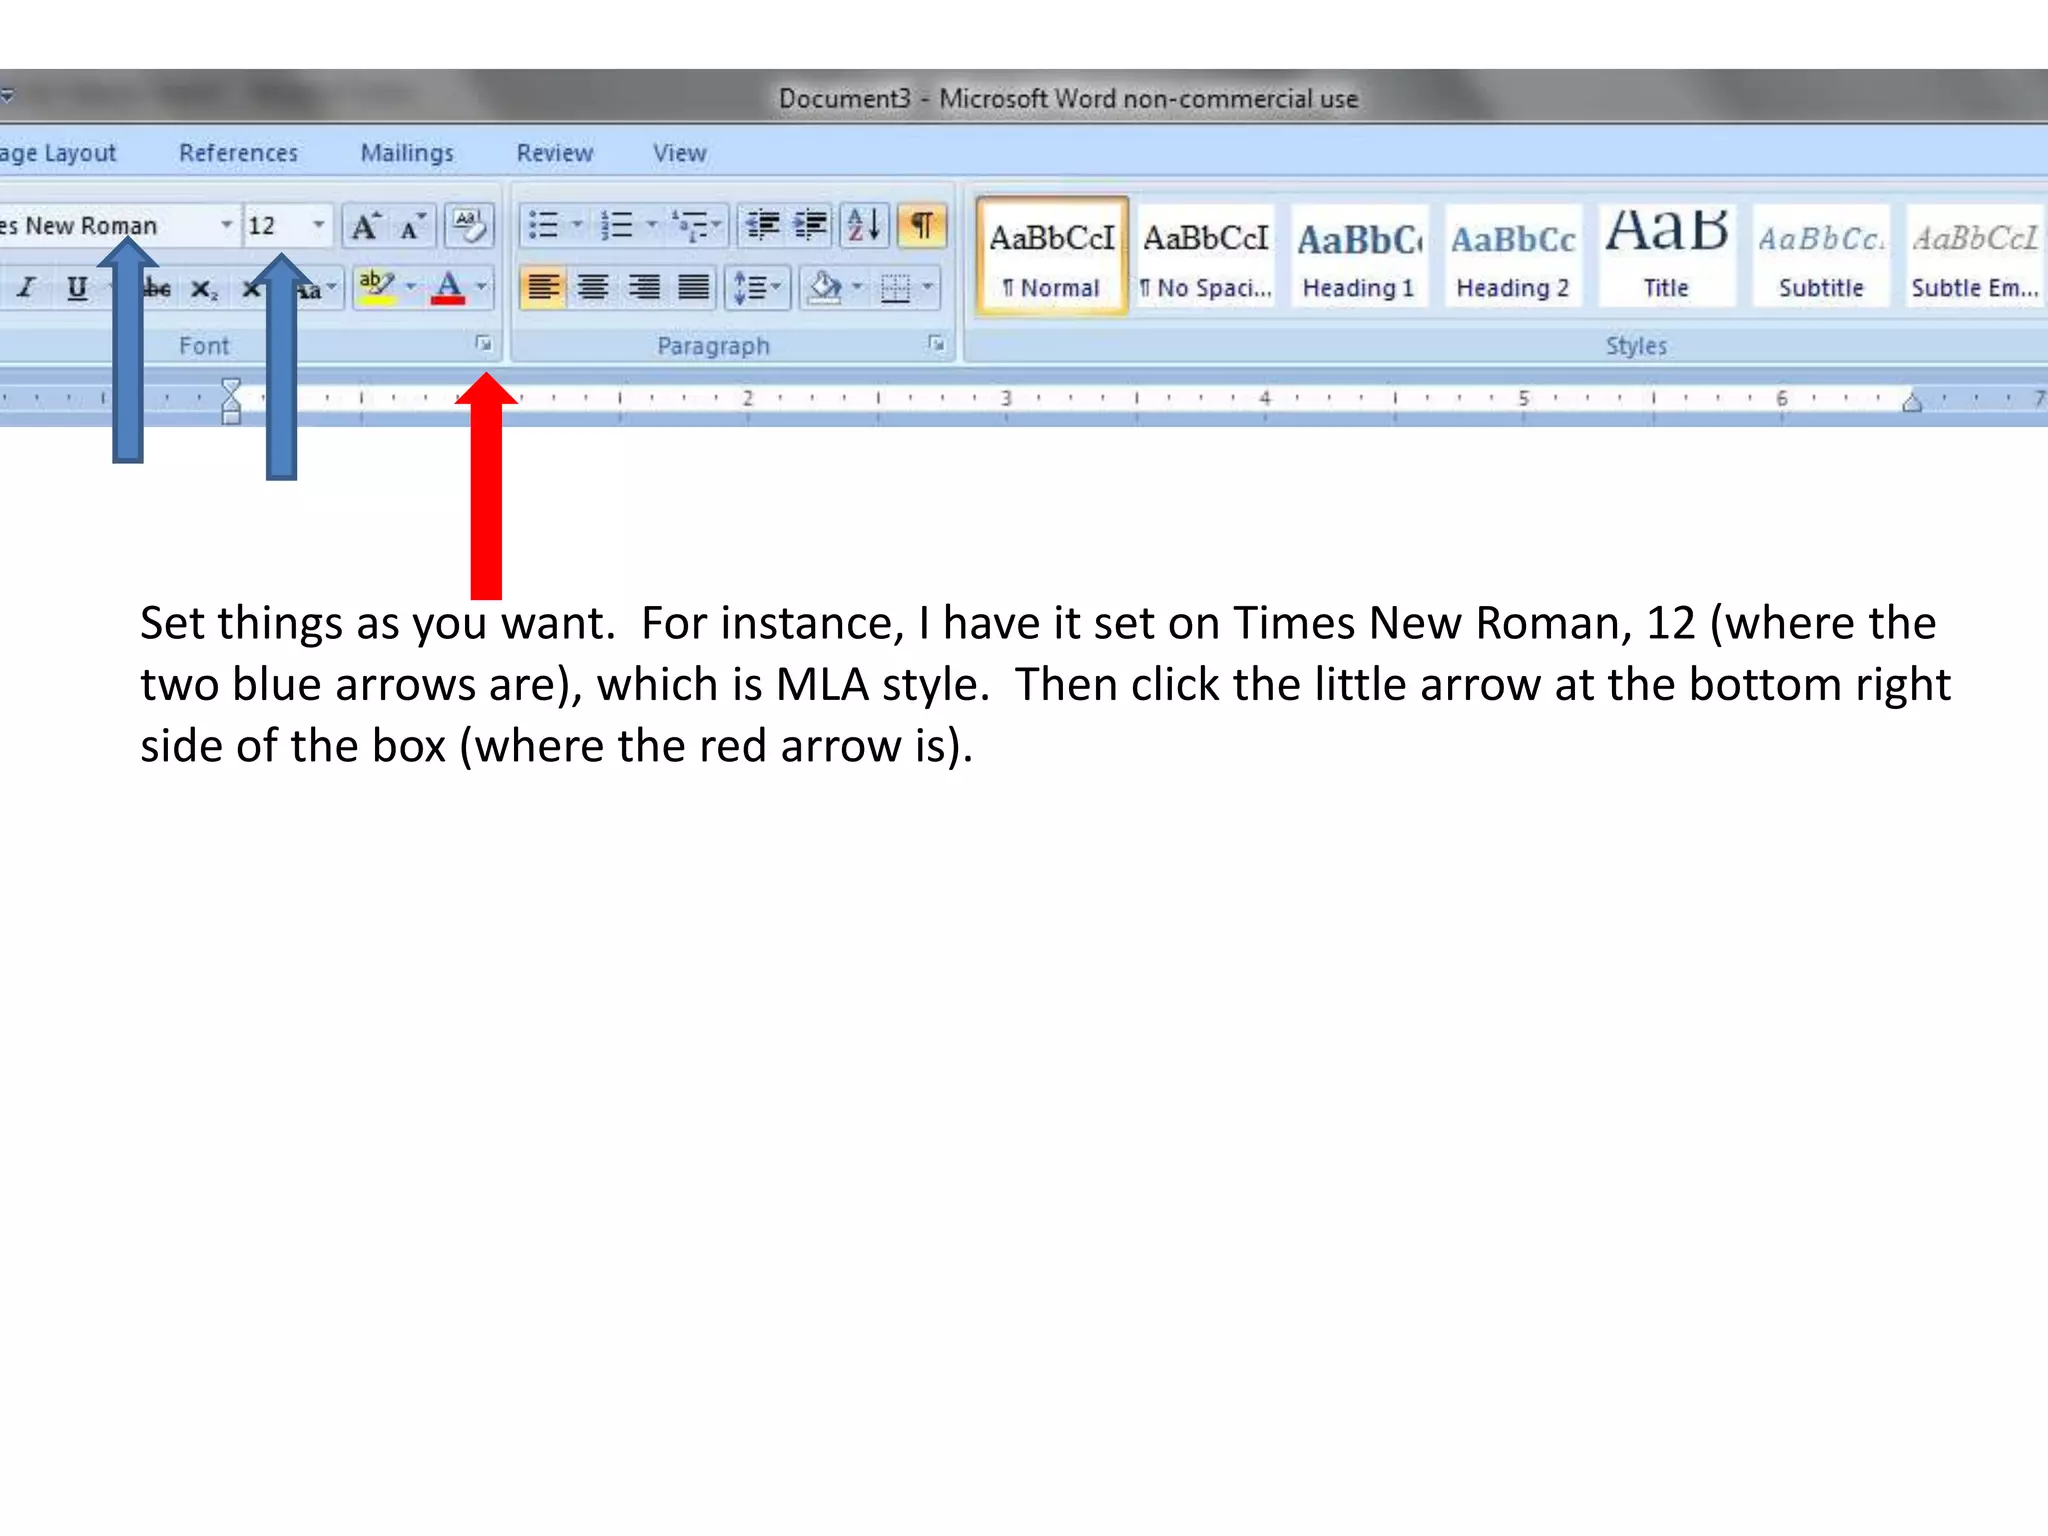
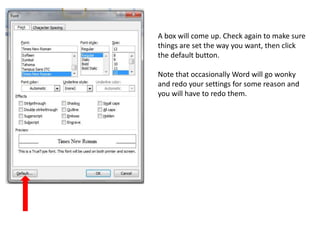
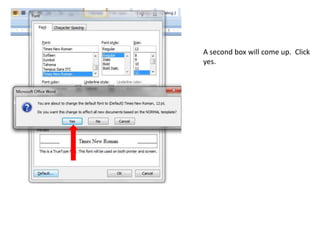
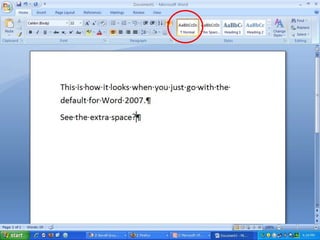
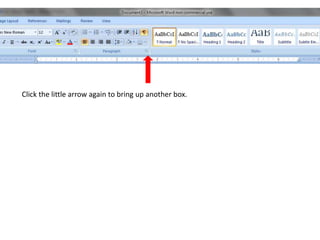
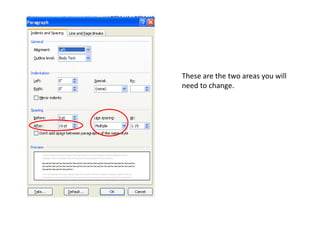
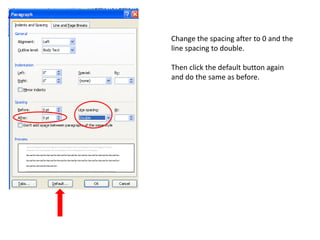
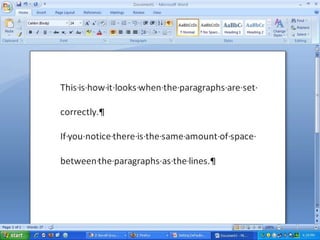
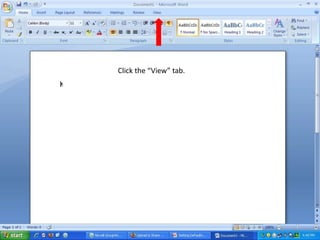
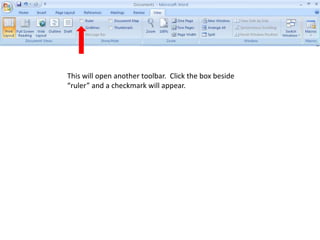
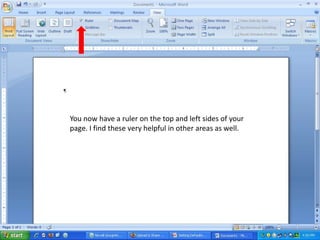
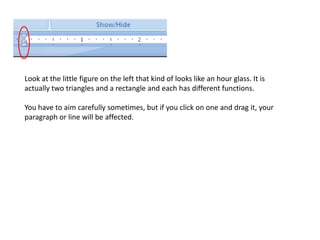
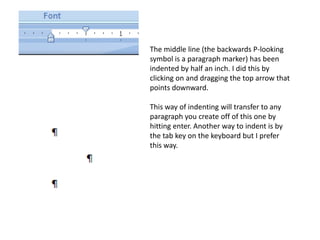
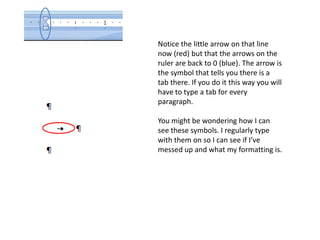
In the departments dealing with literature and language, we use what is known as MLA style. Besides telling you how to cite sources, it also prescribes a certain way to set up your paper. Different disciplines will have different style guides that you need to be aware of, but you might think about setting your defaults as these.
MLA Style calls for Times New Roman, size 12. Set it this way. Then click the little arrow at the bottom right side of the box (where the red arrow is).
A box will come up. Check again to make sure things are set the way you want, then click the default button.Note that occasionally Word will go wonky and redo your settings for some reason and you will have to redo them.
A second box will come up.  Click yes.
You also need to change the spacing of paragraphs to comply with MLA style which is double spaced without extra spacing after each paragraph.
Click the little arrow again to bring up another box.
These are the two areas you will need to change.
Change the spacing for both before and after to 0 and the line spacing to double.Then click the default button again and do the same as before.
The next thing for MLA is indenting the paragraphs. For this it is helpful to be able to view the ruler.
Click the “View” tab.
This will open another toolbar.  Click the box beside “ruler” and a checkmark will appear.
You now have a ruler on the top and left sides of your page. I find these very helpful in other areas as well.
Look at the little figure on the left that kind of looks like an hour glass. It is actually two triangles and a rectangle and each has different functions.You have to aim carefully sometimes, but if you click on one and drag it, your paragraph or line will be affected.
The middle line (the backwards P-looking symbol is a paragraph marker) has been indented by half an inch. I did this by clicking on and dragging the top arrow that points downward.This way of indenting will transfer to any paragraph you create off of this one by hitting enter. Another way to indent is by the tab key on the keyboard but I prefer this way.
Notice the little arrow on that line now (red) but that the arrows on the ruler are back to 0 (blue). The arrow is the symbol that tells you there is a tab there. If you do it this way you will have to type a tab for every paragraph.You might be wondering how I can see these symbols. I regularly type with them on so I can see if I’ve messed up and what my formatting is.
On the “Home” toolbar, notice that the backwards P is a button and it is highlighted. When this is highlighted it means that “special characters” are turned on and you can see things like spaces (a dot), paragraphs, and tabs that are normally hidden and that will still be hidden when you print it. It might take some getting used to, but I would recommend typing with these.
Now watch the second video for more tips on MLA style.

How to set your paper up in mla style

  • 1.
    In the departmentsdealing with literature and language, we use what is known as MLA style. Besides telling you how to cite sources, it also prescribes a certain way to set up your paper. Different disciplines will have different style guides that you need to be aware of, but you might think about setting your defaults as these.
  • 2.
    MLA Style callsfor Times New Roman, size 12. Set it this way. Then click the little arrow at the bottom right side of the box (where the red arrow is).
  • 3.
    A box willcome up. Check again to make sure things are set the way you want, then click the default button.Note that occasionally Word will go wonky and redo your settings for some reason and you will have to redo them.
  • 4.
    A second boxwill come up. Click yes.
  • 5.
    You also needto change the spacing of paragraphs to comply with MLA style which is double spaced without extra spacing after each paragraph.
  • 7.
    Click the littlearrow again to bring up another box.
  • 8.
    These are thetwo areas you will need to change.
  • 9.
    Change the spacingfor both before and after to 0 and the line spacing to double.Then click the default button again and do the same as before.
  • 11.
    The next thingfor MLA is indenting the paragraphs. For this it is helpful to be able to view the ruler.
  • 12.
  • 13.
    This will openanother toolbar. Click the box beside “ruler” and a checkmark will appear.
  • 14.
    You now havea ruler on the top and left sides of your page. I find these very helpful in other areas as well.
  • 15.
    Look at thelittle figure on the left that kind of looks like an hour glass. It is actually two triangles and a rectangle and each has different functions.You have to aim carefully sometimes, but if you click on one and drag it, your paragraph or line will be affected.
  • 16.
    The middle line(the backwards P-looking symbol is a paragraph marker) has been indented by half an inch. I did this by clicking on and dragging the top arrow that points downward.This way of indenting will transfer to any paragraph you create off of this one by hitting enter. Another way to indent is by the tab key on the keyboard but I prefer this way.
  • 17.
    Notice the littlearrow on that line now (red) but that the arrows on the ruler are back to 0 (blue). The arrow is the symbol that tells you there is a tab there. If you do it this way you will have to type a tab for every paragraph.You might be wondering how I can see these symbols. I regularly type with them on so I can see if I’ve messed up and what my formatting is.
  • 18.
    On the “Home”toolbar, notice that the backwards P is a button and it is highlighted. When this is highlighted it means that “special characters” are turned on and you can see things like spaces (a dot), paragraphs, and tabs that are normally hidden and that will still be hidden when you print it. It might take some getting used to, but I would recommend typing with these.
  • 19.
    Now watch thesecond video for more tips on MLA style.