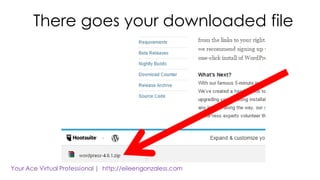
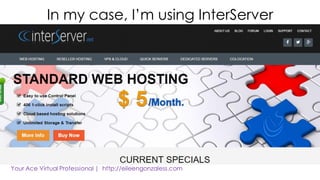
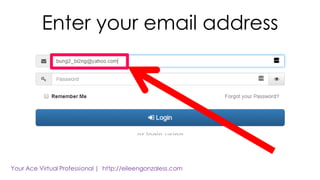
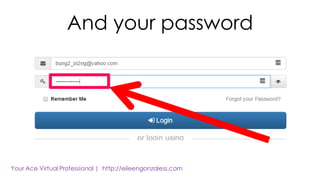
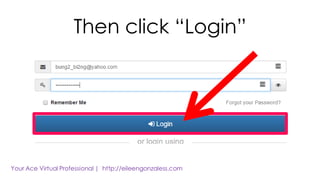
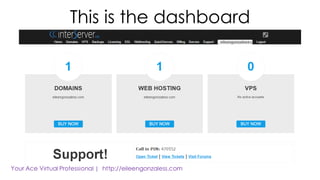
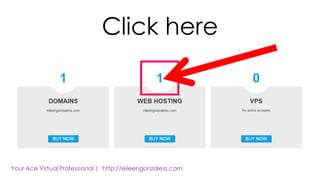
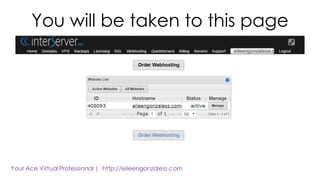
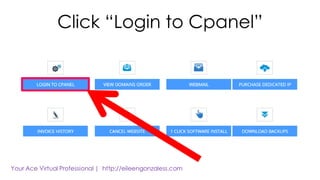
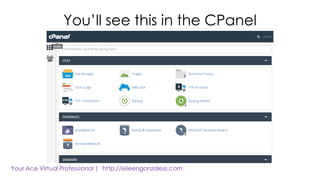
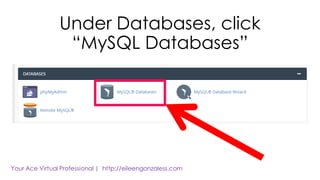
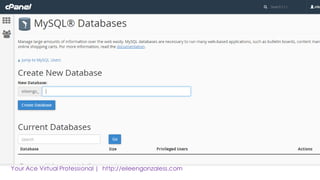
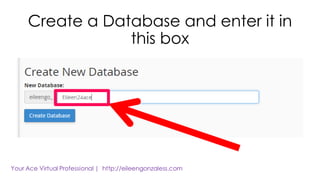
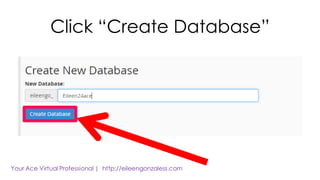
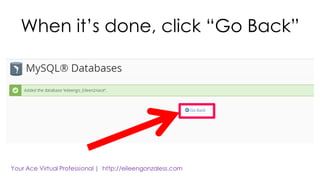
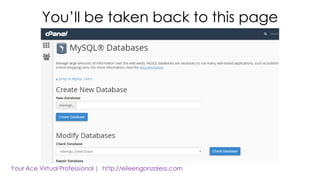
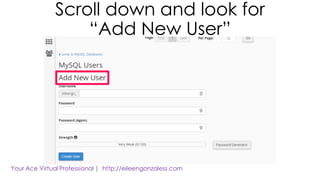
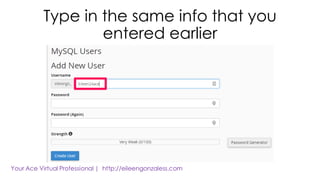
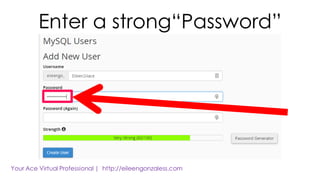
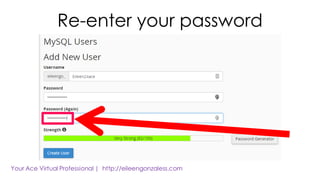
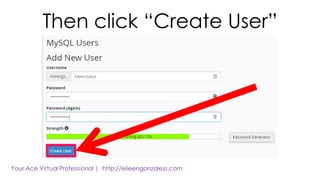
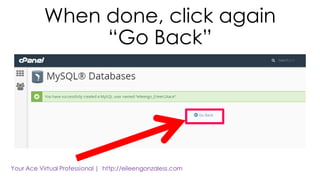
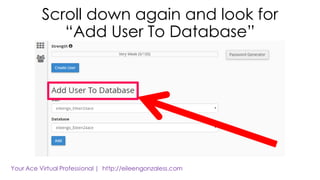
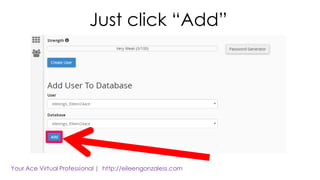
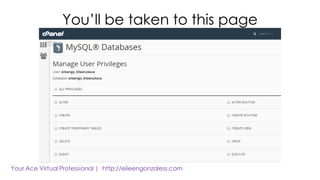
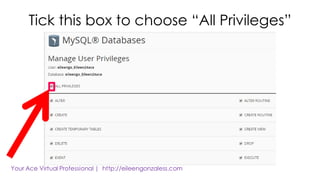
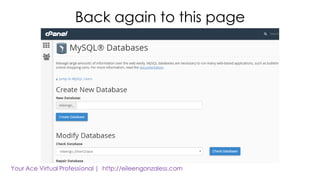
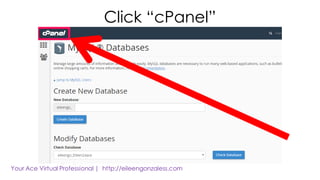
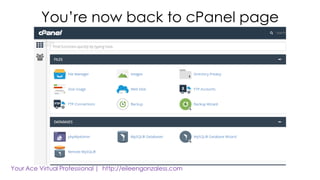
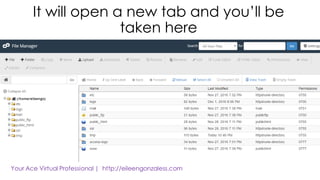
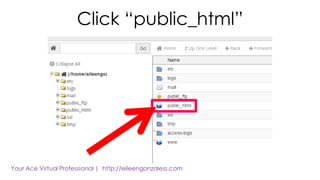
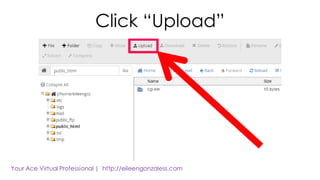
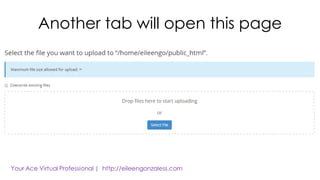
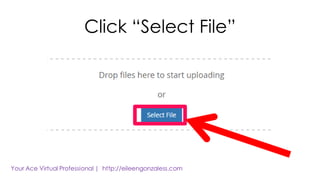
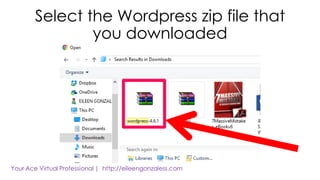
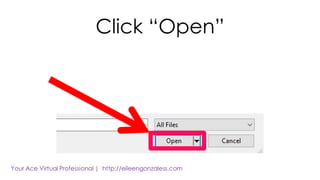
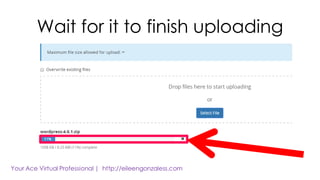
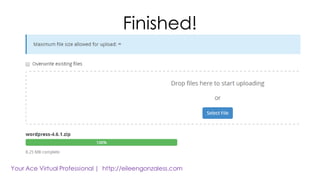
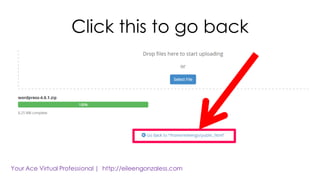
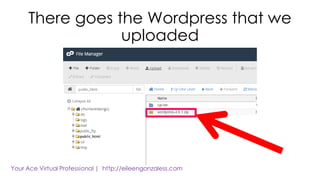
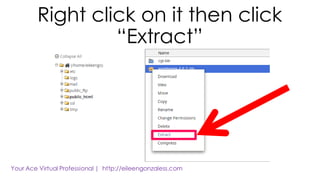
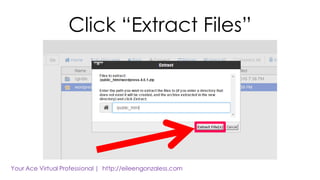
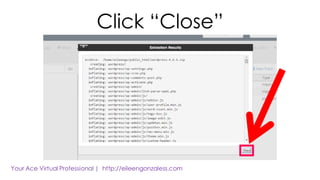
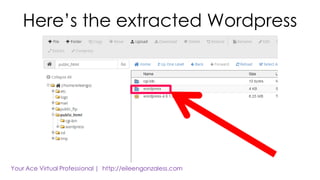
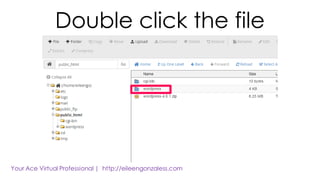
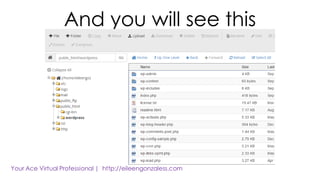
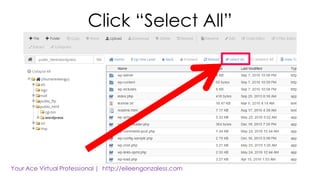
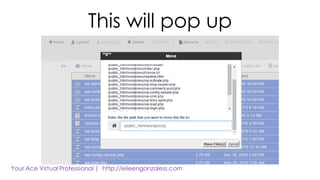
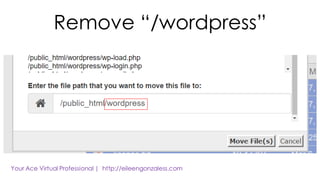
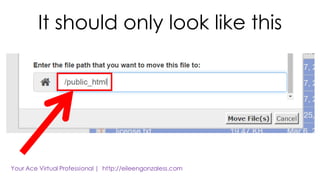
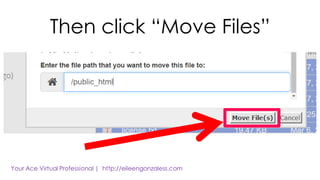
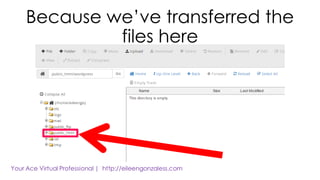
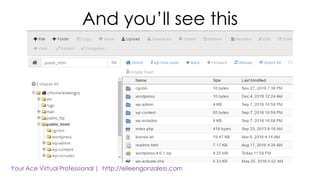
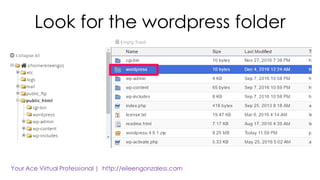
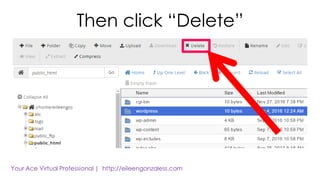
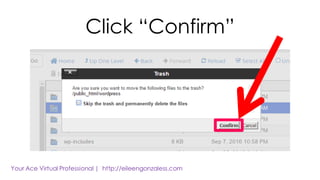
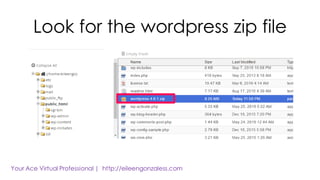
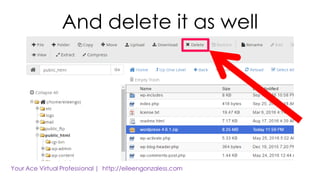
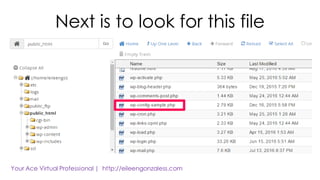
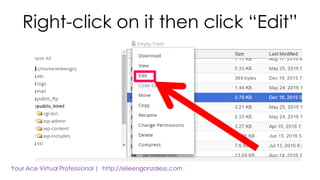
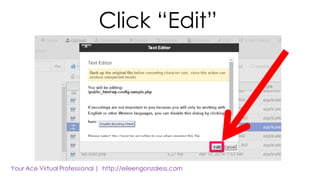
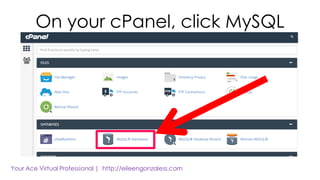
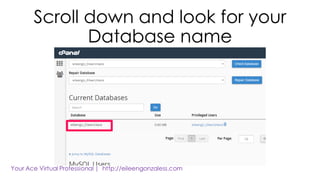
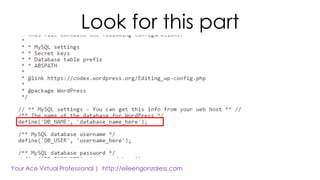
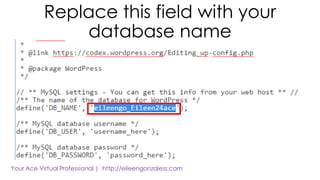
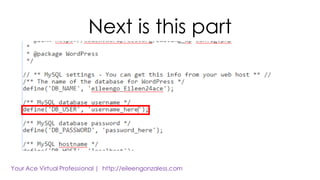
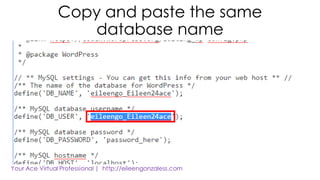
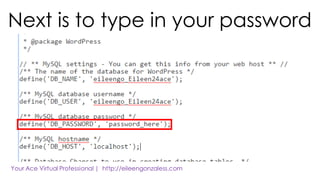
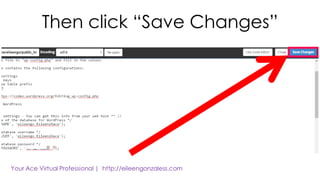
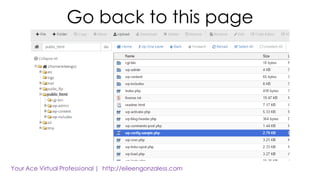
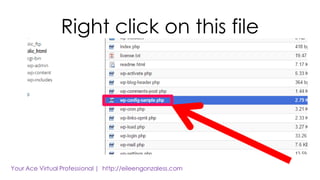
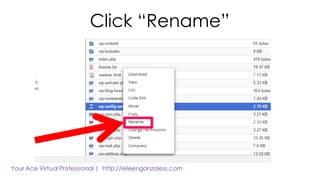
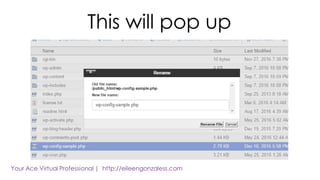
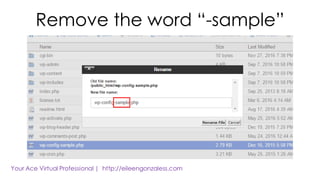
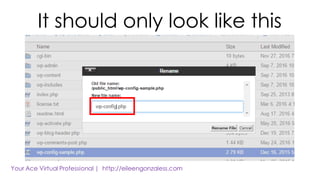
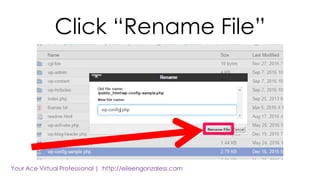
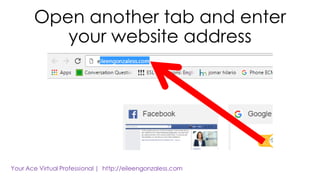
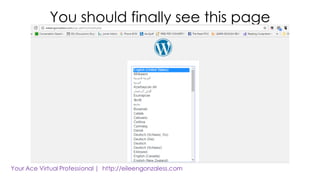
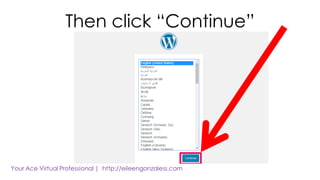
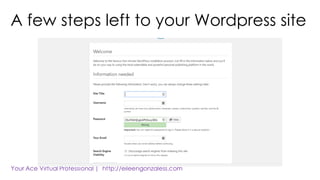
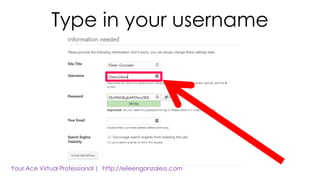
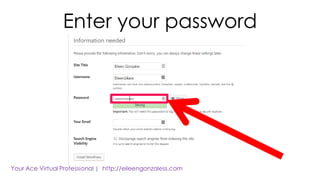
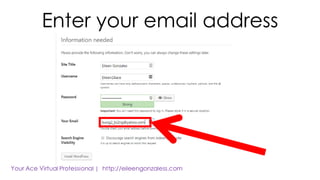
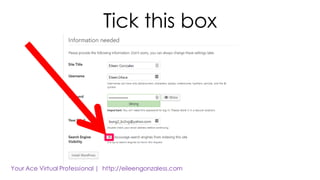
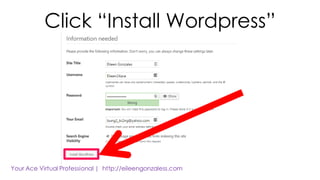
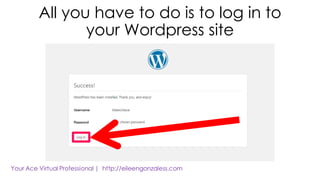
How to Install
Wordpress
The Techie Way
Go to Google and search for
Wordpress.org
This is Wordpress.org
Click “Download Wordpress”
On the next page, click again
“Download Wordpress”
There goes your downloaded file
Open another tab then go
to your web hosting site
In my case, I’m using InterServer
Prior to this tutorial, I’ve already
purchased my domain and web
hosting from Interserver
NOTE:
Click “Login”
Enter your Login details
Enter your email address
And your password
Then click “Login”
This is the dashboard
Click here
You will be taken to this page
Click “Manage”
You’ll be taken to this page
Scroll down to see this menu
Click “Login to Cpanel”
You’ll see this in the CPanel
Under Databases, click
“MySQL Databases”
NOTE:
Get a pen and paper and
take note of the information
that you will input in this page.
You will be needing it later
Create a Database and enter it in
this box
Click “Create Database”
When it’s done, click “Go Back”
You’ll be taken back to this page
Scroll down and look for
“Add New User”
Type in the same info that you
entered earlier
Enter a strong“Password”
Re-enter your password
Then click “Create User”
When done, click again
“Go Back”
Back again to this page
Scroll down again and look for
“Add User To Database”
Just click “Add”
You’ll be taken to this page
Tick this box to choose “All Privileges”
Scroll down and click
“Make Changes”
When done, click “Go Back”
Back again to this page
Click “cPanel”
You’re now back to cPanel page
Under Files, click
“File Manager”
It will open a new tab and you’ll be
taken here
Click “public_html”
You’ll see this
This is where we are
going to upload
the Wordpress file that
we downloaded earlier
Click “Upload”
Another tab will open this page
Click “Select File”
Select the Wordpress zip file that
you downloaded
Click “Open”
Wait for it to finish uploading
Finished!
Click this to go back
There goes the Wordpress that we
uploaded
Right click on it then click
“Extract”
Click “Extract Files”
Click “Close”
Here’s the extracted Wordpress
Double click the file
And you will see this
Click “Select All”
Then click “Move”
This will pop up
Remove “/wordpress”
It should only look like this
Then click “Move Files”
The directory now is empty
Because we’ve transferred the
files here
Double-click it
And you’ll see this
Look for the wordpress folder
Then click “Delete”
Click “Confirm”
Look for the wordpress zip file
And delete it as well
Next is to look for this file
Right-click on it then click “Edit”
This will pop up
Click “Edit”
A new tab will open this page
This time, we have to go back
to our cPanel
On your cPanel, click MySQL
Scroll down and look for your
Database name
Copy your database name
Then go back to this page
Look for this part
Replace this field with your
database name
Next is this part
Copy and paste the same
database name
Next is to type in your password
Type it inside the (‘)
apostrophe
Then click “Save Changes”
Then click “close”
Go back to this page
Right click on this file
Click “Rename”
This will pop up
Remove the word “-sample”
It should only look like this
Click “Rename File”
Then, that’s it!
You can now try going to
your website
Open another tab and enter
your website address
You should finally see this page
Select English as your language
Then click “Continue”
A few steps left to your Wordpress site
NOTE:
Bring out your notes that you
used when you created your
database earlier.
We’ll now use it here
Type in the title of your site here
Type in your username
Enter your password
Enter your email address
Tick this box
So search engines won’t
find your site yet
Since you are still building it
Click “Install Wordpress”
Congratulations!
You’ve finally installed
Wordpress!
All you have to do is to log in to
your Wordpress site
You can now start blogging on
your freshly made website!
Enjoy blogging!

How to install Wordpress the techie way