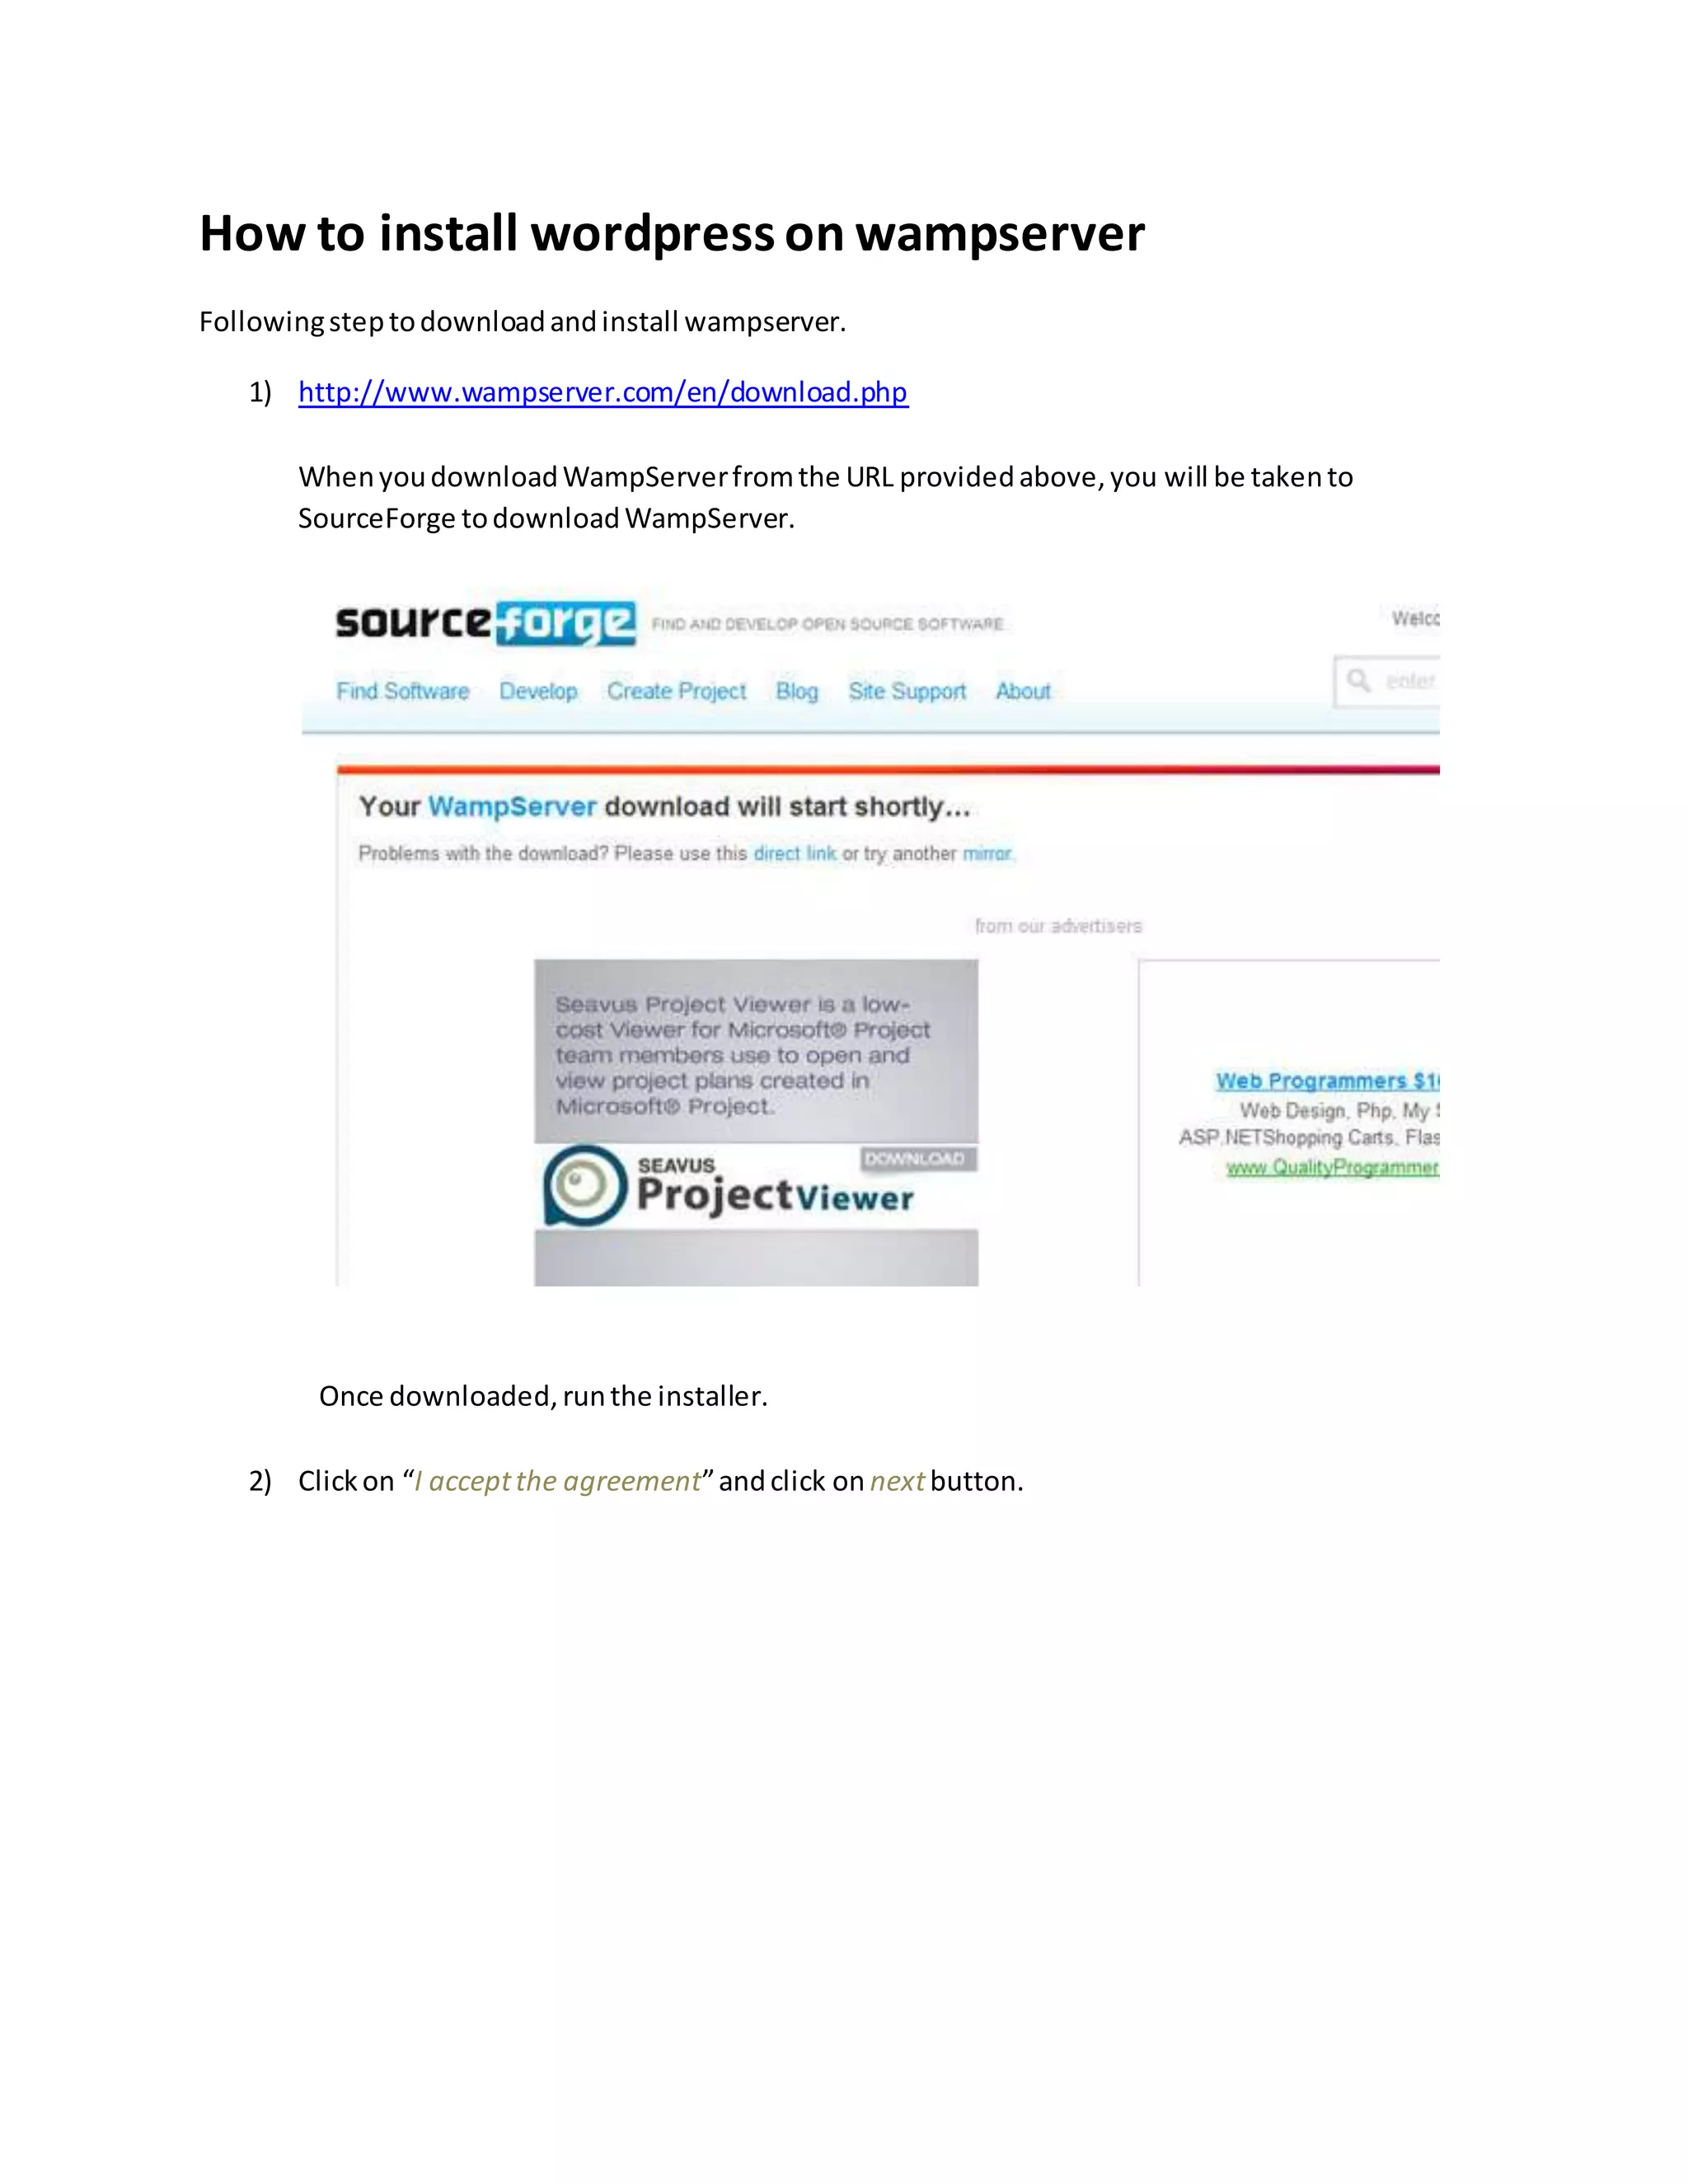
1) Download and install WampServer on your computer. Open your web browser and navigate to localhost:8080 to access your local server.
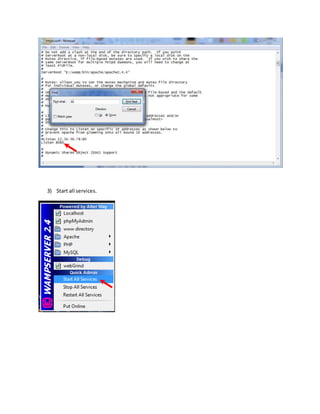
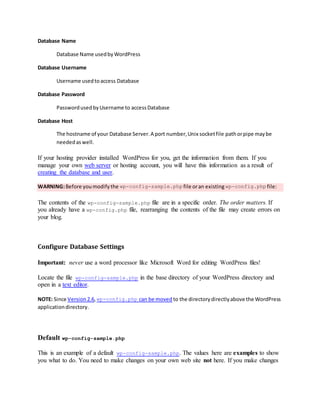
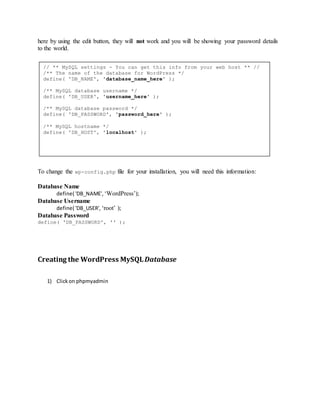
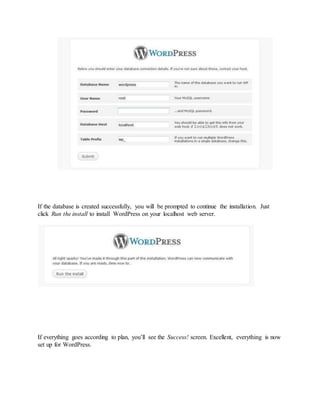
2) Download WordPress and extract the files into your www folder. Edit the wp-config.php file to define the database name, username, password, and other configuration settings using the information from your MySQL database.
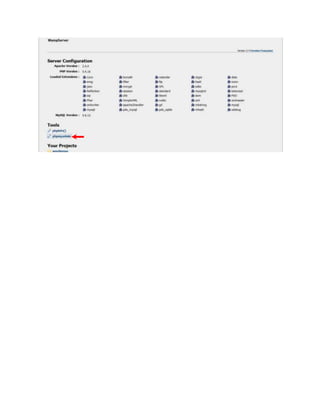
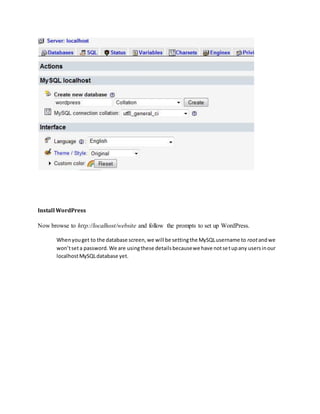
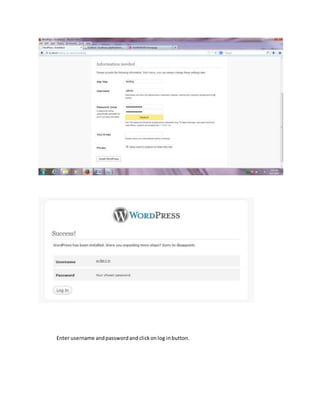
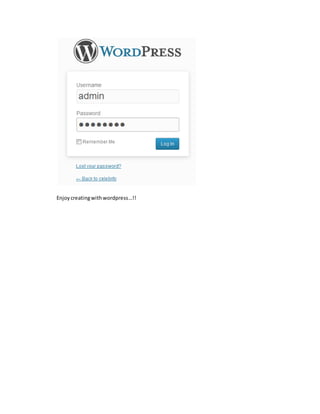
3) Create a new database using phpMyAdmin and continue the WordPress installation process by entering the database details when prompted. You can now log into your new WordPress site locally.
LAMP means Linux, Apache, MySQL, PHP. This tutorial shows how to install Apache 2.4 web server on Ubuntu 16.04 server (Xenial Xerus) with PHP 7 (mod_php) and MySQL / MariaDB support. I will also install PHPMyAdmin to facilitate MySQL administration. LAMP configuration is the perfect foundation for CMS systems such as Joomla, WordPress or Drupal.
In this blog, we are going to explain you to How to install and configure LAMP (Linux,Apache Mysql/MariaDB,Php) with Joomla CMS in Ubuntu 16.04. in a very easy way. For complete knowledge for the same please go through the below-given link: https://cloudminister.com/how-to-install-and-configure-lamp-linuxapache-mysql-mariadbphp-with-joomla-cms-in-ubuntu-16-04/
React is a library for building composable user interfaces. It encourages the creation of reusable UI components, which present data that changes over time. Lots of people use React as the V in MVC. React abstracts away the DOM from you, offering a simpler programming model and better performance.
In this presentation we cover the details of installing WordPress, go over common problems and talk about the importance of maintaining your website and basic website security.
How To Install WordPress On VPS Hosting.pdfHost It Smart
In this blog, we will discuss how you can install WordPress on your VPS server. You can accomplish this using cPanel, automatic installation, or using CWP.
Install WordPress Blogging Software with EasyPHPRupesh Kumar
This show demonstrates how to install and set up your own blog using WordPress Blog Publishing Software and EasyPHP (A WAMP - Windows-Apache-MySQL-PHP) bundle. Both are free for download.
1. How to install wordpress on wampserver
Followingsteptodownloadandinstall wampserver.
1) http://www.wampserver.com/en/download.php
WhenyoudownloadWampServerfromthe URL providedabove,you will be takento
SourceForge todownloadWampServer.
Once downloaded,runthe installer.
2) Clickon “I acceptthe agreement”andclick on nextbutton.
2. 3) Choose yourinstallationdirectory.The defaultlocationis C:/wamp.
4) youcan choose if youwouldlike tohave a QuickLaunch iconand a Desktopiconso that youcan
quicklyopenWampServeronce ithasbeeninstalledandclickon nextbutton.
I accept theagreement
Next
7. Using your localhost web server
Openupyour webbrowserandnavigate to localhost:8080
Setting Up WordPress
1) To get the ball rolling, we are going to quickly set up a WordPress site in our localhost
web server.
2) First, download WordPress.
3) Once downloaded, extract the WordPress files to your newly created
c:wampwwwwebsite folder.
Editing wp-config.php
As part of the WordPress installation, you must modify the wp-config.php file to define the
WordPress configuration settings required to access your MySQL database.
This file, wp-config.php, does not exist in a downloaded copy of WordPress; you need to create
it. The wp-config-sample.php file is provided as an example to work from. Save it as wp-
config.php before editing. Advanced settings and examples are provided below.
To change the wp-config.php file for your installation, you will need this information:
8. Database Name
Database Name usedbyWordPress
Database Username
Username usedtoaccess Database
Database Password
PasswordusedbyUsername to accessDatabase
Database Host
The hostname of your Database Server.A port number,Unix socketfile pathorpipe maybe
neededaswell.
If your hosting provider installed WordPress for you, get the information from them. If you
manage your own web server or hosting account, you will have this information as a result of
creating the database and user.
WARNING:Before youmodifythe wp-config-sample.php file oran existing wp-config.php file:
The contents of the wp-config-sample.php file are in a specific order. The order matters. If
you already have a wp-config.php file, rearranging the contents of the file may create errors on
your blog.
Configure Database Settings
Important: never use a word processor like Microsoft Word for editing WordPress files!
Locate the file wp-config-sample.php in the base directory of your WordPress directory and
open in a text editor.
NOTE: Since Version2.6,wp-config.php can be moved to the directorydirectlyabove the WordPress
applicationdirectory.
Default wp-config-sample.php
This is an example of a default wp-config-sample.php. The values here are examples to show
you what to do. You need to make changes on your own web site not here. If you make changes
9. here by using the edit button, they will not work and you will be showing your password details
to the world.
To change the wp-config.php file for your installation, you will need this information:
Database Name
define( 'DB_NAME', ‘WordPress’);
Database Username
define( 'DB_USER', ‘root’ );
Database Password
define( 'DB_PASSWORD', '' );
Creating the WordPress MySQLDatabase
1) Clickon phpmyadmin
// ** MySQL settings - You can get this info from your web host ** //
/** The name of the database for WordPress */
define( 'DB_NAME', 'database_name_here' );
/** MySQL database username */
define( 'DB_USER', 'username_here' );
/** MySQL database password */
define( 'DB_PASSWORD', 'password_here' );
/** MySQL hostname */
define( 'DB_HOST', 'localhost' );
10.
11. 2) Write downusername rootand password(null) andclickongo.
3) Create database.
Once phpMyAdmin launches, create a new database with the same name as your live setup.
Here, I just called my database wordpress, but I advise you to name it something else so that you
reduce the chances of a successful bruteforce MySQL attack.
12. Install WordPress
Now browse to http://localhost/website and follow the prompts to set up WordPress.
Whenyouget to the database screen,we will be settingthe MySQLusername to rootandwe
won’tseta password.We are usingthese detailsbecausewe have notsetupany usersinour
localhostMySQLdatabase yet.
13. If the database is created successfully, you will be prompted to continue the installation. Just
click Run the install to install WordPress on your localhost web server.
If everything goes according to plan, you’ll see the Success! screen. Excellent, everything is now
set up for WordPress.