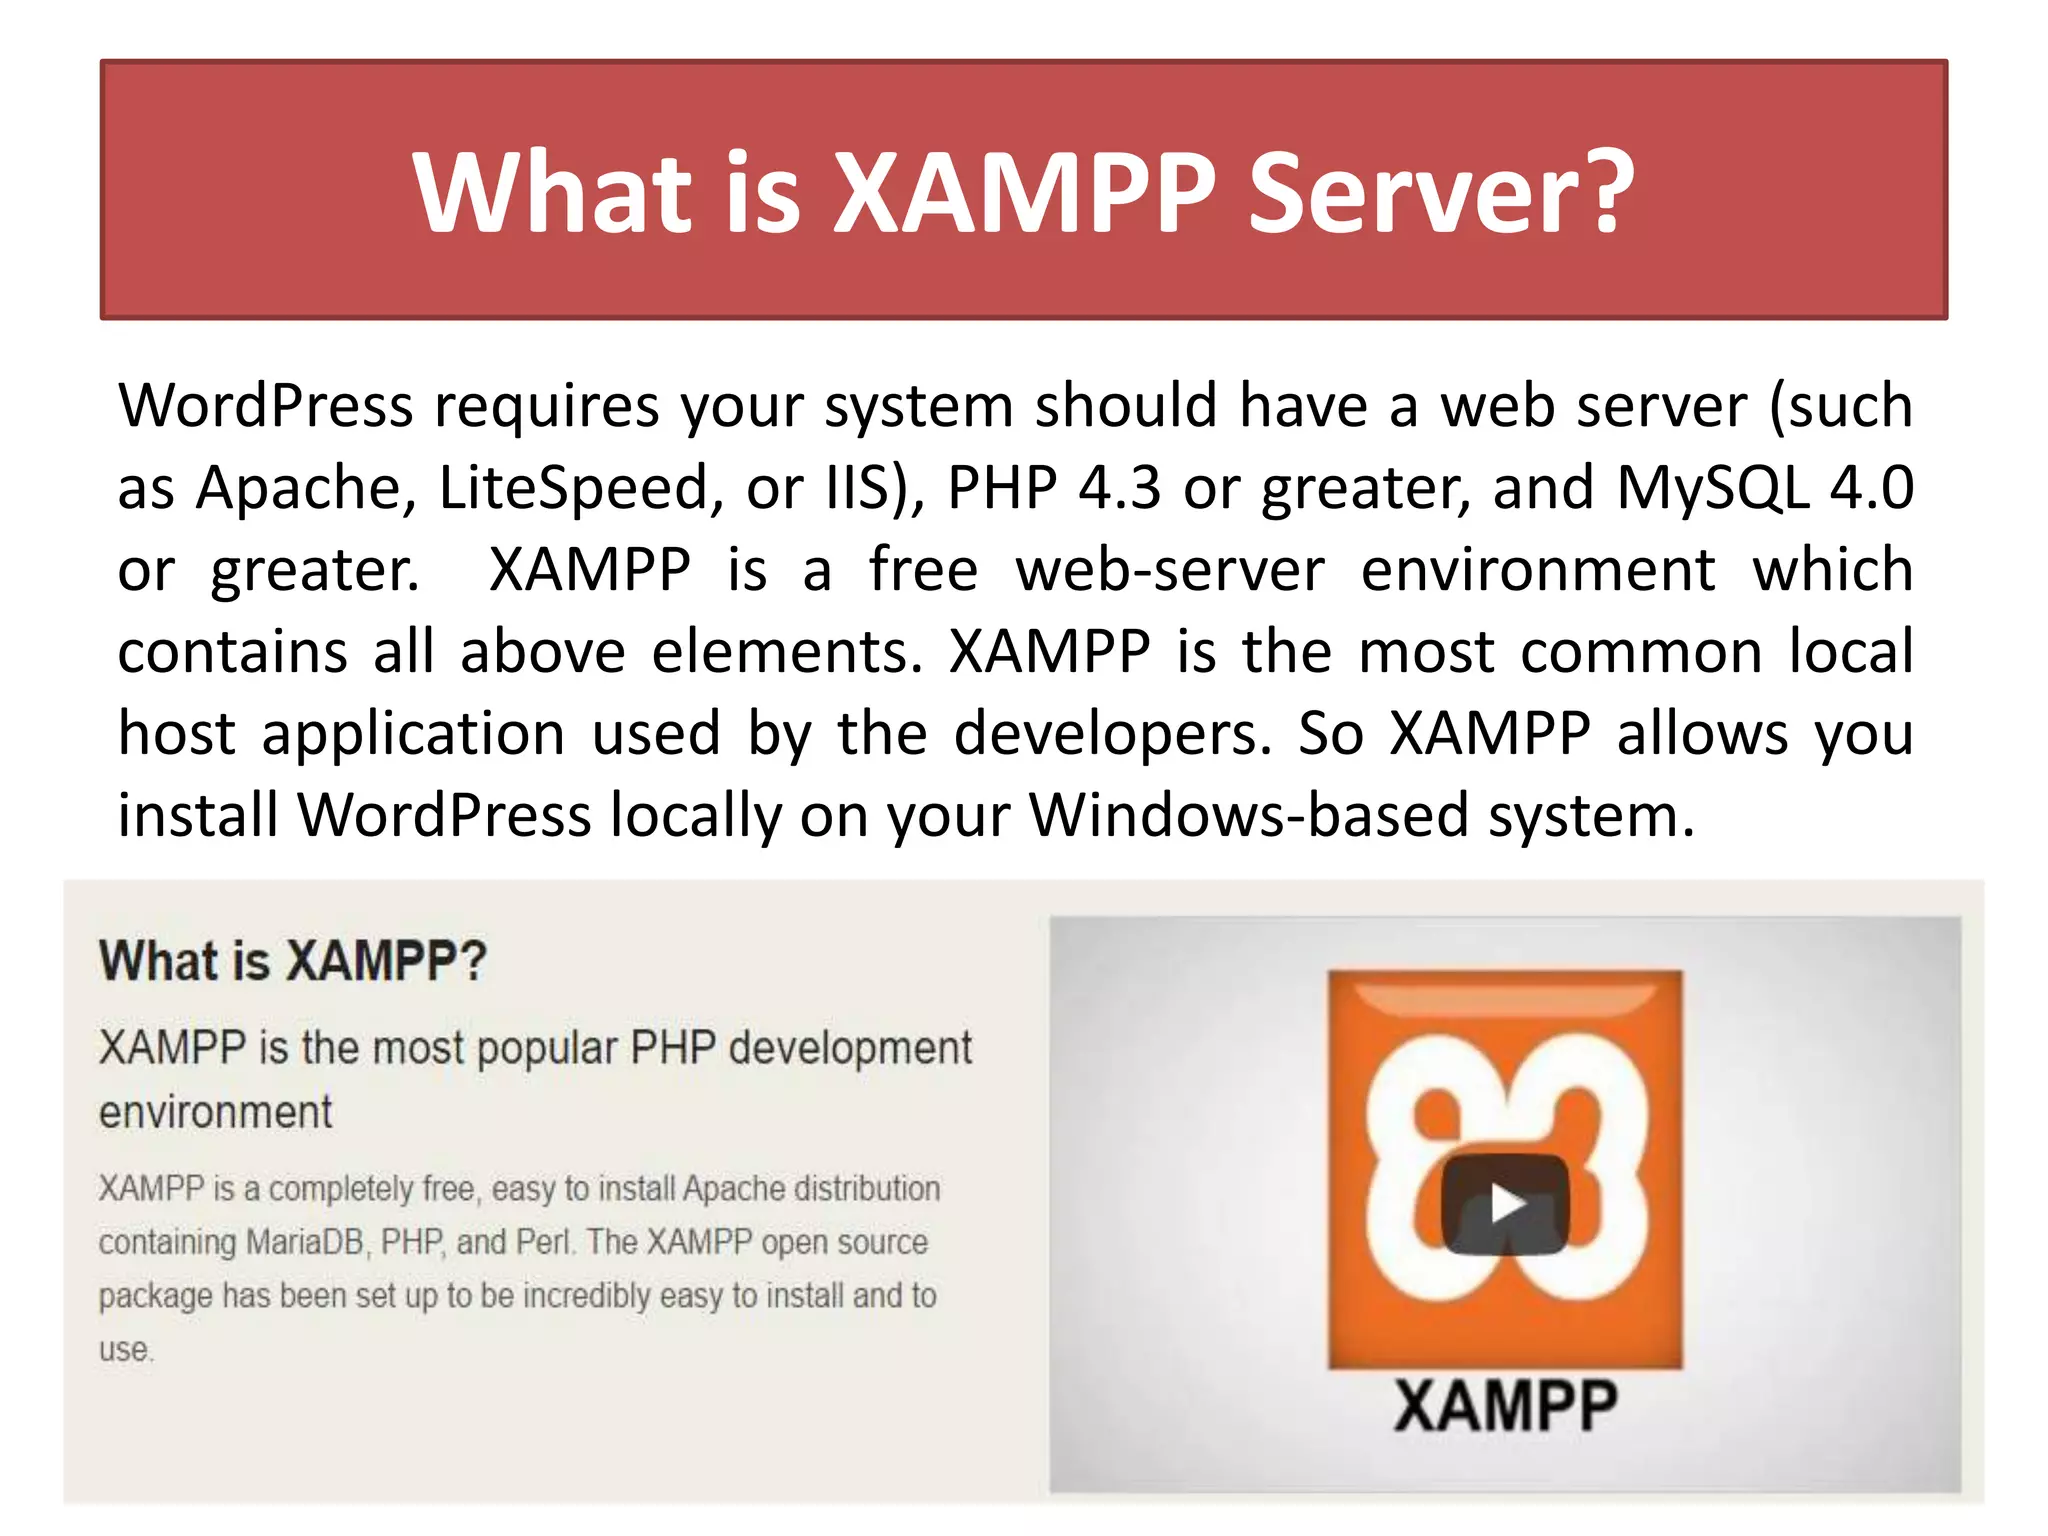
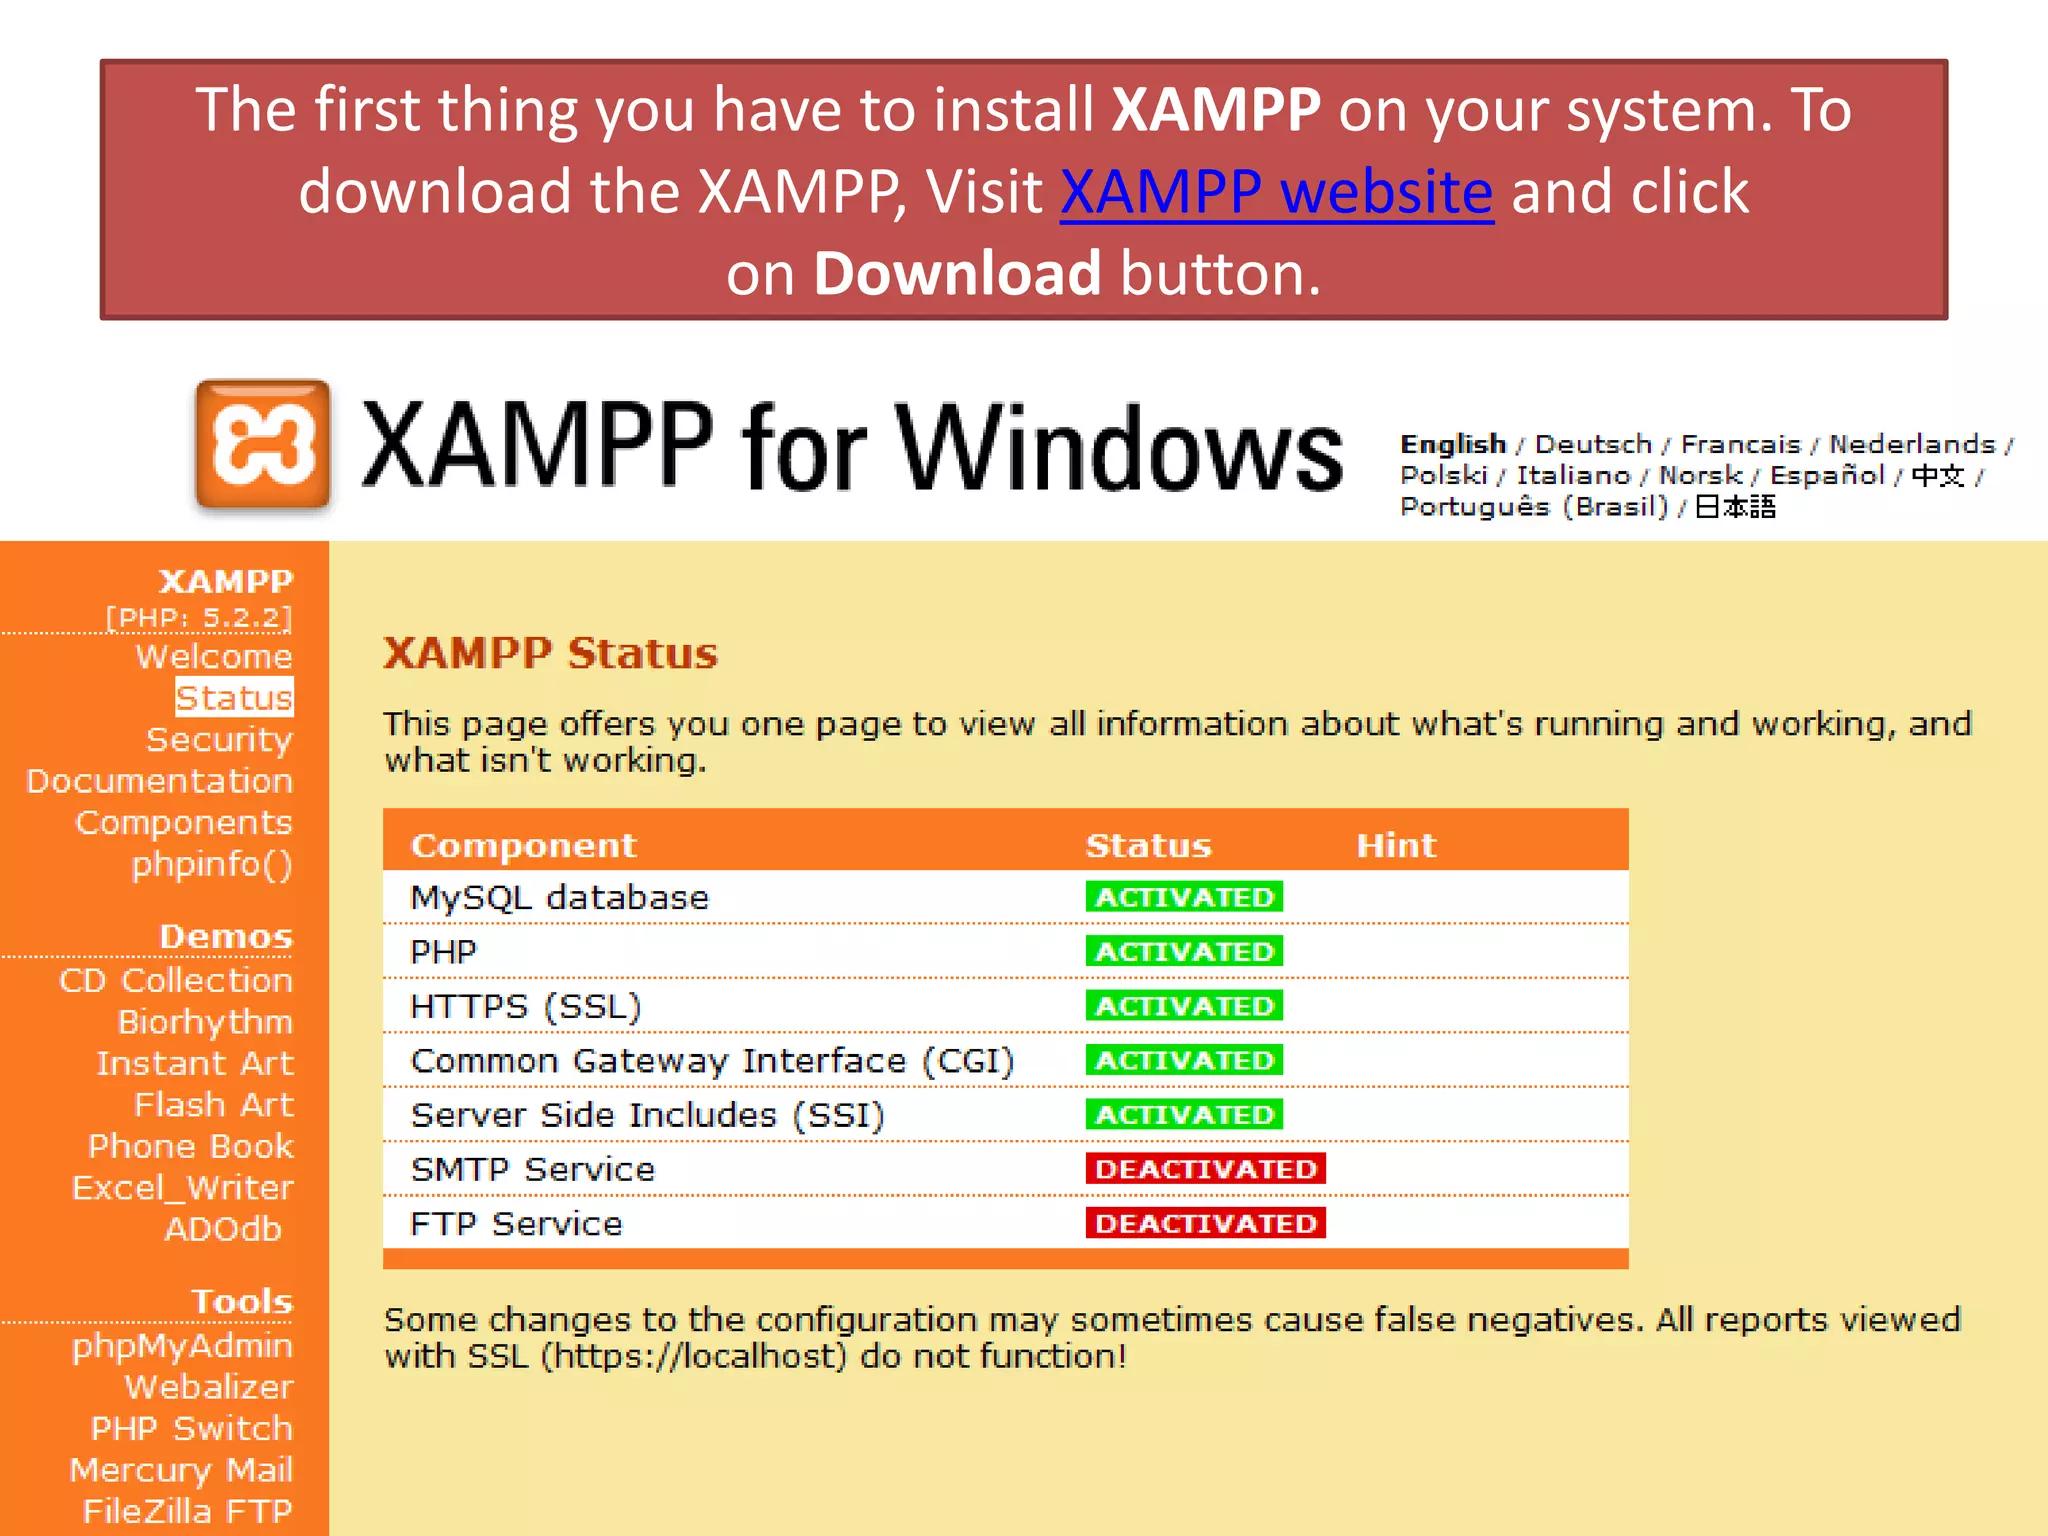
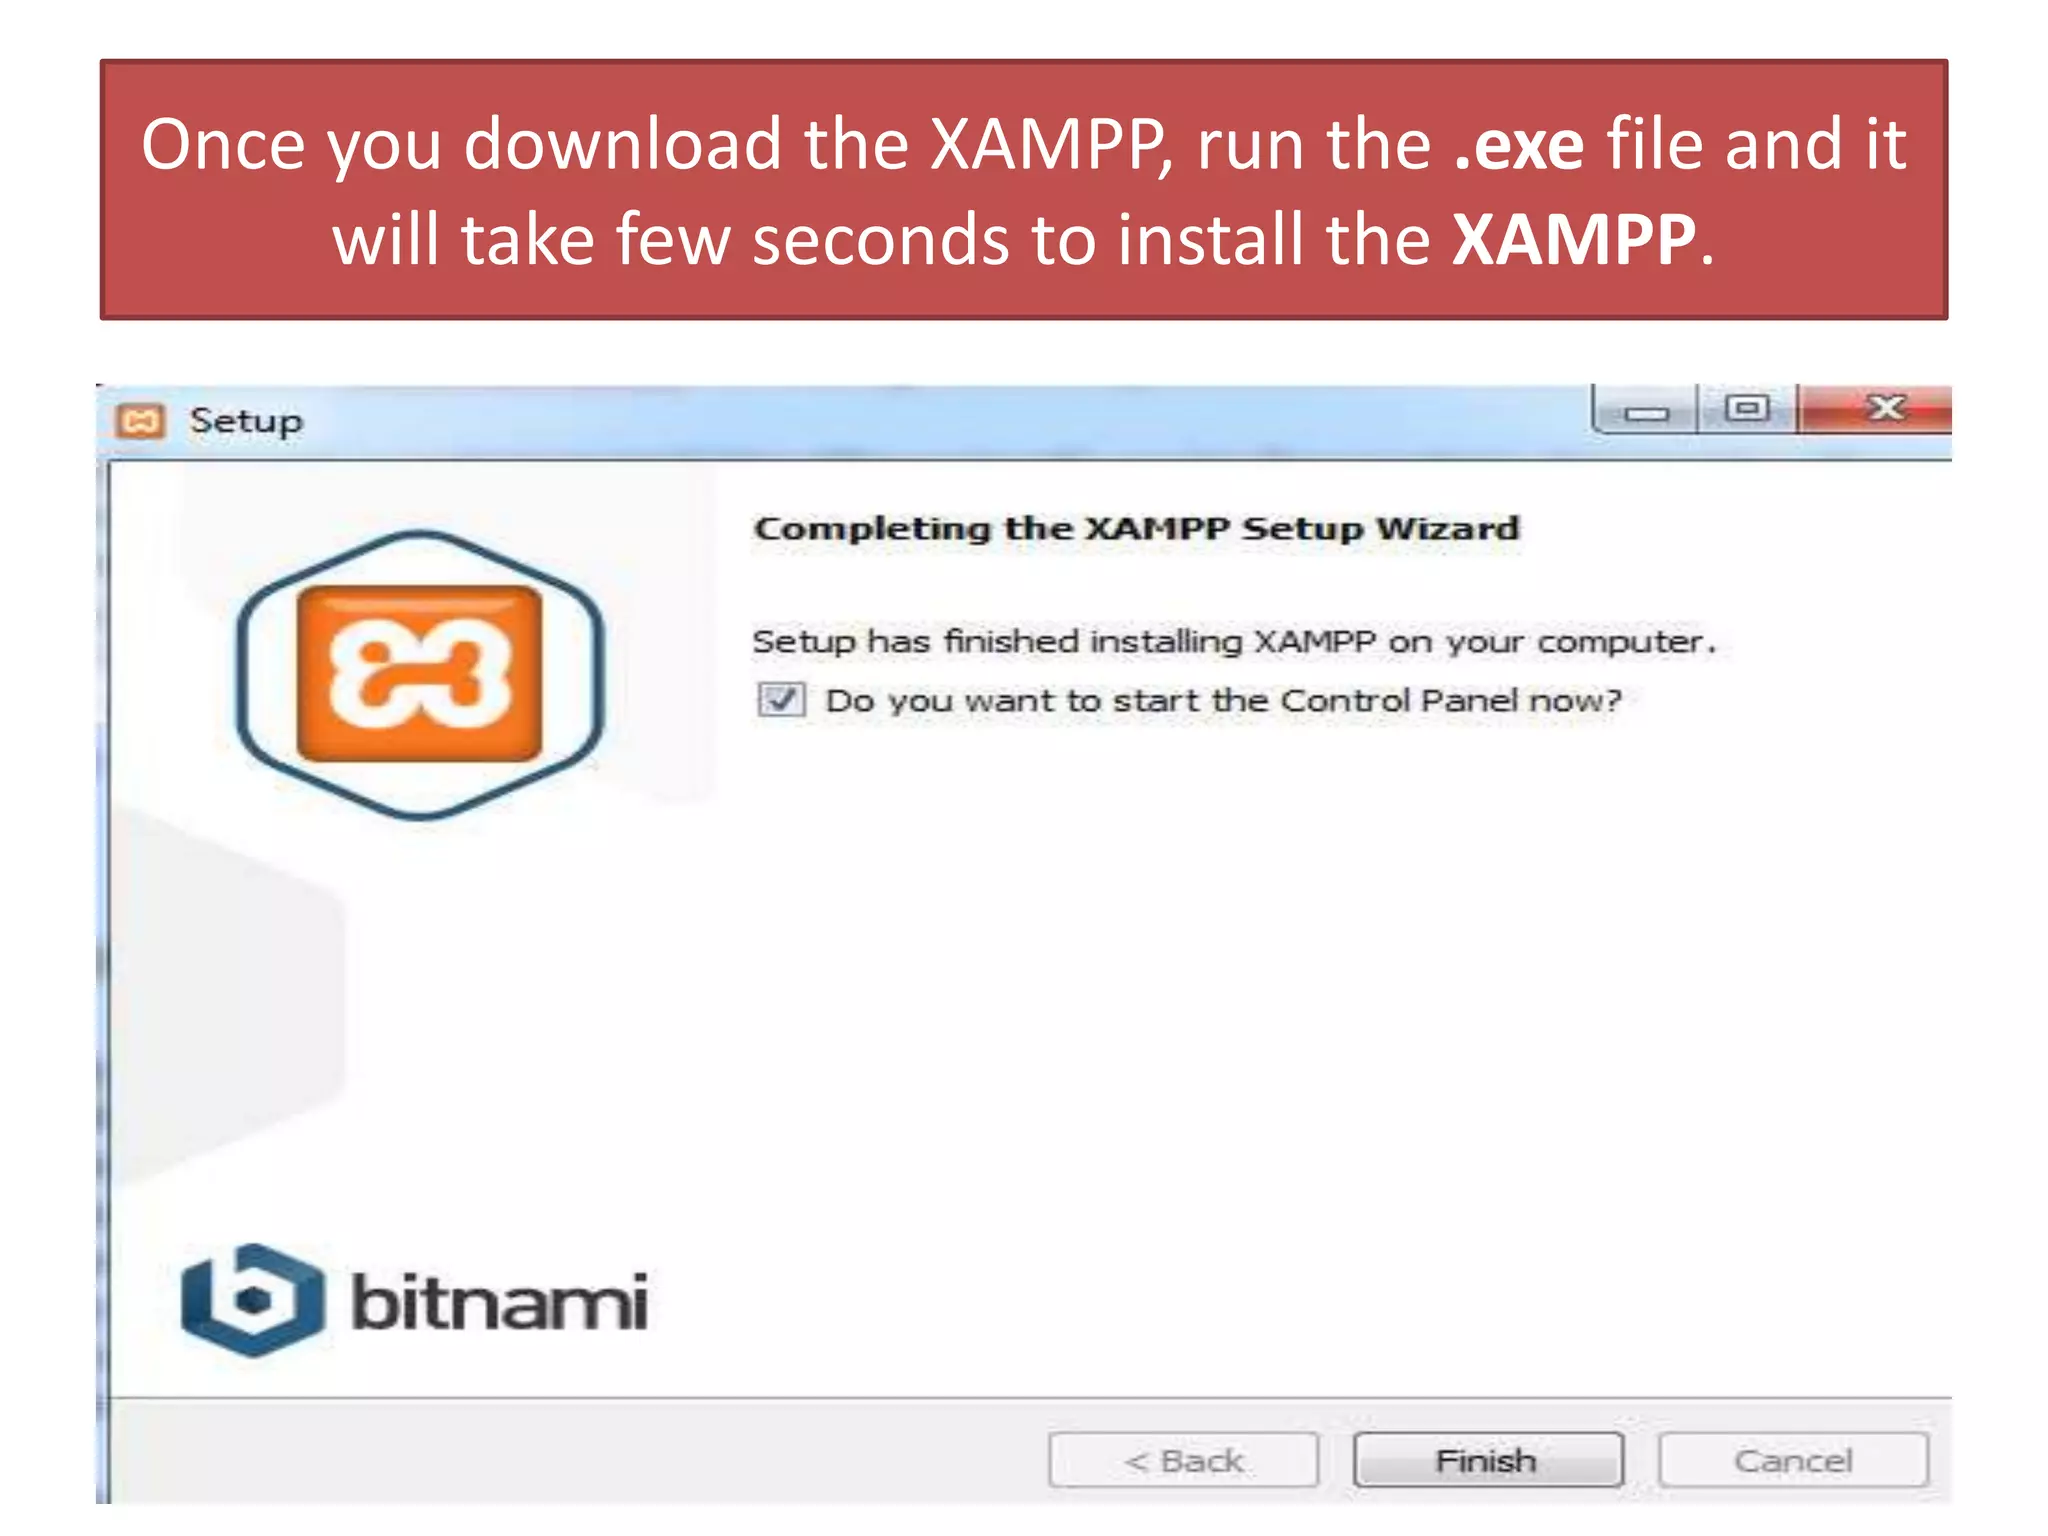
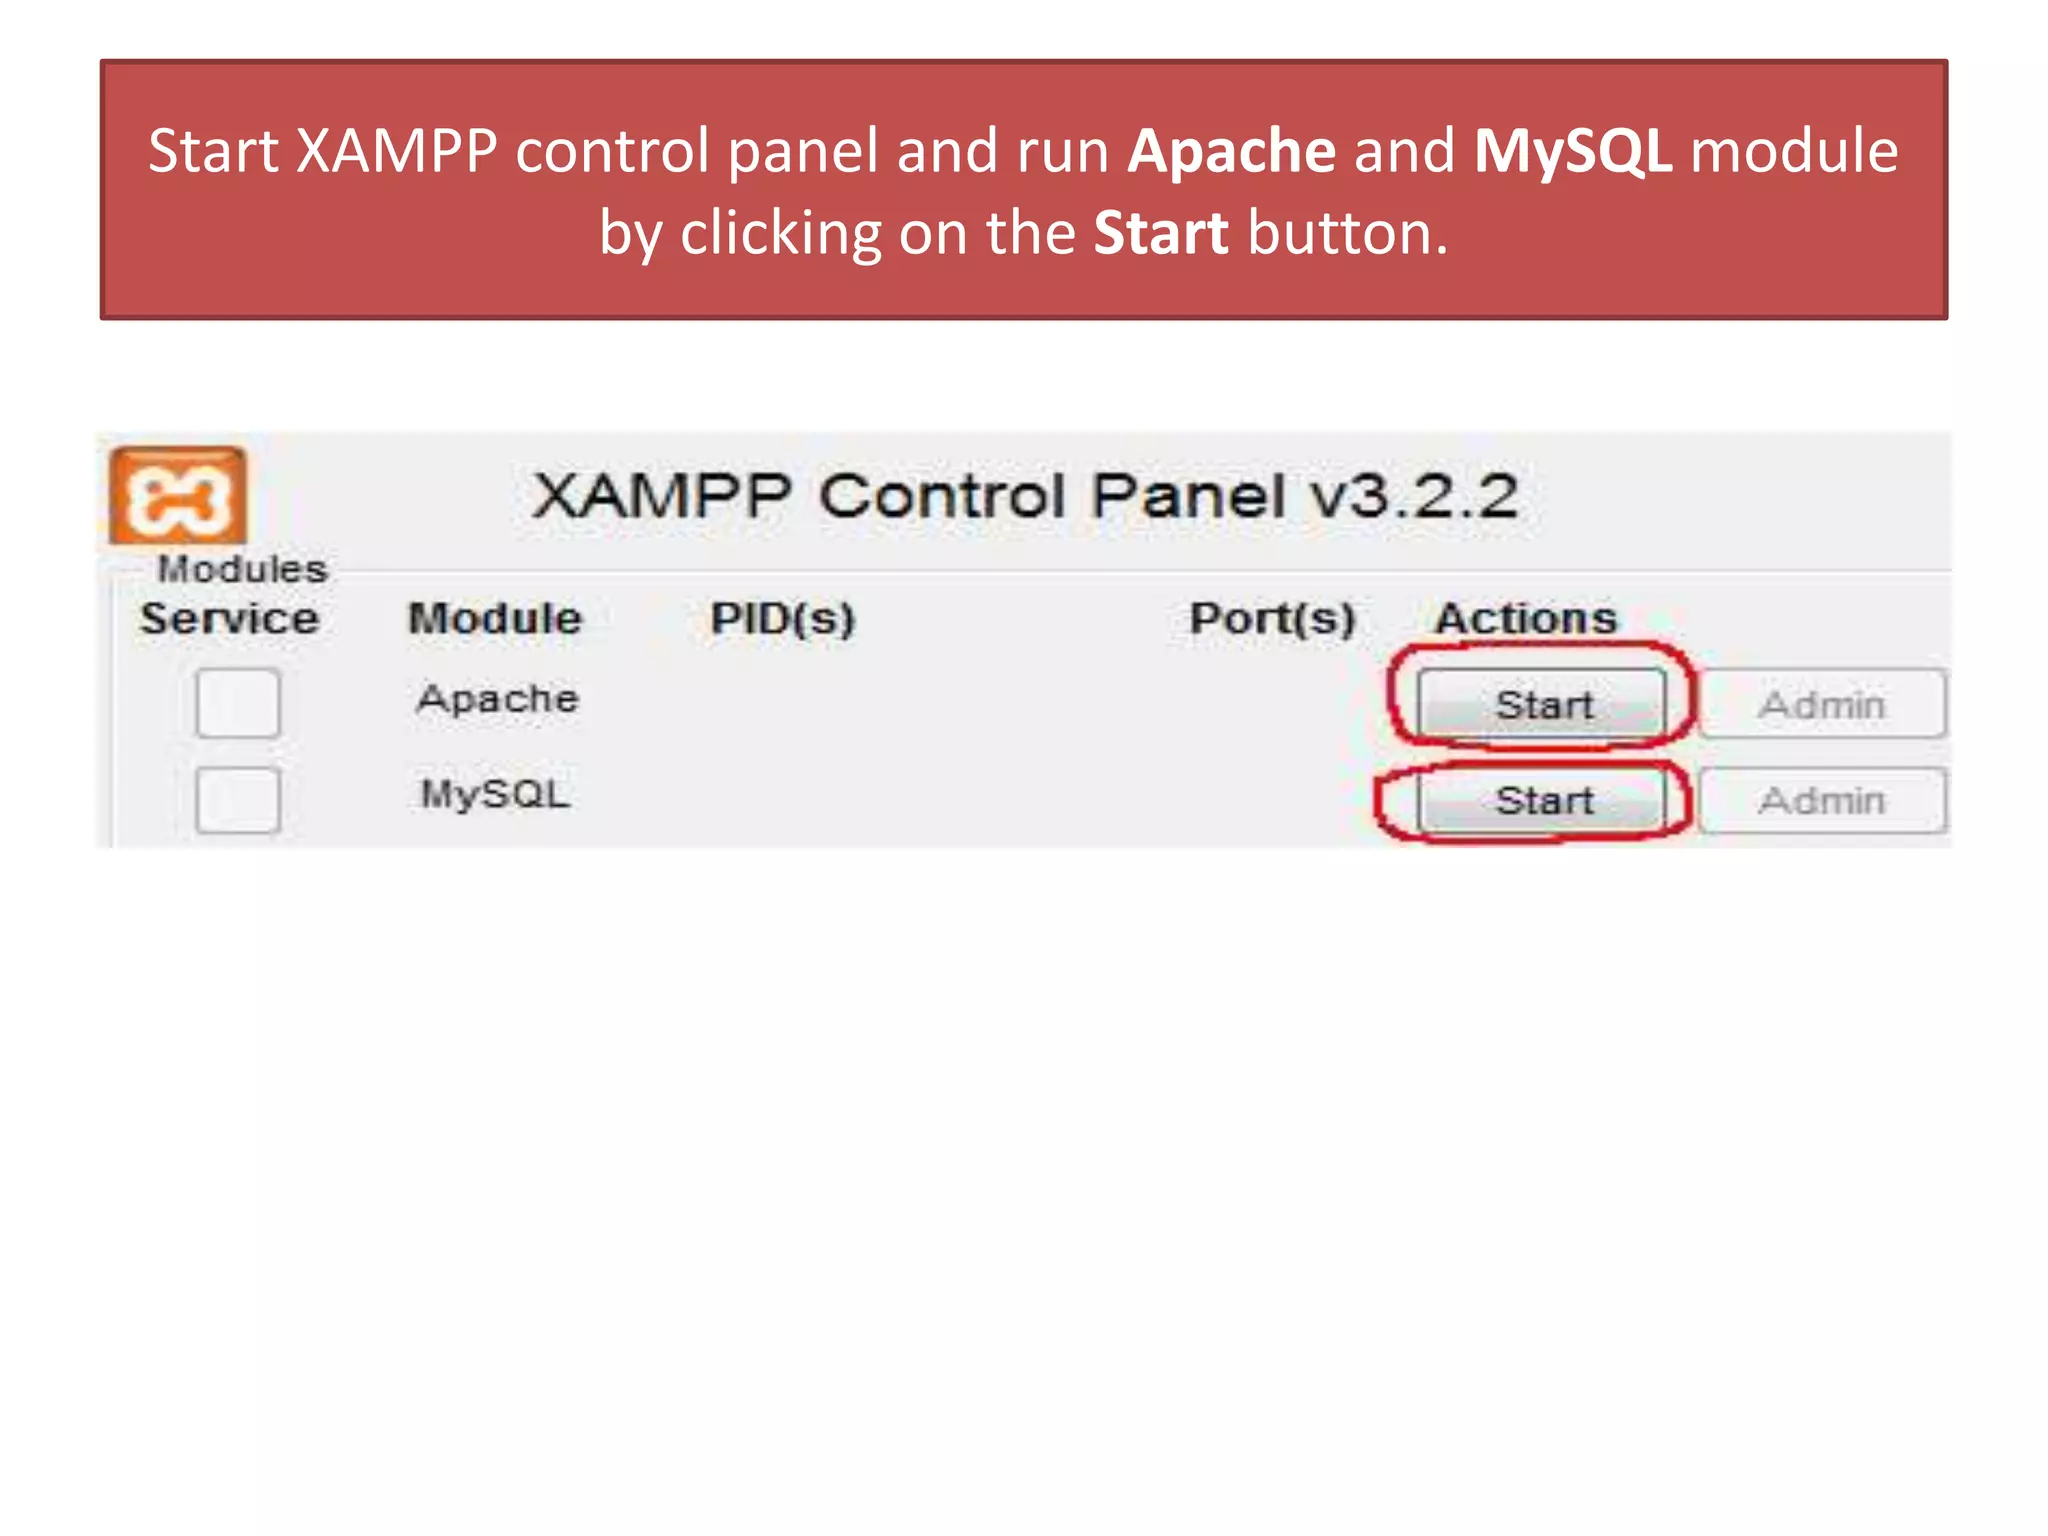
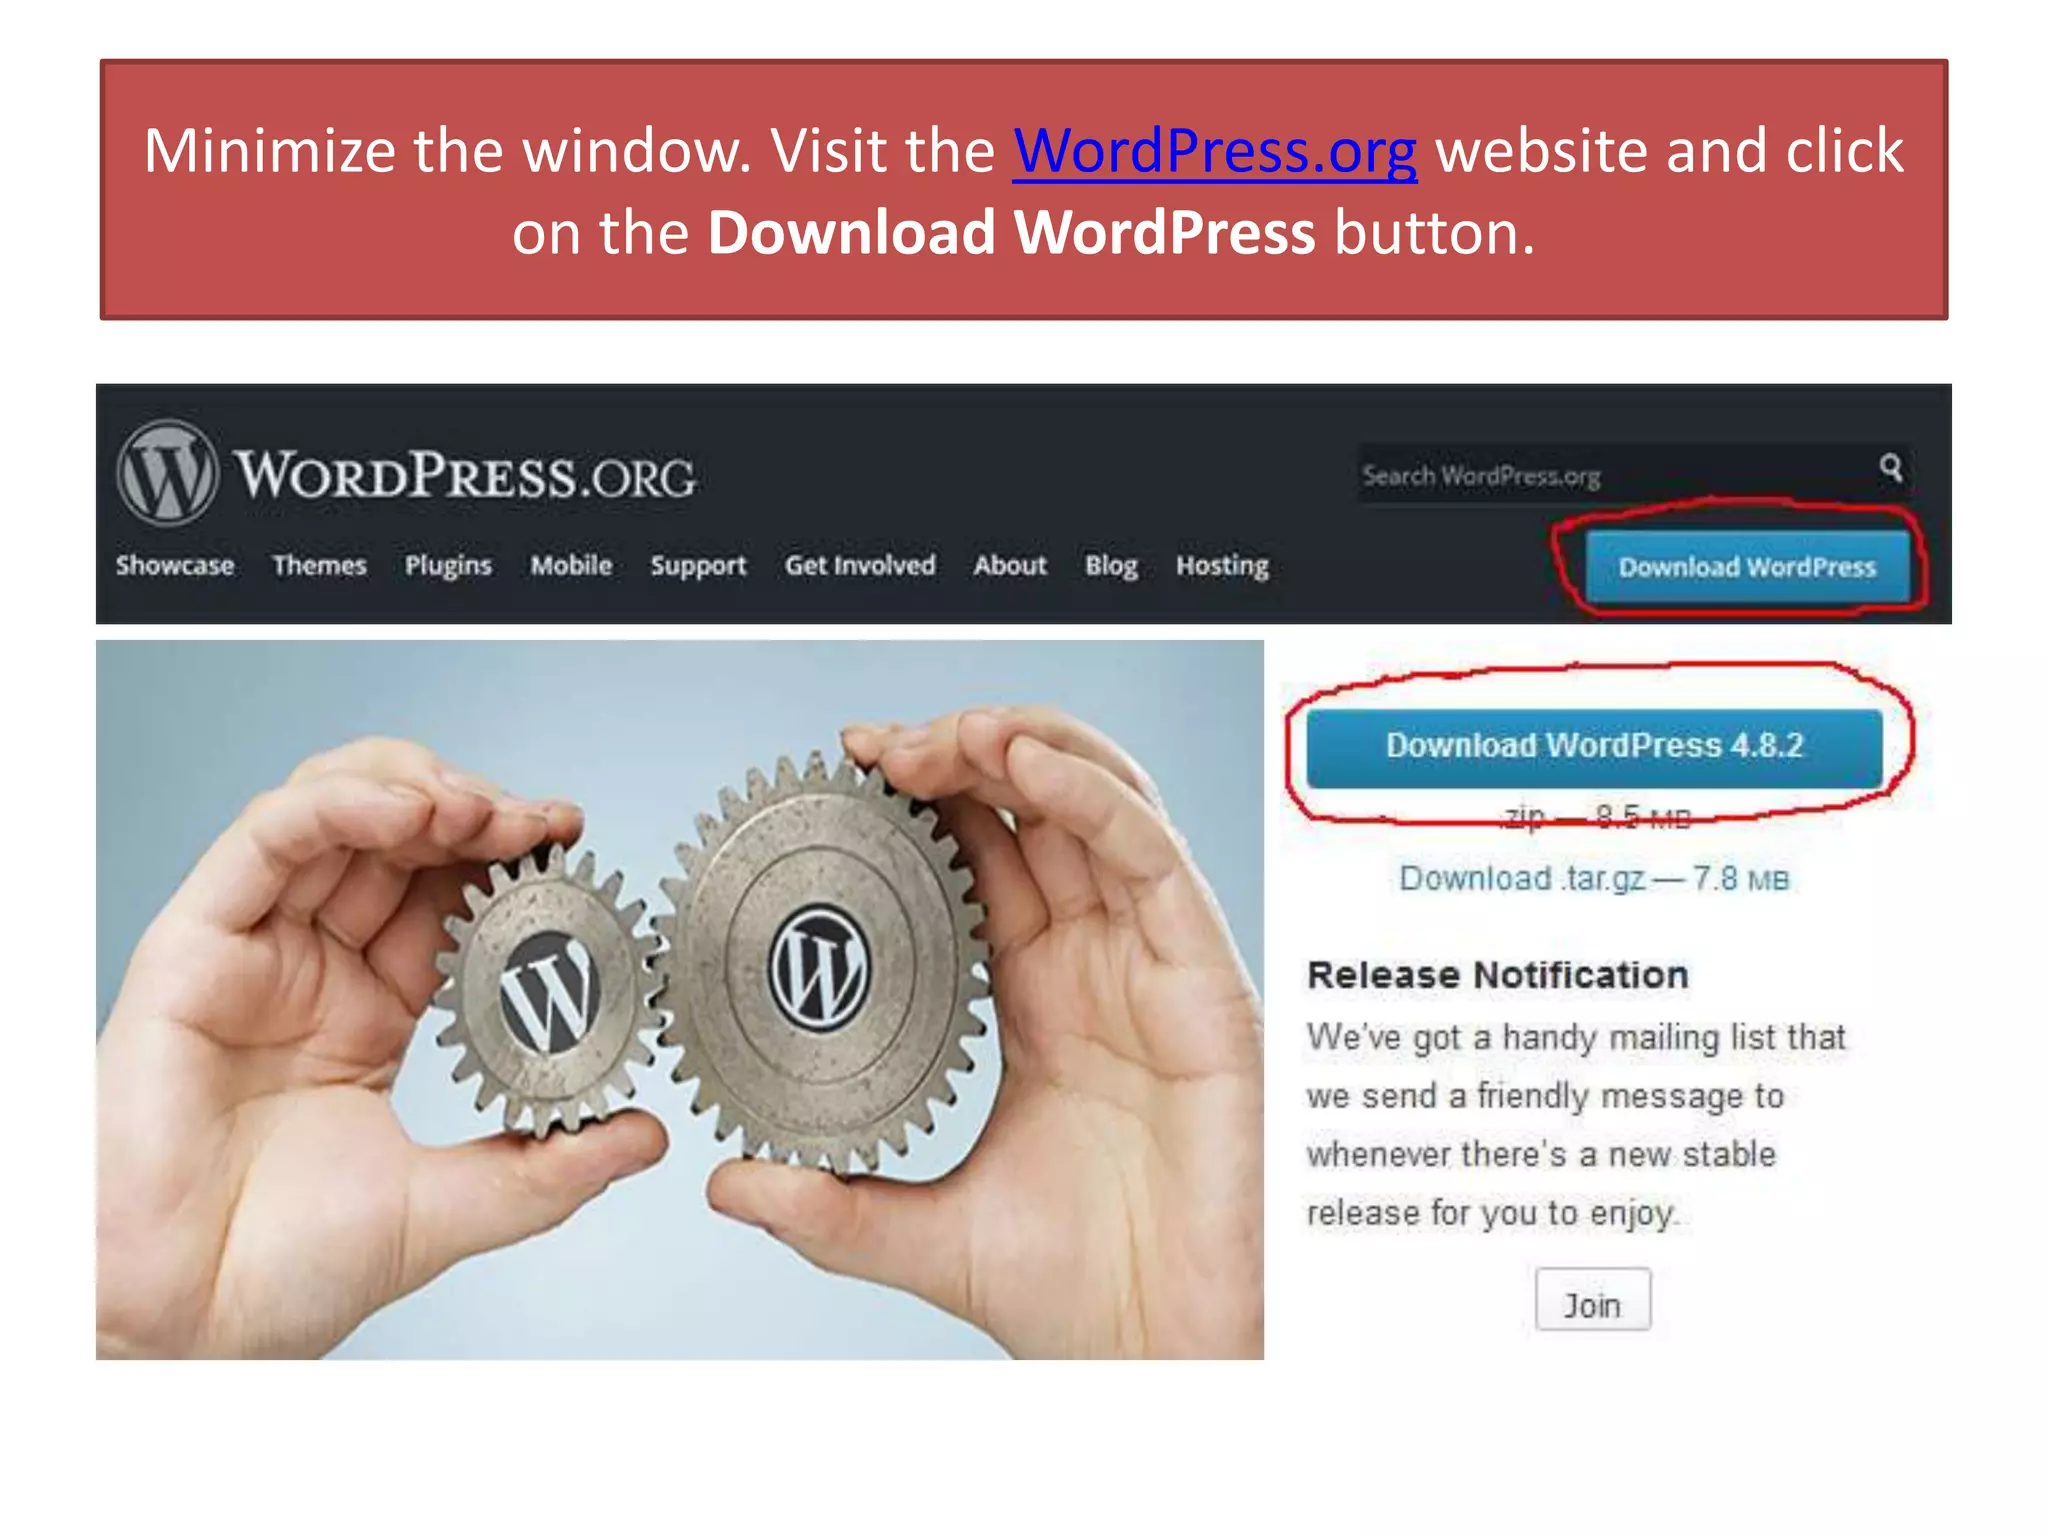
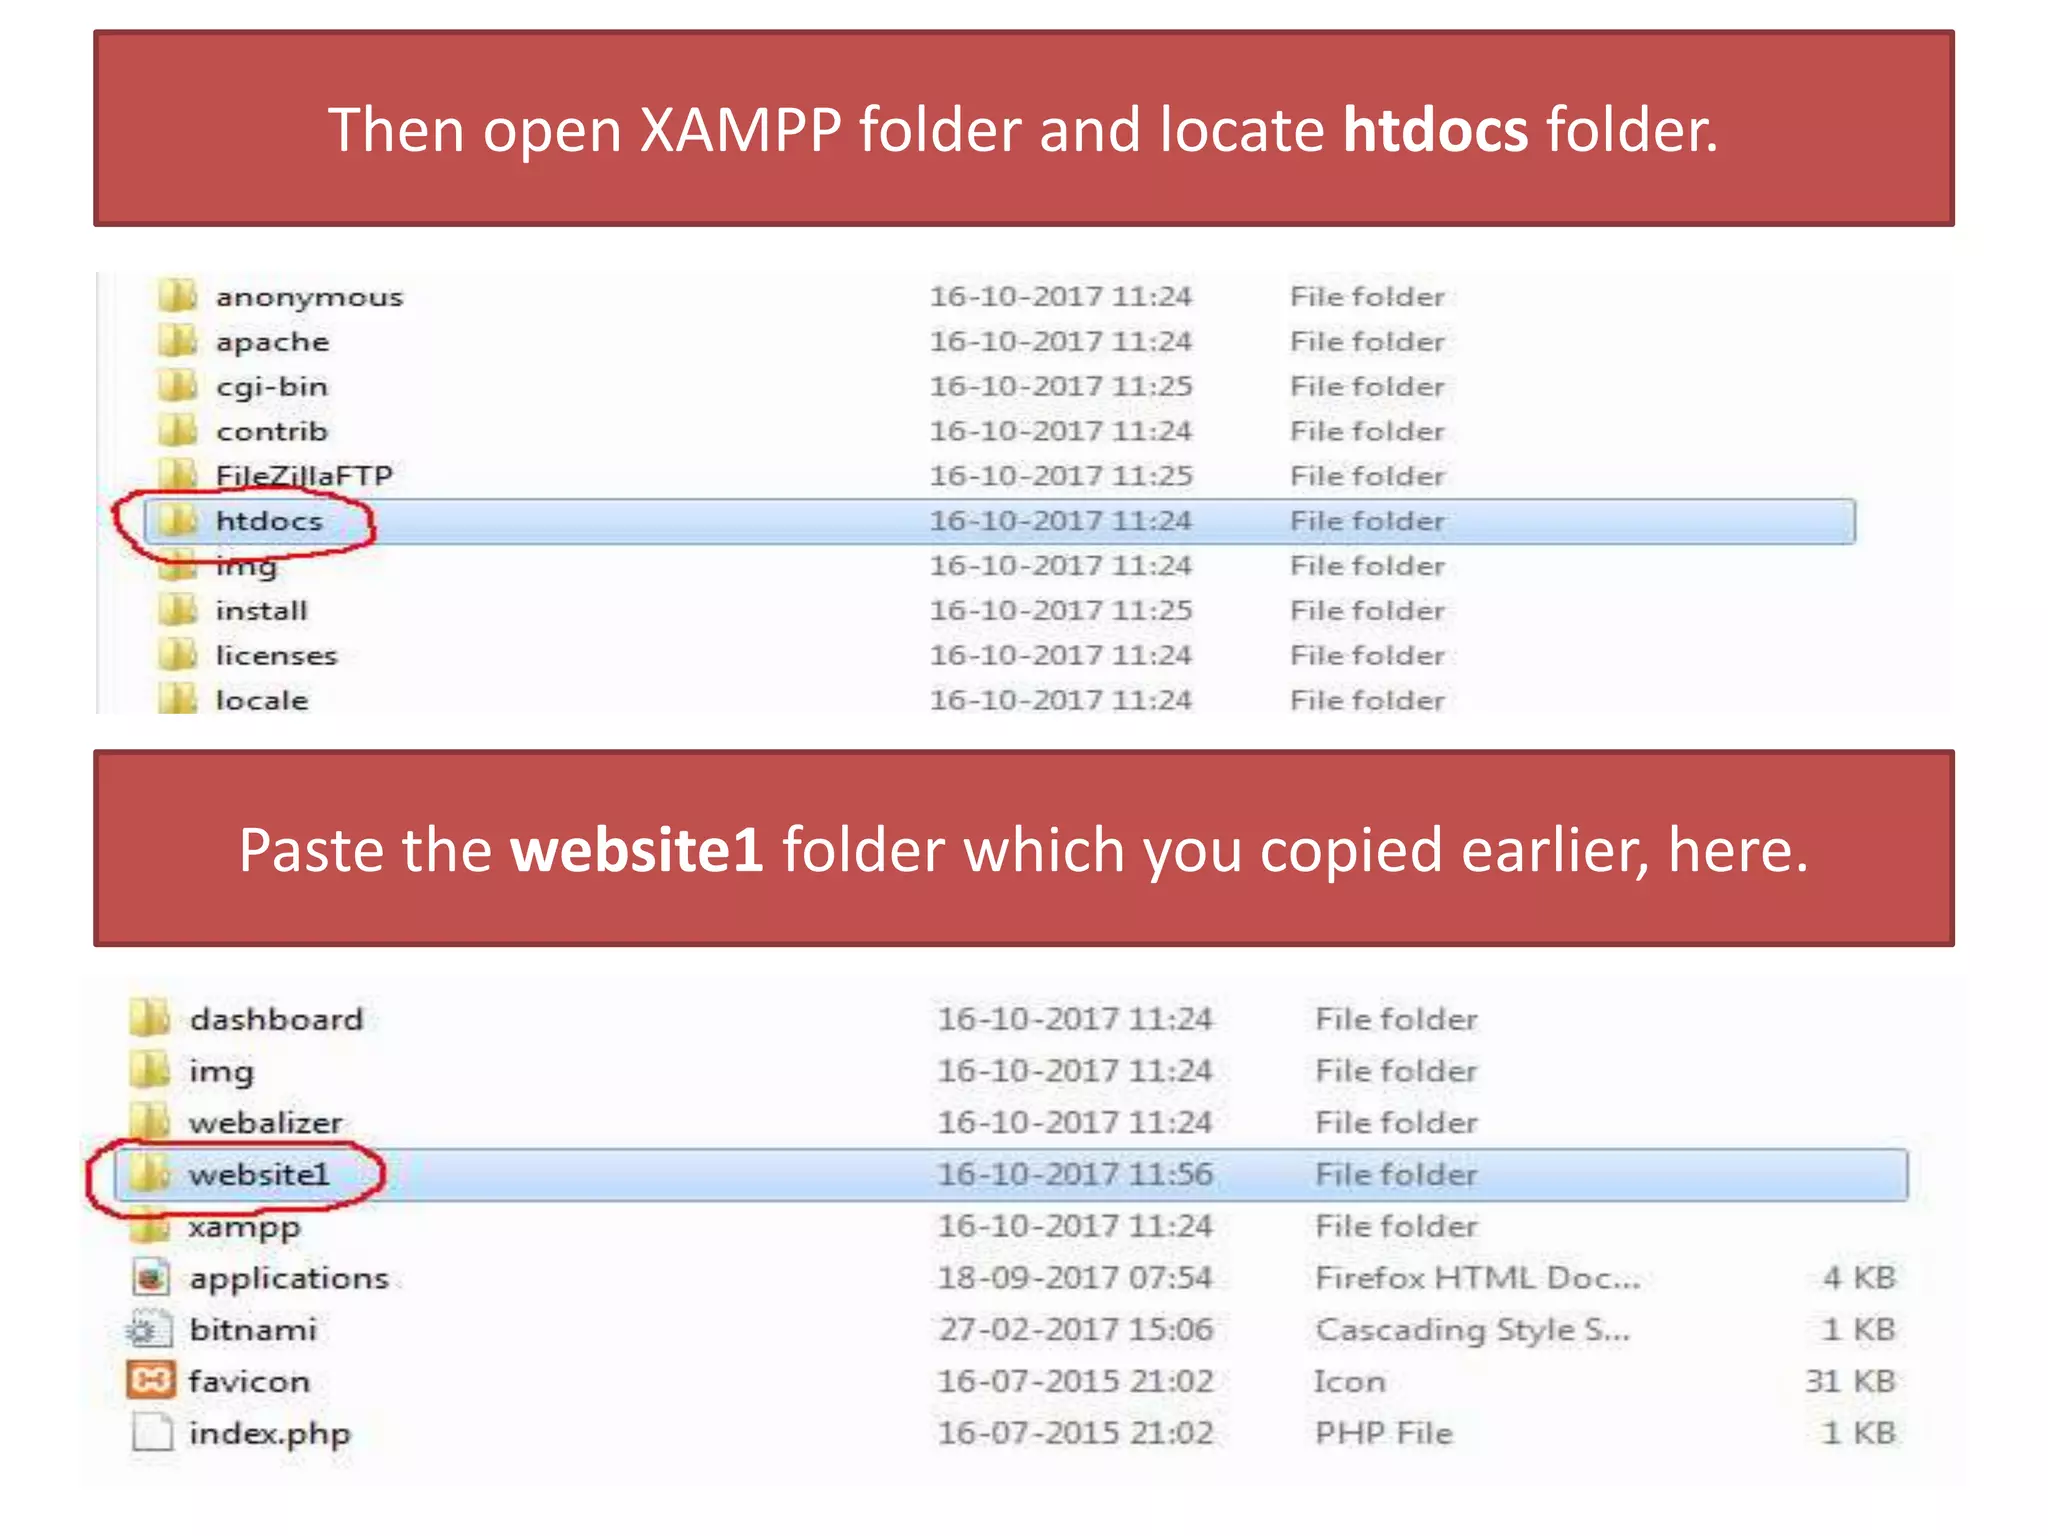
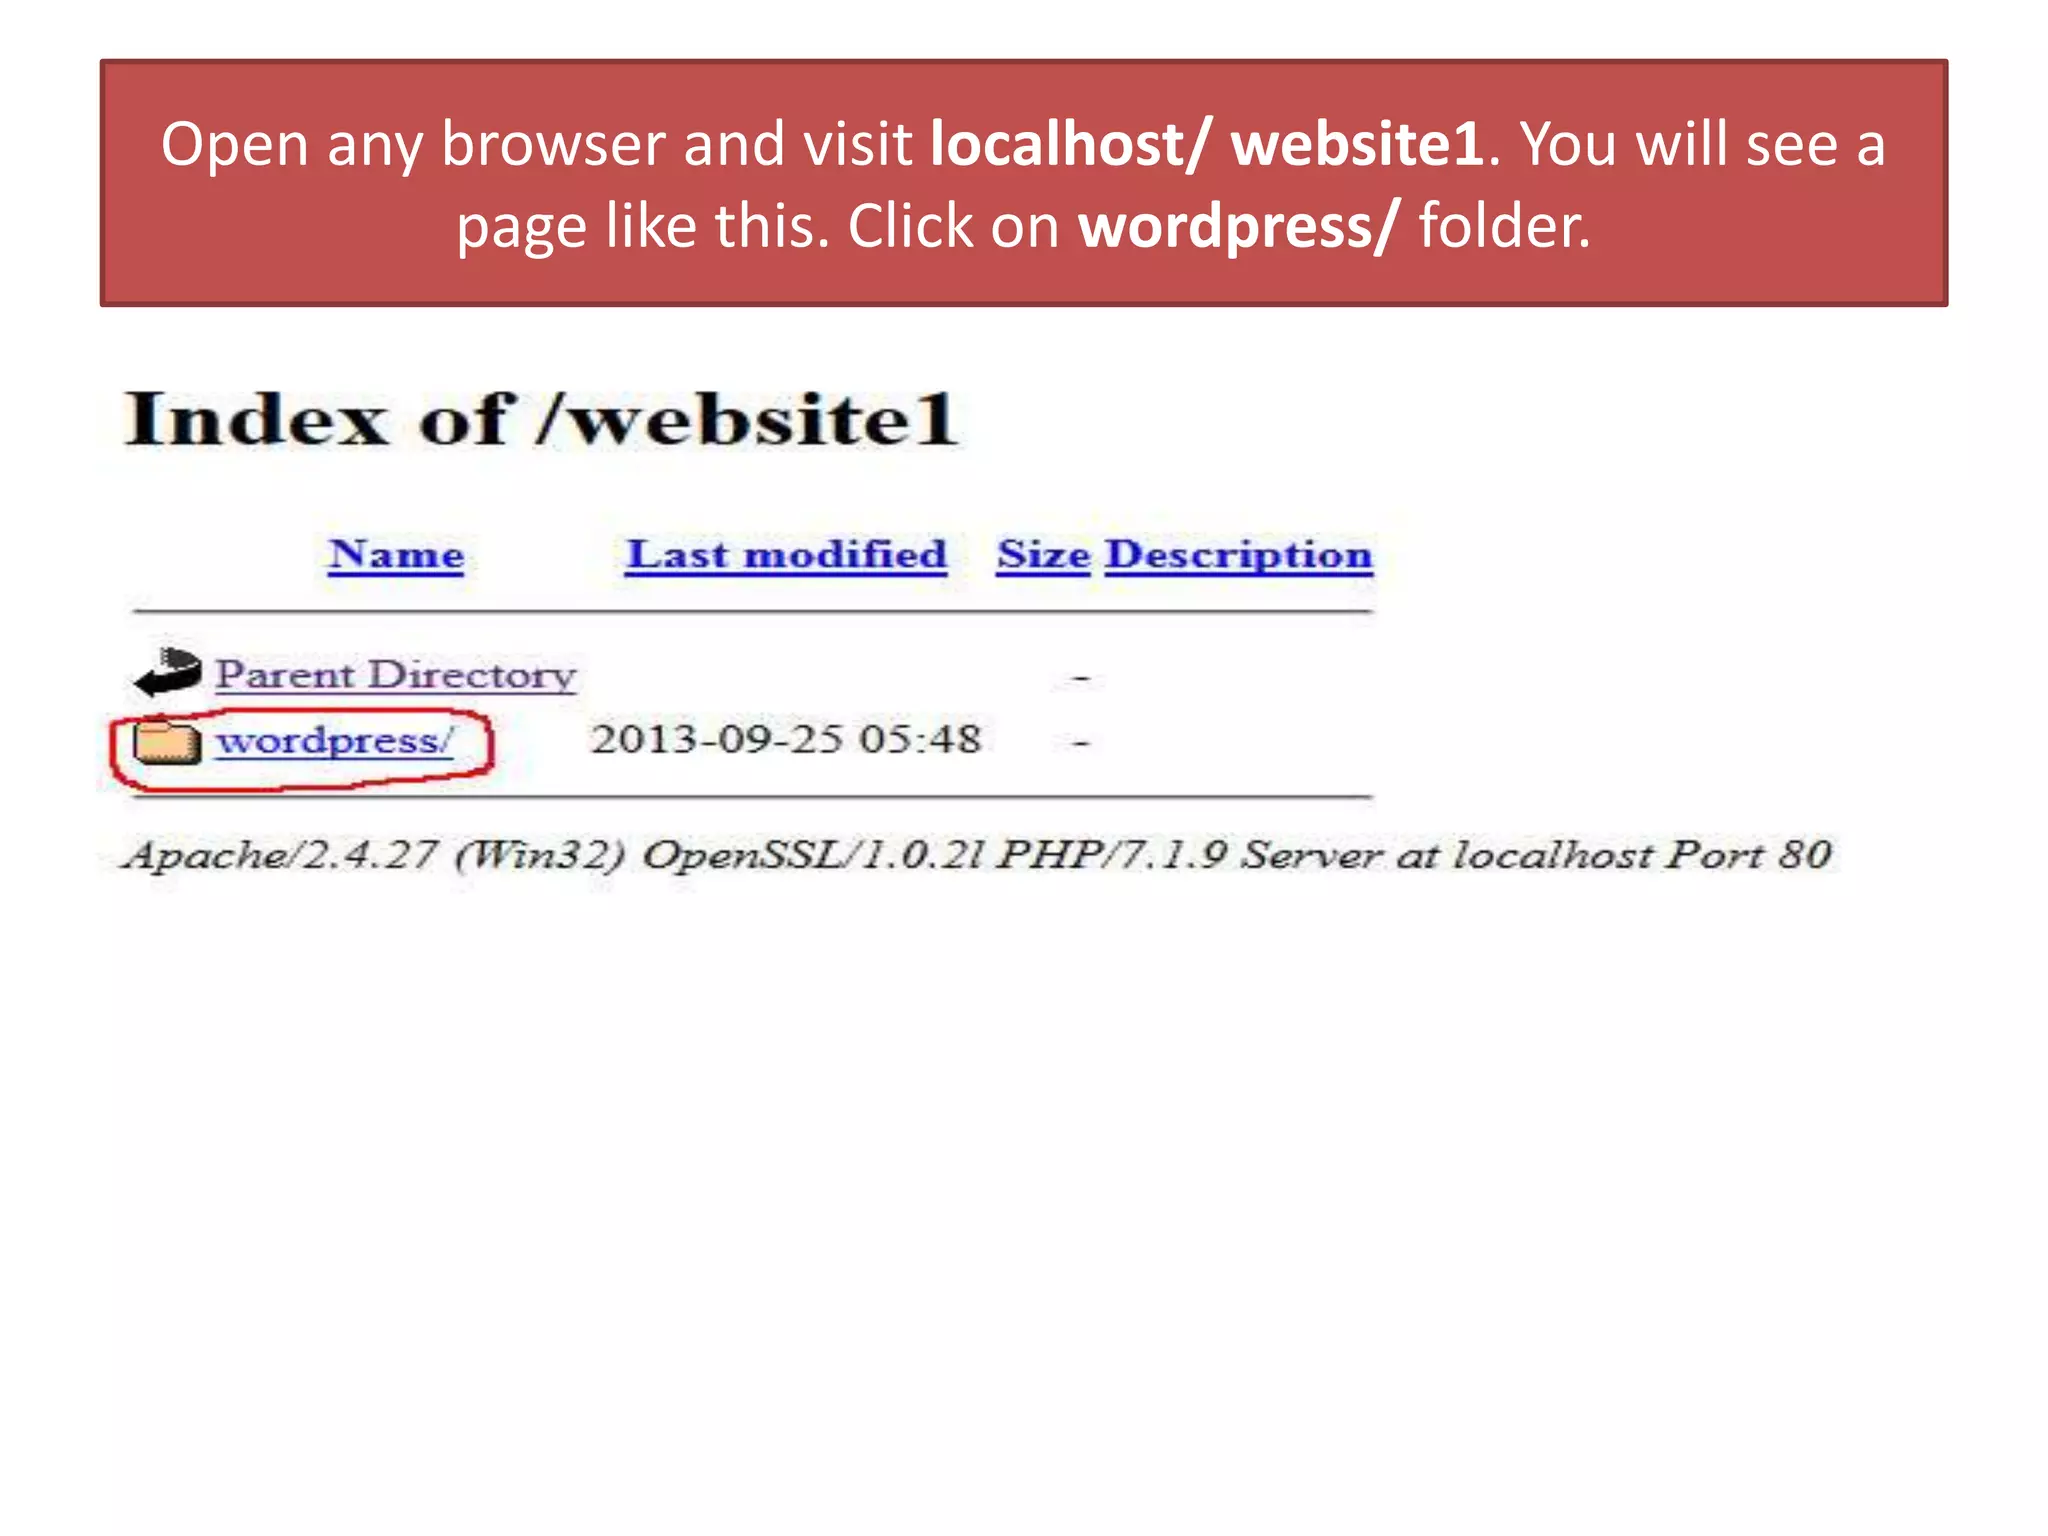
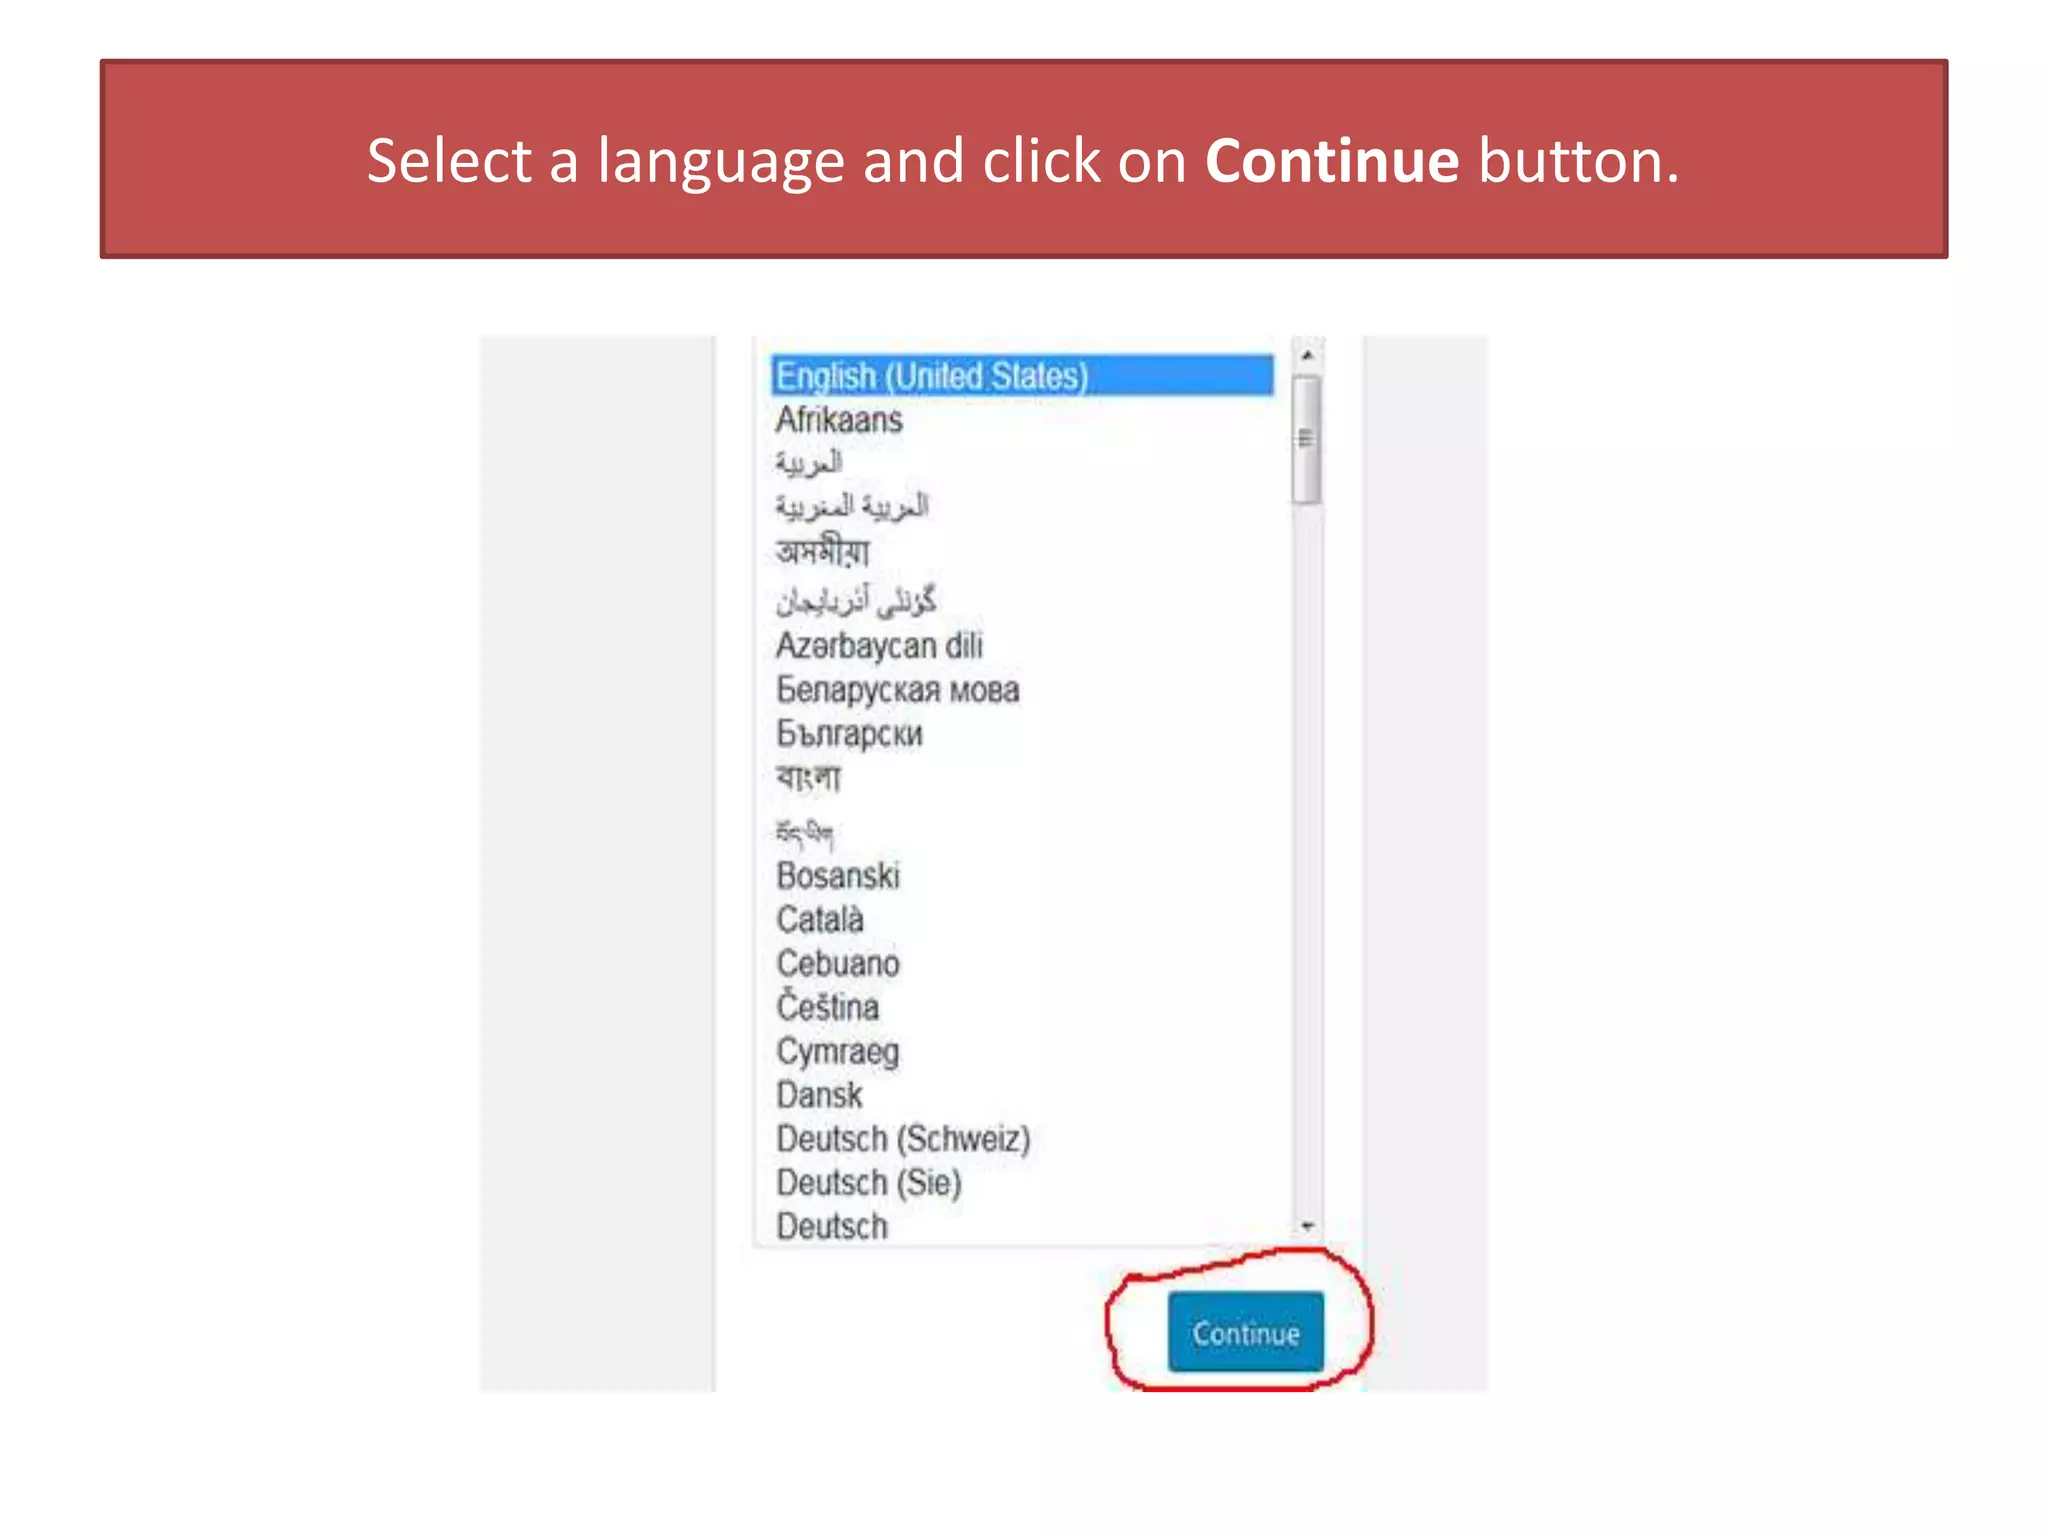
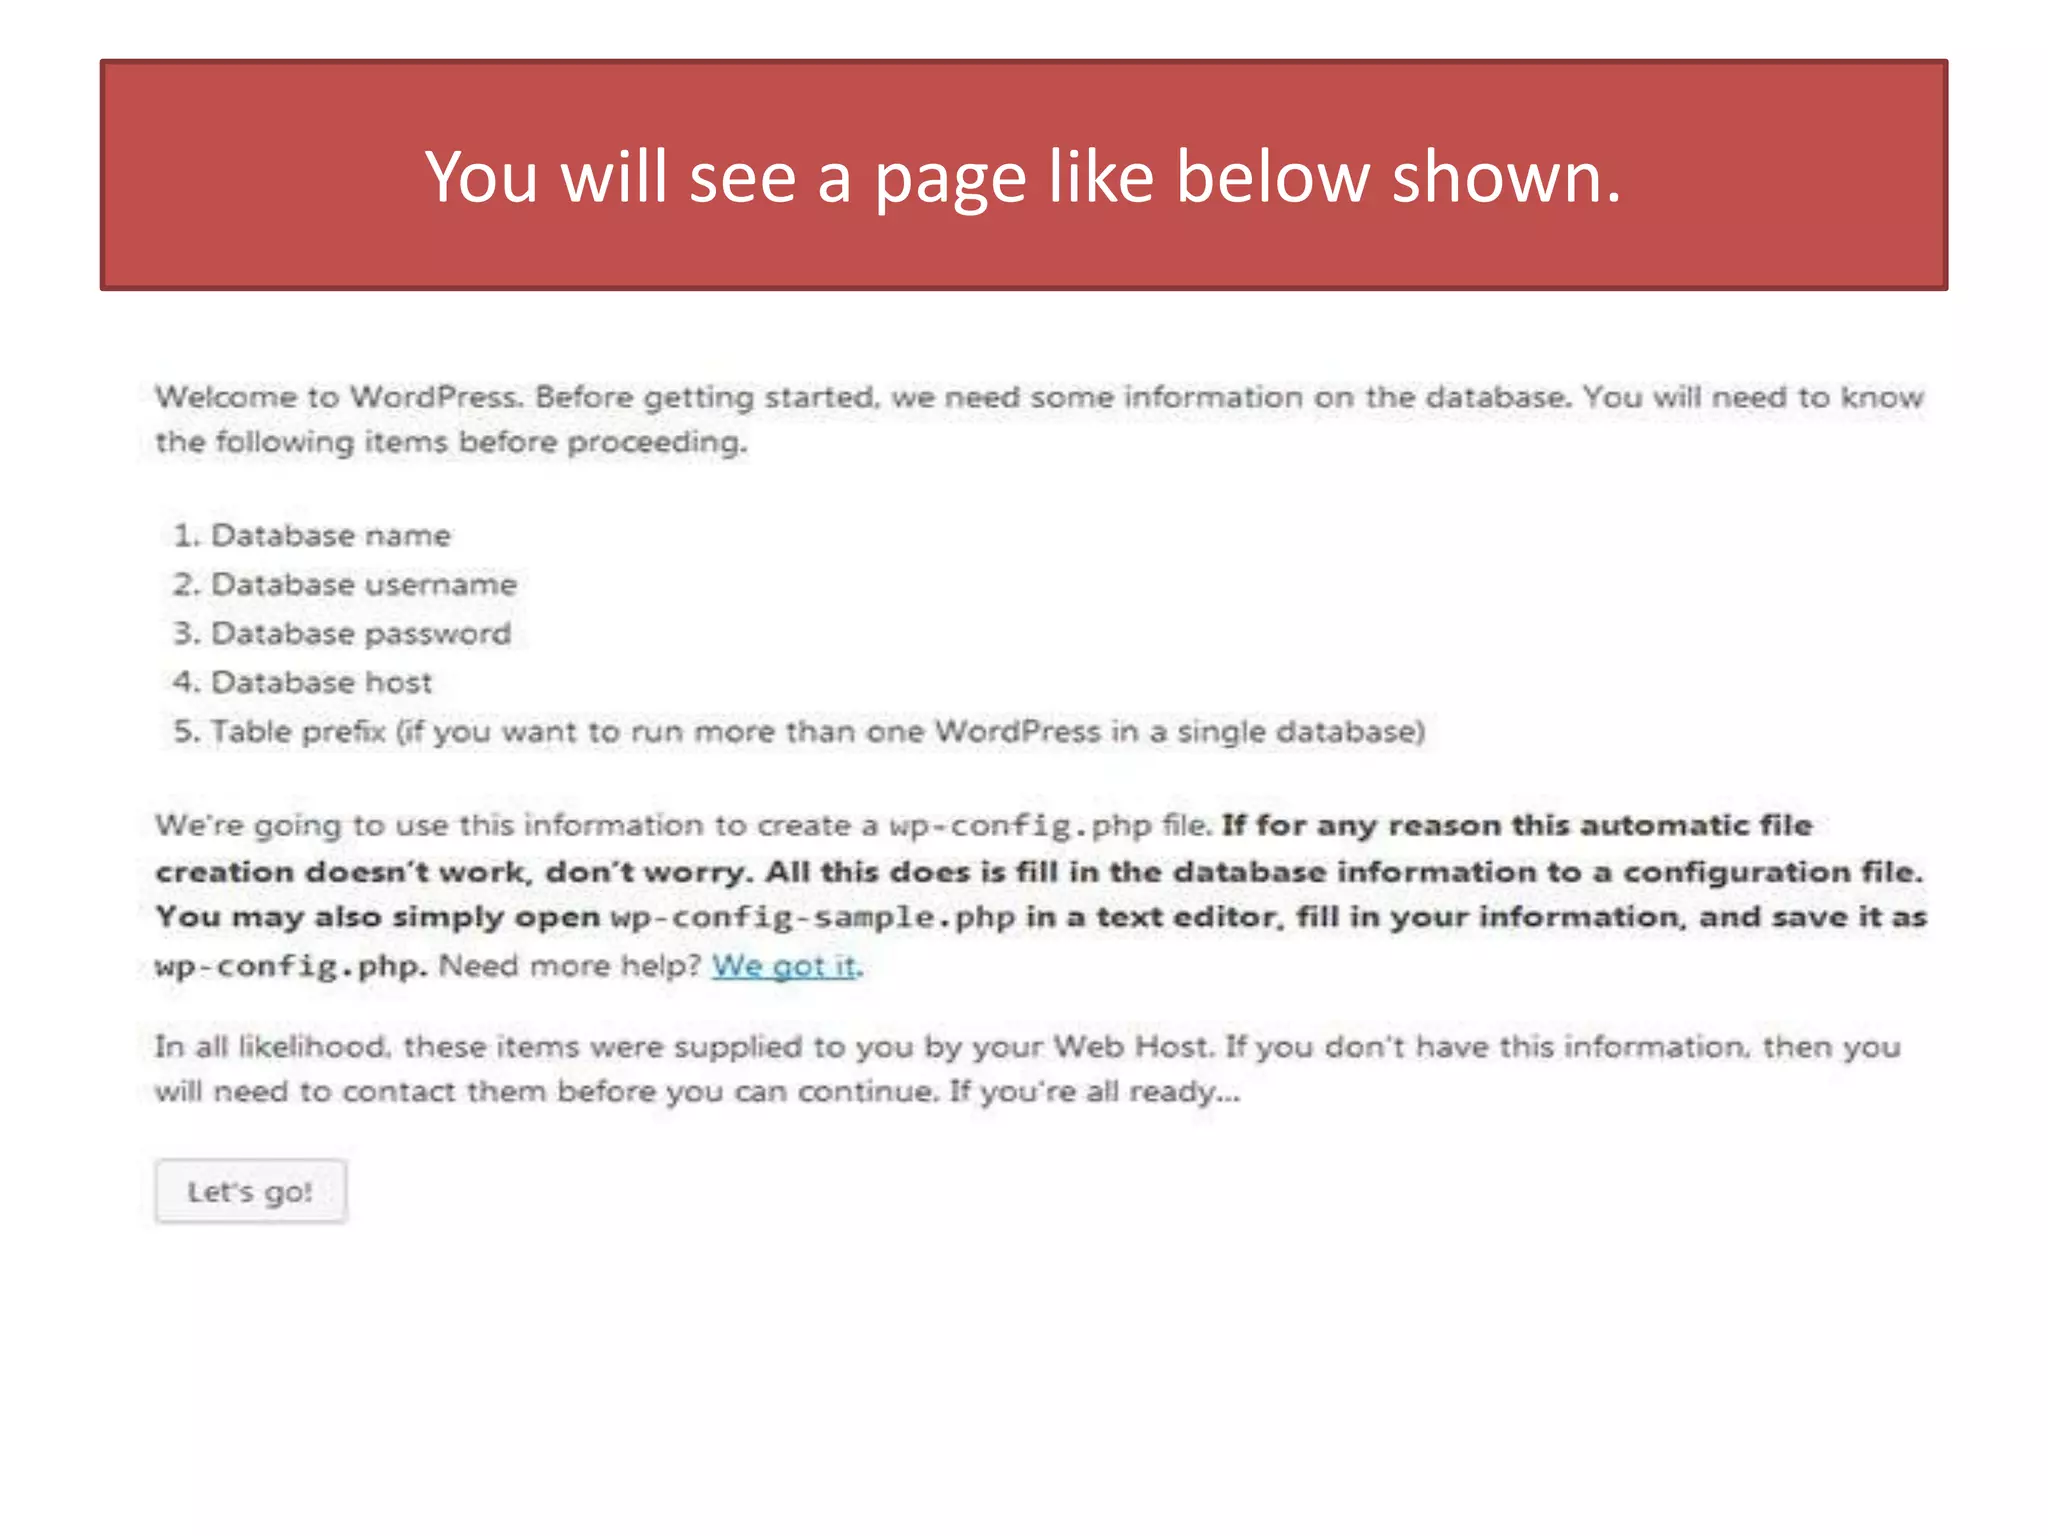
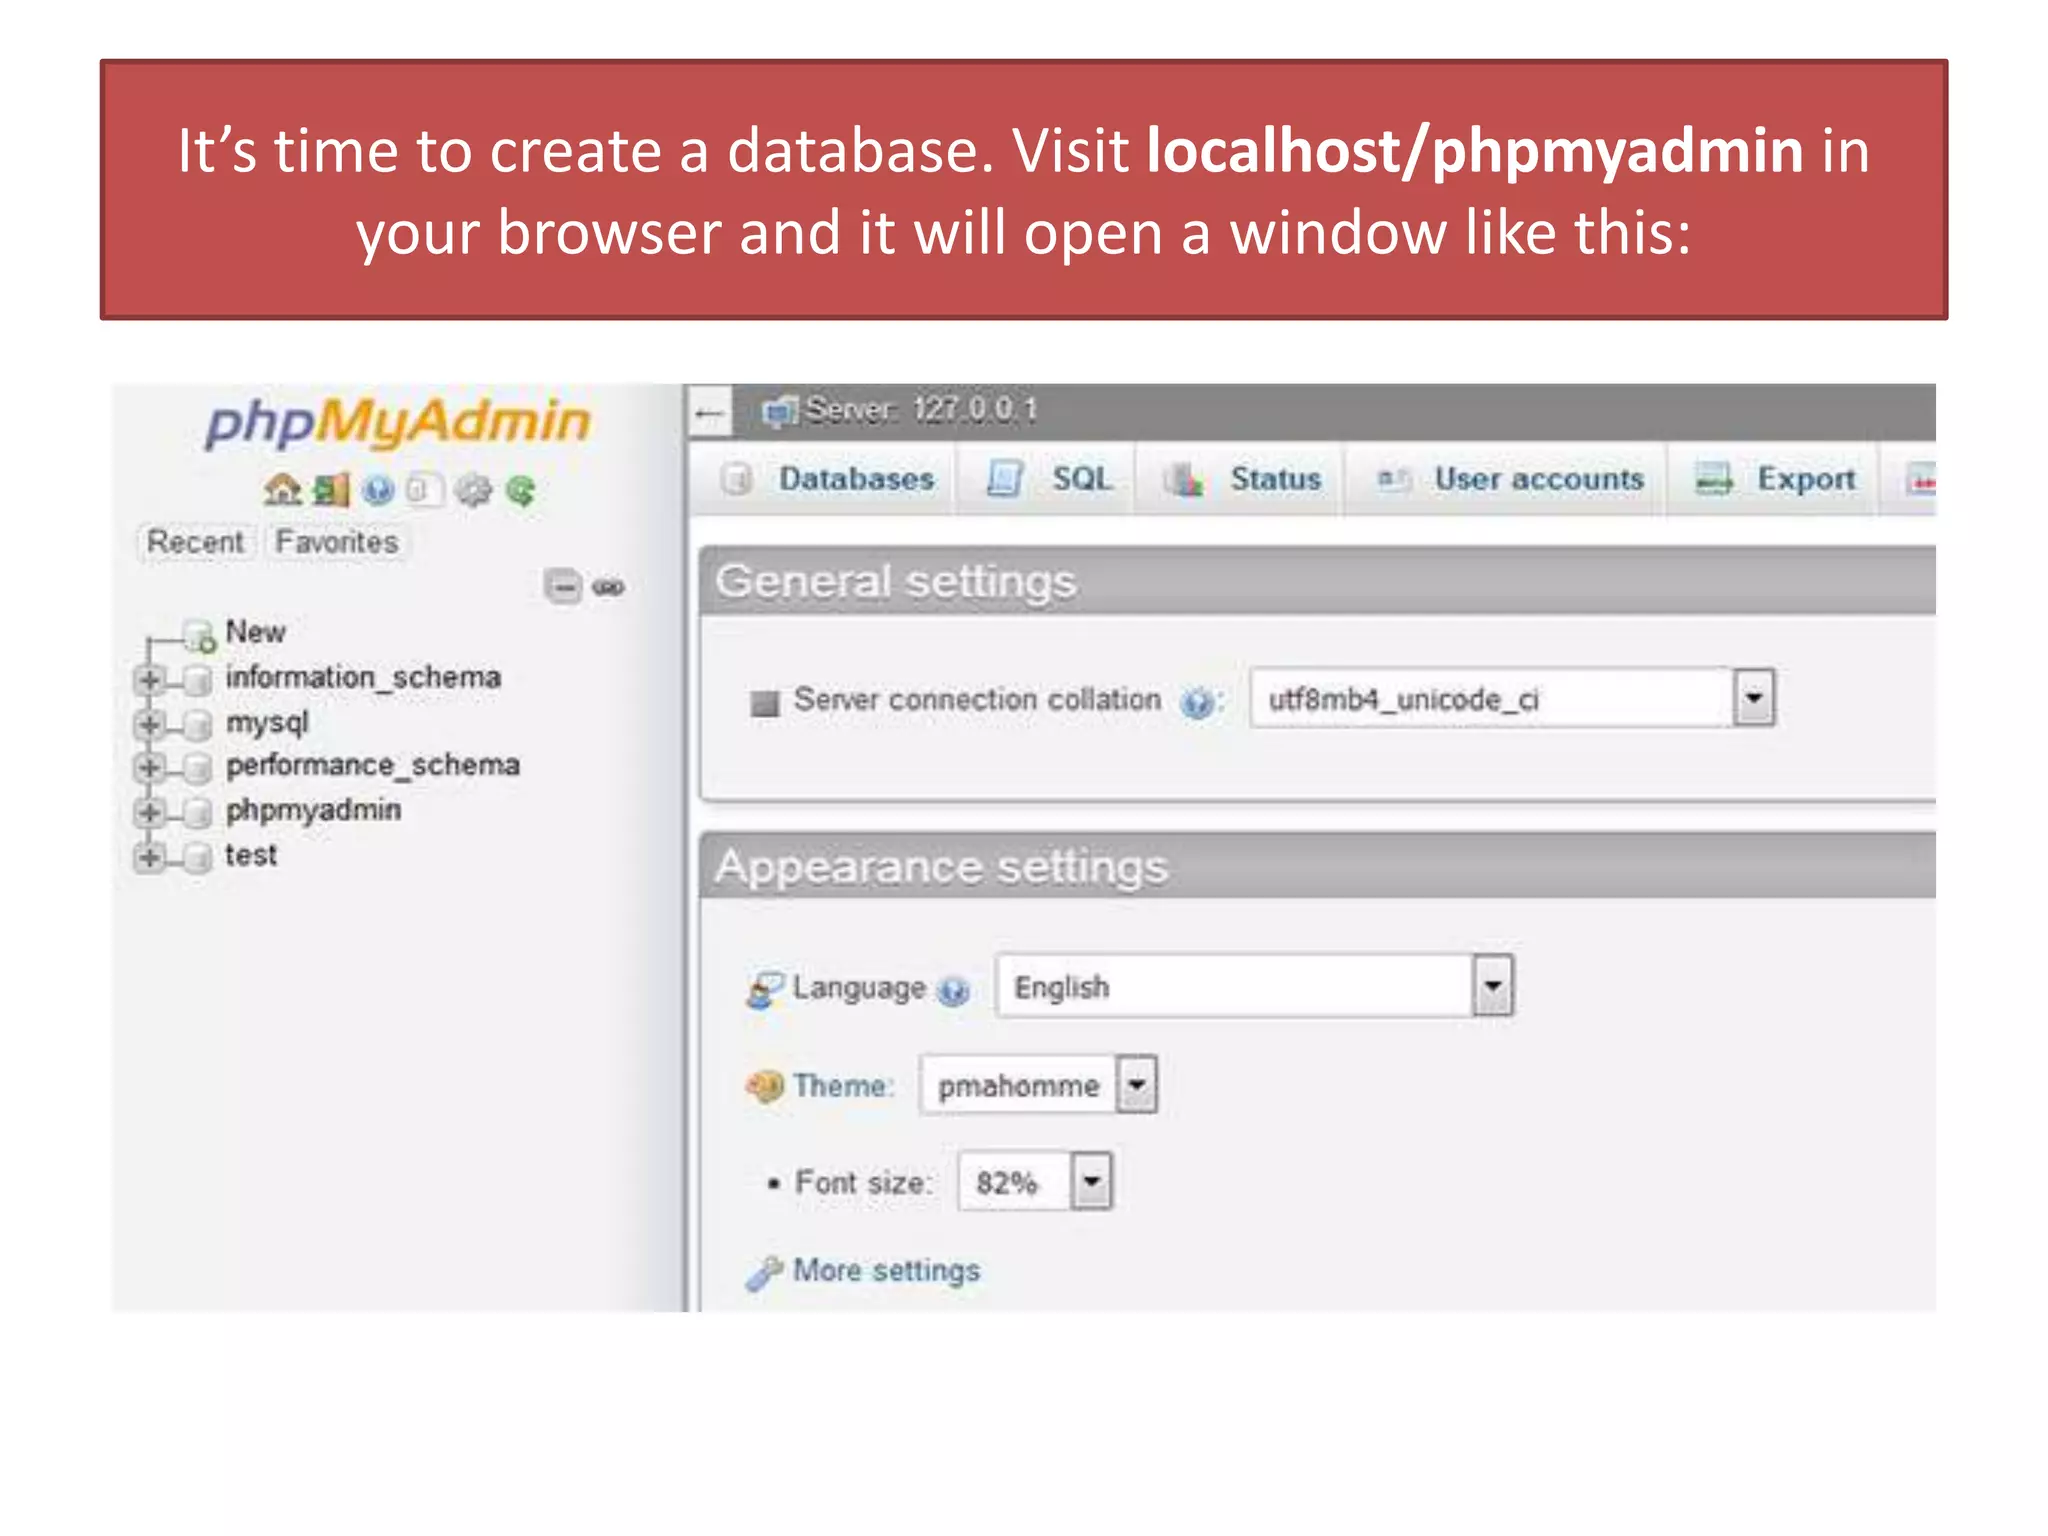
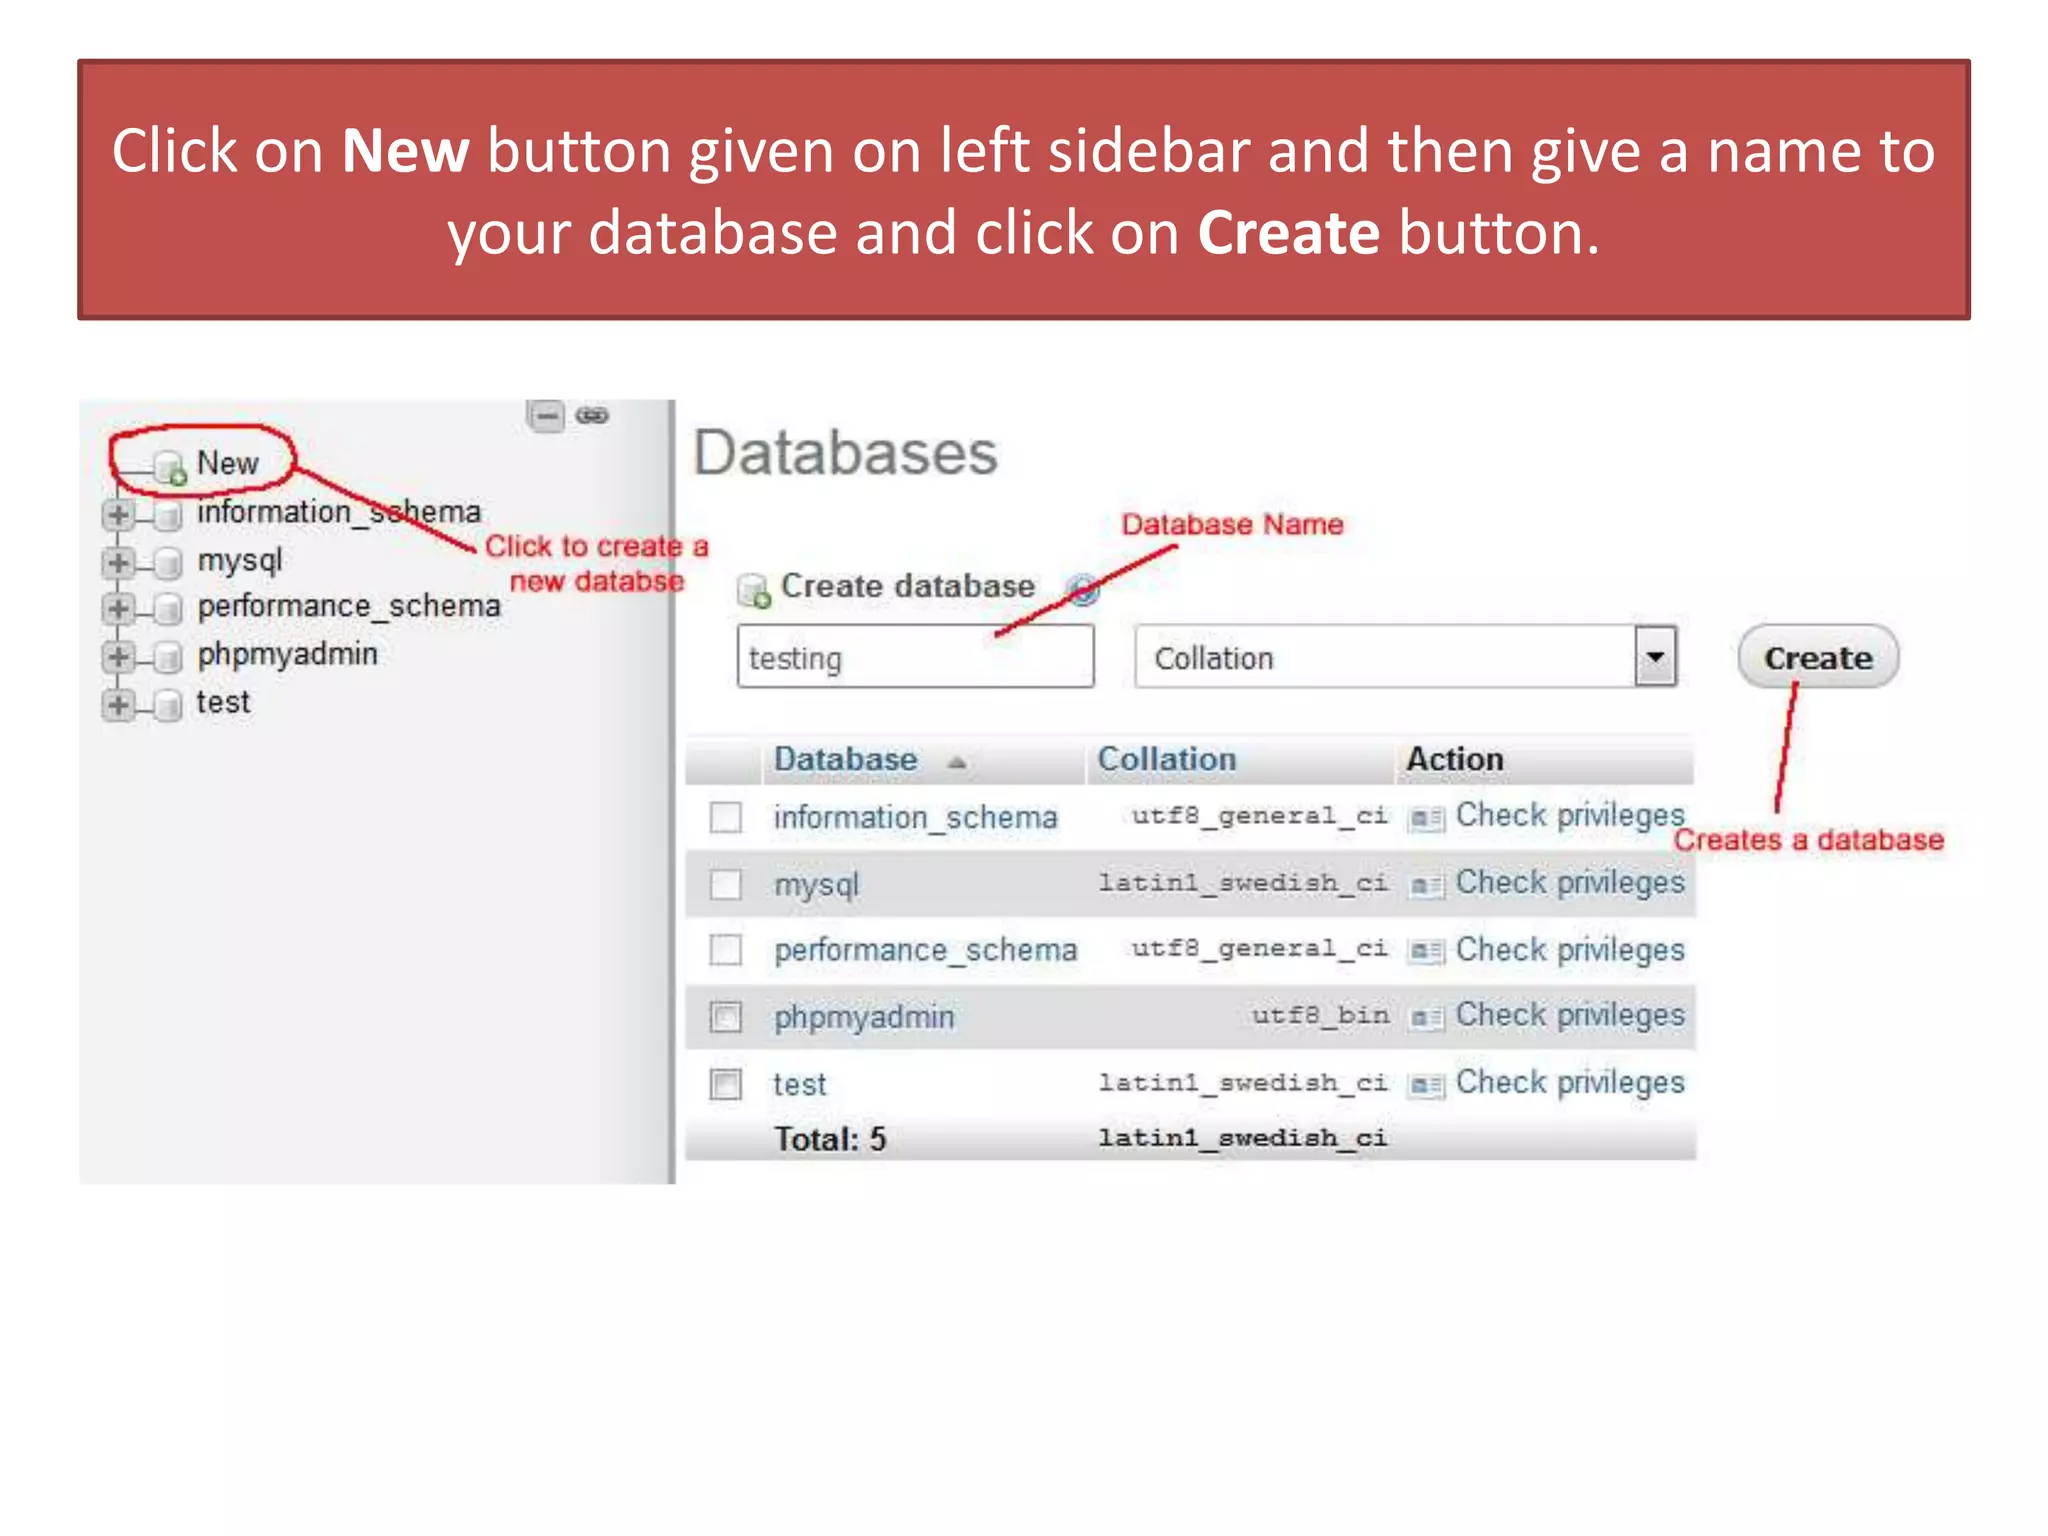
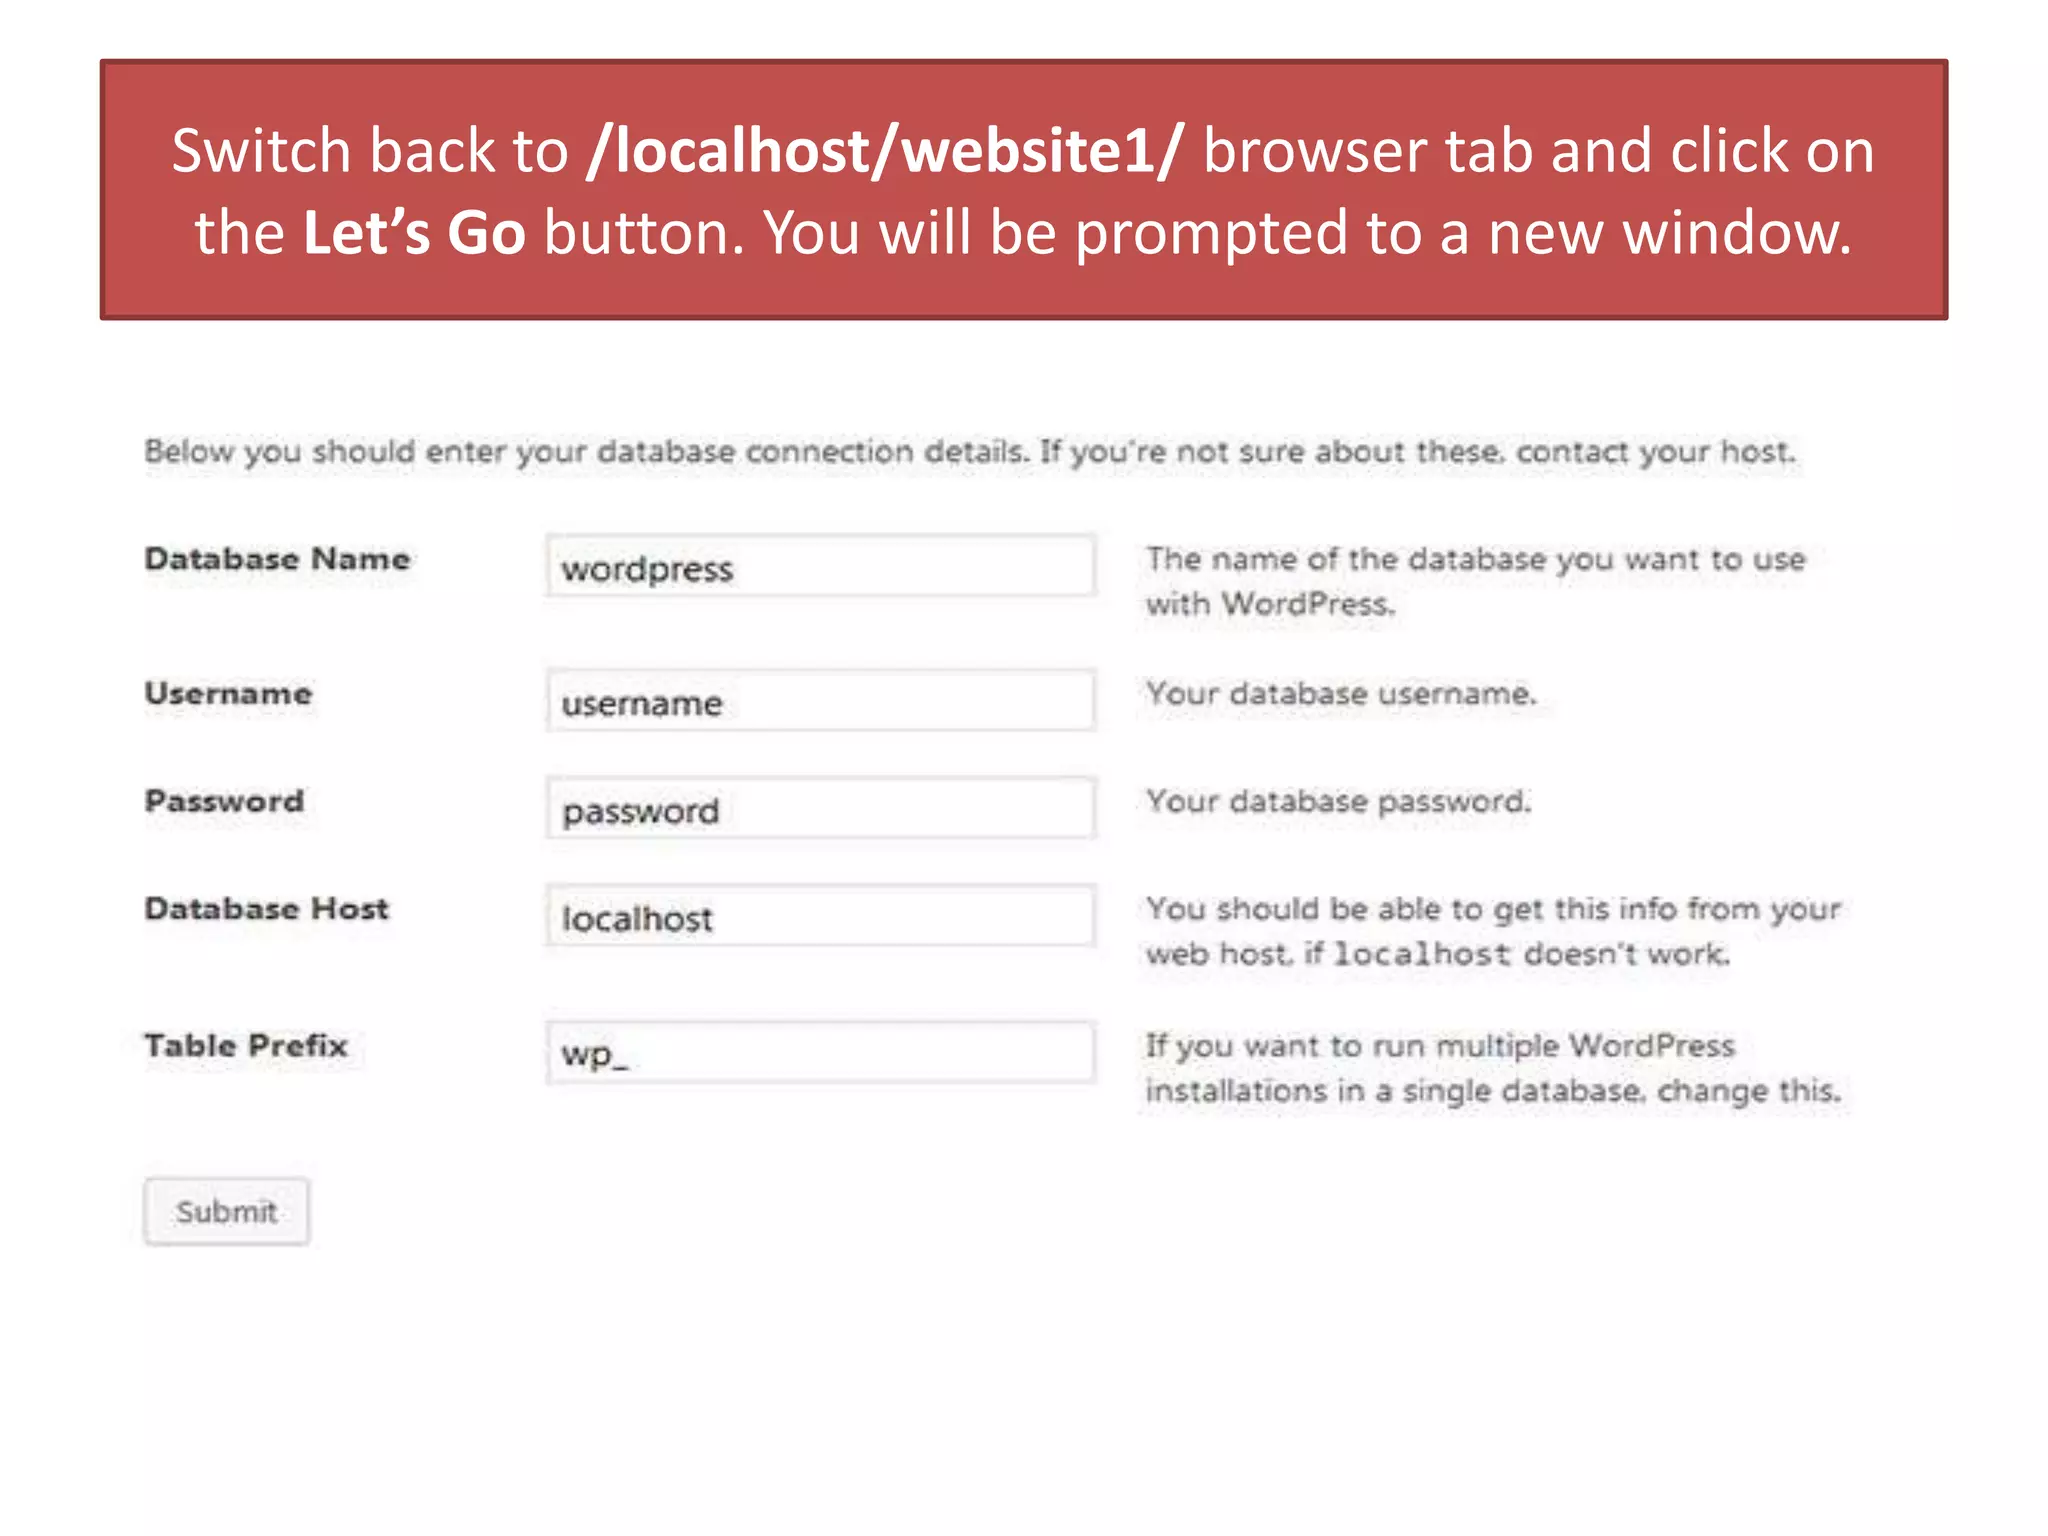
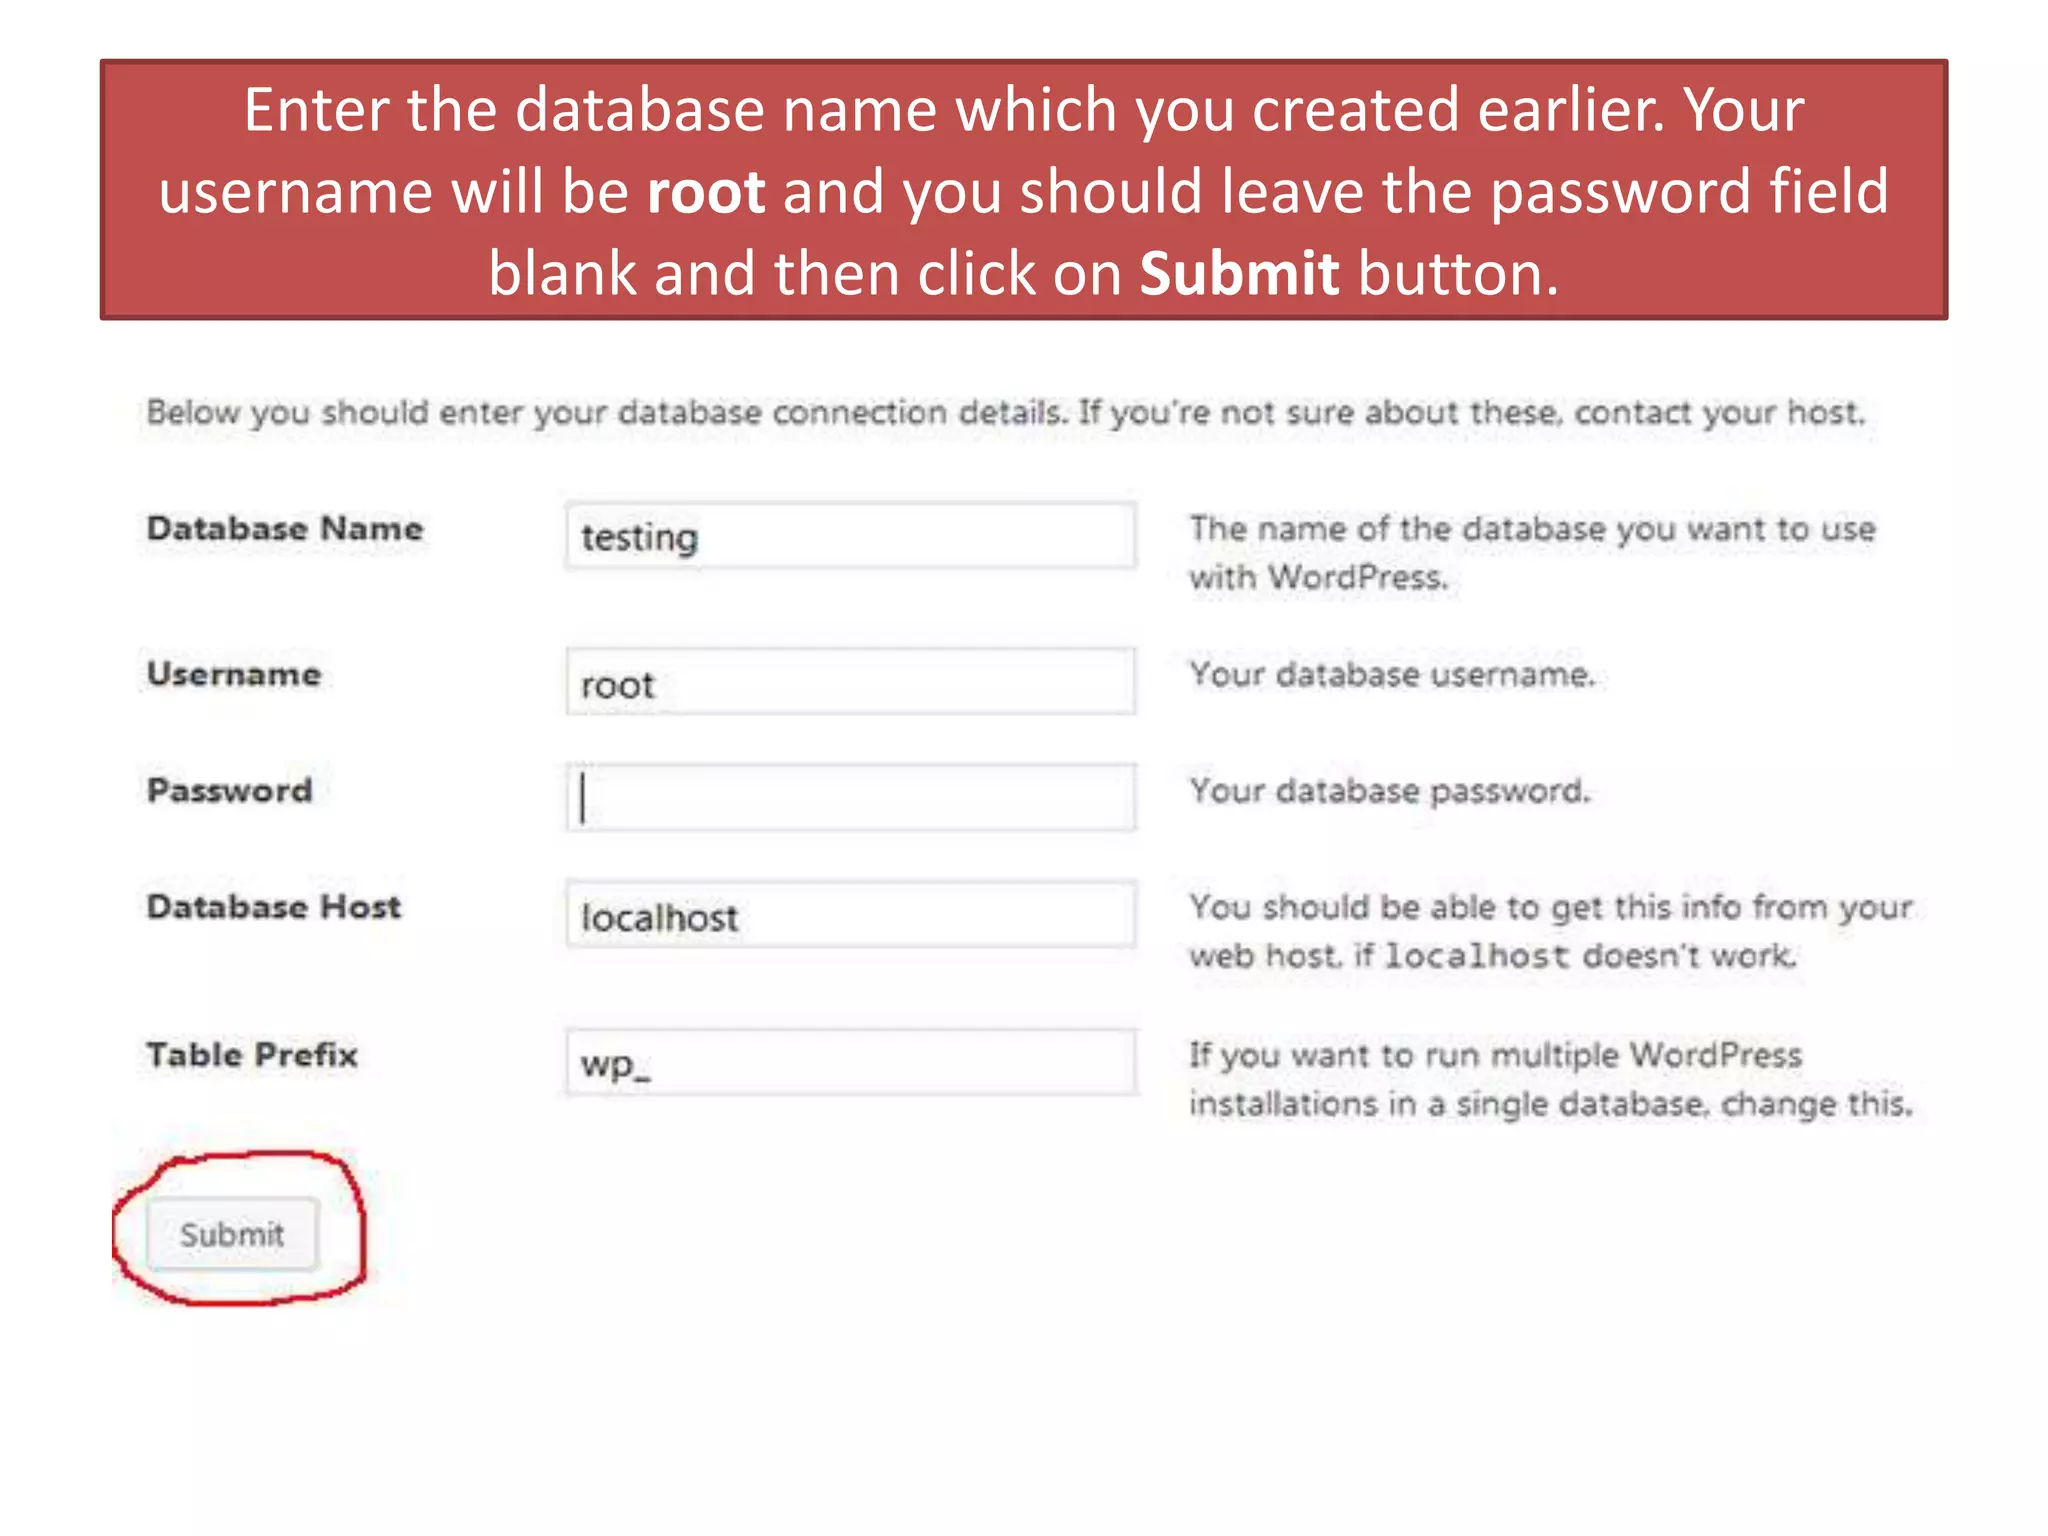
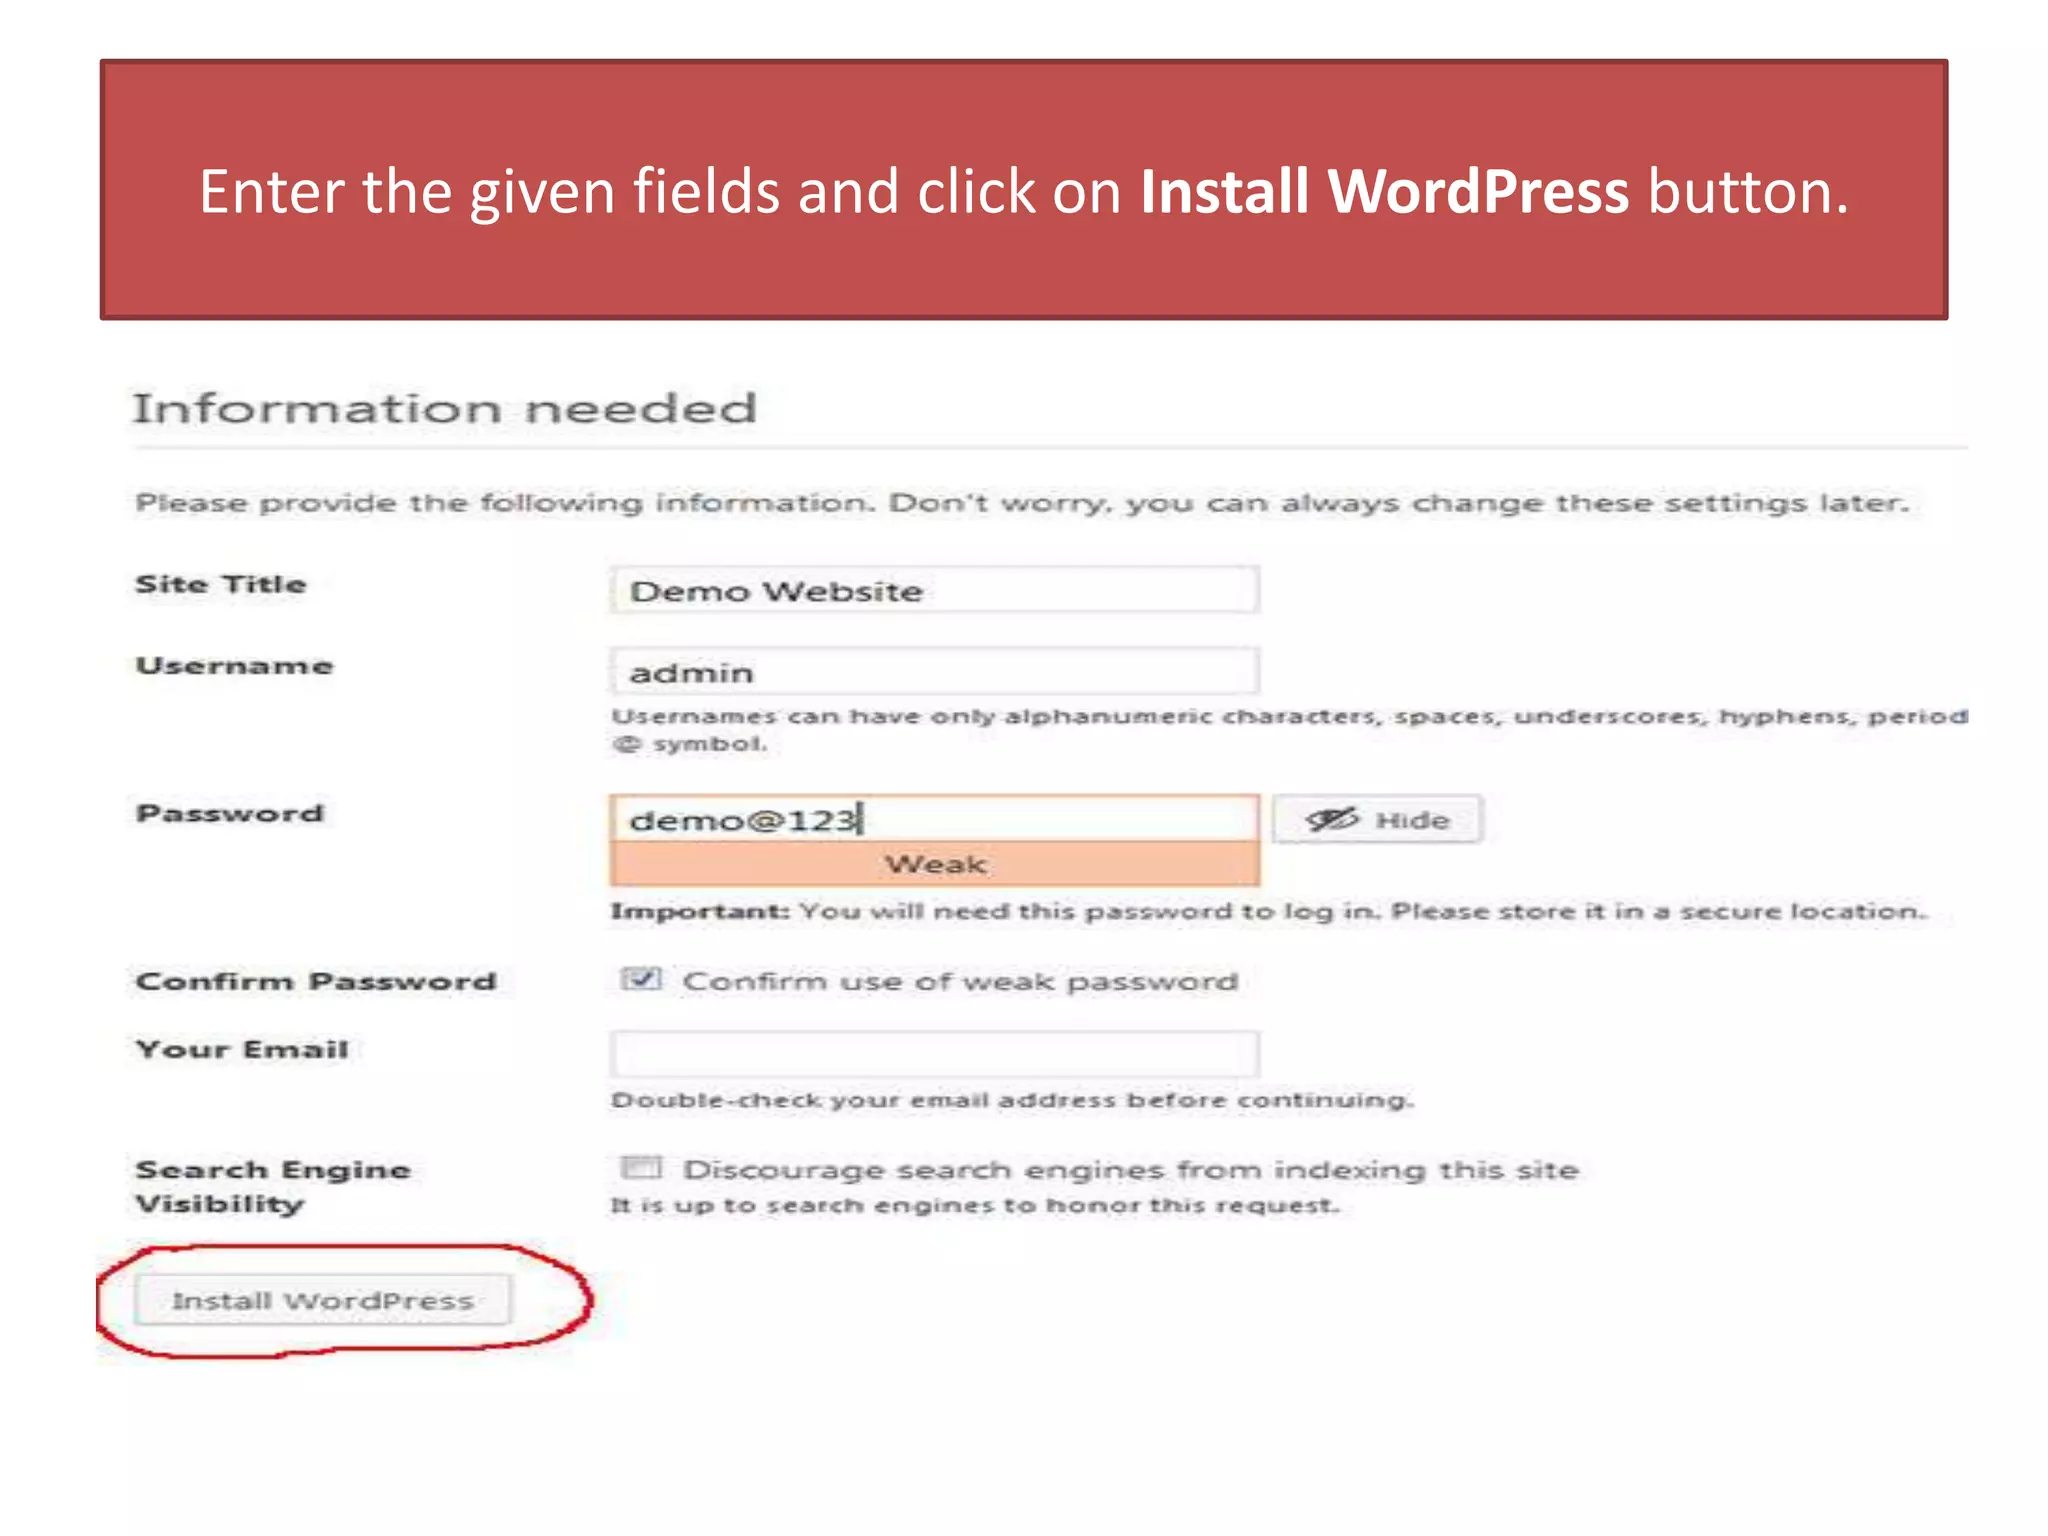
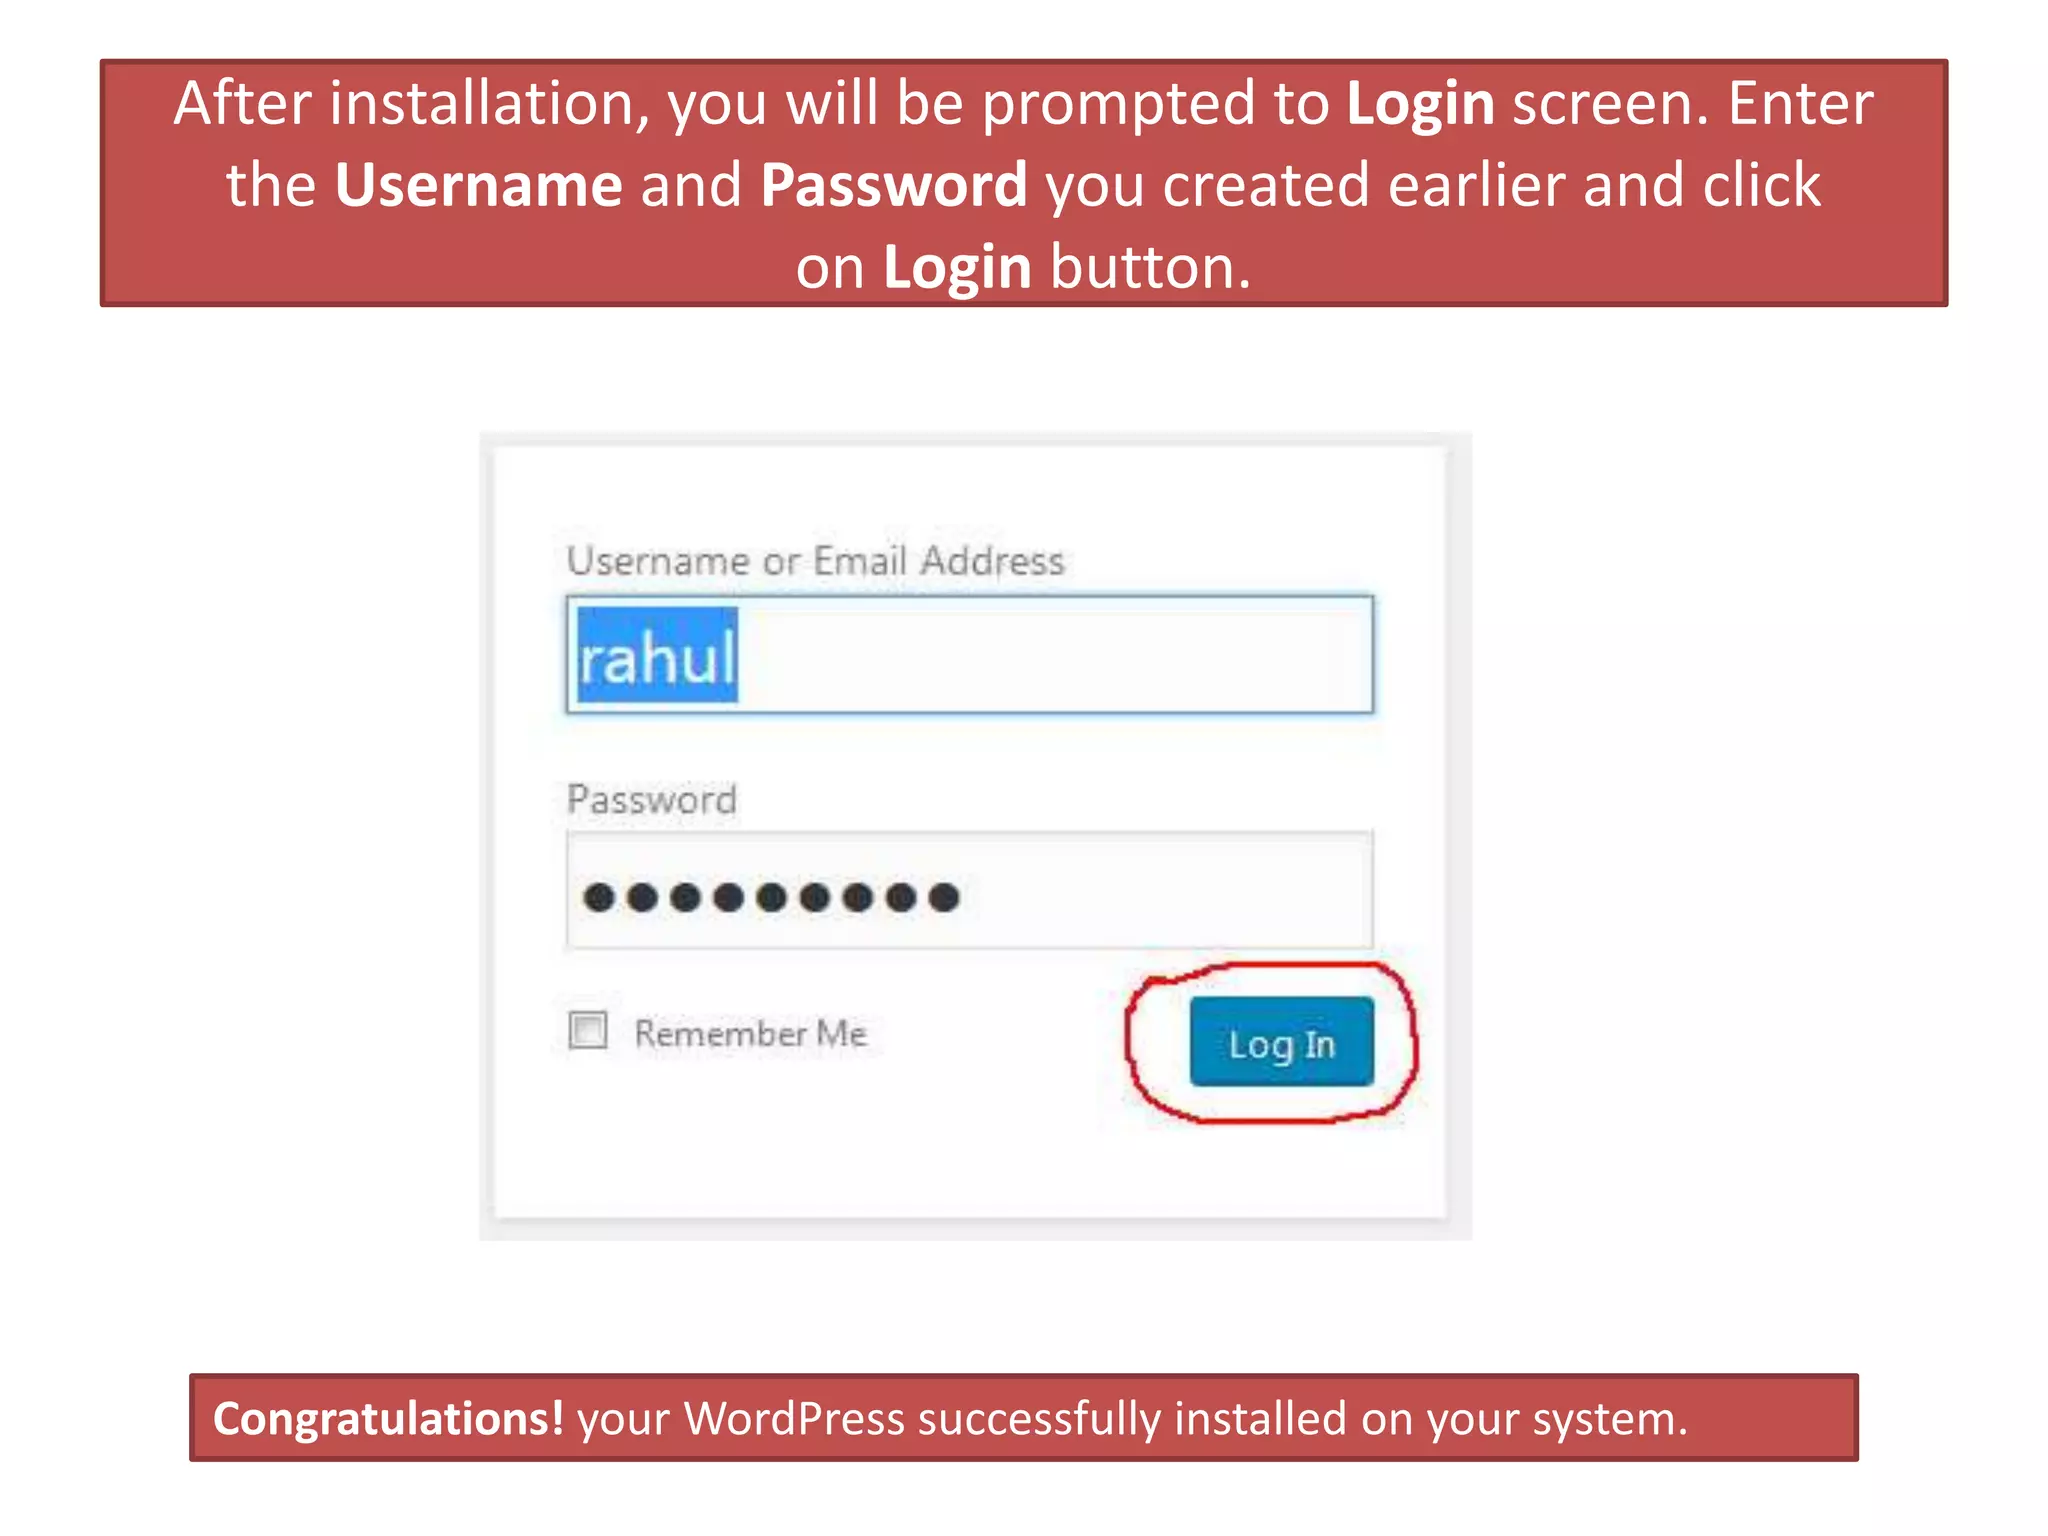
WordPress Basic Tutorial
How to Install WordPress in Local Host
WordPress Installation
In this PPT, We will learn how to install WordPress on
a local machine? Every WordPress user wants to
install WordPress locally on their system.
What is XAMPP Server?
WordPress requires your system should have a web server (such
as Apache, LiteSpeed, or IIS), PHP 4.3 or greater, and MySQL 4.0
or greater. XAMPP is a free web-server environment which
contains all above elements. XAMPP is the most common local
host application used by the developers. So XAMPP allows you
install WordPress locally on your Windows-based system.
The first thing you have to install XAMPP on your system. To
download the XAMPP, Visit XAMPP website and click
on Download button.
Once you download the XAMPP, run the .exe file and it
will take few seconds to install the XAMPP.
Start XAMPP control panel and run Apache and MySQL module
by clicking on the Start button.
Minimize the window. Visit the WordPress.org website and click
on the Download WordPress button.
Extract the .zip file and you will see a wordpress-4.8.2 folder.
Rename it to website1 so that you can easily identify and copy
the folder.
Next, locate your XAMPP installation folder. In windows, it will
be C:/Program Files/XAMPP or C:Xampp.
Then open XAMPP folder and locate htdocs folder.
Paste the website1 folder which you copied earlier, here.
Open any browser and visit localhost/ website1. You will see a
page like this. Click on wordpress/ folder.
Select a language and click on Continue button.
You will see a page like below shown.
It’s time to create a database. Visit localhost/phpmyadmin in
your browser and it will open a window like this:
Click on New button given on left sidebar and then give a name to
your database and click on Create button.
Switch back to /localhost/website1/ browser tab and click on
the Let’s Go button. You will be prompted to a new window.
Enter the database name which you created earlier. Your
username will be root and you should leave the password field
blank and then click on Submit button.
A new page opens and clicks on Run the install button.
Enter the given fields and click on Install WordPress button.
After installation, you will be prompted to Login screen. Enter
the Username and Password you created earlier and click
on Login button.
Congratulations! your WordPress successfully installed on your system.
Thank You
For More WordPress Tutorial Visit Our Site

How to install word press on local server

  • 1.
    WordPress Basic Tutorial Howto Install WordPress in Local Host
  • 2.
    WordPress Installation In thisPPT, We will learn how to install WordPress on a local machine? Every WordPress user wants to install WordPress locally on their system.
  • 3.
    What is XAMPPServer? WordPress requires your system should have a web server (such as Apache, LiteSpeed, or IIS), PHP 4.3 or greater, and MySQL 4.0 or greater. XAMPP is a free web-server environment which contains all above elements. XAMPP is the most common local host application used by the developers. So XAMPP allows you install WordPress locally on your Windows-based system.
  • 4.
    The first thingyou have to install XAMPP on your system. To download the XAMPP, Visit XAMPP website and click on Download button.
  • 5.
    Once you downloadthe XAMPP, run the .exe file and it will take few seconds to install the XAMPP.
  • 6.
    Start XAMPP controlpanel and run Apache and MySQL module by clicking on the Start button.
  • 7.
    Minimize the window.Visit the WordPress.org website and click on the Download WordPress button.
  • 8.
    Extract the .zipfile and you will see a wordpress-4.8.2 folder. Rename it to website1 so that you can easily identify and copy the folder. Next, locate your XAMPP installation folder. In windows, it will be C:/Program Files/XAMPP or C:Xampp.
  • 9.
    Then open XAMPPfolder and locate htdocs folder. Paste the website1 folder which you copied earlier, here.
  • 10.
    Open any browserand visit localhost/ website1. You will see a page like this. Click on wordpress/ folder.
  • 11.
    Select a languageand click on Continue button.
  • 12.
    You will seea page like below shown.
  • 13.
    It’s time tocreate a database. Visit localhost/phpmyadmin in your browser and it will open a window like this:
  • 14.
    Click on Newbutton given on left sidebar and then give a name to your database and click on Create button.
  • 15.
    Switch back to/localhost/website1/ browser tab and click on the Let’s Go button. You will be prompted to a new window.
  • 16.
    Enter the databasename which you created earlier. Your username will be root and you should leave the password field blank and then click on Submit button.
  • 17.
    A new pageopens and clicks on Run the install button.
  • 18.
    Enter the givenfields and click on Install WordPress button.
  • 19.
    After installation, youwill be prompted to Login screen. Enter the Username and Password you created earlier and click on Login button. Congratulations! your WordPress successfully installed on your system.
  • 20.
    Thank You For MoreWordPress Tutorial Visit Our Site