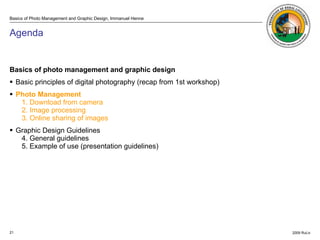
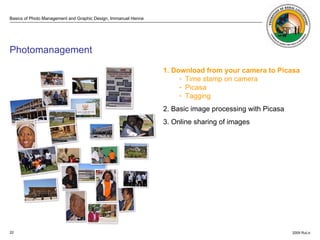
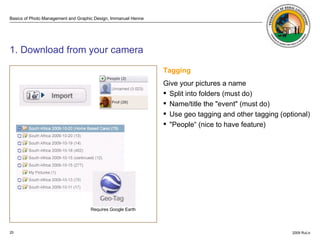
. ISO 100 ISO 3200
Photo Management and Graphic Design Workshop: Basic principles Immanuel Henne , 21st of October 2009
Agenda Basics of photo management and graphic design Basic principles of digital photography (recap from 1st workshop) Photo Management  Download from camera Image processing Online sharing of images Graphic Design Guidelines General guidelines  Example of use (presentation guidelines)
. Light is the foremost indicator of how you are going to go about your photography.  It determines what you will be able to photograph as well as govern your limitations Light Front Lightning Side Lightning Back Lightning Difussed Light
. Front Lightning Representative images Two Dimensional Reduces Shadows Most used  and recognized light source  Original definition: The method of recording  the image of an object through the action of light, on light sensitive material Derived from Greek words: photos = Light | grahphein = to draw
. Side Lighting Brings out Detail in subject Reveals texture  Introduces a third dimension  Shows depth in an image Use side lighting as much as possible, even moving your subject, if necessary, next to a window.
. Back Lighting Striking effect Use with recognizable subjects Halo of light around subject Late evening or early morning
. Diffused Light Clouds act as a large filter and diffuse light Saturate colour Good for taking portraits Good for recording detail Close ups Macro
. One word on flash usage Avoid using flash, even for night shots. The indiscriminate blast of flash destroys the intimate mood of existing light. The use of  frontal flash lighting tends to flatten faces. However use fill-in flash, for backlit situations or overhead sun.
. Angle Changing your angle By changing the angle you look at your subject, you alter the perspective.  This has a great bearing on how the subject is perceived on a photograph. Create impact by photo-graphing your subjects from unexpected angles.  Imagine yourself as an electron spinning around the subject, which is the nucleus of an atom. The way you look at a subject makes a large difference to the end result of a photograph. Changing angle means bending your knees, lying down, looking down at your subject etc.
. Composition There are various guidelines of composition that you can use. Some are for portraits, while others are for landscapes. In this lecture we will discuss how to approach and compose a subject. Leading Lines High contrast scenes Rule of Thirds Balancing background and foreground Even horizons Subject placement (animals and humans) Portrait and landscape Fill the frame and get close
. Rule of thirds Rule of Thirds rule are imaginary lines dividing the image into thirds both horizontally and vertically
. Balancing foreground and background
. Even horizons
. Even horizons
. Subject placement (animals and humans) Drop the “cross hairs” syndrome. Think about where you want to place your subject Frame your subject looking into some space For action, place the subject to the side of the frame, so that it is moving into some space When looking to take a photograph, select your subject. This is normally the first thing your eye is attracted to. Once you have your subject, you can then apply compositional rules to give the image better impact or balance.
. Portrait and landscape …  and check the different impacts
. Portrait and landscape
. Fill the frame and get close For action, sports and portraits a subject that fills the frame makes for a very high impact image.  A good photograph is a subject, a context, and nothing else. Remove any clutter that detracts from your message. Get closer -- zoom in -- and crop as tightly as possible
. Things to know Know your camera (e.g. set correct time) Hold the camera still Avoid using flash, even for night shots Take a few more Change your angle Use frame, lines and diagonals Put subject off center Unclutter the picture Tell a “story” Capture the “mood”
Agenda Basics of photo management and graphic design Basic principles of digital photography (recap from 1st workshop) Photo Management   1. Download from camera 2. Image processing 3. Online sharing of images Graphic Design Guidelines 4. General guidelines  5. Example of use (presentation guidelines)
. ISO 100 ISO 3200  Photomanagement 1. Download from your camera to Picasa Time stamp on camera Picasa Tagging 2. Basic image processing with Picasa 3. Online sharing of images
. ISO 100 ISO 3200  1. Download from your camera Timestamp on camera Easy and one time setup Makes it easy to find pictures in the future Nicely synchronizes sequence of pictures of photographs taken by others on same event.
. ISO 100 ISO 3200  1. Download from your camera Picasa – Your photo library Our recommendation for RuLiv It’s for free Easy to use  Incl. basic options for image processing Image sharing capabilities  Download  and install Picasa* *  http ://picasa.google.com/
. ISO 100 ISO 3200  1. Download from your camera Tagging Give your pictures a name  Split into folders (must do) Name/title the "event" (must do) Use geo tagging and other tagging (optional) "People“ (nice to have feature) Requires Google Earth
. ISO 100 ISO 3200  Photomanagement 1. Download from your camera to Picasa 2. Basic image processing with Picasa Rotate pictures if needed Cropping Straighten Red Eye Reduction 3. Online sharing of images
. ISO 100 ISO 3200  2. Basic Image processing Rotate pictures if needed Before you upload the pictures or share them by sending them in an e-mail rotate them to their natural position.
. ISO 100 ISO 3200  2. Basic Image Processing Cropping Unclutter the image Increase the impact of your picture Crop to match the format needed for your presentation Change from landscape to portrait or the other way round.
. ISO 100 ISO 3200  2. Basic Image Processing Straighten Even horizons …  or the opposite, intentionally put some dynamic into the picture
. ISO 100 ISO 3200  2. Basic Image Processing Red Eye reduction Apply at least for images which are uploaded and shared.
. ISO 100 ISO 3200  Photomanagement 1. Download from your camera to Picasa 2. Basic image processing with Picasa 3 . Online sharing of images Setup Google Account Selective Upload Recommended image sizes in pixels Sharing pictures Web and Email Embed in Blog or Website
. ISO 100 ISO 3200  3. Online sharing of images via Picasa Web Album Setup Google Picasa Account Use for business vs. use for private Each to have their own account.  Existing Google accounts work. Or add a new Google account.  Grant each other access to albums to share each others pictures.  https://www.google.com/accounts/ServiceLogin?service=lh2
. ISO 100 ISO 3200  3. Online sharing of images via Picasa Web Album Selective upload Use the “Star” to select the pictures which are worthwhile sharing. Sync stared photos only Turn automatic synch on
. ISO 100 ISO 3200  3. Online sharing of images via Picasa Web Album Recommended pixel size for Web Album 1600 pixels. Ideal for sharing and large enough for multiple purposes.
. ISO 100 ISO 3200  3. Online sharing of images via Picasa Web Album Recommended size for Emails and other …  just to give you a clue on pixel sizes. These are the Flickr image sizes: Thumbnail: 75 x 100 (Icons) Small: 180 x 240 (E-Mails) Medium: 375 x 500 (Blogs and Webpages) Large: 768 x 1024 (Print, and sharing on Web Album)
. ISO 100 ISO 3200  3. Online sharing of images via Picasa Web Album Sharing pictures Web and Email  “ E-mail” or “Upload” function via the Picasa Web Album offers you automatic resize Lean image sizes, fast e-mail delivery and decreased bandwith issues
. ISO 100 ISO 3200  3. Online sharing of images via Picasa Web Album Embed in blog or Website Select picture size  Copy and past  http://picasaweb.google.com/home http://picasaweb.google.com/lh/photo/TYvxi-JqPnvun4lb3YhD6Q?feat=directlink
Basics of photo management and graphic design Basic principles of digital photography (recap from 1st workshop) Photo Management  1. Download from camera 2. Image processing 3. Online sharing of images Graphic Design Guidelines 4. General guidelines  Combine pictures and text copy Keep aspect ratio (don’t squeeze logos) No more as than 3 different font types Use grid and object alignment No colored backgrounds 5. Example of use (presentation guidelines) General Graphic Design Guidelines
. ISO 100 ISO 3200  4. General graphic design guidelines Combine images and text copy Calling for attention, more appealing Pictures say more than 1000 words Illiterate people can read pictures Use meaningful pictures … choose carefully Don’t use pictures as background image with text copy onto it. It makes the text copy very difficult to read and the image is also not displayed favorably.
. ISO 100 ISO 3200  4. General graphic design guidelines Keep ratio of pictures and logos Same aspect ratio for all pictures on same presentation  When scaling use “Shift key” Don’t squeeze … it looks unprofessional.
. ISO 3200  4. General graphic design guidelines No more than 3 different font types Keep it clean and simple No more then 2 to 3 different font type changes on same presentation.  Count in changes of font sizes, font color, font style. I. General graphic design   II. Keep it clean and simple No more then 2 to 3 different style changes on same presentation.  Count in changes of font sizes, font color, font style. Too many different “font styles”  are heavy on the eye.
Grids help objects to be spaced evenly, aligned and consistent in size Use grid to position objects consistently at same positions Use    View    Grid and Guides    Display drawing guides on screen. 4. General graphic design guidelines
. ISO 3200  Alignment Have everything left and top aligned.  There are exceptions to the rule. Align picture with text copy and other elements Btw. the  left-top alignment is also a better rule for spreadsheets (rather than using the Microsoft default alignment which is “bottom”) 4. General graphic design guidelines
. ISO 3200  Simple typographic rules Usually align text copy to top and to left. That's how you read.  Line breaks within paragraph goes without line spacing 0.5 line spacing after paragraph. Use spell checking 4. General graphic design guidelines
. ISO 3200  No colored backgrounds Try to not use colored backgrounds.  It can be difficult to read.  For “Status” indication on spreadsheets use a dedicated column where the field of just one column uses color coding.  No colored backgrounds Try to not use colored backgrounds.  It can be difficult to read.  For “Status” indication on spreadsheets use a dedicated column where the field of just one column uses color coding.  4. General graphic design guidelines
. ISO 3200  Design templates include Consistent use of Logo image Presentation template and guidelines Letterhead template Evtl. word doc and flyer template (tbd) 5. Use available and standardized RuLiv design templates
. ISO 100 ISO 3200

Graphic Design Workshop 1.3

  • 1.
    . ISO 100ISO 3200
  • 2.
    Photo Management andGraphic Design Workshop: Basic principles Immanuel Henne , 21st of October 2009
  • 3.
    Agenda Basics ofphoto management and graphic design Basic principles of digital photography (recap from 1st workshop) Photo Management Download from camera Image processing Online sharing of images Graphic Design Guidelines General guidelines Example of use (presentation guidelines)
  • 4.
    . Light isthe foremost indicator of how you are going to go about your photography. It determines what you will be able to photograph as well as govern your limitations Light Front Lightning Side Lightning Back Lightning Difussed Light
  • 5.
    . Front LightningRepresentative images Two Dimensional Reduces Shadows Most used and recognized light source Original definition: The method of recording the image of an object through the action of light, on light sensitive material Derived from Greek words: photos = Light | grahphein = to draw
  • 6.
    . Side LightingBrings out Detail in subject Reveals texture Introduces a third dimension Shows depth in an image Use side lighting as much as possible, even moving your subject, if necessary, next to a window.
  • 7.
    . Back LightingStriking effect Use with recognizable subjects Halo of light around subject Late evening or early morning
  • 8.
    . Diffused LightClouds act as a large filter and diffuse light Saturate colour Good for taking portraits Good for recording detail Close ups Macro
  • 9.
    . One wordon flash usage Avoid using flash, even for night shots. The indiscriminate blast of flash destroys the intimate mood of existing light. The use of frontal flash lighting tends to flatten faces. However use fill-in flash, for backlit situations or overhead sun.
  • 10.
    . Angle Changingyour angle By changing the angle you look at your subject, you alter the perspective. This has a great bearing on how the subject is perceived on a photograph. Create impact by photo-graphing your subjects from unexpected angles. Imagine yourself as an electron spinning around the subject, which is the nucleus of an atom. The way you look at a subject makes a large difference to the end result of a photograph. Changing angle means bending your knees, lying down, looking down at your subject etc.
  • 11.
    . Composition Thereare various guidelines of composition that you can use. Some are for portraits, while others are for landscapes. In this lecture we will discuss how to approach and compose a subject. Leading Lines High contrast scenes Rule of Thirds Balancing background and foreground Even horizons Subject placement (animals and humans) Portrait and landscape Fill the frame and get close
  • 12.
    . Rule ofthirds Rule of Thirds rule are imaginary lines dividing the image into thirds both horizontally and vertically
  • 13.
    . Balancing foregroundand background
  • 14.
  • 15.
  • 16.
    . Subject placement(animals and humans) Drop the “cross hairs” syndrome. Think about where you want to place your subject Frame your subject looking into some space For action, place the subject to the side of the frame, so that it is moving into some space When looking to take a photograph, select your subject. This is normally the first thing your eye is attracted to. Once you have your subject, you can then apply compositional rules to give the image better impact or balance.
  • 17.
    . Portrait andlandscape … and check the different impacts
  • 18.
    . Portrait andlandscape
  • 19.
    . Fill theframe and get close For action, sports and portraits a subject that fills the frame makes for a very high impact image. A good photograph is a subject, a context, and nothing else. Remove any clutter that detracts from your message. Get closer -- zoom in -- and crop as tightly as possible
  • 20.
    . Things toknow Know your camera (e.g. set correct time) Hold the camera still Avoid using flash, even for night shots Take a few more Change your angle Use frame, lines and diagonals Put subject off center Unclutter the picture Tell a “story” Capture the “mood”
  • 21.
    Agenda Basics ofphoto management and graphic design Basic principles of digital photography (recap from 1st workshop) Photo Management 1. Download from camera 2. Image processing 3. Online sharing of images Graphic Design Guidelines 4. General guidelines 5. Example of use (presentation guidelines)
  • 22.
    . ISO 100ISO 3200 Photomanagement 1. Download from your camera to Picasa Time stamp on camera Picasa Tagging 2. Basic image processing with Picasa 3. Online sharing of images
  • 23.
    . ISO 100ISO 3200 1. Download from your camera Timestamp on camera Easy and one time setup Makes it easy to find pictures in the future Nicely synchronizes sequence of pictures of photographs taken by others on same event.
  • 24.
    . ISO 100ISO 3200 1. Download from your camera Picasa – Your photo library Our recommendation for RuLiv It’s for free Easy to use Incl. basic options for image processing Image sharing capabilities Download and install Picasa* * http ://picasa.google.com/
  • 25.
    . ISO 100ISO 3200 1. Download from your camera Tagging Give your pictures a name Split into folders (must do) Name/title the "event" (must do) Use geo tagging and other tagging (optional) "People“ (nice to have feature) Requires Google Earth
  • 26.
    . ISO 100ISO 3200 Photomanagement 1. Download from your camera to Picasa 2. Basic image processing with Picasa Rotate pictures if needed Cropping Straighten Red Eye Reduction 3. Online sharing of images
  • 27.
    . ISO 100ISO 3200 2. Basic Image processing Rotate pictures if needed Before you upload the pictures or share them by sending them in an e-mail rotate them to their natural position.
  • 28.
    . ISO 100ISO 3200 2. Basic Image Processing Cropping Unclutter the image Increase the impact of your picture Crop to match the format needed for your presentation Change from landscape to portrait or the other way round.
  • 29.
    . ISO 100ISO 3200 2. Basic Image Processing Straighten Even horizons … or the opposite, intentionally put some dynamic into the picture
  • 30.
    . ISO 100ISO 3200 2. Basic Image Processing Red Eye reduction Apply at least for images which are uploaded and shared.
  • 31.
    . ISO 100ISO 3200 Photomanagement 1. Download from your camera to Picasa 2. Basic image processing with Picasa 3 . Online sharing of images Setup Google Account Selective Upload Recommended image sizes in pixels Sharing pictures Web and Email Embed in Blog or Website
  • 32.
    . ISO 100ISO 3200 3. Online sharing of images via Picasa Web Album Setup Google Picasa Account Use for business vs. use for private Each to have their own account. Existing Google accounts work. Or add a new Google account. Grant each other access to albums to share each others pictures. https://www.google.com/accounts/ServiceLogin?service=lh2
  • 33.
    . ISO 100ISO 3200 3. Online sharing of images via Picasa Web Album Selective upload Use the “Star” to select the pictures which are worthwhile sharing. Sync stared photos only Turn automatic synch on
  • 34.
    . ISO 100ISO 3200 3. Online sharing of images via Picasa Web Album Recommended pixel size for Web Album 1600 pixels. Ideal for sharing and large enough for multiple purposes.
  • 35.
    . ISO 100ISO 3200 3. Online sharing of images via Picasa Web Album Recommended size for Emails and other … just to give you a clue on pixel sizes. These are the Flickr image sizes: Thumbnail: 75 x 100 (Icons) Small: 180 x 240 (E-Mails) Medium: 375 x 500 (Blogs and Webpages) Large: 768 x 1024 (Print, and sharing on Web Album)
  • 36.
    . ISO 100ISO 3200 3. Online sharing of images via Picasa Web Album Sharing pictures Web and Email “ E-mail” or “Upload” function via the Picasa Web Album offers you automatic resize Lean image sizes, fast e-mail delivery and decreased bandwith issues
  • 37.
    . ISO 100ISO 3200 3. Online sharing of images via Picasa Web Album Embed in blog or Website Select picture size Copy and past http://picasaweb.google.com/home http://picasaweb.google.com/lh/photo/TYvxi-JqPnvun4lb3YhD6Q?feat=directlink
  • 38.
    Basics of photomanagement and graphic design Basic principles of digital photography (recap from 1st workshop) Photo Management 1. Download from camera 2. Image processing 3. Online sharing of images Graphic Design Guidelines 4. General guidelines Combine pictures and text copy Keep aspect ratio (don’t squeeze logos) No more as than 3 different font types Use grid and object alignment No colored backgrounds 5. Example of use (presentation guidelines) General Graphic Design Guidelines
  • 39.
    . ISO 100ISO 3200 4. General graphic design guidelines Combine images and text copy Calling for attention, more appealing Pictures say more than 1000 words Illiterate people can read pictures Use meaningful pictures … choose carefully Don’t use pictures as background image with text copy onto it. It makes the text copy very difficult to read and the image is also not displayed favorably.
  • 40.
    . ISO 100ISO 3200 4. General graphic design guidelines Keep ratio of pictures and logos Same aspect ratio for all pictures on same presentation When scaling use “Shift key” Don’t squeeze … it looks unprofessional.
  • 41.
    . ISO 3200 4. General graphic design guidelines No more than 3 different font types Keep it clean and simple No more then 2 to 3 different font type changes on same presentation. Count in changes of font sizes, font color, font style. I. General graphic design II. Keep it clean and simple No more then 2 to 3 different style changes on same presentation. Count in changes of font sizes, font color, font style. Too many different “font styles” are heavy on the eye.
  • 42.
    Grids help objectsto be spaced evenly, aligned and consistent in size Use grid to position objects consistently at same positions Use  View  Grid and Guides  Display drawing guides on screen. 4. General graphic design guidelines
  • 43.
    . ISO 3200 Alignment Have everything left and top aligned. There are exceptions to the rule. Align picture with text copy and other elements Btw. the left-top alignment is also a better rule for spreadsheets (rather than using the Microsoft default alignment which is “bottom”) 4. General graphic design guidelines
  • 44.
    . ISO 3200 Simple typographic rules Usually align text copy to top and to left. That's how you read. Line breaks within paragraph goes without line spacing 0.5 line spacing after paragraph. Use spell checking 4. General graphic design guidelines
  • 45.
    . ISO 3200 No colored backgrounds Try to not use colored backgrounds. It can be difficult to read. For “Status” indication on spreadsheets use a dedicated column where the field of just one column uses color coding. No colored backgrounds Try to not use colored backgrounds. It can be difficult to read. For “Status” indication on spreadsheets use a dedicated column where the field of just one column uses color coding. 4. General graphic design guidelines
  • 46.
    . ISO 3200 Design templates include Consistent use of Logo image Presentation template and guidelines Letterhead template Evtl. word doc and flyer template (tbd) 5. Use available and standardized RuLiv design templates
  • 47.
    . ISO 100ISO 3200