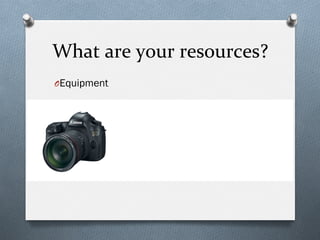
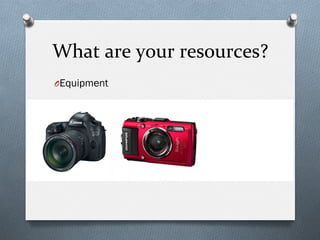
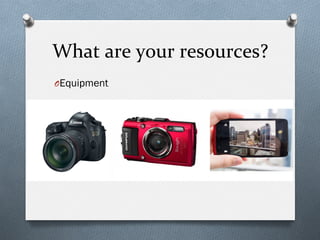
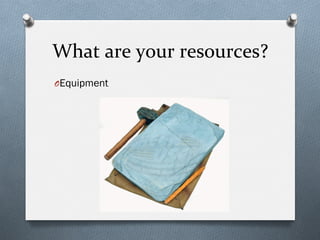
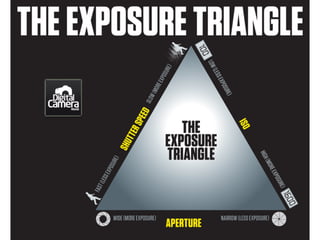
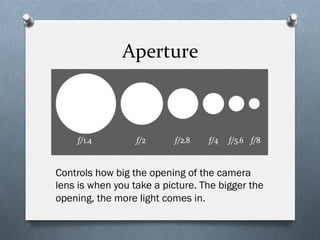
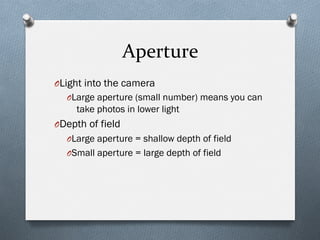
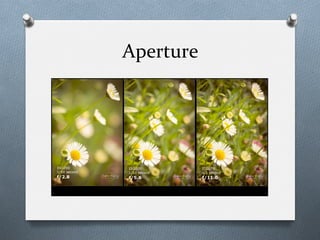
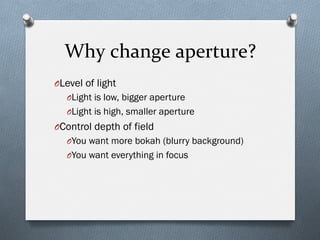
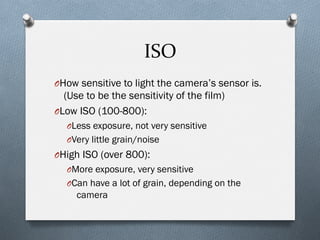
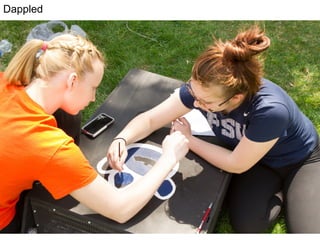
How	
  to	
  be	
  a	
  
photographer	
  
Or at least how to fake it
So,	
  you	
  need	
  to	
  take	
  photos	
  
O Why?
O What do you need them for?
O What are your resources?
O How can you make them look good?
Why	
  take	
  photos?	
  
O Your boss says you have to.
BOSS
BOSS
BOSS
JOE
BOSS
Why	
  take	
  photos?	
  
O Your boss says you have to.
O You need them for work, maybe to put on
your website or Facebook page.
Why	
  take	
  photos?	
  
O Your boss says you have to.
O You need them for work, maybe to put on
your website or Facebook page.
O You want to have fun, maybe take some
photos of your great-niece or your soon-to-
be-daughter-in-law.
MADDY
DAD
ABBY
What	
  will	
  you	
  do	
  with	
  them?	
  
O Print publication?
O Glossies to hang on the wall?
O Website photos?
O Facebook?
O Give them to someone else?
What	
  are	
  your	
  resources?	
  
O Equipment
What	
  are	
  your	
  resources?	
  
O Equipment
What	
  are	
  your	
  resources?	
  
O Equipment
What	
  are	
  your	
  resources?	
  
O Equipment
What	
  are	
  your	
  resources?	
  
O Equipment
The	
  best	
  camera	
  	
  
to	
  use	
  is	
  the	
  one	
  	
  
you	
  have	
  with	
  you.	
  
What	
  are	
  your	
  resources?	
  
O Equipment
O Models or subjects
O Time
O Assistants (or assistance)
O Software
O Your knowledge and creativity
Your	
  camera	
  equipment	
  
doesn’t	
  determine	
  how	
  
good	
  your	
  photos	
  are.	
  
You	
  do.	
  
The	
  basics	
  of	
  good	
  
photography	
  
The	
  basics	
  
O Composition
O Design rules
O Who, what and how you shoot
O Technical stuff
O Exposure
O Lighting
O Some tips
Composition	
  
What’s in your photo and how it's arranged
Rule	
  of	
  Thirds	
  
When you slice an image in thirds vertically
and horizontally, the main focus of the image
should lie along one of the grid lines.
Framing	
  
Showcase the subject of your photo by framing
it with items in the foreground.
Background	
  
Be aware of what’s in the background of your
photo.
O Is someone photobombing (accidentally or on
purpose)?
O Are there other people in the photo who are
distracting or look strange?
Background	
  
O Is something growing out of someone’s
head?
Let’s just pause a moment to consider
how truly bad this photo is.
Background	
  
O Is there something you can move so it
doesn’t end up in the photo? (It’s easier to
see it and move it before you shoot than to
take it out in Photoshop later.)
Leading	
  lines	
  
Strong lines or curves in the photo can lead
the eyes into it and make it more visually
appealing.
Depth	
  of	
  Field:	
  Short	
  
A very shallow focus in a photo makes much of
the content blurry. This can be good if you
focus on the right thing. It helps calm a busy
background.
Depth	
  of	
  Field:	
  Long	
  
Conversely, some subjects need to be tack
sharp throughout the entire image.
Landscapes and group shots are great
examples of when this is necessary.
Point	
  of	
  View	
  
A lot of photos are taken from the
photographer's height looking down, up, or
straight on. Changing that perspective can be
interesting.
O Get down on a child’s level
Point	
  of	
  View	
  
A lot of photos are taken from the
photographer's height looking down, up, or
straight on. Changing that perspective can be
interesting.
O Get down on a child’s level
O Find a different angle
Journalistic	
  Style	
  
Who, what and how to shoot something
What	
  is	
  it?	
  
O Not camera aware
O Sometimes you HAVE to shoot the group shot
or the check passing or the staged photo.
O Take that photo, then take a candid when the
subjects are not paying attention to you.
What	
  is	
  journalistic	
  style?	
  
O Not camera aware, not set up
O Catching moments
O Action and interaction
Portraits	
  with	
  a	
  twist	
  
Good things can happen.
Be ready.
Find	
  the	
  moments	
  
Tell people to just do their thing and not worry about you
Exposure	
  Basics	
  
Embrace the Triangle
The	
  Exposure	
  Triangle	
  
O Aperture
O Shutter Speed
O ISO
They’re	
  interrelated	
  
O To keep the same exposure, when you
change one you have to change another.
O If you make ISO higher, either shutter speed
or aperture had to be lower to keep the
same exposure
Aperture	
  
Controls how big the opening of the camera
lens is when you take a picture. The bigger the
opening, the more light comes in.
Aperture	
  
O Light into the camera
O Large aperture (small number) means you can
take photos in lower light
O Depth of field
O Large aperture = shallow depth of field
O Small aperture = large depth of field
Aperture	
  
Why	
  change	
  aperture?	
  
O Level of light
O Light is low, bigger aperture
O Light is high, smaller aperture
O Control depth of field
O You want more bokah (blurry background)
O You want everything in focus
ISO	
  
O How sensitive to light the camera’s sensor is.
(Use to be the sensitivity of the film)
O Low ISO (100-800):
O Less exposure, not very sensitive
O Very little grain/noise
O High ISO (over 800):
O More exposure, very sensitive
O Can have a lot of grain, depending on the
camera
100 ISO 3200 ISO
Why	
  	
  change	
  ISO?	
  
O Indoor sporting events. You need the camera
to be more sensitive to light.
O Concerts or somewhere you can’t use flash
O You don’t want to use flash
O Birthday candles
O Natural light
O Set the mood
O You want grain for effect
Shutter	
  speed	
  
O Shutter: The thing that opens to let light into
the camera
O Speed: How fast the shutter opens and
closes
O Measured in seconds and fractions of
seconds
Why	
  change	
  shutter	
  speed?	
  
O You want to stop action
O You want to blur something
O Sports: shutter speed over 1/250, at least.
O Important: the lower the shutter speed, the
more you need a tripod!!!!!
Lighting	
  
Lighting	
  types	
  
O Natural light
O Sun inside
O Sun outside
O Shade/defused sun
O Artificial
O Flash
O Studio lights
Natural	
  light	
  
O Inside: Put your subject by a window,
preferably with a white sheer curtain over it.
Natural	
  light	
  
O Inside: Put your subject by a window,
preferably with a white sheer curtain over it.
O Outside
O Cloudy day (the best!)
O Full shade (but not too dark)
O Avoid tree shade (too dappled)
O Avoid full sun
O Pick your time of day (morning or evening is
best)
Cloudy
Dappled
Full sun at noon
Full shade at noon
The golden hour before sunset
Full sun
Artificial	
  light	
  
O Flash is very harsh. Try not to use it inside.
O Turn off the auto flash and only use it if you
really have to.
O Flash can help outside to fill in dark spots,
but it doesn’t travel very far.
O Plenty of ways to soften flash with an
externally mounted flash unit on a DSLR. I’m
not covering that here.
Flash fired to fill shadows
Bad flash inside
Photo	
  tips	
  
You knew there were more
Keep	
  it	
  clean	
  
O Use lens cleaner or a Lens Pen for a DSLR or
a point and shoot
O Use a cloth (your clean shirt, maybe?) or even
your clean finger to wipe off your phone
lens. Pockets make phone lenses foggy,
linty, and sometimes oily. If your pictures are
foggy or dusty, check the lens.
Get	
  close,	
  then	
  closer	
  
Look	
  for	
  moments	
  
Keep	
  shooting	
  
O Shoot at least 5 shots of everything. More if
you have time
Never	
  shoot	
  north	
  
Deep shadows on face No shadows on face
North
East
Respect	
  the	
  horizon	
  
O Some people like to shoot crooked photos.
That’s OK … unless you’re shooting a
landscape.
O Keep the horizon level.
O If it’s not level in camera, straighten it with
software
Turn	
  people	
  sideways	
  
O When shooting people, have them turn
slightly to one side or the other. It’s more
flattering.
Stay	
  steady	
  
O Figure out how to press your shutter without
shaking the camera or phone.
O Hold the camera with both hands and brace
your elbows against your sides.
O Don’t hold it out in front of you.
O Breathe out and hold your breath.
O Find something to brace against.
O Use a tripod.
Choose	
  the	
  highest	
  quality	
  
O Your camera and your camera phone app
have different resolution settings. Pick the
highest one so you don’t lose detail and so
you can print later if you want.
Format	
  
O RAW
O Bigger files
O More control over editing
O Not available on phones or most point and
shoots
O JPG
O Compressed file
O Less control, but still editable
Take	
  time	
  to	
  learn	
  
O How does your camera (or the camera on
your phone) work?
O What is the lag time between when you push
the button/touch the screen and when the
photo is taken?
O What settings are available? What can you
change?
Technical	
  stuff	
  
O Back up your photos regularly.
O Get some good photo processing software.
O Lightroom is great for organizing and editing
your photos, and it’s not expensive
O Photoshop is for heavier editing.
Have	
  fun	
  
O Encourage your subjects to have fun. Get
everyone to laugh. Make jokes. Take some
crazy photos.
One	
  final	
  thing	
  
This is really important!
Your	
  Homework	
  
Shoot Something
I’ll	
  buy	
  the	
  coffee	
  
O Take some great (or sorta great) photos of
the conference with your cell phone.
O Tweet your best to me:
O @cathyb651 #photo4non #psuweb
O Deadline: 12:30 p.m. Tuesday, June 23
O Prize for the best picture
O Starbucks gift card
O Bragging rights
Bonus	
  contest	
  
O Find my son Joe Benscoter at the conference.
O Take his photo doing something interesting. But
be nice!
O Tweet it:
O @cathyb651 #photo4non #psuweb #findJoeB
O @joedrummer8993
O Deadline: 12:30 p.m. Tuesday, June 23
O Prize for the best picture
O Starbucks gift card
O Bragging rights
This	
  is	
  Joe	
  (and	
  Abby)	
  
Helpful	
  links	
  
Get more information about photography
Best	
  phone	
  cameras	
  
O Motorola Droid Turbo
O iPhone 6
O Samsung Galaxy S6
O Samsung Galaxy Note 4
Apps	
  and	
  Software	
  
O Adobe Photoshop and Lightroom package:
$9.99/month
O Camera+
O Pro Camera
O Pixlr Express
Exposure	
  
O Learning about exposure
O ISO settings
O Intro to shutter speed
O Aperture
O Exposure triangle explanation
O The Three Basics of Exposure and
Photography (video)
Camera	
  usage	
  
O Using Auto to learn Manual
O Aperture and shutter priority modes
O National Geographic camera phone tips
Composition	
  Rules	
  
O Four rules of photographic composition
O 10 more quick composition tips
O 9 tips for getting the background right
O 12 Tips for Improving Camera Phone Photos
Cathy	
  Benscoter	
  
cbenscoter@psu.edu	
  
724-­‐773-­‐3807	
  

Photography for Non-Photographers

  • 1.
    How  to  be  a   photographer   Or at least how to fake it
  • 2.
    So,  you  need  to  take  photos   O Why? O What do you need them for? O What are your resources? O How can you make them look good?
  • 3.
    Why  take  photos?   O Your boss says you have to.
  • 4.
  • 5.
  • 6.
  • 7.
  • 8.
    Why  take  photos?   O Your boss says you have to. O You need them for work, maybe to put on your website or Facebook page.
  • 11.
    Why  take  photos?   O Your boss says you have to. O You need them for work, maybe to put on your website or Facebook page. O You want to have fun, maybe take some photos of your great-niece or your soon-to- be-daughter-in-law.
  • 12.
  • 13.
  • 14.
    What  will  you  do  with  them?   O Print publication? O Glossies to hang on the wall? O Website photos? O Facebook? O Give them to someone else?
  • 15.
    What  are  your  resources?   O Equipment
  • 16.
    What  are  your  resources?   O Equipment
  • 17.
    What  are  your  resources?   O Equipment
  • 18.
    What  are  your  resources?   O Equipment
  • 19.
    What  are  your  resources?   O Equipment
  • 20.
    The  best  camera     to  use  is  the  one     you  have  with  you.  
  • 21.
    What  are  your  resources?   O Equipment O Models or subjects O Time O Assistants (or assistance) O Software O Your knowledge and creativity
  • 22.
    Your  camera  equipment   doesn’t  determine  how   good  your  photos  are.   You  do.  
  • 23.
    The  basics  of  good   photography  
  • 24.
    The  basics   O Composition O Designrules O Who, what and how you shoot O Technical stuff O Exposure O Lighting O Some tips
  • 25.
    Composition   What’s inyour photo and how it's arranged
  • 26.
    Rule  of  Thirds   When you slice an image in thirds vertically and horizontally, the main focus of the image should lie along one of the grid lines.
  • 32.
    Framing   Showcase thesubject of your photo by framing it with items in the foreground.
  • 36.
    Background   Be awareof what’s in the background of your photo. O Is someone photobombing (accidentally or on purpose)? O Are there other people in the photo who are distracting or look strange?
  • 43.
    Background   O Is somethinggrowing out of someone’s head?
  • 47.
    Let’s just pausea moment to consider how truly bad this photo is.
  • 48.
    Background   O Is theresomething you can move so it doesn’t end up in the photo? (It’s easier to see it and move it before you shoot than to take it out in Photoshop later.)
  • 53.
    Leading  lines   Stronglines or curves in the photo can lead the eyes into it and make it more visually appealing.
  • 58.
    Depth  of  Field:  Short   A very shallow focus in a photo makes much of the content blurry. This can be good if you focus on the right thing. It helps calm a busy background.
  • 64.
    Depth  of  Field:  Long   Conversely, some subjects need to be tack sharp throughout the entire image. Landscapes and group shots are great examples of when this is necessary.
  • 68.
    Point  of  View   A lot of photos are taken from the photographer's height looking down, up, or straight on. Changing that perspective can be interesting. O Get down on a child’s level
  • 72.
    Point  of  View   A lot of photos are taken from the photographer's height looking down, up, or straight on. Changing that perspective can be interesting. O Get down on a child’s level O Find a different angle
  • 76.
    Journalistic  Style   Who,what and how to shoot something
  • 77.
    What  is  it?   O Not camera aware O Sometimes you HAVE to shoot the group shot or the check passing or the staged photo. O Take that photo, then take a candid when the subjects are not paying attention to you.
  • 88.
    What  is  journalistic  style?   O Not camera aware, not set up O Catching moments O Action and interaction
  • 89.
    Portraits  with  a  twist   Good things can happen. Be ready.
  • 94.
    Find  the  moments   Tell people to just do their thing and not worry about you
  • 103.
  • 104.
    The  Exposure  Triangle   O Aperture O Shutter Speed O ISO
  • 106.
    They’re  interrelated   O Tokeep the same exposure, when you change one you have to change another. O If you make ISO higher, either shutter speed or aperture had to be lower to keep the same exposure
  • 107.
    Aperture   Controls howbig the opening of the camera lens is when you take a picture. The bigger the opening, the more light comes in.
  • 108.
    Aperture   O Light intothe camera O Large aperture (small number) means you can take photos in lower light O Depth of field O Large aperture = shallow depth of field O Small aperture = large depth of field
  • 109.
  • 110.
    Why  change  aperture?   O Level of light O Light is low, bigger aperture O Light is high, smaller aperture O Control depth of field O You want more bokah (blurry background) O You want everything in focus
  • 111.
    ISO   O How sensitiveto light the camera’s sensor is. (Use to be the sensitivity of the film) O Low ISO (100-800): O Less exposure, not very sensitive O Very little grain/noise O High ISO (over 800): O More exposure, very sensitive O Can have a lot of grain, depending on the camera
  • 112.
  • 113.
    Why    change  ISO?   O Indoor sporting events. You need the camera to be more sensitive to light. O Concerts or somewhere you can’t use flash O You don’t want to use flash O Birthday candles O Natural light O Set the mood O You want grain for effect
  • 114.
    Shutter  speed   O Shutter:The thing that opens to let light into the camera O Speed: How fast the shutter opens and closes O Measured in seconds and fractions of seconds
  • 116.
    Why  change  shutter  speed?   O You want to stop action O You want to blur something O Sports: shutter speed over 1/250, at least. O Important: the lower the shutter speed, the more you need a tripod!!!!!
  • 124.
  • 125.
    Lighting  types   O Naturallight O Sun inside O Sun outside O Shade/defused sun O Artificial O Flash O Studio lights
  • 126.
    Natural  light   O Inside:Put your subject by a window, preferably with a white sheer curtain over it.
  • 129.
    Natural  light   O Inside:Put your subject by a window, preferably with a white sheer curtain over it. O Outside O Cloudy day (the best!) O Full shade (but not too dark) O Avoid tree shade (too dappled) O Avoid full sun O Pick your time of day (morning or evening is best)
  • 130.
  • 131.
  • 132.
  • 133.
  • 134.
    The golden hourbefore sunset
  • 135.
    The golden hourbefore sunset
  • 136.
  • 137.
    Artificial  light   O Flashis very harsh. Try not to use it inside. O Turn off the auto flash and only use it if you really have to. O Flash can help outside to fill in dark spots, but it doesn’t travel very far. O Plenty of ways to soften flash with an externally mounted flash unit on a DSLR. I’m not covering that here.
  • 138.
    Flash fired tofill shadows
  • 139.
  • 140.
    Photo  tips   Youknew there were more
  • 141.
    Keep  it  clean   O Use lens cleaner or a Lens Pen for a DSLR or a point and shoot O Use a cloth (your clean shirt, maybe?) or even your clean finger to wipe off your phone lens. Pockets make phone lenses foggy, linty, and sometimes oily. If your pictures are foggy or dusty, check the lens.
  • 142.
  • 143.
  • 144.
    Keep  shooting   O Shootat least 5 shots of everything. More if you have time
  • 146.
    Never  shoot  north   Deep shadows on face No shadows on face
  • 147.
  • 148.
  • 149.
    Respect  the  horizon   O Some people like to shoot crooked photos. That’s OK … unless you’re shooting a landscape. O Keep the horizon level. O If it’s not level in camera, straighten it with software
  • 155.
    Turn  people  sideways   O When shooting people, have them turn slightly to one side or the other. It’s more flattering.
  • 157.
    Stay  steady   O Figureout how to press your shutter without shaking the camera or phone. O Hold the camera with both hands and brace your elbows against your sides. O Don’t hold it out in front of you. O Breathe out and hold your breath. O Find something to brace against. O Use a tripod.
  • 160.
    Choose  the  highest  quality   O Your camera and your camera phone app have different resolution settings. Pick the highest one so you don’t lose detail and so you can print later if you want.
  • 161.
    Format   O RAW O Bigger files O Morecontrol over editing O Not available on phones or most point and shoots O JPG O Compressed file O Less control, but still editable
  • 162.
    Take  time  to  learn   O How does your camera (or the camera on your phone) work? O What is the lag time between when you push the button/touch the screen and when the photo is taken? O What settings are available? What can you change?
  • 163.
    Technical  stuff   O Backup your photos regularly. O Get some good photo processing software. O Lightroom is great for organizing and editing your photos, and it’s not expensive O Photoshop is for heavier editing.
  • 164.
    Have  fun   O Encourageyour subjects to have fun. Get everyone to laugh. Make jokes. Take some crazy photos.
  • 170.
    One  final  thing   This is really important!
  • 172.
  • 174.
    I’ll  buy  the  coffee   O Take some great (or sorta great) photos of the conference with your cell phone. O Tweet your best to me: O @cathyb651 #photo4non #psuweb O Deadline: 12:30 p.m. Tuesday, June 23 O Prize for the best picture O Starbucks gift card O Bragging rights
  • 175.
    Bonus  contest   O Findmy son Joe Benscoter at the conference. O Take his photo doing something interesting. But be nice! O Tweet it: O @cathyb651 #photo4non #psuweb #findJoeB O @joedrummer8993 O Deadline: 12:30 p.m. Tuesday, June 23 O Prize for the best picture O Starbucks gift card O Bragging rights
  • 176.
    This  is  Joe  (and  Abby)  
  • 177.
    Helpful  links   Getmore information about photography
  • 178.
    Best  phone  cameras   O Motorola Droid Turbo O iPhone 6 O Samsung Galaxy S6 O Samsung Galaxy Note 4
  • 179.
    Apps  and  Software   O Adobe Photoshop and Lightroom package: $9.99/month O Camera+ O Pro Camera O Pixlr Express
  • 180.
    Exposure   O Learning aboutexposure O ISO settings O Intro to shutter speed O Aperture O Exposure triangle explanation O The Three Basics of Exposure and Photography (video)
  • 181.
    Camera  usage   O UsingAuto to learn Manual O Aperture and shutter priority modes O National Geographic camera phone tips
  • 182.
    Composition  Rules   O Fourrules of photographic composition O 10 more quick composition tips O 9 tips for getting the background right O 12 Tips for Improving Camera Phone Photos
  • 183.
    Cathy  Benscoter   cbenscoter@psu.edu   724-­‐773-­‐3807