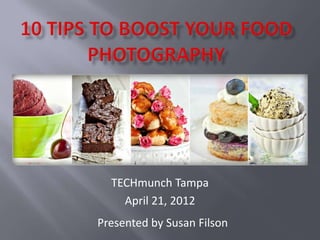
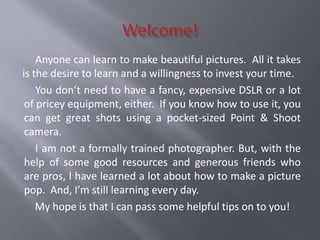
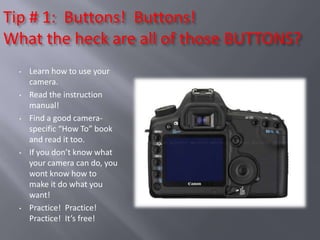
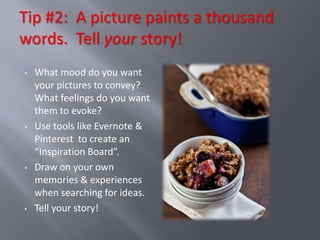
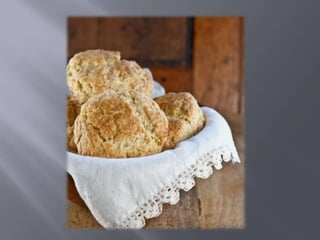
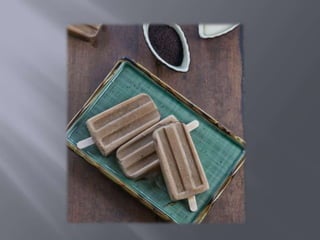
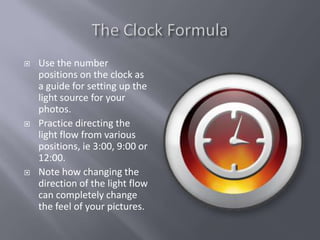
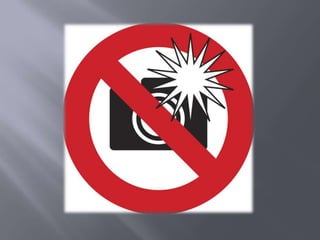
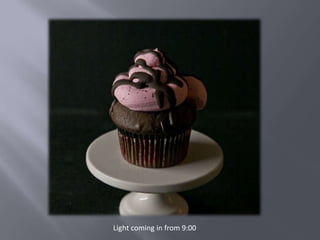
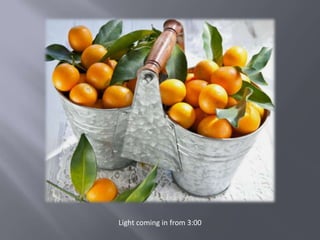
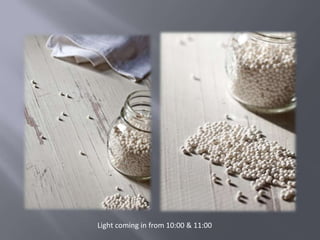
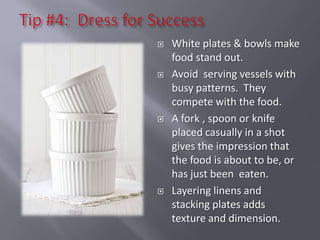
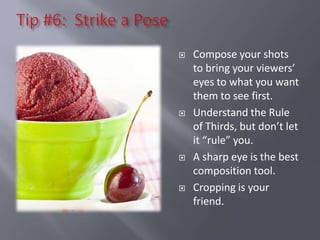
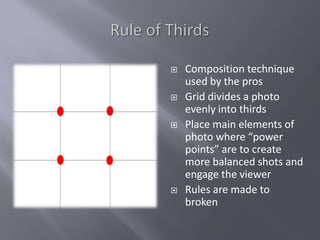
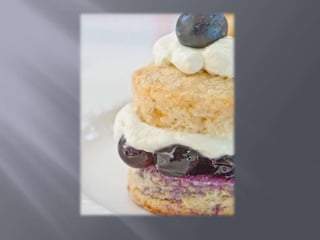
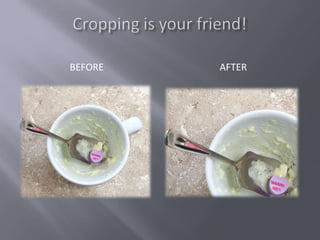
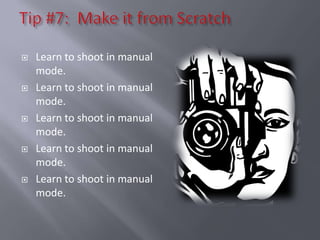
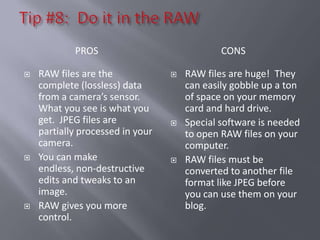
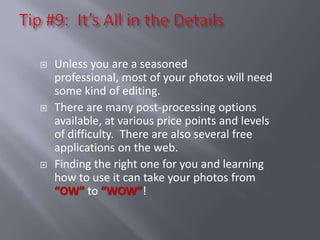
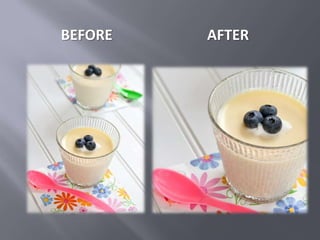
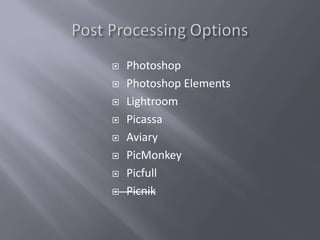
TECHmunch Tampa
    April 21, 2012
Presented by Susan Filson
Anyone can learn to make beautiful pictures. All it takes
is the desire to learn and a willingness to invest your time.
    You don’t need to have a fancy, expensive DSLR or a lot
 of pricey equipment, either. If you know how to use it, you
 can get great shots using a pocket-sized Point & Shoot
 camera.
    I am not a formally trained photographer. But, with the
 help of some good resources and generous friends who
 are pros, I have learned a lot about how to make a picture
 pop. And, I’m still learning every day.
    My hope is that I can pass some helpful tips on to you!
Making Shortcake taken with a Canon S90
Whipped Butter taken with a Canon S90
Heirloom tomatoes at the Portland Farmers Market taken with a Panasonic GF1
Artichokes at the Portland Farmers Market taken with a Panasonic GF1
Tip # 1: Buttons! Buttons!
What the heck are all of those BUTTONS?
  •   Learn how to use your
      camera.
  •   Read the instruction
      manual!
  •   Find a good camera-
      specific “How To” book
      and read it too.
  •   If you don’t know what
      your camera can do, you
      wont know how to
      make it do what you
      want!
  •   Practice! Practice!
      Practice! It’s free!
Tip #2: A picture paints a thousand
words. Tell your story!
•   What mood do you want
    your pictures to convey?
    What feelings do you want
    them to evoke?
•   Use tools like Evernote &
    Pinterest to create an
    “Inspiration Board”.
•   Draw on your own
    memories & experiences
    when searching for ideas.
•   Tell your story!
   Always use natural light
    whenever possible.
   Play around with light by
    physically moving around
    your subject to see how the
    light plays off it from
    different angles.
   Use the “clock formula” to try
    out different ways to light
    your subject.
   Bounce your light to control
    shadows and create
    interesting effects.
   Use the number
    positions on the clock as
    a guide for setting up the
    light source for your
    photos.
   Practice directing the
    light flow from various
    positions, ie 3:00, 9:00 or
    12:00.
   Note how changing the
    direction of the light flow
    can completely change
    the feel of your pictures.
Light coming in from 9:00
Light coming in from 3:00
Light coming in from 10:00 & 11:00
   White plates & bowls make
    food stand out.
   Avoid serving vessels with
    busy patterns. They
    compete with the food.
   A fork , spoon or knife
    placed casually in a shot
    gives the impression that
    the food is about to be, or
    has just been eaten.
   Layering linens and
    stacking plates adds
    texture and dimension.
   Scrapbooking paper
   Ceramic floor tiles
   Salvaged wood paneling and doors
   Fabric remnants
   Scenic posters mounted on foamboard
   Antique kitchen gadgets, bottles and jars
   Old baskets, buckets and fruit crates
   Human hands
   Homegoods (www.homegoods.com)
   Target (www.target.com)
   Shop Sweet Lulu (www.shopsweetlulu.com)
   Bake it Pretty (www.bakeitpretty.com)
   Classic Hostess (www.classichostess.com)
   Craft Stores
   Thrift Shops
   Garage Sales
   Architectural salvage yards
   When staging a shoot, try
    setting up a whole
    vignette or “scene” to
    set a mood & make your
    food more “real”.
   Add props like
    utensils, napkins, drinks
    & vases.
   Drips, spills & half-eaten
    plates make the viewer
    want to “dig in”.
   Place ingredients used in
    your recipe, like fruits or
    herbs in the shot.
   Don’t overdo it. Less is
    sometimes more.
   Keep a little food
    styling toolbox handy
    with tools to make
    your food “picture
    perfect”.
   Fill it with things like
    tweezers, toothpicks, q
    -tips and a small spray
    bottle filled with water.
   Compose your shots
    to bring your viewers’
    eyes to what you want
    them to see first.
   Understand the Rule
    of Thirds, but don’t let
    it “rule” you.
   A sharp eye is the best
    composition tool.
   Cropping is your
    friend.
   Composition technique
    used by the pros
   Grid divides a photo
    evenly into thirds
   Place main elements of
    photo where “power
    points” are to create
    more balanced shots and
    engage the viewer
   Rules are made to
    broken
BEFORE   AFTER
   Learn to shoot in manual
    mode.
   Learn to shoot in manual
    mode.
   Learn to shoot in manual
    mode.
   Learn to shoot in manual
    mode.
   Learn to shoot in manual
    mode.
PROS                              CONS

   RAW files are the                RAW files are huge! They
    complete (lossless) data          can easily gobble up a ton
    from a camera’s sensor.           of space on your memory
    What you see is what you          card and hard drive.
    get. JPEG files are              Special software is needed
    partially processed in your       to open RAW files on your
    camera.                           computer.
   You can make                     RAW files must be
    endless, non-destructive          converted to another file
    edits and tweaks to an            format like JPEG before
    image.                            you can use them on your
   RAW gives you more                blog.
    control.
   Unless you are a seasoned
    professional, most of your photos will need
    some kind of editing.
   There are many post-processing options
    available, at various price points and levels
    of difficulty. There are also several free
    applications on the web.
   Finding the right one for you and learning
    how to use it can take your photos from
    “OW” to “WOW”!
BEFORE   AFTER
   Photoshop
   Photoshop Elements
   Lightroom
   Picassa
   Aviary
   PicMonkey
   Picfull
   Picnik
   Instagram
   Aviary
   Filterstorm (can process in
    RAW format)
   Photoshop Express
   Photo Pad
   Art Studio
10 Tips to Boost Your Photography

10 Tips to Boost Your Photography

  • 1.
    TECHmunch Tampa April 21, 2012 Presented by Susan Filson
  • 2.
    Anyone can learnto make beautiful pictures. All it takes is the desire to learn and a willingness to invest your time. You don’t need to have a fancy, expensive DSLR or a lot of pricey equipment, either. If you know how to use it, you can get great shots using a pocket-sized Point & Shoot camera. I am not a formally trained photographer. But, with the help of some good resources and generous friends who are pros, I have learned a lot about how to make a picture pop. And, I’m still learning every day. My hope is that I can pass some helpful tips on to you!
  • 3.
    Making Shortcake takenwith a Canon S90
  • 4.
    Whipped Butter takenwith a Canon S90
  • 5.
    Heirloom tomatoes atthe Portland Farmers Market taken with a Panasonic GF1
  • 6.
    Artichokes at thePortland Farmers Market taken with a Panasonic GF1
  • 8.
    Tip # 1:Buttons! Buttons! What the heck are all of those BUTTONS? • Learn how to use your camera. • Read the instruction manual! • Find a good camera- specific “How To” book and read it too. • If you don’t know what your camera can do, you wont know how to make it do what you want! • Practice! Practice! Practice! It’s free!
  • 9.
    Tip #2: Apicture paints a thousand words. Tell your story! • What mood do you want your pictures to convey? What feelings do you want them to evoke? • Use tools like Evernote & Pinterest to create an “Inspiration Board”. • Draw on your own memories & experiences when searching for ideas. • Tell your story!
  • 12.
    Always use natural light whenever possible.  Play around with light by physically moving around your subject to see how the light plays off it from different angles.  Use the “clock formula” to try out different ways to light your subject.  Bounce your light to control shadows and create interesting effects.
  • 13.
    Use the number positions on the clock as a guide for setting up the light source for your photos.  Practice directing the light flow from various positions, ie 3:00, 9:00 or 12:00.  Note how changing the direction of the light flow can completely change the feel of your pictures.
  • 15.
    Light coming infrom 9:00
  • 16.
    Light coming infrom 3:00
  • 17.
    Light coming infrom 10:00 & 11:00
  • 18.
    White plates & bowls make food stand out.  Avoid serving vessels with busy patterns. They compete with the food.  A fork , spoon or knife placed casually in a shot gives the impression that the food is about to be, or has just been eaten.  Layering linens and stacking plates adds texture and dimension.
  • 19.
    Scrapbooking paper  Ceramic floor tiles  Salvaged wood paneling and doors  Fabric remnants  Scenic posters mounted on foamboard  Antique kitchen gadgets, bottles and jars  Old baskets, buckets and fruit crates  Human hands
  • 21.
    Homegoods (www.homegoods.com)  Target (www.target.com)  Shop Sweet Lulu (www.shopsweetlulu.com)  Bake it Pretty (www.bakeitpretty.com)  Classic Hostess (www.classichostess.com)  Craft Stores  Thrift Shops  Garage Sales  Architectural salvage yards
  • 22.
    When staging a shoot, try setting up a whole vignette or “scene” to set a mood & make your food more “real”.  Add props like utensils, napkins, drinks & vases.  Drips, spills & half-eaten plates make the viewer want to “dig in”.  Place ingredients used in your recipe, like fruits or herbs in the shot.  Don’t overdo it. Less is sometimes more.
  • 25.
    Keep a little food styling toolbox handy with tools to make your food “picture perfect”.  Fill it with things like tweezers, toothpicks, q -tips and a small spray bottle filled with water.
  • 26.
    Compose your shots to bring your viewers’ eyes to what you want them to see first.  Understand the Rule of Thirds, but don’t let it “rule” you.  A sharp eye is the best composition tool.  Cropping is your friend.
  • 27.
    Composition technique used by the pros  Grid divides a photo evenly into thirds  Place main elements of photo where “power points” are to create more balanced shots and engage the viewer  Rules are made to broken
  • 29.
    BEFORE AFTER
  • 30.
    Learn to shoot in manual mode.  Learn to shoot in manual mode.  Learn to shoot in manual mode.  Learn to shoot in manual mode.  Learn to shoot in manual mode.
  • 31.
    PROS CONS  RAW files are the  RAW files are huge! They complete (lossless) data can easily gobble up a ton from a camera’s sensor. of space on your memory What you see is what you card and hard drive. get. JPEG files are  Special software is needed partially processed in your to open RAW files on your camera. computer.  You can make  RAW files must be endless, non-destructive converted to another file edits and tweaks to an format like JPEG before image. you can use them on your  RAW gives you more blog. control.
  • 32.
    Unless you are a seasoned professional, most of your photos will need some kind of editing.  There are many post-processing options available, at various price points and levels of difficulty. There are also several free applications on the web.  Finding the right one for you and learning how to use it can take your photos from “OW” to “WOW”!
  • 33.
    BEFORE AFTER
  • 34.
    Photoshop  Photoshop Elements  Lightroom  Picassa  Aviary  PicMonkey  Picfull  Picnik
  • 35.
    Instagram  Aviary  Filterstorm (can process in RAW format)  Photoshop Express  Photo Pad  Art Studio