Download as PDF, PPTX
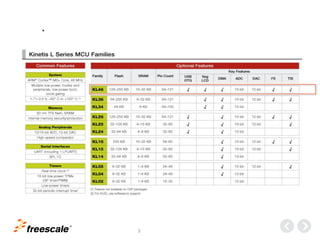
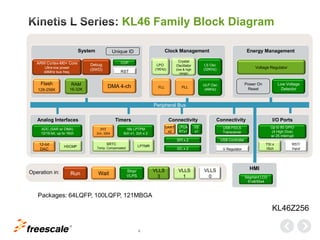
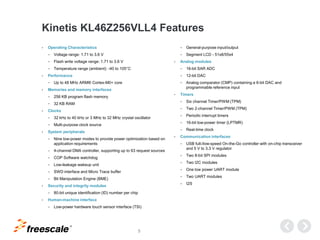
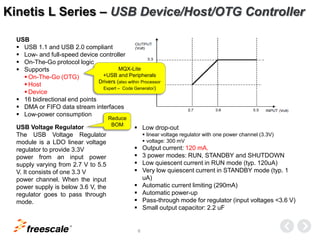
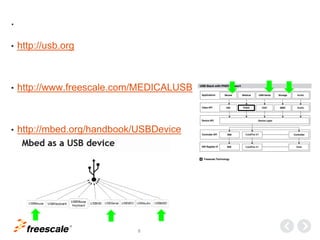
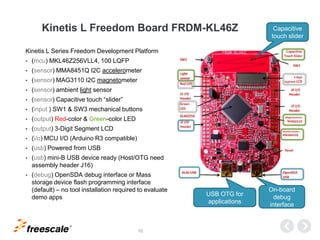
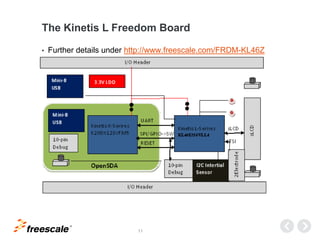
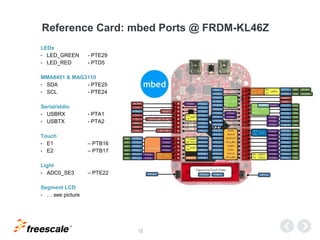
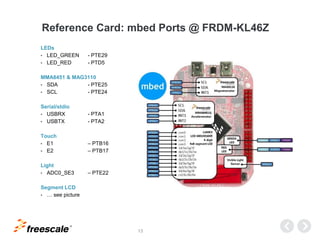

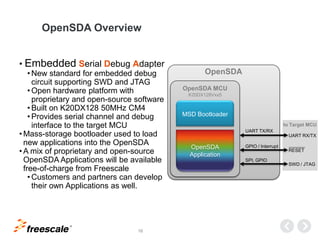
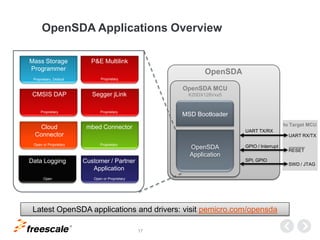


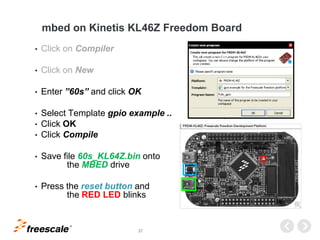

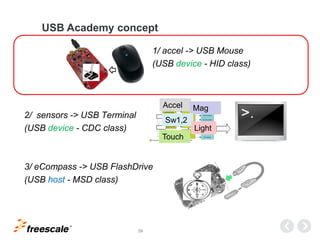
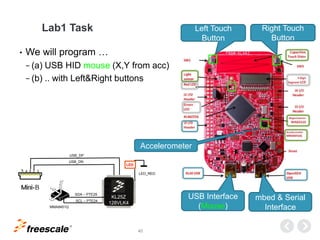
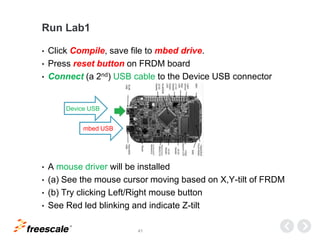
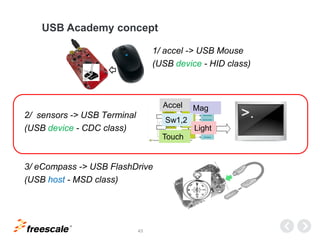
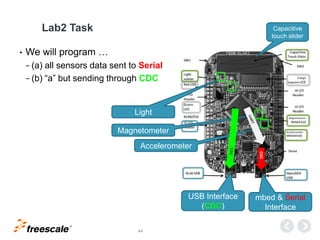
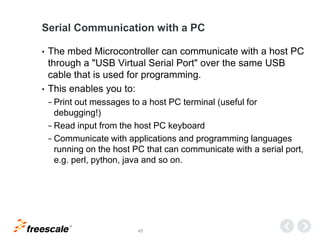
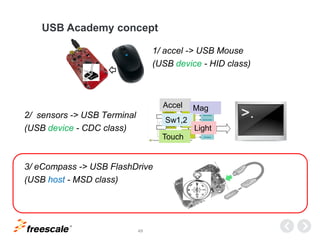
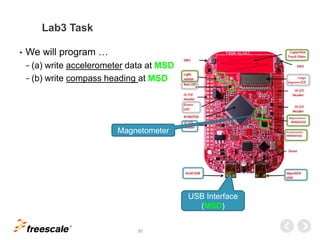
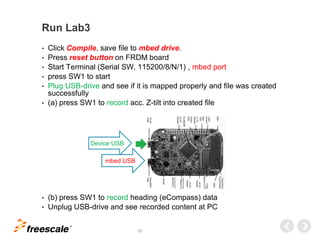


The document provides information about a Freescale USB Academy training on ARM Cortex-M0+ using the FRDM-KL46Z board. It includes: - An overview of the KL46Z256 microcontroller and FRDM-KL46Z board. - Details of four labs that will be covered: Lab 0 demonstrates a basic "hello world" blinky program; Lab 1 implements a USB HID mouse using the accelerometer; Lab 2 implements a USB CDC serial device; Lab 3 implements a USB mass storage host. - Information on using mbed.org and the OpenSDA debug interface to program the board.