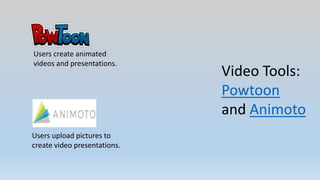
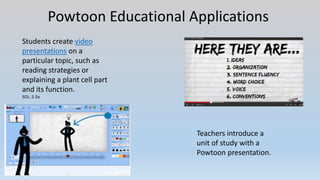
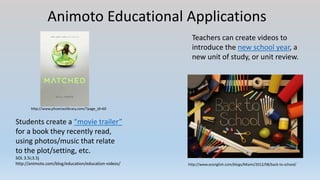
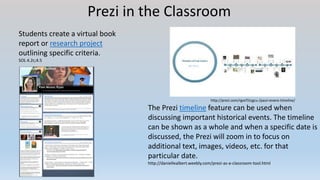
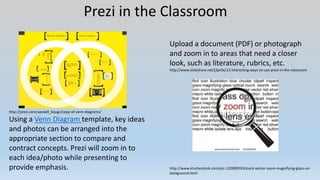
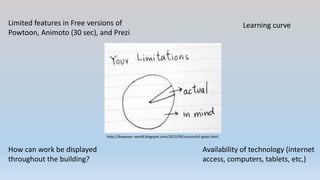
Diving
into Web
2.0 Tools
How technology applications can
benefit every classroom
A
Little
Bit
About
Me
Magazine cover created
with Bighugelabs.com
What is
Web 2.0?
“Web 2.0 refers to a new generation of websites that
allow people to collaborate and share information
online in ways that were not possible before.”
http://etc.usf.edu/techease/win/internet/what-is-web-2-0/
Created with Wordle
Video Tools:
Powtoon
and Animoto
Users create animated
videos and presentations.
Users upload pictures to
create video presentations.
Powtoon Educational Applications
Students create video
presentations on a
particular topic, such as
reading strategies or
explaining a plant cell part
and its function.
SOL: 5.5a
Teachers introduce a
unit of study with a
Powtoon presentation.
Animoto Educational Applications
Students create a “movie trailer”
for a book they recently read,
using photos/music that relate
to the plot/setting, etc.
SOL 3.5i;3.5j
http://animoto.com/blog/education/education-videos/
Teachers can create videos to
introduce the new school year, a
new unit of study, or unit review.
http://www.ecenglish.com/blogs/Miami/2012/08/back-to-school/
http://www.phoenixslibrary.com/?page_id=60
Presentation Tool:
Prezi
http://commons.wikimedia.org/wiki/File:Prezi_logo_transparent_2012.png
“Prezi is a web-based presentation and
storytelling tool that uses a single canvas
instead of traditional slides.”
http://online.illawarra.tafensw.edu.au/GetFlexible/workout/docs/wg_prezi.pdf
Prezi in the Classroom
Students create a virtual book
report or research project
outlining specific criteria.
SOL 4.2c;4.5
http://prezi.com/rgvcf1tcgcu-/paul-revere-timeline/
The Prezi timeline feature can be used when
discussing important historical events. The timeline
can be shown as a whole and when a specific date is
discussed, the Prezi will zoom in to focus on
additional text, images, videos, etc. for that
particular date.
http://daniellealbert.weebly.com/prezi-as-a-classroom-tool.html
Prezi in the Classroom
http://prezi.com/upsiw9_6qugc/copy-of-venn-diagrams/
Using a Venn Diagram template, key ideas
and photos can be arranged into the
appropriate section to compare and
contract concepts. Prezi will zoom in to
each idea/photo while presenting to
provide emphasis.
Upload a document (PDF) or photograph
and zoom in to areas that need a closer
look, such as literature, rubrics, etc.
http://www.slideshare.net/j3pr0x/13-interesting-ways-to-use-prezi-in-the-classroom
http://www.shutterstock.com/pic-120989593/stock-vector-zoom-magnifying-glass-on-
background.html
Image Editing Tool:
Big Huge Labs
Create posters, trading cards,
magazine covers, ID cards, etc. using
your own images or those found on
the web. This website offers an array
of different editing features.
www.freetech4teachers.com
Teaching & Learning with BigHugeLabs.com
Students create a trading card
for a famous explorer. SOL 3.3a
Students explore new vocabulary by
creating a poster to illustrate and use
the word correctly in a sentence.
http://tigertools.pbworks.com/f/How_can_I_use_Big_Huge_Labs_in
_the_Classroom.pdf
Teaching & Learning with BigHugeLabs.com
Teacher and students create and
share an ID card or Press Pass to get
to know teacher and classmates.
Students create a movie poster or
magazine cover on a particular book or
topic. Example : Greek Mythology
http://techtoolsforyou.weebly.com/big-huge-labs.html
Layered Reality Tool:
QR Code Monkey
A free QR code generator that
makes codes with or without color
and images.
http://www.pinterest.com/
pin/329185053984764310/
http://www.qrcode-monkey.com
QR Codes in the Classroom/Library
Create a feature wall of QR
codes in the library that link
students to book trailers.
http://www.huffenglish.com/tag/qr-code/
Include a QR code on a worksheet that links
students with a tutorial for completing the
objectives, such as applying order of
operations or the answers to given problems.
SOL 8.4
http://www.teacherspayteachers.com/Product/QR-Code-
Worksheet-Adding-Three-3-Numbers-936179
QR Codes in the Classroom/Library
http://aeeclibrary.blogspot.com/2013/10/qr-code-scavenger-
hunt.html
Students travel to various QR codes placed
throughout the space and use the information
provided by the code to respond to
questions/tasks on the assignment sheet.
Post a QR code outside the classroom door that
connects to an updated classroom newsletter. Also
send a copy of the QR code home with students, to
ensure parents have access to the online newsletter.
http://begborrowandteach.blogspot.com/2012/04/classroom-
newsletter-freebie.html
Limited features in Free versions of
Powtoon, Animoto (30 sec), and Prezi
Availability of technology (internet
access, computers, tablets, etc,)
Learning curve
How can work be displayed
throughout the building?
http://dwaynes--world.blogspot.com/2012/09/successful-goals.html
Noteworthy Technology Websites
https://imconfident.wordpress.com/2013/04/
• http://www.freetech4teachers.com/
• http://www.ala.org/aasl/standards-guidelines/best-websites/2014
• http://www.ala.org/aasl/standards-guidelines/best-apps/2014
• www.easybib.com
My email: mhami013@odu.edu
http://www.keepcalm-o-matic.co.uk/p/keep-calm-and-ask-me-questions/

Archer web 2.0 presentation

  • 1.
    Diving into Web 2.0 Tools Howtechnology applications can benefit every classroom
  • 2.
  • 3.
    What is Web 2.0? “Web2.0 refers to a new generation of websites that allow people to collaborate and share information online in ways that were not possible before.” http://etc.usf.edu/techease/win/internet/what-is-web-2-0/ Created with Wordle
  • 4.
    Video Tools: Powtoon and Animoto Userscreate animated videos and presentations. Users upload pictures to create video presentations.
  • 5.
    Powtoon Educational Applications Studentscreate video presentations on a particular topic, such as reading strategies or explaining a plant cell part and its function. SOL: 5.5a Teachers introduce a unit of study with a Powtoon presentation.
  • 6.
    Animoto Educational Applications Studentscreate a “movie trailer” for a book they recently read, using photos/music that relate to the plot/setting, etc. SOL 3.5i;3.5j http://animoto.com/blog/education/education-videos/ Teachers can create videos to introduce the new school year, a new unit of study, or unit review. http://www.ecenglish.com/blogs/Miami/2012/08/back-to-school/ http://www.phoenixslibrary.com/?page_id=60
  • 7.
    Presentation Tool: Prezi http://commons.wikimedia.org/wiki/File:Prezi_logo_transparent_2012.png “Prezi isa web-based presentation and storytelling tool that uses a single canvas instead of traditional slides.” http://online.illawarra.tafensw.edu.au/GetFlexible/workout/docs/wg_prezi.pdf
  • 8.
    Prezi in theClassroom Students create a virtual book report or research project outlining specific criteria. SOL 4.2c;4.5 http://prezi.com/rgvcf1tcgcu-/paul-revere-timeline/ The Prezi timeline feature can be used when discussing important historical events. The timeline can be shown as a whole and when a specific date is discussed, the Prezi will zoom in to focus on additional text, images, videos, etc. for that particular date. http://daniellealbert.weebly.com/prezi-as-a-classroom-tool.html
  • 9.
    Prezi in theClassroom http://prezi.com/upsiw9_6qugc/copy-of-venn-diagrams/ Using a Venn Diagram template, key ideas and photos can be arranged into the appropriate section to compare and contract concepts. Prezi will zoom in to each idea/photo while presenting to provide emphasis. Upload a document (PDF) or photograph and zoom in to areas that need a closer look, such as literature, rubrics, etc. http://www.slideshare.net/j3pr0x/13-interesting-ways-to-use-prezi-in-the-classroom http://www.shutterstock.com/pic-120989593/stock-vector-zoom-magnifying-glass-on- background.html
  • 10.
    Image Editing Tool: BigHuge Labs Create posters, trading cards, magazine covers, ID cards, etc. using your own images or those found on the web. This website offers an array of different editing features. www.freetech4teachers.com
  • 11.
    Teaching & Learningwith BigHugeLabs.com Students create a trading card for a famous explorer. SOL 3.3a Students explore new vocabulary by creating a poster to illustrate and use the word correctly in a sentence. http://tigertools.pbworks.com/f/How_can_I_use_Big_Huge_Labs_in _the_Classroom.pdf
  • 12.
    Teaching & Learningwith BigHugeLabs.com Teacher and students create and share an ID card or Press Pass to get to know teacher and classmates. Students create a movie poster or magazine cover on a particular book or topic. Example : Greek Mythology http://techtoolsforyou.weebly.com/big-huge-labs.html
  • 13.
    Layered Reality Tool: QRCode Monkey A free QR code generator that makes codes with or without color and images. http://www.pinterest.com/ pin/329185053984764310/ http://www.qrcode-monkey.com
  • 14.
    QR Codes inthe Classroom/Library Create a feature wall of QR codes in the library that link students to book trailers. http://www.huffenglish.com/tag/qr-code/ Include a QR code on a worksheet that links students with a tutorial for completing the objectives, such as applying order of operations or the answers to given problems. SOL 8.4 http://www.teacherspayteachers.com/Product/QR-Code- Worksheet-Adding-Three-3-Numbers-936179
  • 15.
    QR Codes inthe Classroom/Library http://aeeclibrary.blogspot.com/2013/10/qr-code-scavenger- hunt.html Students travel to various QR codes placed throughout the space and use the information provided by the code to respond to questions/tasks on the assignment sheet. Post a QR code outside the classroom door that connects to an updated classroom newsletter. Also send a copy of the QR code home with students, to ensure parents have access to the online newsletter. http://begborrowandteach.blogspot.com/2012/04/classroom- newsletter-freebie.html
  • 16.
    Limited features inFree versions of Powtoon, Animoto (30 sec), and Prezi Availability of technology (internet access, computers, tablets, etc,) Learning curve How can work be displayed throughout the building? http://dwaynes--world.blogspot.com/2012/09/successful-goals.html
  • 17.
    Noteworthy Technology Websites https://imconfident.wordpress.com/2013/04/ •http://www.freetech4teachers.com/ • http://www.ala.org/aasl/standards-guidelines/best-websites/2014 • http://www.ala.org/aasl/standards-guidelines/best-apps/2014 • www.easybib.com My email: mhami013@odu.edu
  • 18.

Editor's Notes

  • #2 Good morning/afternoon and thank you so much for your interest in learning more about Web 2.0 technologies. I’m very excited to be able to share with all of you some creative ways to incorporate a few of these wonderful tools into your classroom or library. I’ve learned so much over the last several months and I am eager to share my experiences and knowledge in working with these tools with you all. I’d like you to think to yourself for a minute about the technology (or lack thereof) that use in your classroom on a somewhat regular basis. Now think about if you feel like you should be using more technology in your classroom or library than you are right now. (Pause) With someone at your table, please turn and talk about the technologies you feel comfortable using and why you don’t incorporate more technology into your instruction. (1:30 min) (Pause) Is there anyone willing to share what you and your partner discussed? (take 1-2 responses) (1:00min) 2:30 min total
  • #3 My name is Meredith Archer and I have been teaching for the past 10 years. I started my career with Newport News Public Schools in 2005, as a 8th grade special education assistant. The following year I became a 6th grade English and social studies teacher. I stayed in middle school for 3 years and then transferred to elementary and have been teaching 5th grade ever since. I have taught many different types of learners, including special education students and Gifted students. I share all of this with you because I want you to know that when new teaching ideas are presented to me, I am always considering how the new idea would work in the classroom with real students of varying skill sets. I’ve realized over the years, that many ideas sound great in theory but don’t translate well when actually used in the classroom. I’ve learned about many Web 2.0 tools over the last several months and the ones I am highlighting for you today are tools that I see great value in, not only in theory but practice as well. The most important thing I want all of you to know about me today is that incorporating technology into the classroom has always been a struggle for me. To be honest, I feel like because of my younger age, it’s just assumed that I’m comfortable with new technologies and would be open-minded about leading a 21st century classroom. I’ve always known that technology integration is important in today’s classrooms, both for increased student engagement and providing students with 21st century skills that are important for their success in the world in which they live. That said though, I was not comfortable with incorporating new technologies into my classroom or with asking for help. I thought people would think it was ridiculous for someone my age to be so technology-illiterate, if you will. Rewind to 6 months ago when I enrolled in a class that centered around creating products with new technologies. I felt like a fish out of water and my anxiety was palpable. I had to dive into these tools head first, on my own, and I was nervous. I just kept thinking to myself, week after week, “there is no way I’m going to be able to create something with this new tool.” Week after week, though, I had a new and pretty cool product to share with my classmates. I was amazed at how, almost every week, I learned about a tool or two that I really wanted to integrate into my teaching. Not only did I want to do this, but I felt like it was a realistic goal. I know teachers do not have a single second to spare and the last thing any of us need is to be given new ideas that will take up a lot of our time to understand or implement into our classrooms. When choosing these tools for you today I focused on 3 main criteria. First of all, the tools I’m highlighting for you are all free. Many of them have the option of upgrading to allow more features, but the free versions are what I have used and I have been pleased with the products. Secondly, as a technology novice myself, I only chose tools that were fairly easy for me to navigate and understand on my own. None of us have the time to spend a great deal of time trying to understand how to use a new program. I don’t want to share something that I think will cause frustration. Everything I’m going to talk to you about today is user-friendly. Finally, I chose the 4 tools that I could really see working in the classroom, for both teachers and students of varying grade levels and abilities. Not only are the programs user-friendly and free, but they also provide great ways to incorporate new technology into your SOL objectives. If you like the magazine cover I am displaying, it was made with bighugelabs.com and I will be talking much more about that free site a little later in the presentation. (3:30min)
  • #4 So that bring us to the idea of Web 2.0 and what exactly does that mean? What is it? It used to be that the internet was strictly for gathering information. Things could be posted. People could go there to learn something new about a topic. It wasn’t interactive, it wasn’t a place for collaboration. But nowadays with the development of web 2.0 tools, that really refers to the new generation of the internet and websites that not only allow people to gather information, but also to create products, to collaborate with each other and to share information in ways that we didn’t do before. (1:15min)
  • #5 The first web 2.0 tools that I want to share with you today both allow users to create video presentations. First we will talk about Powtoon. With powtoon, teachers and students can create animated video presentations that they can share among their peers. The other video tool that I think is very valuable is Animoto. With animoto users can actually upload pictures or video to create their own video presentations. With animoto, users are able to create their own video theme and music that goes along well with the content that they are sharing. (55sec.)
  • #6 Ok so let’s dive a little bit deeper into Powtoon and how this tool can be applied in an educational setting. I mentioned before that with Powtoon students can create animated video presentations. This can be utilized in the classroom in many ways. For example, you could ask students to create a presentation outlining their top 5 tips for becoming a better reader or you could assign each student a specific plant or animal cell part and ask them to create their own powtoon explaining what their cell part is and how it functions within the cell. These are just two ways to incorporate powtoon into your curriculum. This tool can be used across every academic area. On the other hand, teachers themselves can use Powtoon as a way to engage students into a lesson or project. For example, as a snapshot introduction prior to beginning a unit, a teacher could actually introduce that unit of study with a powtoon presentation by giving a glimpse as to what the teacher thinks are some of the most important concepts to be taught and this works well to get the students excited about what they will be learning about. Not only would they be more excited to learn about the content, but they will also be very interested in making a powtoon on their own. I have a powtoon for you all see so you have a better idea of what a powtoon my look like in its finished state. (Play 30 sec powtoon). Also remember that powtoon can be shared so all of your students have access to their classmates’ presentations that they can use later for studying purposes. (2:40min)
  • #7 Another amazing video tool that I want to share with you is Animoto and the possibilities with Animoto are really endless. Like I mentioned before, Animoto allows users to create their own short videos by uploading images, photos, video clips and Animoto can be applied in to the classroom in a lot of different ways. For example, let’s think about summer reading book projects. How excited would your students be if they were given the opportunity to create a movie trailer for the book they read over the summer? They would use photos, they would choose their own music that goes along well with the plot, the setting, and mood of the book and that movie trailer that they create would of course be shared with the class. Here’s an example of what I’m talking about (show 1:20min animoto video). How many of you are now interested in reading Matched? I know I am! Not only will this activity be beneficial to the student making the video by reinforcing what they learned about their book, and to you as the teacher since you will be able to tell very clearly that they understood the plot and other elements of fiction for their book but it will also be beneficial to those that watch the animoto movie trailer. Because now they are exposed to more literature, they’re going to be interested in the content of these videos and they are probably going to learn about books they didn’t already know about that they are now interested in reading. So not only can the teacher see their students demonstrate comprehension, but also more reading interest is being created throughout the classroom. Another way that a teacher could use Animoto in the classroom is to create their own videos. Maybe a video that introduces the kids to the new school year or like powtoon, a video that introduces a new unit of study or on the other hand, an animoto could be used at the end of a unit as a review that really highlights the key concepts within a unit. (4:40min)
  • #8 Ok I want to shift our focus now to a great new presentation tool that I think students and teachers will find to be both user-friendly and interesting. It’s called Prezi and prezi is a web-based presentation tool, like the others we have been learning about, meaning that it is public and everyone in your class will be able to view each other’s presentations, just right along with what we have been talking about with Powtoon and Animoto: how they are public and shareable as well. So prezi is web-based and it is a presentation and story-telling tool that uses a single canvas rather than the traditional slide format, such as power point. (1:05min)
  • #9 So I just mentioned how prezi is a presentation tool that is created on a single canvas rather than the traditional slide format that we are all very familiar with and this is exactly what I mean by that. If you look at this Prezi screen shot, you see how the entire presentation is visible. When I actually go into the prezi website which I am going to do for you now, and view the live presentation, now you notice that when you start to play this presentation, it zooms in to each specific frame. The students choose their own theme or template and add their own text. Prezi allows users to upload images, photos, and YouTube videos. Now this particular prezi that you’re looking at is an example of a research project that you could assign your students. This one just happens to be on a well-known multicultural children’s author. They could do a prezi on any particular type of research topic, whether it be a famous person, period in history, or a well-known historical event. Another idea would be to have them do a virtual book report on prezi where they go through the different elements of fiction and so forth. So it’s a lot like a poster, but it does introduce a collaborative aspect into the classroom since the work is viewable to others. Prezi offers an array of templates they will not all look like the author’s example I showed you. Looking at the timeline screen shot, you can see that it obviously looks very different. What is similar though, is that when I go into the live site and play this prezi, each frame of the timeline will be zoomed in an appropriate order. Again, the students have to complete the research, enter the text, and upload any images or media that they feel will enhance their presentation. (2:20min)
  • #10 Ok so here are some more ideas for using Prezi in the classroom. You can see on the left, here’s another screen shot of a different prezi. Again obviously this prezi looks very different from the two examples we looked at a few minutes ago. This one is a Venn diagram template but when I actually go into this prezi and I play it, again, key ideas and photos are arranged appropriately in order to compare and contrast the concepts. When I view the live prezi, and I start to play it, the prezi is going to zoom in to each idea or image while presenting in order to provide emphasis for the audience. So again this is just another template that is available and another type of assignment that students could be doing on the prezi. So it’s not just for research, it’s not just for book reports, it’s not just for timelines or Venn diagrams. These are just a few of the templates that are offered, there are just so many to choose from. Another way to use prezi a little differently in the classroom is that the teacher could actually upload a document or pdf file or photograph and zoom into areas that need a closer look. So for example, if you are assigning a project and you want to go over the expectations or the rubric for the project, you could actually upload that assignment sheet onto a prezi and zoom in to certain information that you want to emphasize as you are going over the information with the students. Or let’s say that you are doing a literature study on poetry and you want to emphasize a particular stanza, again you can upload that poem onto a pdf file, put it into prezi and you can actually zoom into any particular section of that literature that you want to emphasize. Photographs work the same way. If you are doing some sort of historical study, and you’re looking at photos from the Great Depression, maybe there is something in a particular photograph that you want the students to really be able to notice, well the photo might not be large enough for them to notice fine details, so you can upload the photograph and zoom in and they will have a much clearer picture of the part of the photograph you are drawing attention to. (3:10min)
  • #11 Now I want to introduce you to an image editing website called Big Huge Labs, found at bighugelabs.com. This is honestly the tool that I’m probably most excited about because it is so versatile. There are just so many different things that can be created with the tools offered on this website. You can create posters, trading cards, ID cards, magazine covers, and that’s just the beginning. Using your own images or images that are found on the web, there are so many different editing features that this website offers, that it really just has limitless potential in the classroom. If you remember my magazine cover at the beginning of this presentation, that is one of the editing features that Big Huge labs offers and I did use Big Huge Labs to create that so keep that idea in mind if you think it is something you might like to incorporate into your classroom in some way. (1:25min)
  • #12 Here are some examples of some products that can be created with Big Huge Labs and some ways that you can incorporate these products into your teaching. You see on the left, a trading card has been created for Juan Ponce de Leon, which correlates with 3rd grade curriculum. So a student can choose to make a trading card. They would find and upload an image that correlates with the topic they ae doing and then underneath it they create a title and subtitle, followed by a summary about that particular person or topic. This could tie in to reading instruction also and a trading card could be made for real or fictional characters. For example, after reading a story, students could choose one character to create a trading card for and the summary would show that they understand the characterization or contributions of that person. Then on the right, I’m showing a motivational poster centered around new vocabulary. The students create a poster where they find and upload an image that relates to the meaning of their vocabulary word. Then underneath, they add an original sentence with the vocabulary word used correctly in context. The inclusion of an image is very helpful for English language learners as well as so many other students. (1:30min)
  • #13 Big Huge Labs can also be used to create products that are more personal for the students and an example would be on the left where I’ve created a Press pass for myself and included a statement that describes who I am to my students. This would be something that the teacher could do for him or herself and also ask the students to do. It could be used as a get-to-know-you activity at the very beginning of the school year. Not only will the kids love the activity because they get to create a product using technology, but it will allow them an opportunity to learn about their classmates as well. Then on the right, I have a magazine cover or movie poster that is centered around a particular topic, in this case, Greek Mythology. The students have a particular book or concept in mind and they have to create a magazine cover or movie poster with text that create that demonstrates their understanding of a particular topic. These 4 products I’ve shared with you just start to scratch the surface of what Big Huge Labs offers. I hope all of you will explore the website on your own to see all that this site has to offer. There are so many more tools available beyond what I showed you today. (1:45min)
  • #14 The last web 2.0 tool I want to highlight for you today centers around QR codes. Specifically the website qrcodemonkey.com I found to be very user-friendly and easy to navigate. The website is a free QR code generator that makes QR codes with or without color and images. (35sec)
  • #15 You’ve probably all seen QR codes before, on sales ads, brochures, posters, and the like. QR codes are used a lot in advertising, but can translate well into education as well. Think for a minute about the school library. A lot of times students can be very overwhelmed by the number of books they have to choose from. They just don’t know where to start. The Media Specialist can create a feature wall in the library with different QR codes, that when scanned, would link students to various book trailers for titles carried in the library. This would expose students to new books and create interest for them. Imagine how great it would be if some of these book trailers were actually animoto movies that other students in the building had created, like I showed you earlier when discussing animoto. Another way to use QR codes in education is to include a QR code on a worksheet that can link students to a tutorial on how to complete an objective, such as order of operations. I don’t know about y’all but it’s frustrating when a student returns to class with their homework and they say they couldn’t do it because they didn’t understand it. Or they tell me their mom or dad helped them. It’s especially awkward when they have their parents help and they still get it wrong. With a tutorial available from scanning a code, the parent doesn’t have to struggle to understand the work and the student can easily locate helpful information. The other option is to include codes on the homework that link the students to the answers, like I have pictured on the right. This provides kids with immediate feedback and can help them determine when they are ready to move on to the next problem. (1:50min)
  • #16 Another great way to get QR codes integrated into your instruction is to create a QR code scavenger hunt. You could have students working individually or in pairs or small groups. You post QR codes around the space, whether it’s the classroom or other areas throughout the building. Students would then travel to these various QR codes, in any order, scan the codes and read the information provided, and then respond to the questions or tasks that are on the assignment sheet. This is a sure-fire way to get them very excited and engaged in an activity. A final way that QR codes could be used in your classroom, is to post a QR code outside your classroom door that connects to your updated classroom newsletter when scanned. And let’s face it, a lot of times you will have parents that aren’t in the building frequently so you can send a copy of the QR code home at the beginning of the year to ensure they always have access to the online newsletter. You might think “well what’s the benefit of that? Why don’t I just send a copy of the newsletter home every week?” Think about how limited our resources are and the push to go green. Instead of using 25 sheets of paper every week to send the newsletter home, parents receive the QR code in the beginning of the year and that same code will link them to the updated newsletter and any other pertinent classroom information. That’s the difference of using 1 sheet of paper vs. 900 sheets of paper, not to mention printer toner and clicks on the copier. Not only that though, it’s been my experience that when parents know their children are in a classroom with a teacher who embraces technology, they see it as a benefit. (2:05min)
  • #17 Like I said in the beginning of this presentation, there were certain criteria that needed to be met in order for me to share a particular tool with you today. I wanted to make sure that the tools were free, that they are user-friendly, and that they would realistically work well in classroom, not just in theory but in practice as well. With that said, there will always be some limitations when talking about technology. First and foremost the availability of technology resources has to be there. In today’s world it seems that every school does have a fair amount of technology available and accessible to the teachers and students. Internet access is a must, obviously, along with computers, whether it be desktops or laptops. And for some schools, even tablets being available would be a huge benefit. A lot of school divisions nowadays have implemented a “bring your own device” policy, where students can actually being their personal devices, such as iPads and smartphones, because they know so much instruction can be centered around web 2.0 technology. If your school division hasn’t made that decision yet, I imagine that over the next few years there will most likely be some changes, which will, of course, make these technologies easier to introduce. Another limitation is that many of these tools limit the features in the free versions, so if you want to have access to all of the features you would have to upgrade which would cost money. Now all of the examples that I showed you today were created with the free version of the program, such as the Prezi examples and the Powtoon. The only exception to that is the Animoto and everything that was on that animoto could be done with the free version, except for the length of it. The free version of Animoto limits the user to 30 second videos, which would work for many of the activities you might like for your class to do, but realistically 30 seconds is a short amount of time and being able to make videos of a longer length is definitely a benefit. Another thought that I had when thinking about limitations was how student work can be displayed throughout the building. Obviously it’s an expectation to the parents and administrators that when visitors walk through the building they can see student work that shows what is happening in the classroom. With these tools, the products are online and not on paper, so how do we overcome this? Well one thought is to display a lot of these products over the TV. For example, a select few could be shown on the morning news show each day. The work can be shared on the class website or Facebook page, the library website, and or the school website. You won’t be able to have as much old-fashioned displays of work when products are being created with these tools, however, the benefit of the skills that these skills are learning are so great that to me, it’s worth it to make that sacrifice. When entering the workforce and/or college, these students will be expected to be so technology savvy and if we don’t embrace that and start focusing on technology in our classrooms we are doing them a major disservice. And obviously another limitation is the learning curve. You are not expected to be an expert with any of these tools before you implement them into your instruction. I’m giving this presentation today and I am by no means an expert either. It’s ok for you to dive into these tools without being 100% confident. You will have enough information that you can help your students and they will also be able to help you and that’s an amazing thing. If you wait until you are completely confident before you introduce some of these tools into the classroom then it will never end up happening. There are limitations. That said, the actual limitations are probably less than what you ate thinking. If you just jump into this and get your feet wet, your students will appreciate it, they will be more engaged, more motivated, they will be interested in the work which in turn will lead you to have a classroom with fewer management problems. Don’t feel like you have to implement all of these tools at once. Just try one, get comfortable with one and then if you are interested in trying another tool, try another one. Just give it a shot! Your students will thank you and they will benefit tremendously. (6:20min)
  • #18 I know that I’ve thrown a lot of information on you in a very short period of time and you are probably feeling a bit overwhelmed. I just want to end things today with 4 great websites that I think will help you in the future as you go through this technology journey. I’ve listed these websites and I recommend that you write them down because they will offer you a wealth of current information as you continue on this technology journey. First is www.freetech4teachers.com and this is a free blog that I highly suggest you subscribe to. Information is given frequently with new technology features and websites that will really keep you on the cusp of new technologies. Along those same lines, The American Library Association also names every year some of the best new websites and the best new apps. I’ve provided the links for both the 2014 best websites and 2014 best apps according to the American Library Association. You will learn about a lot of really cool technologies by exploring both of these websites. In the future, on your own time, if you peruse these sites you will stay abreast to the up and coming technologies as well. The last website that I have found to be so worthwhile is easybib.com. What easybib does is it allows you to input certain information from a source you need to cite, whether it be an image, YouTube video, book, website, etc. and it allows you to choose the type of citation you need, whether it be MLA or APA and it actually writes the citation for you. Citations are so difficult for people to learn and there is no way they can ever remember all the specific formatting requirements on their own and with research being such a push and with these web 2.0 tools requiring students to research and to share information from the internet, citing sources is so important. Easybib is a quick and easy way for students to learn to cite their work properly. Also, my email address is on the bottom of the screen. Please write it down and email me if you have any questions about how to use these tool once you have an opportunity to start exploring on your own. (3:45min)
  • #19 If you have any questions I am happy to take them now. (5sec) Allow 3-4 minutes for questions Total Time (without questions): 41:45