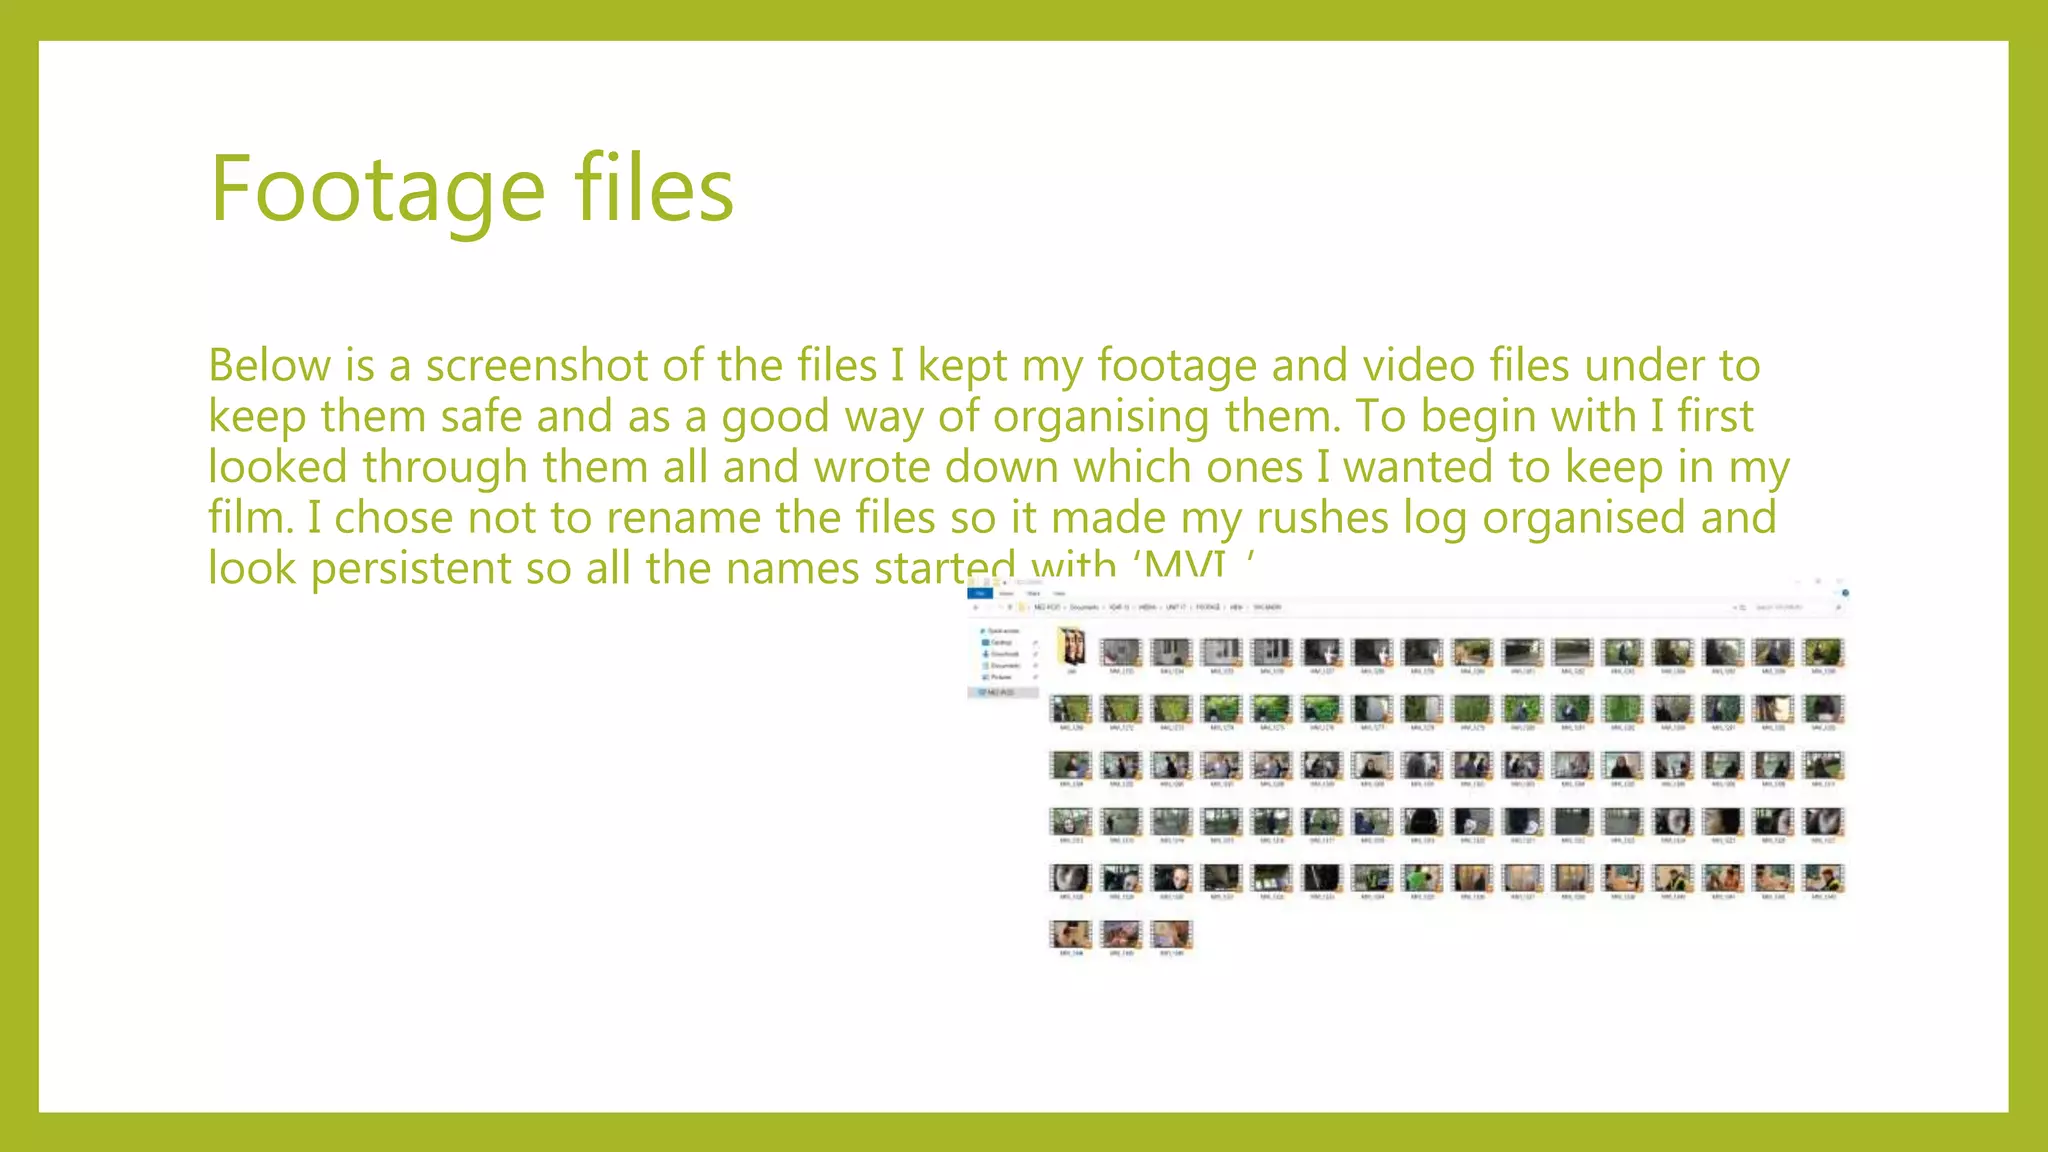
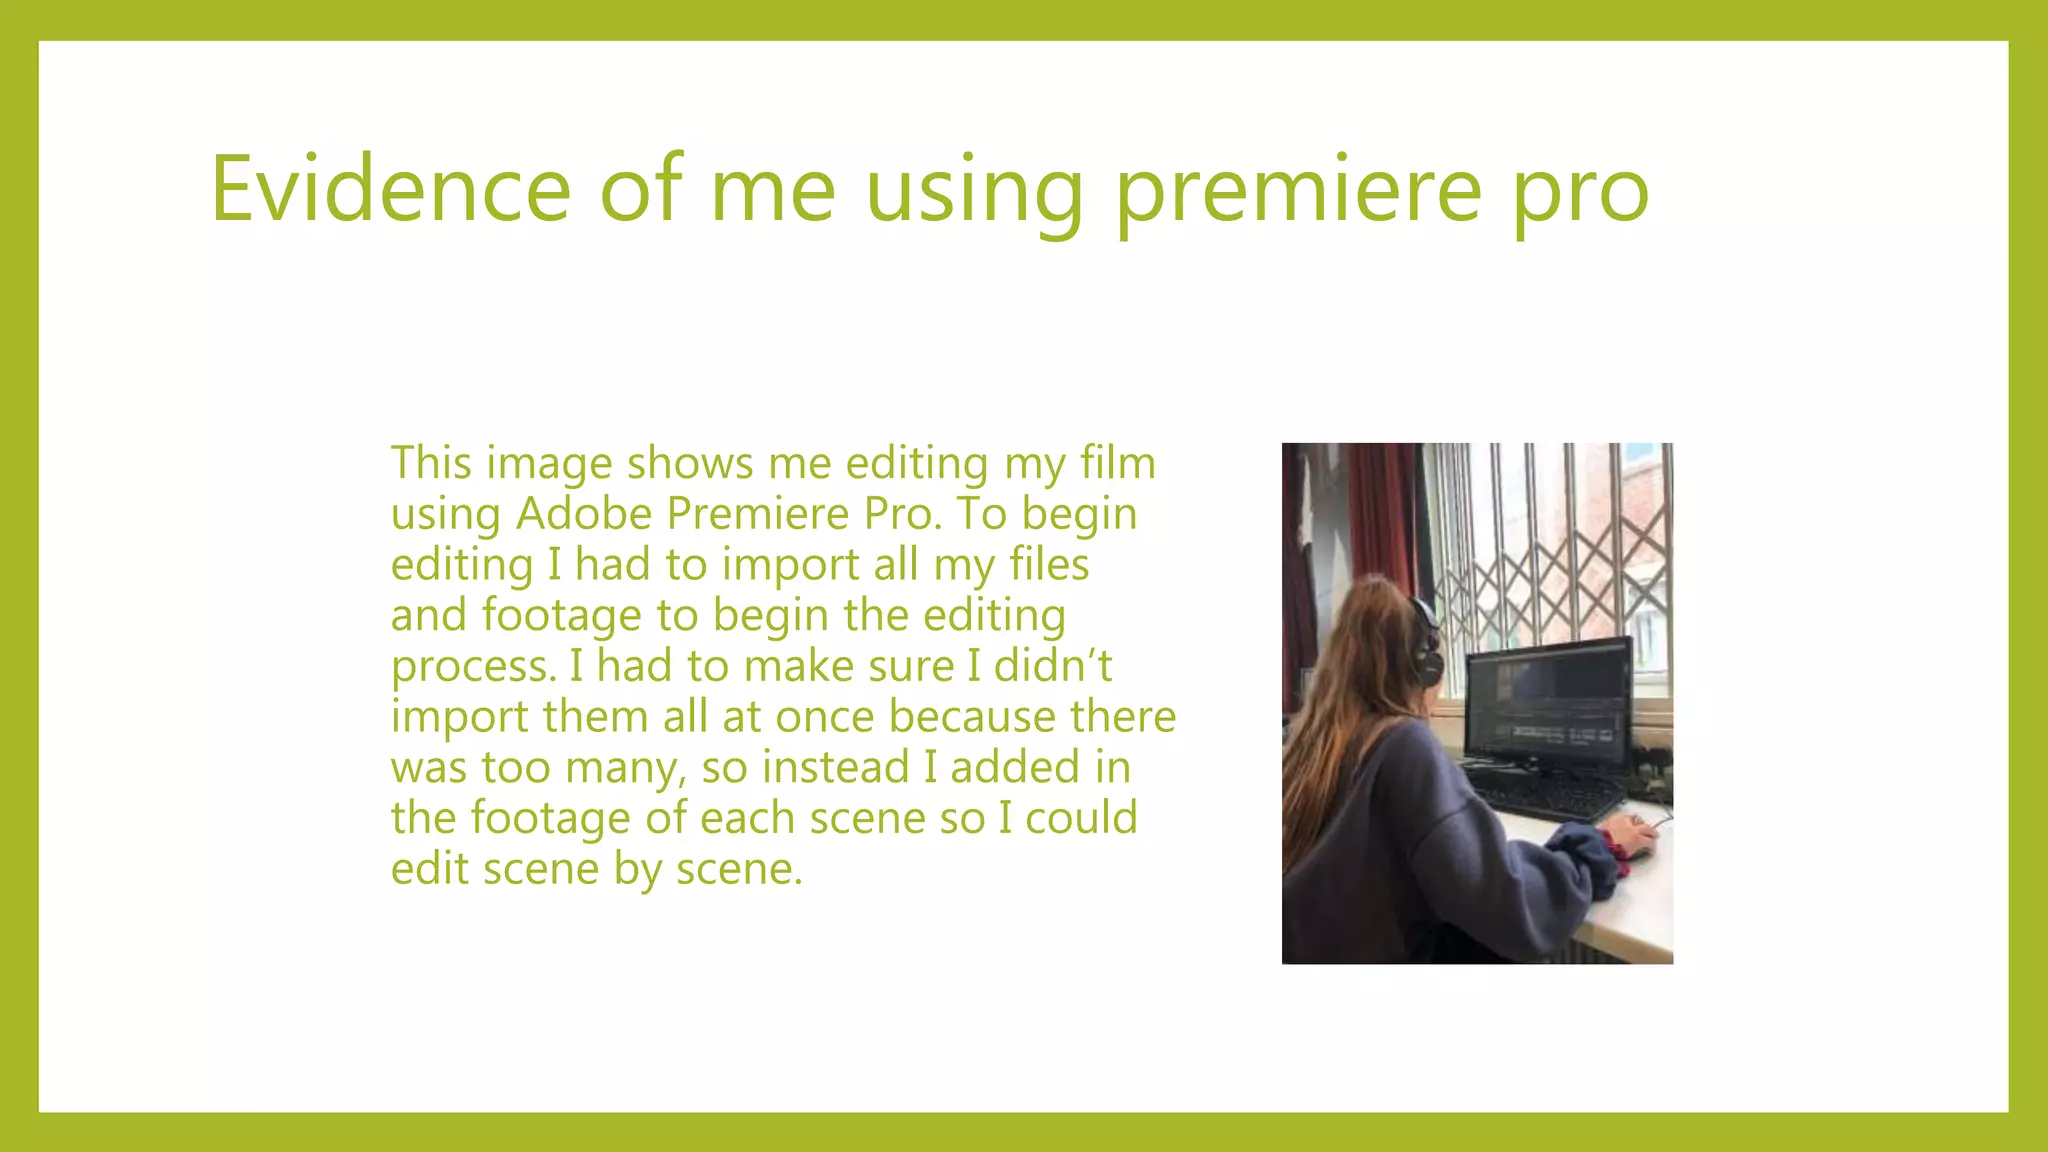
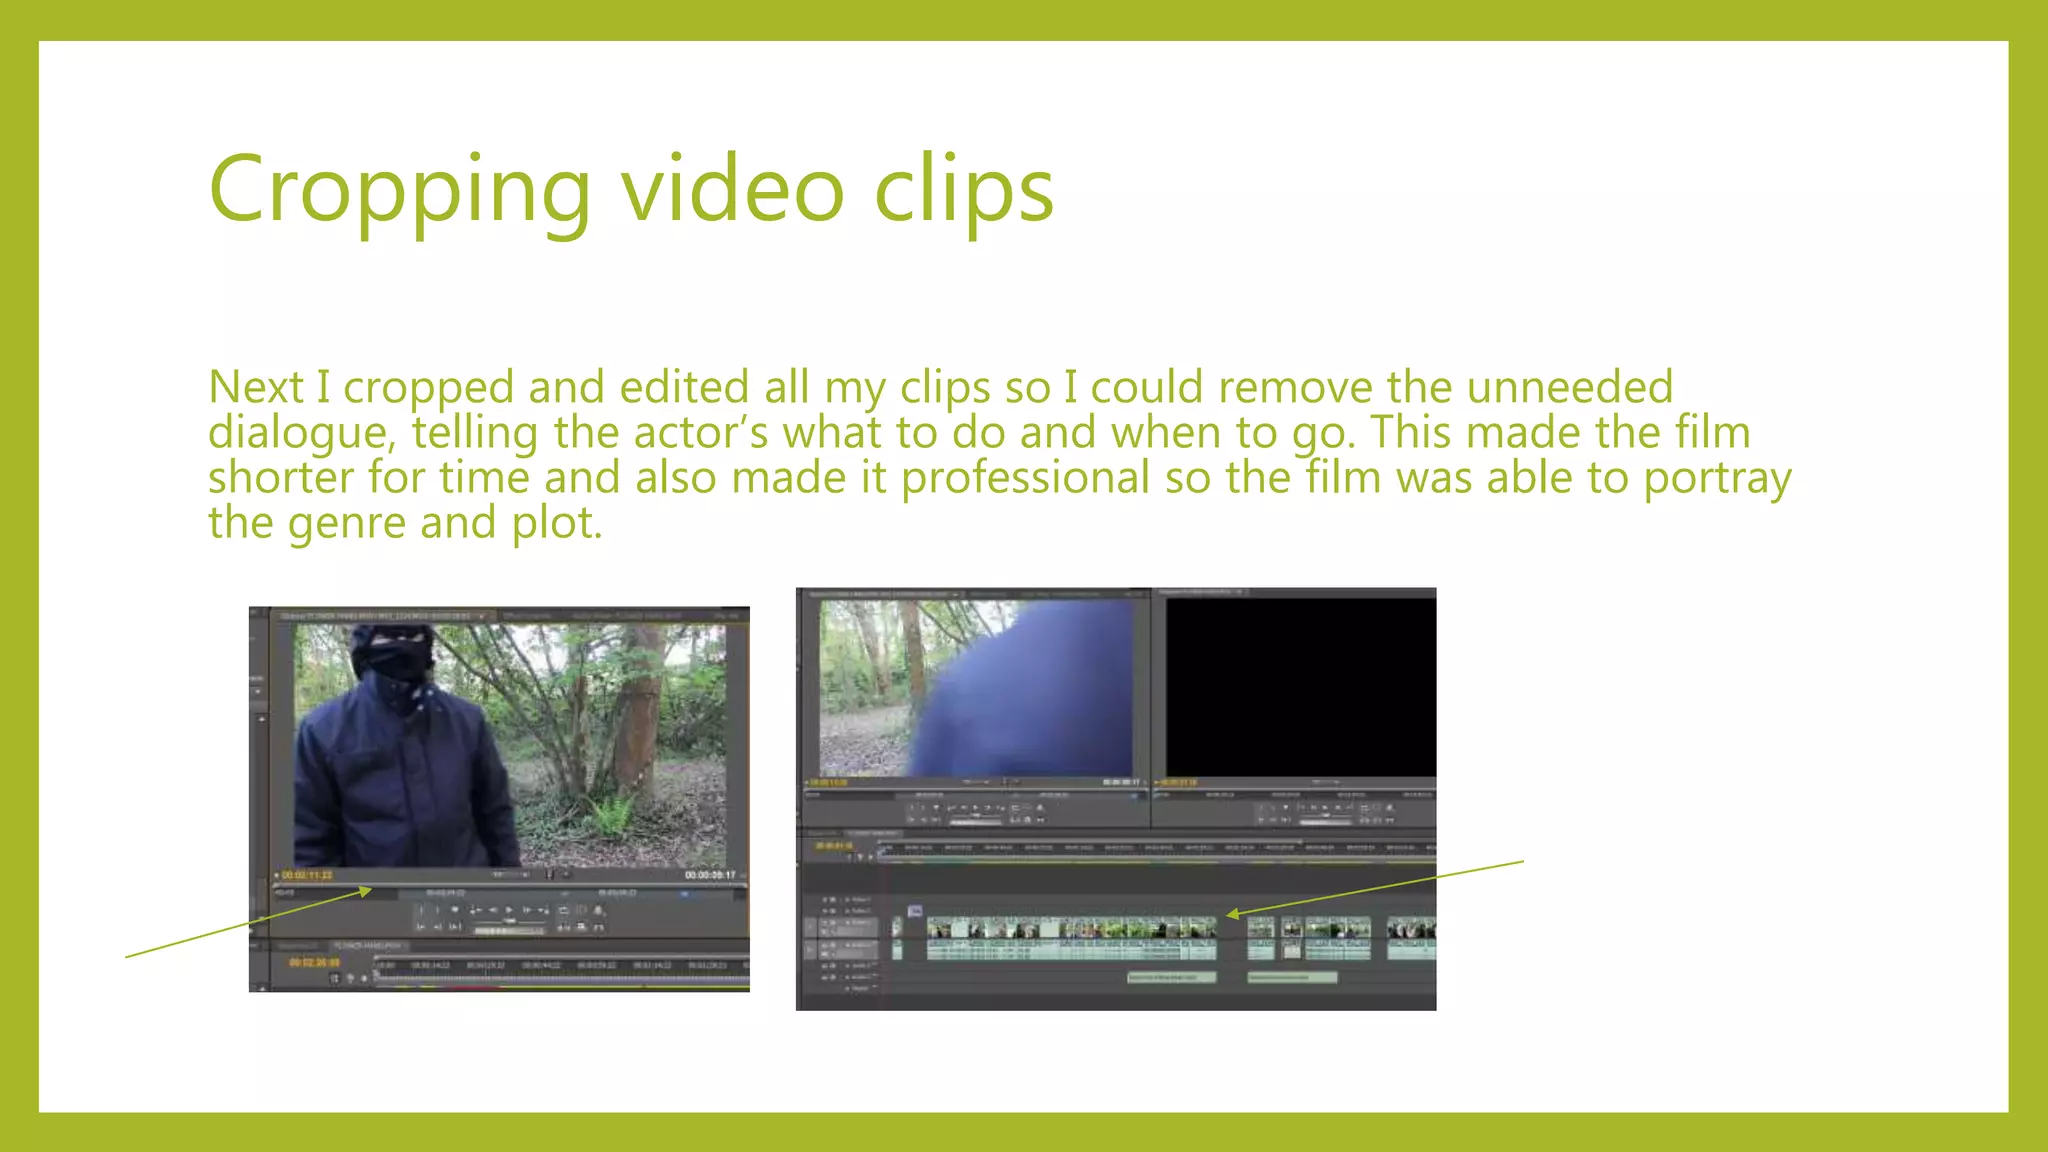
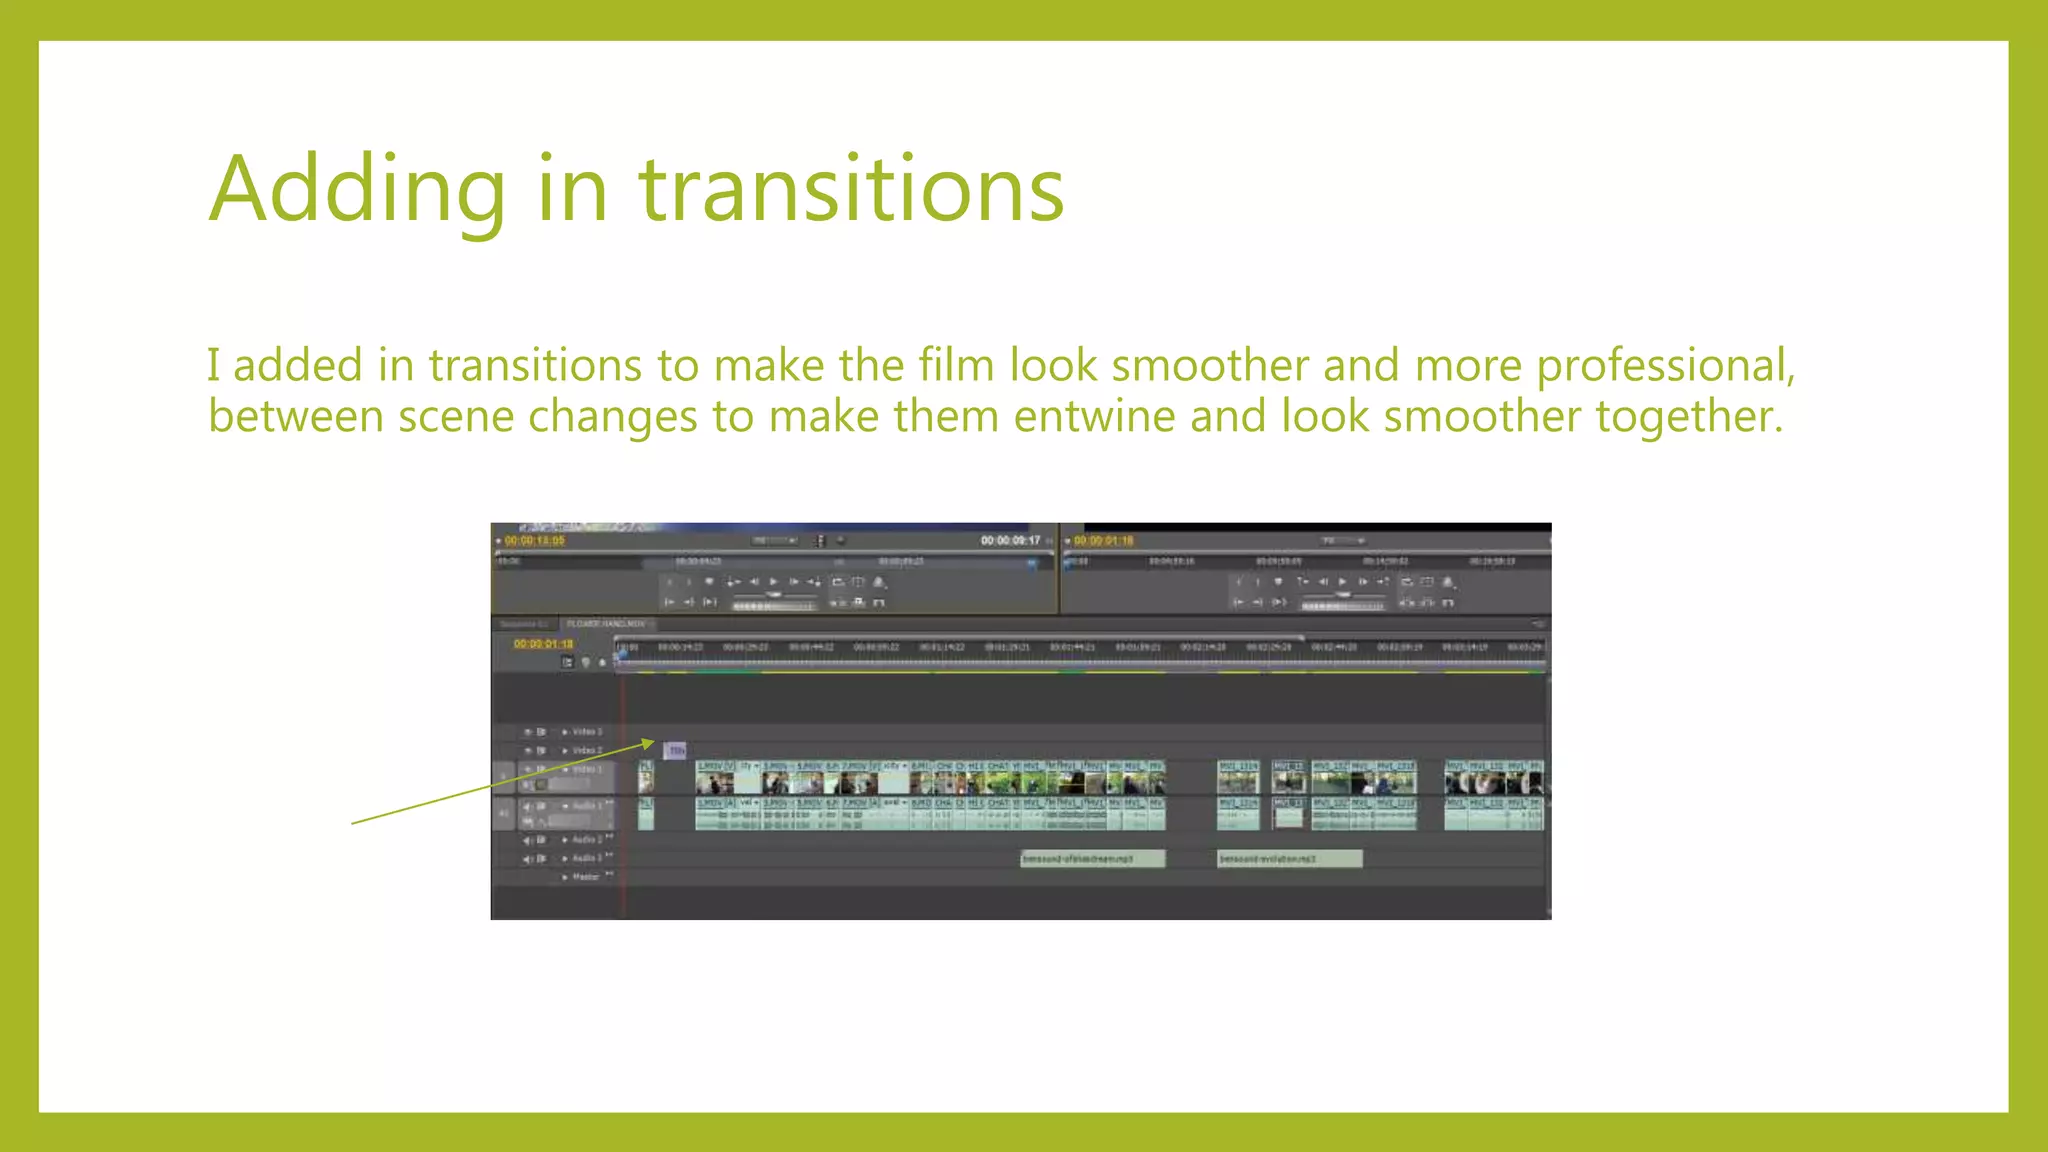
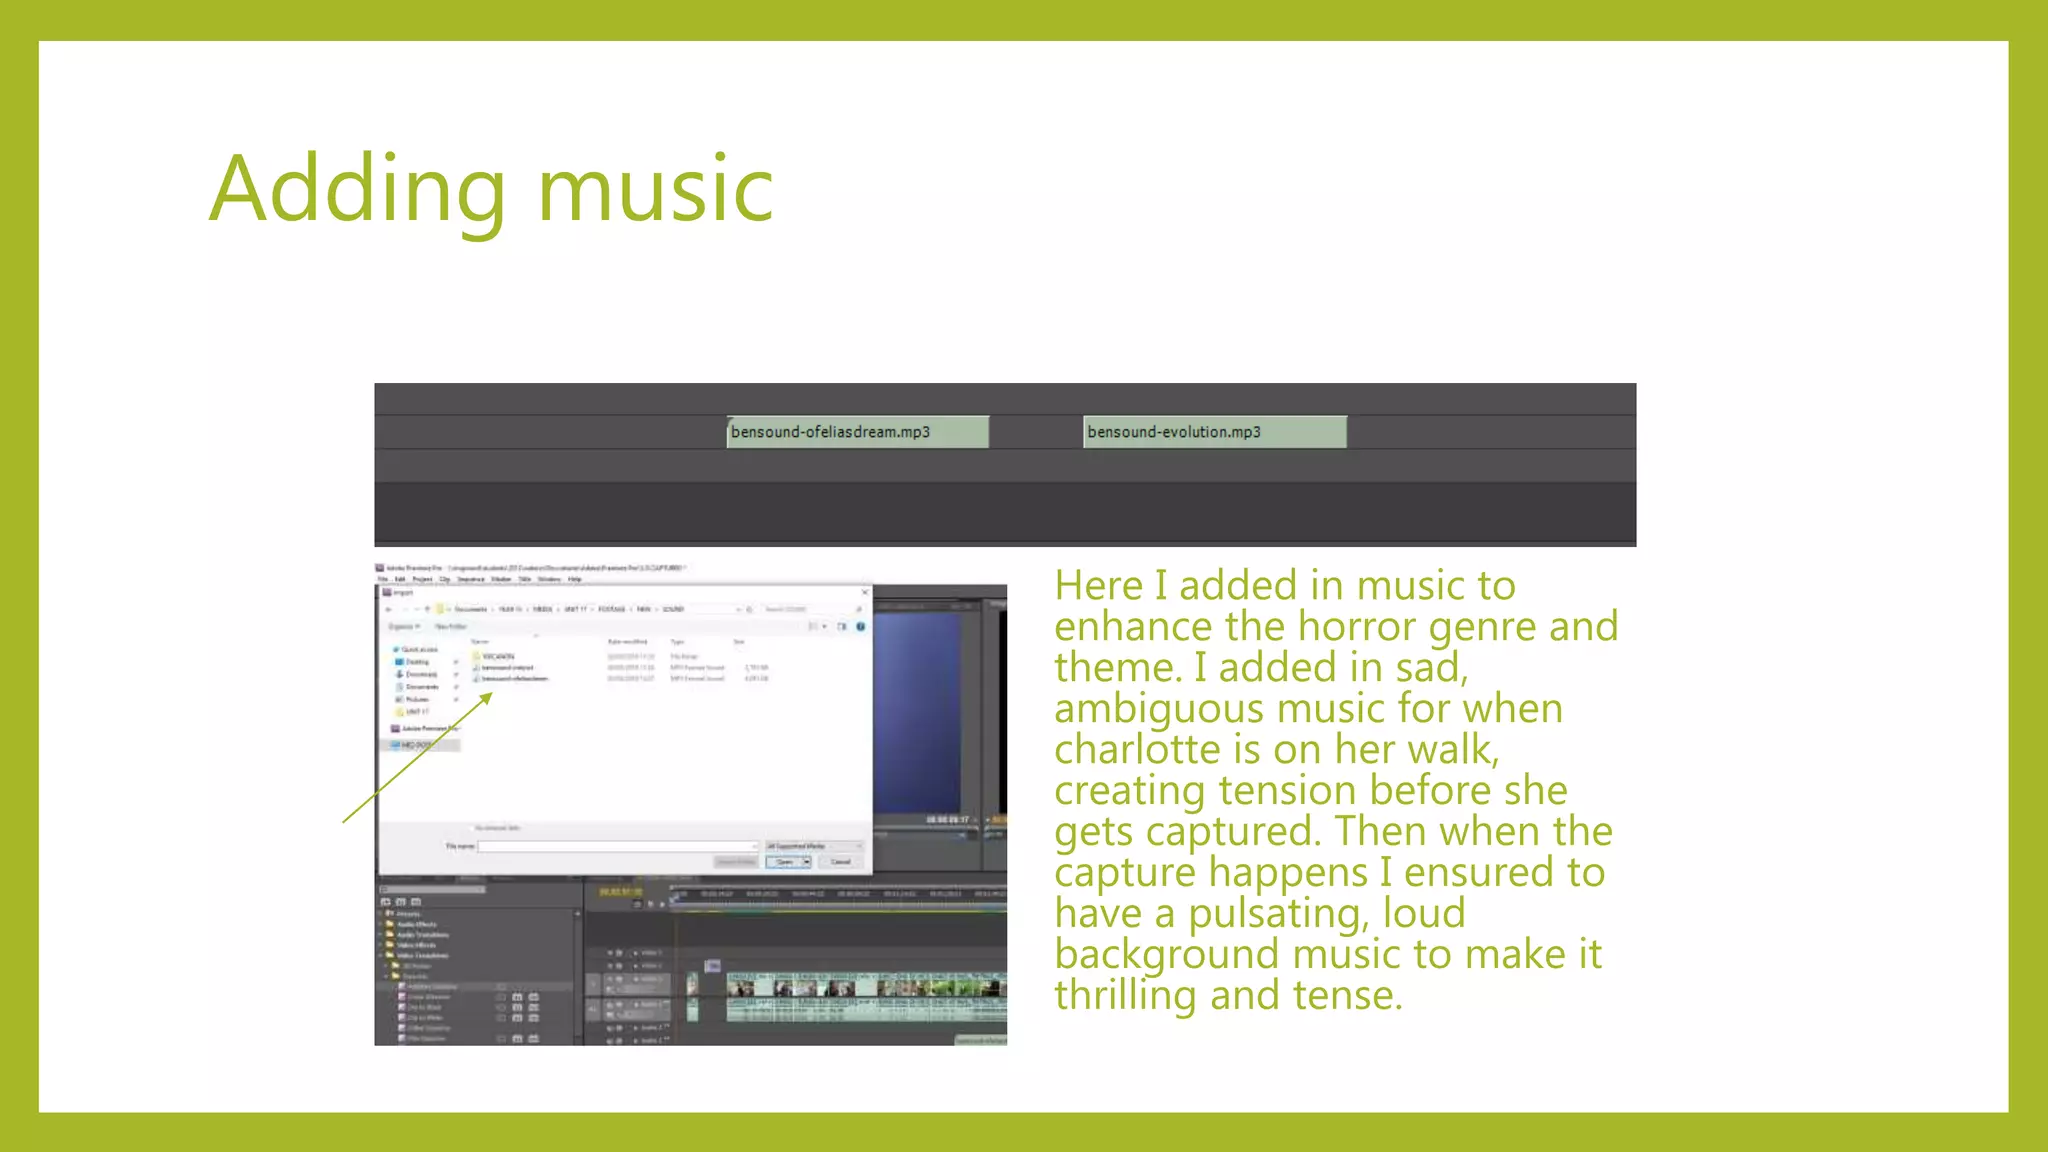
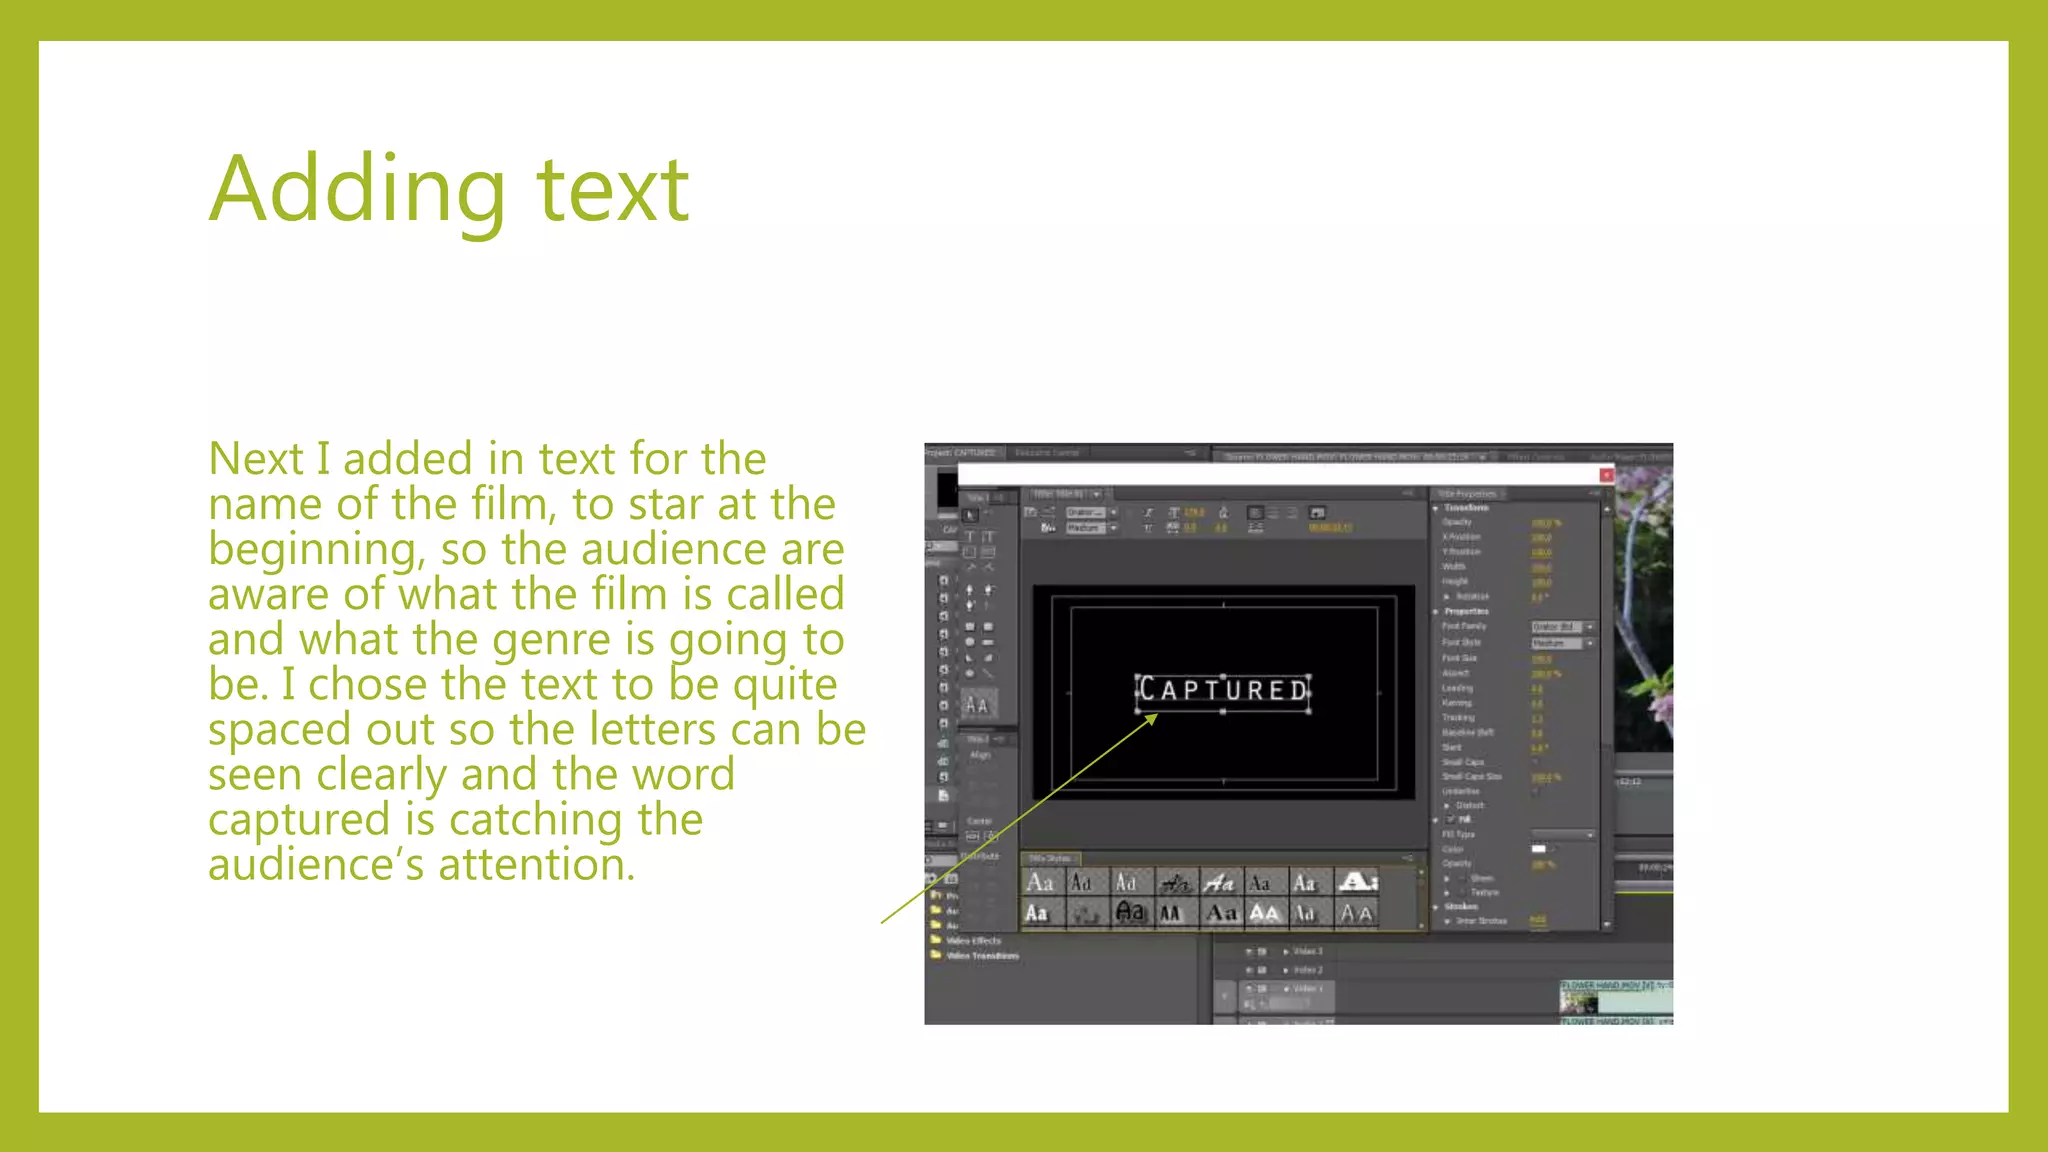
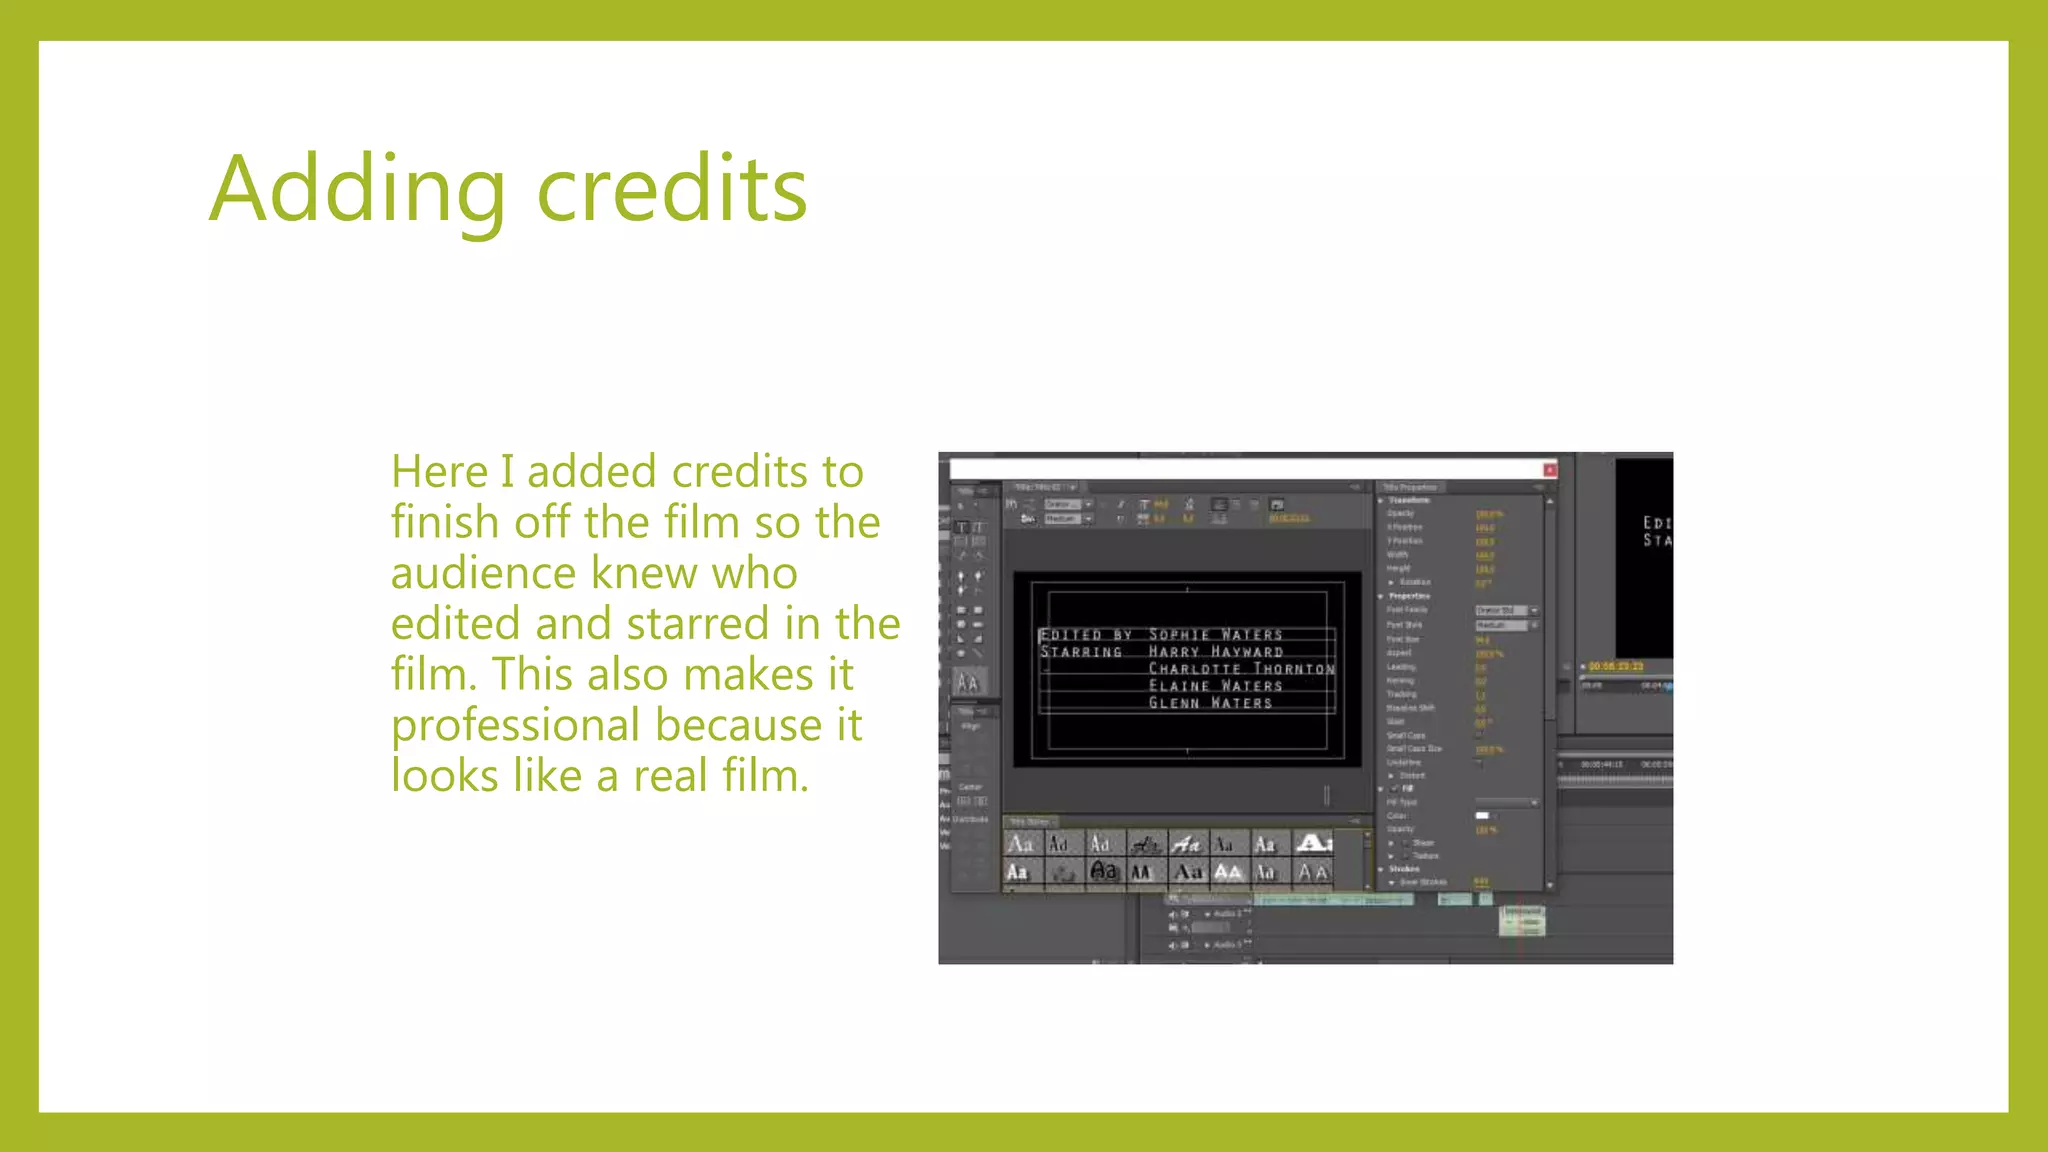
EVIDENCE OF EDITING
PROCESS
Unit 17
Footage files
Below is a screenshot of the files I kept my footage and video files under to
keep them safe and as a good way of organising them. To begin with I first
looked through them all and wrote down which ones I wanted to keep in my
film. I chose not to rename the files so it made my rushes log organised and
look persistent so all the names started with ‘MVI_’.
Evidence of me using premiere pro
This image shows me editing my film
using Adobe Premiere Pro. To begin
editing I had to import all my files
and footage to begin the editing
process. I had to make sure I didn’t
import them all at once because there
was too many, so instead I added in
the footage of each scene so I could
edit scene by scene.
Cropping video clips
Next I cropped and edited all my clips so I could remove the unneeded
dialogue, telling the actor’s what to do and when to go. This made the film
shorter for time and also made it professional so the film was able to portray
the genre and plot.
Adding in transitions
I added in transitions to make the film look smoother and more professional,
between scene changes to make them entwine and look smoother together.
Adding music
Here I added in music to
enhance the horror genre and
theme. I added in sad,
ambiguous music for when
charlotte is on her walk,
creating tension before she
gets captured. Then when the
capture happens I ensured to
have a pulsating, loud
background music to make it
thrilling and tense.
Adding text
Next I added in text for the
name of the film, to star at the
beginning, so the audience are
aware of what the film is called
and what the genre is going to
be. I chose the text to be quite
spaced out so the letters can be
seen clearly and the word
captured is catching the
audience’s attention.
Adding credits
Here I added credits to
finish off the film so the
audience knew who
edited and starred in the
film. This also makes it
professional because it
looks like a real film.
Final render and exporting film
Lastly to finish my
short film I rendered
and then exported
it. This allowed my
film to be uploaded
onto YouTube and
onto ‘short of the
week’

EVIDENCE OF EDITING PROCESS

  • 1.
  • 2.
    Footage files Below isa screenshot of the files I kept my footage and video files under to keep them safe and as a good way of organising them. To begin with I first looked through them all and wrote down which ones I wanted to keep in my film. I chose not to rename the files so it made my rushes log organised and look persistent so all the names started with ‘MVI_’.
  • 3.
    Evidence of meusing premiere pro This image shows me editing my film using Adobe Premiere Pro. To begin editing I had to import all my files and footage to begin the editing process. I had to make sure I didn’t import them all at once because there was too many, so instead I added in the footage of each scene so I could edit scene by scene.
  • 4.
    Cropping video clips NextI cropped and edited all my clips so I could remove the unneeded dialogue, telling the actor’s what to do and when to go. This made the film shorter for time and also made it professional so the film was able to portray the genre and plot.
  • 5.
    Adding in transitions Iadded in transitions to make the film look smoother and more professional, between scene changes to make them entwine and look smoother together.
  • 6.
    Adding music Here Iadded in music to enhance the horror genre and theme. I added in sad, ambiguous music for when charlotte is on her walk, creating tension before she gets captured. Then when the capture happens I ensured to have a pulsating, loud background music to make it thrilling and tense.
  • 7.
    Adding text Next Iadded in text for the name of the film, to star at the beginning, so the audience are aware of what the film is called and what the genre is going to be. I chose the text to be quite spaced out so the letters can be seen clearly and the word captured is catching the audience’s attention.
  • 8.
    Adding credits Here Iadded credits to finish off the film so the audience knew who edited and starred in the film. This also makes it professional because it looks like a real film.
  • 9.
    Final render andexporting film Lastly to finish my short film I rendered and then exported it. This allowed my film to be uploaded onto YouTube and onto ‘short of the week’