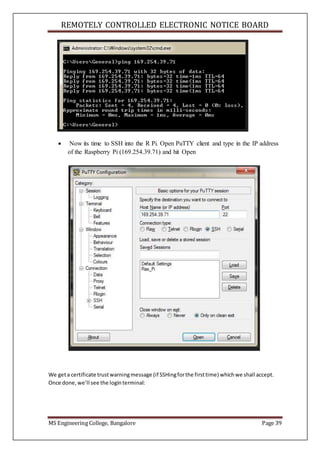
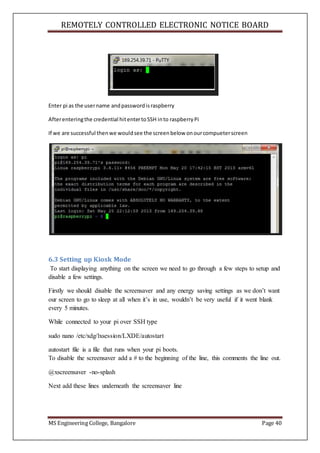
The document outlines a project for a remotely controlled electronic notice board that utilizes a Raspberry Pi and Android mobile phone for message display. It describes the setup where text messages are sent wirelessly from the user’s phone to a server, which processes and displays them on an LCD screen. The project aims to streamline notice posting in institutions by automating the process and eliminating the need for manual updates.


![REMOTELY CONTROLLED ELECTRONIC NOTICE BOARD
MS Engineering College, Bangalore Page 11
3.1.5 ServerProcess
This is the process which takes a request from the clients. After getting a request from the
client, this process will perform the required processing, gather the requested information,
and send it to the requestor client. Once done, it becomes ready to serve another client. Server
processes are always alert and ready to serve incoming requests.
Example − Web Server keeps waiting for requests from Internet Browsers and as soon as it
gets any request from a browser, it picks up a requested HTML page and sends it back to that
Browser.
Note that the client needs to know the address of the server, but the server does not need to
know the address or even the existence of the client prior to the connection being established.
Once a connection is established, both sides can send and receive information.
3.1.6 Structureused insockets
Various structures are used in Unix Socket Programming to hold information about the
address and port, and other information. Most socket functions require a pointer to a socket
address structure as an argument. Structures defined in this chapter are related to Internet
Protocol Family.
sockaddr
The first structure is sockaddr that holds the socket information −
struct sockaddr {
unsigned short sa_family;
char sa_data[14];
};
This is a generic socket address structure, which will be passed in most of the socket function
calls. The following table provides a description of the member fields −
Attribute Values Description
sa_family
AF_INET
AF_UNIX
AF_NS
AF_IMPLINK
It representsanaddressfamily. Inmostof the
Internet-basedapplications,we use AF_INET.](https://image.slidesharecdn.com/noticeboardreport-160501091140/85/Electronic-Notice-Board-Using-Raspberry-Pi-and-Android-Phone-11-320.jpg)
![REMOTELY CONTROLLED ELECTRONIC NOTICE BOARD
MS Engineering College, Bangalore Page 12
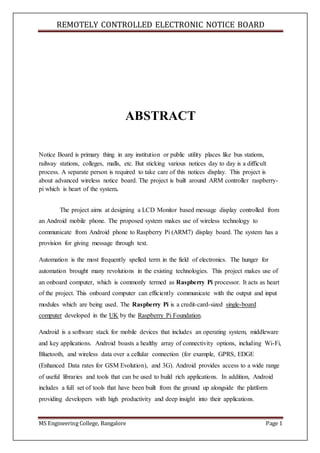
sa_data Protocol-specificAddress The contentof the 14 bytesof protocol specific
addressare interpretedaccordingtothe type of
address.Forthe Internetfamily,we will use port
numberIPaddress,whichisrepresentedby
sockaddr_in structure definedbelow.
sockaddr in
The second structure that helps you to reference to the socket's elements is as follows −
struct sockaddr_in {
short int sin_family;
unsigned short int sin_port;
struct in_addr sin_addr;
unsigned char sin_zero[8];
};
Attribute Values Description
sa_family AF_INET
AF_UNIX
AF_NS
AF_IMPLINK
It representsanaddressfamily.Inmostof the
Internet-basedapplications,we use AF_INET.
sin_port Service Port A 16-bitport numberinNetworkByte Order.
sin_addr IP Address A 32-bitIP addressinNetworkByte Order.
sin_zero NotUsed You justsetthisvalue to NULL as thisis not being
used.
3.1.7 Steps to create TCPServer
Create a socket with the socket() system call.
Bind the socket to an address using the bind() system call. For a server socket on the
Internet, an address consists of a port number on the host machine.
Listen for connections with the listen() system call.
Accept a connection with the accept() system call. This call typically blocks until a
client connects with the server.
Send and receive data using the read() and write() system calls.](https://image.slidesharecdn.com/noticeboardreport-160501091140/85/Electronic-Notice-Board-Using-Raspberry-Pi-and-Android-Phone-12-320.jpg)


![REMOTELY CONTROLLED ELECTRONIC NOTICE BOARD
MS Engineering College, Bangalore Page 24
5.1.1 Linux
Linux is a Unix-like computer operating system assembled under the model of free and
open source software development and distribution. Most Linux distributions, as
collections of software based around the Linux kernel and often around a package
management system, provide complete LAMP setups through their packages. According
to W3Techs in October 2013, 58.5% of web server market share was shared between
Debian and Ubuntu, while RHEL, Fedora and centOS together shared 37.3%. In this
project we will use Raspbian OS which is a flavor of linux suitable for Raspberry Pi.
5.1.2 Apache
The role of LAMP's web server has been traditionally supplied by Apache, and has since
included other web servers such as Nginx.
The Apache HTTP Server has been the most popular web server on the public Internet. In
June 2013, Netcraft estimated that Apache served 54.2% of all active websites and 53.3%
of the top servers across all domains. In June 2014, Apache was estimated to serve
52.27% of all active websites, followed by nginx with 14.36%.
Apache is developed and maintained by an open community of developers under the
auspices of the Apache Software Foundation. Released under the Apache License,
Apache is open-source software. A wide variety of features are supported, and many of
them are implemented as compiled modules which extend the core functionality of
Apache. These can range from server-side programming language support to
authentication schemes.
5.1.3 PHP
PHP is a server-side scripting language designed for web development but also used as a
general-purpose programming language. Originally created by Rasmus Lerdorf in 1994,
the PHP reference implementation is now produced by The PHP Group.PHP originally
stood for Personal Home Page,[3] but it now stands for the recursive backronym PHP:
Hypertext Preprocessor.
PHP code may be embedded into HTML code, or it can be used in combination with
various web template systems, web content management system and web frameworks.
PHP code is usually processed by a PHP interpreter implemented as a module in the web
server or as a Common Gateway Interface (CGI) executable. The web server combines
the results of the interpreted and executed PHP code, which may be any type of data,
including images, with the generated web page. PHP code may also be executed with a](https://image.slidesharecdn.com/noticeboardreport-160501091140/85/Electronic-Notice-Board-Using-Raspberry-Pi-and-Android-Phone-24-320.jpg)


![REMOTELY CONTROLLED ELECTRONIC NOTICE BOARD
MS Engineering College, Bangalore Page 44
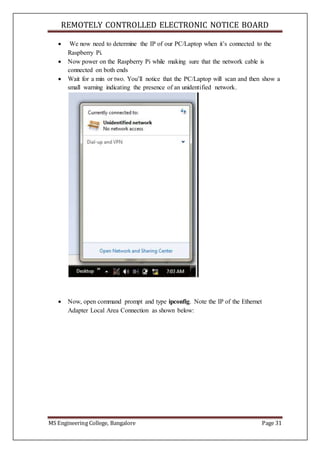
<?php
// Open the text file
$f = fopen("web.txt", "w");
// Write text in to the file
fwrite($f, $_POST["textblock"]);
fwrite($f,"rn");
// Close the text file
fclose($f);
// Open file for reading, and read the line
$f = fopen("web.txt", "r");
// Read text
//echo fgets($f);
fclose($f)
?>](https://image.slidesharecdn.com/noticeboardreport-160501091140/85/Electronic-Notice-Board-Using-Raspberry-Pi-and-Android-Phone-44-320.jpg)