Downloaded 327 times


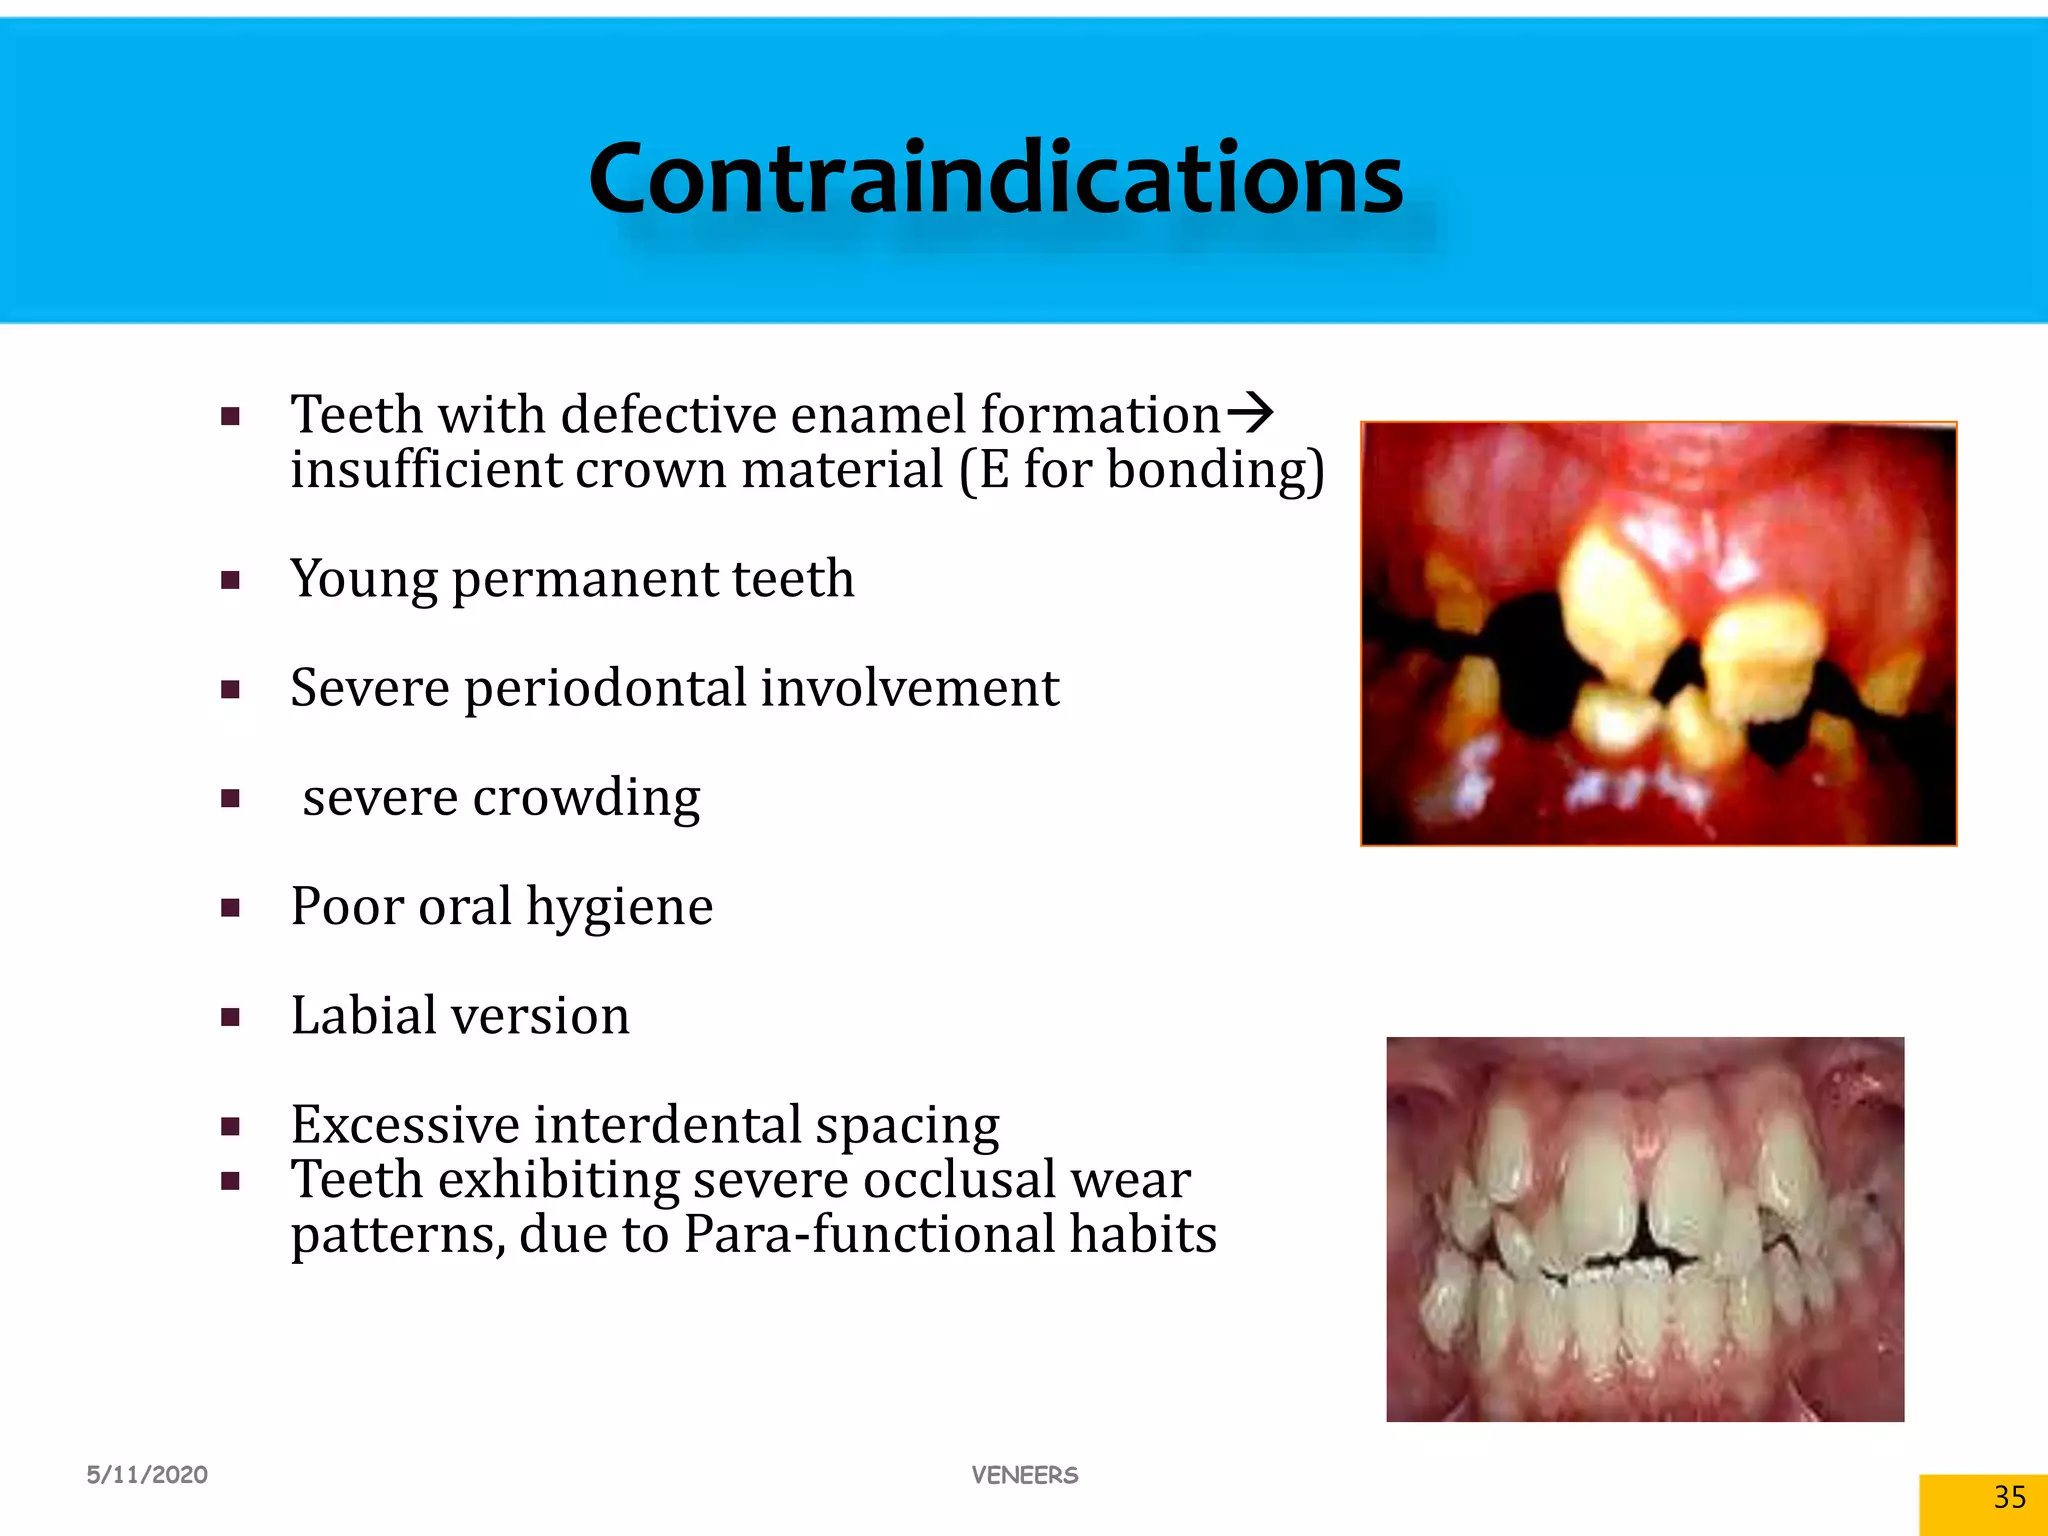
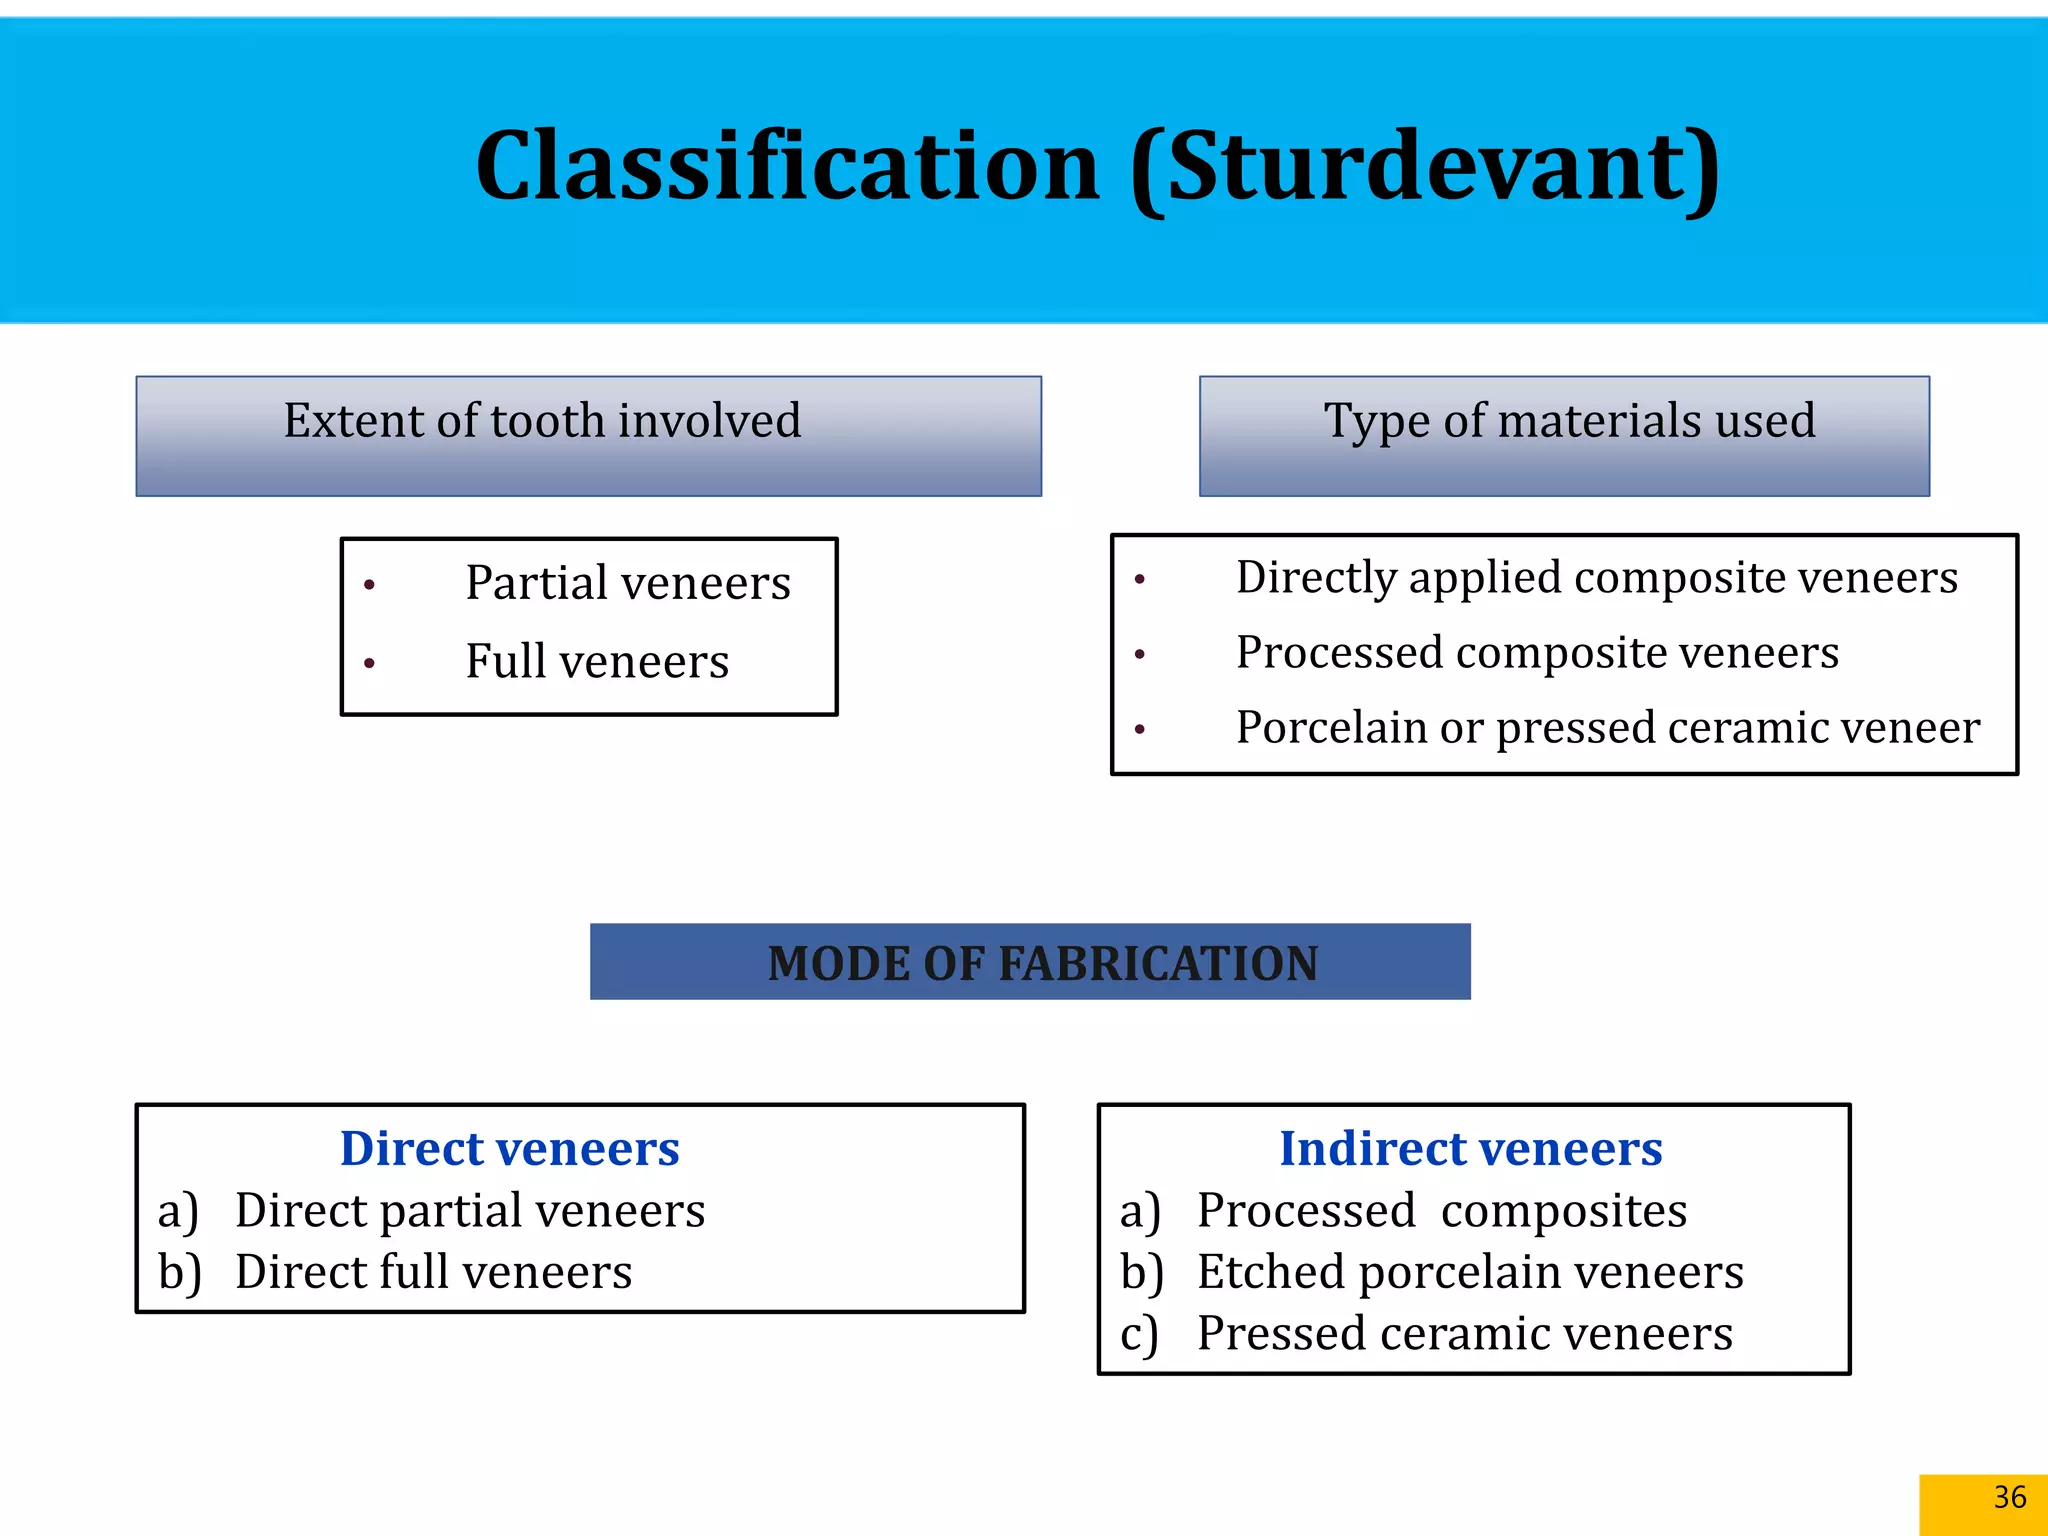


The document presents a comprehensive overview of dental veneers, including their history, definitions, treatment planning, materials, and techniques for application. It discusses various types of veneers, their advantages and disadvantages, indications, contraindications, preparation methods, and aesthetic considerations in smile design. The conclusion emphasizes the aesthetic effectiveness and durability of porcelain veneers while noting composite veneers as a conservative alternative.