Download to read offline


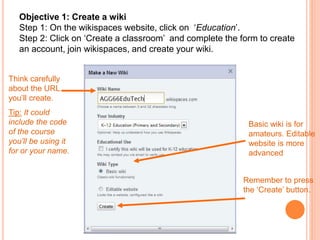

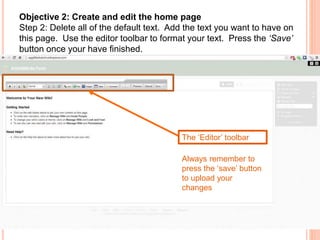


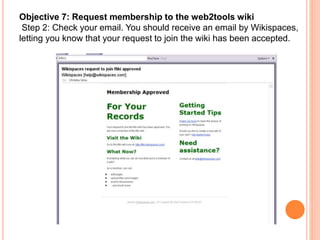


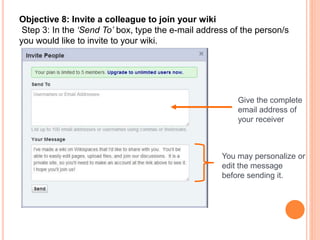


This document provides step-by-step instructions for creating and customizing a wiki. It outlines how to create a wiki account, set up the home page and navigation menu, add external and multimedia links, upload files, invite members, and more. The instructions are accompanied by screenshots to illustrate each step. The overall goal is to teach users how to build out a fully functioning wiki website.