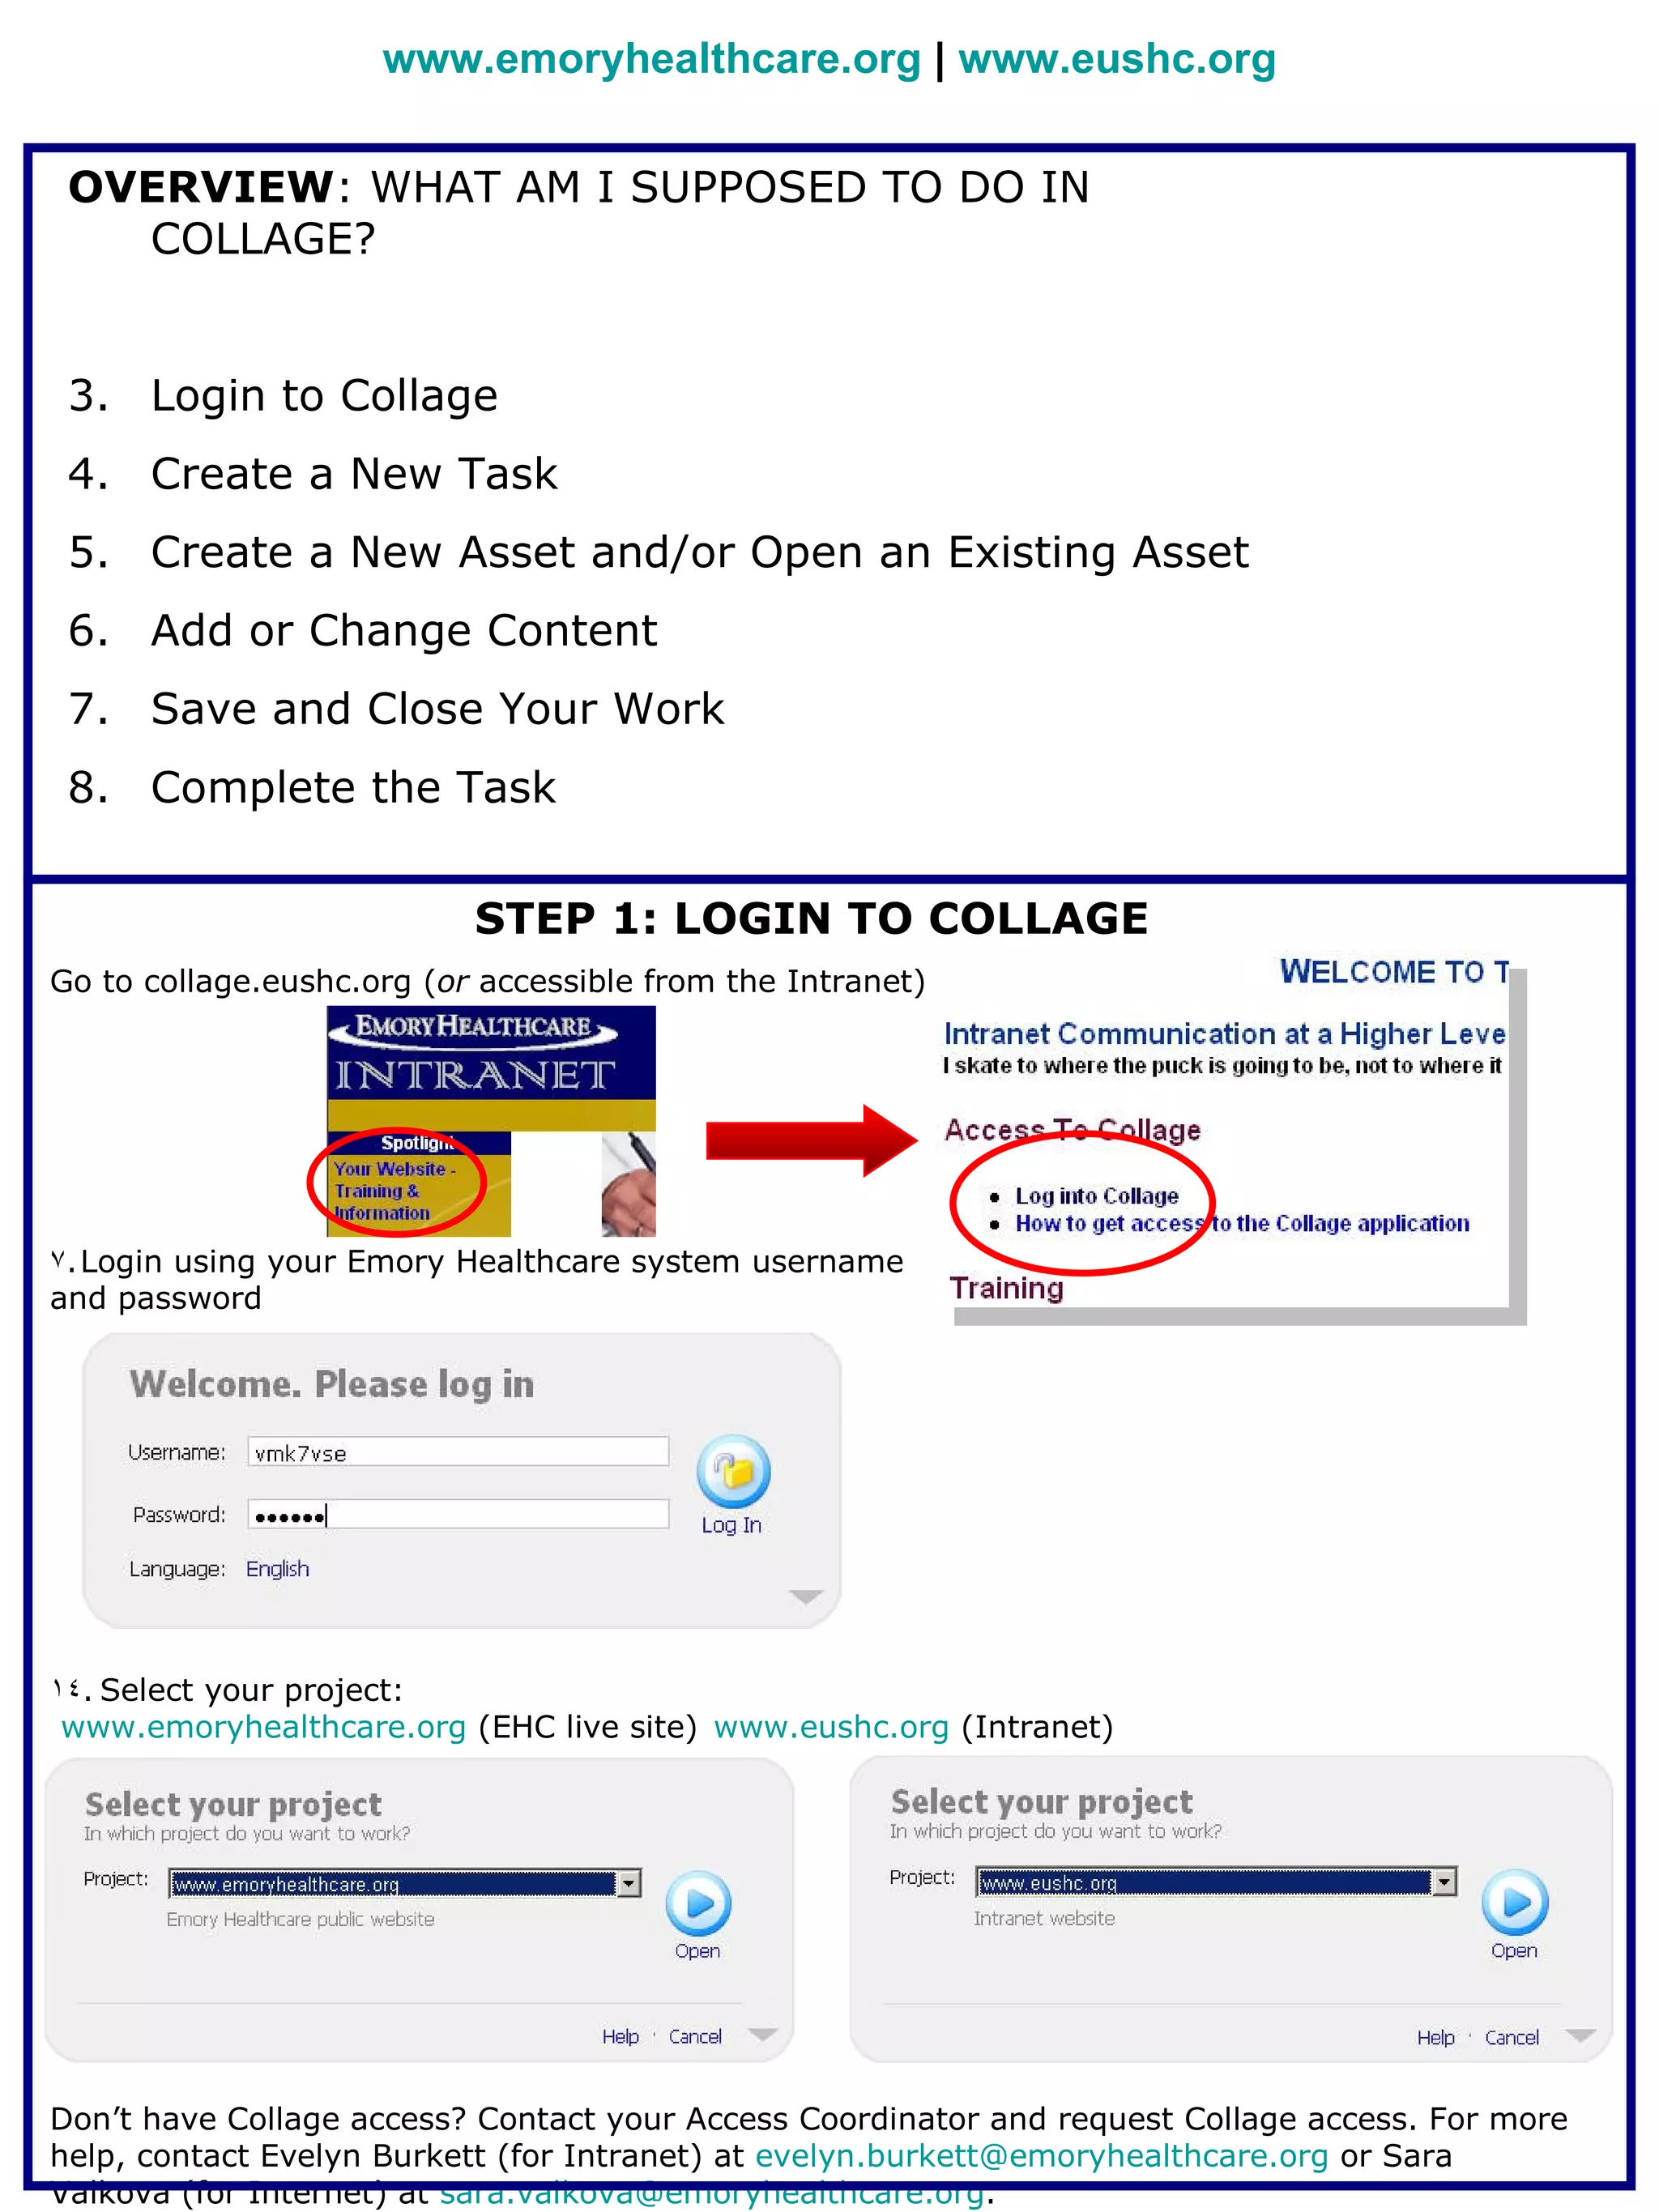
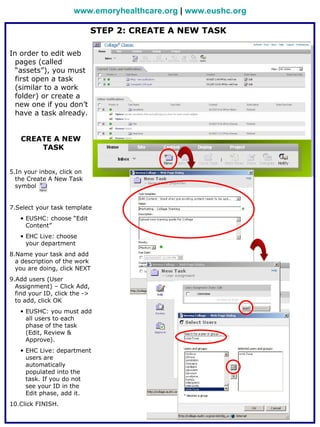
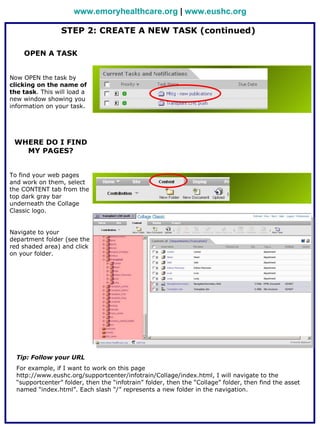
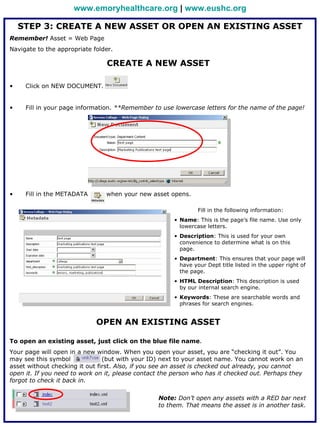
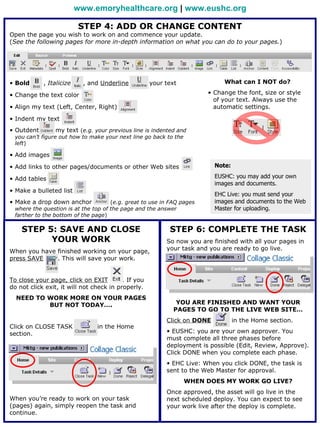
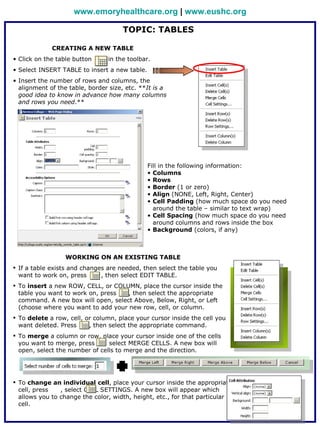
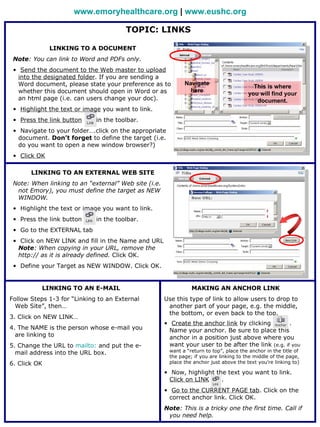
www.emoryhealthcare.org | www.eushc.org


 OVERVIEW: WHAT AM I SUPPOSED TO DO IN
   COLLAGE?


 3. Login to Collage
 4. Create a New Task
 5. Create a New Asset and/or Open an Existing Asset
 6. Add or Change Content
 7. Save and Close Your Work
 8. Complete the Task


                           STEP 1: LOGIN TO COLLAGE
Go to collage.eushc.org (or accessible from the Intranet)


7. Login using your Emory Healthcare system username
and password


14. Select your project:
 www.emoryhealthcare.org (EHC live site) www.eushc.org (Intranet)


Don’t have Collage access? Contact your Access Coordinator and request Collage access. For more
help, contact Evelyn Burkett (for Intranet) at evelyn.burkett@emoryhealthcare.org or Sara
Valkova (for Internet) at sara.valkova@emoryhealthcare.org.
www.emoryhealthcare.org | www.eushc.org

                               STEP 2: CREATE A NEW TASK

In order to edit web
  pages (called
  “assets”), you must
  first open a task
  (similar to a work
  folder) or create a
  new one if you don’t
  have a task already.


   CREATE A NEW
       TASK


5.In your inbox, click on
  the Create A New Task
  symbol


7.Select your task template
   • EUSHC: choose “Edit
     Content”
   • EHC Live: choose
     your department
8.Name your task and add
  a description of the work
  you are doing, click NEXT
9.Add users (User
  Assignment) – Click Add,
  find your ID, click the ->
  to add, click OK
   • EUSHC: you must add
     all users to each
     phase of the task
     (Edit, Review &
     Approve).
   • EHC Live: department
     users are
     automatically
     populated into the
     task. If you do not
     see your ID in the
     Edit phase, add it.
10.Click FINISH.
www.emoryhealthcare.org | www.eushc.org

                 STEP 2: CREATE A NEW TASK (continued)

    OPEN A TASK


Now OPEN the task by
clicking on the name of
the task. This will load a
new window showing you
information on your task.


 WHERE DO I FIND
   MY PAGES?


To find your web pages
and work on them, select
the CONTENT tab from the
top dark gray bar
underneath the Collage
Classic logo.


Navigate to your
department folder (see the
red shaded area) and click
on your folder.


  Tip: Follow your URL
  For example, if I want to work on this page
  http://www.eushc.org/supportcenter/infotrain/Collage/index.html, I will navigate to the
  “supportcenter” folder, then the “infotrain” folder, then the “Collage” folder, then find the asset
  named “index.html”. Each slash “/” represents a new folder in the navigation.
www.emoryhealthcare.org | www.eushc.org

    STEP 3: CREATE A NEW ASSET OR OPEN AN EXISTING ASSET
Remember! Asset = Web Page
Navigate to the appropriate folder.

                                CREATE A NEW ASSET

•    Click on NEW DOCUMENT.


•    Fill in your page information. **Remember to use lowercase letters for the name of the page!


•    Fill in the METADATA       when your new asset opens.

                                                                Fill in the following information:
                                                       • Name: This is the page’s file name. Use only
                                                         lowercase letters.
                                                       • Description: This is used for your own
                                                         convenience to determine what is on this
                                                         page.
                                                       • Department: This ensures that your page will
                                                         have your Dept title listed in the upper right of
                                                         the page.
                                                       • HTML Description: This description is used
                                                         by our internal search engine.
                                                       • Keywords: These are searchable words and
                                                         phrases for search engines.


                             OPEN AN EXISTING ASSET

To open an existing asset, just click on the blue file name.
Your page will open in a new window. When you open your asset, you are “checking it out”. You
may see this symbol             (but with your ID) next to your asset name. You cannot work on an
asset without checking it out first. Also, if you see an asset is checked out already, you cannot
open it. If you need to work on it, please contact the person who has it checked out. Perhaps they
forgot to check it back in.

                                                 Note: Don’t open any assets with a RED bar next
                                                 to them. That means the asset is in another task.
www.emoryhealthcare.org | www.eushc.org

                          STEP 4: ADD OR CHANGE CONTENT
Open the page you wish to work on and commence your update.
(See the following pages for more in-depth information on what you can do to your pages.)


• Bold      , Italicize     , and Underline          your text               What can I NOT do?

• Change the text color                                                • Change the font, size or style
                                                                         of your text. Always use the
• Align my text (Left, Center, Right)                                    automatic settings.

• Indent my text
• Outdent        my text (e.g. your previous line is indented and
 you can’t figure out how to make your next line go back to the
 left)

• Add images

• Add links to other pages/documents or other Web sites                   Note:

• Add tables                                                              EUSHC: you may add your own
                                                                          images and documents.
• Make a bulleted list
                                                                          EHC Live: you must send your
• Make a drop down anchor            (e.g. great to use in FAQ pages      images and documents to the Web
 where the question is at the top of the page and the answer              Master for uploading.
 farther to the bottom of the page)

    STEP 5: SAVE AND CLOSE                                 STEP 6: COMPLETE THE TASK
          YOUR WORK                                       So now you are finished with all your pages in
When you have finished working on your page,              your task and you are ready to go live.
press SAVE    . This will save your work.


To close your page, click on EXIT         . If you
do not click exit, it will not check in properly.
  NEED TO WORK MORE ON YOUR PAGES
          BUT NOT TODAY….                                     YOU ARE FINISHED AND WANT YOUR
                                                             PAGES TO GO TO THE LIVE WEB SITE…
                                                          Click on DONE           in the Home section.
Click on CLOSE TASK             in the Home
section.                                                  • EUSHC: you are your own approver. You
                                                          must complete all three phases before
                                                          deployment is possible (Edit, Review, Approve).
                                                          Click DONE when you complete each phase.
                                                          • EHC Live: When you click DONE, the task is
                                                          sent to the Web Master for approval.
                                                                 WHEN DOES MY WORK GO LIVE?
                                                          Once approved, the asset will go live in the
When you’re ready to work on your task                    next scheduled deploy. You can expect to see
(pages) again, simply reopen the task and                 your work live after the deploy is complete.
continue.
www.emoryhealthcare.org | www.eushc.org

                                     TOPIC: TABLES

             CREATING A NEW TABLE
• Click on the table button     in the toolbar.
• Select INSERT TABLE to insert a new table.
• Insert the number of rows and columns, the
  alignment of the table, border size, etc. **It is a
  good idea to know in advance how many columns
  and rows you need.**


                                               Fill in the following information:
                                               • Columns
                                               • Rows
                                               • Border (1 or zero)
                                               • Align (NONE, Left, Right, Center)
                                               • Cell Padding (how much space do you need
                                                 around the table – similar to text wrap)
                                               • Cell Spacing (how much space do you need
                                                 around columns and rows inside the box
                                               • Background (colors, if any)


                  WORKING ON AN EXISTING TABLE
 If a table exists and changes are needed, then select the table you
  want to work on, press      , then select EDIT TABLE.
 To insert a new ROW, CELL, or COLUMN, place the cursor inside the
  table you want to work on, press   , then select the appropriate
  command. A new box will open, select Above, Below, Right, or Left
  (choose where you want to add your new row, cell, or column.
 To delete a row, cell, or column, place your cursor inside the cell you
  want deleted. Press     , then select the appropriate command.
 To merge a column or row, place your cursor inside one of the cells
  you want to merge, press    , select MERGE CELLS. A new box will
  open, select the number of cells to merge and the direction.


 To change an individual cell, place your cursor inside the appropriate
  cell, press   , select CELL SETTINGS. A new box will appear which
  allows you to change the color, width, height, etc., for that particular
  cell.
www.emoryhealthcare.org | www.eushc.org

                                       TOPIC: LINKS

              LINKING TO A DOCUMENT
 Note: You can link to Word and PDFs only.
 • Send the document to the Web master to upload
   into the designated folder. If you are sending a
   Word document, please state your preference as to         Navigate
                                                                                          This is where
   whether this document should open in Word or as             here
                                                                                        you will find your
   an html page (i.e. can users change your doc).                                          document.
 • Highlight the text or image you want to link.
 • Press the link button     in the toolbar.
 • Navigate to your folder….click on the appropriate
   document. Don’t forget to define the target (i.e.
   do you want to open a new window browser?)
 • Click OK

       LINKING TO AN EXTERNAL WEB SITE
 Note: When linking to an “external” Web site (i.e.
  not Emory), you must define the target as NEW
  WINDOW.
 • Highlight the text or image you want to link.
 • Press the link button     in the toolbar.
 • Go to the EXTERNAL tab
 • Click on NEW LINK and fill in the Name and URL
   Note: When copying in your URL, remove the
   http:// as it is already defined. Click OK.
 • Define your Target as NEW WINDOW. Click OK.


          LINKING TO AN E-MAIL                                  MAKING AN ANCHOR LINK
Follow Steps 1-3 for “Linking to an External          Use this type of link to allow users to drop to
  Web Site”, then…                                     another part of your page, e.g. the middle,
                                                       the bottom, or even back to the top.
3. Click on NEW LINK…
                                                      • Create the anchor link by clicking          .
4. The NAME is the person whose e-mail you              Name your anchor. Be sure to place this
  are linking to                                        anchor in a position just above where you
5. Change the URL to mailto: and put the e-             want your user to be after the link (e.g. if you
  mail address into the URL box.                       want a “return to top”, place the anchor in the title of
                                                       the page; if you are linking to the middle of the page,
6. Click OK                                            place the anchor just above the text you’re linking to)

                                                      • Now, highlight the text you want to link.
                                                        Click on LINK    .
                                                      • Go to the CURRENT PAGE tab. Click on the
                                                        correct anchor link. Click OK.
                                                      Note: This is a tricky one the first time. Call if
                                                       you need help.

Collage Cheatsheet

  • 1.
    www.emoryhealthcare.org | www.eushc.org OVERVIEW: WHAT AM I SUPPOSED TO DO IN COLLAGE? 3. Login to Collage 4. Create a New Task 5. Create a New Asset and/or Open an Existing Asset 6. Add or Change Content 7. Save and Close Your Work 8. Complete the Task STEP 1: LOGIN TO COLLAGE Go to collage.eushc.org (or accessible from the Intranet) 7. Login using your Emory Healthcare system username and password 14. Select your project: www.emoryhealthcare.org (EHC live site) www.eushc.org (Intranet) Don’t have Collage access? Contact your Access Coordinator and request Collage access. For more help, contact Evelyn Burkett (for Intranet) at evelyn.burkett@emoryhealthcare.org or Sara Valkova (for Internet) at sara.valkova@emoryhealthcare.org.
  • 2.
    www.emoryhealthcare.org | www.eushc.org STEP 2: CREATE A NEW TASK In order to edit web pages (called “assets”), you must first open a task (similar to a work folder) or create a new one if you don’t have a task already. CREATE A NEW TASK 5.In your inbox, click on the Create A New Task symbol 7.Select your task template • EUSHC: choose “Edit Content” • EHC Live: choose your department 8.Name your task and add a description of the work you are doing, click NEXT 9.Add users (User Assignment) – Click Add, find your ID, click the -> to add, click OK • EUSHC: you must add all users to each phase of the task (Edit, Review & Approve). • EHC Live: department users are automatically populated into the task. If you do not see your ID in the Edit phase, add it. 10.Click FINISH.
  • 3.
    www.emoryhealthcare.org | www.eushc.org STEP 2: CREATE A NEW TASK (continued) OPEN A TASK Now OPEN the task by clicking on the name of the task. This will load a new window showing you information on your task. WHERE DO I FIND MY PAGES? To find your web pages and work on them, select the CONTENT tab from the top dark gray bar underneath the Collage Classic logo. Navigate to your department folder (see the red shaded area) and click on your folder. Tip: Follow your URL For example, if I want to work on this page http://www.eushc.org/supportcenter/infotrain/Collage/index.html, I will navigate to the “supportcenter” folder, then the “infotrain” folder, then the “Collage” folder, then find the asset named “index.html”. Each slash “/” represents a new folder in the navigation.
  • 4.
    www.emoryhealthcare.org | www.eushc.org STEP 3: CREATE A NEW ASSET OR OPEN AN EXISTING ASSET Remember! Asset = Web Page Navigate to the appropriate folder. CREATE A NEW ASSET • Click on NEW DOCUMENT. • Fill in your page information. **Remember to use lowercase letters for the name of the page! • Fill in the METADATA when your new asset opens. Fill in the following information: • Name: This is the page’s file name. Use only lowercase letters. • Description: This is used for your own convenience to determine what is on this page. • Department: This ensures that your page will have your Dept title listed in the upper right of the page. • HTML Description: This description is used by our internal search engine. • Keywords: These are searchable words and phrases for search engines. OPEN AN EXISTING ASSET To open an existing asset, just click on the blue file name. Your page will open in a new window. When you open your asset, you are “checking it out”. You may see this symbol (but with your ID) next to your asset name. You cannot work on an asset without checking it out first. Also, if you see an asset is checked out already, you cannot open it. If you need to work on it, please contact the person who has it checked out. Perhaps they forgot to check it back in. Note: Don’t open any assets with a RED bar next to them. That means the asset is in another task.
  • 5.
    www.emoryhealthcare.org | www.eushc.org STEP 4: ADD OR CHANGE CONTENT Open the page you wish to work on and commence your update. (See the following pages for more in-depth information on what you can do to your pages.) • Bold , Italicize , and Underline your text What can I NOT do? • Change the text color • Change the font, size or style of your text. Always use the • Align my text (Left, Center, Right) automatic settings. • Indent my text • Outdent my text (e.g. your previous line is indented and you can’t figure out how to make your next line go back to the left) • Add images • Add links to other pages/documents or other Web sites Note: • Add tables EUSHC: you may add your own images and documents. • Make a bulleted list EHC Live: you must send your • Make a drop down anchor (e.g. great to use in FAQ pages images and documents to the Web where the question is at the top of the page and the answer Master for uploading. farther to the bottom of the page) STEP 5: SAVE AND CLOSE STEP 6: COMPLETE THE TASK YOUR WORK So now you are finished with all your pages in When you have finished working on your page, your task and you are ready to go live. press SAVE . This will save your work. To close your page, click on EXIT . If you do not click exit, it will not check in properly. NEED TO WORK MORE ON YOUR PAGES BUT NOT TODAY…. YOU ARE FINISHED AND WANT YOUR PAGES TO GO TO THE LIVE WEB SITE… Click on DONE in the Home section. Click on CLOSE TASK in the Home section. • EUSHC: you are your own approver. You must complete all three phases before deployment is possible (Edit, Review, Approve). Click DONE when you complete each phase. • EHC Live: When you click DONE, the task is sent to the Web Master for approval. WHEN DOES MY WORK GO LIVE? Once approved, the asset will go live in the When you’re ready to work on your task next scheduled deploy. You can expect to see (pages) again, simply reopen the task and your work live after the deploy is complete. continue.
  • 6.
    www.emoryhealthcare.org | www.eushc.org TOPIC: TABLES CREATING A NEW TABLE • Click on the table button in the toolbar. • Select INSERT TABLE to insert a new table. • Insert the number of rows and columns, the alignment of the table, border size, etc. **It is a good idea to know in advance how many columns and rows you need.** Fill in the following information: • Columns • Rows • Border (1 or zero) • Align (NONE, Left, Right, Center) • Cell Padding (how much space do you need around the table – similar to text wrap) • Cell Spacing (how much space do you need around columns and rows inside the box • Background (colors, if any) WORKING ON AN EXISTING TABLE  If a table exists and changes are needed, then select the table you want to work on, press , then select EDIT TABLE.  To insert a new ROW, CELL, or COLUMN, place the cursor inside the table you want to work on, press , then select the appropriate command. A new box will open, select Above, Below, Right, or Left (choose where you want to add your new row, cell, or column.  To delete a row, cell, or column, place your cursor inside the cell you want deleted. Press , then select the appropriate command.  To merge a column or row, place your cursor inside one of the cells you want to merge, press , select MERGE CELLS. A new box will open, select the number of cells to merge and the direction.  To change an individual cell, place your cursor inside the appropriate cell, press , select CELL SETTINGS. A new box will appear which allows you to change the color, width, height, etc., for that particular cell.
  • 7.
    www.emoryhealthcare.org | www.eushc.org TOPIC: LINKS LINKING TO A DOCUMENT Note: You can link to Word and PDFs only. • Send the document to the Web master to upload into the designated folder. If you are sending a Word document, please state your preference as to Navigate This is where whether this document should open in Word or as here you will find your an html page (i.e. can users change your doc). document. • Highlight the text or image you want to link. • Press the link button in the toolbar. • Navigate to your folder….click on the appropriate document. Don’t forget to define the target (i.e. do you want to open a new window browser?) • Click OK LINKING TO AN EXTERNAL WEB SITE Note: When linking to an “external” Web site (i.e. not Emory), you must define the target as NEW WINDOW. • Highlight the text or image you want to link. • Press the link button in the toolbar. • Go to the EXTERNAL tab • Click on NEW LINK and fill in the Name and URL Note: When copying in your URL, remove the http:// as it is already defined. Click OK. • Define your Target as NEW WINDOW. Click OK. LINKING TO AN E-MAIL MAKING AN ANCHOR LINK Follow Steps 1-3 for “Linking to an External Use this type of link to allow users to drop to Web Site”, then… another part of your page, e.g. the middle, the bottom, or even back to the top. 3. Click on NEW LINK… • Create the anchor link by clicking . 4. The NAME is the person whose e-mail you Name your anchor. Be sure to place this are linking to anchor in a position just above where you 5. Change the URL to mailto: and put the e- want your user to be after the link (e.g. if you mail address into the URL box. want a “return to top”, place the anchor in the title of the page; if you are linking to the middle of the page, 6. Click OK place the anchor just above the text you’re linking to) • Now, highlight the text you want to link. Click on LINK . • Go to the CURRENT PAGE tab. Click on the correct anchor link. Click OK. Note: This is a tricky one the first time. Call if you need help.