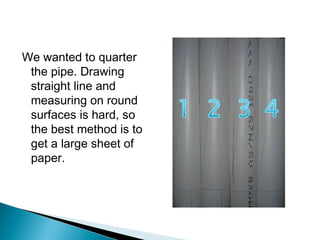
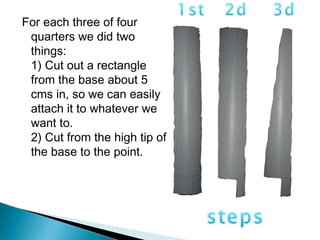
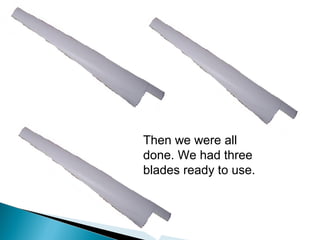
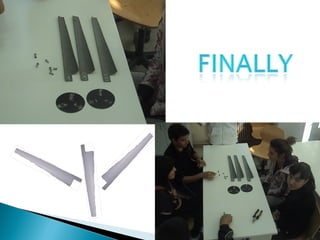
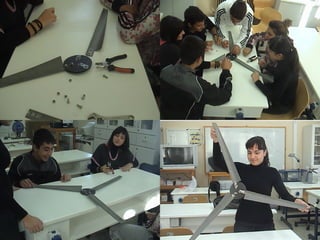
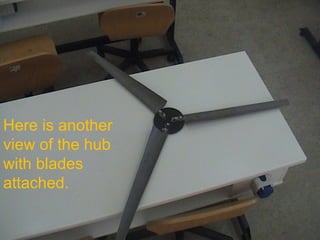
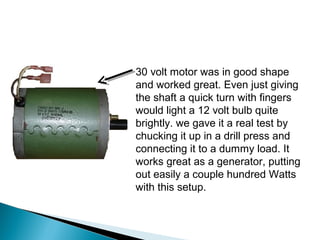
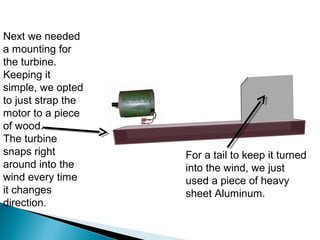
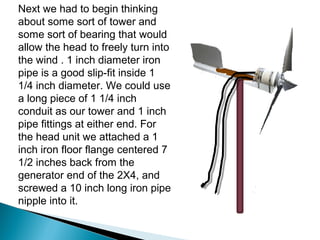
First we took a PVC pipe.
The pipe was about 1/5 as
thick as it is long . We have
50 cm blades so the PVC
pipe should have a diameter
of 10 cm. One length of pvc
pipe can make four blades.
We wanted to quarter
the pipe. Drawing
straight line and
measuring on round
surfaces is hard, so
the best method is to
get a large sheet of
paper.
For each three of four
quarters we did two
things:
1) Cut out a rectangle
from the base about 5
cms in, so we can easily
attach it to whatever we
want to.
2) Cut from the high tip of
the base to the point.
Then we were all
done. We had three
blades ready to use.
Here is another
view of the hub
with blades
attached.
30 volt motor was in good shape
and worked great. Even just giving
the shaft a quick turn with fingers
would light a 12 volt bulb quite
brightly. we gave it a real test by
chucking it up in a drill press and
connecting it to a dummy load. It
works great as a generator, putting
out easily a couple hundred Watts
with this setup.
Next we needed
a mounting for
the turbine.
Keeping it
simple, we opted
to just strap the
motor to a piece
of wood.
The turbine
snaps right
around into the
wind every time
it changes
direction.
For a tail to keep it turned
into the wind, we just
used a piece of heavy
sheet Aluminum.
Next we had to begin thinking
about some sort of tower and
some sort of bearing that would
allow the head to freely turn into
the wind . 1 inch diameter iron
pipe is a good slip-fit inside 1
1/4 inch diameter. We could use
a long piece of 1 1/4 inch
conduit as our tower and 1 inch
pipe fittings at either end. For
the head unit we attached a 1
inch iron floor flange centered 7
1/2 inches back from the
generator end of the 2X4, and
screwed a 10 inch long iron pipe
nipple into it.

Building a wind turbine

  • 2.
    First we tooka PVC pipe. The pipe was about 1/5 as thick as it is long . We have 50 cm blades so the PVC pipe should have a diameter of 10 cm. One length of pvc pipe can make four blades.
  • 3.
    We wanted toquarter the pipe. Drawing straight line and measuring on round surfaces is hard, so the best method is to get a large sheet of paper.
  • 4.
    For each threeof four quarters we did two things: 1) Cut out a rectangle from the base about 5 cms in, so we can easily attach it to whatever we want to. 2) Cut from the high tip of the base to the point.
  • 5.
    Then we wereall done. We had three blades ready to use.
  • 8.
    Here is another viewof the hub with blades attached.
  • 9.
    30 volt motorwas in good shape and worked great. Even just giving the shaft a quick turn with fingers would light a 12 volt bulb quite brightly. we gave it a real test by chucking it up in a drill press and connecting it to a dummy load. It works great as a generator, putting out easily a couple hundred Watts with this setup.
  • 10.
    Next we needed amounting for the turbine. Keeping it simple, we opted to just strap the motor to a piece of wood. The turbine snaps right around into the wind every time it changes direction. For a tail to keep it turned into the wind, we just used a piece of heavy sheet Aluminum.
  • 11.
    Next we hadto begin thinking about some sort of tower and some sort of bearing that would allow the head to freely turn into the wind . 1 inch diameter iron pipe is a good slip-fit inside 1 1/4 inch diameter. We could use a long piece of 1 1/4 inch conduit as our tower and 1 inch pipe fittings at either end. For the head unit we attached a 1 inch iron floor flange centered 7 1/2 inches back from the generator end of the 2X4, and screwed a 10 inch long iron pipe nipple into it.