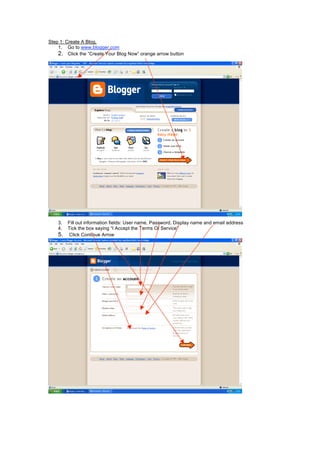
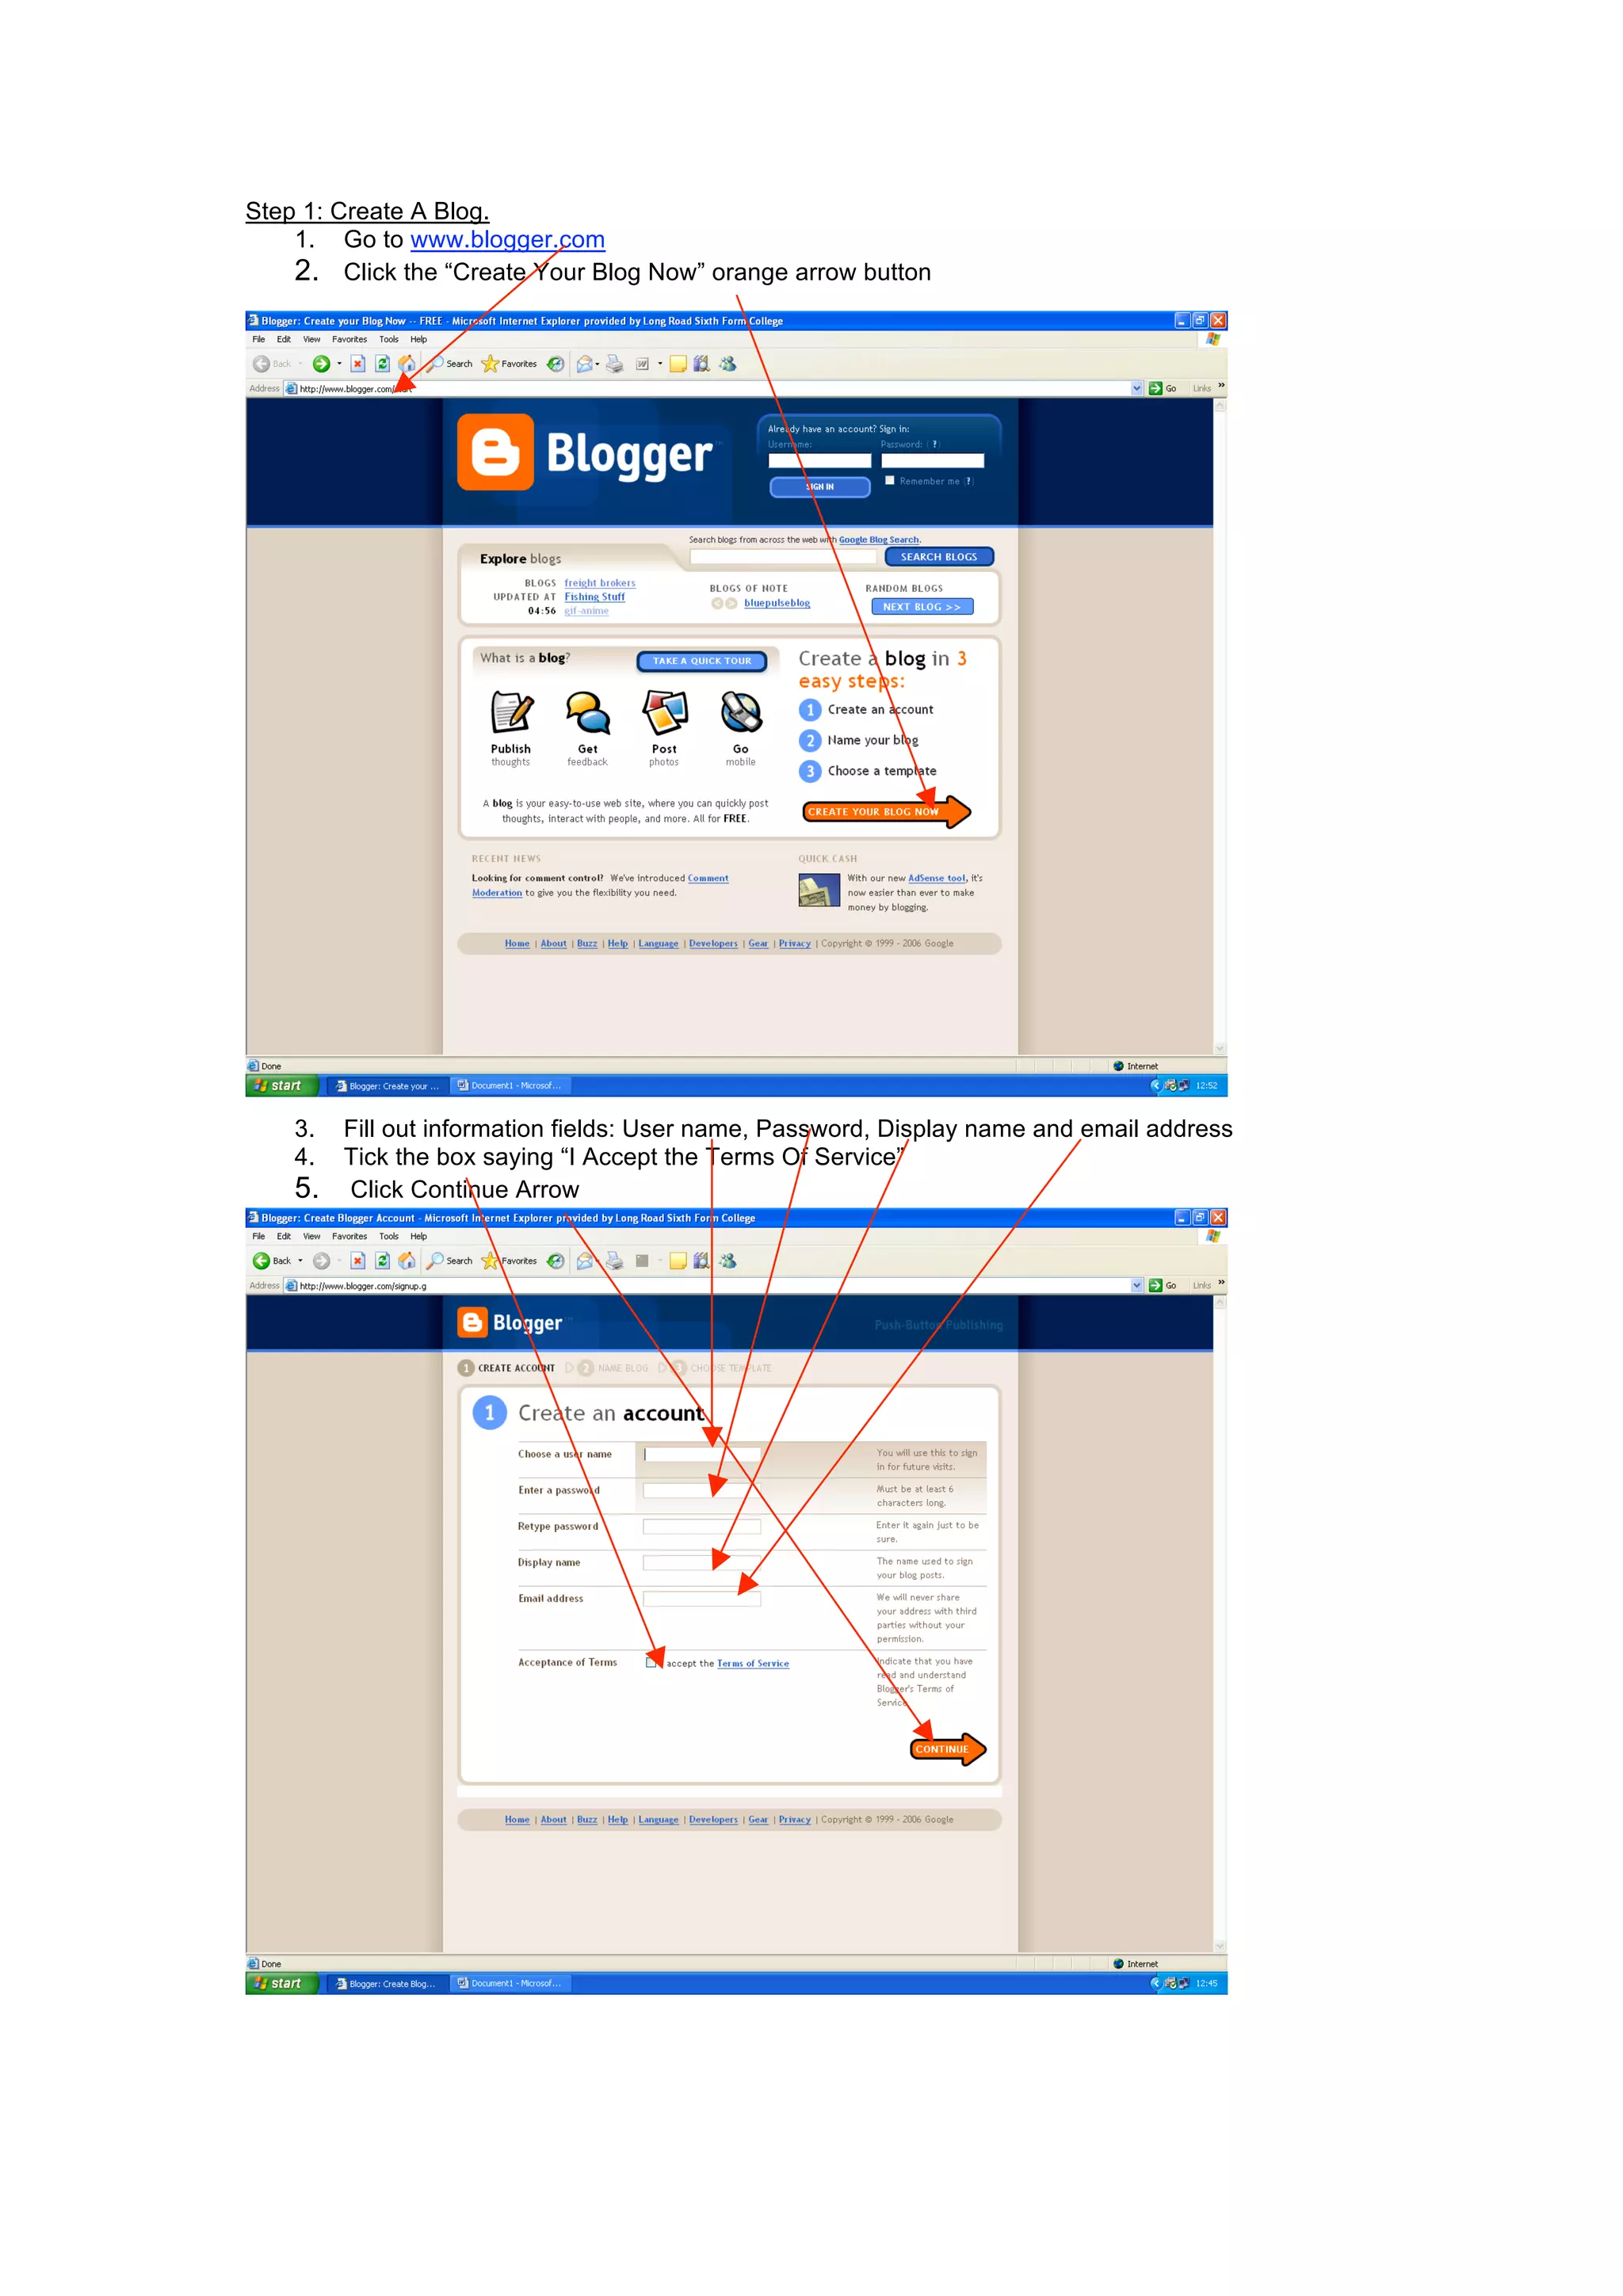
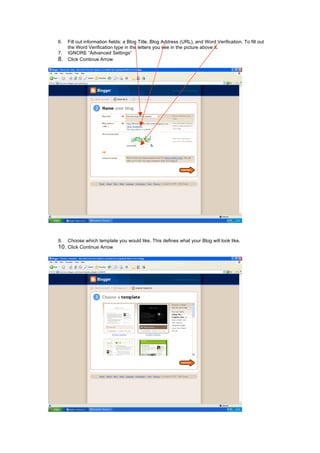
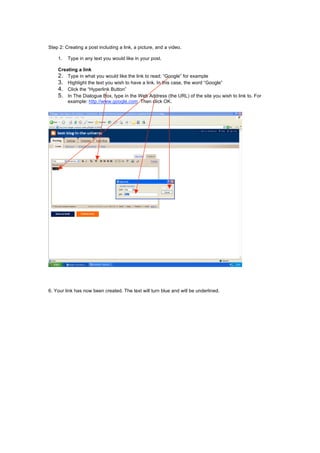
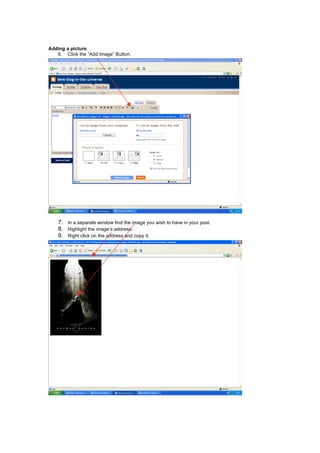
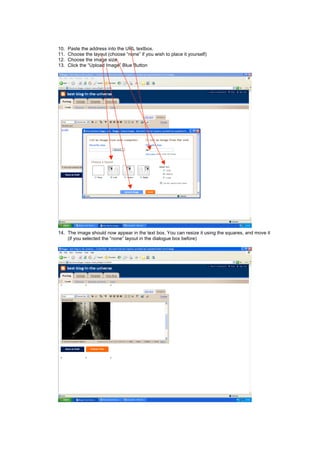
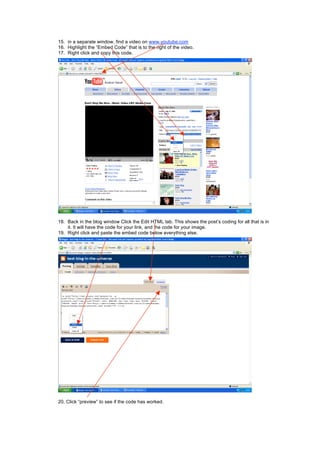
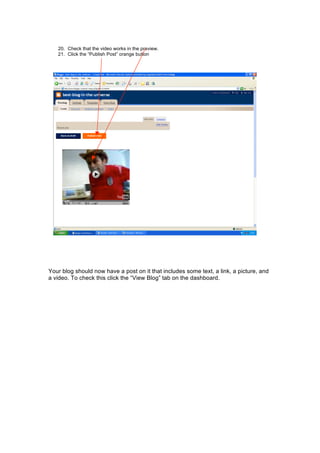
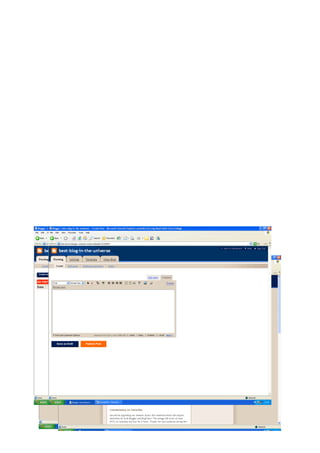
The document provides step-by-step instructions for creating a blog post that includes a link, picture, and video. It outlines the process of setting up a blog on Blogger.com, making the initial post, and inserting different types of media like links, images, and embedded YouTube videos into the post. Key steps include filling out account information to set up the blog, choosing a template, adding text and hyperlinks to the post, uploading an image, copying and pasting YouTube embed codes, and publishing the completed post.
How to Use Evernote - Liezel Kabigting - Simpliezel.m4vLiezel Kabigting
I love using this app! It stores everything you could possibly imagine losing track of, like your to-do list, receipt, article you want to read, file you want to keep or even a simple typed note. Also, good thing about it is it works brilliantly, keeping everything in sync between your computer, smartphone, or tablet. Accessing your important files anywhere you go is just a click away.
How to Use Jing - Liezel Kabigting - Simpliezel.m4vLiezel Kabigting
Jing is the always-ready program that allows you to instantly capture images and record video on your computer—then share them with anyone. It is a great tool for adding basic visual elements to all of your online conversations.
Have you ever wondered how website designers create dazzling websites? This is your chance to dive into the wonderful world of web design. Come learn the basics of HTML and CSS. You'll even get to do a little coding! By the end of the session, you'll launch a customized website about the topic of your choice!
This tutorial on creating a blog was created by Dave Drake, Humanities AST for Wiltshire, based at Abbeyfield School in Chippenham, for the Wiltshire AST Network Meeting in June 2009
1. Step 1: Create A Blog.
1. Go to www.blogger.com
2. Click the “Create Your Blog Now” orange arrow button
3. Fill out information fields: User name, Password, Display name and email address
4. Tick the box saying “I Accept the Terms Of Service”
5. Click Continue Arrow
2. 6. Fill out information fields: a Blog Title, Blog Address (URL), and Word Verification. To fill out
the Word Verification type in the letters you see in the picture above it.
7. IGNORE “Advanced Settings”
8. Click Continue Arrow
9. Choose which template you would like. This defines what your Blog will look like.
10. Click Continue Arrow
3. 11. Your Blog has now been created. Now click the Start Posting Arrow
4. Step 2: Creating a post including a link, a picture, and a video.
1. Type in any text you would like in your post.
Creating a link
2. Type in what you would like the link to read; “Google” for example
3. Highlight the text you wish to have a link. In this case, the word “Google”
4. Click the “Hyperlink Button”
5. In The Dialogue Box, type in the Web Address (the URL) of the site you wish to link to. For
example: http://www.google.com. Then click OK.
6. Your link has now been created. The text will turn blue and will be underlined.
5. Adding a picture
6. Click the “Add Image” Button.
7. In a separate window find the image you wish to have in your post.
8. Highlight the image’s address.
9. Right click on the address and copy it.
6. 10. Paste the address into the URL textbox.
11. Choose the layout (choose “none” if you wish to place it yourself)
12. Choose the image size
13. Click the “Upload Image” Blue Button
14. The image should now appear in the text box. You can resize it using the squares, and move it
(if you selected the “none” layout in the dialogue box before)
7. 15. in a separate window, find a video on www.youtube.com
16. Highlight the “Embed Code” that is to the right of the video.
17. Right click and copy this code.
18. Back in the blog window Click the Edit HTML tab. This shows the post’s coding for all that is in
it. It will have the code for your link, and the code for your image.
19. Right click and paste the embed code below everything else.
20. Click “preview” to see if the code has worked.
8. 20. Check that the video works in the preview.
21. Click the “Publish Post” orange button
Your blog should now have a post on it that includes some text, a link, a picture, and
a video. To check this click the “View Blog” tab on the dashboard.