Download to read offline
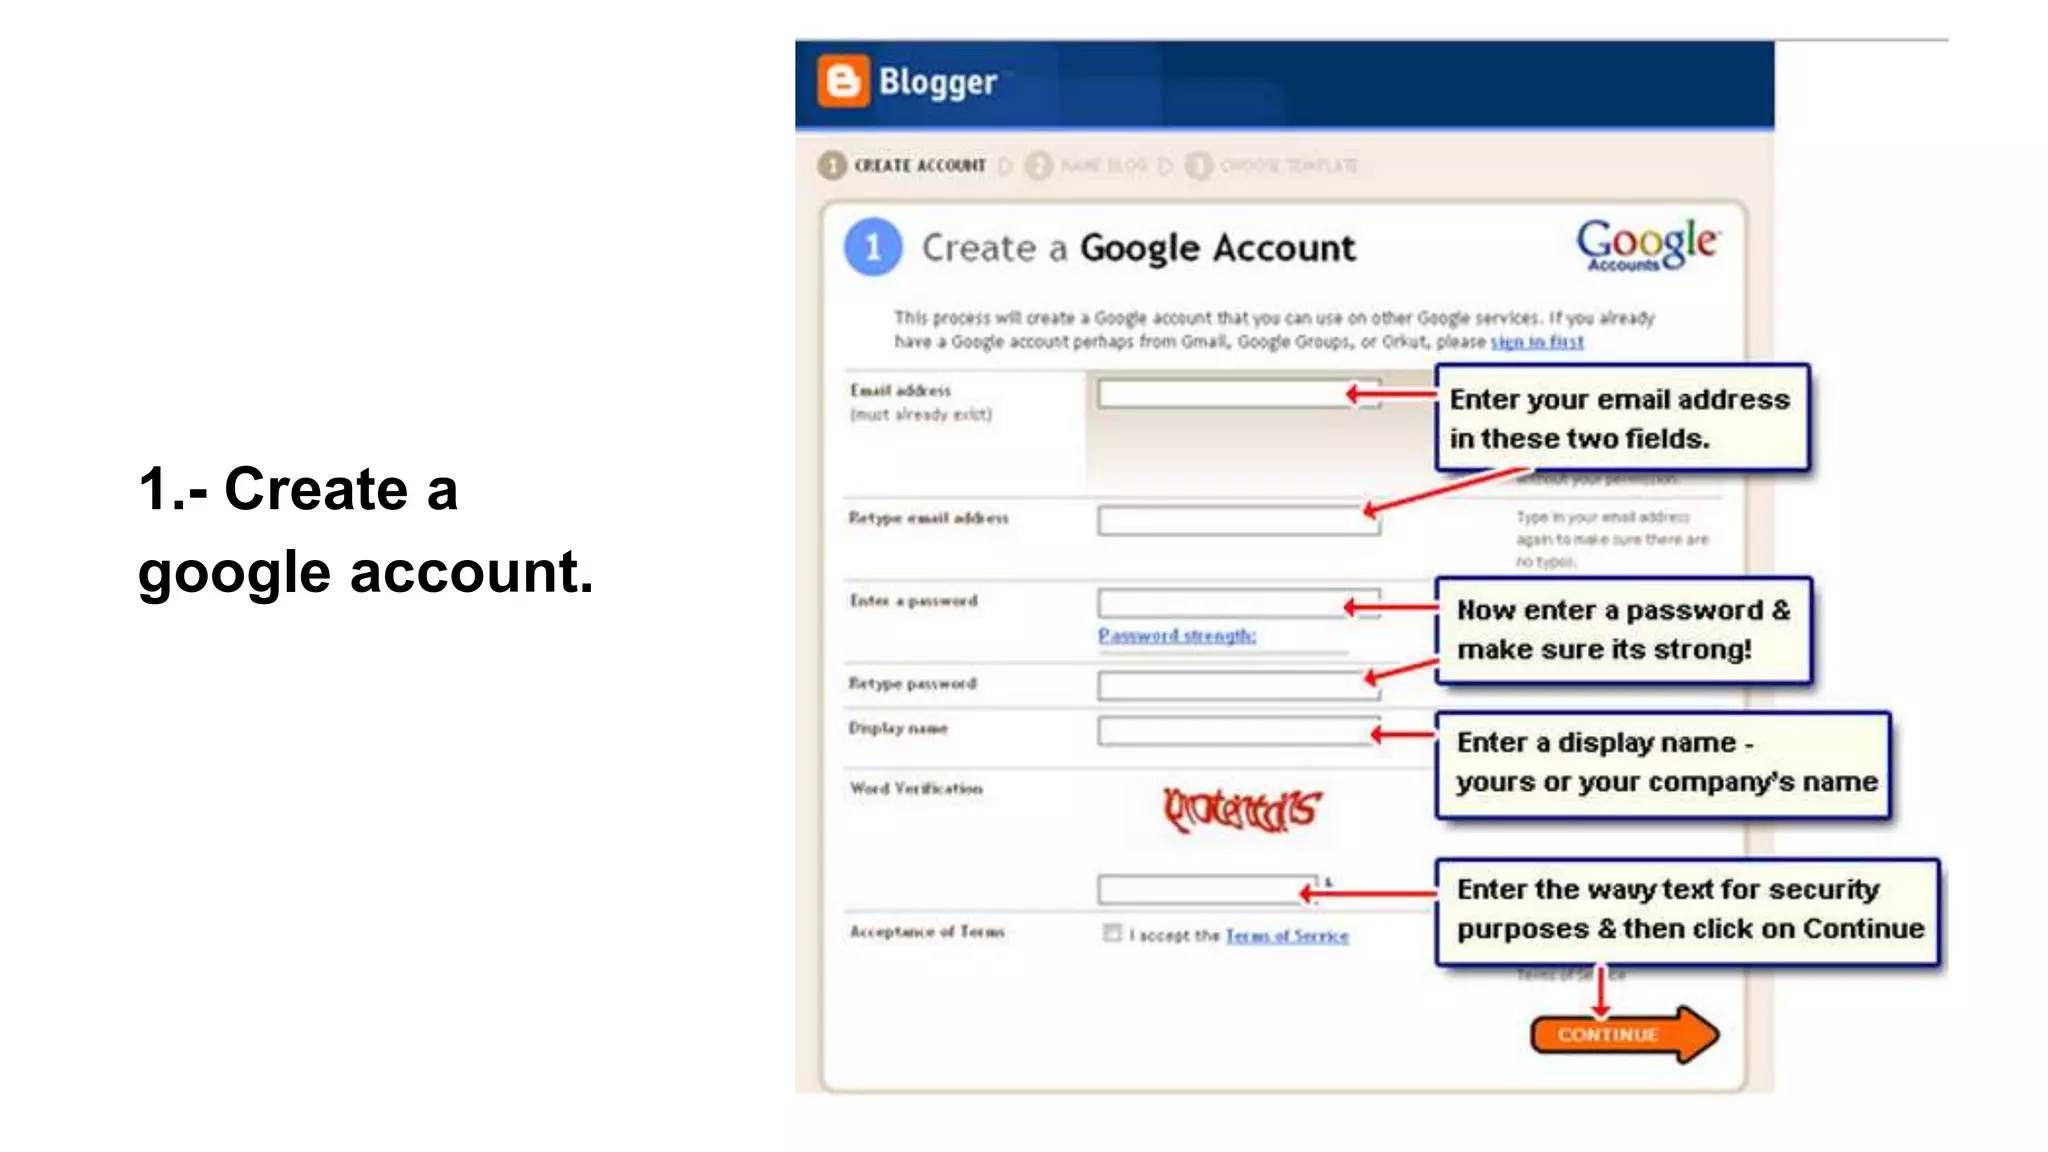
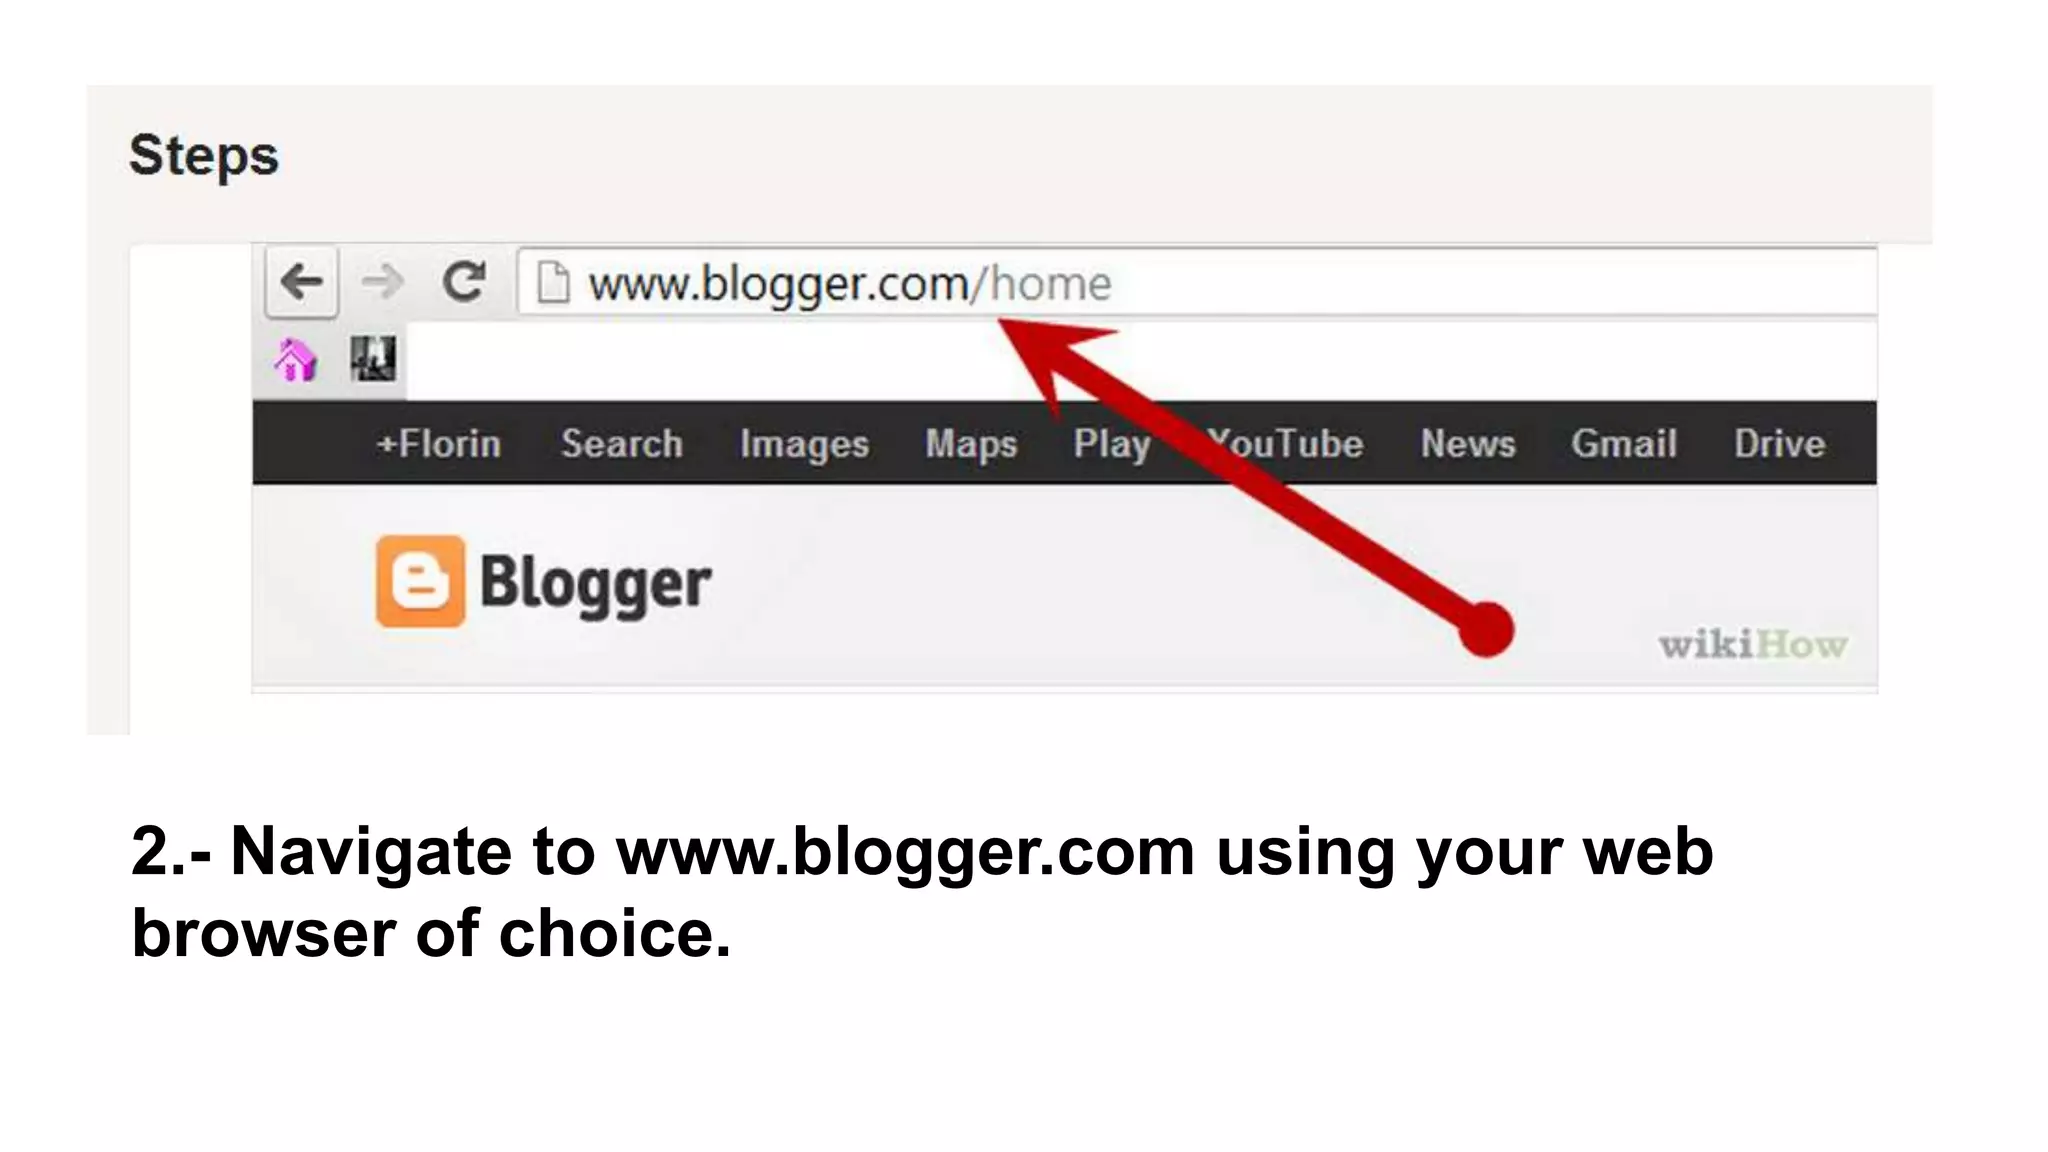
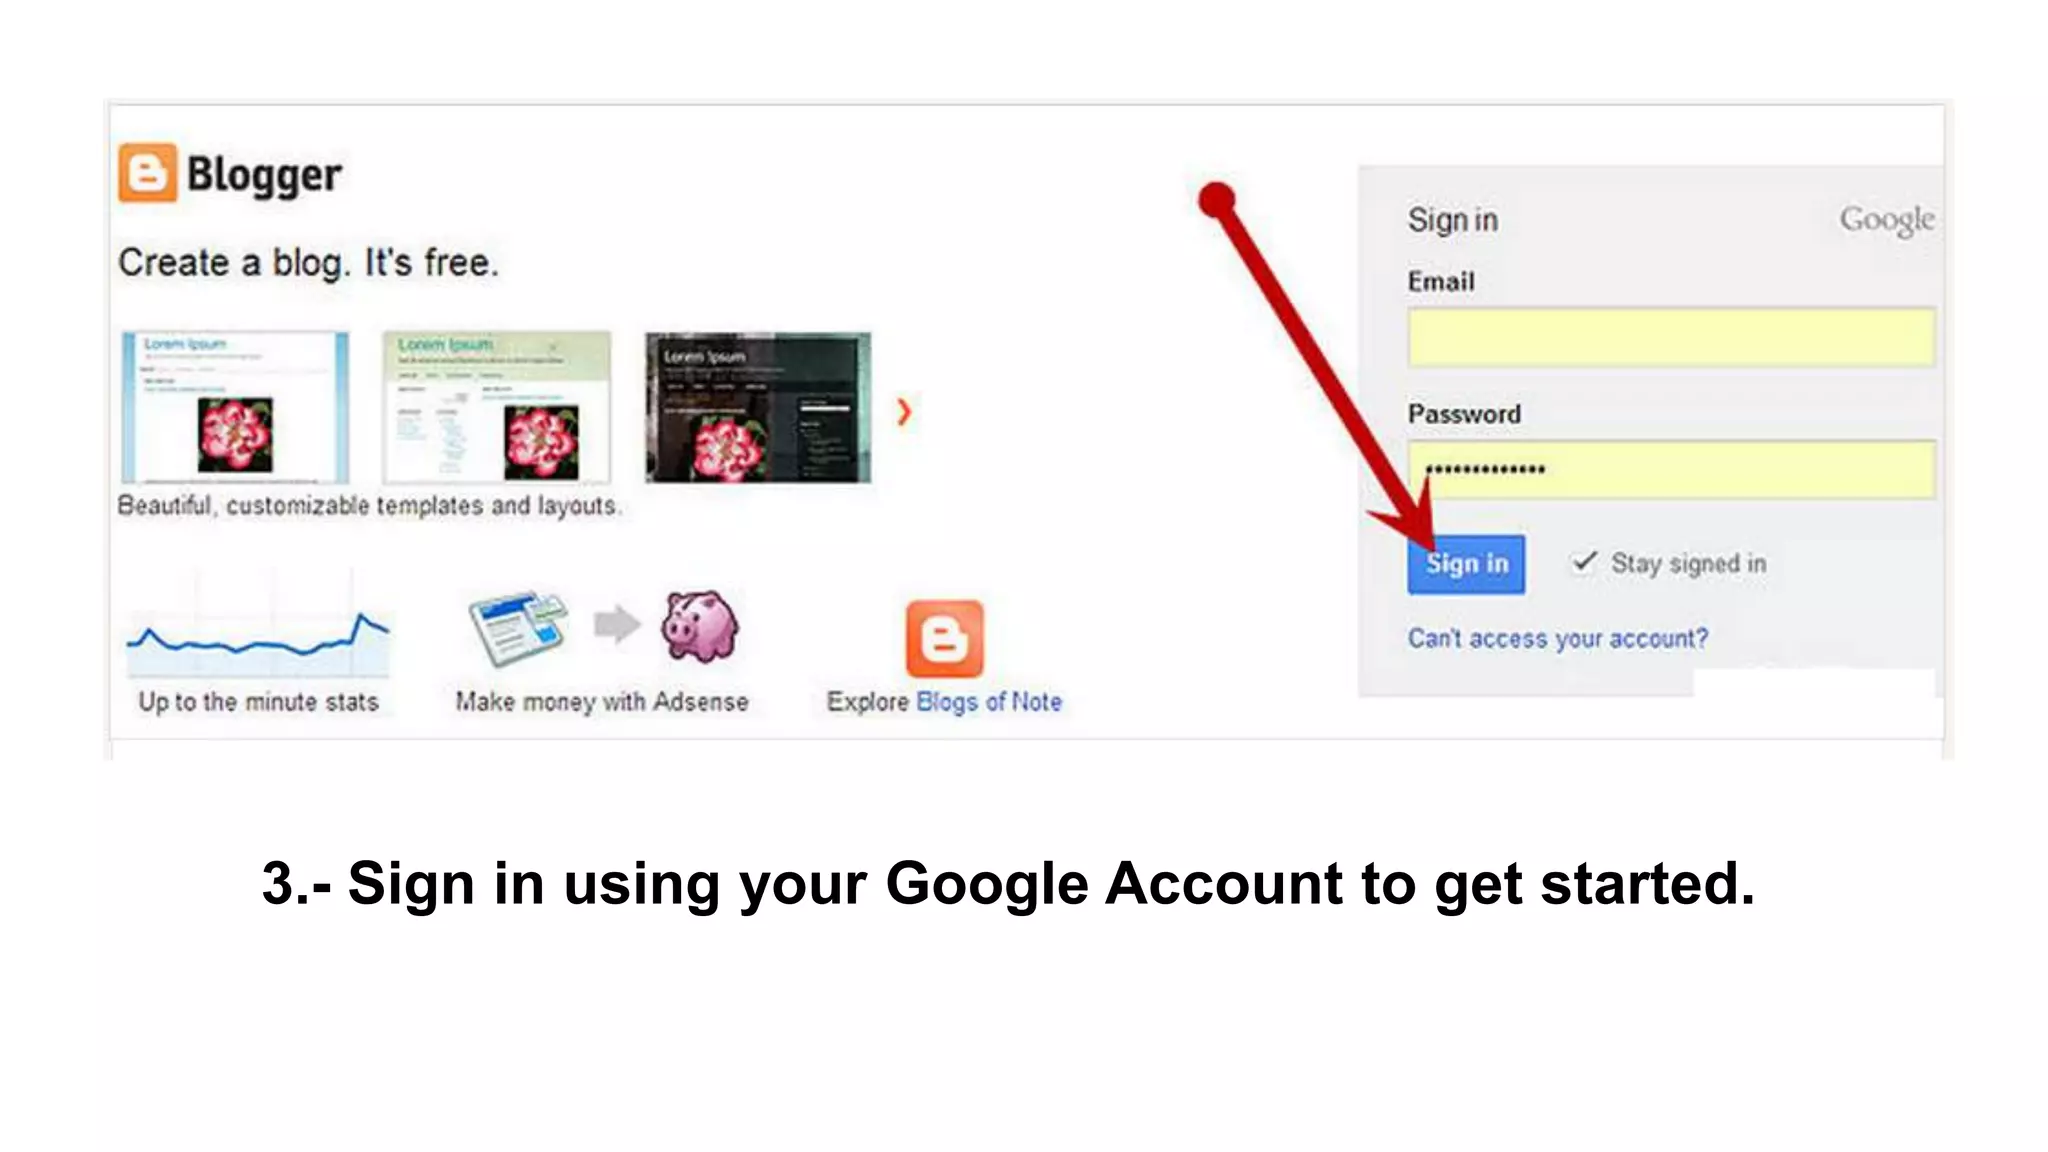
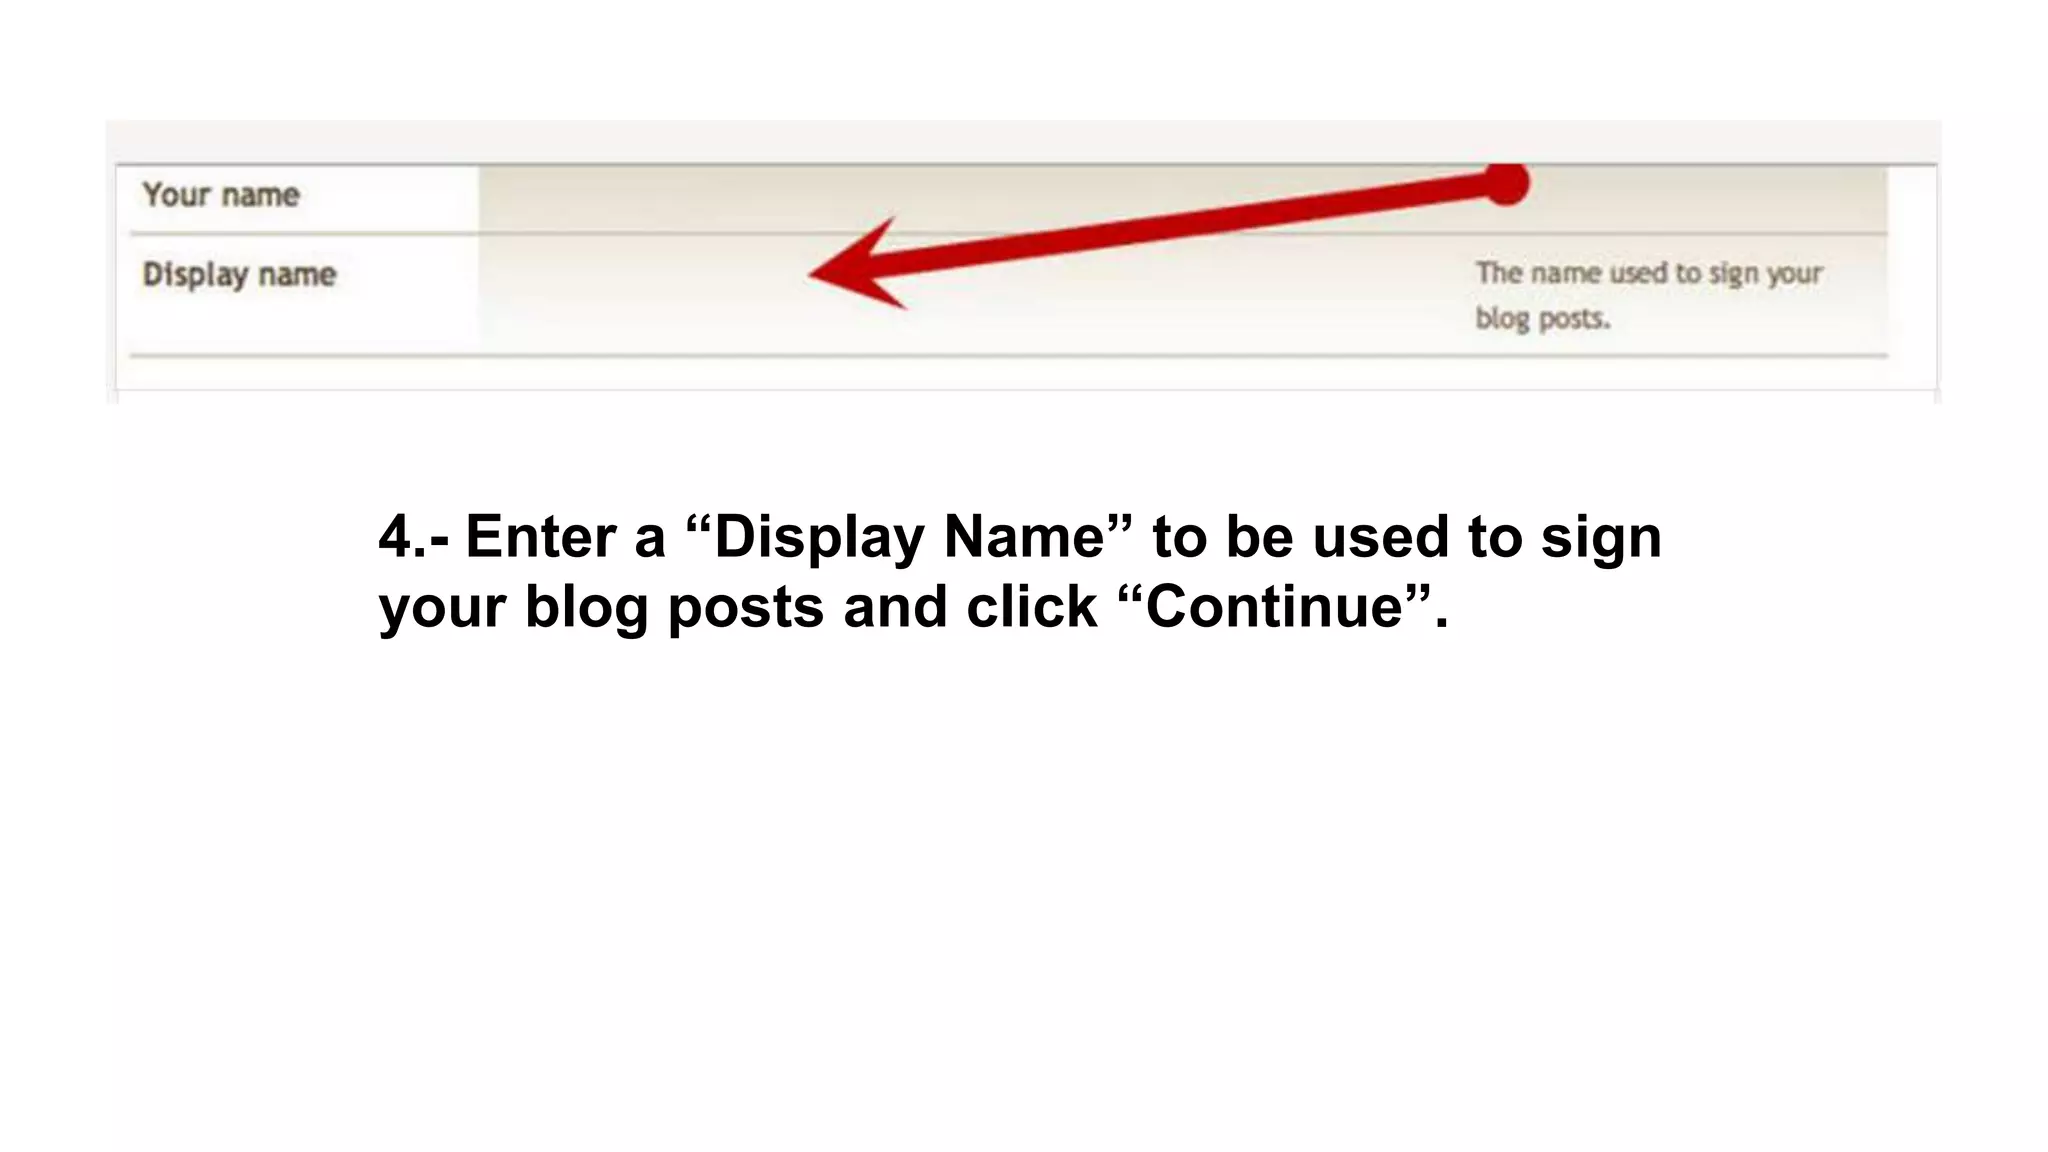
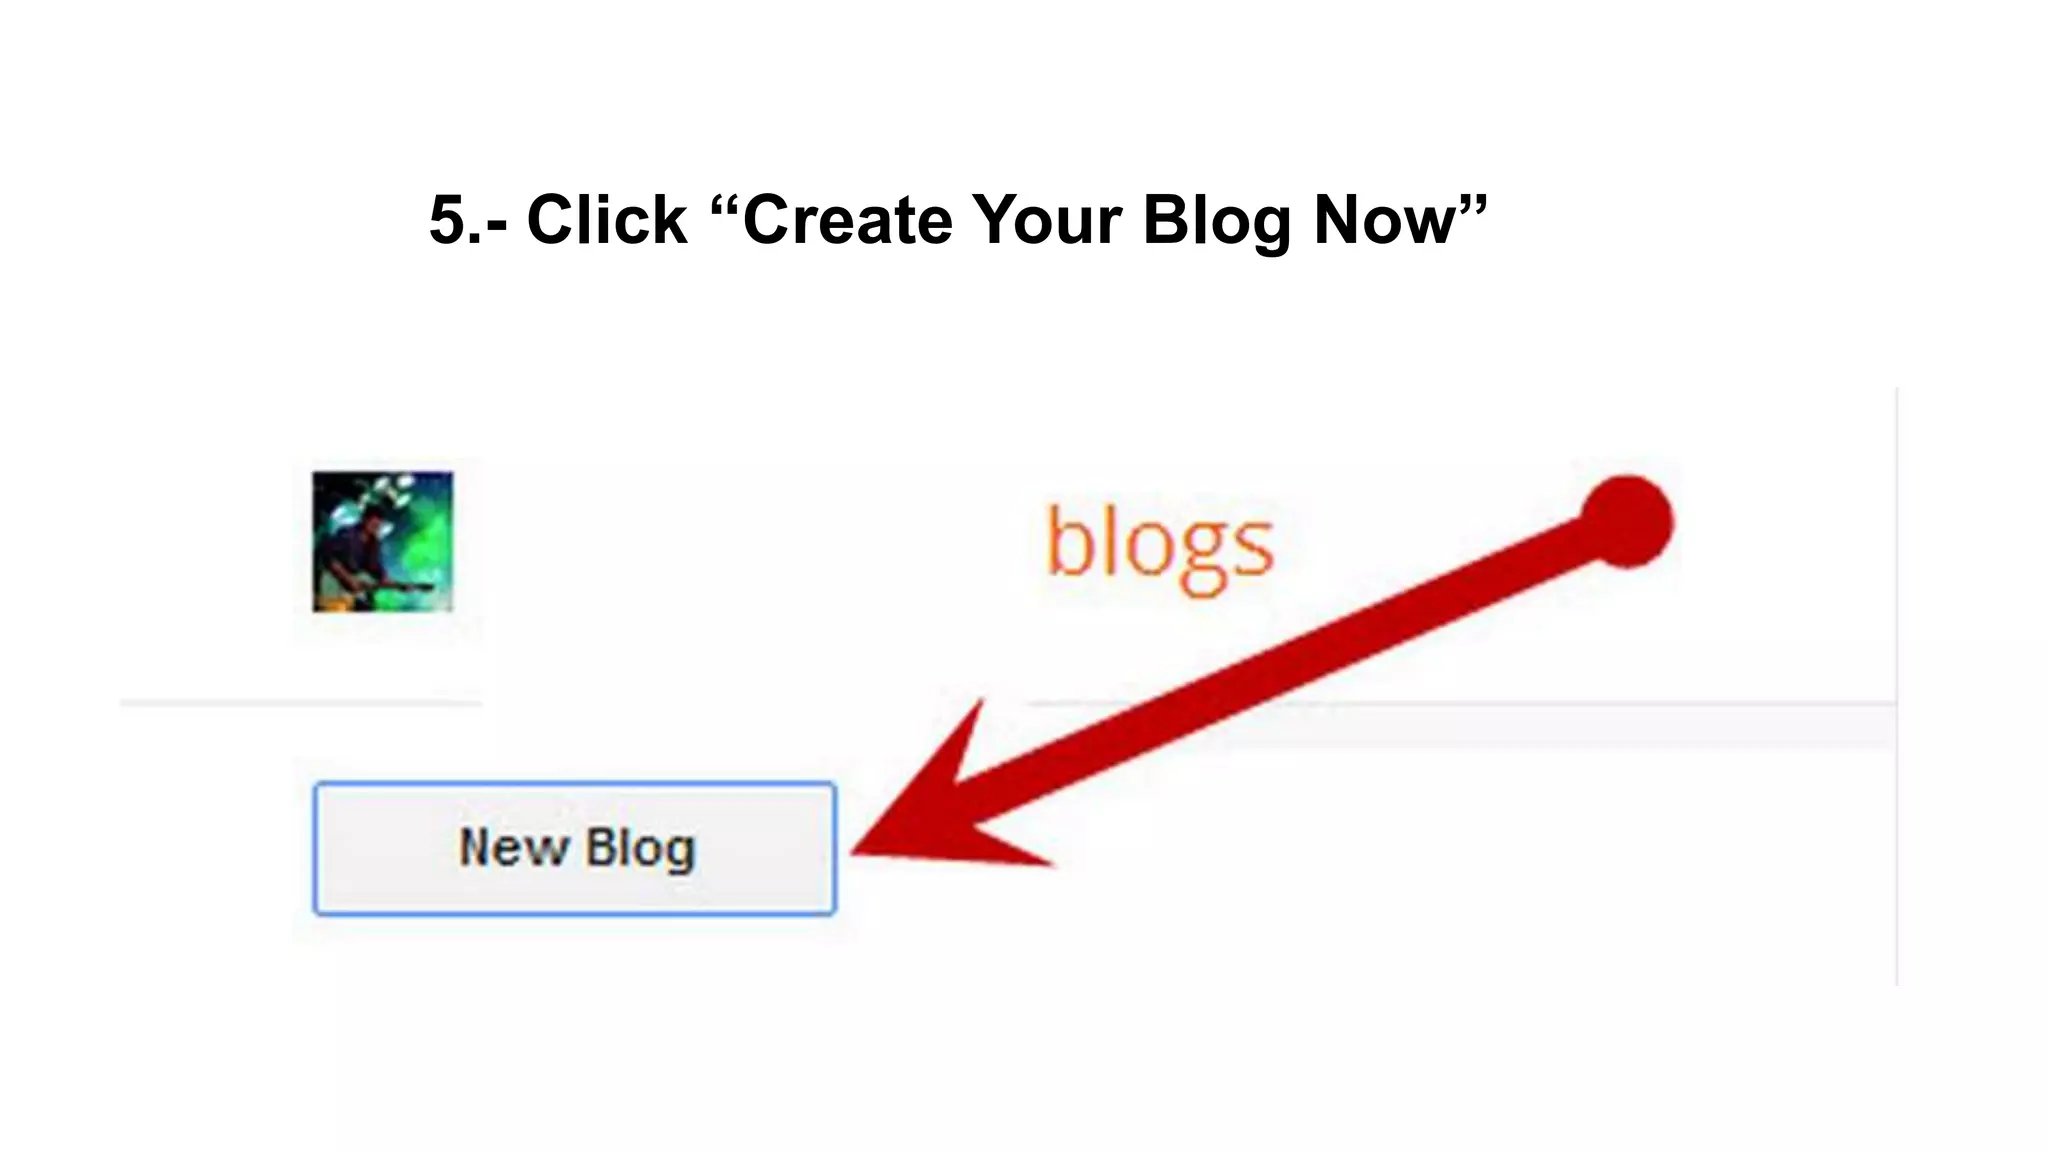
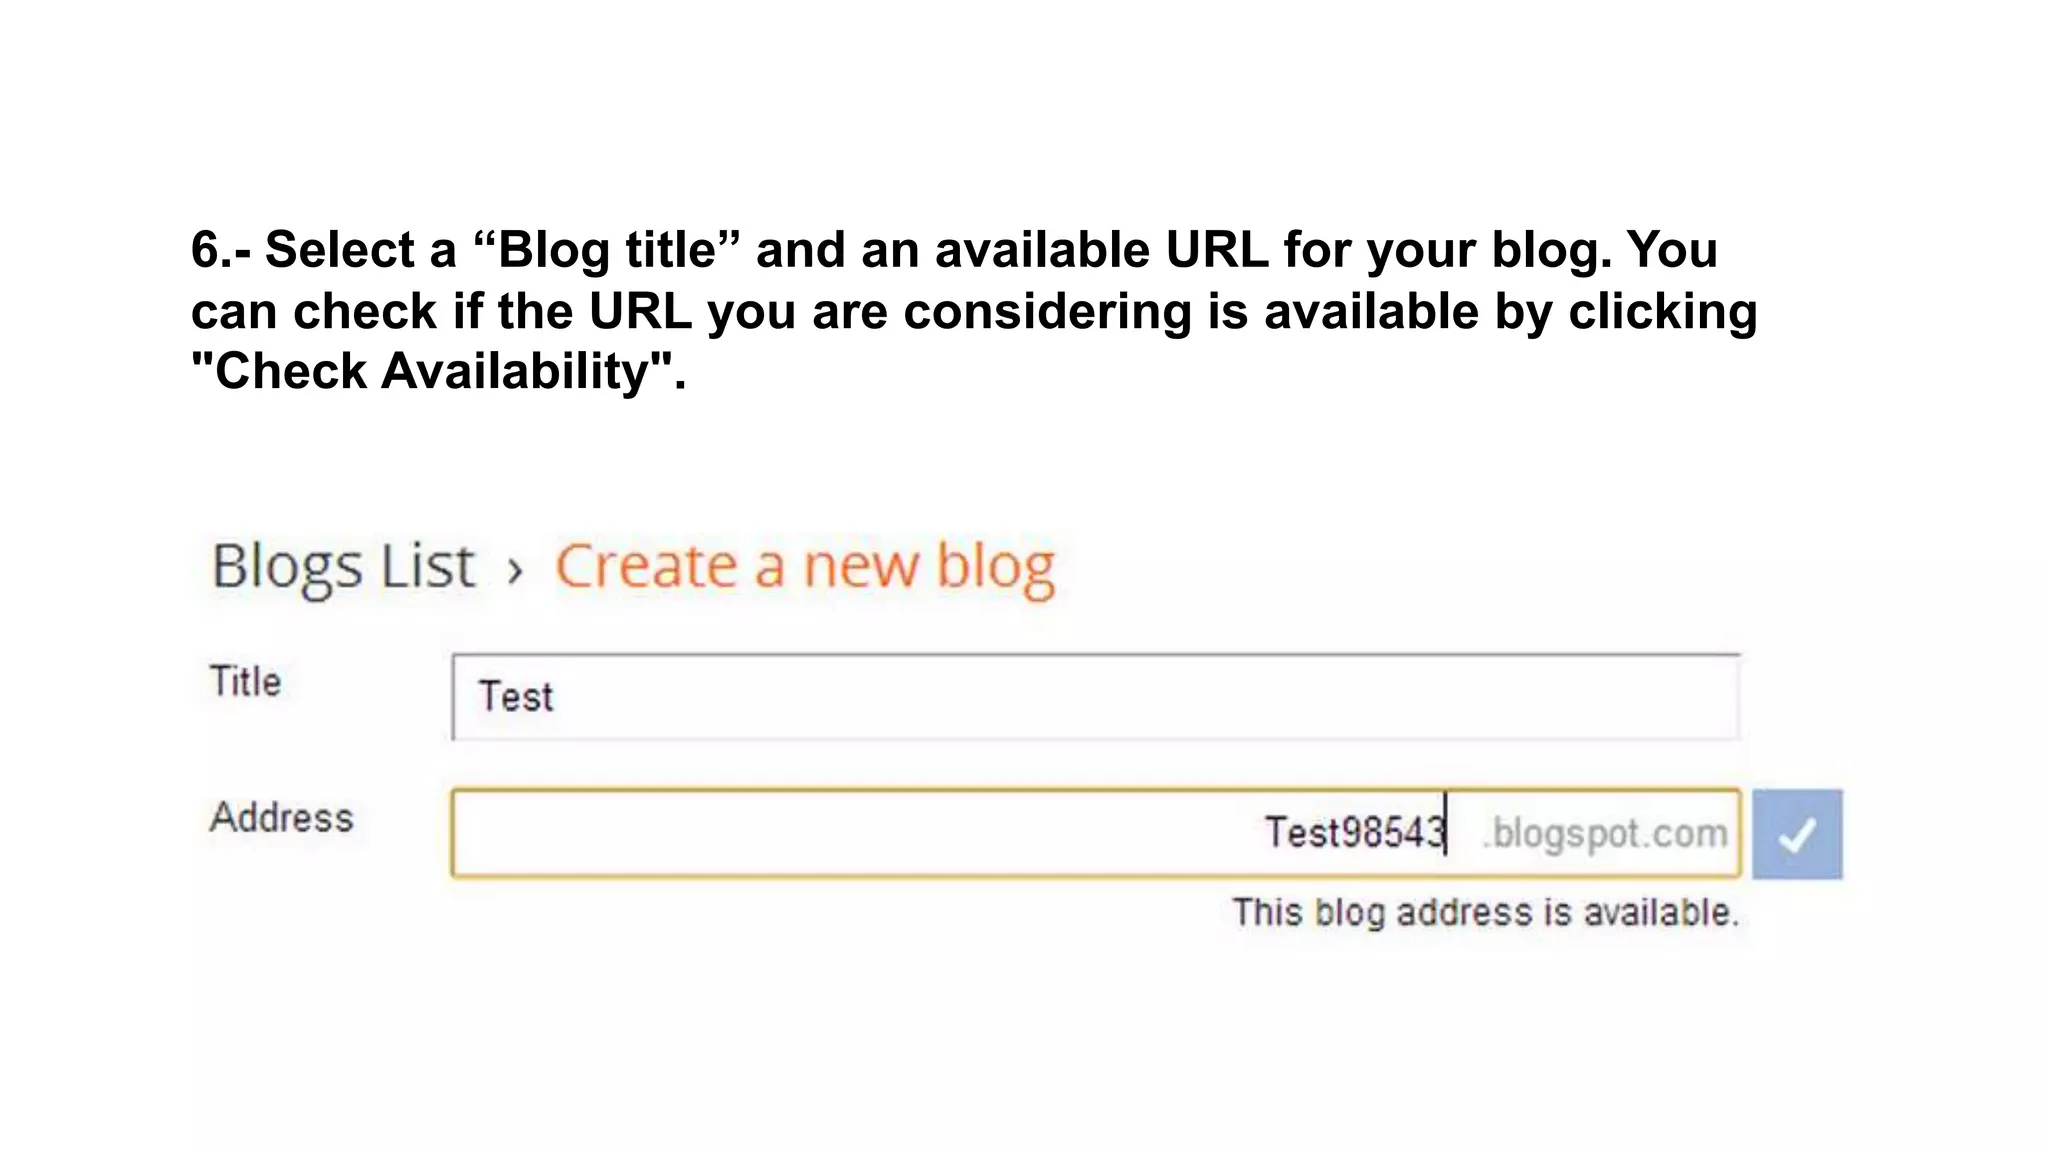
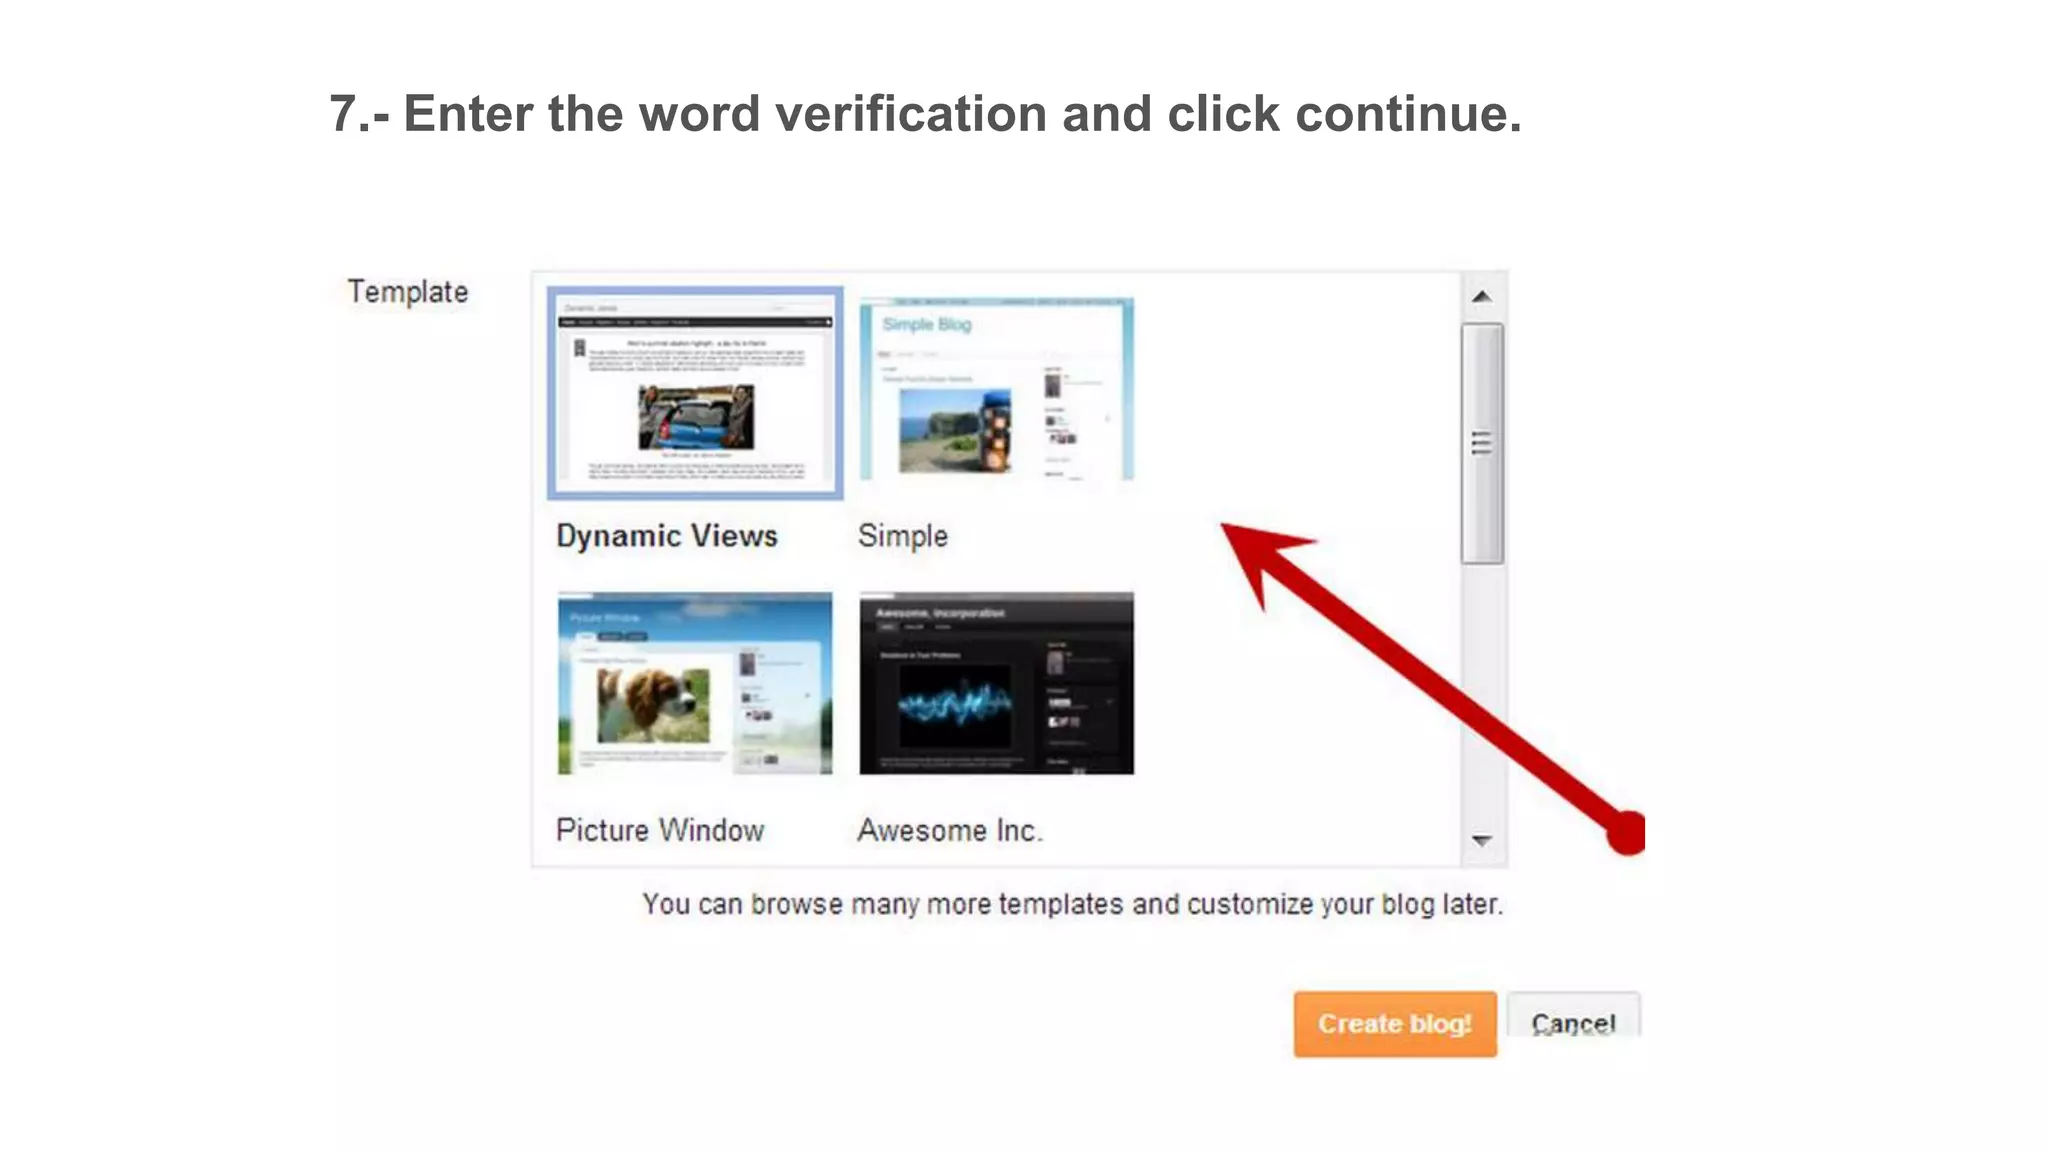
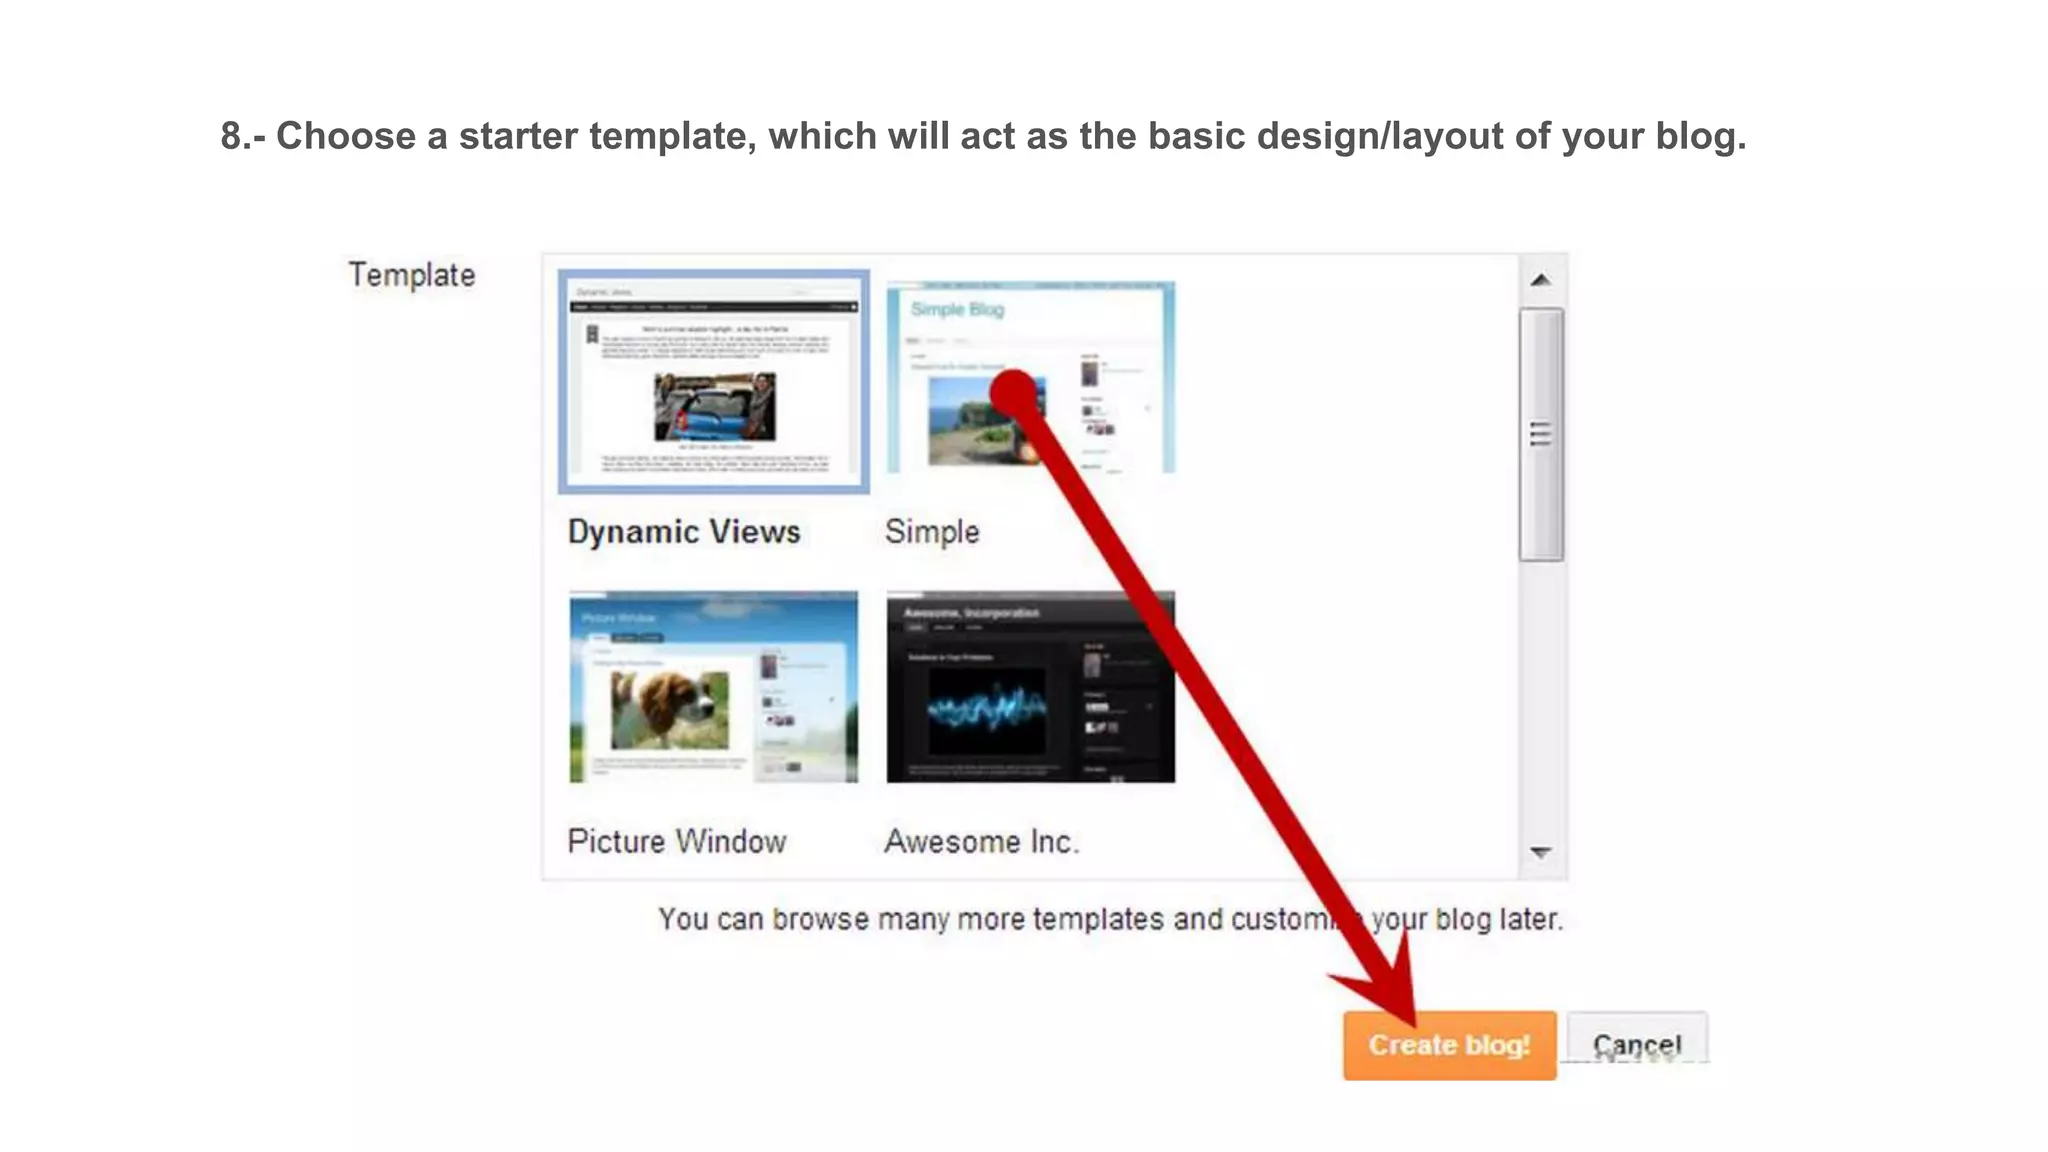
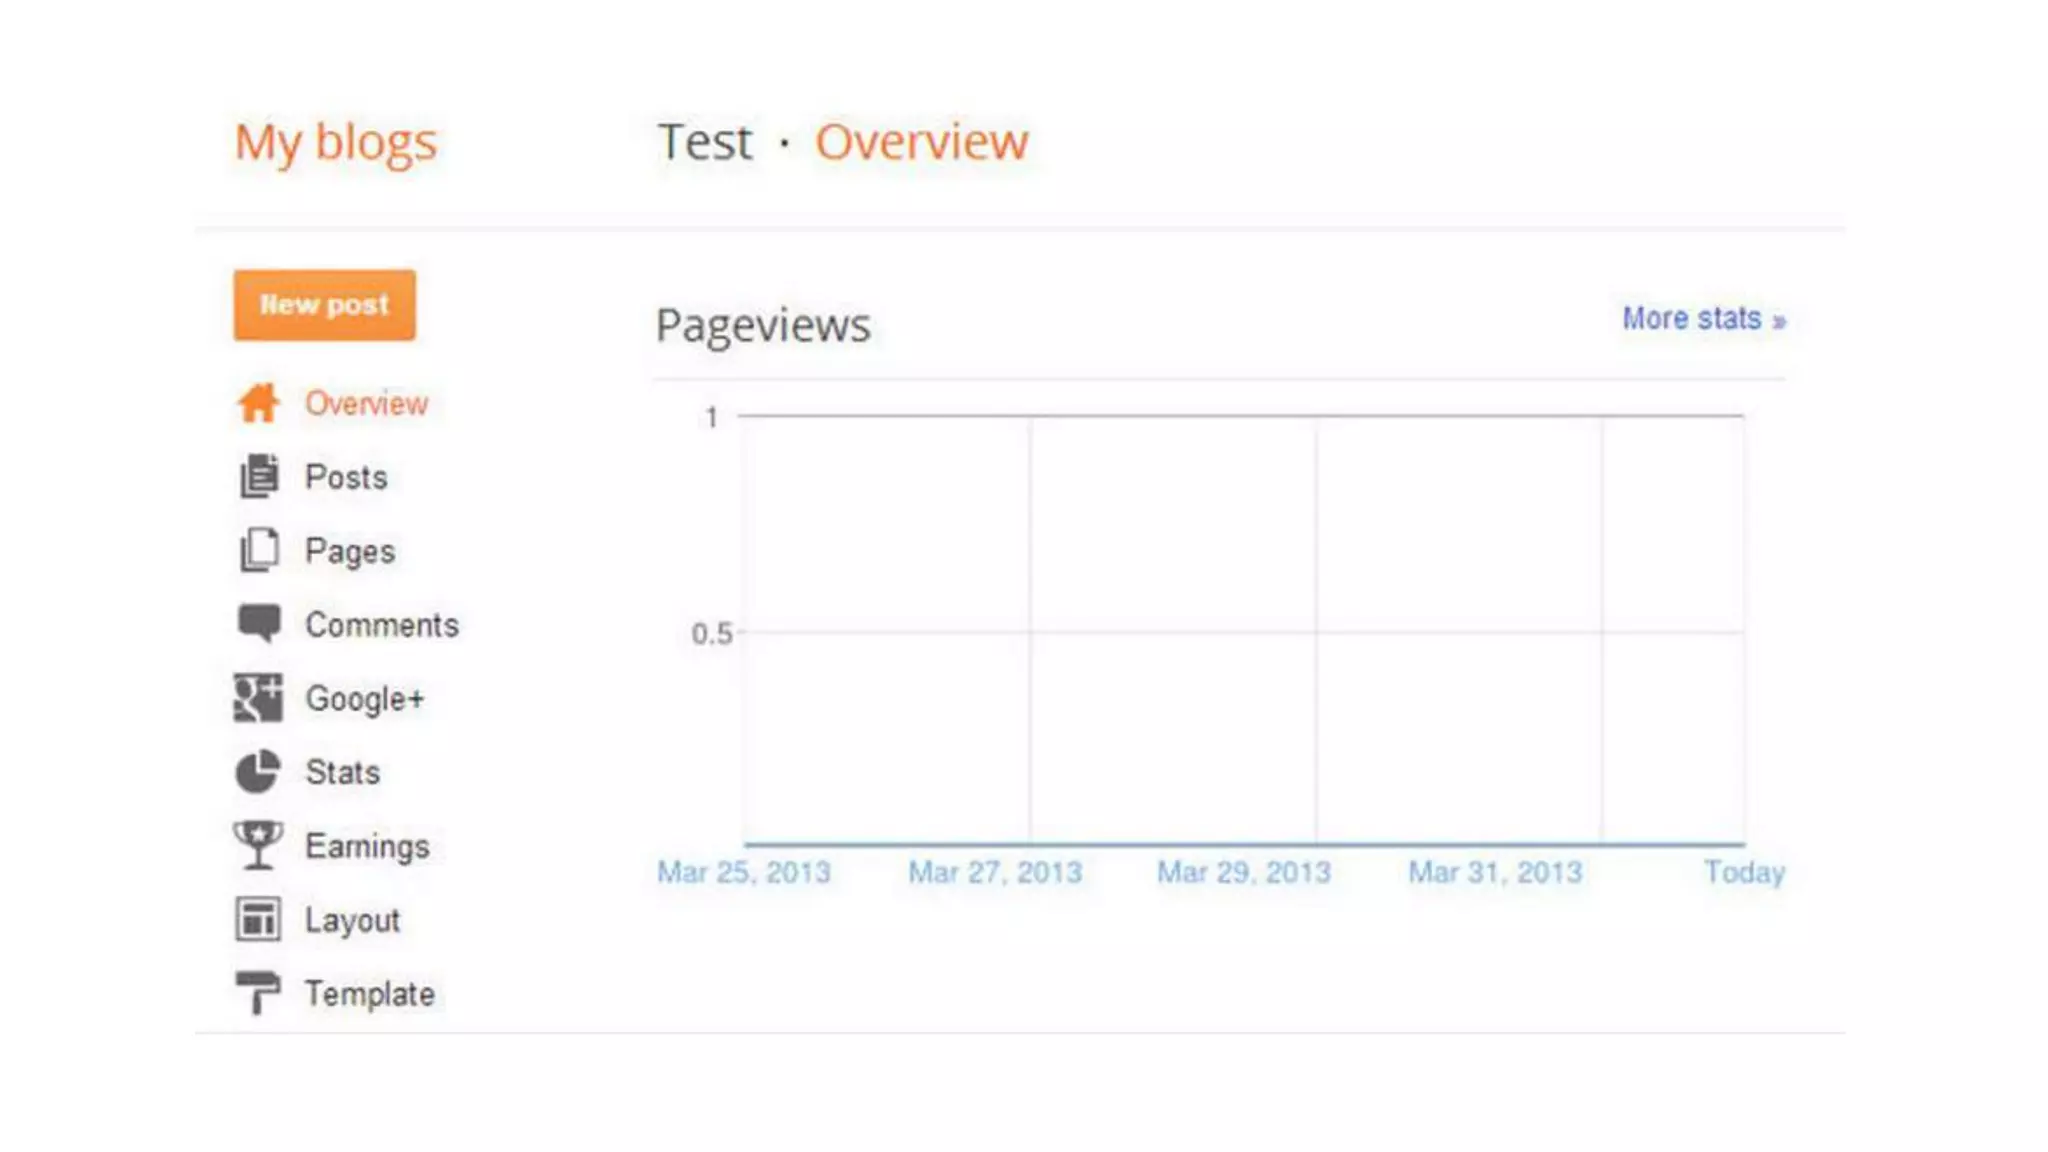
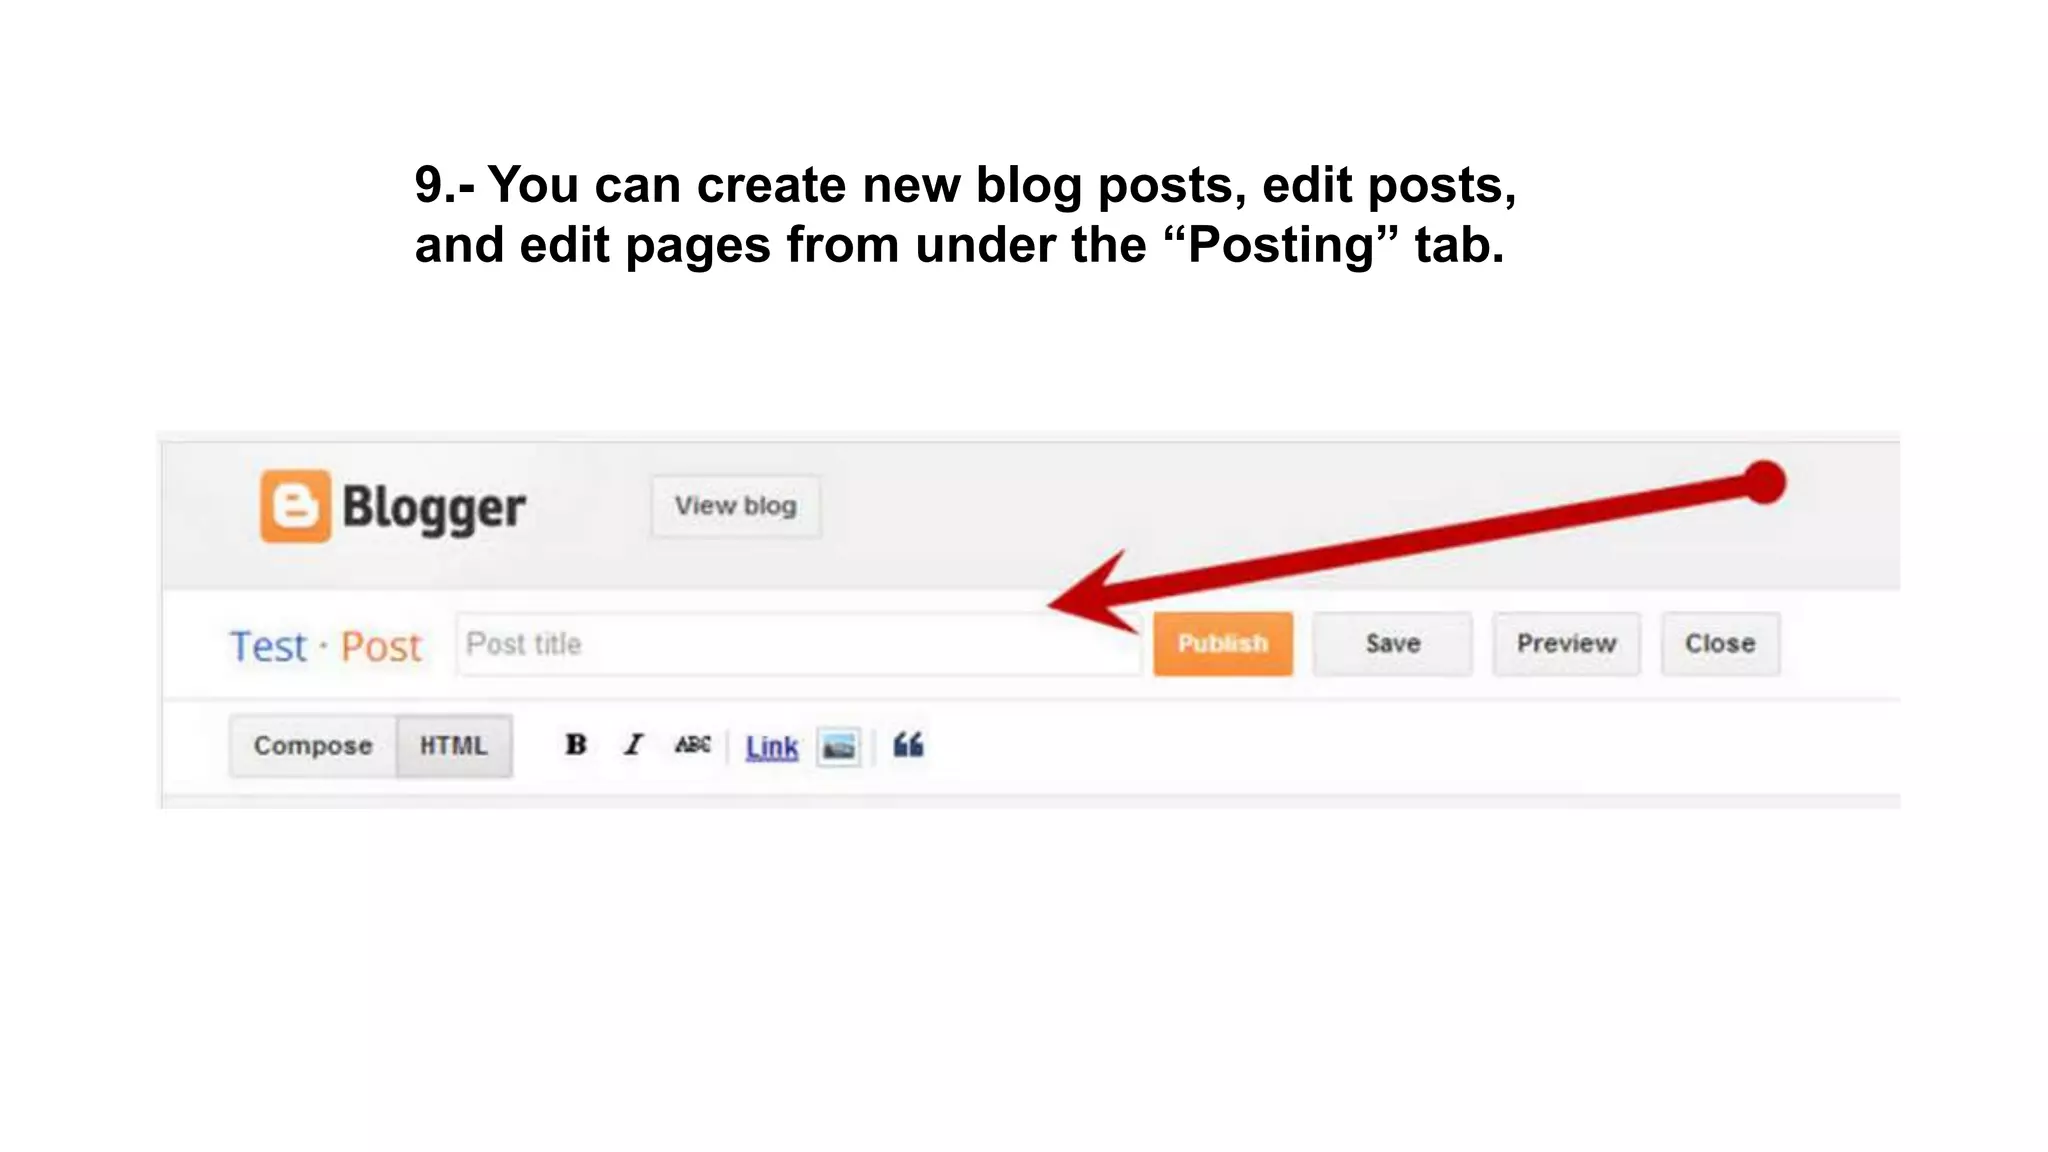
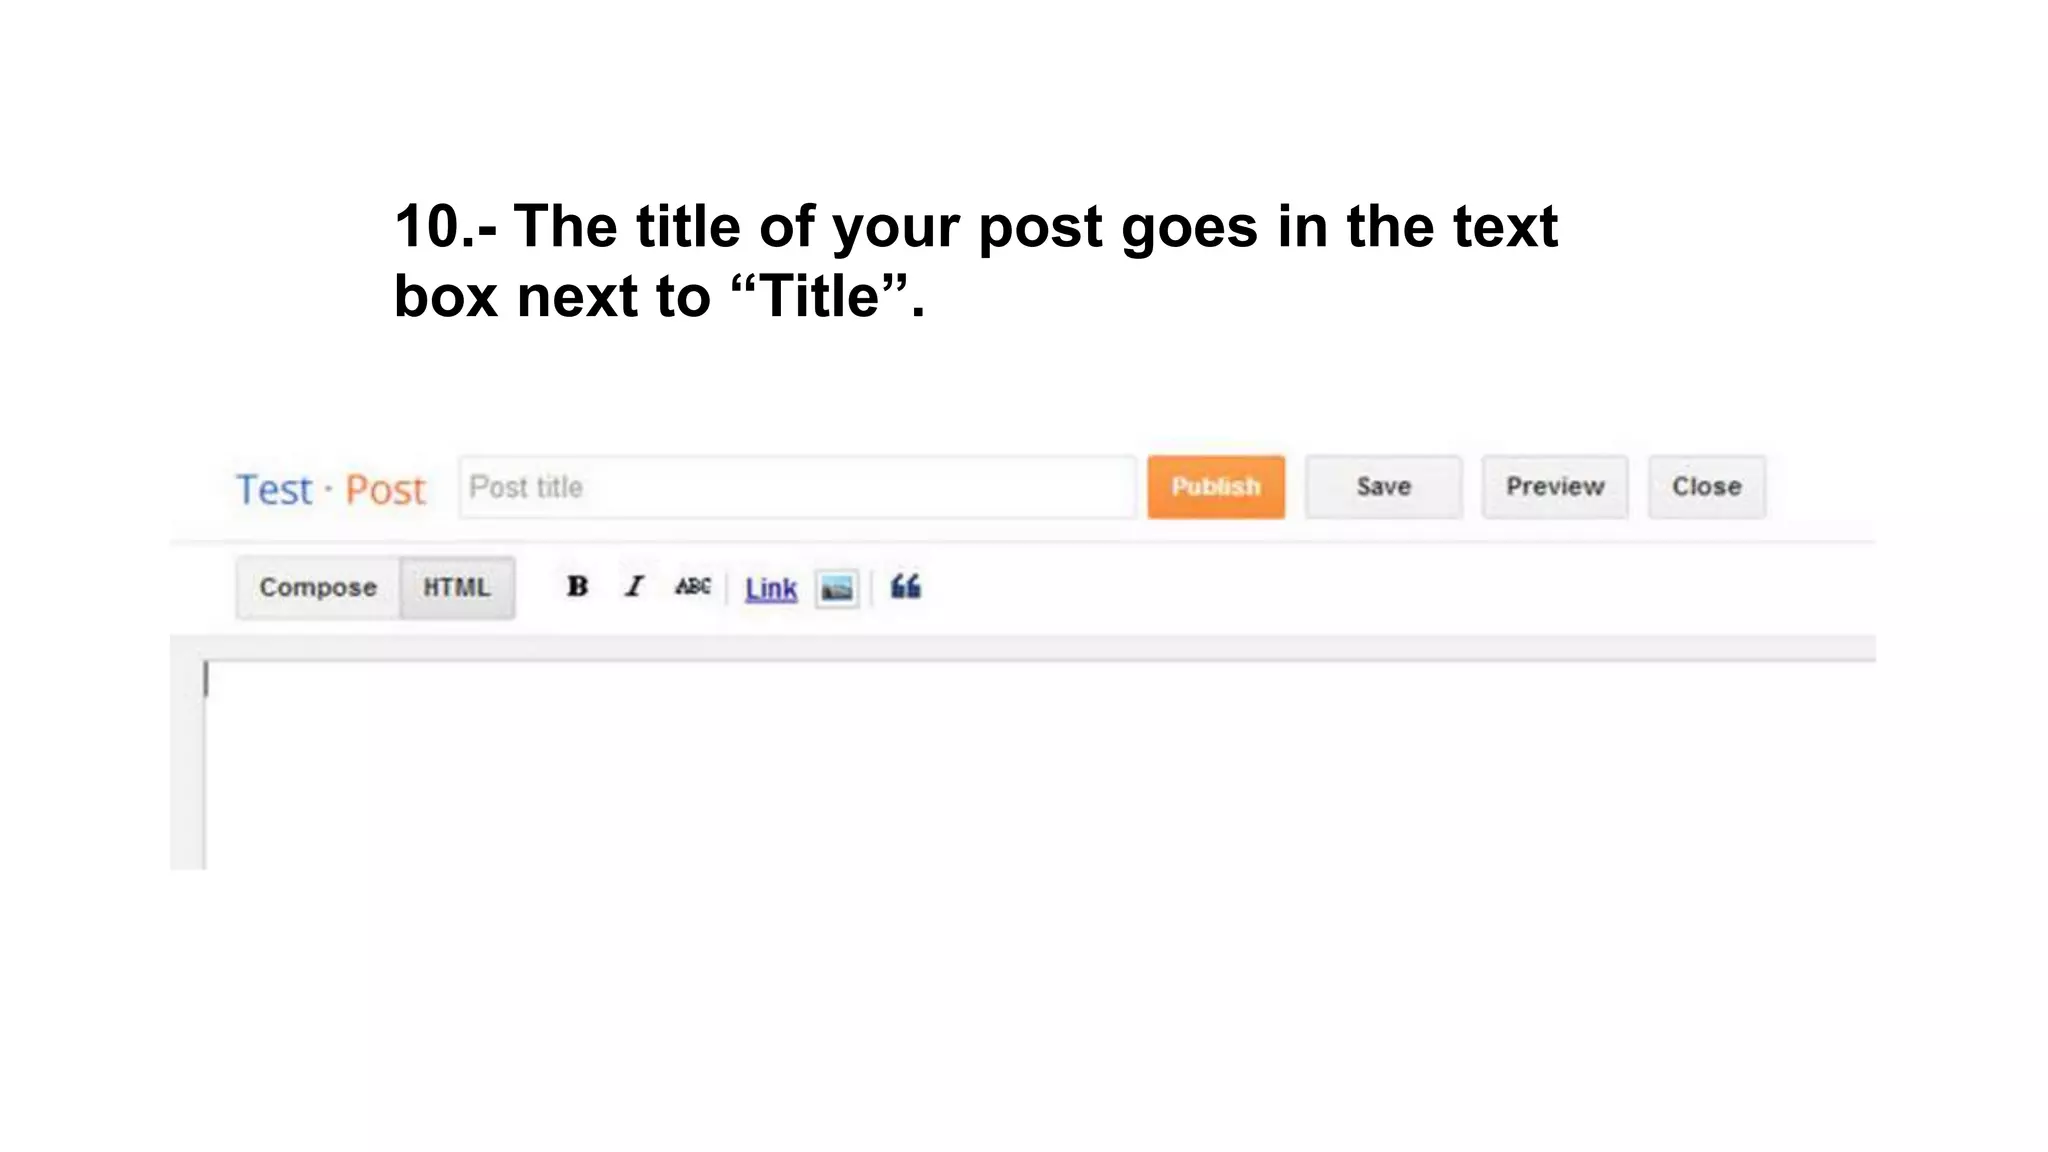
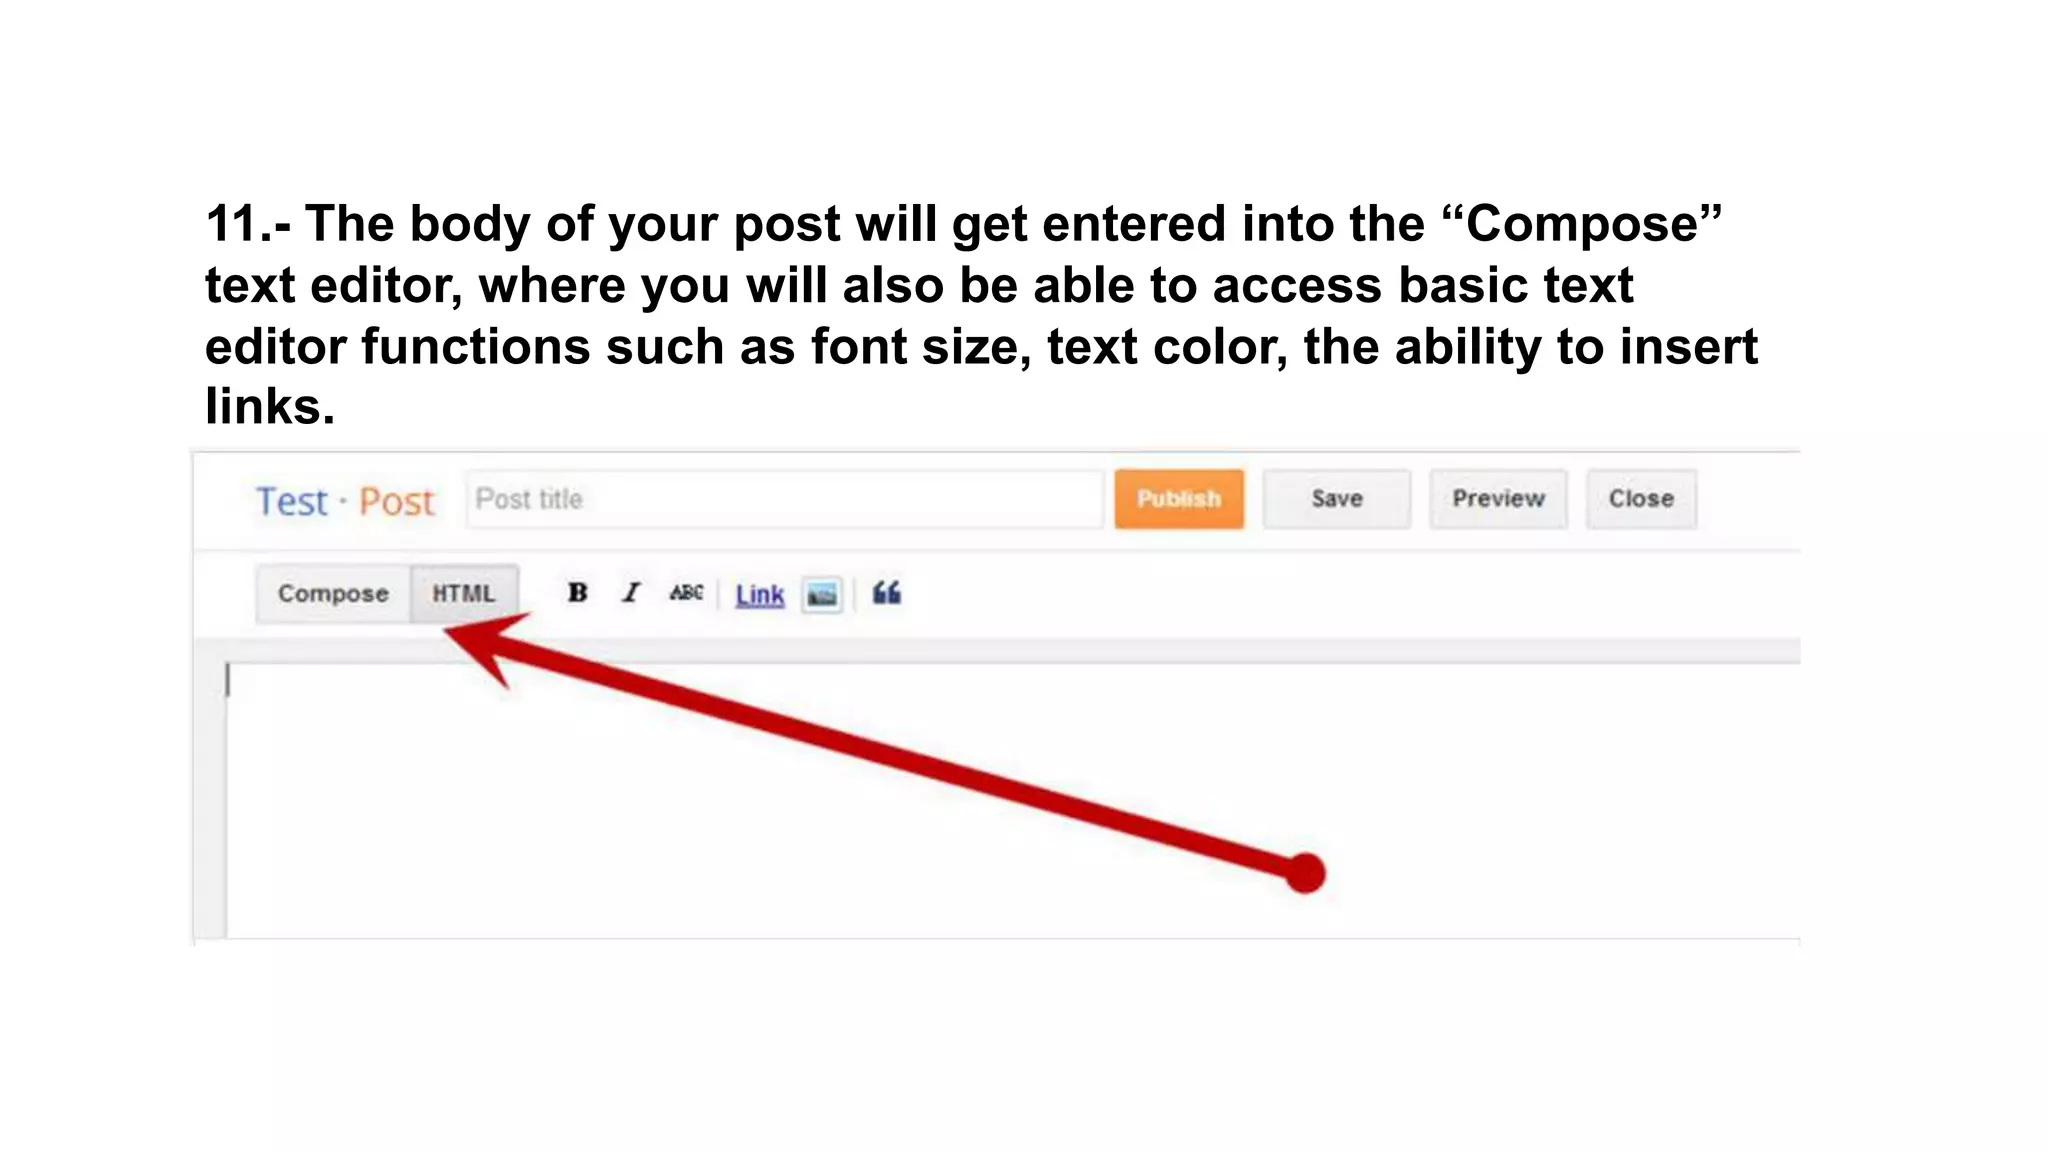
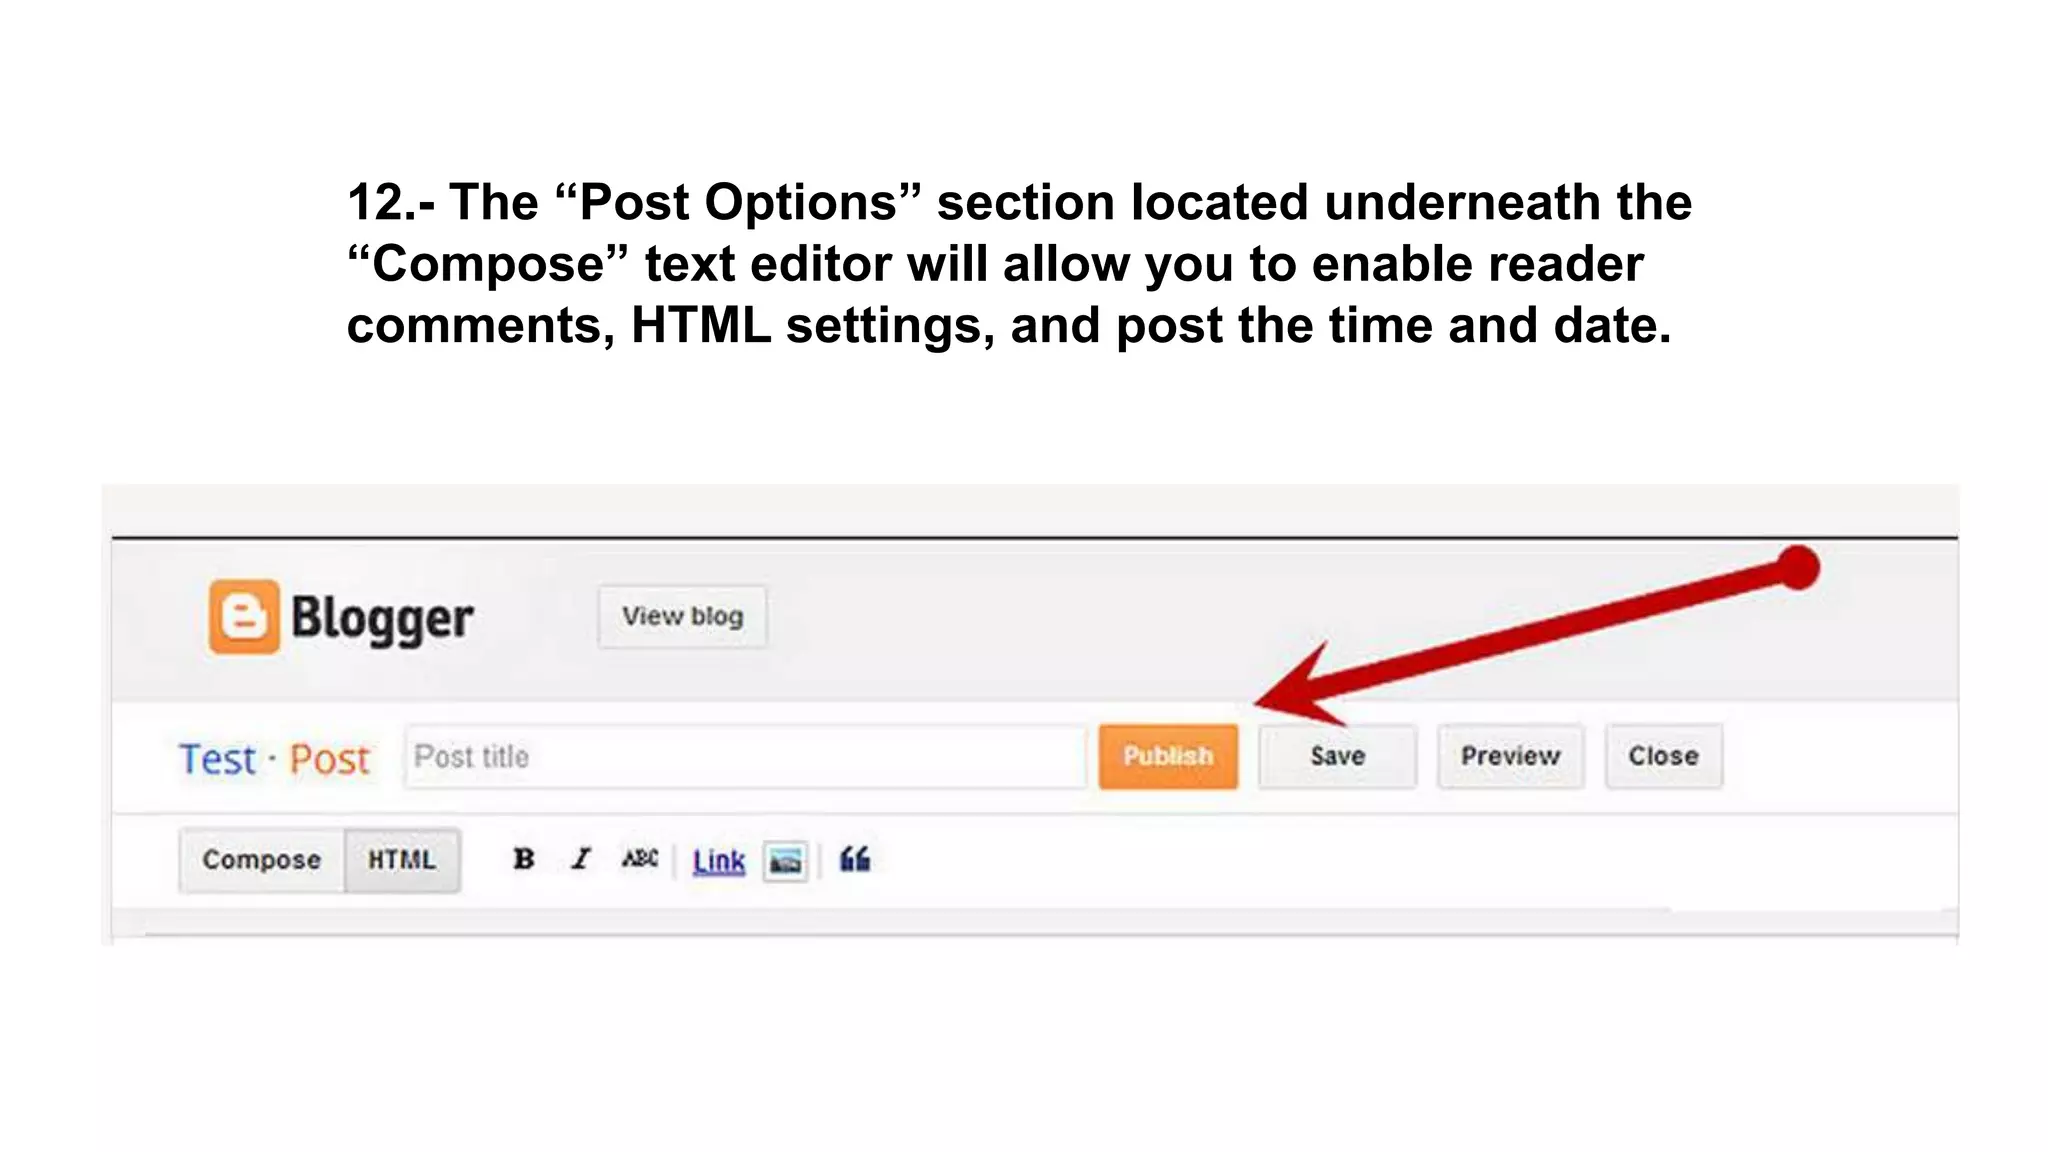

Starting a blog can be confusing, but the process has become much easier. The document provides step-by-step instructions for setting up a blog on Blogger.com, including choosing a topic, creating a Google account, selecting a blog title and template, and writing posts. No technical skills are required, as the process is largely automatic. Key steps include deciding on a topic you're passionate about, navigating to Blogger.com, signing in with a Google account, customizing basic blog details and settings, and writing posts using Blogger's text editor.