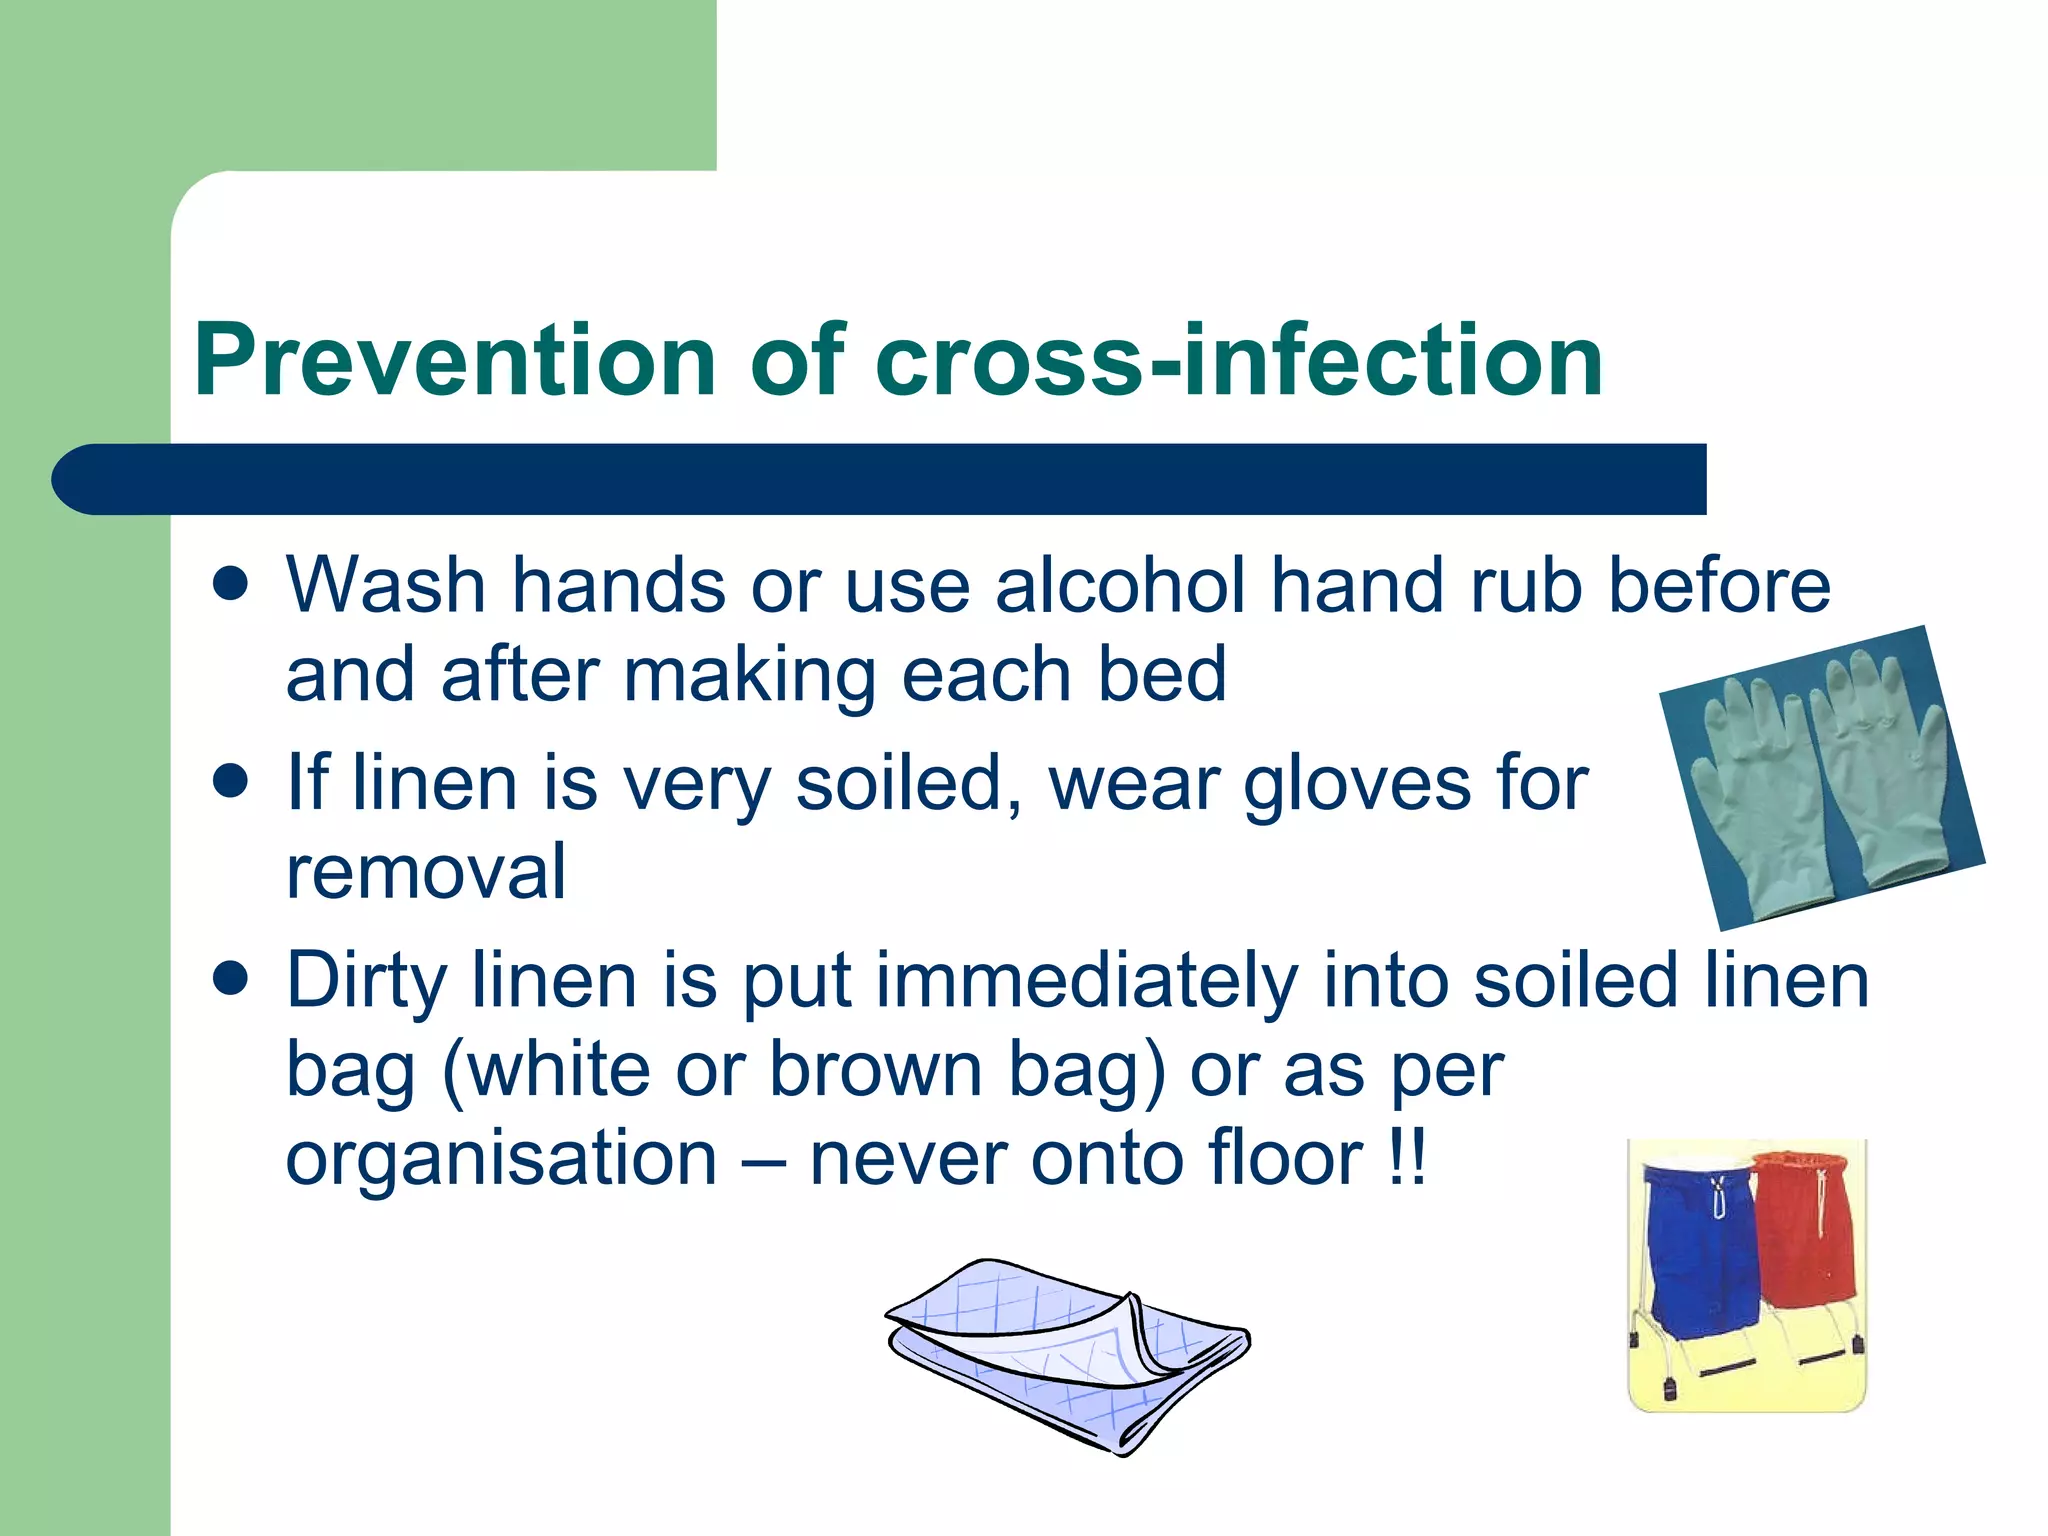
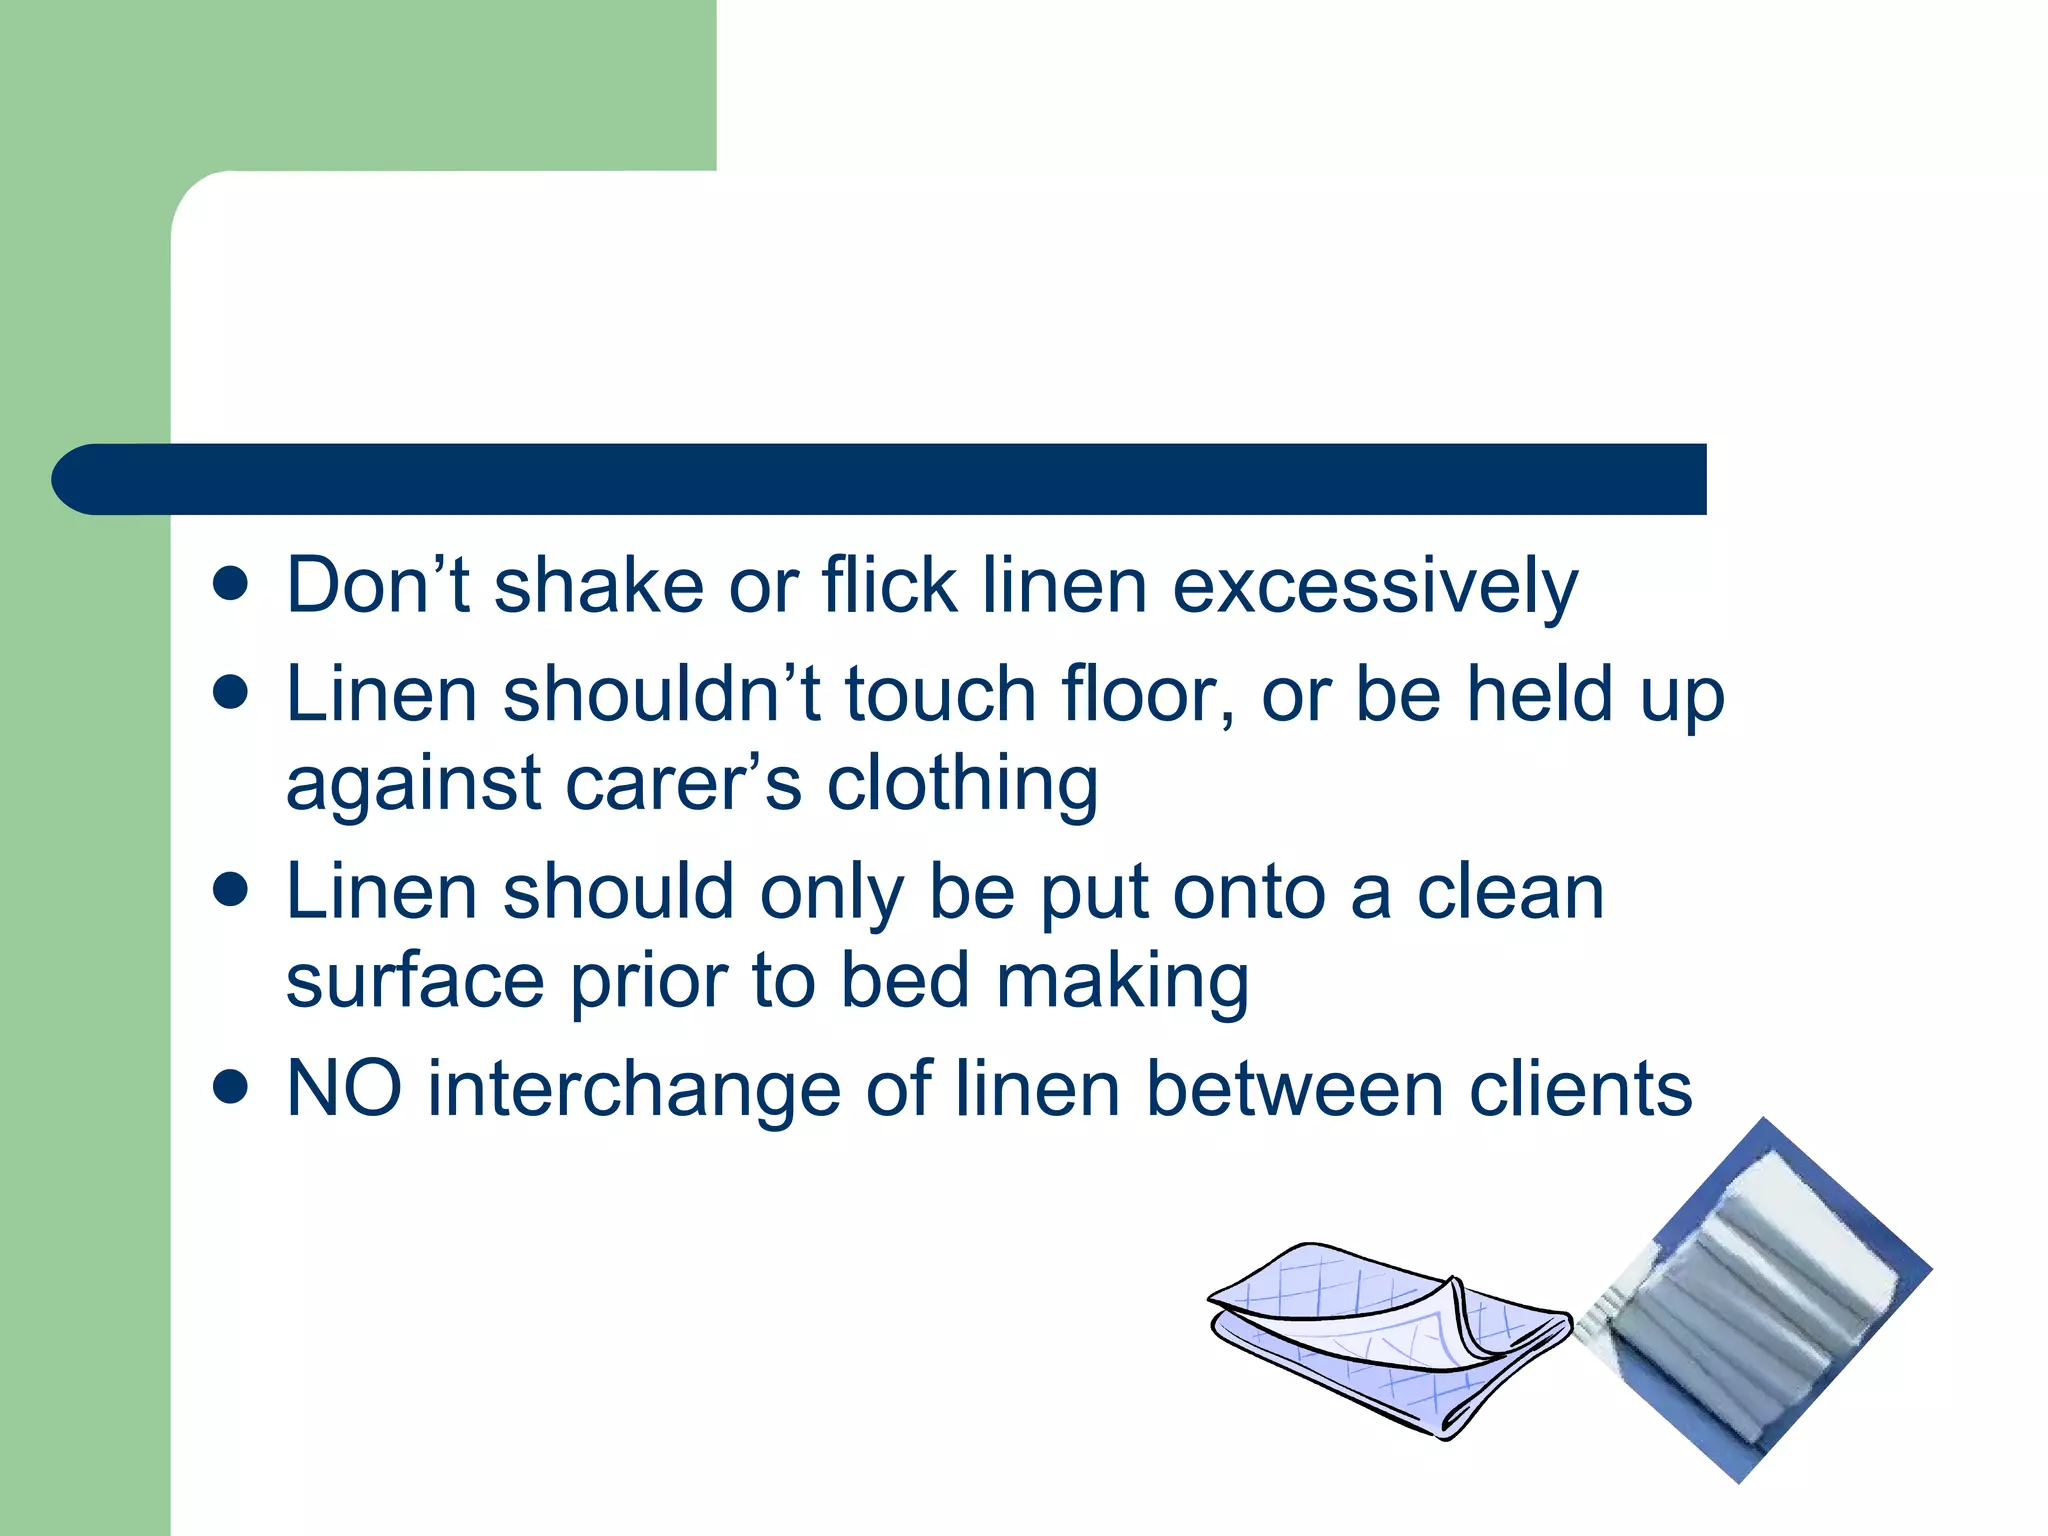
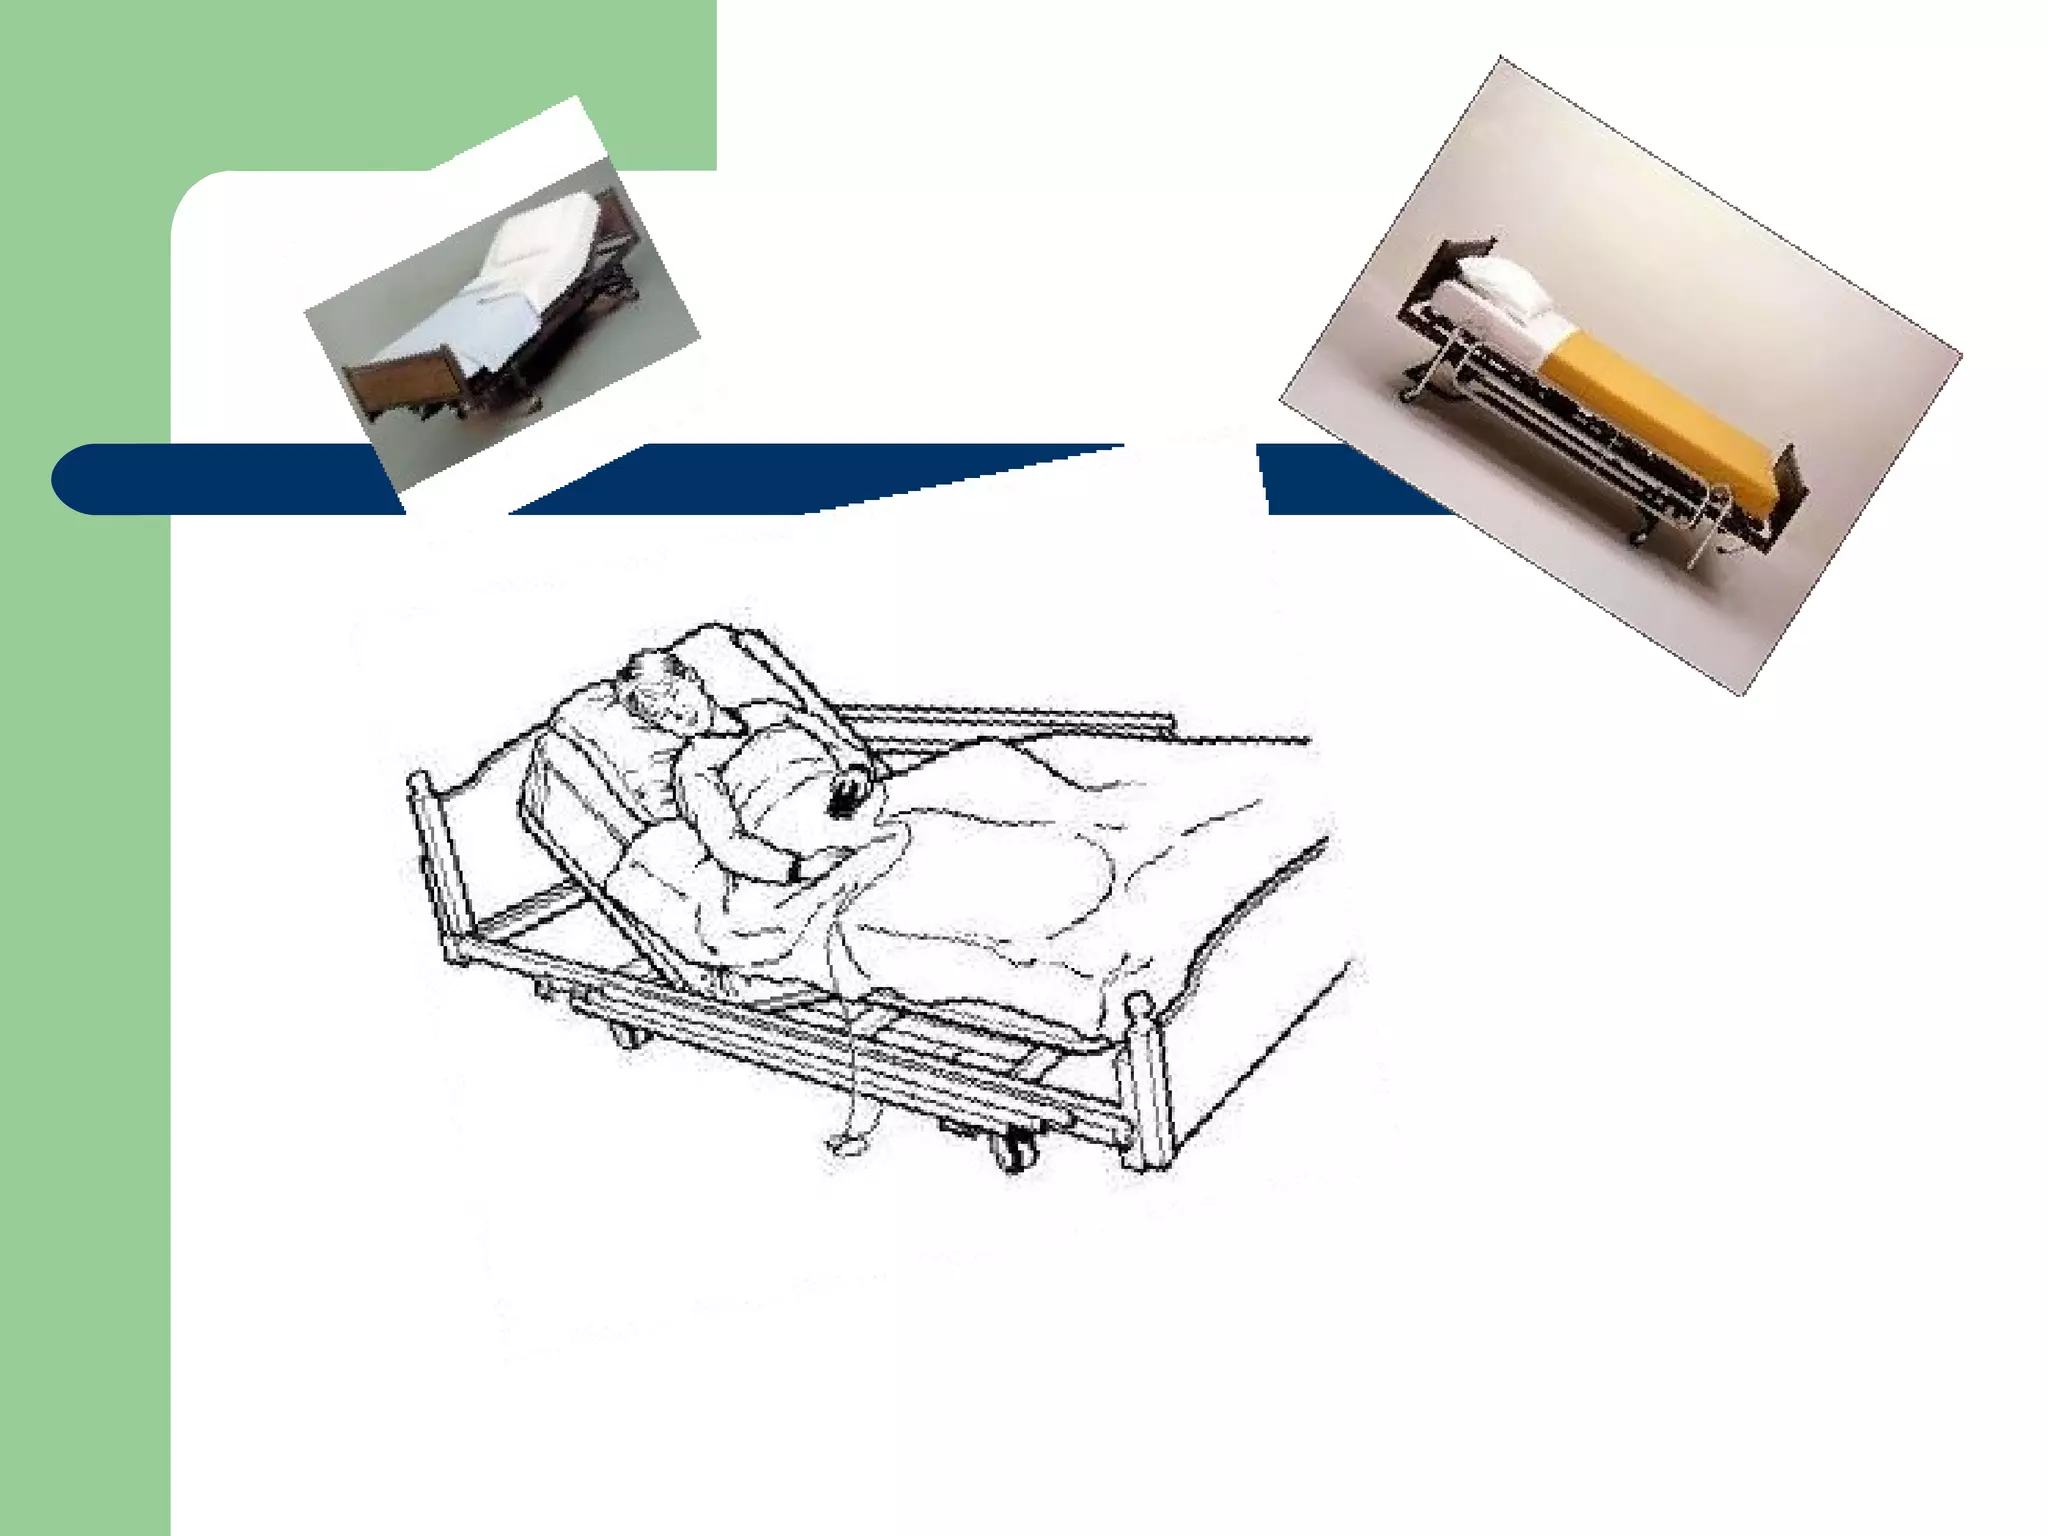
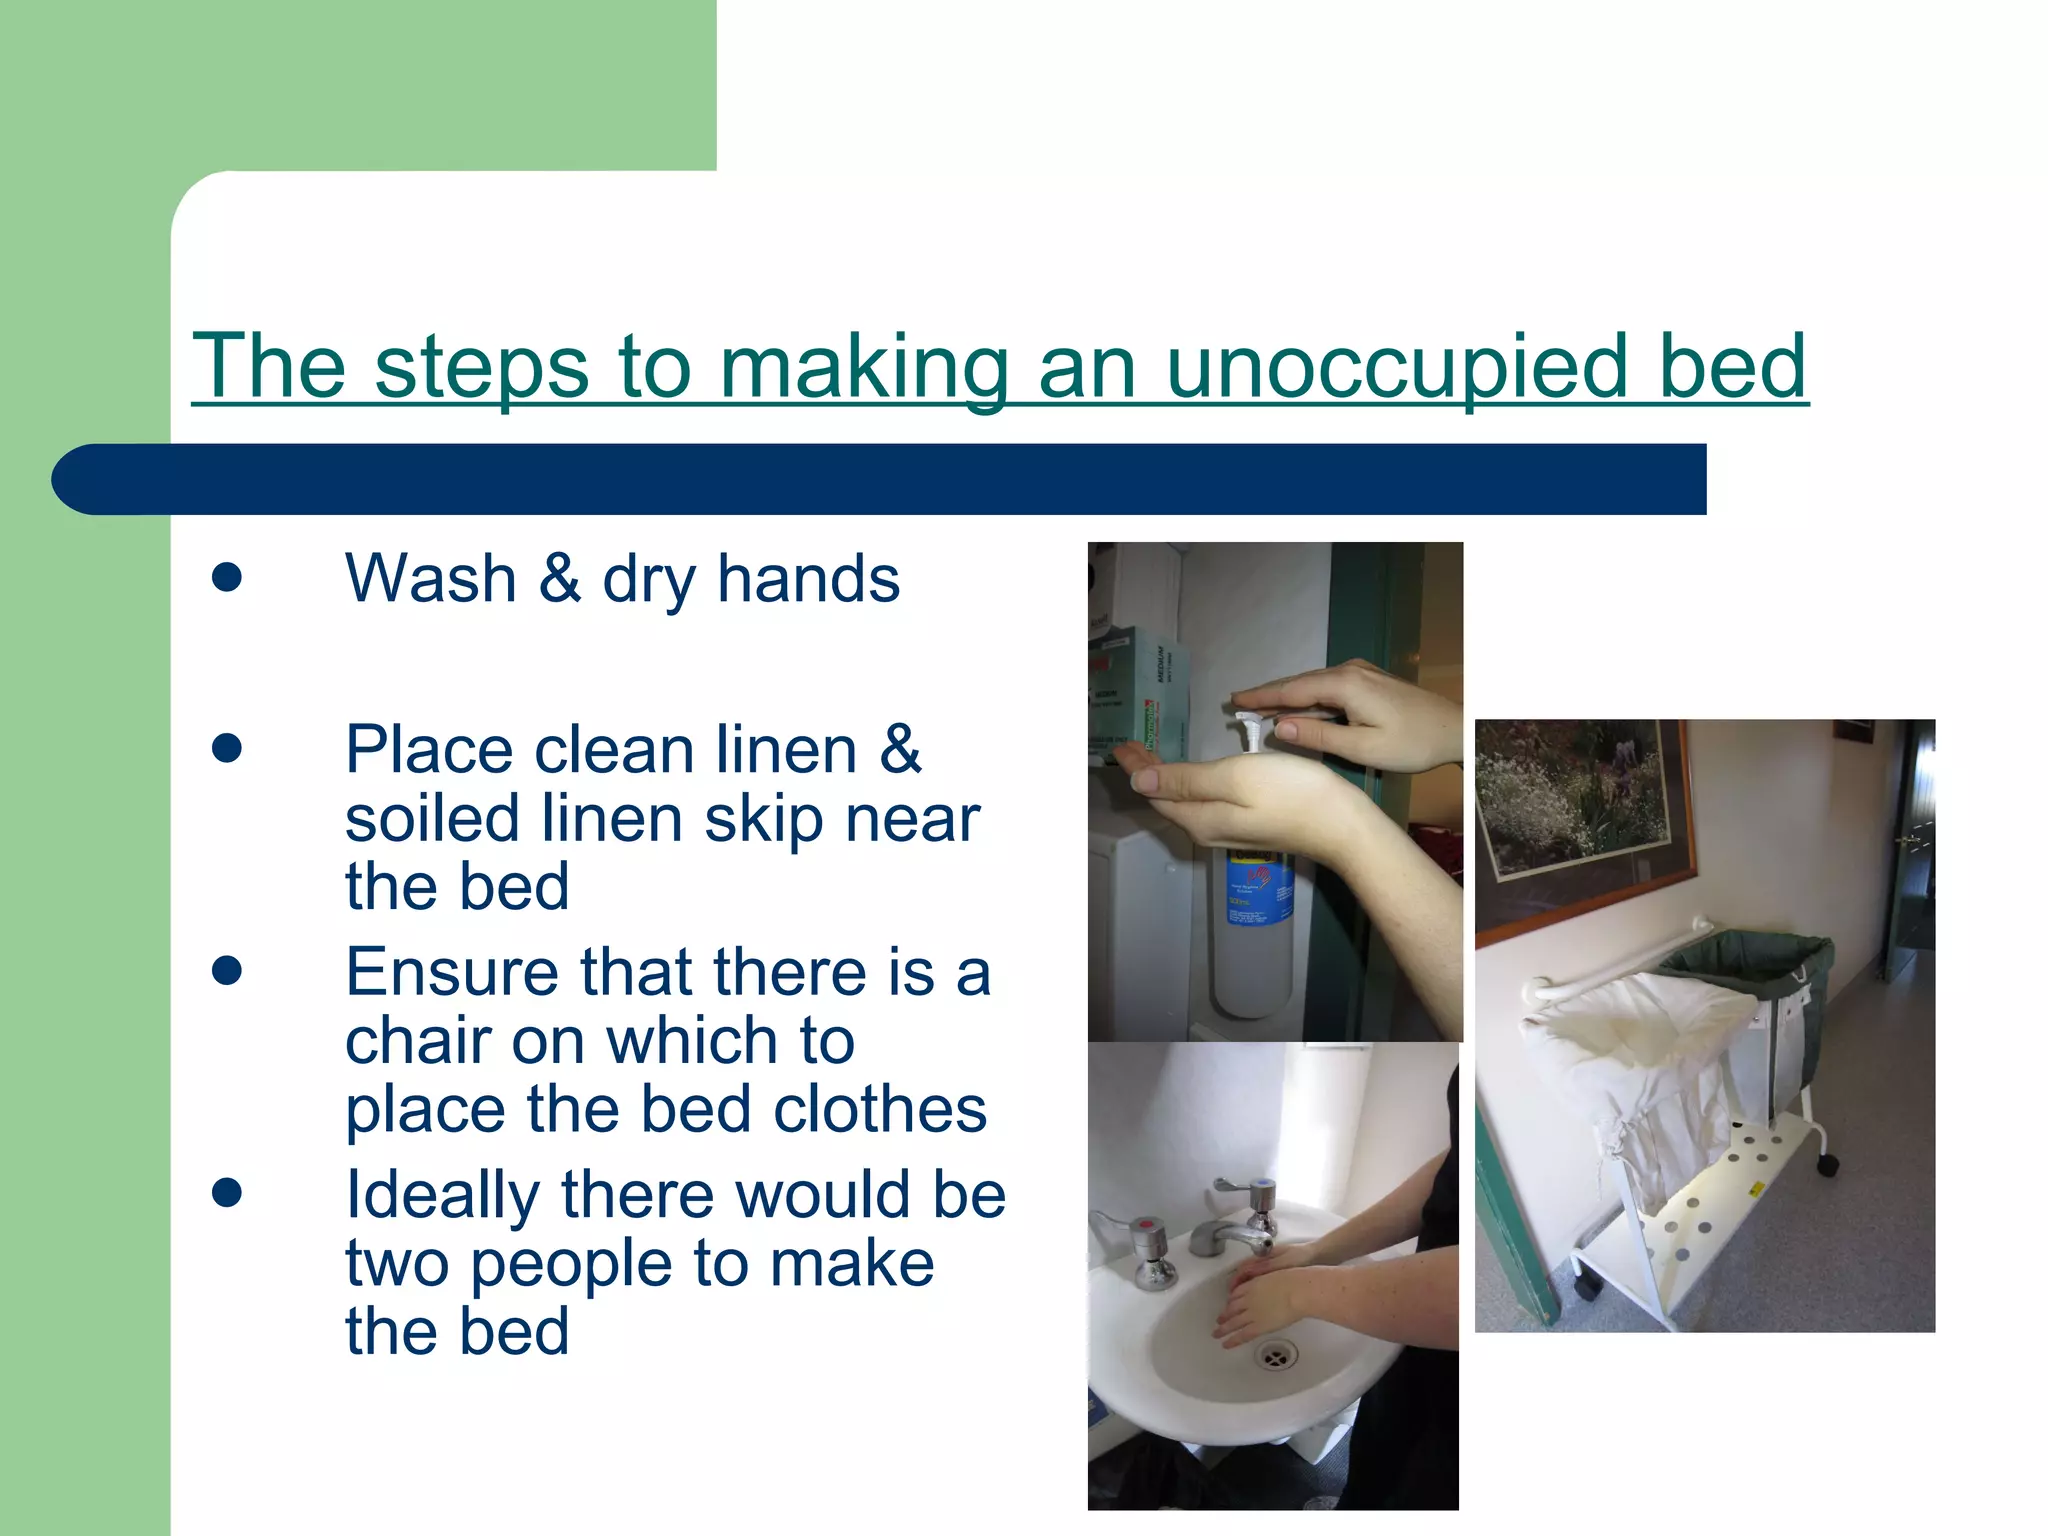
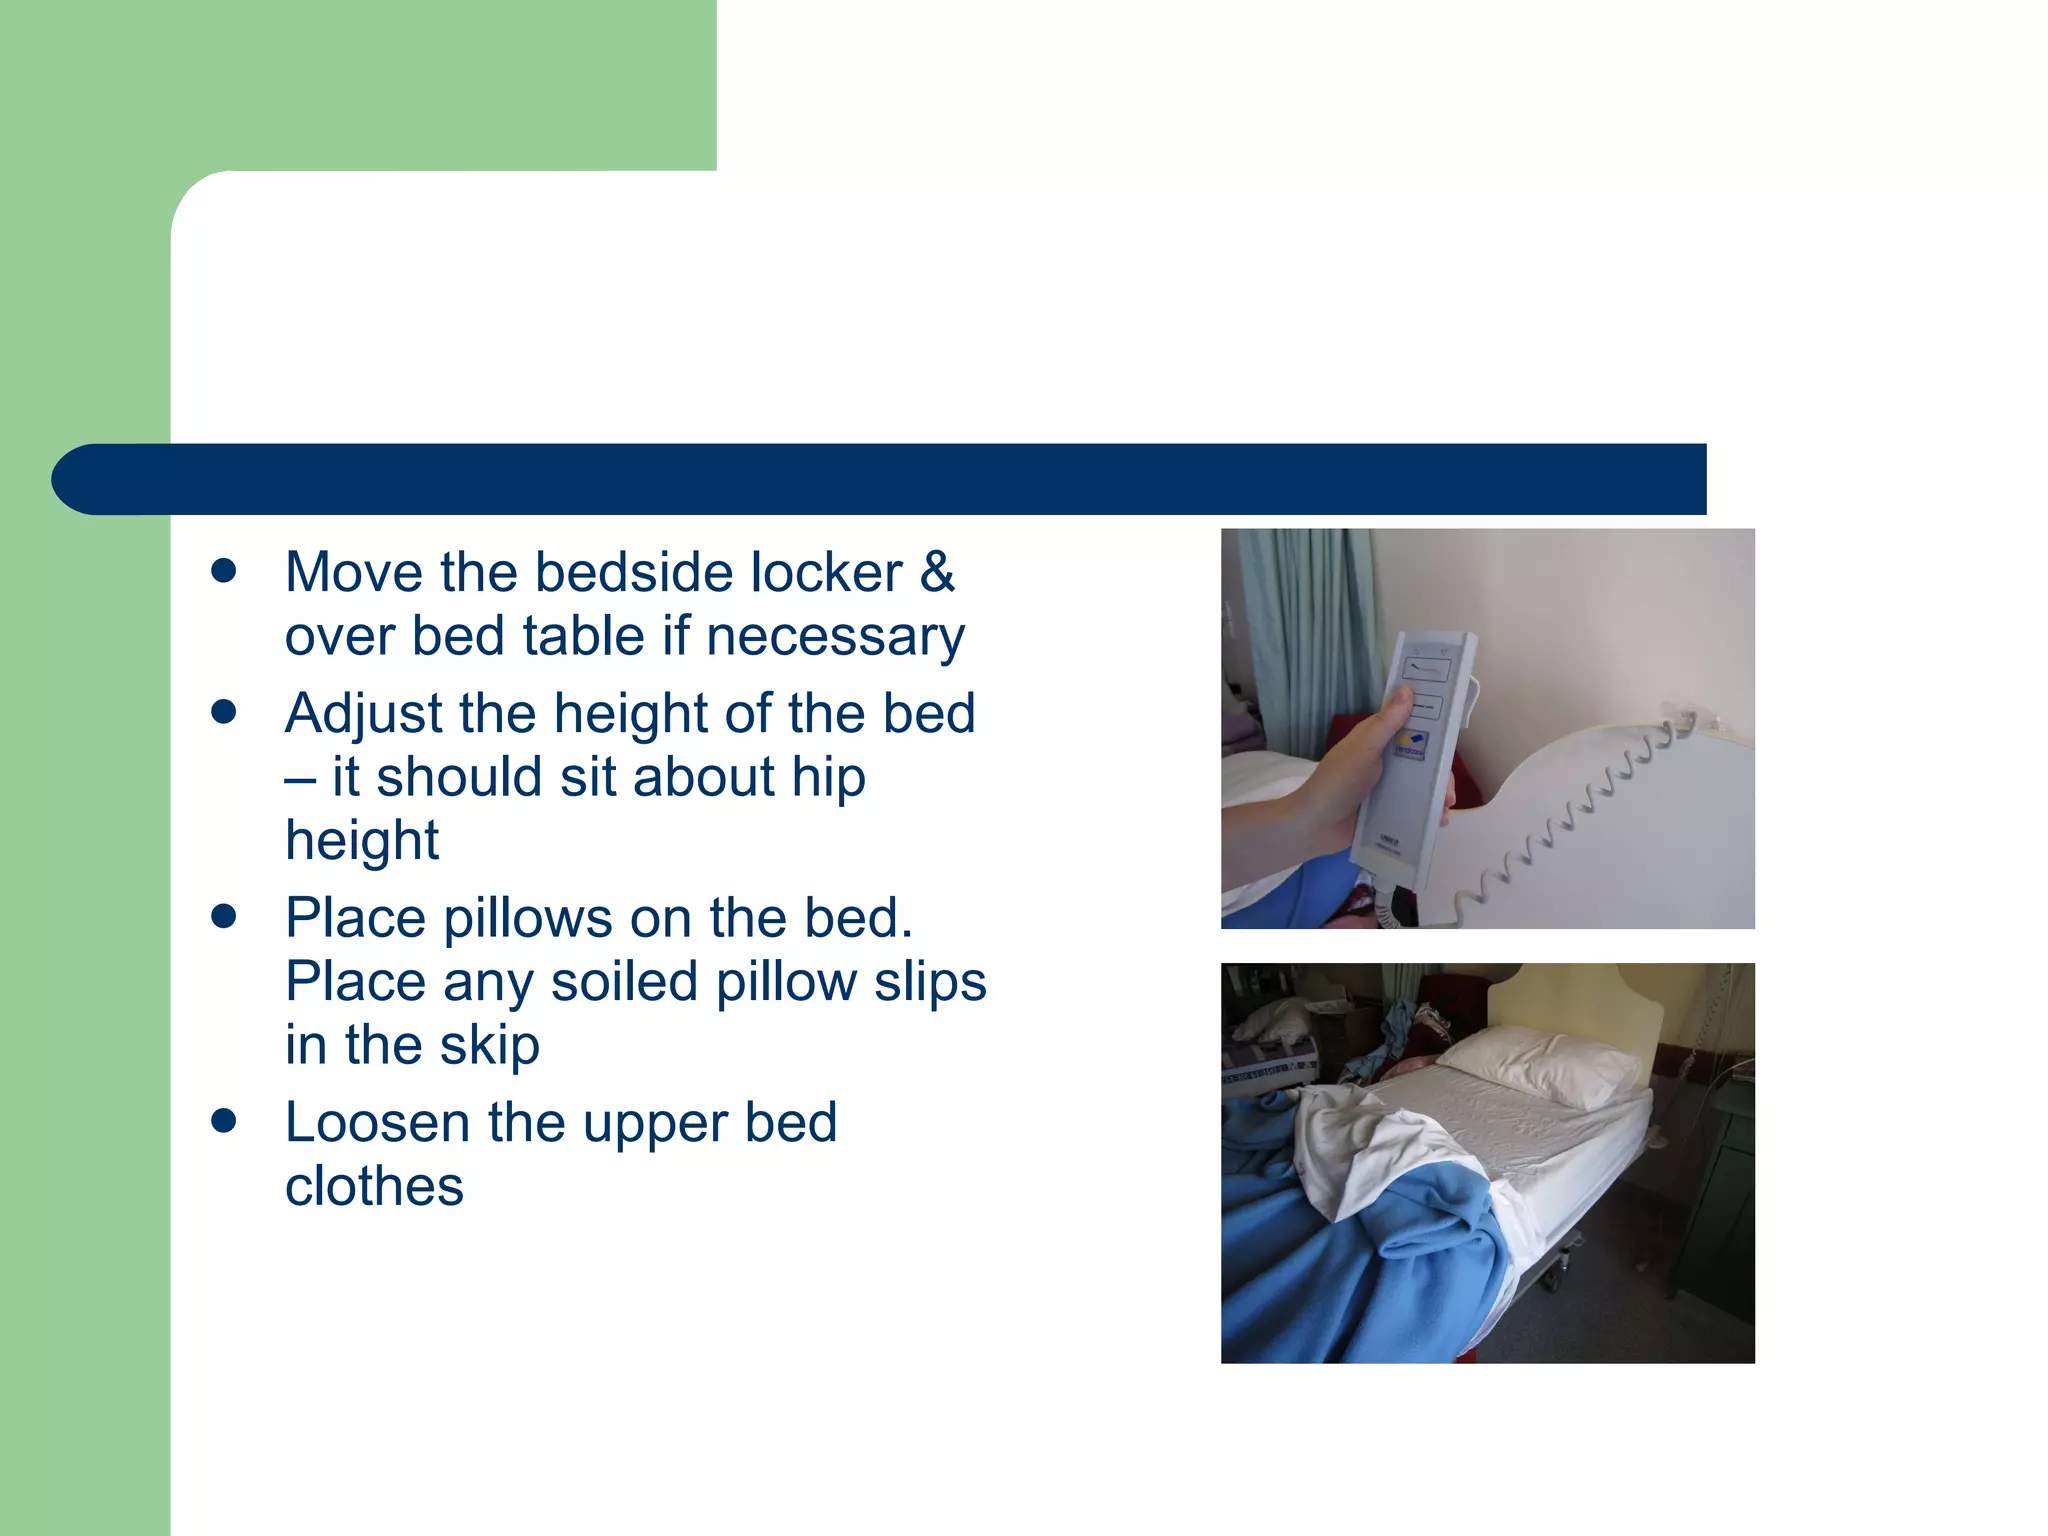
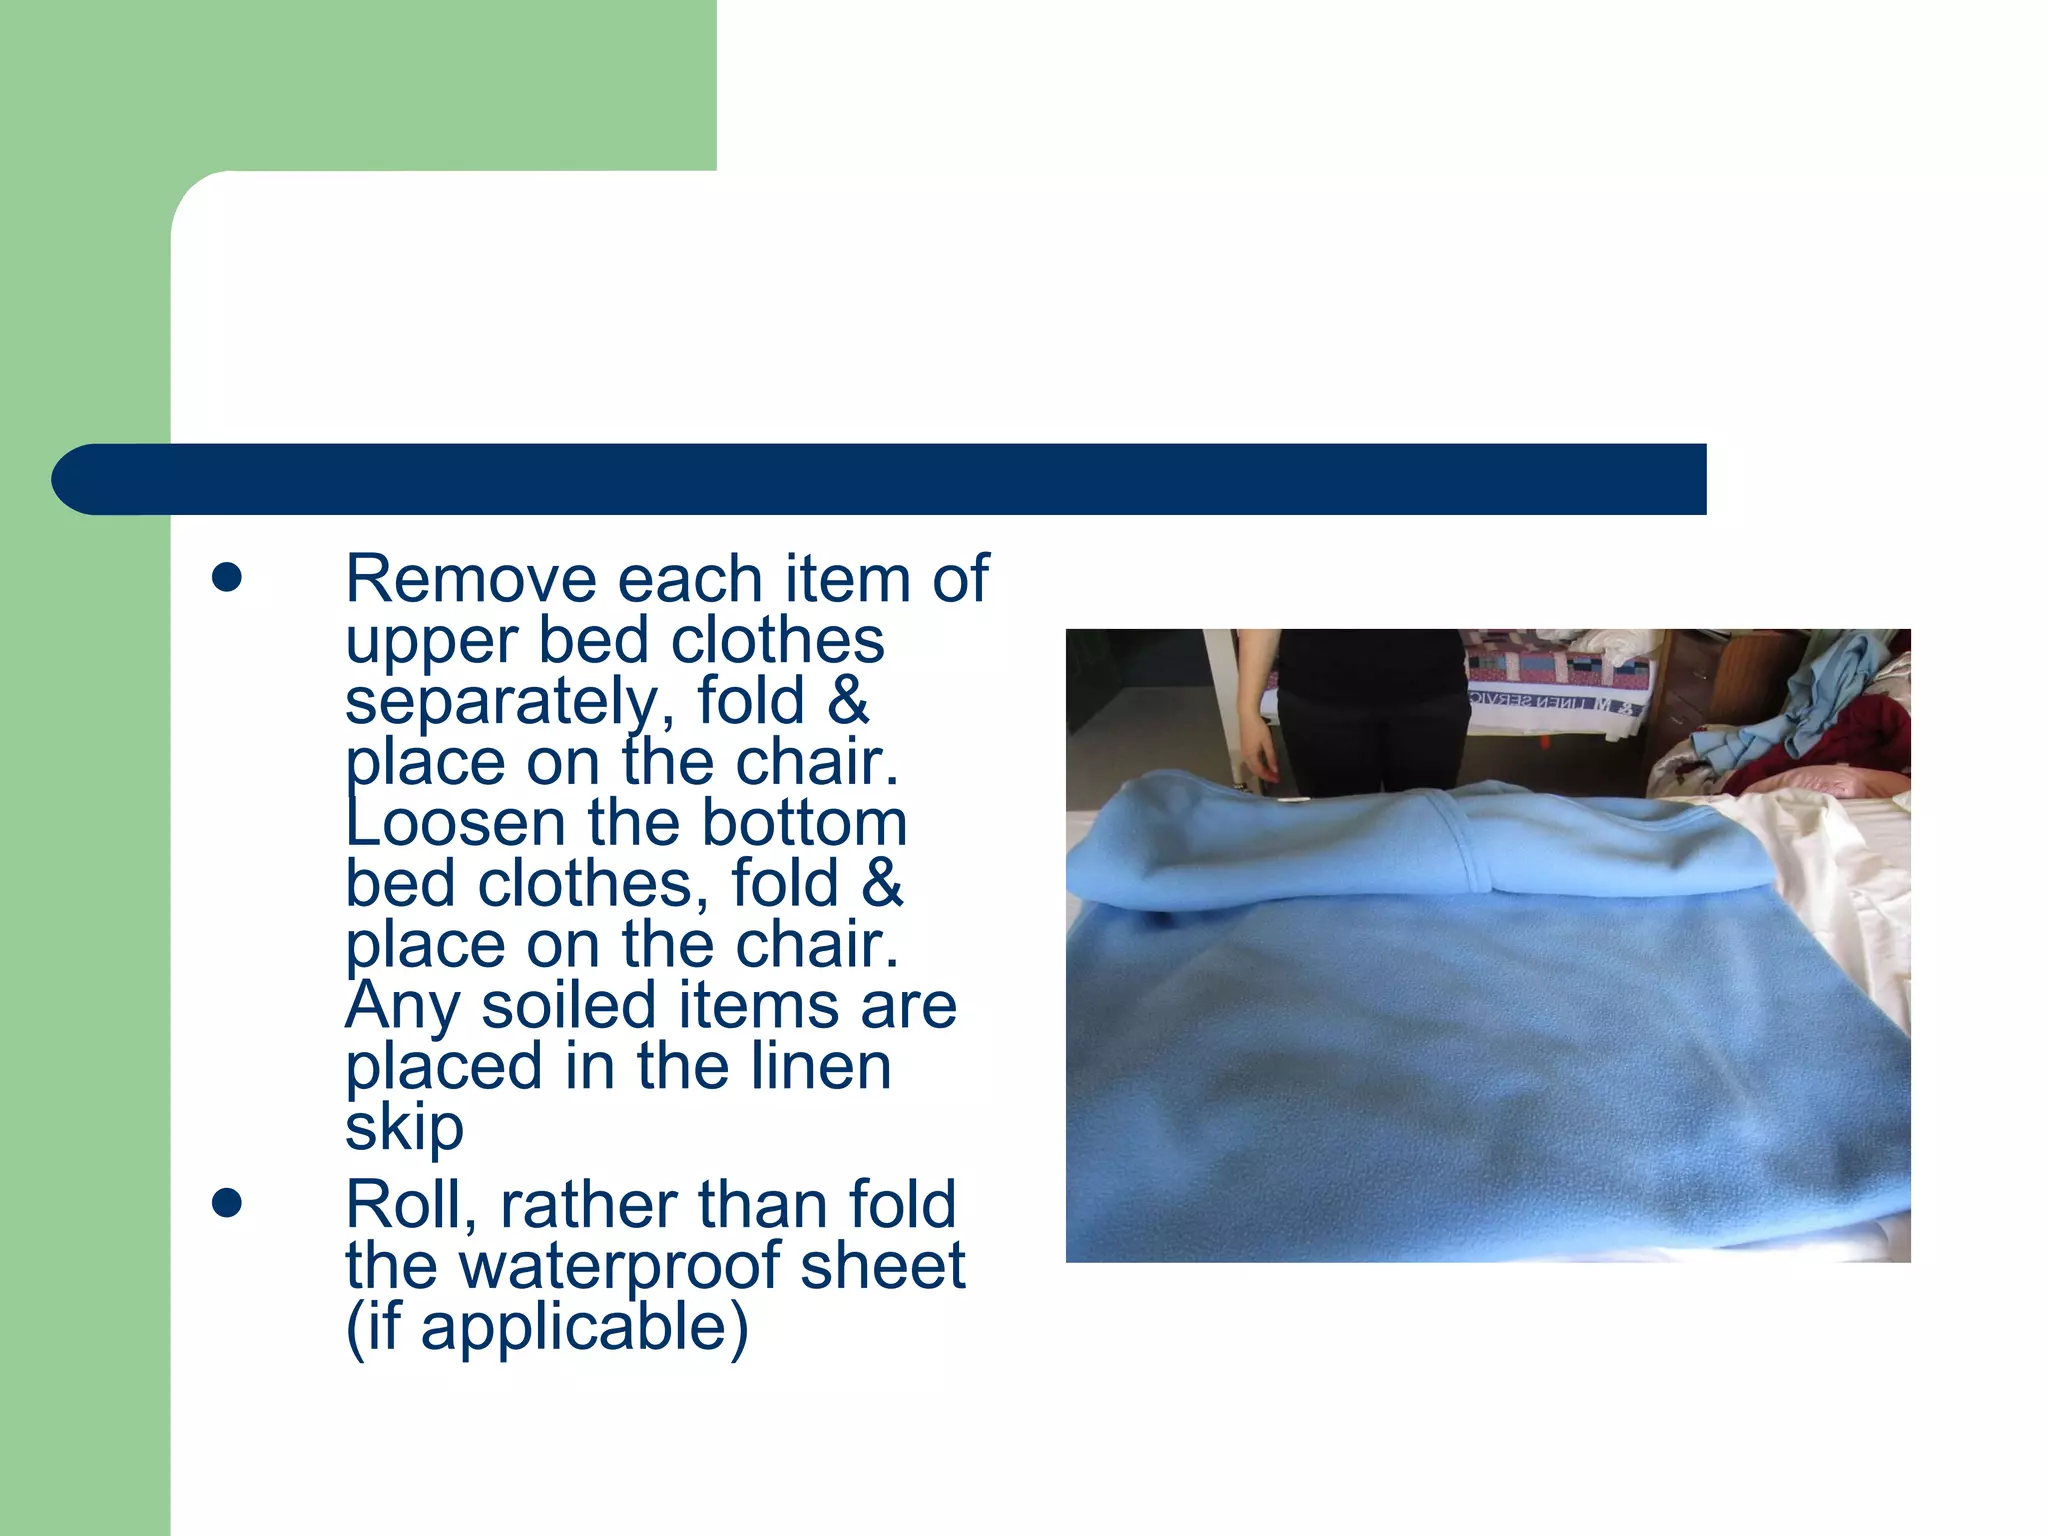
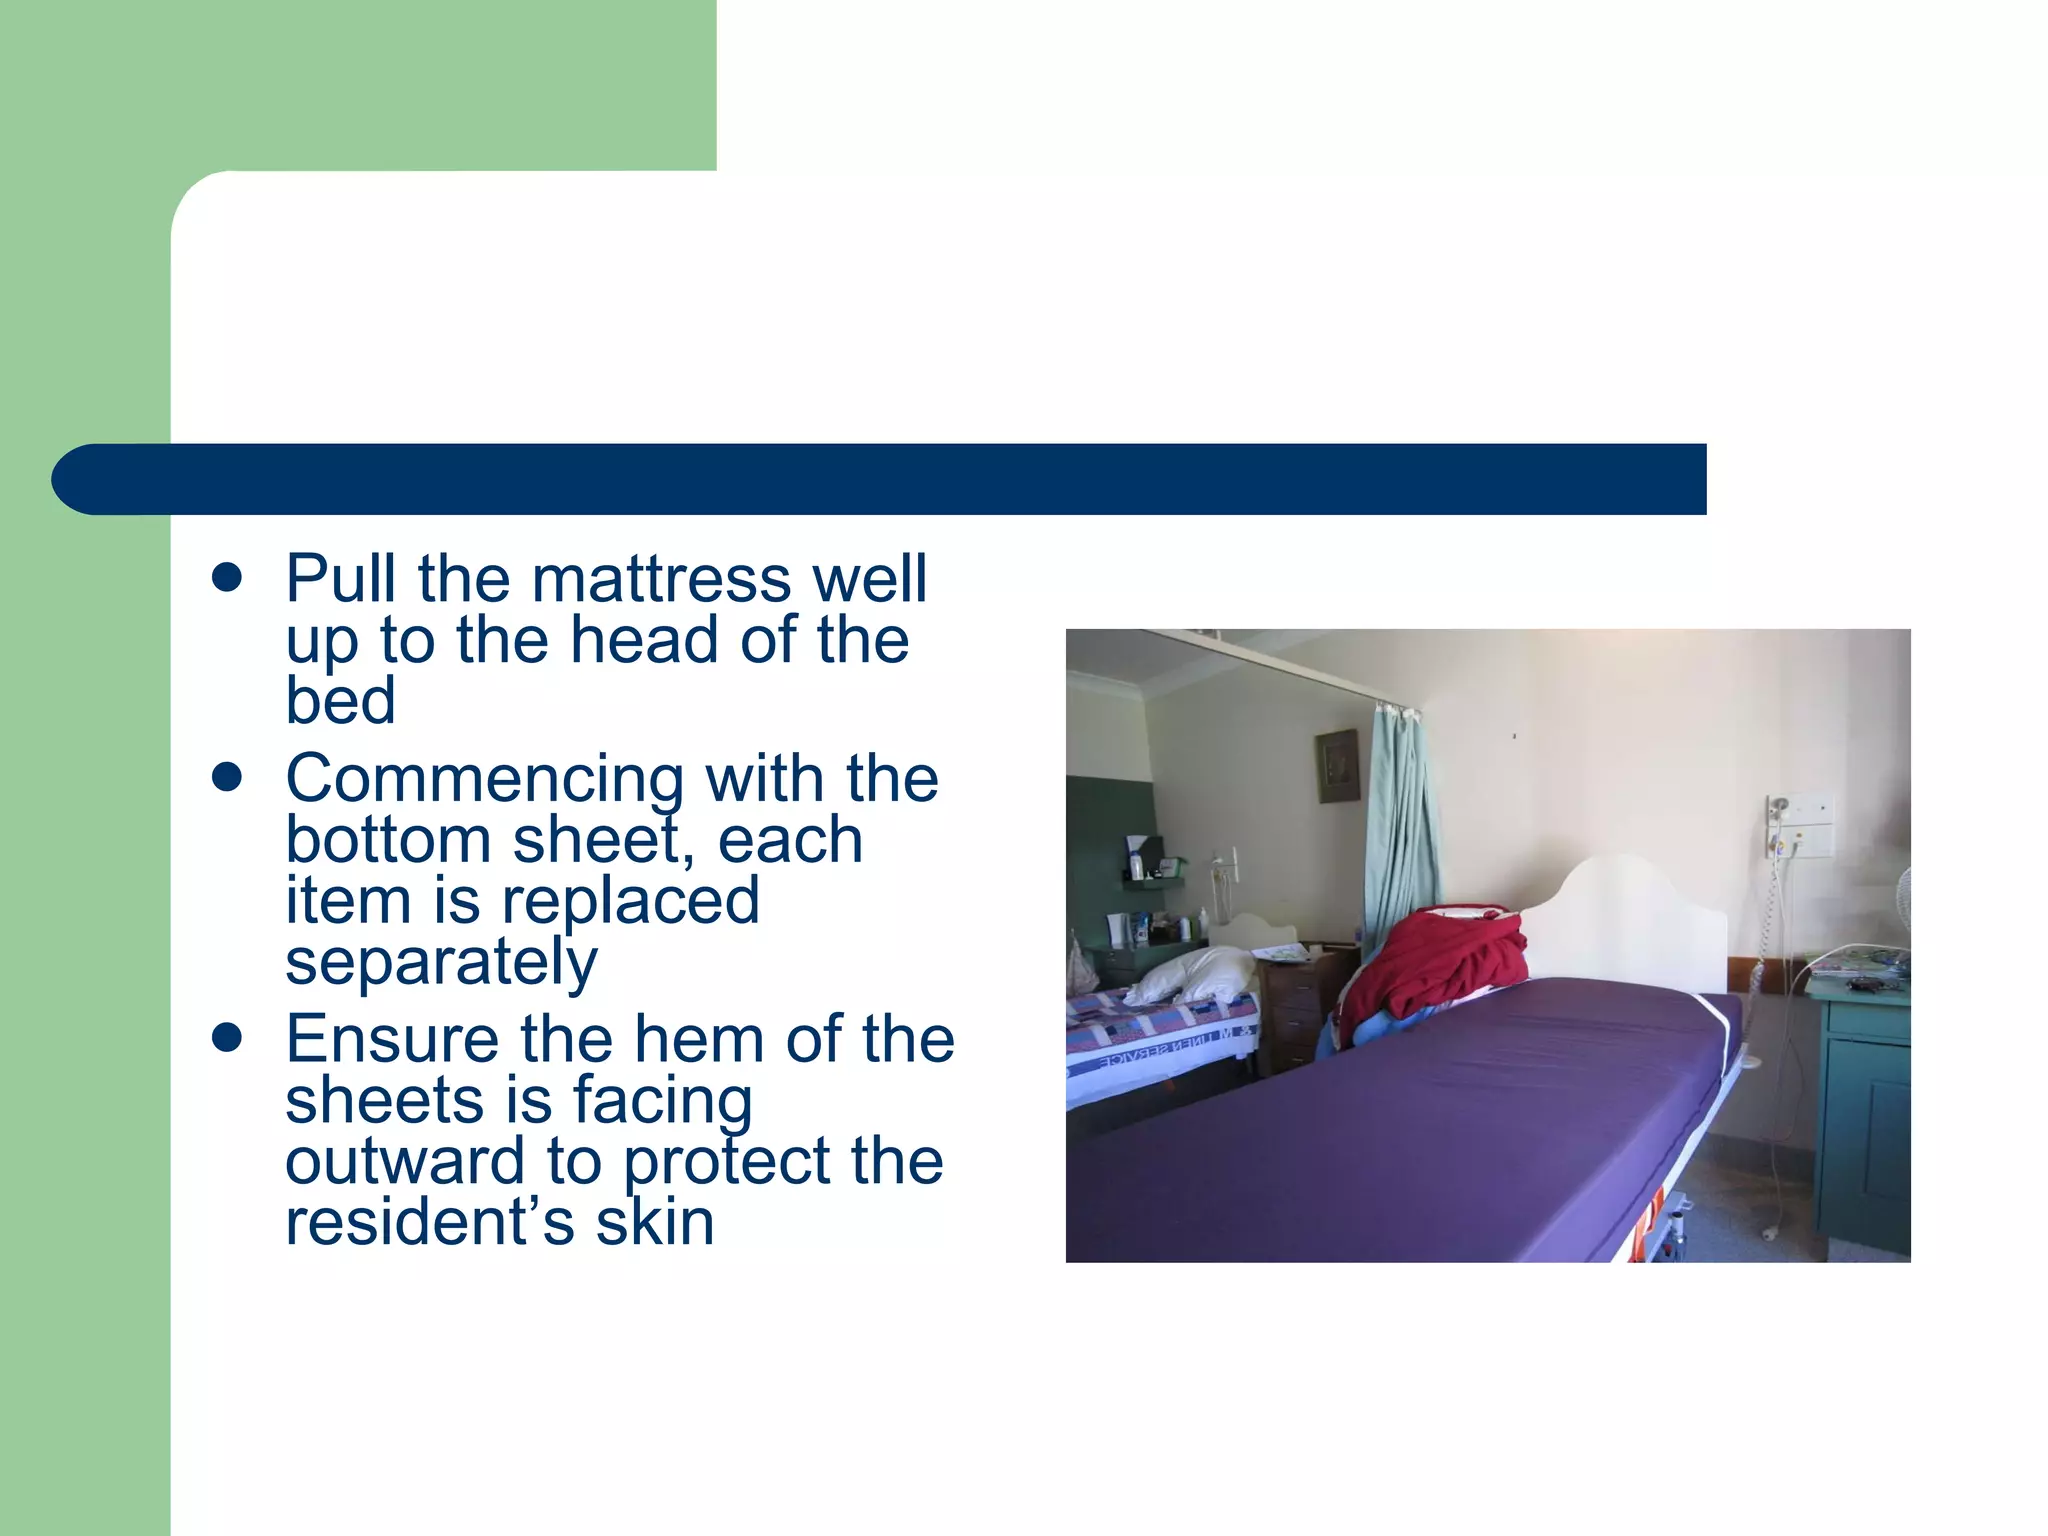
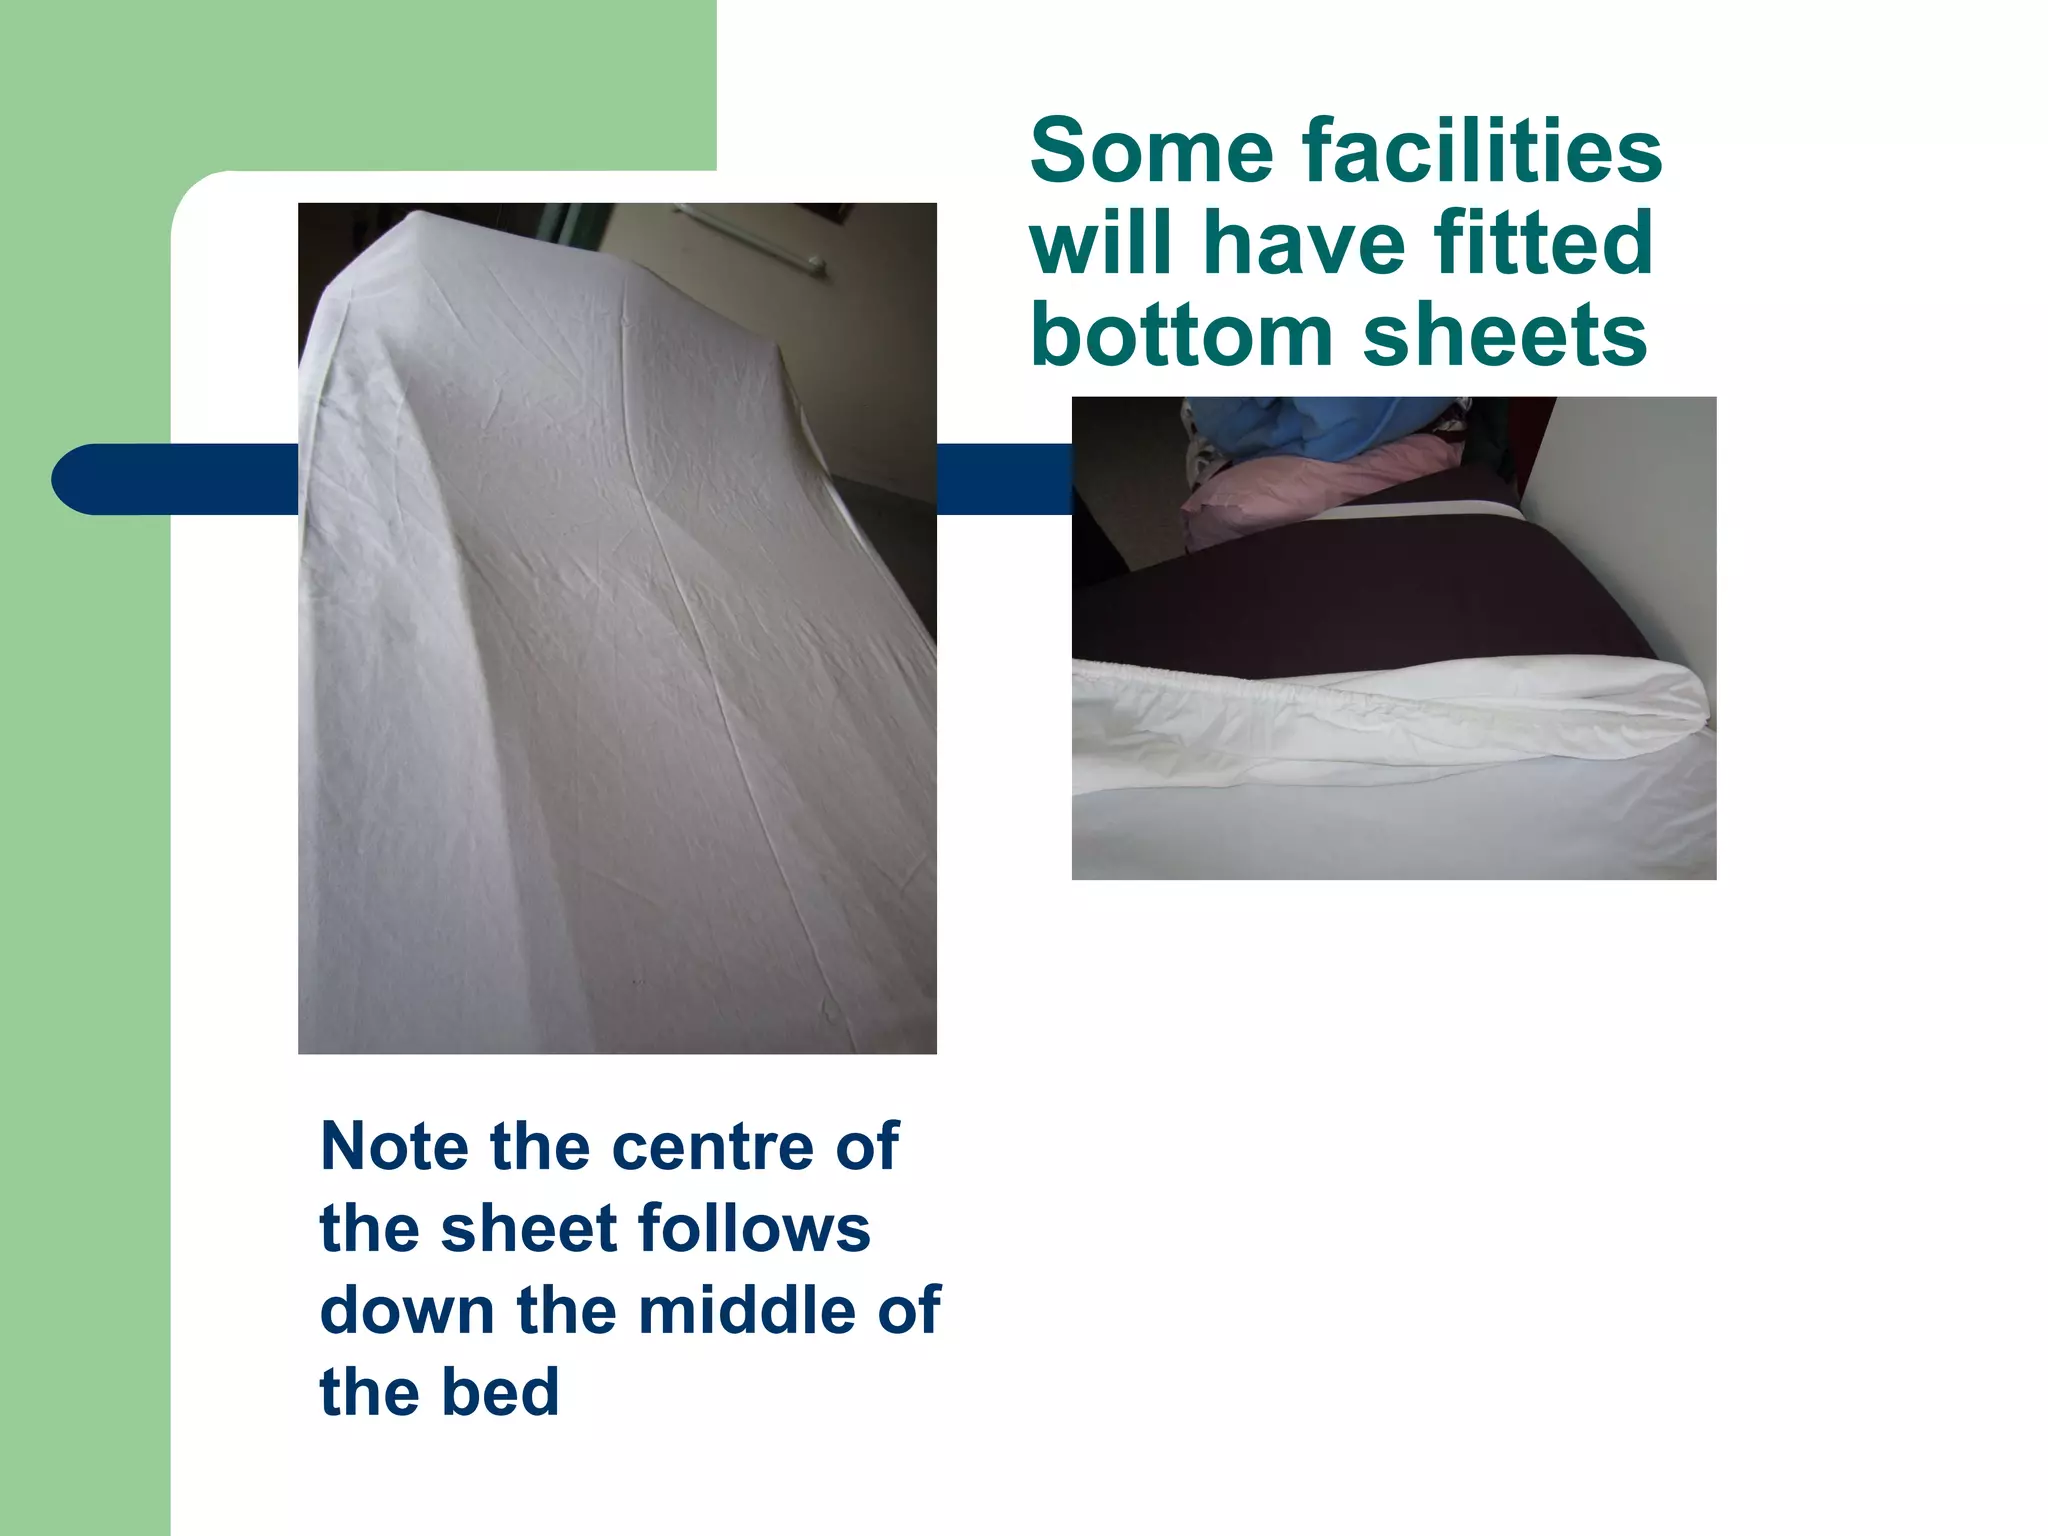
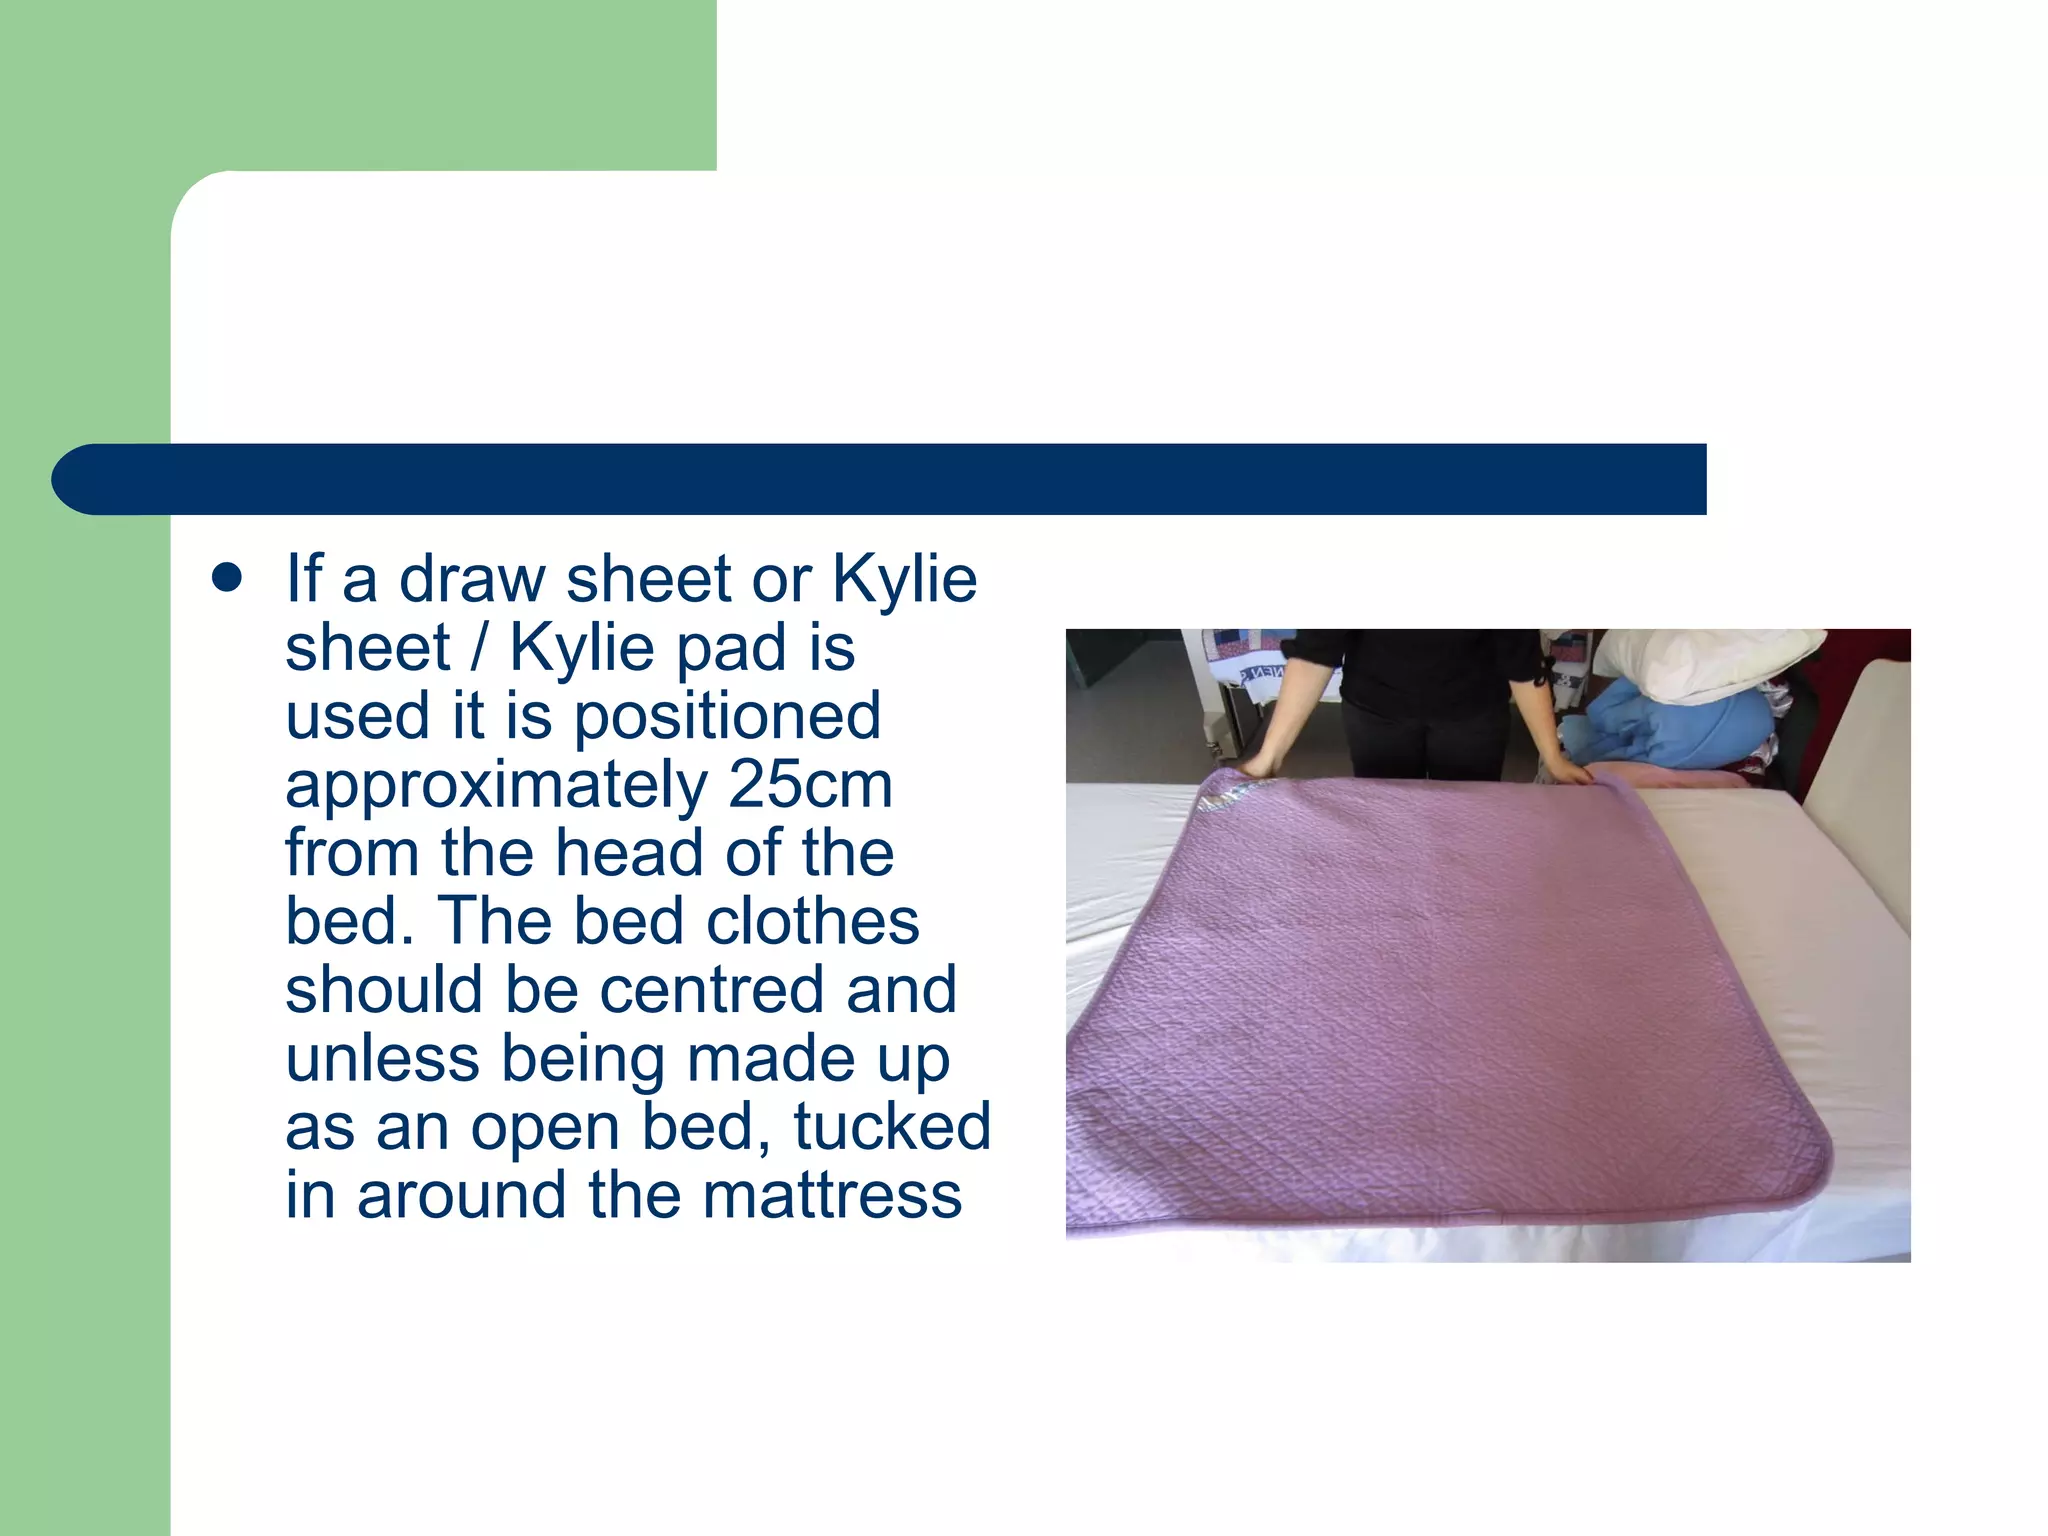
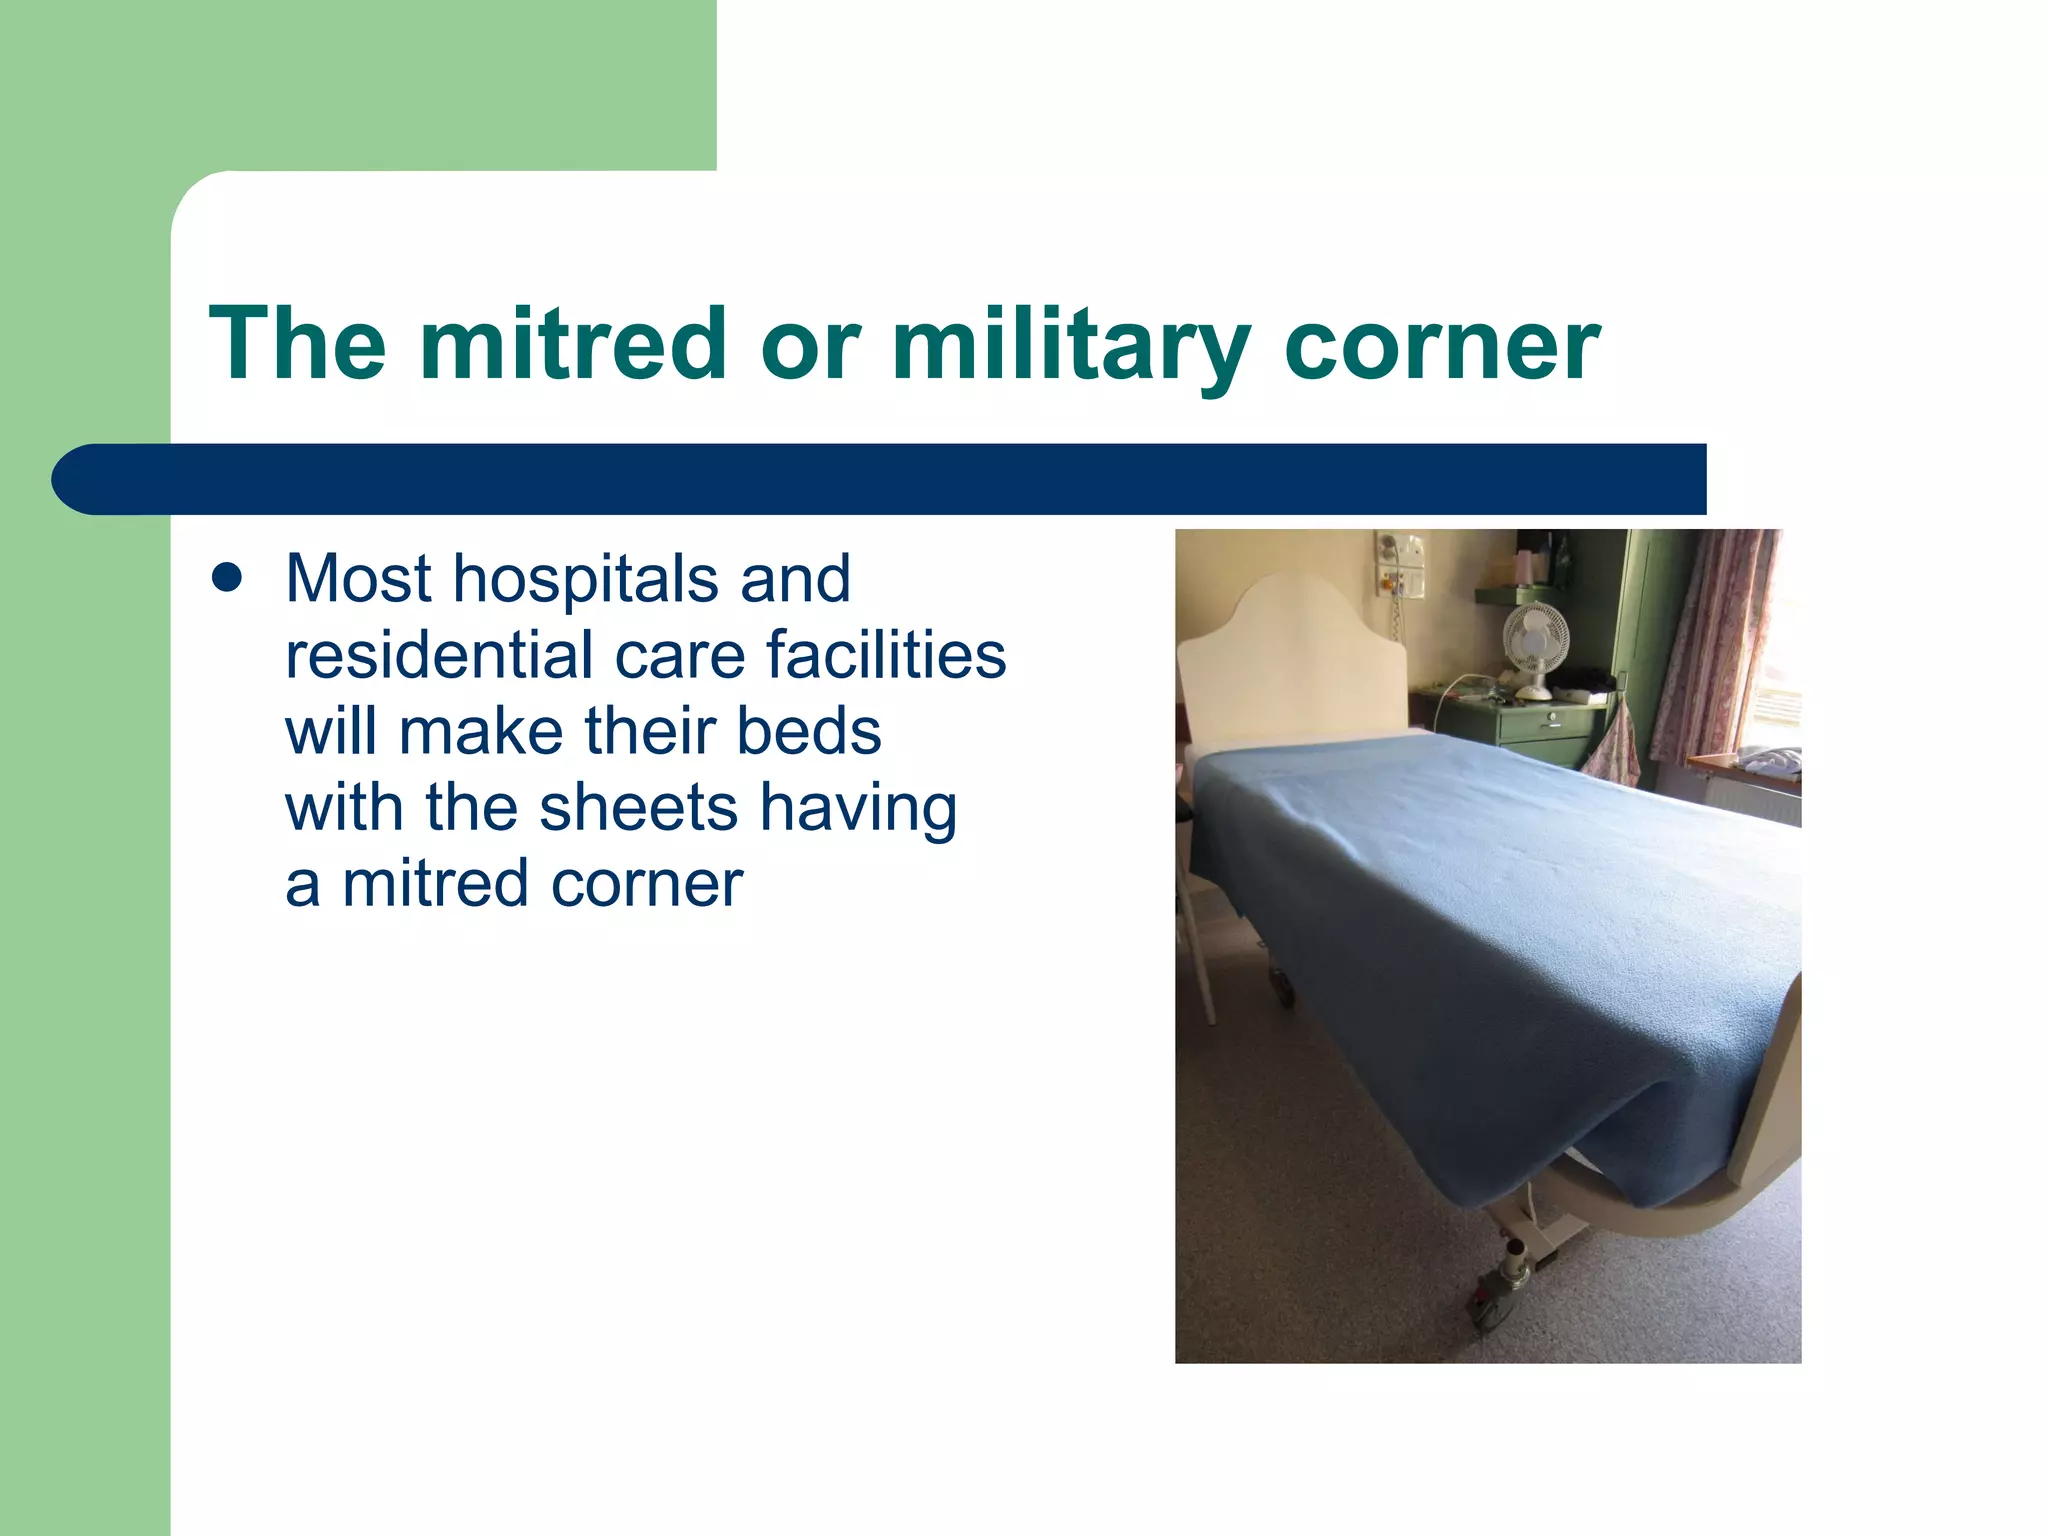
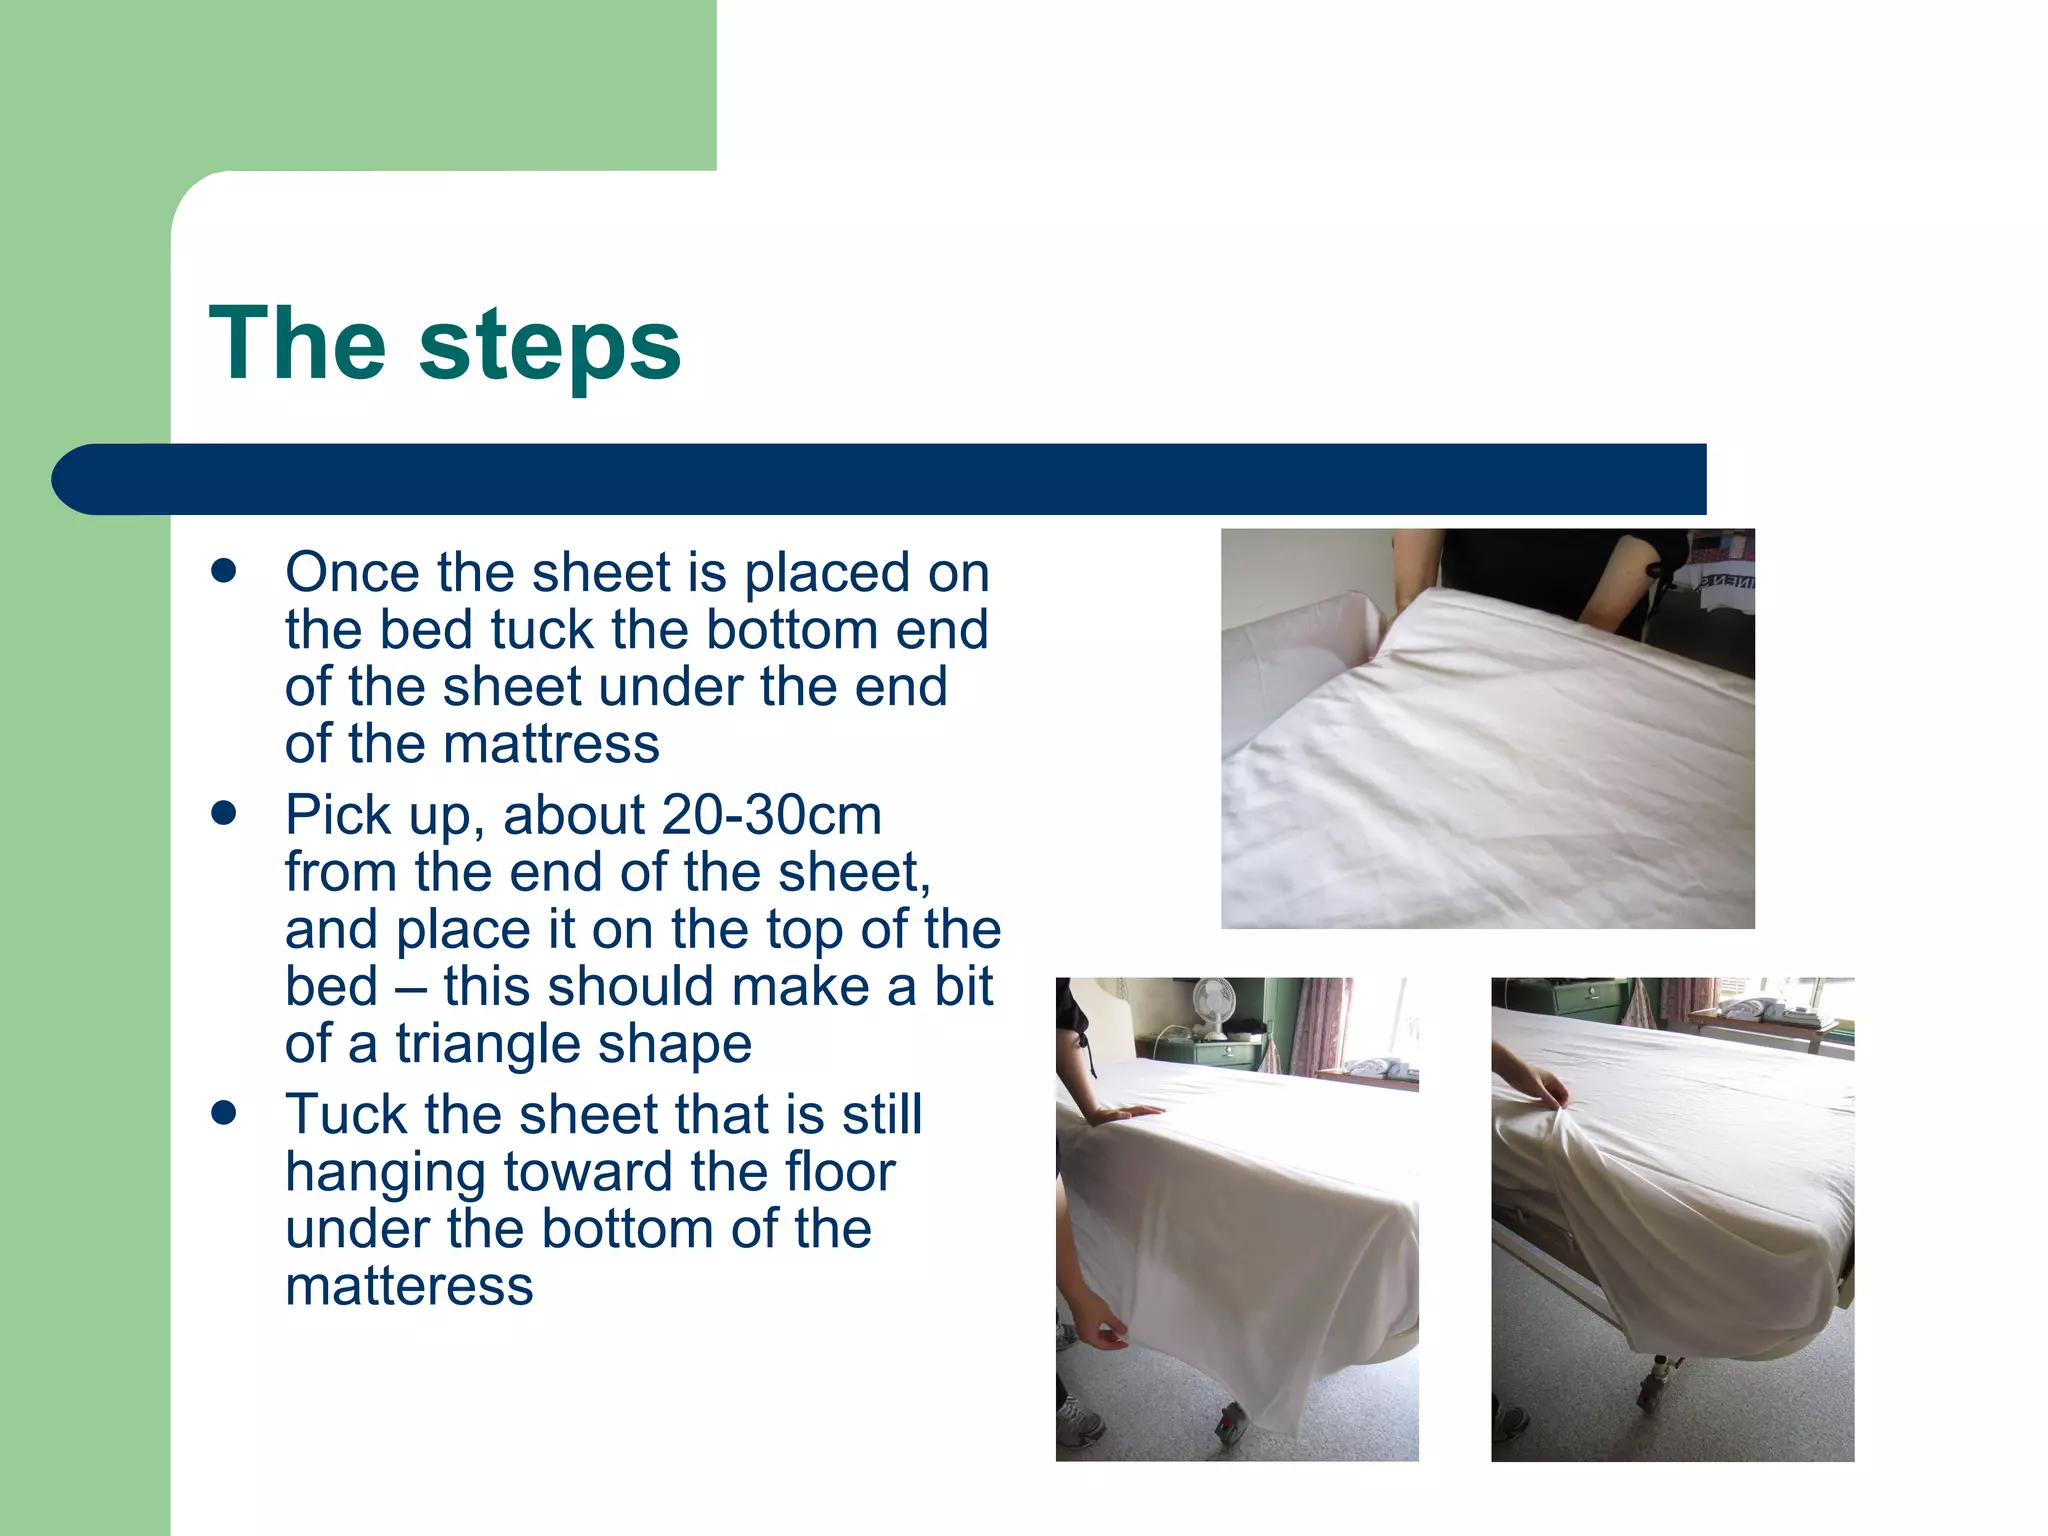
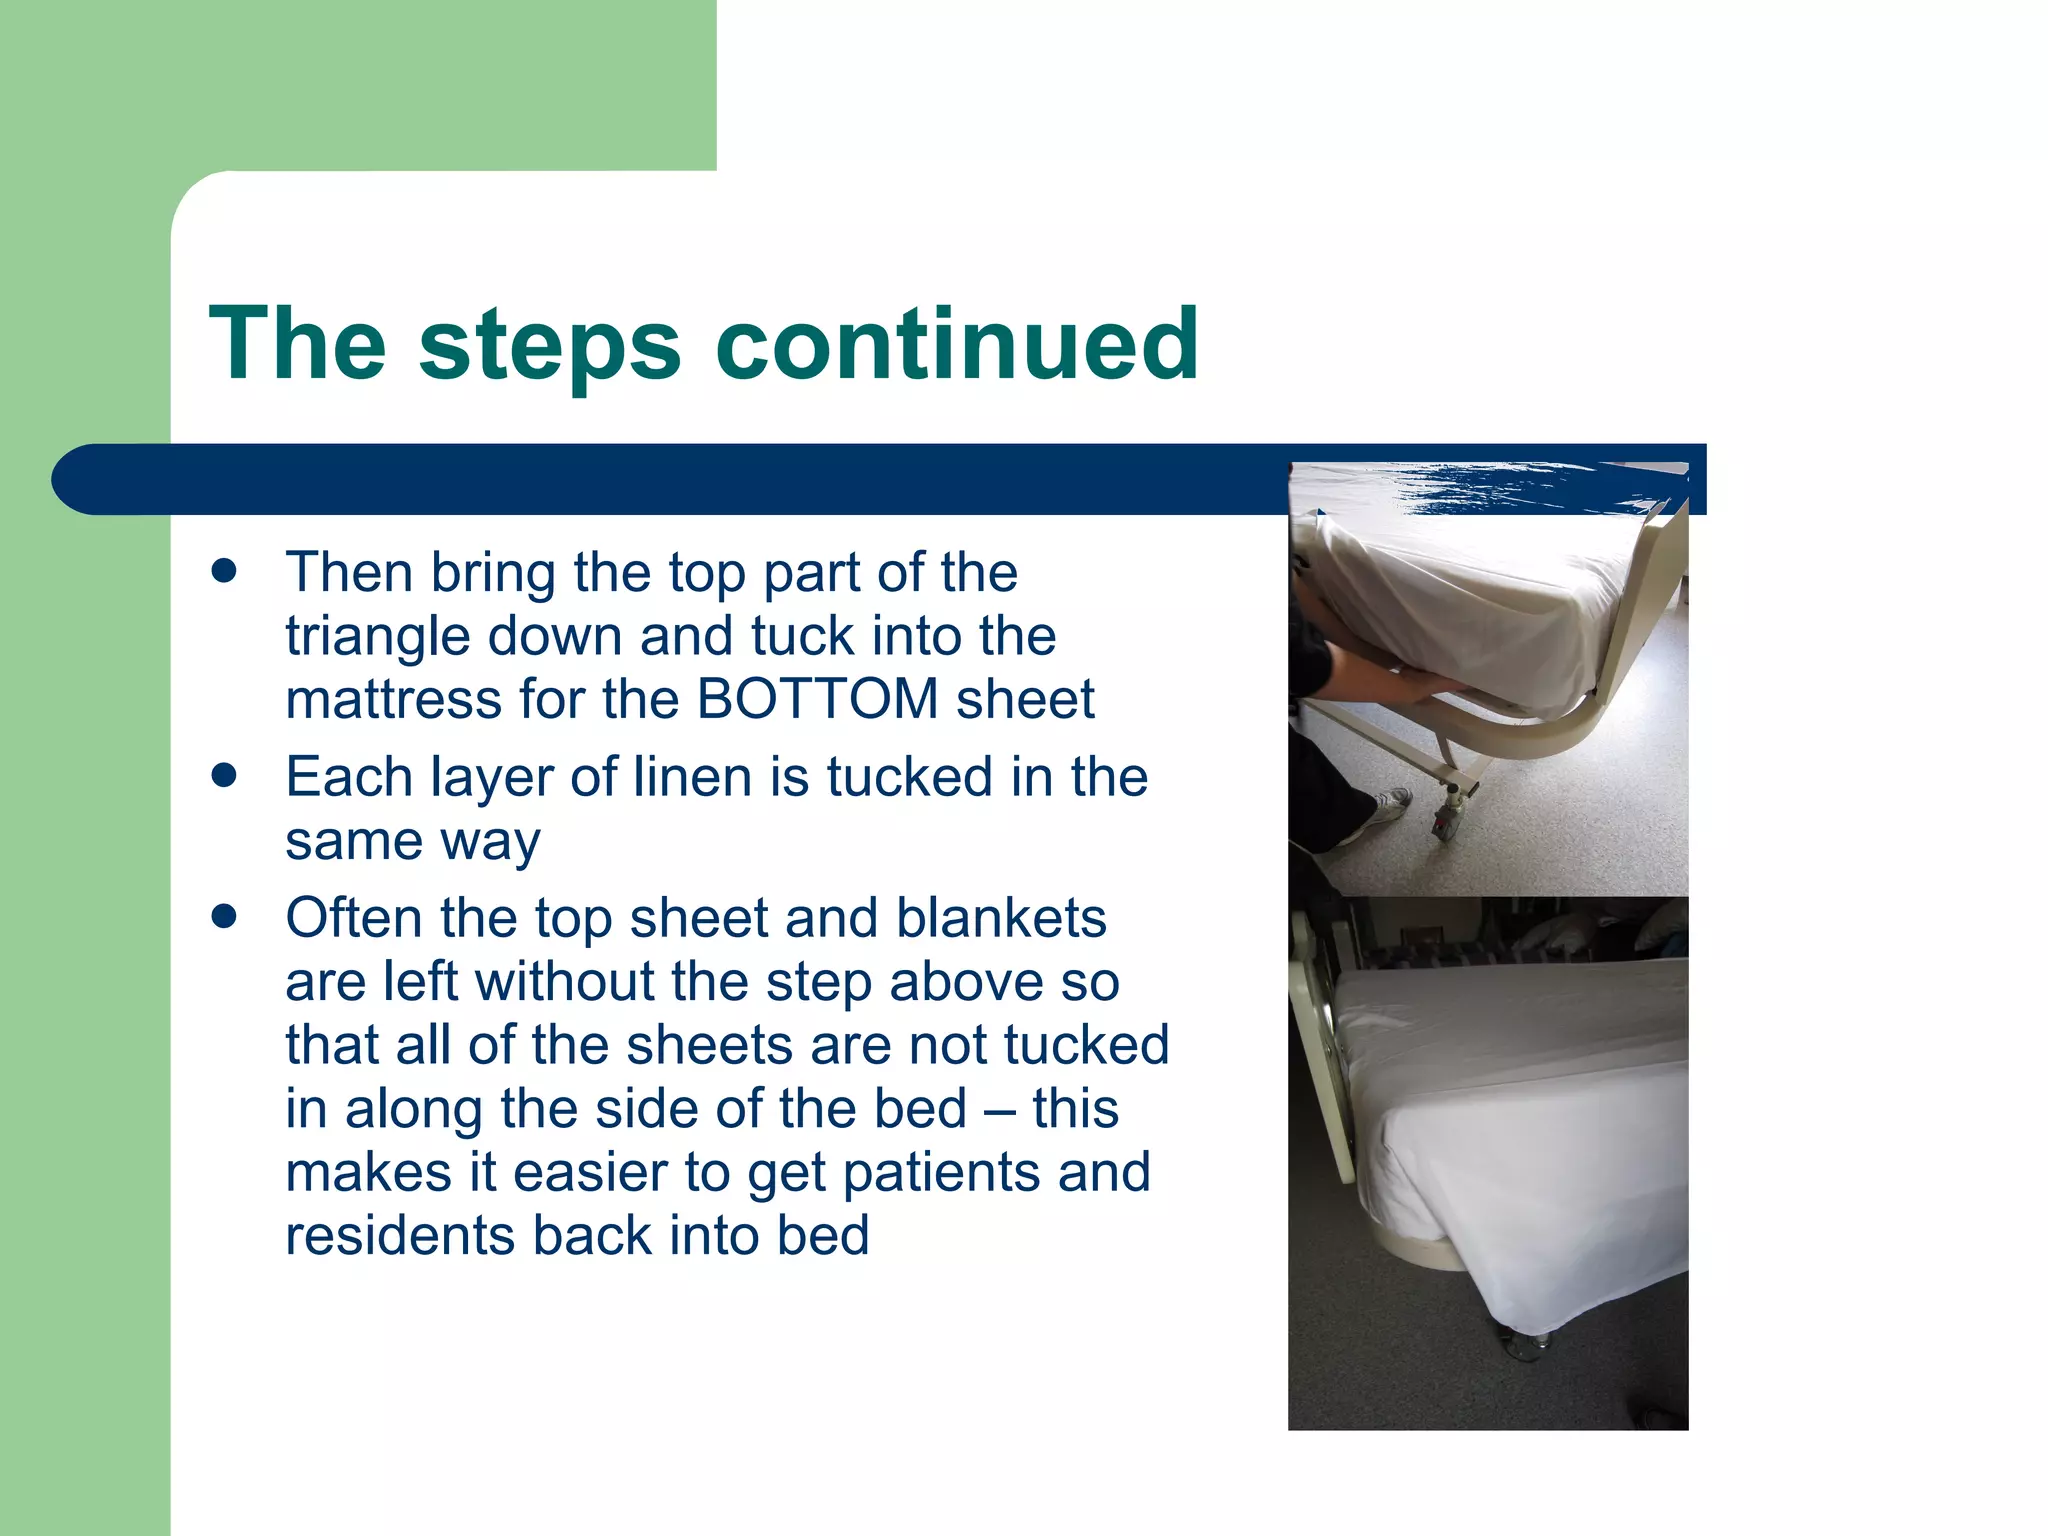
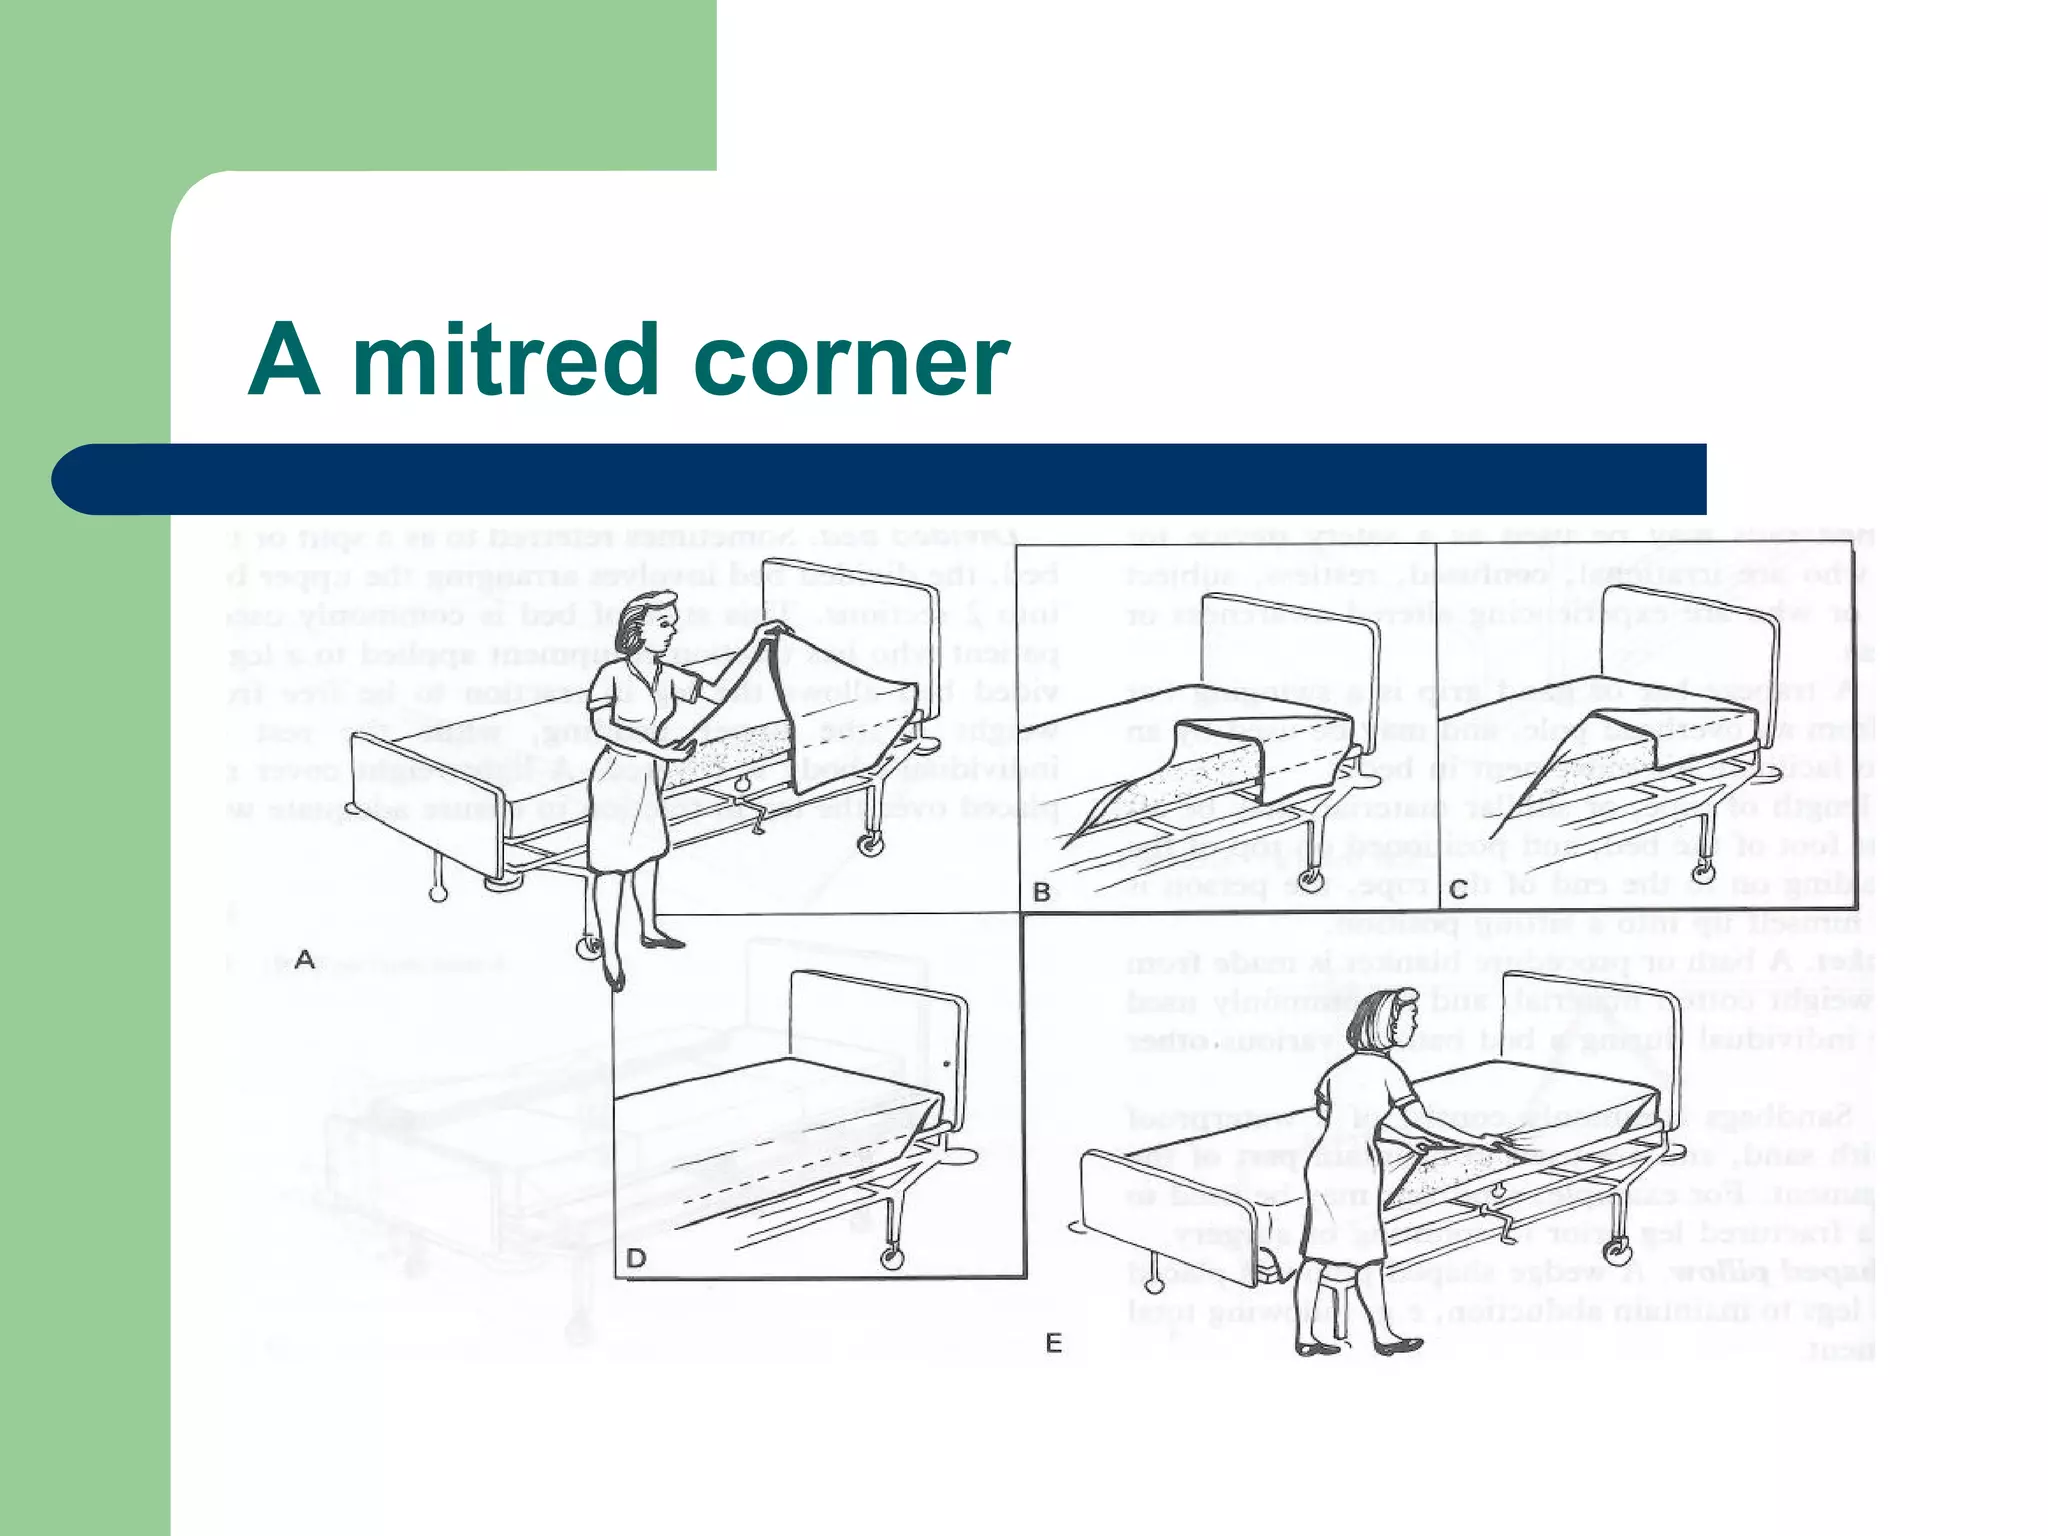
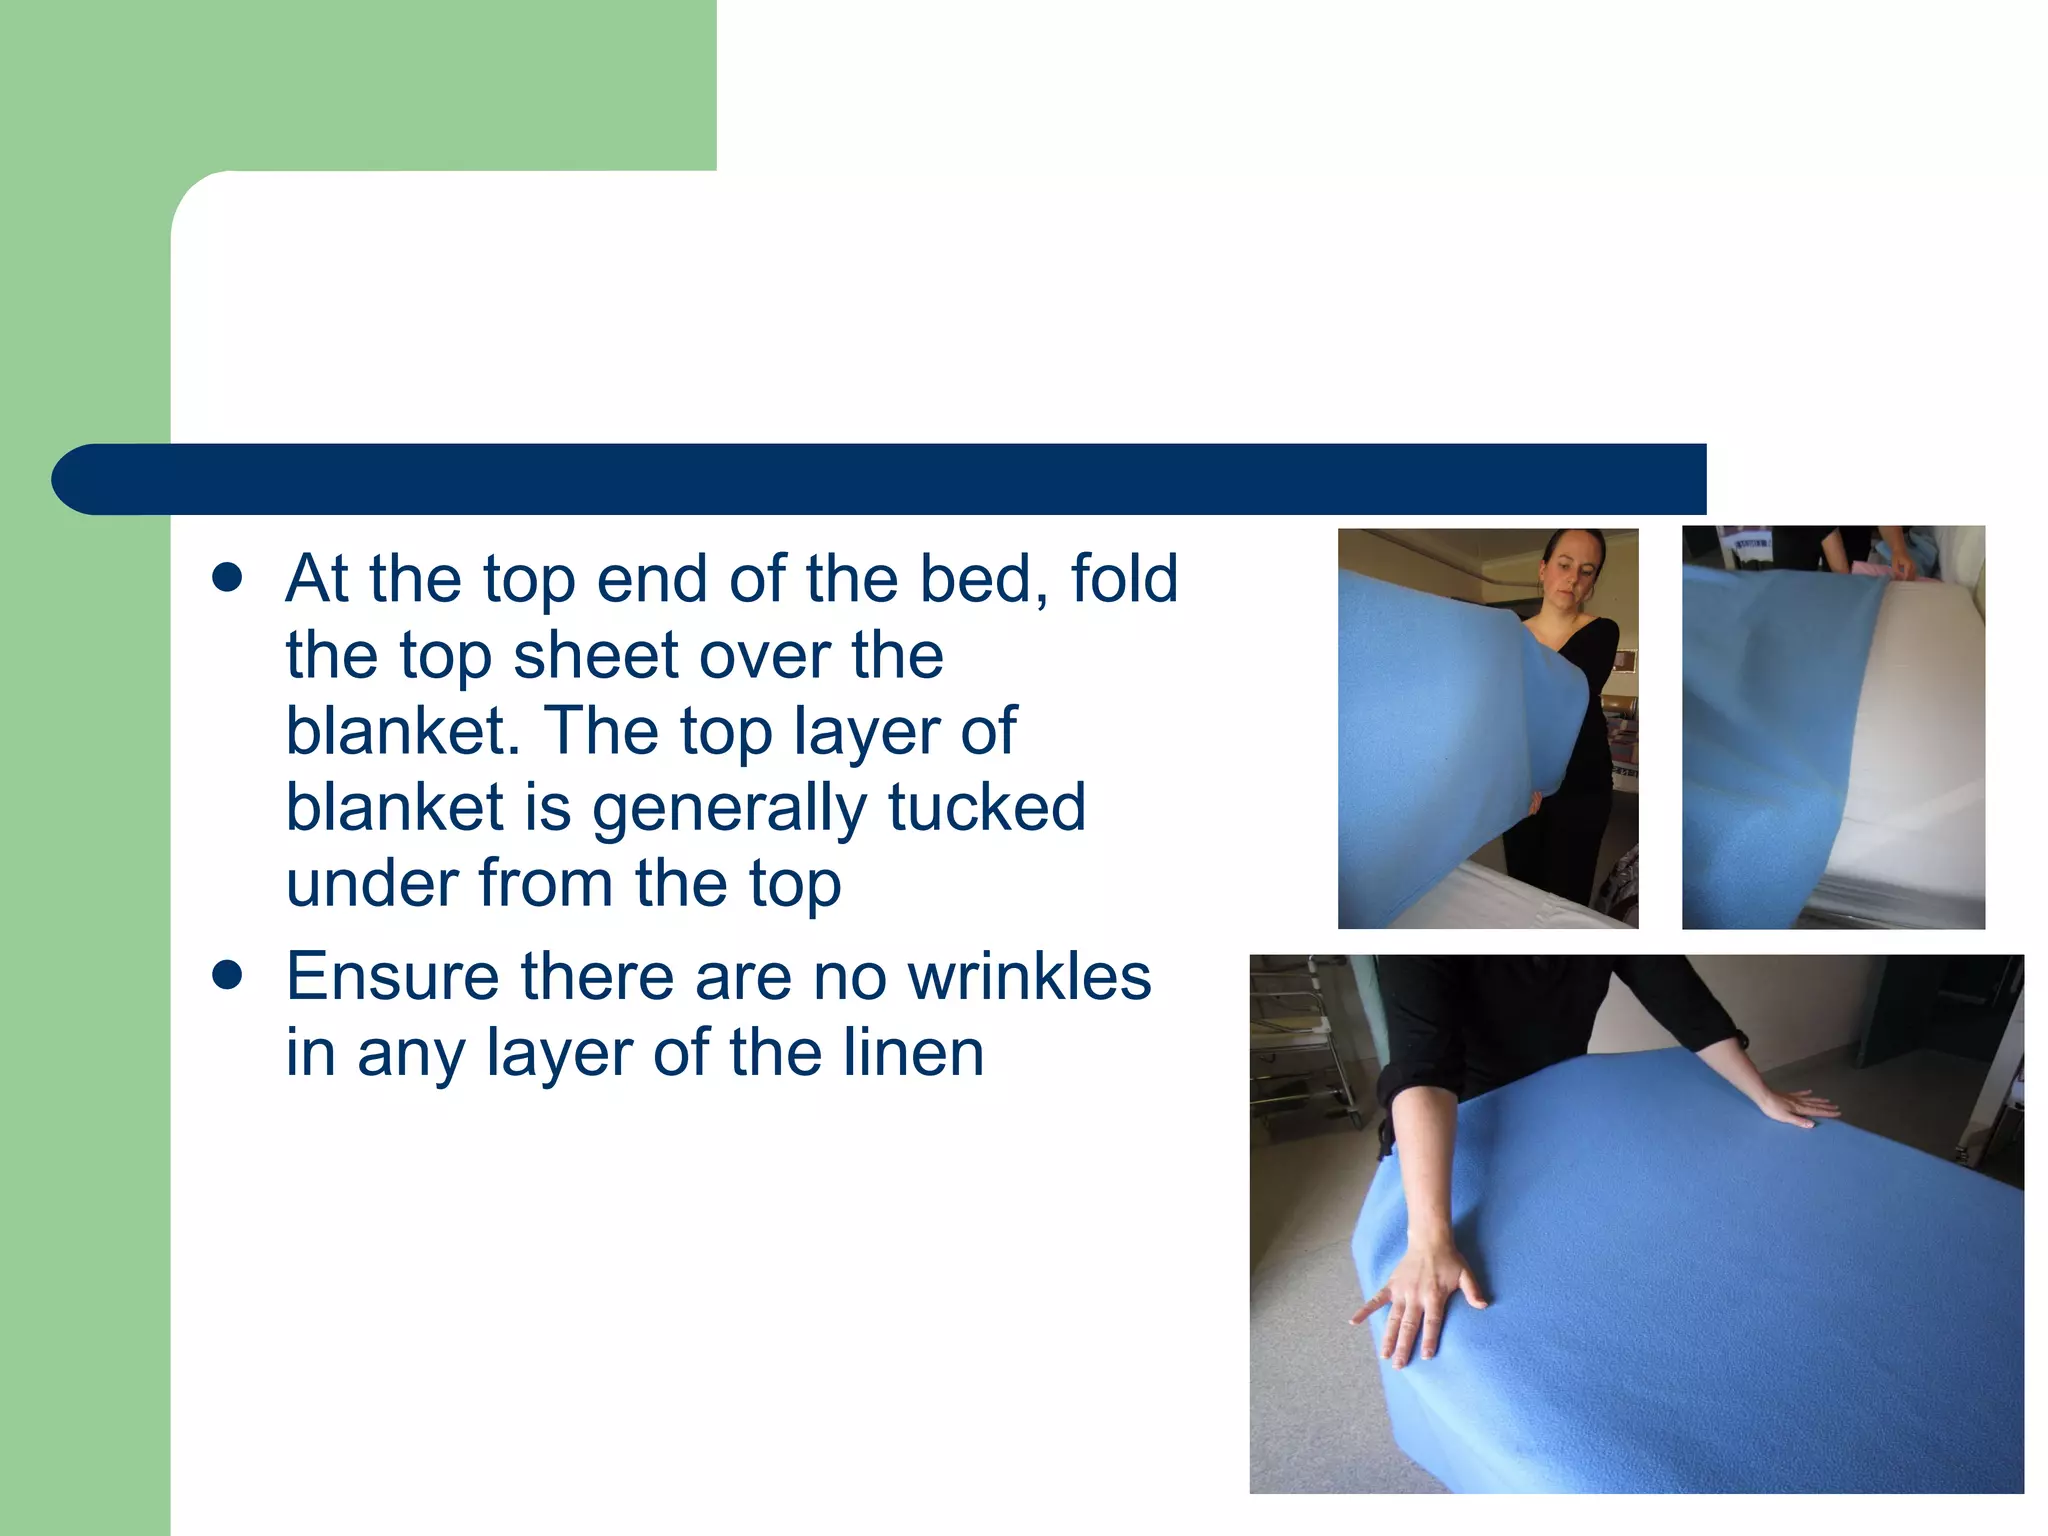
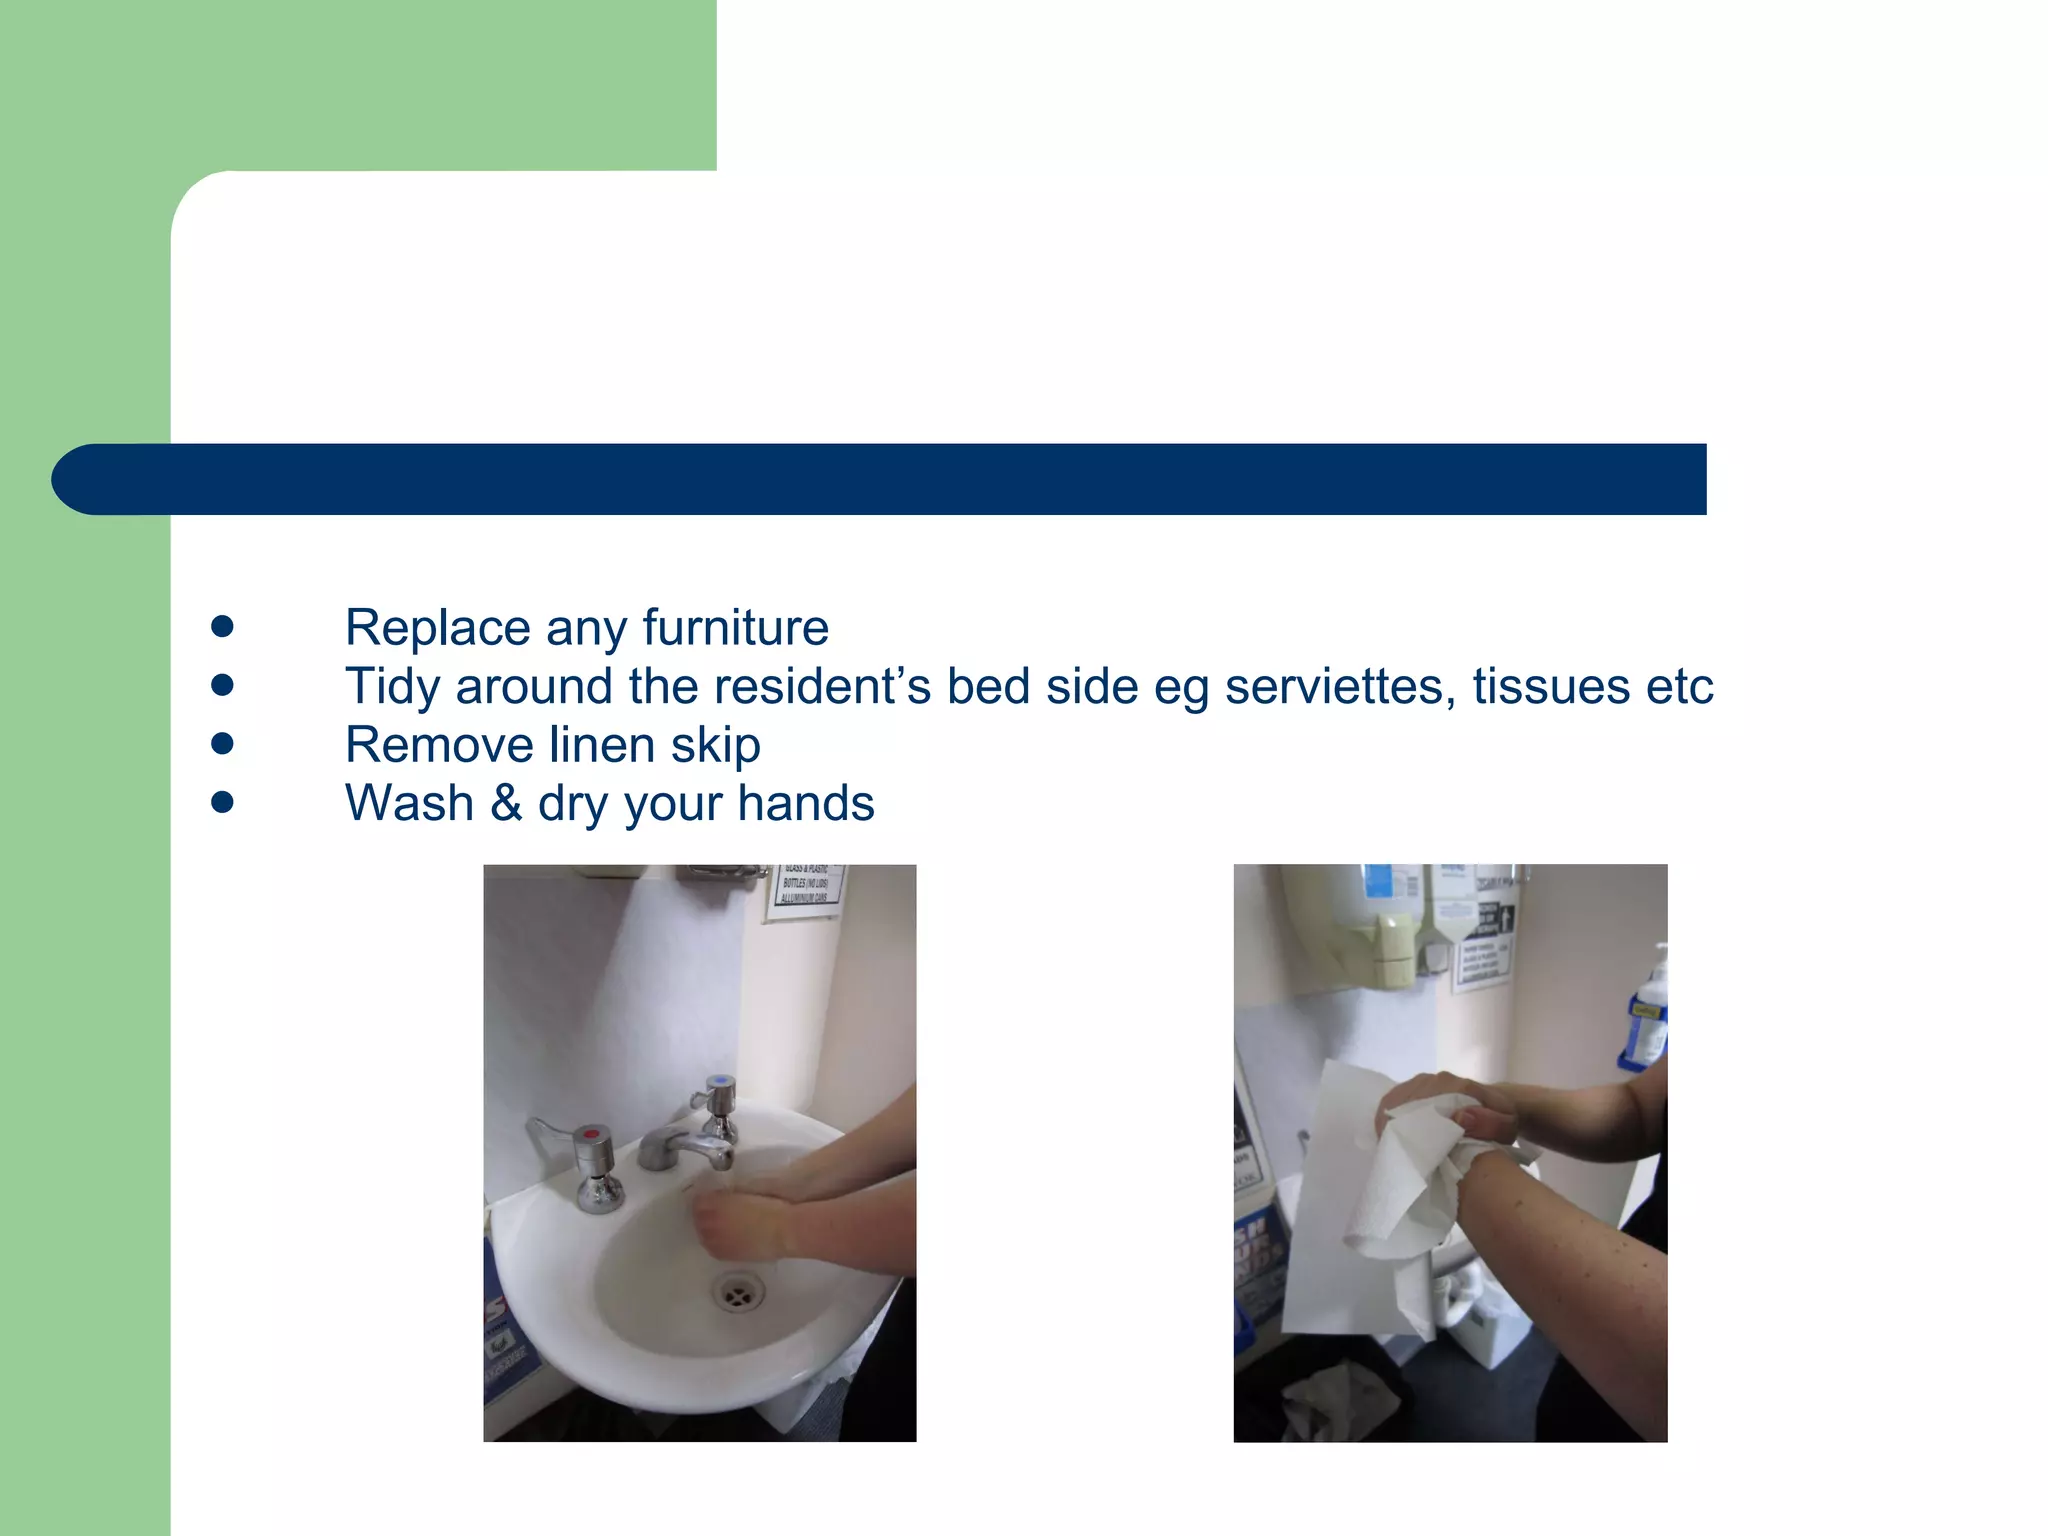
BED MAKING Provide Support to Meet Personal Care Needs CHCIC301A
Bed Making Ongoing provision of basic cleanliness, comfort and safety Clients may spend long periods of time  in bed, undertaking various activities – depending on individual health state, and on situational factors (ie if at home, or in a health care agency)
Principles Factors to consider with each bedmaking episode: Prevention of cross-infection Safety and comfort for the client Maintenance of good body mechanics
Prevention of cross-infection Wash hands or use alcohol hand rub before and after making each bed If linen is very soiled, wear gloves for removal  Dirty linen is put immediately into soiled linen bag (white or brown bag) or as per organisation – never onto floor !!
Don’t shake or flick linen excessively Linen shouldn’t touch floor, or be held up against carer’s clothing Linen should only be put onto a clean surface prior to bed making NO interchange of linen between clients
Client safety and comfort Ensure that bed brakes are on, and that bed is returned to its original position (usually to a height the resident can easily access), after bed making is complete Promote comfort, by having sheets free of rough areas, wrinkles or creases, food crumbs and foreign bodies
Avoid areas of potential pressure, ie hems of sheets away from direct contact with client’s skin If waterproofing layer is used, must  not come into contact with client’s skin Need to particularly consider safety and comfort, if client occupies bed whilst it is being made
Body mechanics of the carer Maintain good body alignment when bed making – avoid bending, stretching and twisting Use large leg muscles (bend knees), rather than back muscles Work smoothly and rhythmically – 2 people to make beds together is optimal
If able, raise bed to a comfortable working height (usually waist high) – to avoid bending and back strain Prepare well – gather all equipment initially, and avoid legwork
Bed features Many types of beds available, with multiple modifications possible In health agencies, most are “hi-lo”, allowing adjustment of the bed base up and down Most also allow position changes, ie head/feet up/down
 
Different types of operation – some have hand-winding action, others with hydraulic foot pump mechanism and release button, some are electric Bed brakes Bed heads and feet are detachable, for emergency access situations, or for transfer of clients on their beds
Bed “attachments” Trapeze/overhead “monkeybar” Bedstick Drainage tube bag hangers Client call bell Bed siderails – may constitute restraint!
Bed aids Most bed aids relate to the comfort and correct positioning of a client If bed aids used, need to be appropriately selected and used Pillows – with waterproof cover
Bed aids - Mattress Many different types Air alternating Egg carton
Bed cradle Sheepskin – for under buttocks, or elbow/heel protectors Wedges/wedge shaped pillows Footboards/foot bolsters Absorbent layers
Sheepskins Medical sheepskins – green in color 30mm pile (springy), especially tanned High density-creates a cushion that distributes body weight & pressure points over a large area-each fibre acts as a spring
Sheepskins Cont. Wool can absorb moisture up to 33% of its weight without feeling wet Reduces friction & shear Medical sheepskins are stamped
The steps to making an unoccupied bed Wash & dry hands  Place clean linen & soiled linen skip near the bed Ensure that there is a chair on which to place the bed clothes Ideally there would be two people to make the bed
Move the bedside locker & over bed table if necessary Adjust the height of the bed – it should sit about hip height Place pillows on the bed. Place any soiled pillow slips in the skip Loosen the upper bed clothes
Remove each item of upper bed clothes separately, fold & place on the chair. Loosen the bottom bed clothes, fold & place on the chair. Any soiled items are placed in the linen skip Roll, rather than fold the waterproof sheet (if applicable)
Pull the mattress well up to the head of the bed Commencing with the bottom sheet, each item is replaced separately Ensure the hem of the sheets is facing outward to protect the resident’s skin
Some facilities will have fitted bottom sheets Note the centre of the sheet follows down the middle of the bed
If a draw sheet or Kylie sheet / Kylie pad is used it is positioned approximately 25cm from the head of the bed. The bed clothes should be centred and unless being made up as an open bed, tucked in around the mattress
The mitred or military corner Most hospitals and residential care facilities will make their beds with the sheets having a mitred corner
The steps Once the sheet is placed on the bed tuck the bottom end of the sheet under the end of the mattress Pick up, about 20-30cm from the end of the sheet, and place it on the top of the bed – this should make a bit of a triangle shape Tuck the sheet that is still hanging toward the floor under the bottom of the matteress
The steps continued Then bring the top part of the triangle down and tuck into the mattress for the BOTTOM sheet Each layer of linen is tucked in the same way Often the top sheet and blankets are left without the step above so that all of the sheets are not tucked in along the side of the bed – this makes it easier to get patients and residents back into bed
A mitred corner
At the top end of the bed, fold the top sheet over the blanket. The top layer of blanket is generally tucked under from the top Ensure there are no wrinkles in any layer of the linen
Many facilities will have their own policies about using resident’s own linen, and how the bed should look Some facilities do not like to have blankets underneath showing  Be aware of your facility’s policy on laundering of personal linen
Replace & arrange the pillows to meet the resident’s needs If a person is to return to bed, the top corner of the upper bed clothes may be folded back Ensure the bed is returned back to an appropriate level for the resident to get back into bed, and place call bells etc in reach Make sure there is no linen hanging on the floor
Replace any furniture Tidy around the resident’s bed side eg serviettes, tissues etc Remove linen skip Wash & dry your hands
Now to make the occupied bed  Wash & dry hands Explain the procedure to the individual & ensure privacy Collect clean linen & linen skip before commencing to make the bed Move the bedside locker & over bed table if necessary
Ensure there is a nearby chair on which to place the bed clothes Adjust the height of the bed Leaving sufficient pillows to support the individual, place the reminder on the chair Remove each item of upper bedclothes separately. Bed clothes to be replaced are folded and put on the chair. Cover the person with a procedure blanket before removing the top sheet. Place soiled items into the linen skip Remove accessories such as bed cradle
Support the individual & gently turn him onto one side of the bed. If only one nurse is making the bed, the side rail away from her should be elevated (if insitu) Loosen the bottom sheets on the occupied side, and roll each one towards the centre of the bed. Brush out any debris eg crumbs. Eliminate any creases from the mattress cover Working at the unoccupied side of the bed, either:  Unroll, pull the bottom sheets taut, and tuck in around the mattress  OR  If using a fresh sheet, place on the bed and unfold it so that centre laundry crease lies at the centre of the mattress. Tuck in at the top, bottom and side. Roll the excess to the centre of the bed
Carefully turn the individual to the other side of the bed, providing adequate support as he is moved. If appropriate, elevate side rail From the opposite side of the bed, either:  Remove any soiled sheets and place in the linen skip  OR  Untuck and roll sheet/s to the centre of the bed Ensure that side of the mattress is free from debris and ceases, unroll and tuck the sheet/s in around the mattress Assist the individual back into the centre of the bed, arrange the pillows to meet the need and assist him into position
Replace any accessories, put on the top sheet and remove the procedure blanket Replace the blankets and quilt, ensuring that they are positioned to cover the individual’s chest and shoulders. Make foot pleats in the upper bed clothes and avoid tucking them in to tightly Adjust the height of the bed – ensure nurse call bell within reach Replace any furniture. Remove the linen skip. Wash and dry hands.

Bed making

  • 1.
    BED MAKING ProvideSupport to Meet Personal Care Needs CHCIC301A
  • 2.
    Bed Making Ongoingprovision of basic cleanliness, comfort and safety Clients may spend long periods of time in bed, undertaking various activities – depending on individual health state, and on situational factors (ie if at home, or in a health care agency)
  • 3.
    Principles Factors toconsider with each bedmaking episode: Prevention of cross-infection Safety and comfort for the client Maintenance of good body mechanics
  • 4.
    Prevention of cross-infectionWash hands or use alcohol hand rub before and after making each bed If linen is very soiled, wear gloves for removal Dirty linen is put immediately into soiled linen bag (white or brown bag) or as per organisation – never onto floor !!
  • 5.
    Don’t shake orflick linen excessively Linen shouldn’t touch floor, or be held up against carer’s clothing Linen should only be put onto a clean surface prior to bed making NO interchange of linen between clients
  • 6.
    Client safety andcomfort Ensure that bed brakes are on, and that bed is returned to its original position (usually to a height the resident can easily access), after bed making is complete Promote comfort, by having sheets free of rough areas, wrinkles or creases, food crumbs and foreign bodies
  • 7.
    Avoid areas ofpotential pressure, ie hems of sheets away from direct contact with client’s skin If waterproofing layer is used, must not come into contact with client’s skin Need to particularly consider safety and comfort, if client occupies bed whilst it is being made
  • 8.
    Body mechanics ofthe carer Maintain good body alignment when bed making – avoid bending, stretching and twisting Use large leg muscles (bend knees), rather than back muscles Work smoothly and rhythmically – 2 people to make beds together is optimal
  • 9.
    If able, raisebed to a comfortable working height (usually waist high) – to avoid bending and back strain Prepare well – gather all equipment initially, and avoid legwork
  • 10.
    Bed features Manytypes of beds available, with multiple modifications possible In health agencies, most are “hi-lo”, allowing adjustment of the bed base up and down Most also allow position changes, ie head/feet up/down
  • 11.
  • 12.
    Different types ofoperation – some have hand-winding action, others with hydraulic foot pump mechanism and release button, some are electric Bed brakes Bed heads and feet are detachable, for emergency access situations, or for transfer of clients on their beds
  • 13.
    Bed “attachments” Trapeze/overhead“monkeybar” Bedstick Drainage tube bag hangers Client call bell Bed siderails – may constitute restraint!
  • 14.
    Bed aids Mostbed aids relate to the comfort and correct positioning of a client If bed aids used, need to be appropriately selected and used Pillows – with waterproof cover
  • 15.
    Bed aids -Mattress Many different types Air alternating Egg carton
  • 16.
    Bed cradle Sheepskin– for under buttocks, or elbow/heel protectors Wedges/wedge shaped pillows Footboards/foot bolsters Absorbent layers
  • 17.
    Sheepskins Medical sheepskins– green in color 30mm pile (springy), especially tanned High density-creates a cushion that distributes body weight & pressure points over a large area-each fibre acts as a spring
  • 18.
    Sheepskins Cont. Woolcan absorb moisture up to 33% of its weight without feeling wet Reduces friction & shear Medical sheepskins are stamped
  • 19.
    The steps tomaking an unoccupied bed Wash & dry hands Place clean linen & soiled linen skip near the bed Ensure that there is a chair on which to place the bed clothes Ideally there would be two people to make the bed
  • 20.
    Move the bedsidelocker & over bed table if necessary Adjust the height of the bed – it should sit about hip height Place pillows on the bed. Place any soiled pillow slips in the skip Loosen the upper bed clothes
  • 21.
    Remove each itemof upper bed clothes separately, fold & place on the chair. Loosen the bottom bed clothes, fold & place on the chair. Any soiled items are placed in the linen skip Roll, rather than fold the waterproof sheet (if applicable)
  • 22.
    Pull the mattresswell up to the head of the bed Commencing with the bottom sheet, each item is replaced separately Ensure the hem of the sheets is facing outward to protect the resident’s skin
  • 23.
    Some facilities willhave fitted bottom sheets Note the centre of the sheet follows down the middle of the bed
  • 24.
    If a drawsheet or Kylie sheet / Kylie pad is used it is positioned approximately 25cm from the head of the bed. The bed clothes should be centred and unless being made up as an open bed, tucked in around the mattress
  • 25.
    The mitred ormilitary corner Most hospitals and residential care facilities will make their beds with the sheets having a mitred corner
  • 26.
    The steps Oncethe sheet is placed on the bed tuck the bottom end of the sheet under the end of the mattress Pick up, about 20-30cm from the end of the sheet, and place it on the top of the bed – this should make a bit of a triangle shape Tuck the sheet that is still hanging toward the floor under the bottom of the matteress
  • 27.
    The steps continuedThen bring the top part of the triangle down and tuck into the mattress for the BOTTOM sheet Each layer of linen is tucked in the same way Often the top sheet and blankets are left without the step above so that all of the sheets are not tucked in along the side of the bed – this makes it easier to get patients and residents back into bed
  • 28.
  • 29.
    At the topend of the bed, fold the top sheet over the blanket. The top layer of blanket is generally tucked under from the top Ensure there are no wrinkles in any layer of the linen
  • 30.
    Many facilities willhave their own policies about using resident’s own linen, and how the bed should look Some facilities do not like to have blankets underneath showing Be aware of your facility’s policy on laundering of personal linen
  • 31.
    Replace & arrangethe pillows to meet the resident’s needs If a person is to return to bed, the top corner of the upper bed clothes may be folded back Ensure the bed is returned back to an appropriate level for the resident to get back into bed, and place call bells etc in reach Make sure there is no linen hanging on the floor
  • 32.
    Replace any furnitureTidy around the resident’s bed side eg serviettes, tissues etc Remove linen skip Wash & dry your hands
  • 33.
    Now to makethe occupied bed Wash & dry hands Explain the procedure to the individual & ensure privacy Collect clean linen & linen skip before commencing to make the bed Move the bedside locker & over bed table if necessary
  • 34.
    Ensure there isa nearby chair on which to place the bed clothes Adjust the height of the bed Leaving sufficient pillows to support the individual, place the reminder on the chair Remove each item of upper bedclothes separately. Bed clothes to be replaced are folded and put on the chair. Cover the person with a procedure blanket before removing the top sheet. Place soiled items into the linen skip Remove accessories such as bed cradle
  • 35.
    Support the individual& gently turn him onto one side of the bed. If only one nurse is making the bed, the side rail away from her should be elevated (if insitu) Loosen the bottom sheets on the occupied side, and roll each one towards the centre of the bed. Brush out any debris eg crumbs. Eliminate any creases from the mattress cover Working at the unoccupied side of the bed, either: Unroll, pull the bottom sheets taut, and tuck in around the mattress OR If using a fresh sheet, place on the bed and unfold it so that centre laundry crease lies at the centre of the mattress. Tuck in at the top, bottom and side. Roll the excess to the centre of the bed
  • 36.
    Carefully turn theindividual to the other side of the bed, providing adequate support as he is moved. If appropriate, elevate side rail From the opposite side of the bed, either: Remove any soiled sheets and place in the linen skip OR Untuck and roll sheet/s to the centre of the bed Ensure that side of the mattress is free from debris and ceases, unroll and tuck the sheet/s in around the mattress Assist the individual back into the centre of the bed, arrange the pillows to meet the need and assist him into position
  • 37.
    Replace any accessories,put on the top sheet and remove the procedure blanket Replace the blankets and quilt, ensuring that they are positioned to cover the individual’s chest and shoulders. Make foot pleats in the upper bed clothes and avoid tucking them in to tightly Adjust the height of the bed – ensure nurse call bell within reach Replace any furniture. Remove the linen skip. Wash and dry hands.