Download to read offline
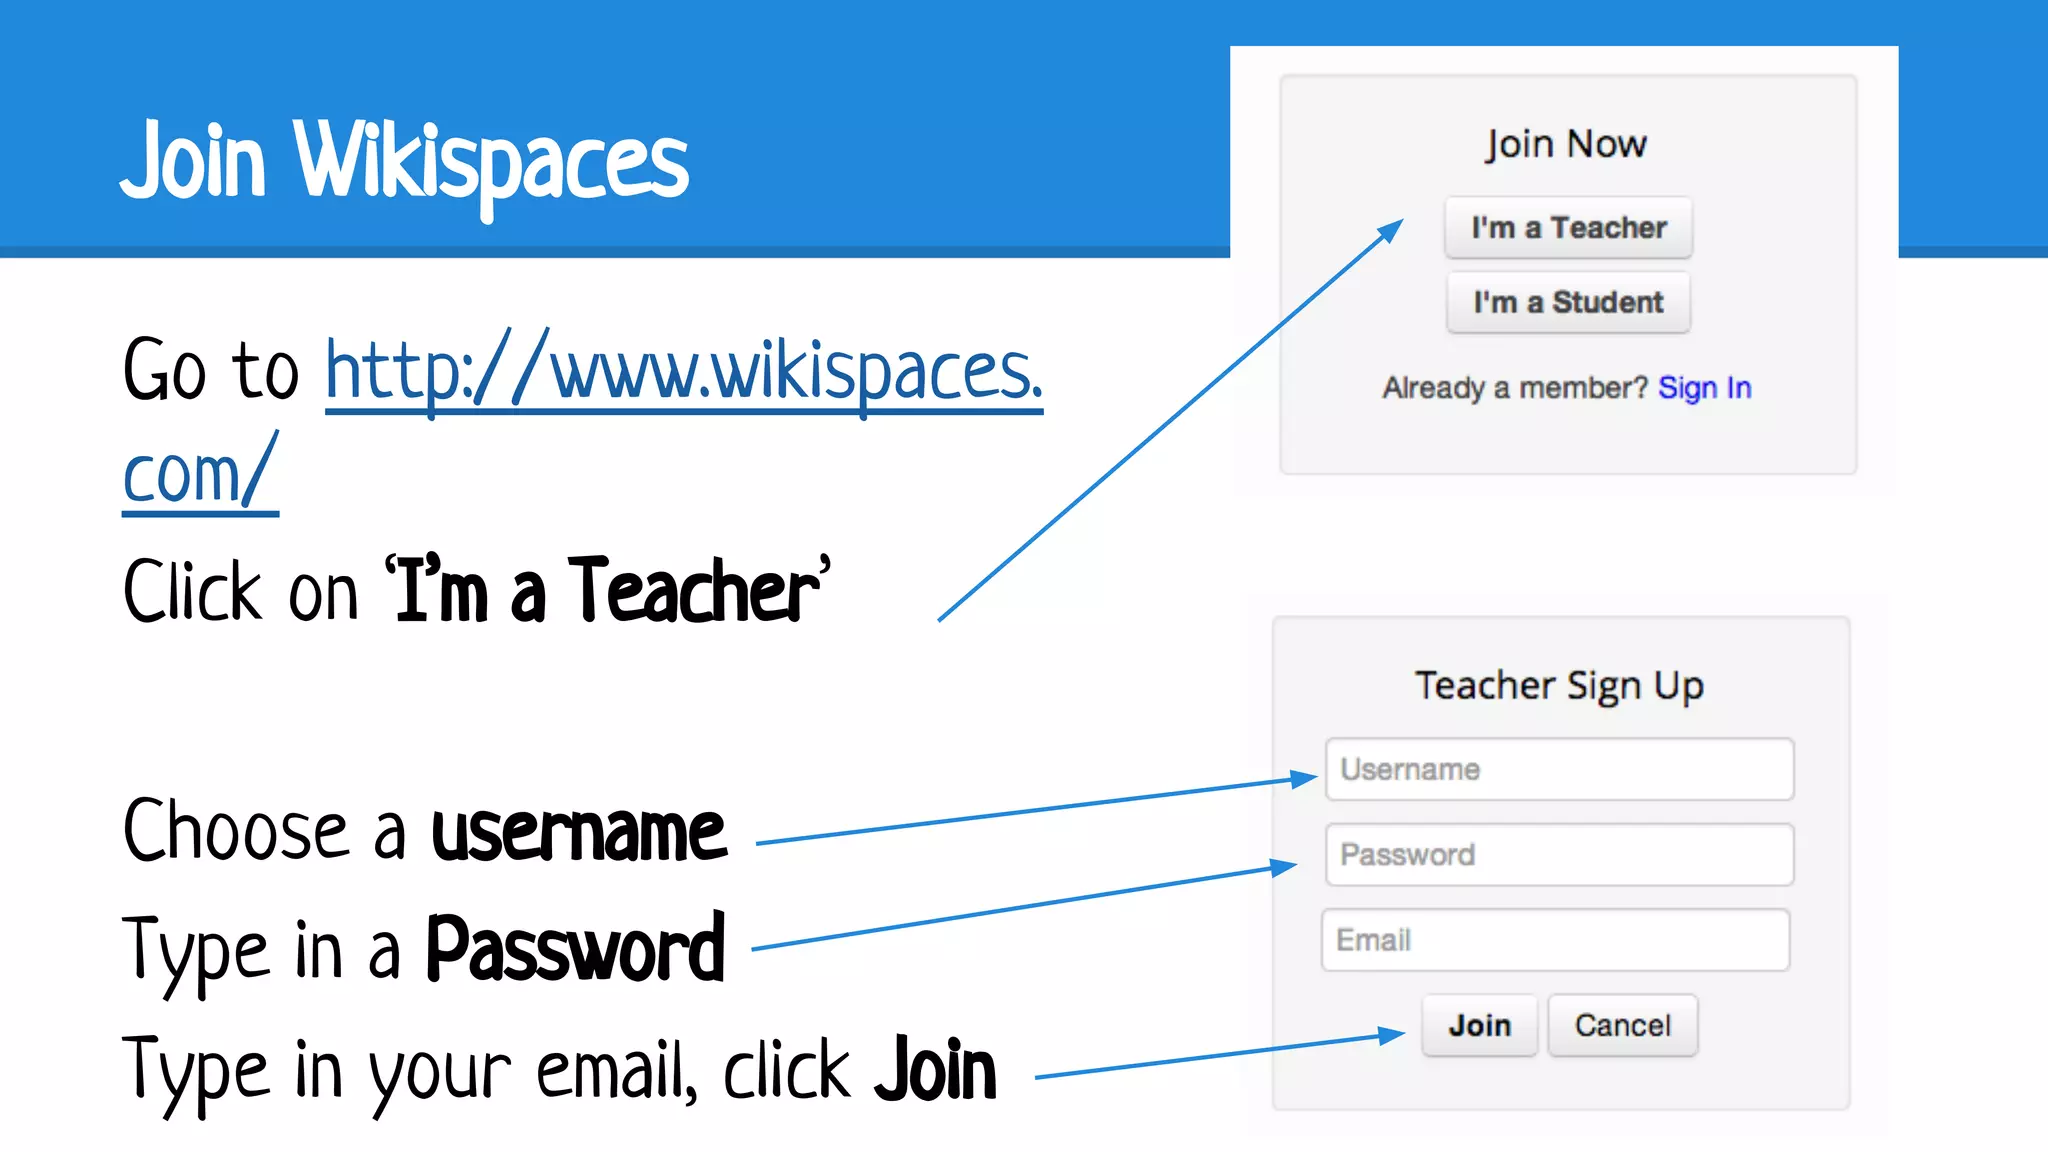
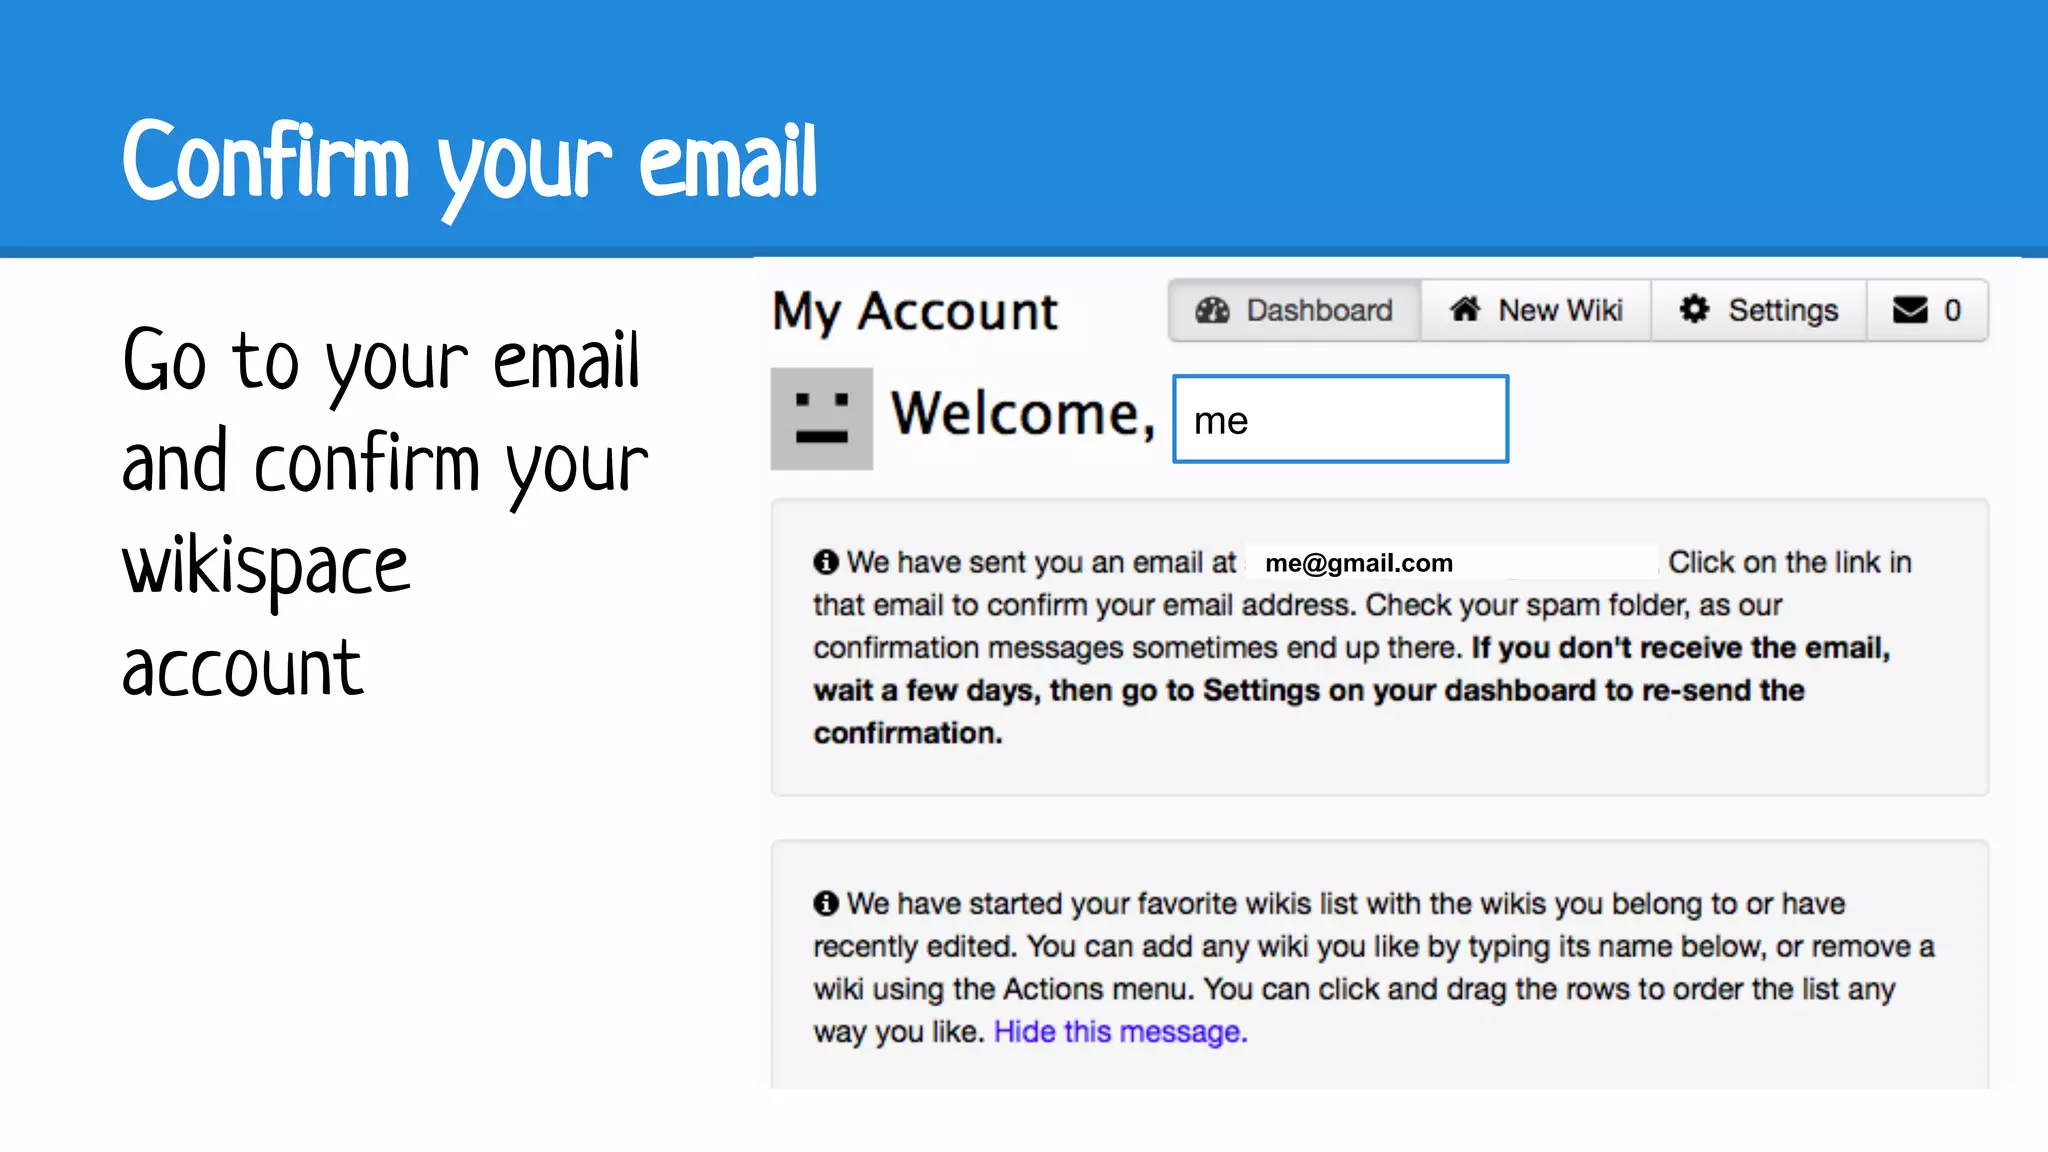
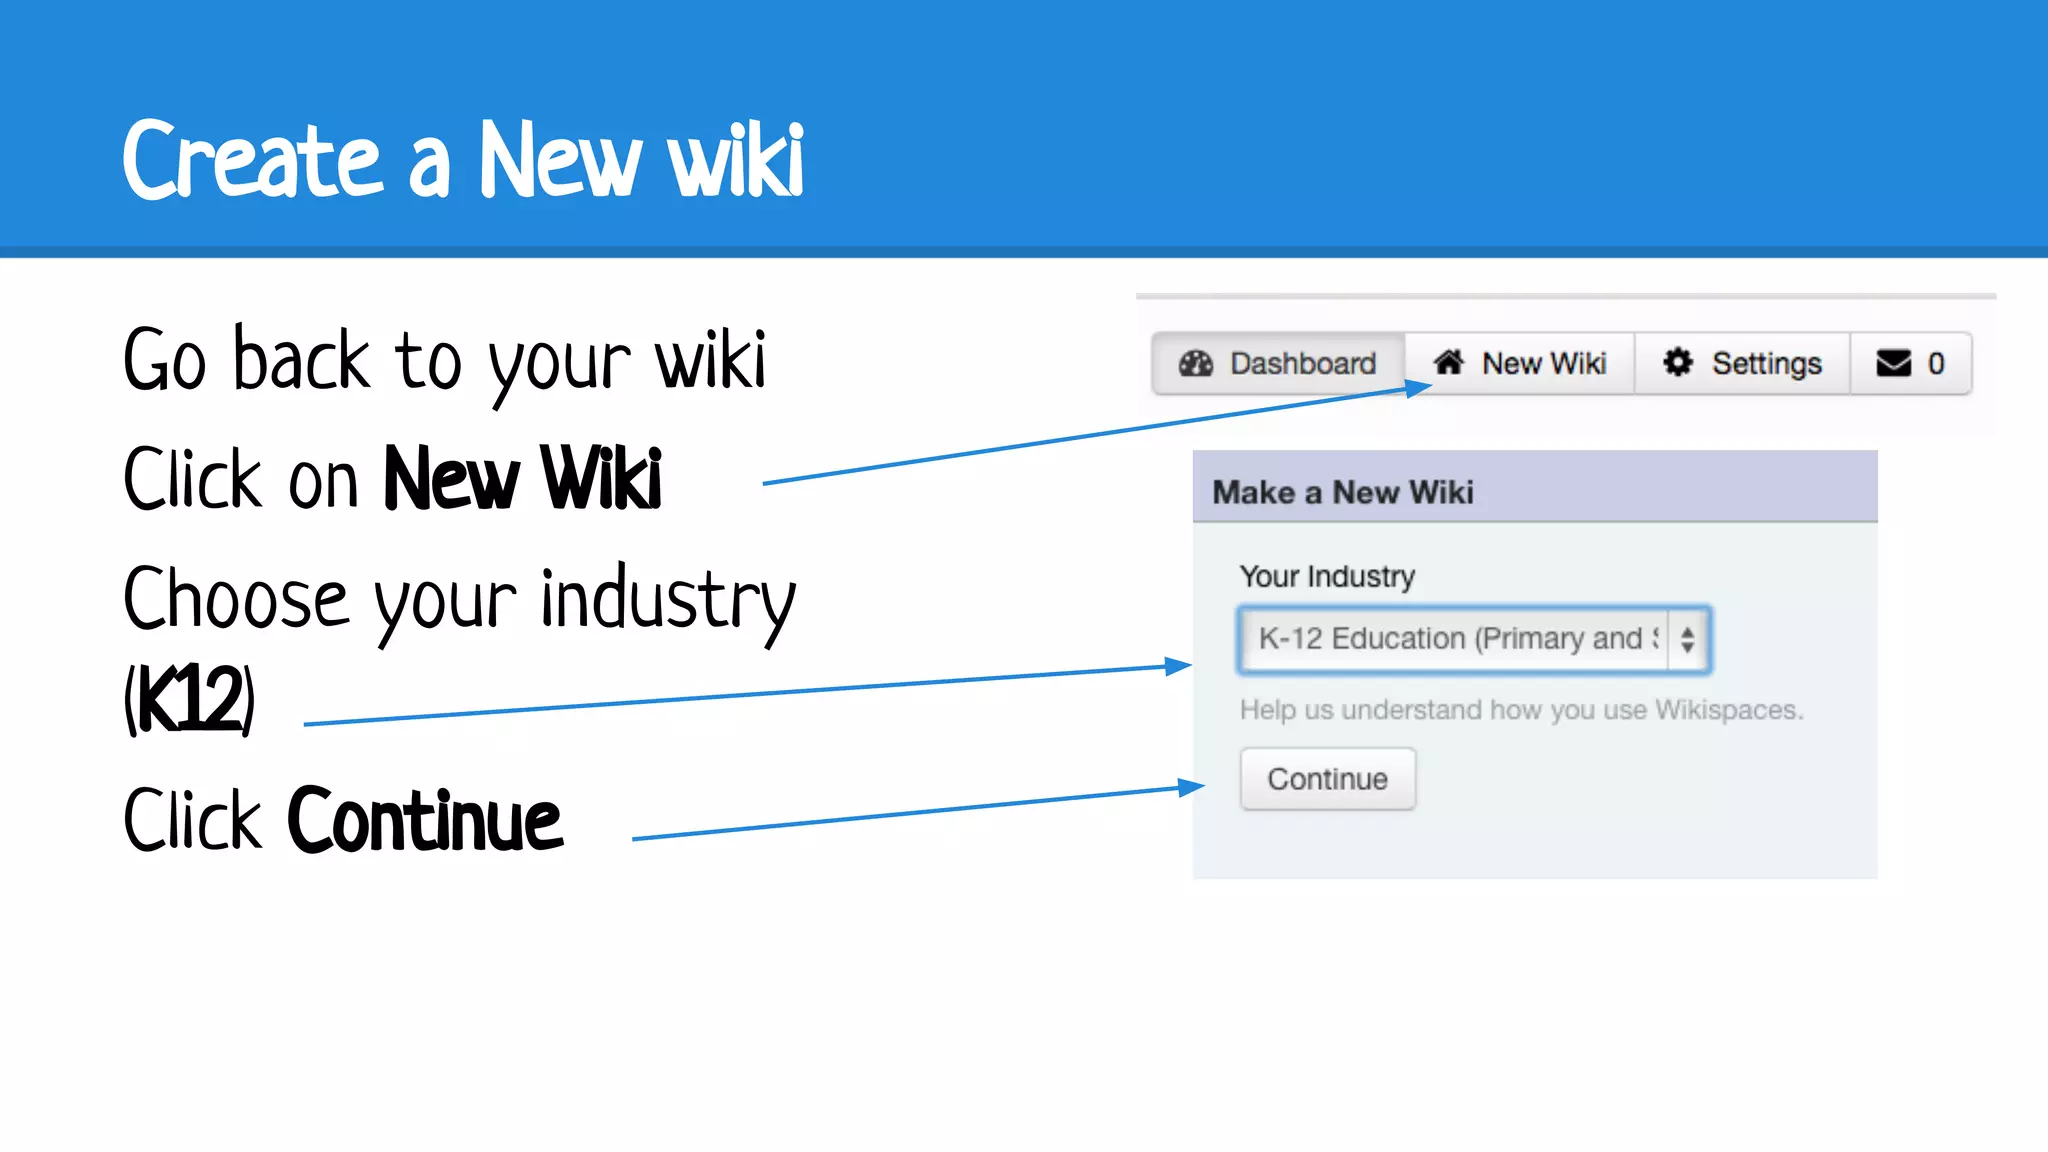
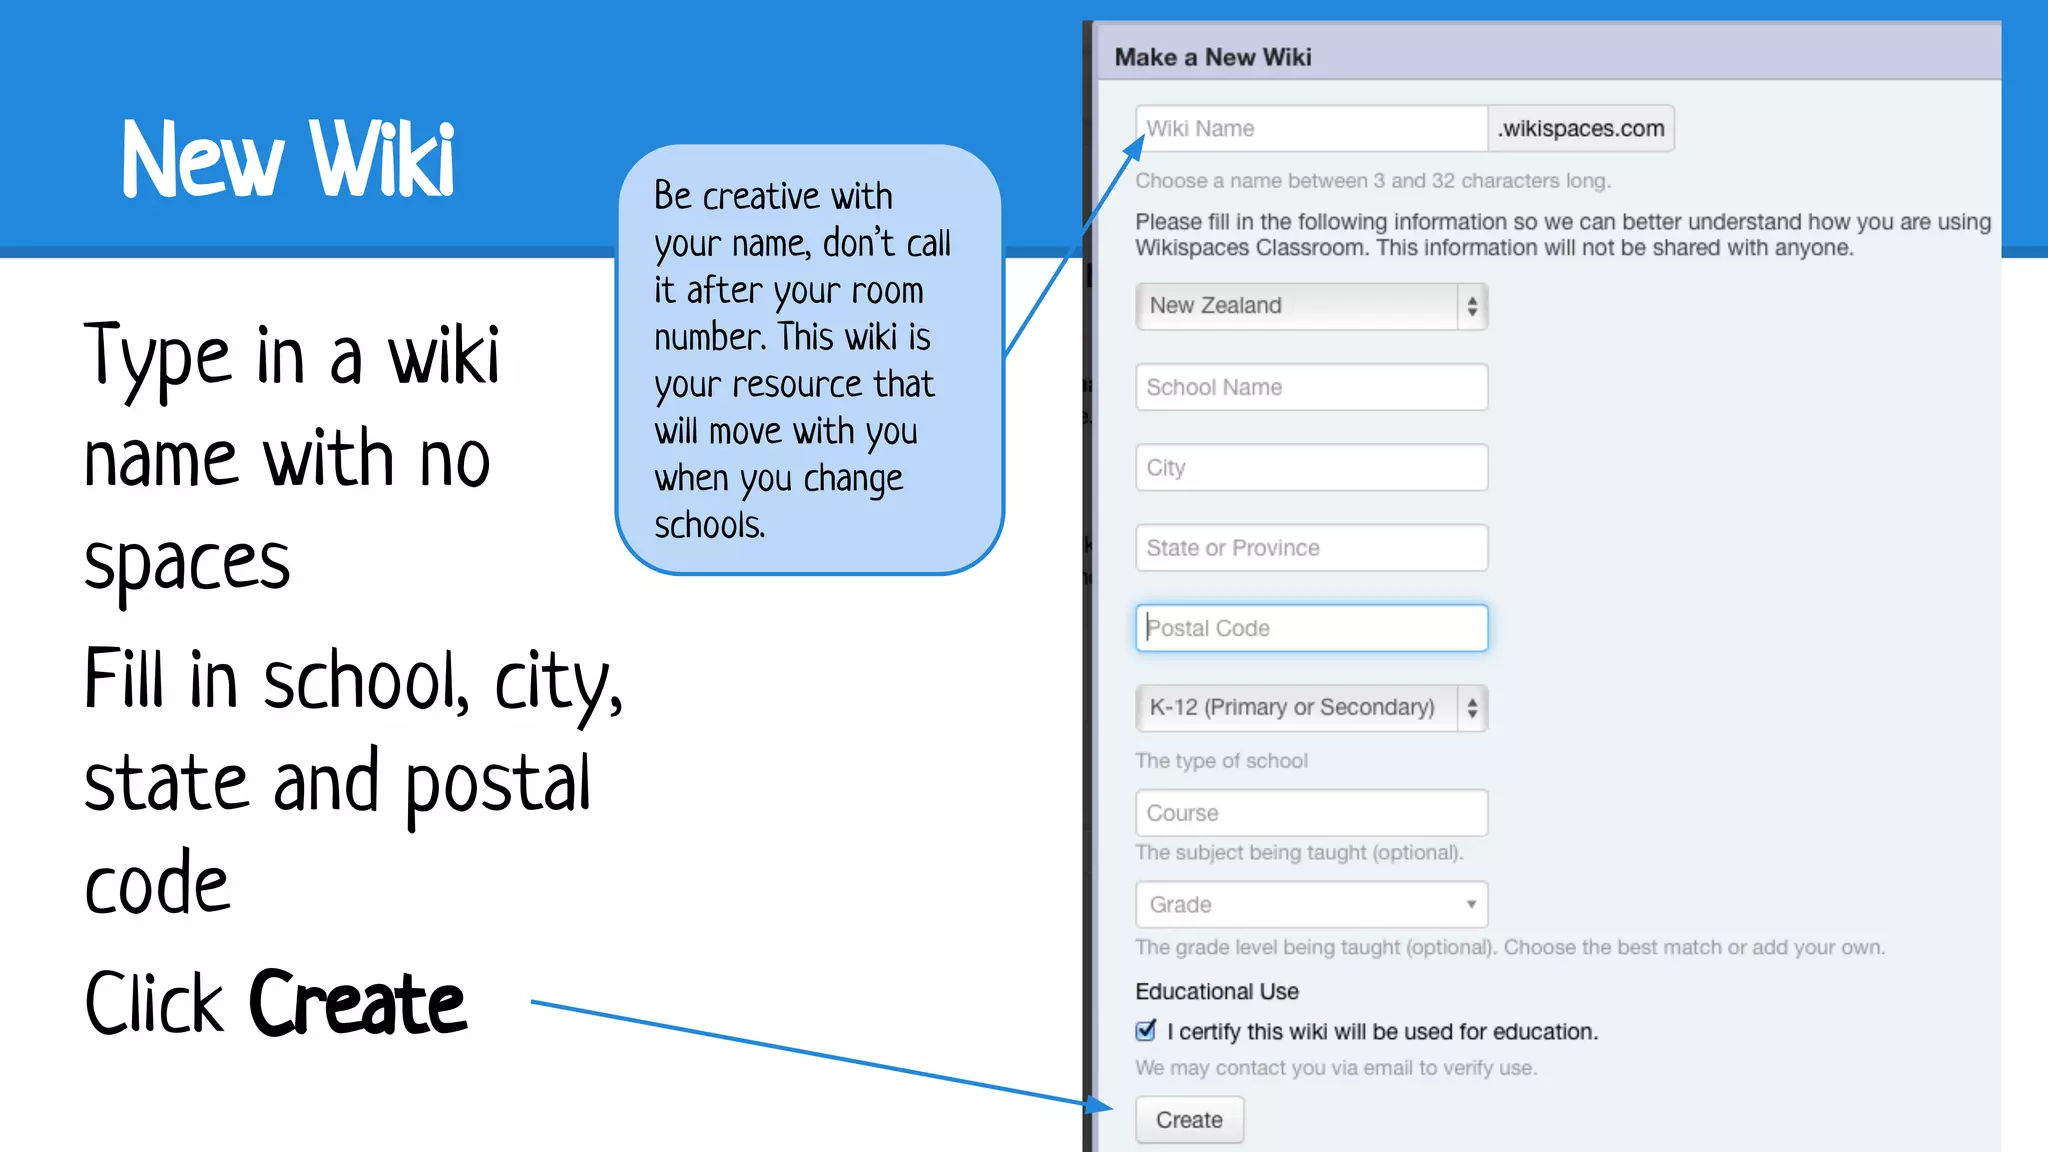
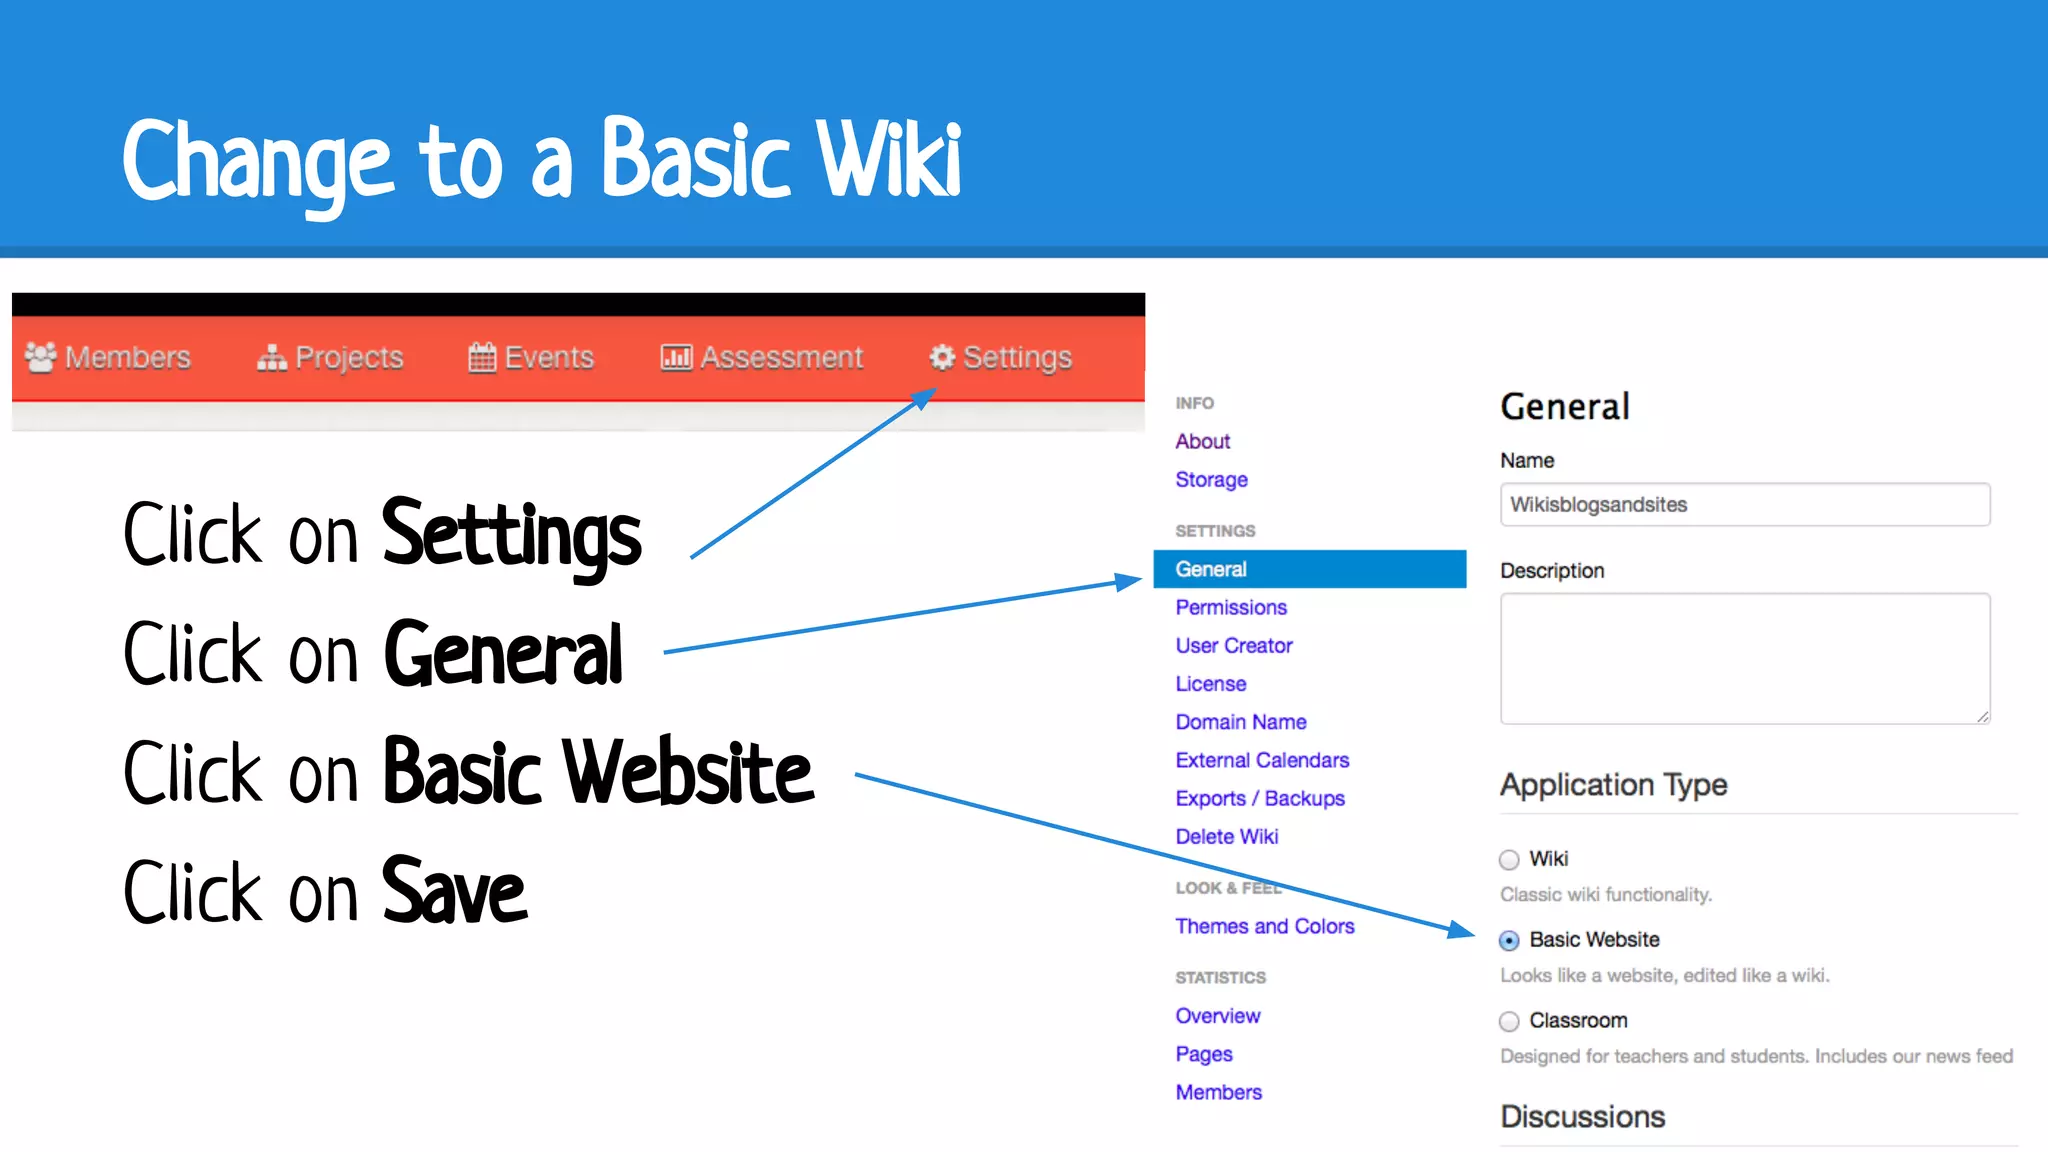
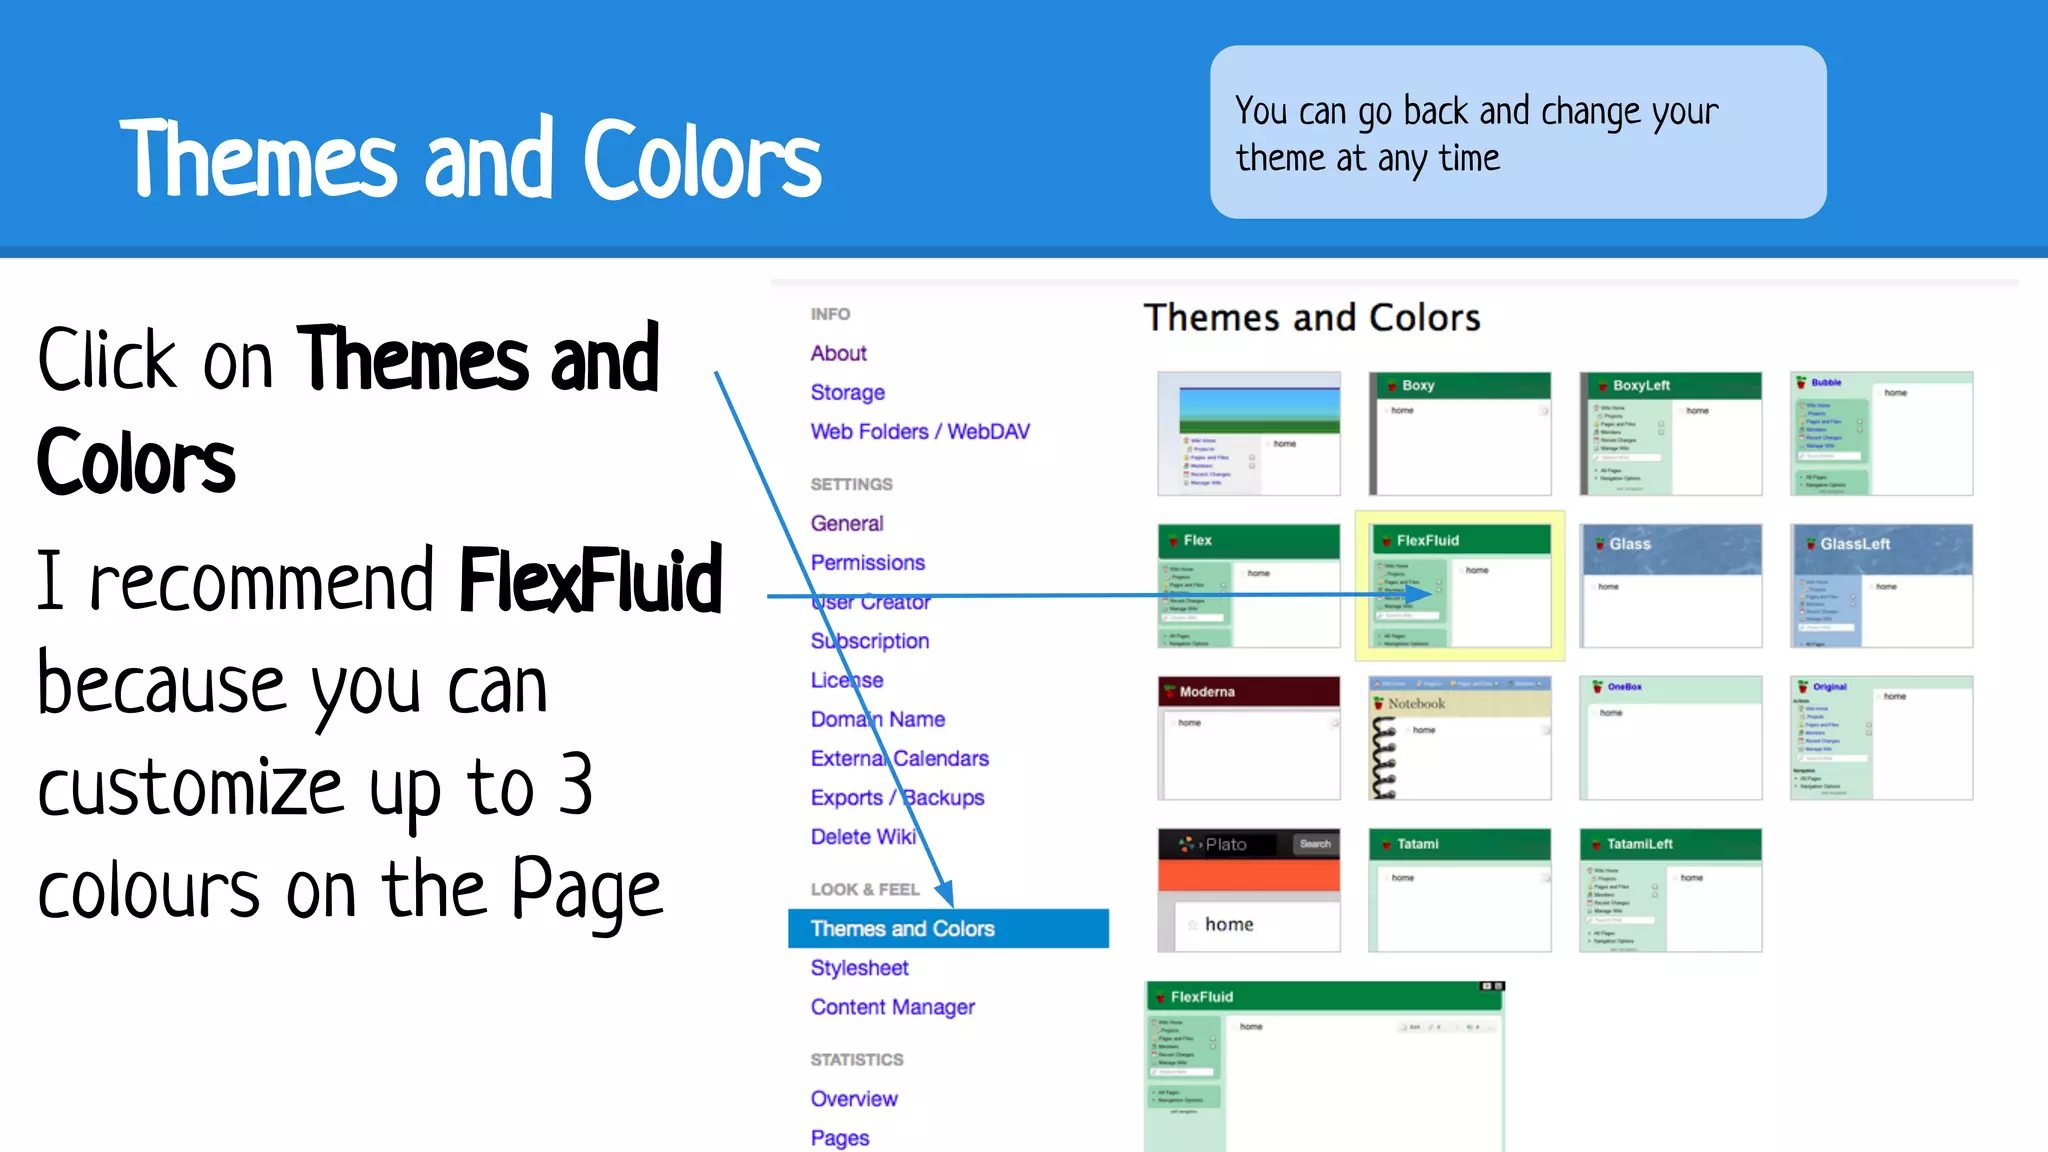
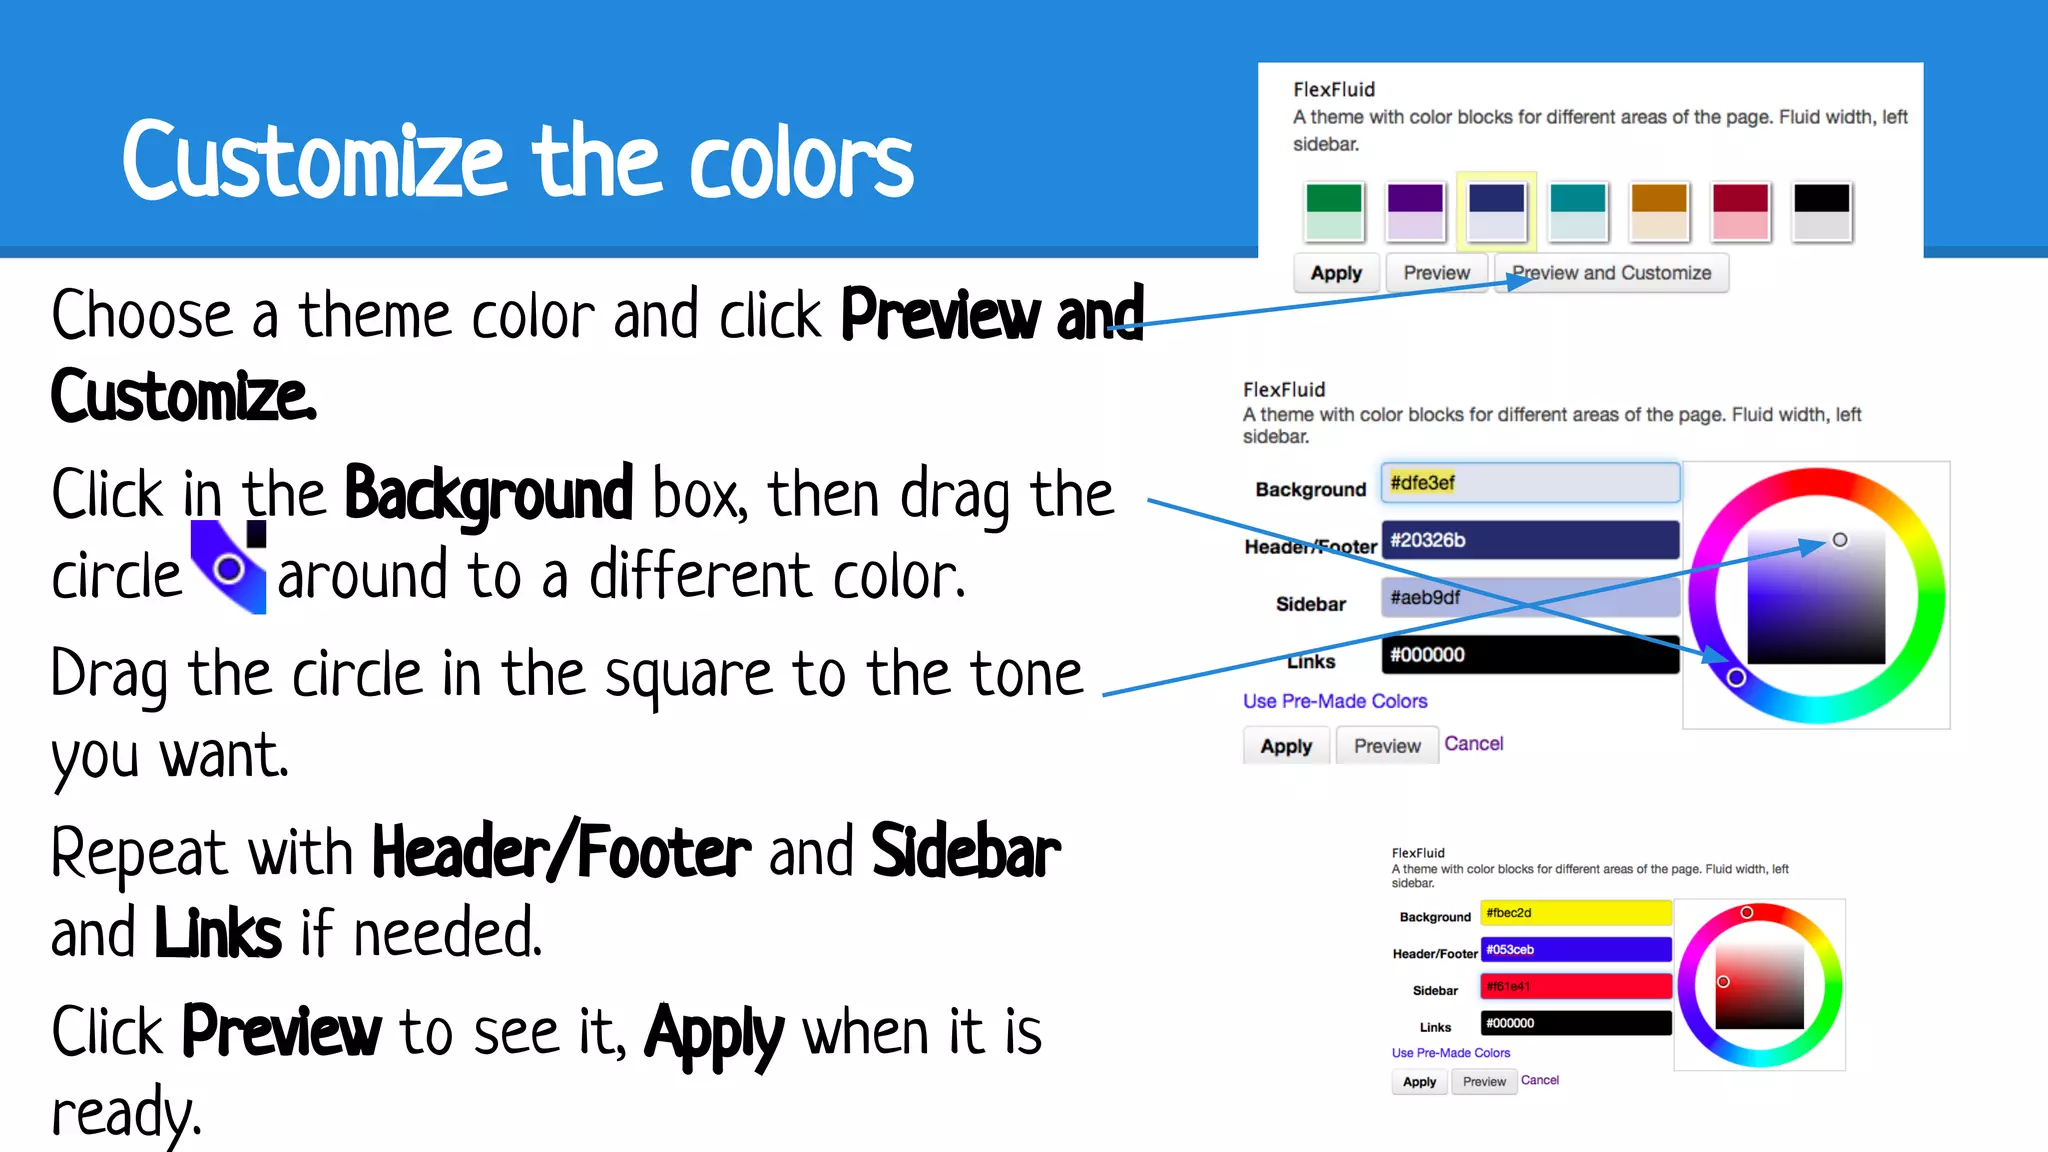
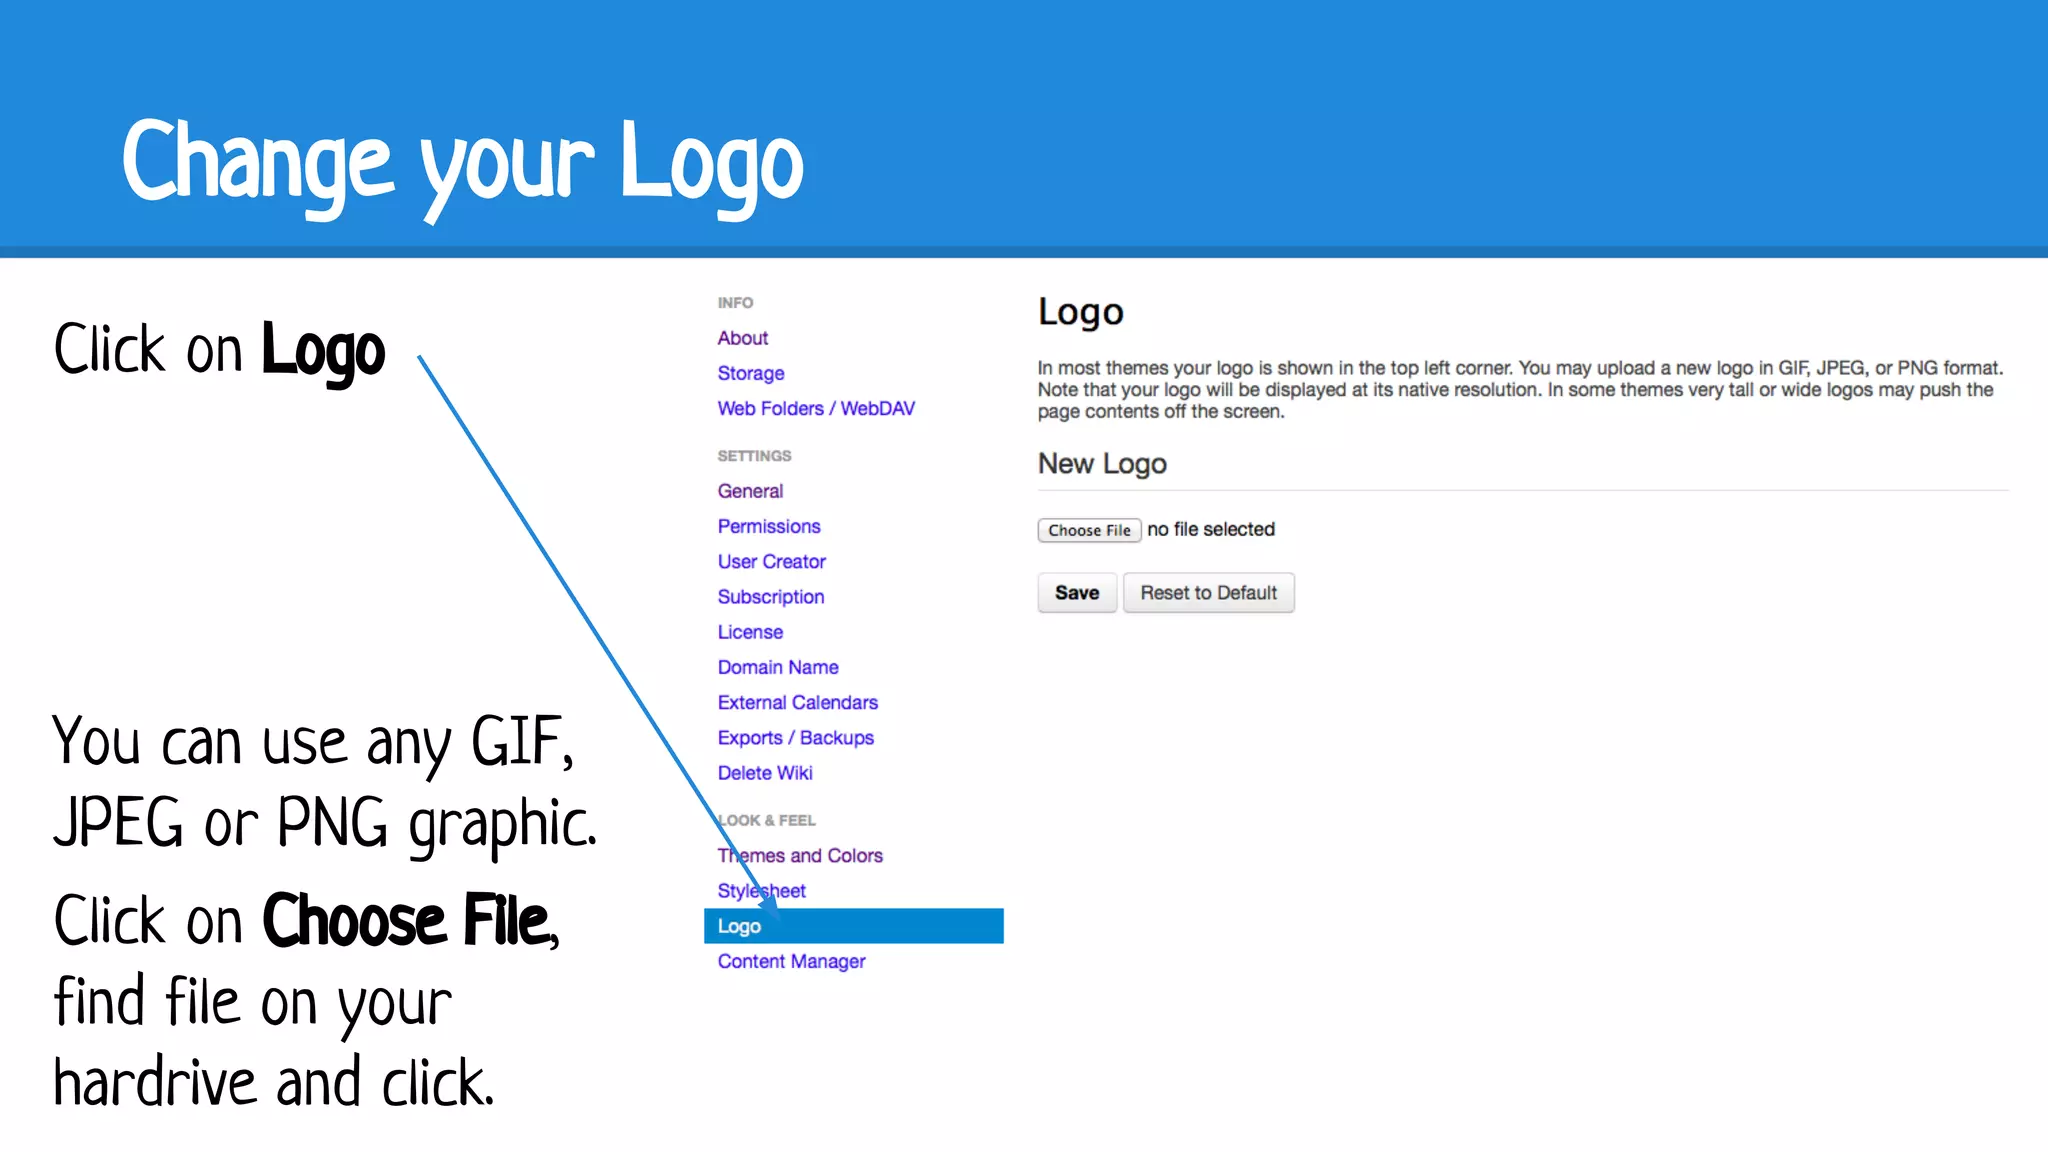
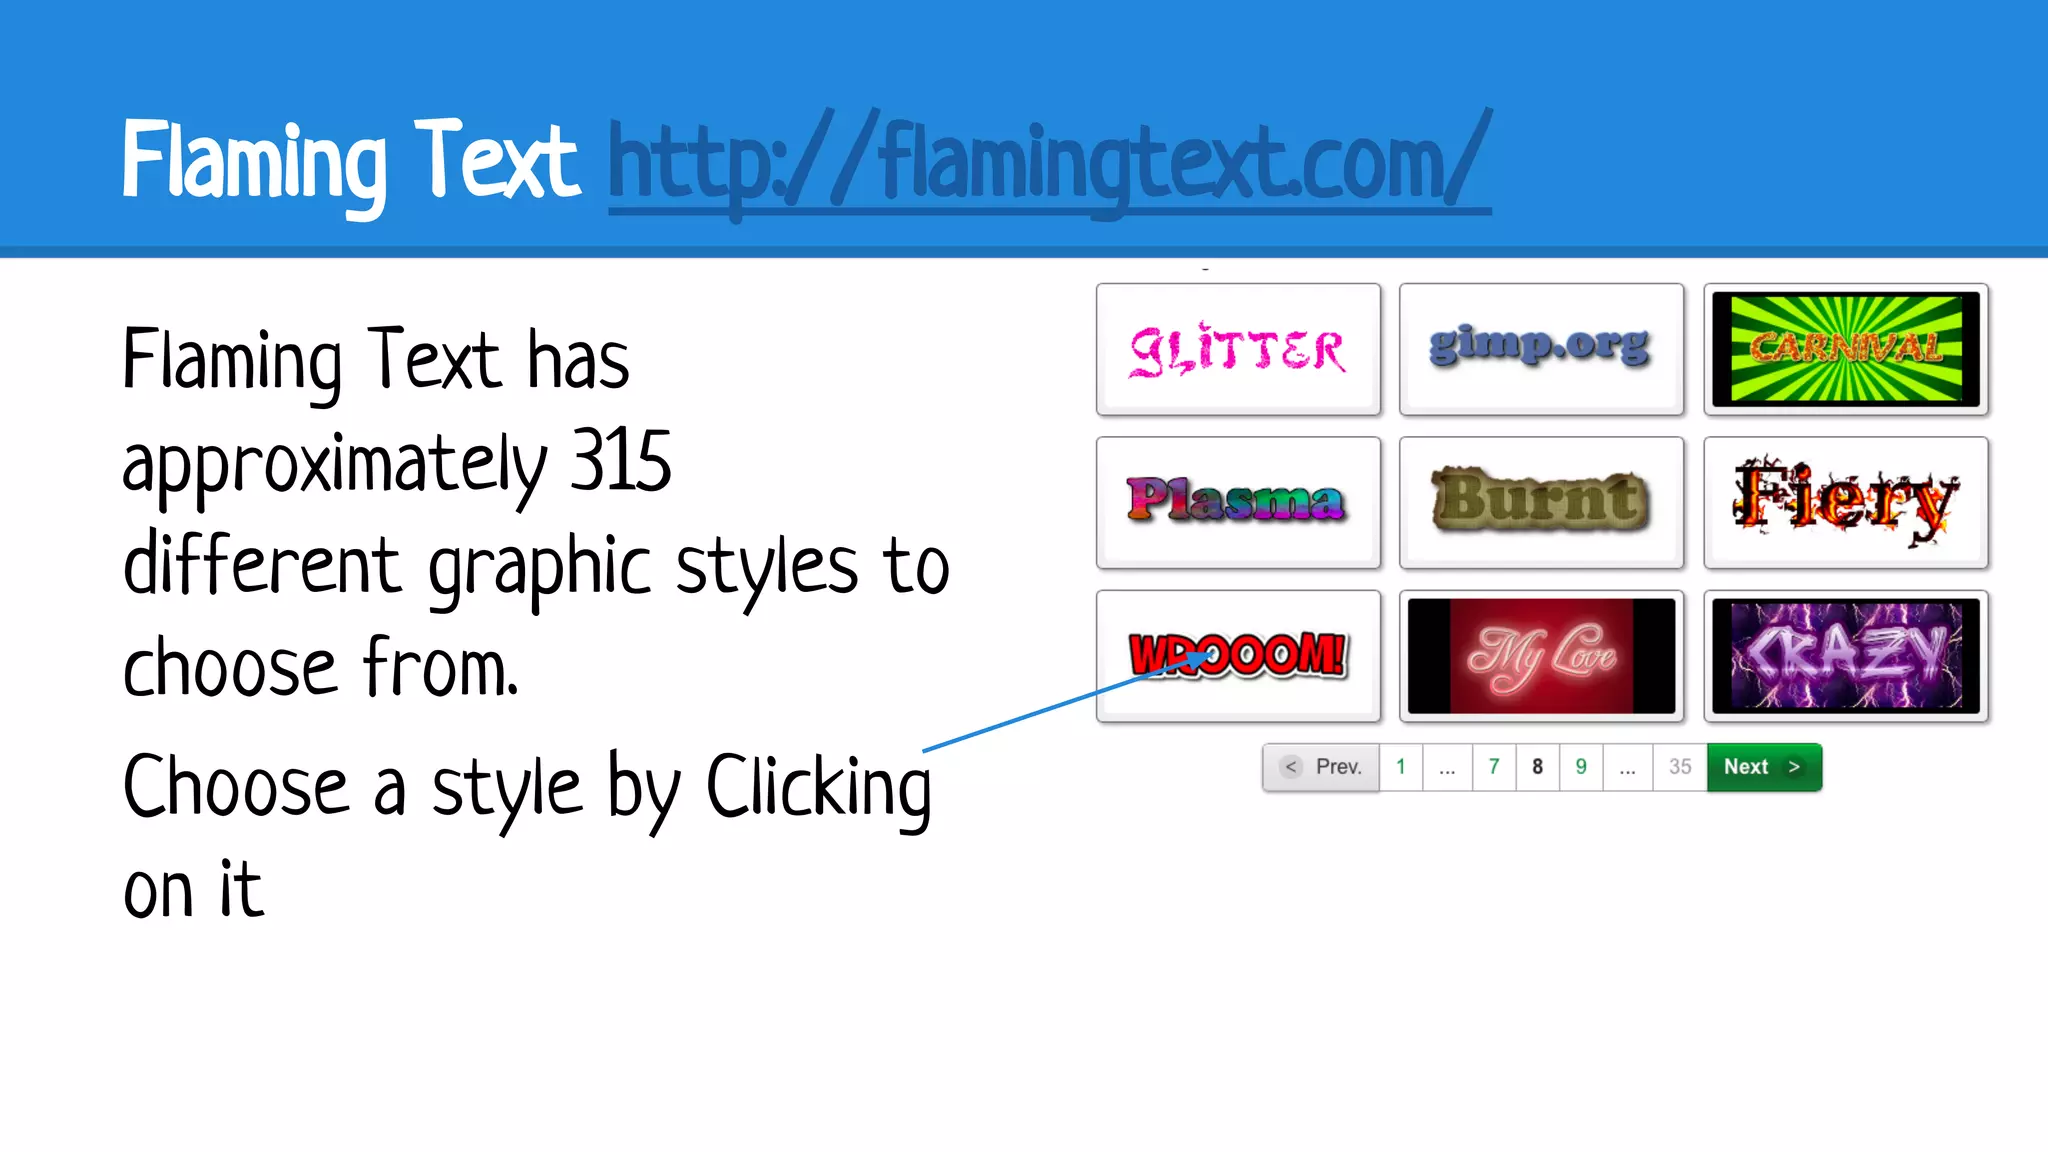
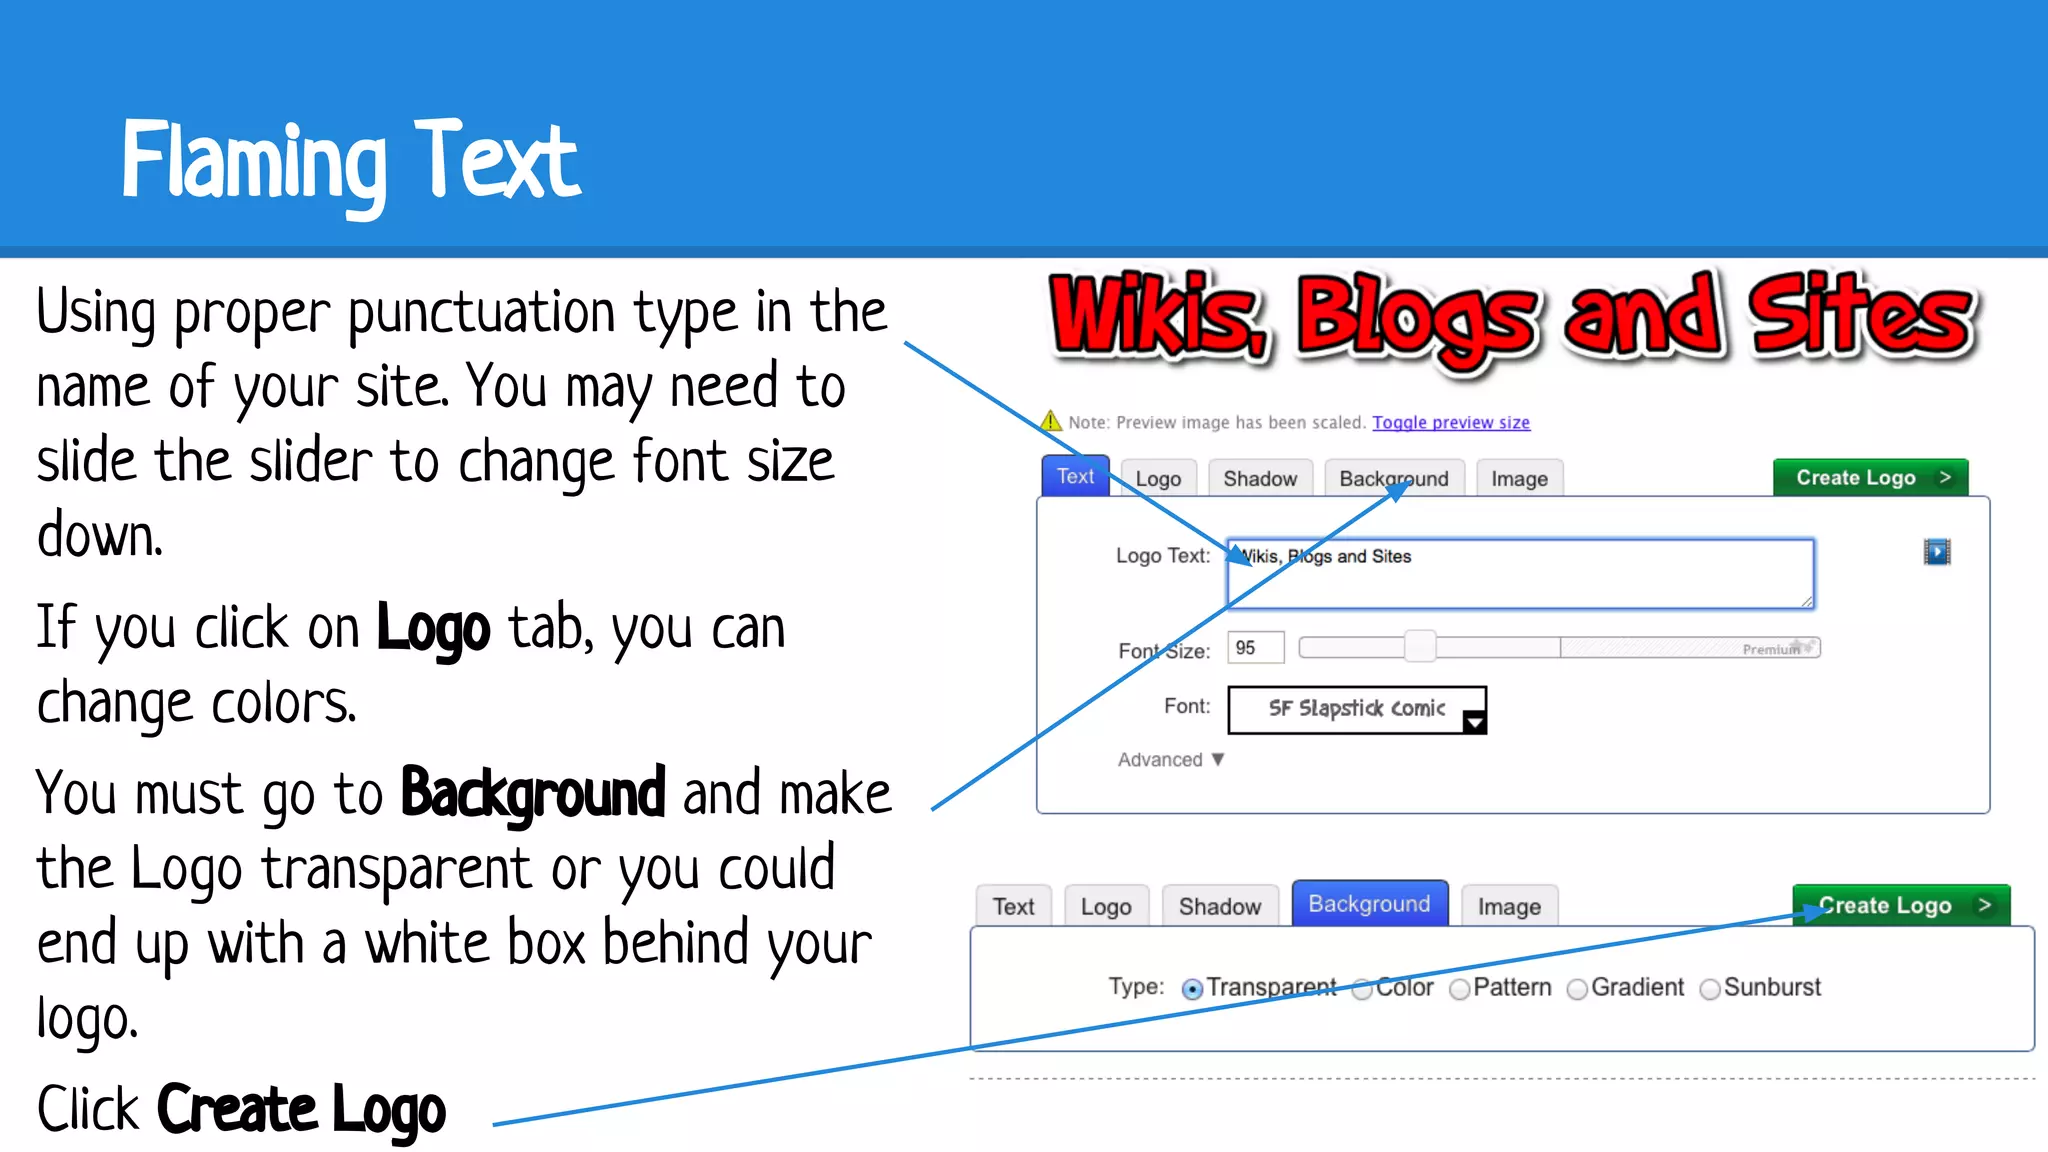
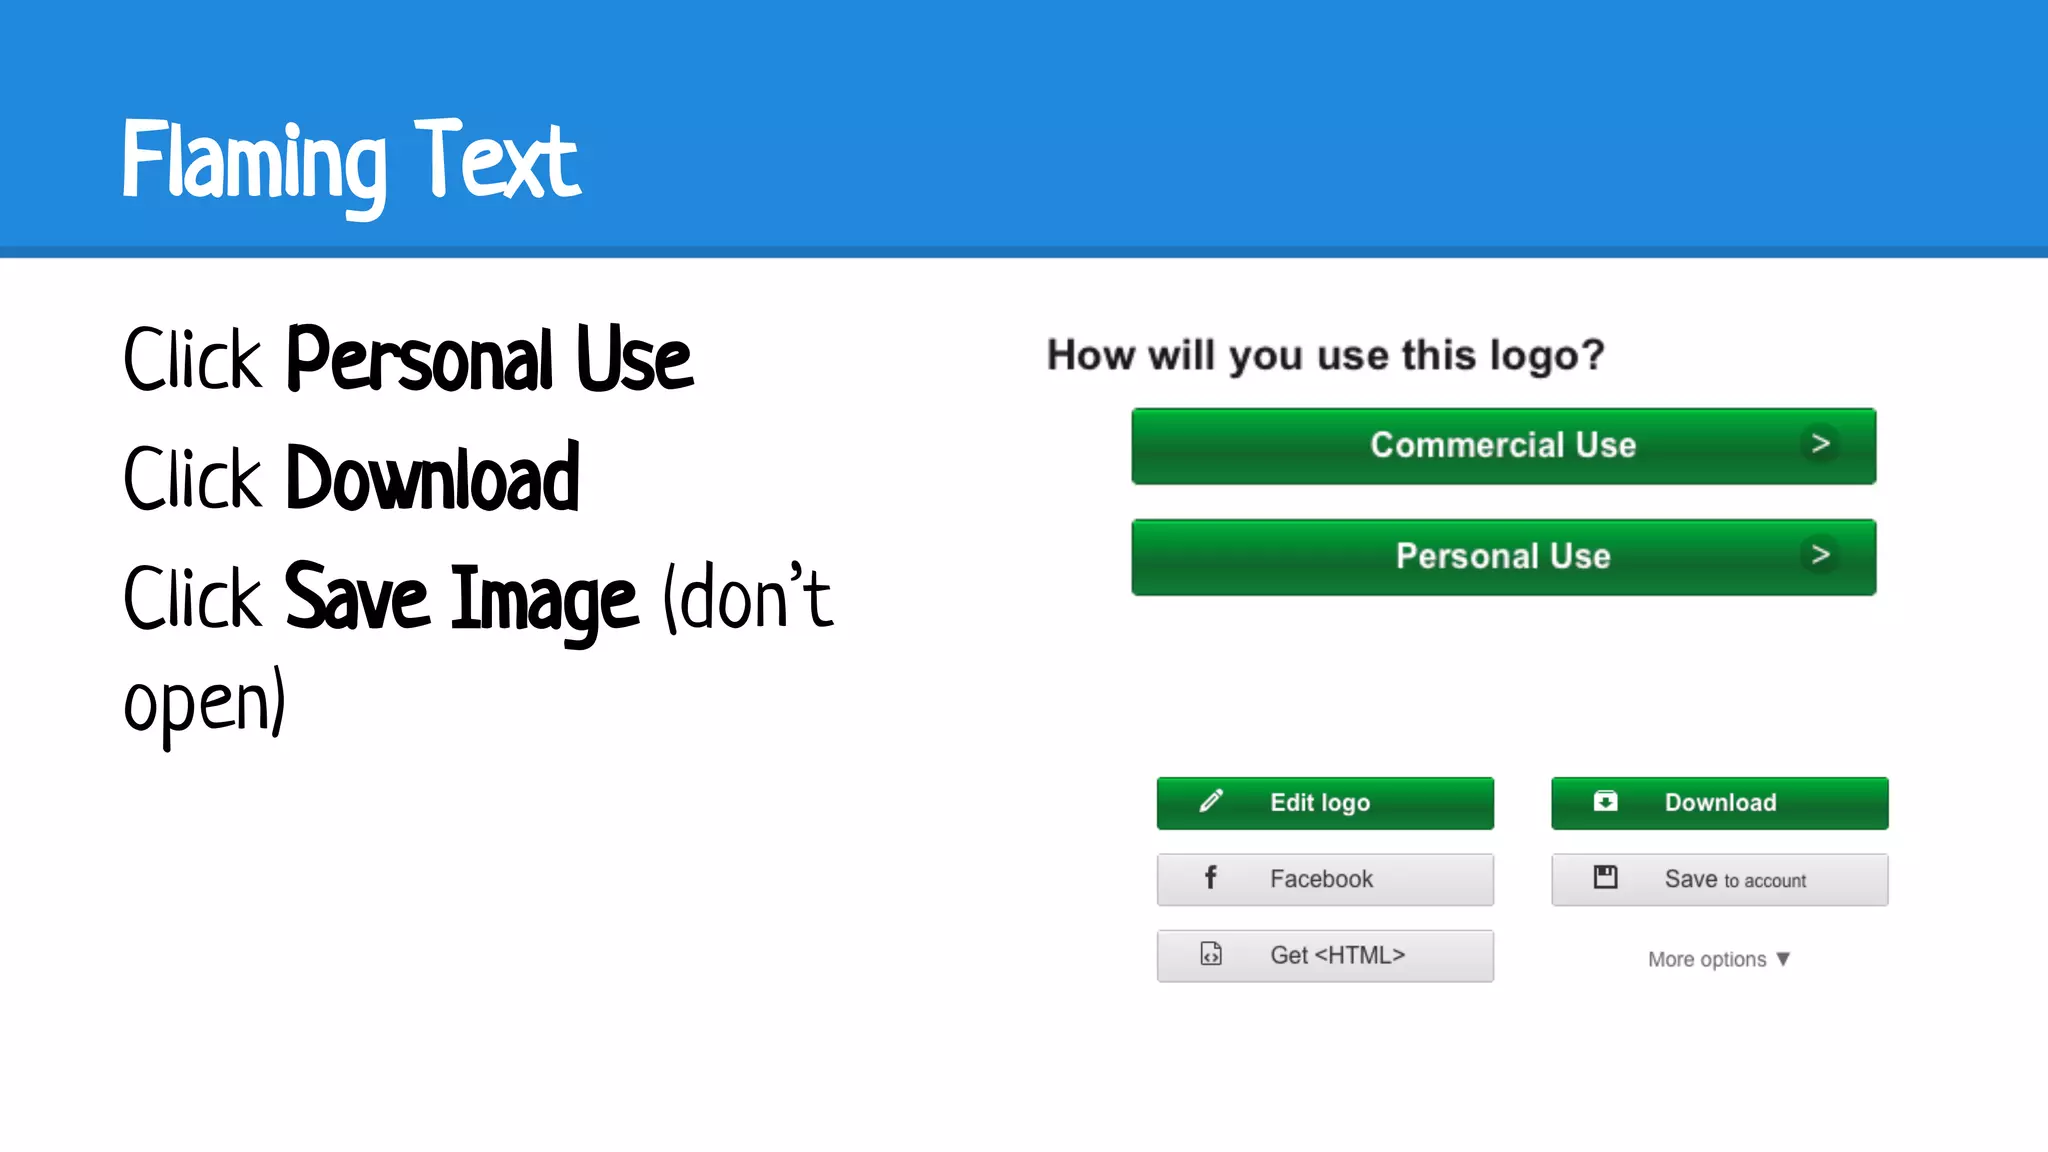
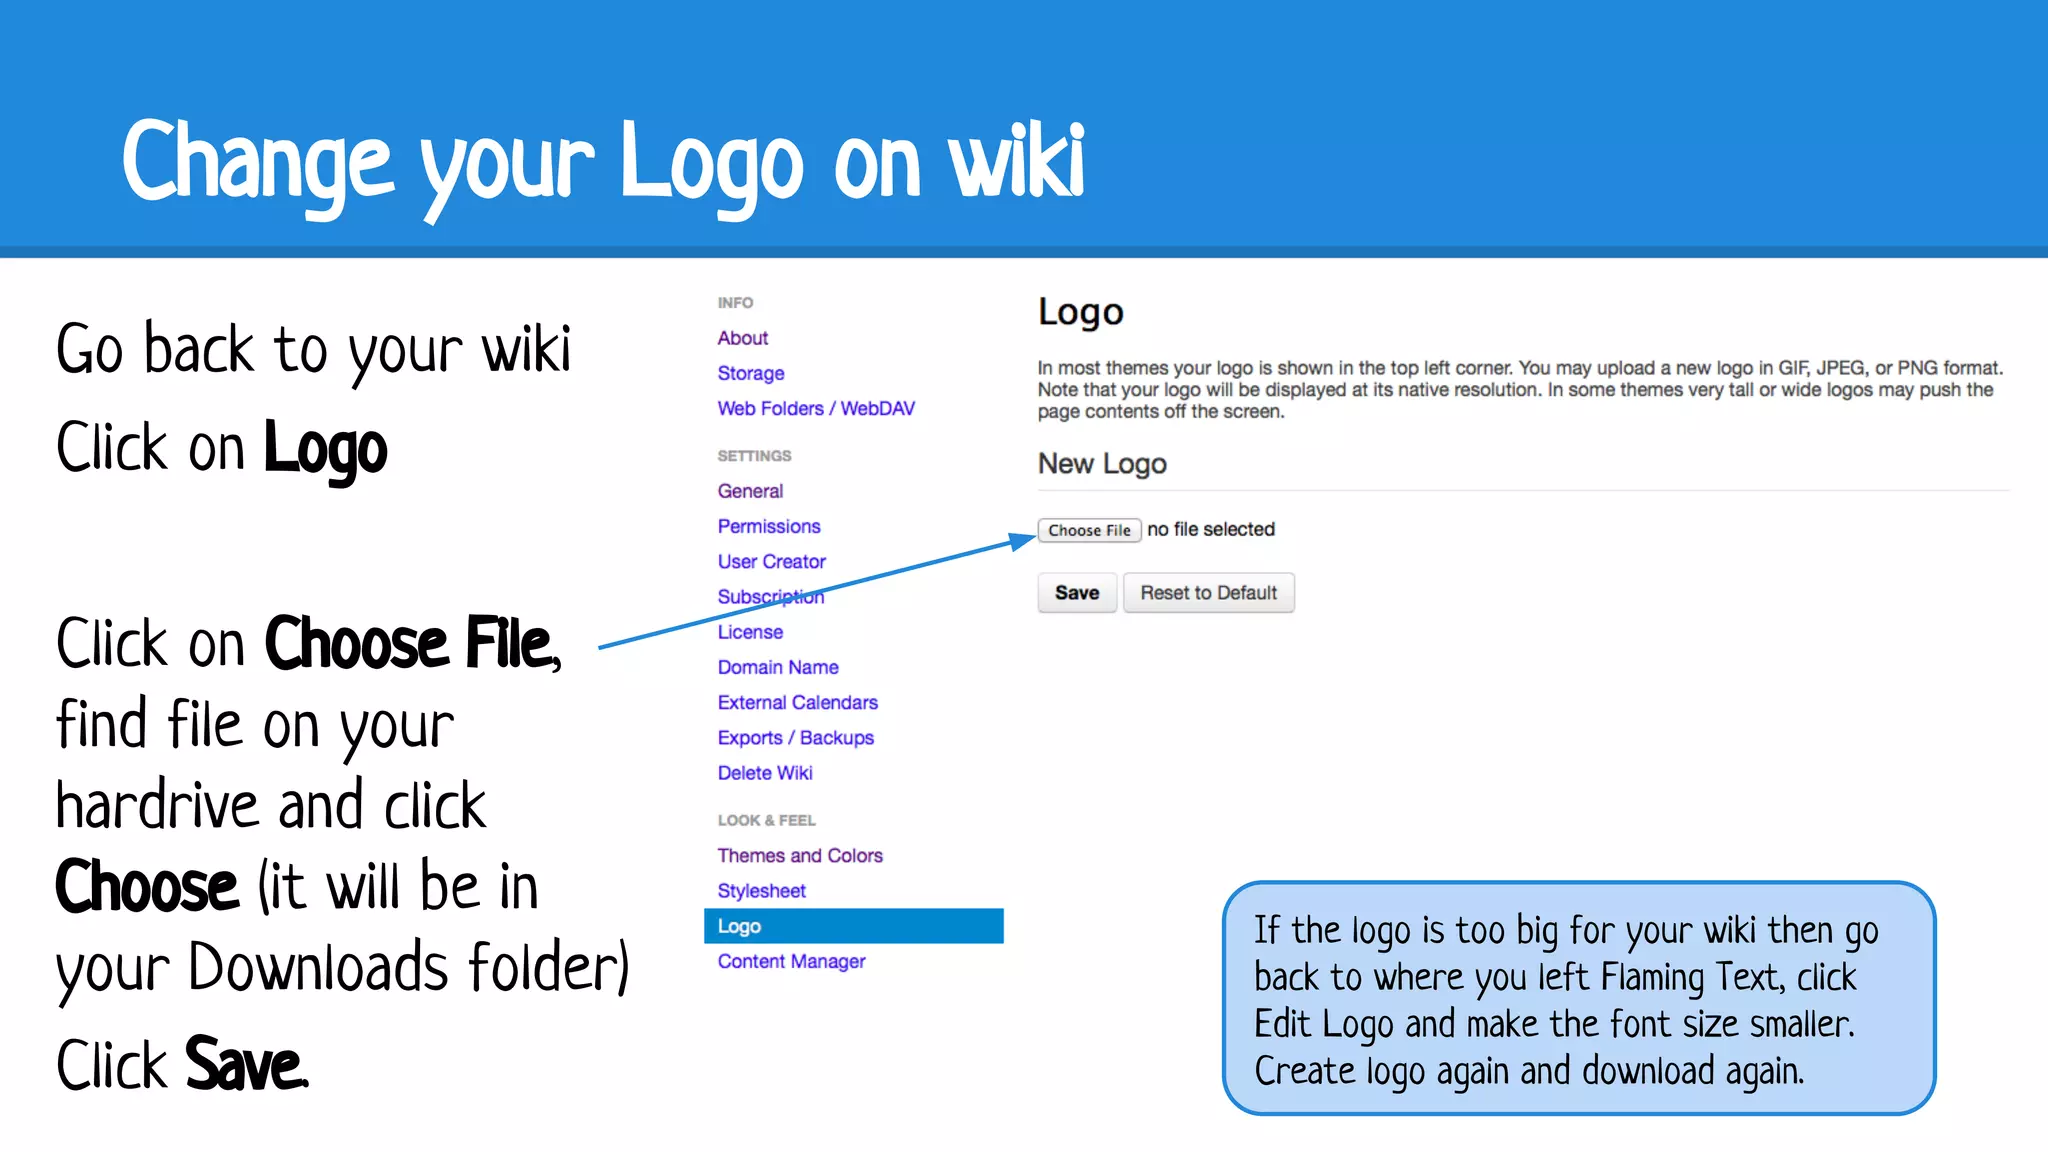
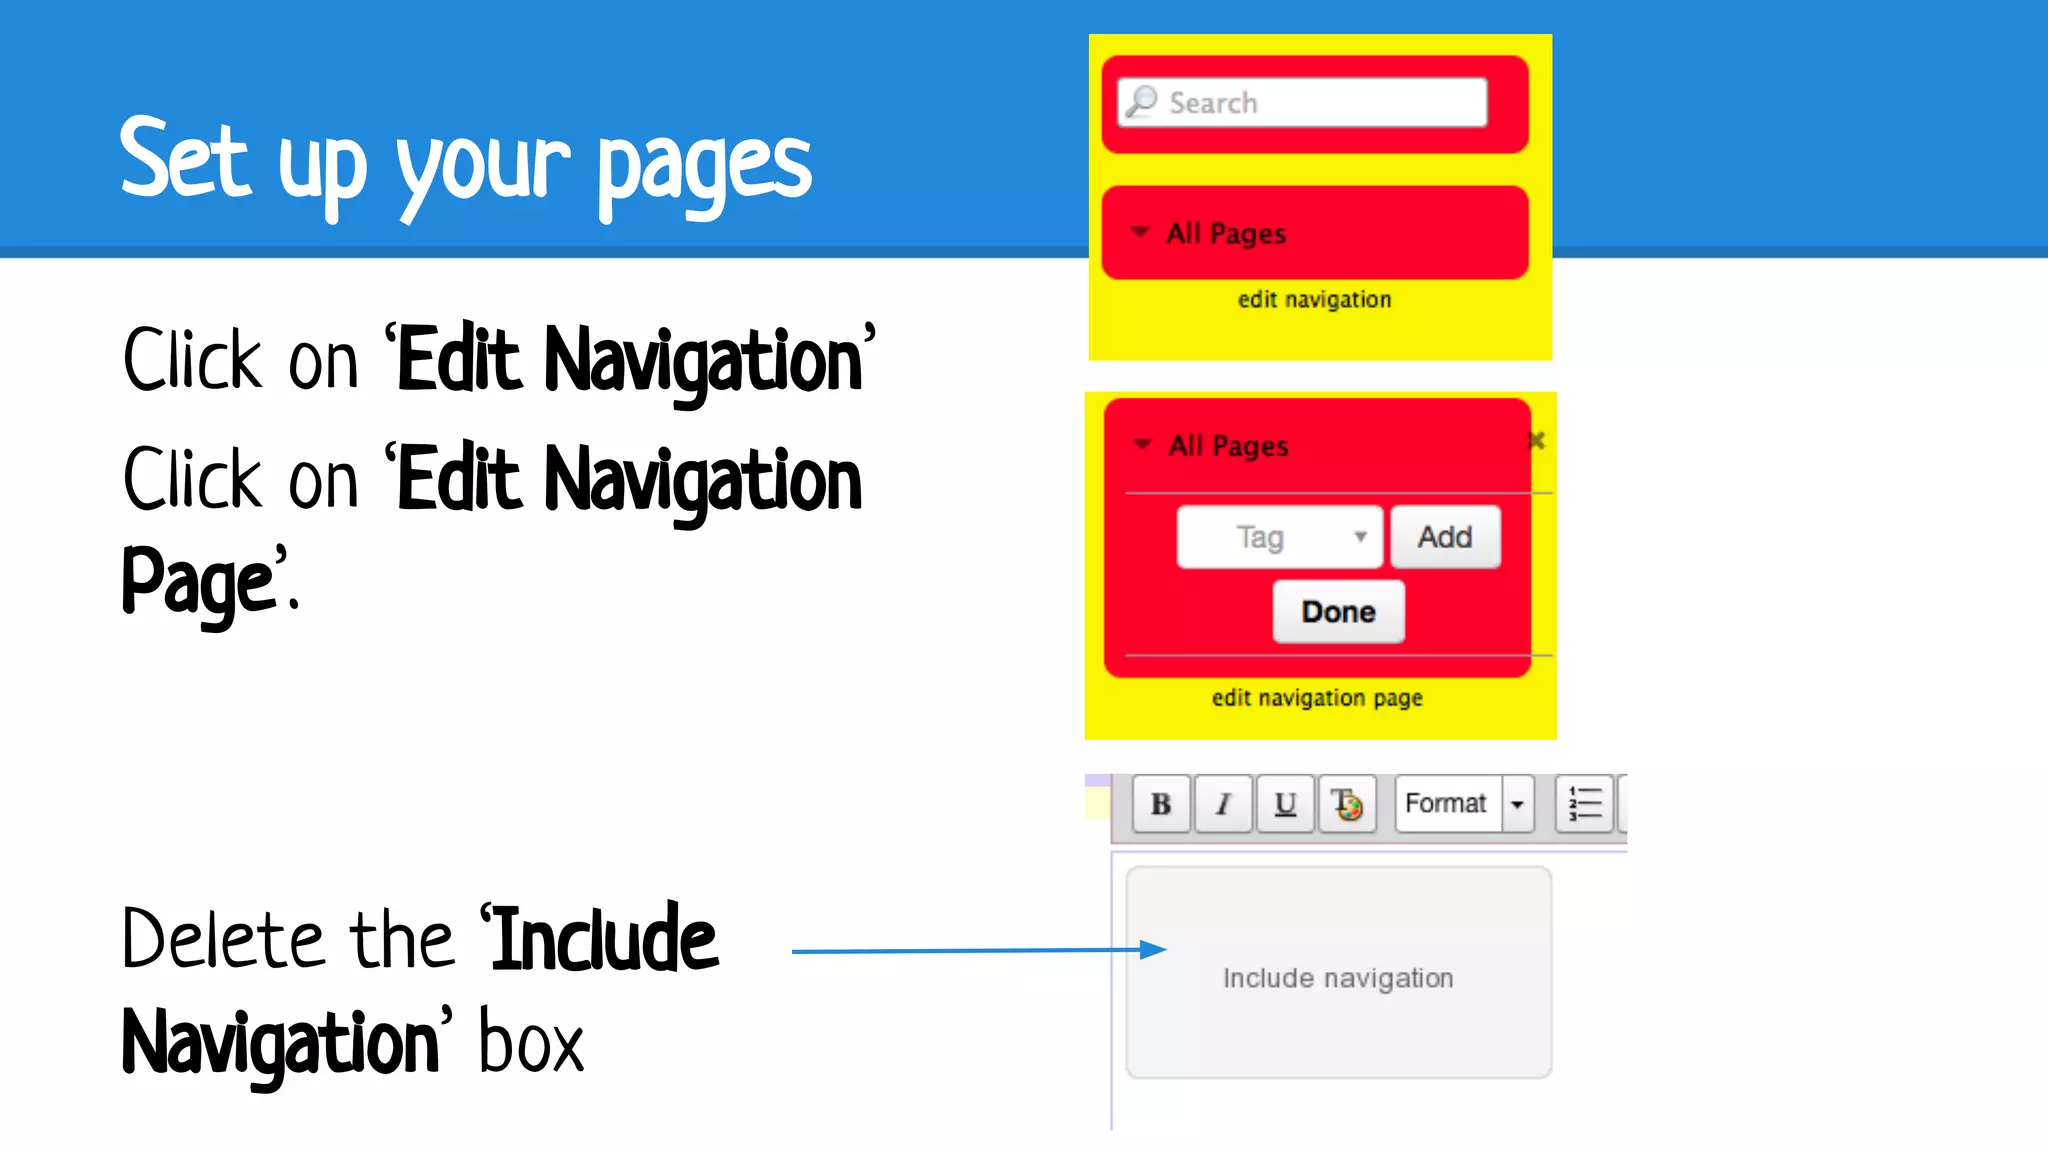
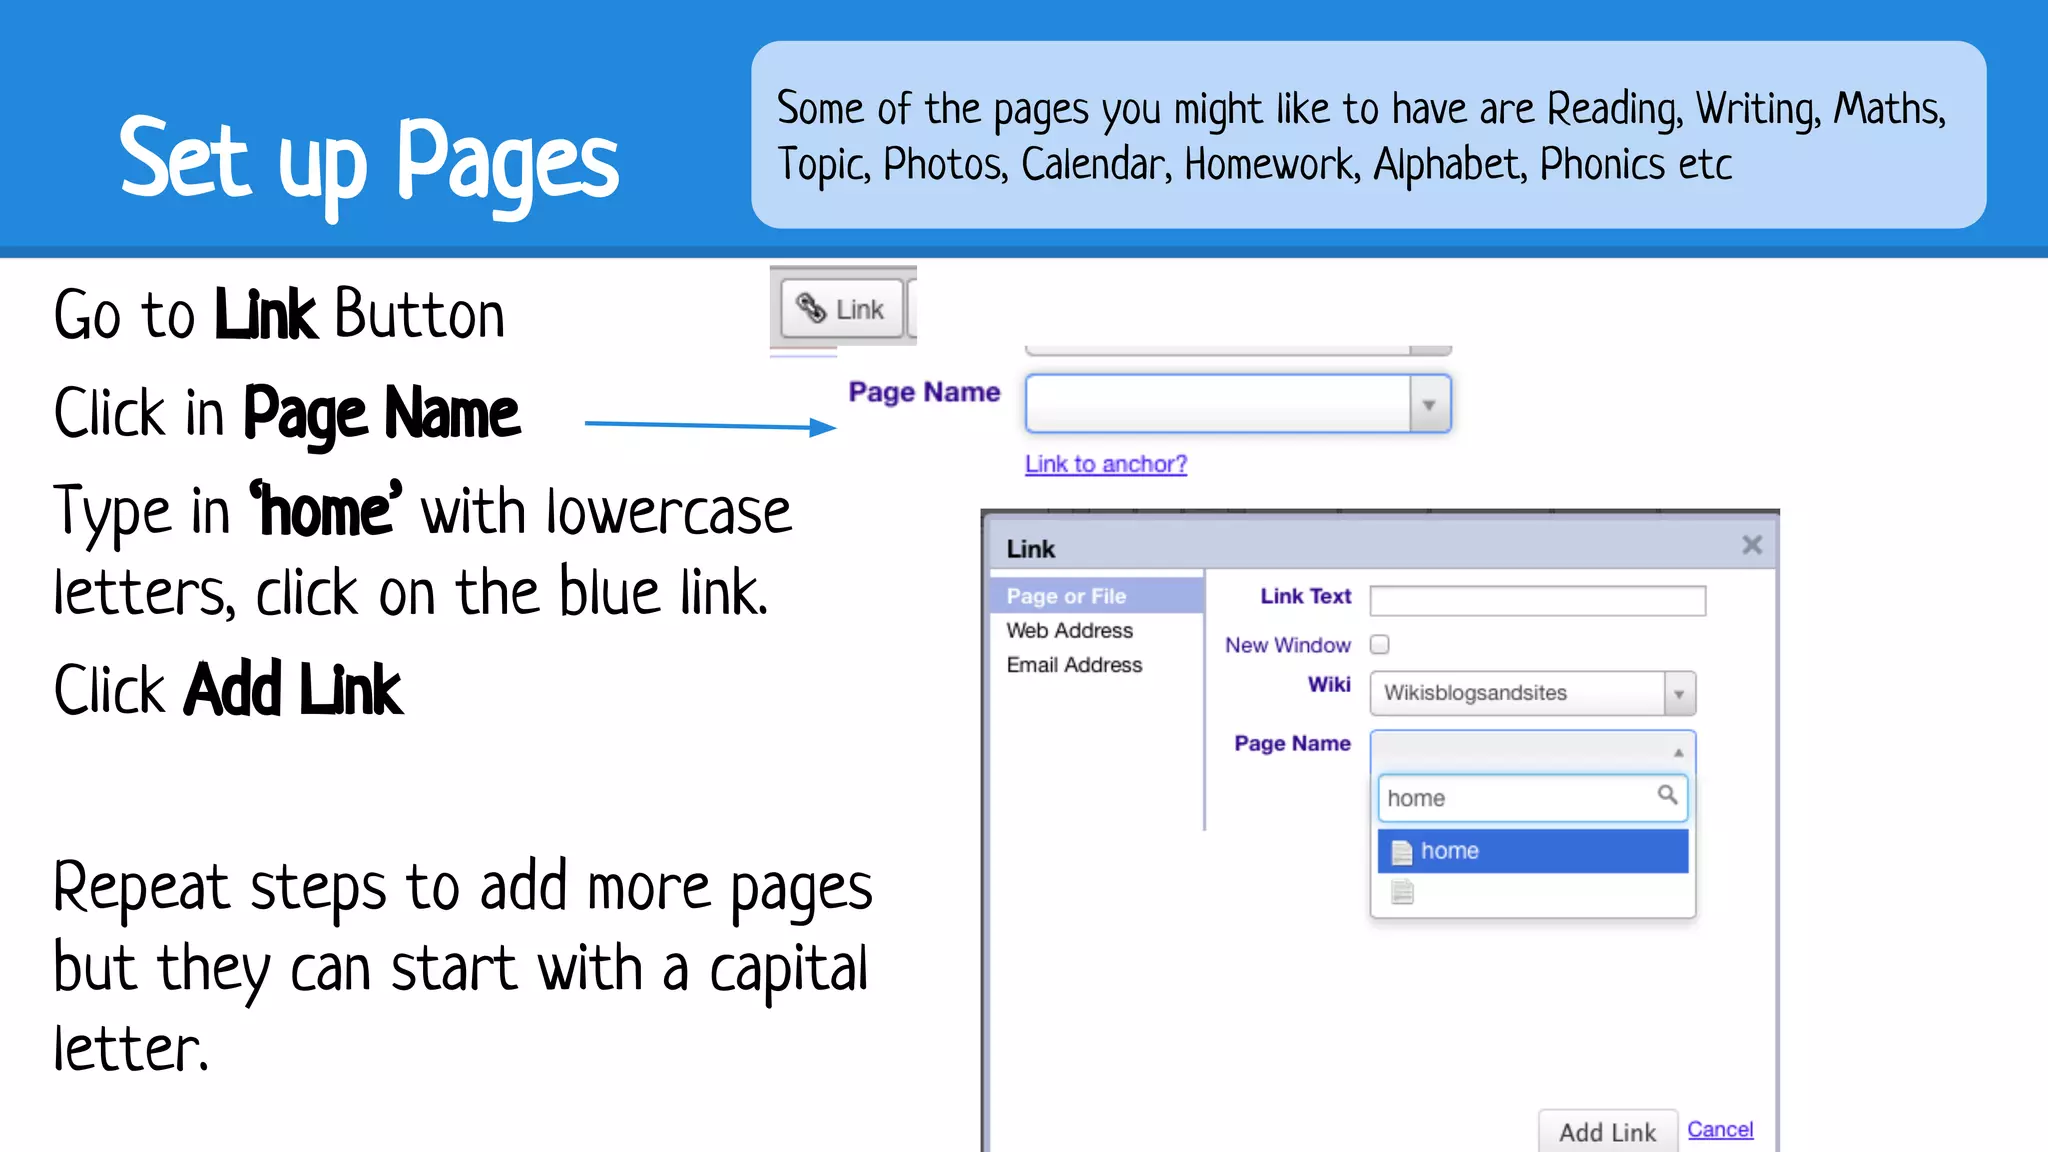
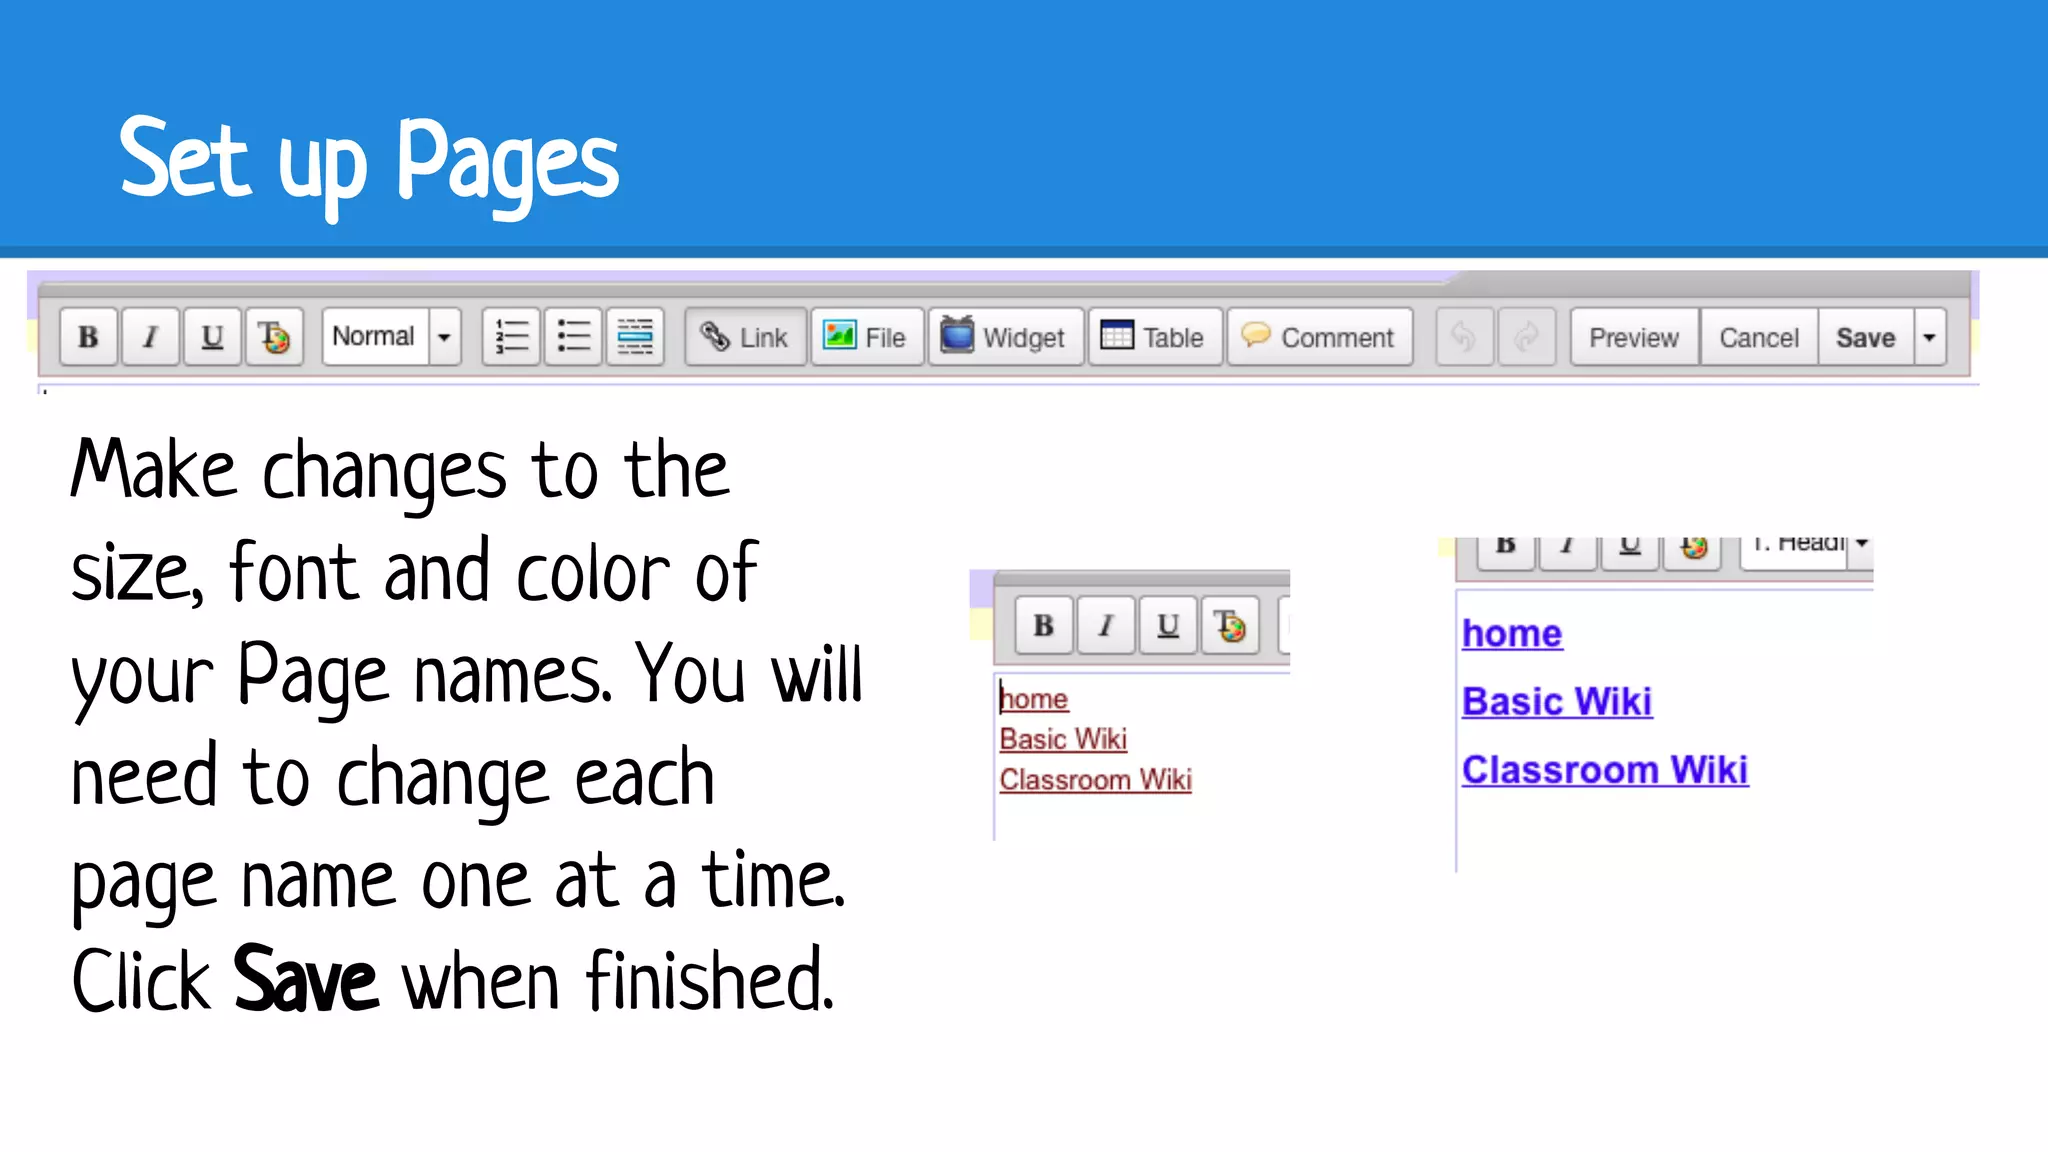

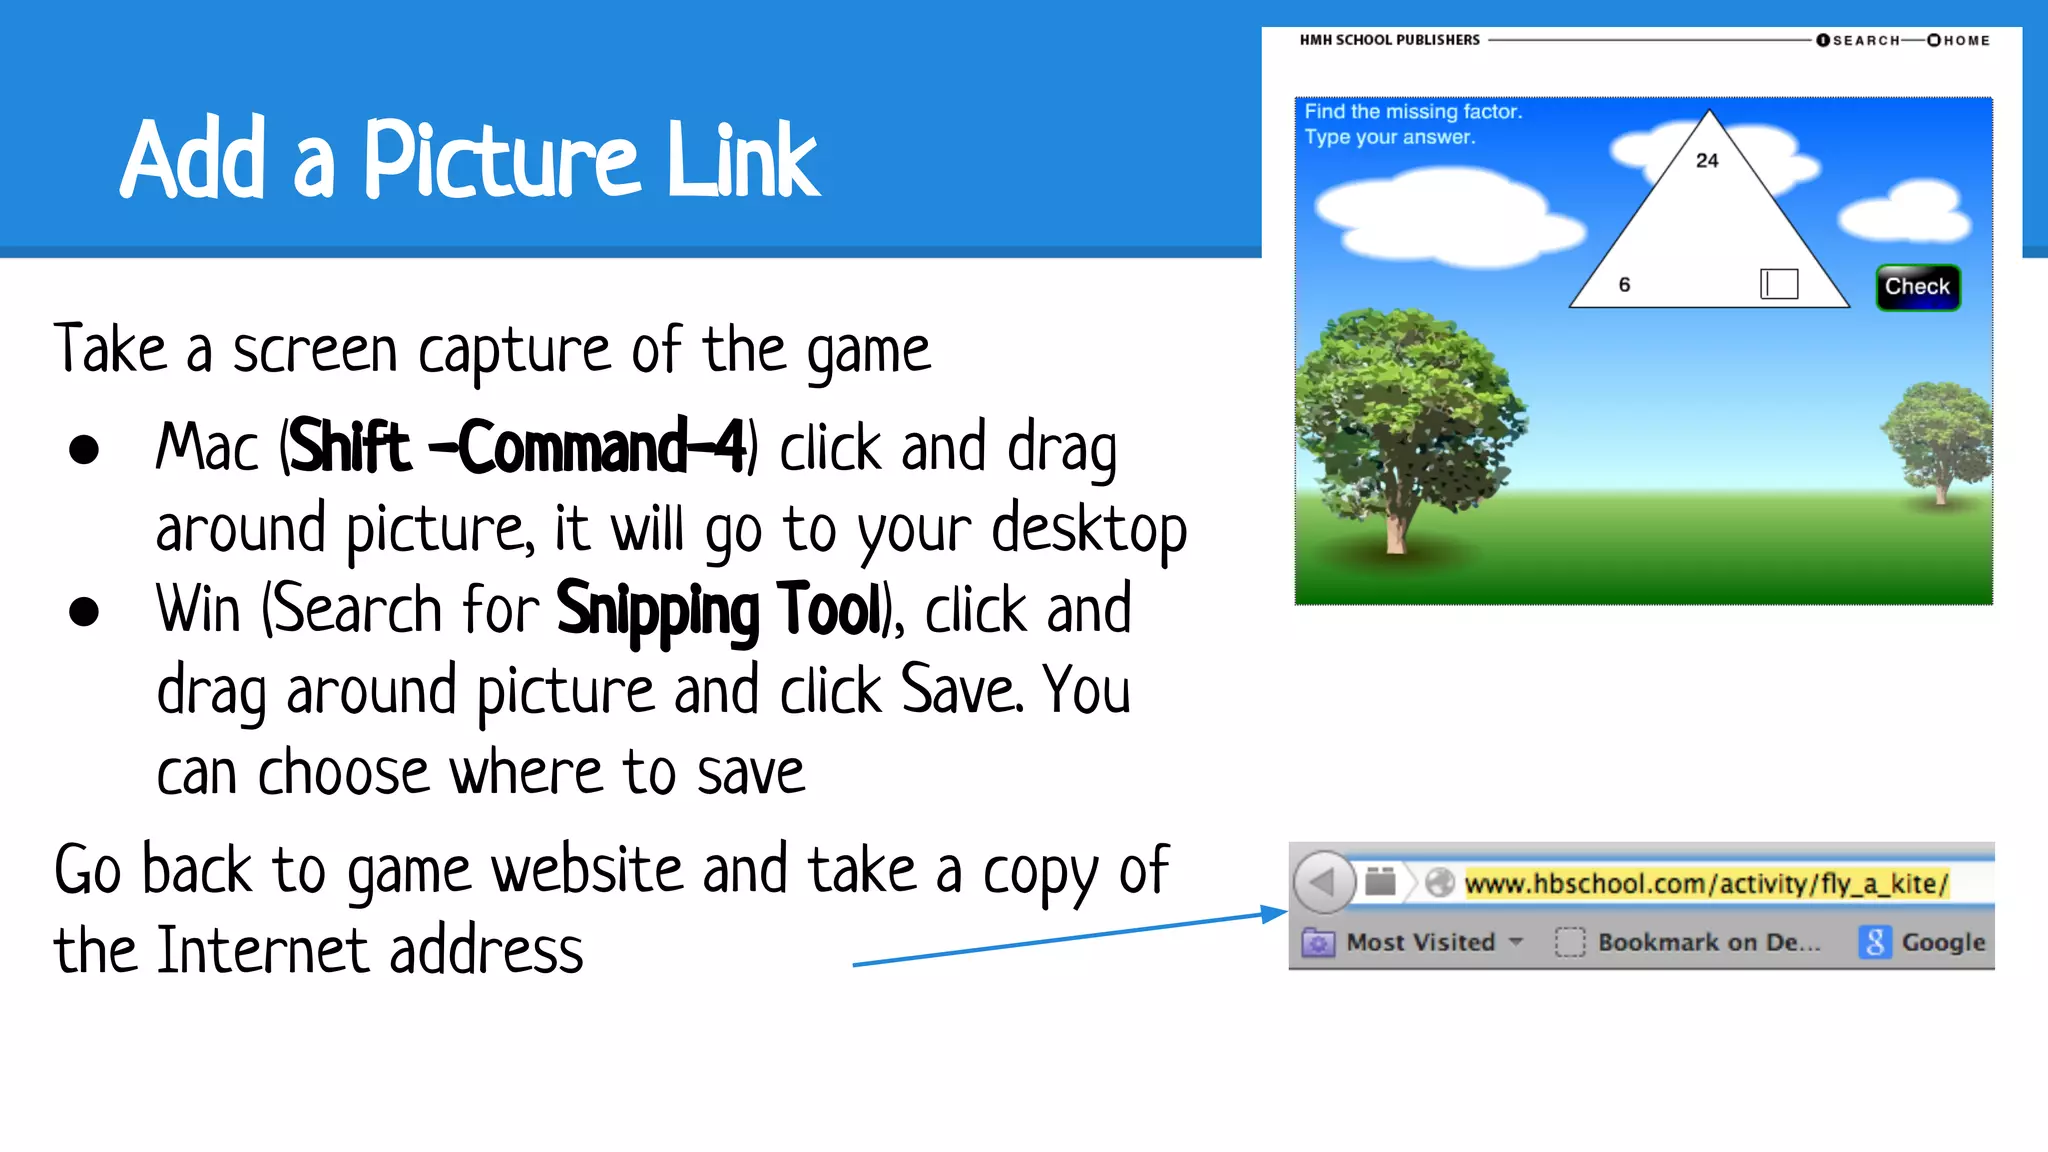
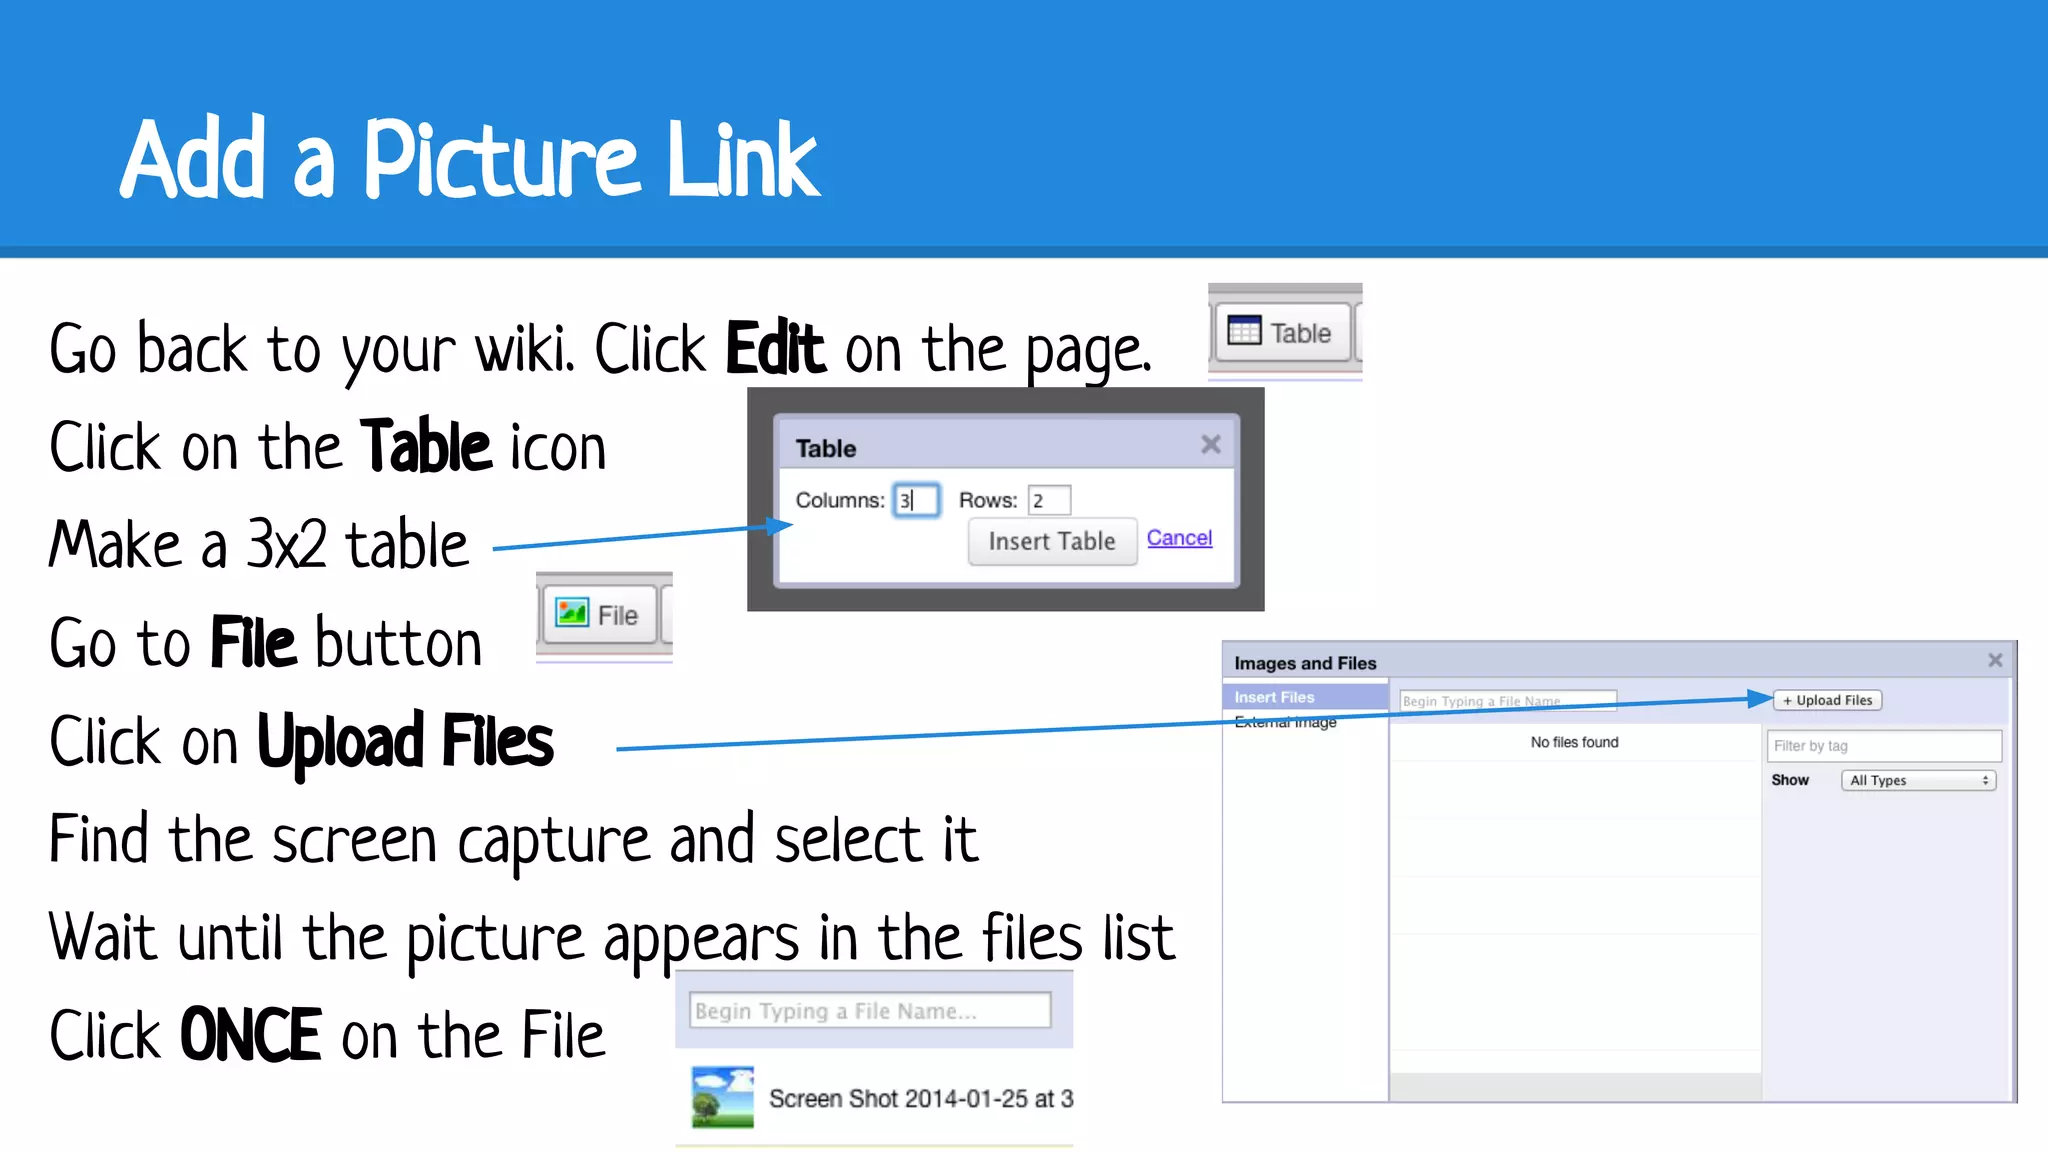
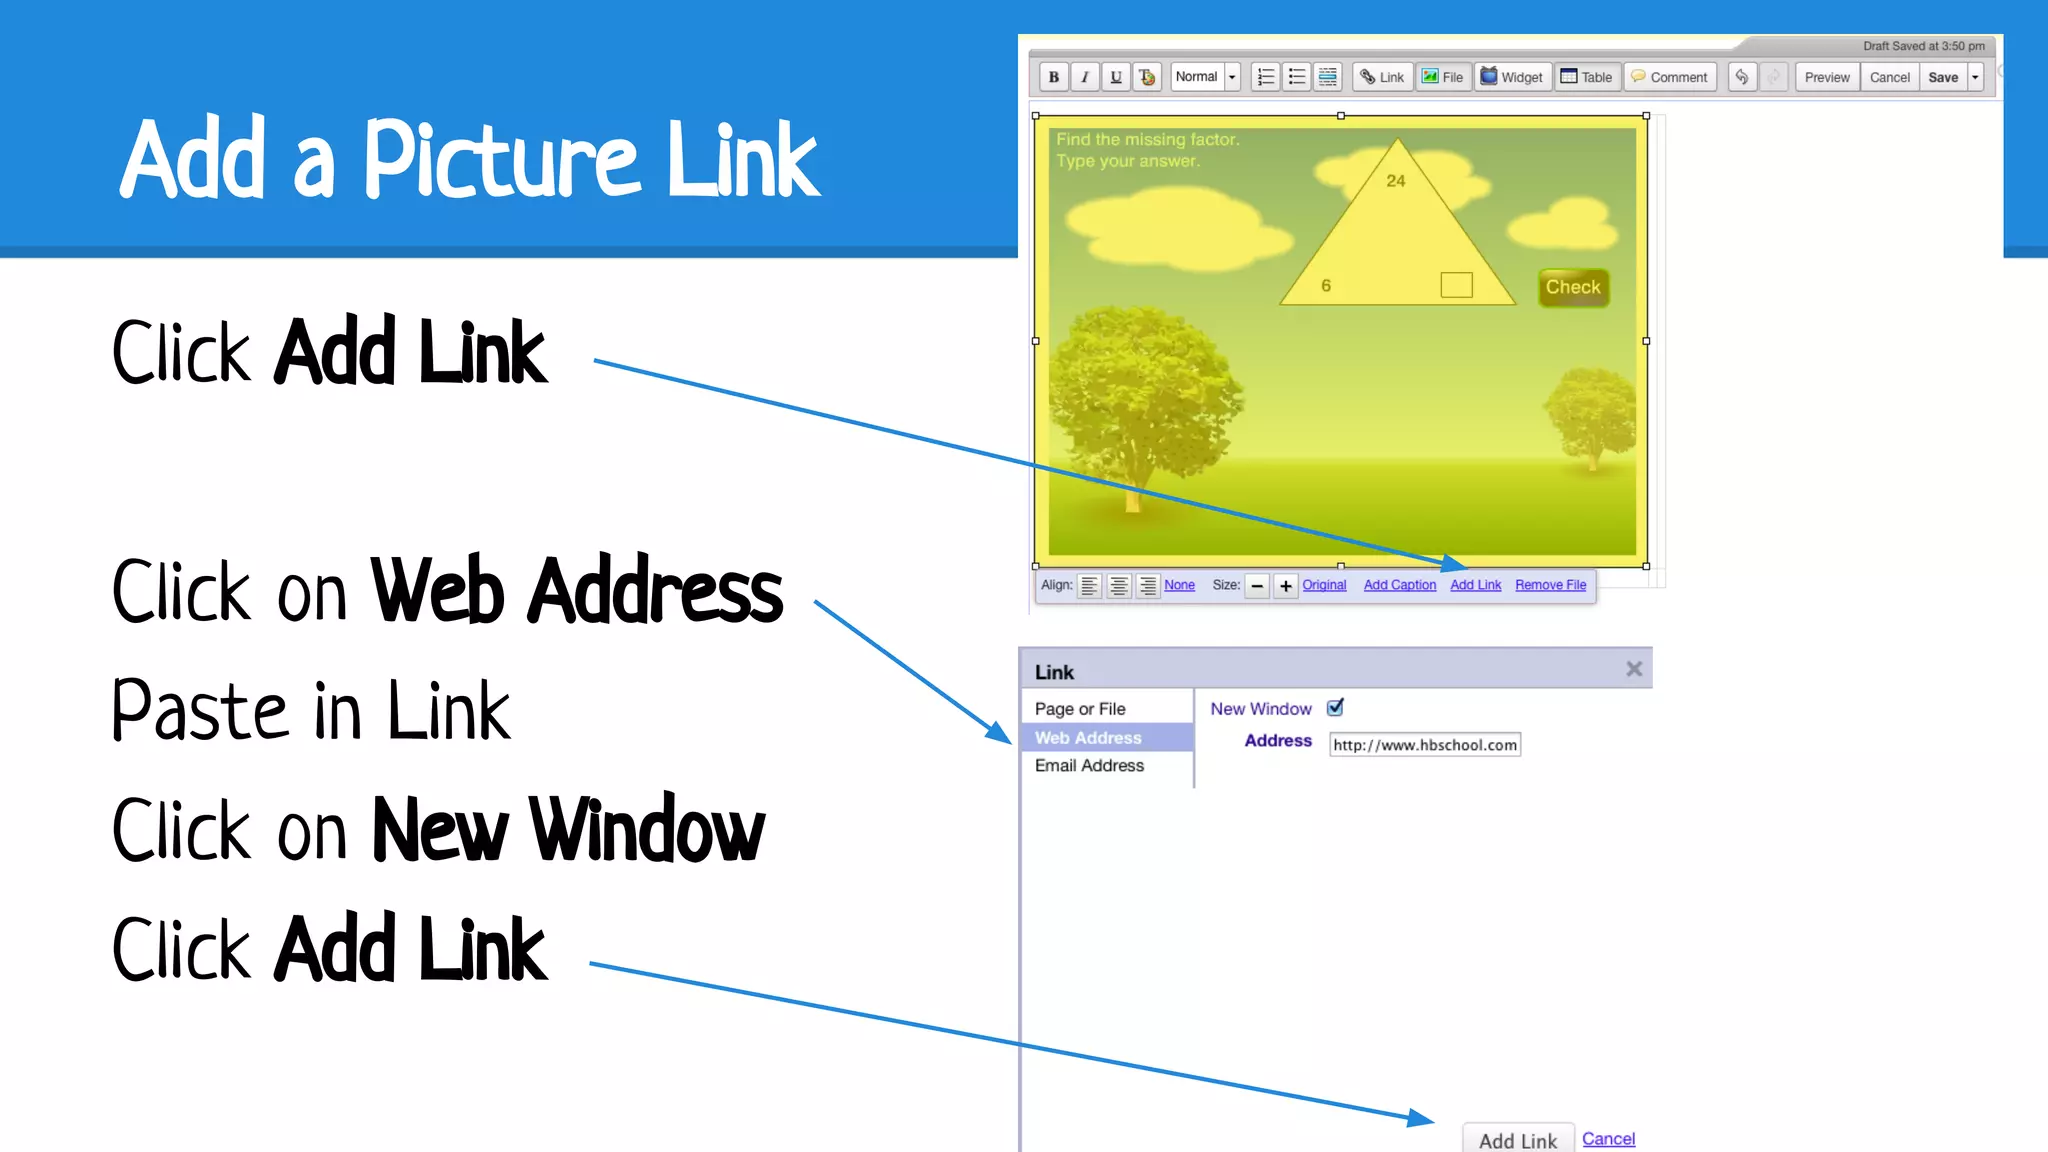
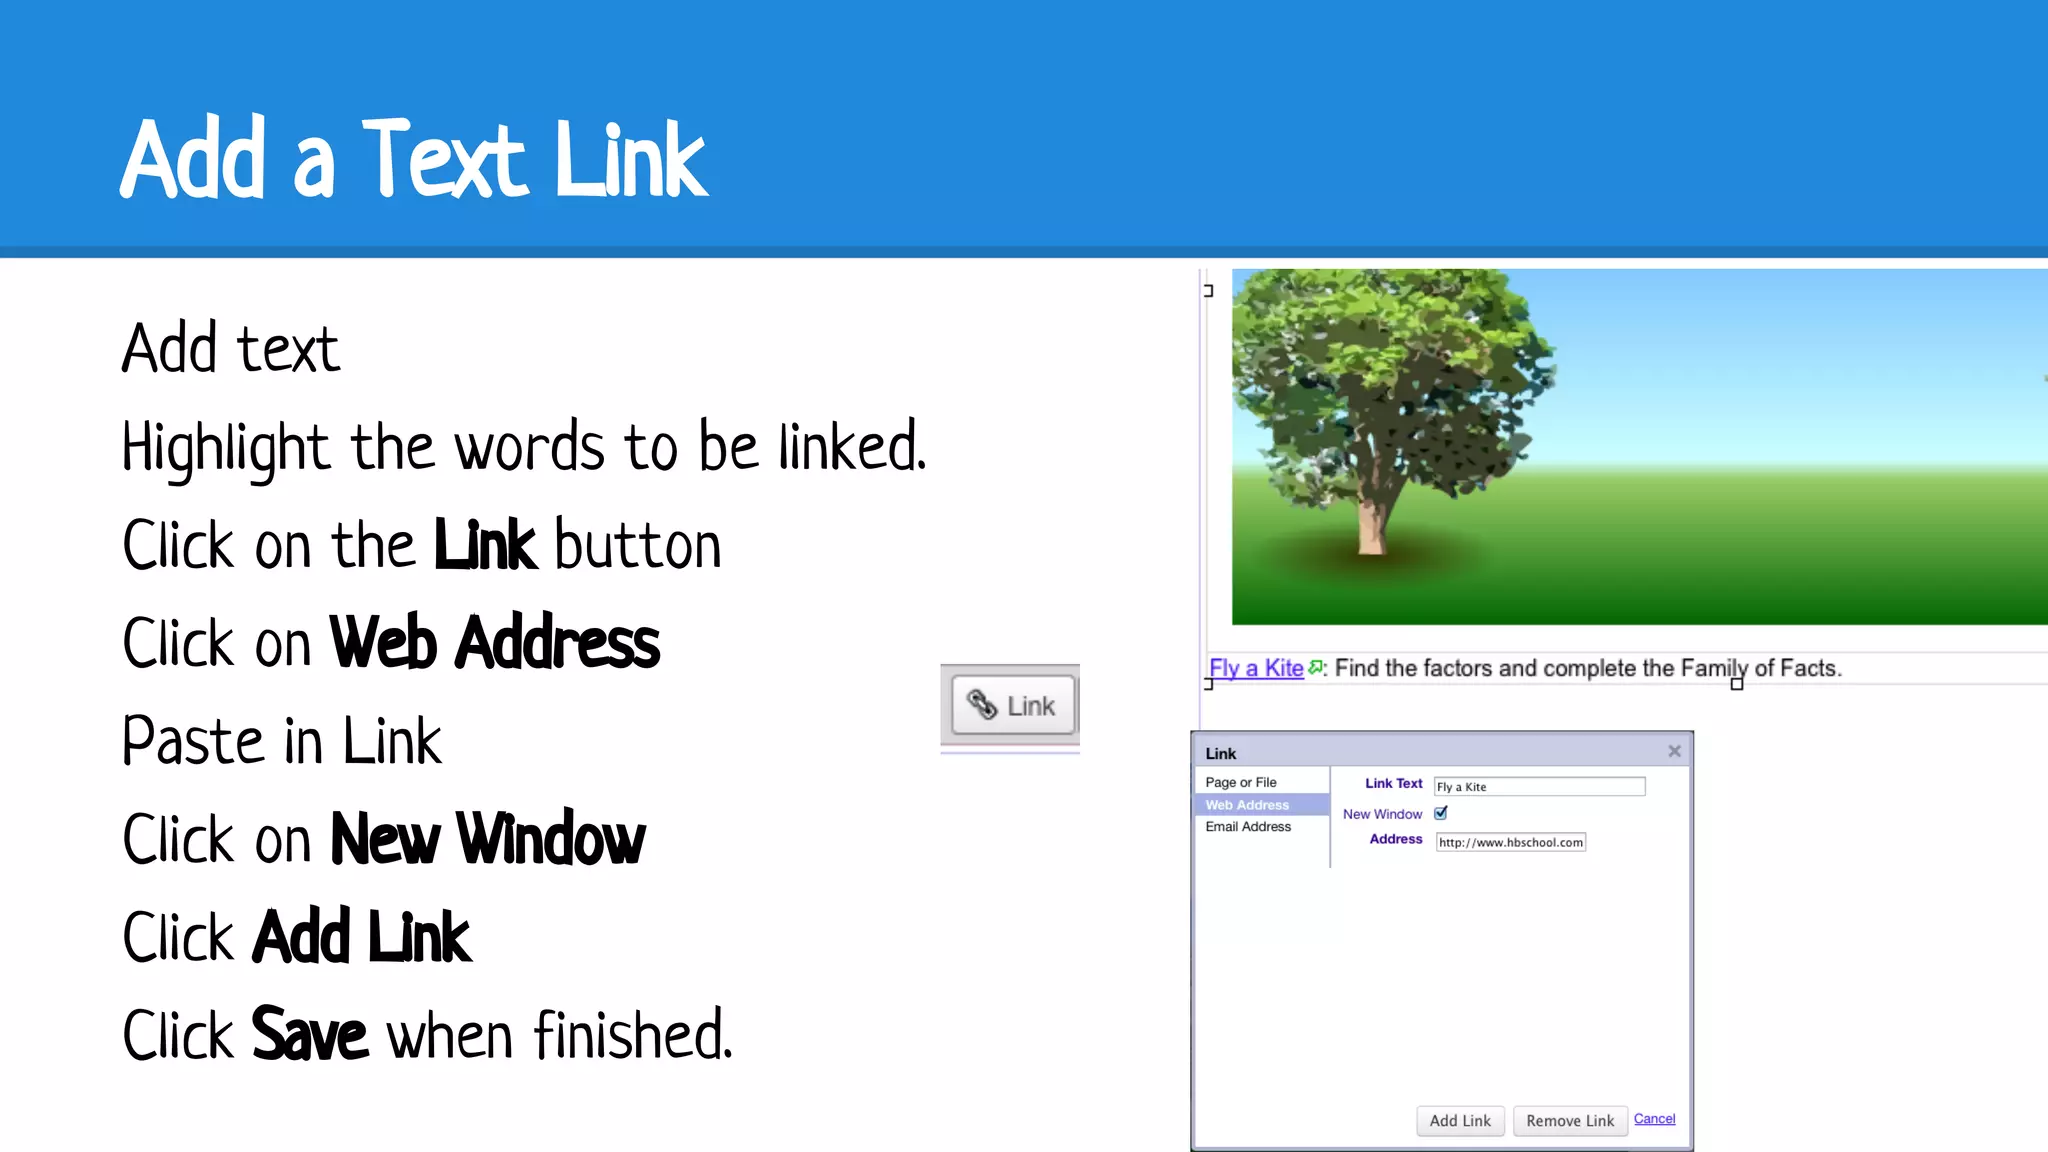
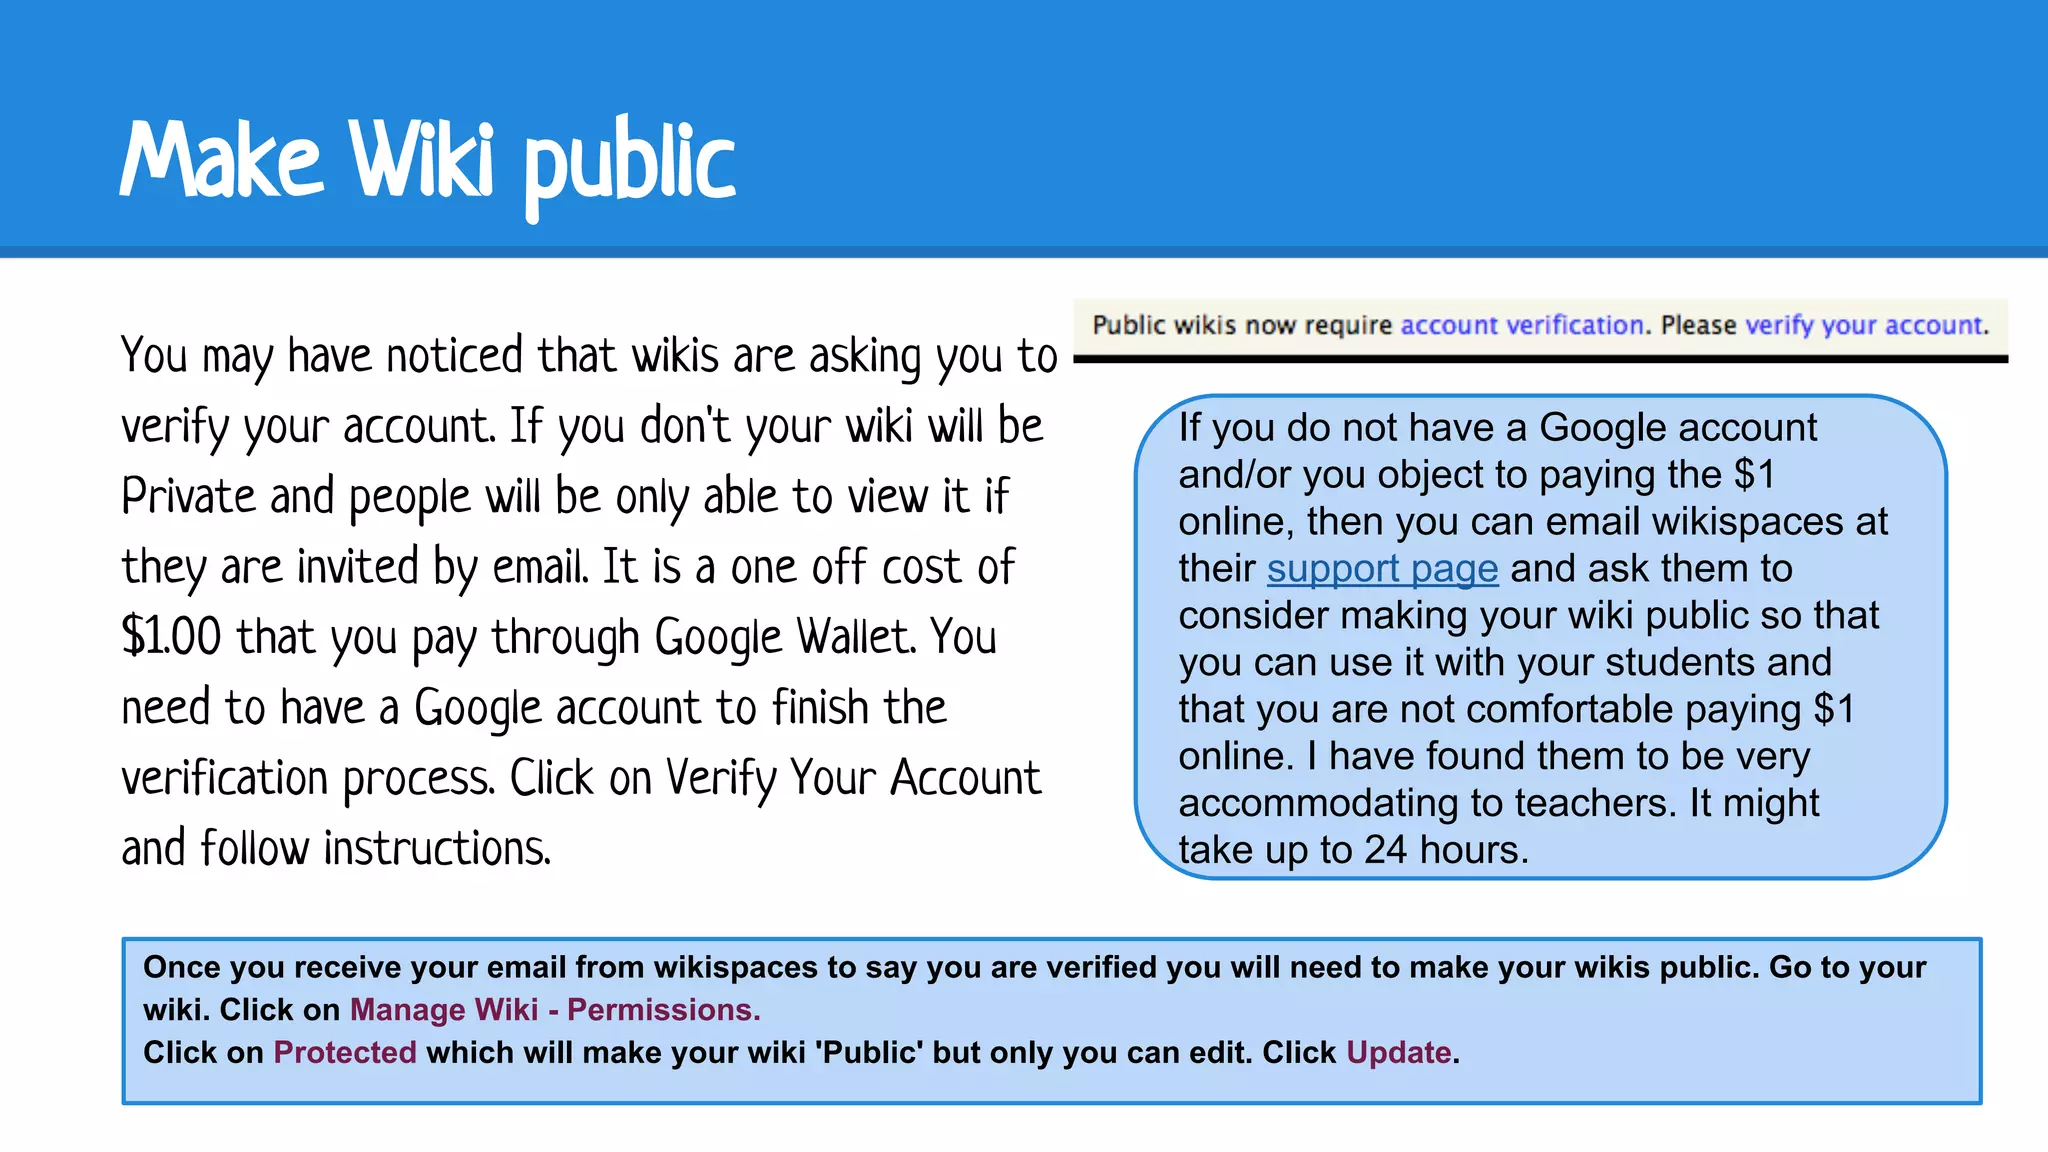
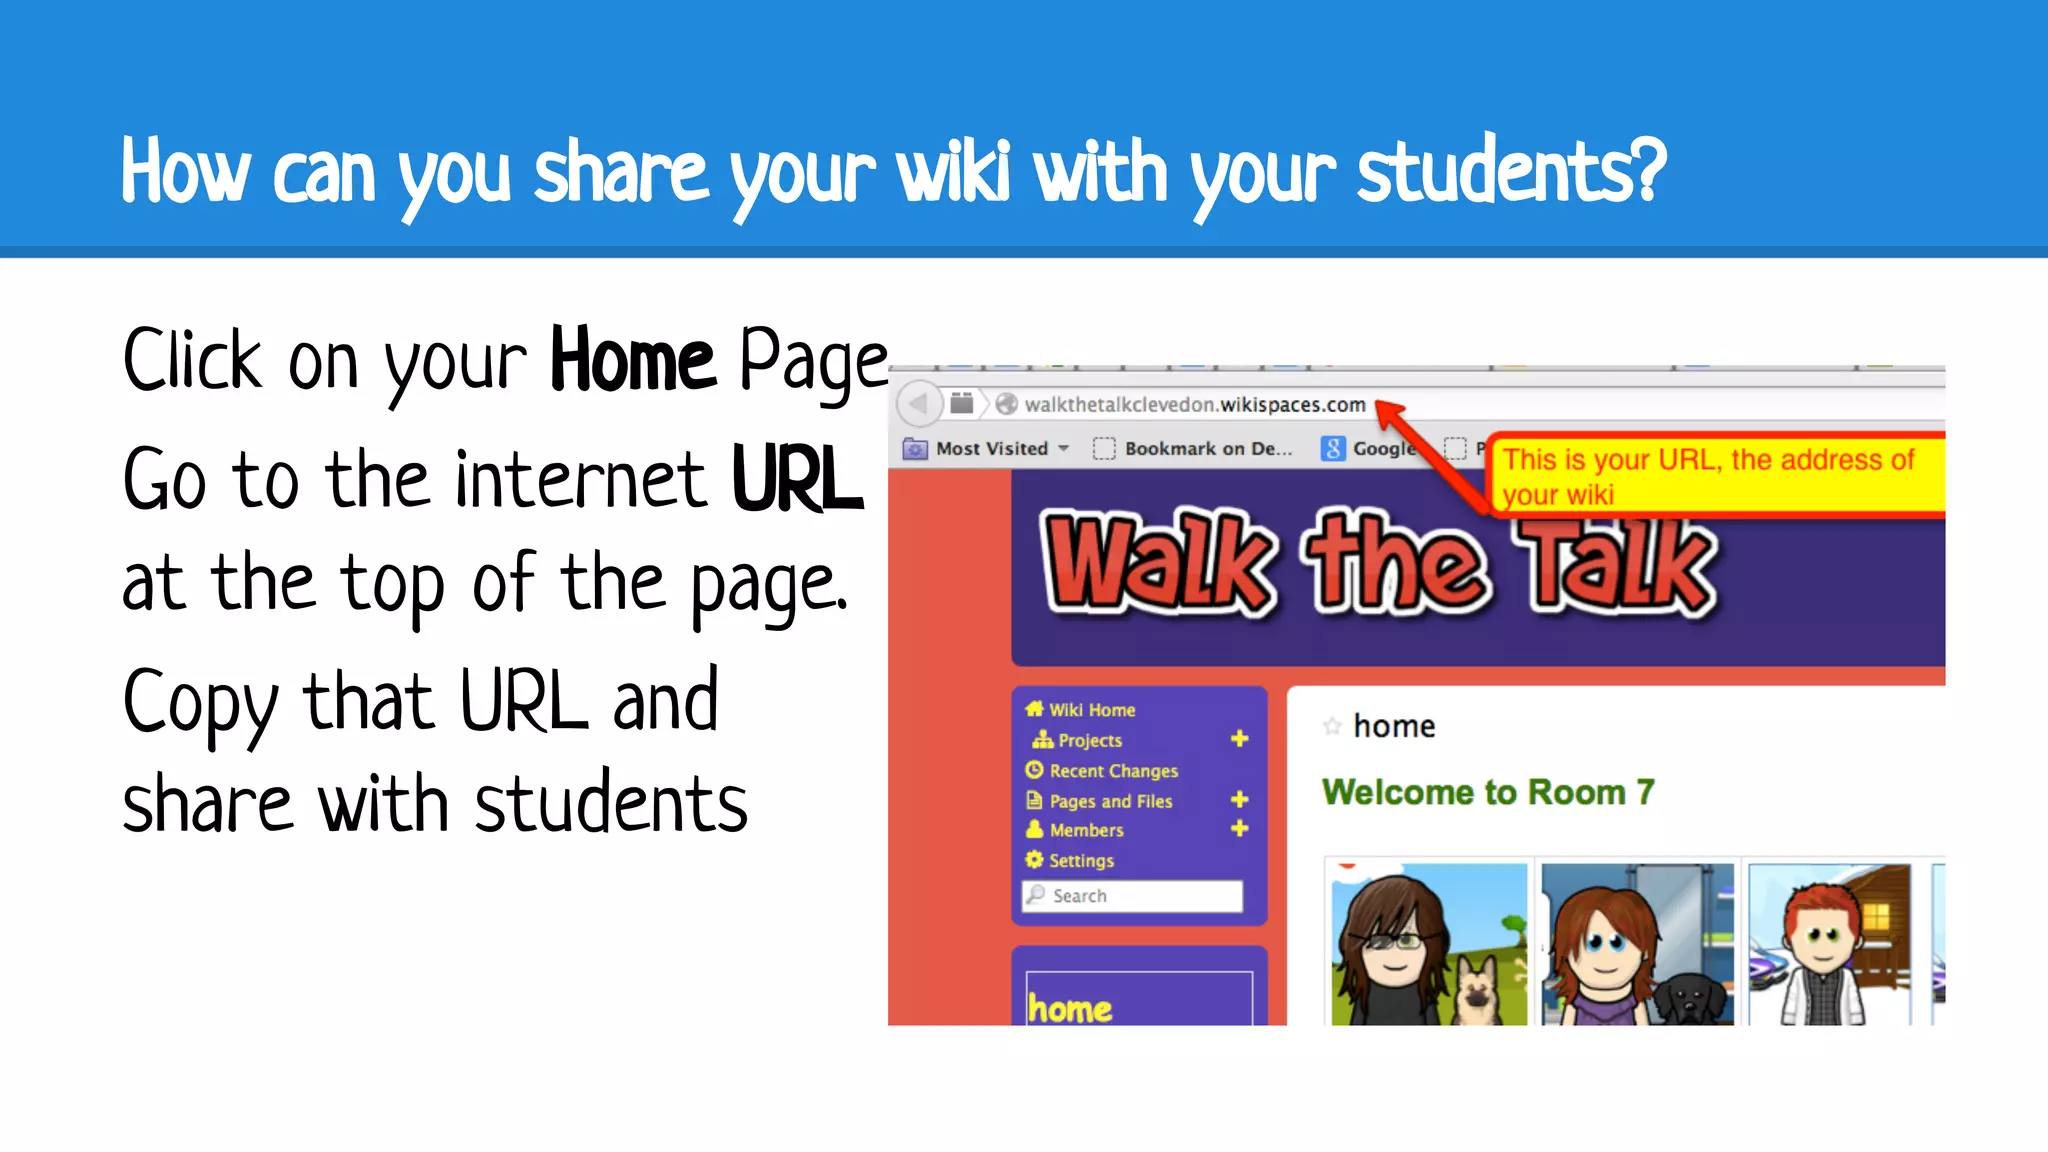

This document provides step-by-step instructions for setting up a basic wiki on Wikispaces.com. It outlines how to create an account, set up a new wiki, customize colors and themes, add a logo, set up navigation pages, edit pages by adding content and links, and make the wiki public so students can access it. The goal is to create an organized, easy-to-navigate online resource that can be shared with students.


![Wicked wikis presentation[1]](https://cdn.slidesharecdn.com/ss_thumbnails/wickedwikispresentation1-100726170121-phpapp01-thumbnail.jpg?width=640&height=640&fit=bounds)


