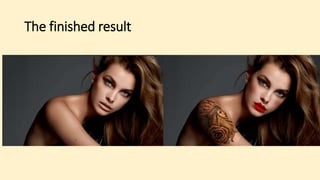
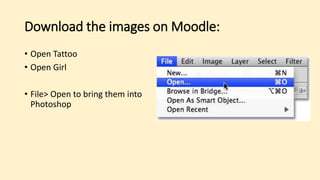
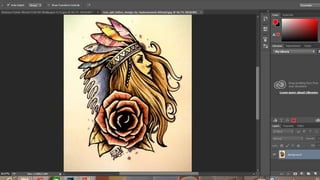
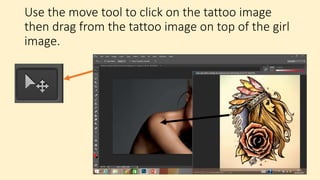
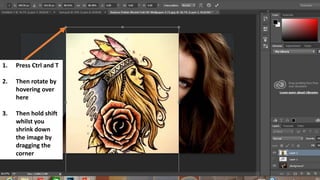
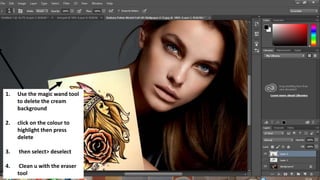
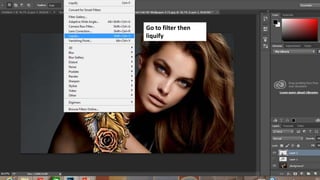
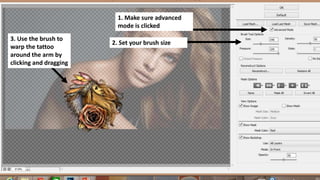
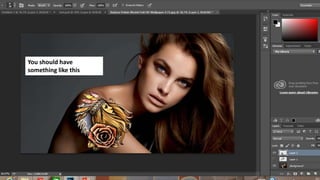
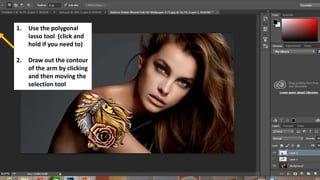
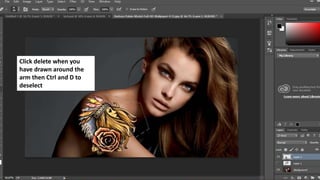
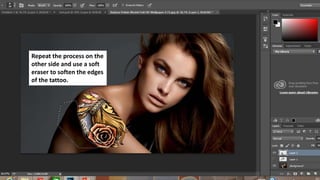
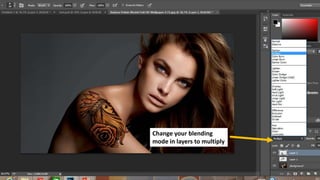
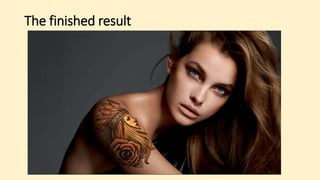
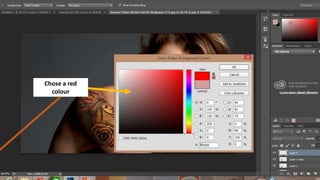
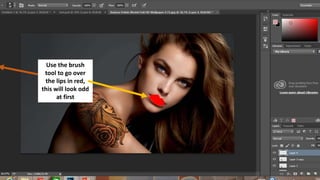
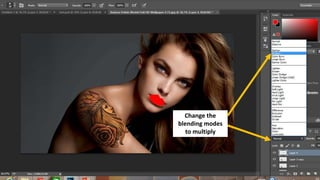
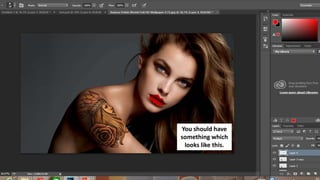
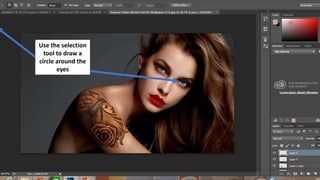
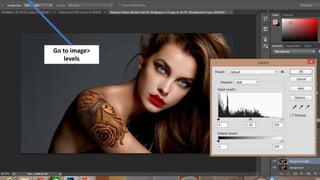
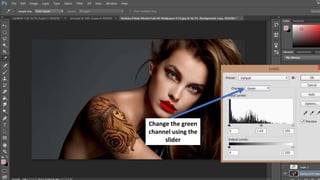
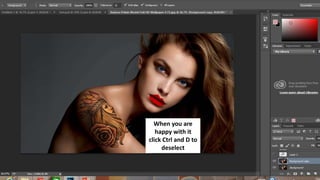
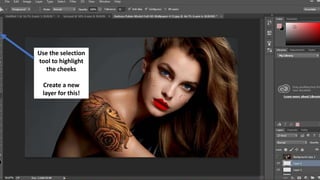
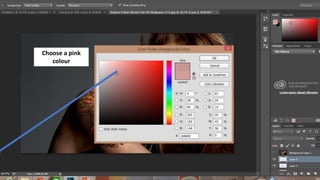
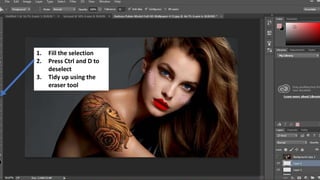
Basic Image manipulation
Tutorial
The finished result
Open up Photoshop
Download the images on Moodle:
• Open Tattoo
• Open Girl
• File> Open to bring them into
Photoshop
Use the move tool to click on the tattoo image
then drag from the tattoo image on top of the girl
image.
1. Press Ctrl and T
2. Then rotate by
hovering over
here
3. Then hold shift
whilst you
shrink down
the image by
dragging the
corner
1. Use the magic wand tool
to delete the cream
background
2. click on the colour to
highlight then press
delete
3. then select> deselect
4. Clean u with the eraser
tool
Go to filter then
liquify
3. Use the brush to
warp the tattoo
around the arm by
clicking and dragging
1. Make sure advanced
mode is clicked
2. Set your brush size
You should have
something like this
1. Use the polygonal
lasso tool (click and
hold if you need to)
2. Draw out the contour
of the arm by clicking
and then moving the
selection tool
Click delete when you
have drawn around the
arm then Ctrl and D to
deselect
Repeat the process on the
other side and use a soft
eraser to soften the edges
of the tattoo.
Change your blending
mode in layers to multiply
Use the eraser to tidy up
the tattoo edges and
change the fill of your
tattoo
The finished result
Task 2
Adding make up effects
Chose a red
colour
Use the brush
tool to go over
the lips in red,
this will look odd
at first
Change the
blending modes
to multiply
You should have
something which
looks like this.
Use the selection
tool to draw a
circle around the
eyes
Go to image>
levels
Change the green
channel using the
slider
When you are
happy with it
click Ctrl and D to
deselect
Use the selection
tool to highlight
the cheeks
Create a new
layer for this!
Choose a pink
colour
1. Fill the selection
2. Press Ctrl and D to
deselect
3. Tidy up using the
eraser tool
Here’s your final image!
You could try changing
her hair colour or adding
other adjustments!

Basic image manipulation tutorial