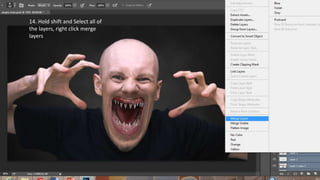
This Photoshop tutorial demonstrates how to edit a photo to give a man a shark mouth and cat eyes. The key steps are:
1. Duplicate the man's layer and use selection tools to remove the background.
2. Use the liquify filter to stretch the man's mouth and chin. Select and transform a shark mouth to fit inside the man's mouth, erasing parts to reveal his tongue.
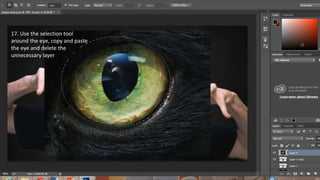
3. Select and transform a cat's eye to replace one of the man's eyes, then duplicate and flip the layer to replace the other eye.
The end result is an image of a man with a shark mouth and cat eyes created through photo manipulation in Photoshop.