SlideShare a Scribd company logo
Basic Configuration Access Point
Rocket M2
Discuss in this topic
1) The device used
2) Set up Access Point
3) Main Node Configuration Access Point
4) Sub Node Configuration Access Point
5) Connection Test
6) Troubleshoot
1) The device used
1. 1 unit PC/Laptop
2. 1 unit Access Point Ubiquiti Rocket M2
3. 2 unit Network Cable LAN
4. 1 unit Power Cable
5. 1 unit POE Adapter
6. 1 unit Antenna Sectorial/Omni
Access Point Main Node Access Point Sub Node
2) Set upAccess Point - Rocket M2
1. Download ubnt discovery tool from Ubiquiti (optional)
(http://www.ubnt.com/downloads/discovery/ubnt-discovery-v2.3.zip)
2. Extract ubnt-discovery-v2.3.zip.
3. Plug in first network cable from laptop to LAN port at POE adapter
4. Plug in second network cable from Rocket M2 AP to POE port at POE adapter
MAIN NODE
2) Main Node Configuration Access Point - Rocket M2
1. By default Rocket M2 IP address is 192.168.1.20. Set Laptop to static IP
TCP/IPv4
 Set – 192.168.1.22 as Laptop IP Address
 Set – 255.255.255.0 as Subnet Mask
 Set - 192.168.1.20 as Default Getaway
2. Open browser and type Rocket M2 IP address 192.168.1.20. Default username
and password:
 Username - ubnt
 Password - ubnt
 * for the first time or after reset to factory default
o Country –United State
o Language - English
o I agree to these terms of use – Tick
o Click button “Login”
3. Click WIRELESS menu
 Wireless Mode – Access Point
 SSID – KG WIFI <site name>eg. KG WIFI FELDA MEMPAGA 3 A (for AP
sectorial A)
 Channel Width – 20 MHz
 Antenna Gain – 15 dBi
 Output Power – 24 dBm
 Click on button “Change” and “Apply” to save configuration
4. Click NETWORK menu
 Set – 10.16.9.2 as IP address (sectorial AP A for main node)
 Set – 255.255.255.224 as Netmask (main node using /27)
 Set – 10.16.9.1 as Gateway IP (router IP address)
 Click on button “Change” and “Apply” to save configuration
5. Re-insert address is 10.16.9.2. Set Laptop to static IP TCP/IPv4
 Set – 10.16.9.10 as Laptop IP Address
 Set – 255.255.255.0 as Subnet Mask
 Set - 10.16.9.1 as Default Getaway
6. Open browser and type Rocket M2 IP address 10.16.9.2 Default username and
password:
 Username - ubnt
 Password – ubnt
 Click button “Login”
7. Click SERVICES menu
 Set – Enable SNMP Agent
 Set – PI1M2HOME as SNMP community TBD
 Set – FELDA MEMPAGA 3 (refer to which Pi1M)
 Set – Enable Telnet Server
 Set – Enable NTP Client
 Set – 10.10.10.1 as NTP Server TBD
 Click on button “Change” and “Apply” to save configuration
8. Click SYSTEM menu
 Upload firmware - click on button “Choose File” and “Select” file XM-
v5.5.build12536.bin and click button “Open”
 Click button ”Upload”
 Click button ”Update”
 Wait until finish uploading
 Firmware Version: XM.v5.5 is successful update
 Set – Device name “AP Main Node 1” TBD
o Click key icon for change new password
 Set - Administrator Username:Admin
 Set – Current Password : ubnt
 Set - New Password: m5d1t383
 Set - Verify New Password : m5d1t383
 Click on button “Change” and “Apply” to save configuration
Configuration main node is complete
Figure 1: The final installation Access Point (x3) sectorial in main node
SUB NODE
3) Sub Node Configuration Access Point - Rocket M2
1. By default Rocket M2 IP address is 192.168.1.20. Set Laptop to static IP
TCP/IPv4
 Set – 192.168.1.22 as Laptop IP Address
 Set – 255.255.255.0 as Subnet Mask
 Set - 192.168.1.20 as Default Getaway
2. Open browser and type Rocket M2 IP address 192.168.1.20. Default username
and password:
 Username - ubnt
 Password - ubnt
 * for the first time or after reset to factory default
o Country – United State
o Language - English
o I agree to these terms of use – Tick
o Click button “Login”
3. Click WIRELESS menu
 Wireless Mode – Access Point
 SSID – KTW WIFI ZON A/ZON B/ZON C
 Channel Width – 20 MHz
 Antenna Gain – 13dBi
 Output Power – 24 dBm
 Click on button “Change” and “Apply” to save configuration
4. Click NETWORK menu
 Set – 10.21.9.60 as IP address (Omni AP A for sub node)
 Set – 255.255.255.224 as Netmask (main node using /27)
 Set – 10.21.9.65 as Gateway IP (briging IP address)
 Click on button “Change” and “Apply” to save configuration
5. Re-insert address is 10.16.9.2. Set Laptop to static IP TCP/IPv4
 Set – 10.21.9.60 as Laptop IP Address
 Set – 255.255.255.0 as Subnet Mask
 Set - 10.21.9.60 as Default Getaway
6. Open browser and type Rocket M2 IP address 0.21.9.60 Default username and
password:
 Username - ubnt
 Password – ubnt
 Click button “Login”
7. Click SERVICES menu
 Set – Enable SNMP Agent
 Set – PI1M2HOME as SNMP community TBD
 Set – FELDA MEMPAGA 3 (refer to which Pi1M)
 Set – Enable Telnet Server
 Set – Enable NTP Client
 Set – 10.10.10.1 as NTP Server TBD
 Click on button “Change” and “Apply” to save configuration
8. Click SYSTEM menu
 Upload firmware - click on button “Choose File” and “Select” file XM-
v5.5.build12536.bin and click button “Open”
 Click button ”Upload”
 Click button ”Update”
 Wait until finish uploading
 Firmware Version: XM.v5.5 is successful update
 Set – Device name “AP Main Node 1” TBD
o Click key icon for change new password
 Set – Current Password : ubnt
 Set - Administrator Username:Admin
 Set - New Password: m5d1t383
 Set - Verify New Password : m5d1t383
 Click on button “Change” and “Apply” to save configuration
Configuration sub node is complete
Figure 2: The final installation Access Point (x4) omni in sub node
4) Connection Test
1. Plug in first network cable from laptop to LAN port at POE adapter
2. Change laptop IP address same with NanoBridge M5 IP segment
3. On PC/Laptop run command prompt
a. Windows = Start>run> type “cmd” > hit Enter
4. Ping 10.16.9.98 (main node / sub node IP Address) to NanoBridge M5 IP address
to see the connection between laptop and AP
5) Troubleshoot
1. Cannot detect NanoBridge M5 IP address
 Open ubnt-discovery.bat and wait until it show AP detail including IP
address and MAC address
2. How to reboot device
 Click on button “Reboot”and button “Yes, reboot!”
 Wait for a while until finish rebooting device
3. How to backup configuration device
 Click on button “Download”
 Save the file
4. How to upload configuration
 Click on button “Choose File”
 Click on button “Upload”
 Click on button “Apply” to save configuration
5. How to reset to factory default device
 Click SYSTEM menu and click Reset button at Reset to Factory Default
 Wait until Rocket M2 AP reboot completely
 By default IP Address is 192.168.1.20

More Related Content

What's hot

Part 3: IMT-2020 - 5G for Absolute Beginners
Part 3: IMT-2020 - 5G for Absolute BeginnersPart 3: IMT-2020 - 5G for Absolute Beginners
Part 3: IMT-2020 - 5G for Absolute Beginners
3G4G
 
Wireless network
Wireless networkWireless network
Wireless network
mattglover0
 
Handoff
HandoffHandoff
Rf fundamentals
Rf fundamentalsRf fundamentals
Rf fundamentals
Sura Satish Babu
 
Wi-Fi Technology
Wi-Fi TechnologyWi-Fi Technology
Wi-Fi Technology
Naveen Kumar
 
A survey on Device-to-Device Communication
A survey on Device-to-Device CommunicationA survey on Device-to-Device Communication
A survey on Device-to-Device CommunicationKuldeep Narayan Singh
 
Presentation of-wimax
Presentation of-wimaxPresentation of-wimax
Presentation of-wimax
Rubab Fatima
 
Cell-Phone/Tower Radiation Hazards
Cell-Phone/Tower Radiation Hazards Cell-Phone/Tower Radiation Hazards
Cell-Phone/Tower Radiation Hazards
Aswin KP
 
Li-Fi technology
Li-Fi technologyLi-Fi technology
Li-Fi technology
Rishikesh Bhutada
 
Wi-fi (ppt) by Mayank Saxena
Wi-fi (ppt) by Mayank SaxenaWi-fi (ppt) by Mayank Saxena
Wi-fi (ppt) by Mayank Saxena
Mayank Saxena
 
Generations of mobile
Generations of mobileGenerations of mobile
Generations of mobilekondalarao7
 
Mobile Communication Generation
Mobile Communication GenerationMobile Communication Generation
Mobile Communication Generation
Yansi Keim
 
5G wireless technology
5G wireless technology5G wireless technology
5G wireless technology
Dr. Ali Yadborughi
 
Rf receiver design case studies
Rf receiver design case studiesRf receiver design case studies
Rf receiver design case studiesPhani Kumar
 
New carrier technique for 5G mobile communication
New carrier technique for 5G mobile communicationNew carrier technique for 5G mobile communication
New carrier technique for 5G mobile communication
mohamed naeem
 
Sdr
SdrSdr

What's hot (20)

Part 3: IMT-2020 - 5G for Absolute Beginners
Part 3: IMT-2020 - 5G for Absolute BeginnersPart 3: IMT-2020 - 5G for Absolute Beginners
Part 3: IMT-2020 - 5G for Absolute Beginners
 
Wireless network
Wireless networkWireless network
Wireless network
 
Handoff
HandoffHandoff
Handoff
 
Rf fundamentals
Rf fundamentalsRf fundamentals
Rf fundamentals
 
Wi-Fi Technology
Wi-Fi TechnologyWi-Fi Technology
Wi-Fi Technology
 
Wireless networks ppt
Wireless networks pptWireless networks ppt
Wireless networks ppt
 
A survey on Device-to-Device Communication
A survey on Device-to-Device CommunicationA survey on Device-to-Device Communication
A survey on Device-to-Device Communication
 
Presentation of-wimax
Presentation of-wimaxPresentation of-wimax
Presentation of-wimax
 
Ppt on 5G
Ppt on 5GPpt on 5G
Ppt on 5G
 
Cell-Phone/Tower Radiation Hazards
Cell-Phone/Tower Radiation Hazards Cell-Phone/Tower Radiation Hazards
Cell-Phone/Tower Radiation Hazards
 
Li-Fi technology
Li-Fi technologyLi-Fi technology
Li-Fi technology
 
Wi-fi (ppt) by Mayank Saxena
Wi-fi (ppt) by Mayank SaxenaWi-fi (ppt) by Mayank Saxena
Wi-fi (ppt) by Mayank Saxena
 
Generations of mobile
Generations of mobileGenerations of mobile
Generations of mobile
 
Mobile Communication Generation
Mobile Communication GenerationMobile Communication Generation
Mobile Communication Generation
 
Wi fi
Wi fiWi fi
Wi fi
 
5G wireless technology
5G wireless technology5G wireless technology
5G wireless technology
 
Rf receiver design case studies
Rf receiver design case studiesRf receiver design case studies
Rf receiver design case studies
 
Blue1
Blue1Blue1
Blue1
 
New carrier technique for 5G mobile communication
New carrier technique for 5G mobile communicationNew carrier technique for 5G mobile communication
New carrier technique for 5G mobile communication
 
Sdr
SdrSdr
Sdr
 

Viewers also liked

Ubiquiti nano beam m2 point to-point wireless bridge
Ubiquiti nano beam m2 point to-point wireless bridgeUbiquiti nano beam m2 point to-point wireless bridge
Ubiquiti nano beam m2 point to-point wireless bridge
usmanii786
 
Wireless technology - Wi-Fi
Wireless technology - Wi-FiWireless technology - Wi-Fi
Wireless technology - Wi-Fi
Bhushan Jadhav
 
Wireless communication
Wireless communicationWireless communication
Wireless communicationDarshan Maru
 
Project loon report in ieee format
Project loon report in ieee formatProject loon report in ieee format
Project loon report in ieee format
sahithi reddy
 
Telecommunications, the internet, and wireless technology
Telecommunications, the internet, and wireless technologyTelecommunications, the internet, and wireless technology
Telecommunications, the internet, and wireless technologyProf. Othman Alsalloum
 
Wireless communication
Wireless communicationWireless communication
Wireless communication
Komal Gandhi
 
Network Security Presentation
Network Security PresentationNetwork Security Presentation
Network Security Presentation
Allan Pratt MBA
 
Wireless technology
Wireless technologyWireless technology
Wireless technologyFatma Ala'a
 
The Race to 2021: The State of Autonomous Vehicles and a "Who's Who" of Indus...
The Race to 2021: The State of Autonomous Vehicles and a "Who's Who" of Indus...The Race to 2021: The State of Autonomous Vehicles and a "Who's Who" of Indus...
The Race to 2021: The State of Autonomous Vehicles and a "Who's Who" of Indus...
Altimeter, a Prophet Company
 

Viewers also liked (9)

Ubiquiti nano beam m2 point to-point wireless bridge
Ubiquiti nano beam m2 point to-point wireless bridgeUbiquiti nano beam m2 point to-point wireless bridge
Ubiquiti nano beam m2 point to-point wireless bridge
 
Wireless technology - Wi-Fi
Wireless technology - Wi-FiWireless technology - Wi-Fi
Wireless technology - Wi-Fi
 
Wireless communication
Wireless communicationWireless communication
Wireless communication
 
Project loon report in ieee format
Project loon report in ieee formatProject loon report in ieee format
Project loon report in ieee format
 
Telecommunications, the internet, and wireless technology
Telecommunications, the internet, and wireless technologyTelecommunications, the internet, and wireless technology
Telecommunications, the internet, and wireless technology
 
Wireless communication
Wireless communicationWireless communication
Wireless communication
 
Network Security Presentation
Network Security PresentationNetwork Security Presentation
Network Security Presentation
 
Wireless technology
Wireless technologyWireless technology
Wireless technology
 
The Race to 2021: The State of Autonomous Vehicles and a "Who's Who" of Indus...
The Race to 2021: The State of Autonomous Vehicles and a "Who's Who" of Indus...The Race to 2021: The State of Autonomous Vehicles and a "Who's Who" of Indus...
The Race to 2021: The State of Autonomous Vehicles and a "Who's Who" of Indus...
 

Similar to Basic configuration access point (1)

Wi fi ruckus config
Wi fi ruckus configWi fi ruckus config
Wi fi ruckus config
tmukumba
 
Soal lks networking support 2013 SMK N 1 Binangun
Soal lks networking support 2013 SMK N 1 BinangunSoal lks networking support 2013 SMK N 1 Binangun
Soal lks networking support 2013 SMK N 1 BinangunRudi AdiTia
 
Lightspeed ii-manual-2012-jan
Lightspeed ii-manual-2012-janLightspeed ii-manual-2012-jan
Lightspeed ii-manual-2012-jan
Alan Spicer Marine Telecom
 
Mikrotik Network Simulator (MUM Presentation Material 2013)
Mikrotik Network Simulator (MUM Presentation Material 2013)Mikrotik Network Simulator (MUM Presentation Material 2013)
Mikrotik Network Simulator (MUM Presentation Material 2013)Rofiq Fauzi
 
Mikro tik site to site eoip tunnel with i psec
Mikro tik site to site eoip tunnel with i psecMikro tik site to site eoip tunnel with i psec
Mikro tik site to site eoip tunnel with i psec
Uttam Ds
 
2.1.1.5 Packet Tracer - Create a Simple Network Using Packet Tracer (3).pdf
2.1.1.5 Packet Tracer - Create a Simple  Network Using Packet Tracer (3).pdf2.1.1.5 Packet Tracer - Create a Simple  Network Using Packet Tracer (3).pdf
2.1.1.5 Packet Tracer - Create a Simple Network Using Packet Tracer (3).pdf
HaseebAli795005
 
ACN Micro- Project Group no. 22.pptx
ACN Micro- Project Group no. 22.pptxACN Micro- Project Group no. 22.pptx
ACN Micro- Project Group no. 22.pptx
MohdHasnainRaza1
 
Manuale Router Sitecom Wl577
Manuale Router Sitecom Wl577Manuale Router Sitecom Wl577
Manuale Router Sitecom Wl577guest854c41d
 
Practica_Configuracion_Basica_SW_Cisco
Practica_Configuracion_Basica_SW_CiscoPractica_Configuracion_Basica_SW_Cisco
Practica_Configuracion_Basica_SW_Cisco
Ranghel Soto Espinoza
 
Wireless lab4902
Wireless lab4902Wireless lab4902
Wireless lab4902mark scott
 
Setup VoIP System and Interconnection with LTE network
Setup VoIP System and Interconnection with LTE networkSetup VoIP System and Interconnection with LTE network
Setup VoIP System and Interconnection with LTE network
Nazmul Hossain Rakib
 
Mikrotik Network Simulator (MUM Presentation Material 2013) [COPY]
Mikrotik Network Simulator (MUM Presentation Material 2013) [COPY]Mikrotik Network Simulator (MUM Presentation Material 2013) [COPY]
Mikrotik Network Simulator (MUM Presentation Material 2013) [COPY]Mahadiputra S
 
Raspberry pi and Azure
Raspberry pi and AzureRaspberry pi and Azure
Raspberry pi and Azure
Faisal Mehmood
 
ccna 1 chapter 2 v5.0 exam answers 2014
ccna 1 chapter 2 v5.0 exam answers 2014ccna 1 chapter 2 v5.0 exam answers 2014
ccna 1 chapter 2 v5.0 exam answers 2014Đồng Quốc Vương
 
Simple hybrid voice deployments with Sonus
Simple hybrid voice deployments with SonusSimple hybrid voice deployments with Sonus
Simple hybrid voice deployments with Sonus
mscug
 
Simple hybrid voice deployments with Sonus
Simple hybrid voice deployments with SonusSimple hybrid voice deployments with Sonus
Simple hybrid voice deployments with Sonus
Adam Hand
 
IPmux ws 4.00.ppt
IPmux ws 4.00.pptIPmux ws 4.00.ppt
IPmux ws 4.00.ppt
LawrenceMutinda1
 
SafePeak - How to manually configure SafePeak Cluster
SafePeak - How to manually configure SafePeak ClusterSafePeak - How to manually configure SafePeak Cluster
SafePeak - How to manually configure SafePeak Cluster
Vladi Vexler
 

Similar to Basic configuration access point (1) (20)

Wi fi ruckus config
Wi fi ruckus configWi fi ruckus config
Wi fi ruckus config
 
Soal lks networking support 2013 SMK N 1 Binangun
Soal lks networking support 2013 SMK N 1 BinangunSoal lks networking support 2013 SMK N 1 Binangun
Soal lks networking support 2013 SMK N 1 Binangun
 
Lightspeed ii-manual-2012-jan
Lightspeed ii-manual-2012-janLightspeed ii-manual-2012-jan
Lightspeed ii-manual-2012-jan
 
Mikrotik Network Simulator (MUM Presentation Material 2013)
Mikrotik Network Simulator (MUM Presentation Material 2013)Mikrotik Network Simulator (MUM Presentation Material 2013)
Mikrotik Network Simulator (MUM Presentation Material 2013)
 
Mikro tik site to site eoip tunnel with i psec
Mikro tik site to site eoip tunnel with i psecMikro tik site to site eoip tunnel with i psec
Mikro tik site to site eoip tunnel with i psec
 
2.1.1.5 Packet Tracer - Create a Simple Network Using Packet Tracer (3).pdf
2.1.1.5 Packet Tracer - Create a Simple  Network Using Packet Tracer (3).pdf2.1.1.5 Packet Tracer - Create a Simple  Network Using Packet Tracer (3).pdf
2.1.1.5 Packet Tracer - Create a Simple Network Using Packet Tracer (3).pdf
 
Chapter
ChapterChapter
Chapter
 
ACN Micro- Project Group no. 22.pptx
ACN Micro- Project Group no. 22.pptxACN Micro- Project Group no. 22.pptx
ACN Micro- Project Group no. 22.pptx
 
Manuale Router Sitecom Wl577
Manuale Router Sitecom Wl577Manuale Router Sitecom Wl577
Manuale Router Sitecom Wl577
 
Air os qs
Air os qsAir os qs
Air os qs
 
Practica_Configuracion_Basica_SW_Cisco
Practica_Configuracion_Basica_SW_CiscoPractica_Configuracion_Basica_SW_Cisco
Practica_Configuracion_Basica_SW_Cisco
 
Wireless lab4902
Wireless lab4902Wireless lab4902
Wireless lab4902
 
Setup VoIP System and Interconnection with LTE network
Setup VoIP System and Interconnection with LTE networkSetup VoIP System and Interconnection with LTE network
Setup VoIP System and Interconnection with LTE network
 
Mikrotik Network Simulator (MUM Presentation Material 2013) [COPY]
Mikrotik Network Simulator (MUM Presentation Material 2013) [COPY]Mikrotik Network Simulator (MUM Presentation Material 2013) [COPY]
Mikrotik Network Simulator (MUM Presentation Material 2013) [COPY]
 
Raspberry pi and Azure
Raspberry pi and AzureRaspberry pi and Azure
Raspberry pi and Azure
 
ccna 1 chapter 2 v5.0 exam answers 2014
ccna 1 chapter 2 v5.0 exam answers 2014ccna 1 chapter 2 v5.0 exam answers 2014
ccna 1 chapter 2 v5.0 exam answers 2014
 
Simple hybrid voice deployments with Sonus
Simple hybrid voice deployments with SonusSimple hybrid voice deployments with Sonus
Simple hybrid voice deployments with Sonus
 
Simple hybrid voice deployments with Sonus
Simple hybrid voice deployments with SonusSimple hybrid voice deployments with Sonus
Simple hybrid voice deployments with Sonus
 
IPmux ws 4.00.ppt
IPmux ws 4.00.pptIPmux ws 4.00.ppt
IPmux ws 4.00.ppt
 
SafePeak - How to manually configure SafePeak Cluster
SafePeak - How to manually configure SafePeak ClusterSafePeak - How to manually configure SafePeak Cluster
SafePeak - How to manually configure SafePeak Cluster
 

Recently uploaded

Drugs used in parkinsonism and other movement disorders.pptx
Drugs used in parkinsonism and other movement disorders.pptxDrugs used in parkinsonism and other movement disorders.pptx
Drugs used in parkinsonism and other movement disorders.pptx
ThalapathyVijay15
 
一比一原版SDSU毕业证圣地亚哥州立大学毕业证成绩单如何办理
一比一原版SDSU毕业证圣地亚哥州立大学毕业证成绩单如何办理一比一原版SDSU毕业证圣地亚哥州立大学毕业证成绩单如何办理
一比一原版SDSU毕业证圣地亚哥州立大学毕业证成绩单如何办理
eemet
 
MATHEMATICS BRIDGE COURSE (TEN DAYS PLANNER) (FOR CLASS XI STUDENTS GOING TO ...
MATHEMATICS BRIDGE COURSE (TEN DAYS PLANNER) (FOR CLASS XI STUDENTS GOING TO ...MATHEMATICS BRIDGE COURSE (TEN DAYS PLANNER) (FOR CLASS XI STUDENTS GOING TO ...
MATHEMATICS BRIDGE COURSE (TEN DAYS PLANNER) (FOR CLASS XI STUDENTS GOING TO ...
PinkySharma900491
 
NO1 Uk Amil Baba In Lahore Kala Jadu In Lahore Best Amil In Lahore Amil In La...
NO1 Uk Amil Baba In Lahore Kala Jadu In Lahore Best Amil In Lahore Amil In La...NO1 Uk Amil Baba In Lahore Kala Jadu In Lahore Best Amil In Lahore Amil In La...
NO1 Uk Amil Baba In Lahore Kala Jadu In Lahore Best Amil In Lahore Amil In La...
Amil baba
 
web-tech-lab-manual-final-abhas.pdf. Jer
web-tech-lab-manual-final-abhas.pdf. Jerweb-tech-lab-manual-final-abhas.pdf. Jer
web-tech-lab-manual-final-abhas.pdf. Jer
freshgammer09
 
F5 LTM TROUBLESHOOTING Guide latest.pptx
F5 LTM TROUBLESHOOTING Guide latest.pptxF5 LTM TROUBLESHOOTING Guide latest.pptx
F5 LTM TROUBLESHOOTING Guide latest.pptx
ArjunJain44
 
一比一原版SDSU毕业证圣地亚哥州立大学毕业证成绩单如何办理
一比一原版SDSU毕业证圣地亚哥州立大学毕业证成绩单如何办理一比一原版SDSU毕业证圣地亚哥州立大学毕业证成绩单如何办理
一比一原版SDSU毕业证圣地亚哥州立大学毕业证成绩单如何办理
kywwoyk
 
Cyber Sequrity.pptx is life of cyber security
Cyber Sequrity.pptx is life of cyber securityCyber Sequrity.pptx is life of cyber security
Cyber Sequrity.pptx is life of cyber security
perweeng31
 
一比一原版UVM毕业证佛蒙特大学毕业证成绩单如何办理
一比一原版UVM毕业证佛蒙特大学毕业证成绩单如何办理一比一原版UVM毕业证佛蒙特大学毕业证成绩单如何办理
一比一原版UVM毕业证佛蒙特大学毕业证成绩单如何办理
kywwoyk
 

Recently uploaded (9)

Drugs used in parkinsonism and other movement disorders.pptx
Drugs used in parkinsonism and other movement disorders.pptxDrugs used in parkinsonism and other movement disorders.pptx
Drugs used in parkinsonism and other movement disorders.pptx
 
一比一原版SDSU毕业证圣地亚哥州立大学毕业证成绩单如何办理
一比一原版SDSU毕业证圣地亚哥州立大学毕业证成绩单如何办理一比一原版SDSU毕业证圣地亚哥州立大学毕业证成绩单如何办理
一比一原版SDSU毕业证圣地亚哥州立大学毕业证成绩单如何办理
 
MATHEMATICS BRIDGE COURSE (TEN DAYS PLANNER) (FOR CLASS XI STUDENTS GOING TO ...
MATHEMATICS BRIDGE COURSE (TEN DAYS PLANNER) (FOR CLASS XI STUDENTS GOING TO ...MATHEMATICS BRIDGE COURSE (TEN DAYS PLANNER) (FOR CLASS XI STUDENTS GOING TO ...
MATHEMATICS BRIDGE COURSE (TEN DAYS PLANNER) (FOR CLASS XI STUDENTS GOING TO ...
 
NO1 Uk Amil Baba In Lahore Kala Jadu In Lahore Best Amil In Lahore Amil In La...
NO1 Uk Amil Baba In Lahore Kala Jadu In Lahore Best Amil In Lahore Amil In La...NO1 Uk Amil Baba In Lahore Kala Jadu In Lahore Best Amil In Lahore Amil In La...
NO1 Uk Amil Baba In Lahore Kala Jadu In Lahore Best Amil In Lahore Amil In La...
 
web-tech-lab-manual-final-abhas.pdf. Jer
web-tech-lab-manual-final-abhas.pdf. Jerweb-tech-lab-manual-final-abhas.pdf. Jer
web-tech-lab-manual-final-abhas.pdf. Jer
 
F5 LTM TROUBLESHOOTING Guide latest.pptx
F5 LTM TROUBLESHOOTING Guide latest.pptxF5 LTM TROUBLESHOOTING Guide latest.pptx
F5 LTM TROUBLESHOOTING Guide latest.pptx
 
一比一原版SDSU毕业证圣地亚哥州立大学毕业证成绩单如何办理
一比一原版SDSU毕业证圣地亚哥州立大学毕业证成绩单如何办理一比一原版SDSU毕业证圣地亚哥州立大学毕业证成绩单如何办理
一比一原版SDSU毕业证圣地亚哥州立大学毕业证成绩单如何办理
 
Cyber Sequrity.pptx is life of cyber security
Cyber Sequrity.pptx is life of cyber securityCyber Sequrity.pptx is life of cyber security
Cyber Sequrity.pptx is life of cyber security
 
一比一原版UVM毕业证佛蒙特大学毕业证成绩单如何办理
一比一原版UVM毕业证佛蒙特大学毕业证成绩单如何办理一比一原版UVM毕业证佛蒙特大学毕业证成绩单如何办理
一比一原版UVM毕业证佛蒙特大学毕业证成绩单如何办理
 

Basic configuration access point (1)

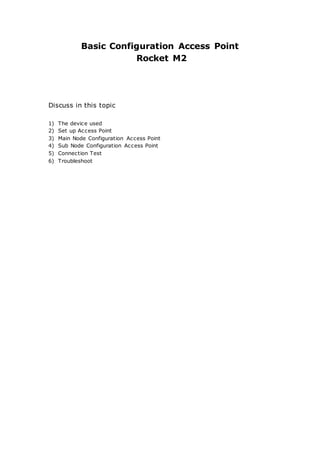
  • 1. Basic Configuration Access Point Rocket M2 Discuss in this topic 1) The device used 2) Set up Access Point 3) Main Node Configuration Access Point 4) Sub Node Configuration Access Point 5) Connection Test 6) Troubleshoot
  • 2. 1) The device used 1. 1 unit PC/Laptop 2. 1 unit Access Point Ubiquiti Rocket M2 3. 2 unit Network Cable LAN 4. 1 unit Power Cable 5. 1 unit POE Adapter 6. 1 unit Antenna Sectorial/Omni
  • 3. Access Point Main Node Access Point Sub Node
  • 4. 2) Set upAccess Point - Rocket M2 1. Download ubnt discovery tool from Ubiquiti (optional) (http://www.ubnt.com/downloads/discovery/ubnt-discovery-v2.3.zip) 2. Extract ubnt-discovery-v2.3.zip. 3. Plug in first network cable from laptop to LAN port at POE adapter 4. Plug in second network cable from Rocket M2 AP to POE port at POE adapter
  • 6. 2) Main Node Configuration Access Point - Rocket M2 1. By default Rocket M2 IP address is 192.168.1.20. Set Laptop to static IP TCP/IPv4  Set – 192.168.1.22 as Laptop IP Address  Set – 255.255.255.0 as Subnet Mask  Set - 192.168.1.20 as Default Getaway
  • 7. 2. Open browser and type Rocket M2 IP address 192.168.1.20. Default username and password:  Username - ubnt  Password - ubnt  * for the first time or after reset to factory default o Country –United State o Language - English o I agree to these terms of use – Tick o Click button “Login”
  • 8. 3. Click WIRELESS menu  Wireless Mode – Access Point  SSID – KG WIFI <site name>eg. KG WIFI FELDA MEMPAGA 3 A (for AP sectorial A)  Channel Width – 20 MHz  Antenna Gain – 15 dBi  Output Power – 24 dBm  Click on button “Change” and “Apply” to save configuration
  • 9. 4. Click NETWORK menu  Set – 10.16.9.2 as IP address (sectorial AP A for main node)  Set – 255.255.255.224 as Netmask (main node using /27)  Set – 10.16.9.1 as Gateway IP (router IP address)  Click on button “Change” and “Apply” to save configuration
  • 10. 5. Re-insert address is 10.16.9.2. Set Laptop to static IP TCP/IPv4  Set – 10.16.9.10 as Laptop IP Address  Set – 255.255.255.0 as Subnet Mask  Set - 10.16.9.1 as Default Getaway 6. Open browser and type Rocket M2 IP address 10.16.9.2 Default username and password:  Username - ubnt  Password – ubnt  Click button “Login”
  • 11. 7. Click SERVICES menu  Set – Enable SNMP Agent  Set – PI1M2HOME as SNMP community TBD  Set – FELDA MEMPAGA 3 (refer to which Pi1M)  Set – Enable Telnet Server  Set – Enable NTP Client  Set – 10.10.10.1 as NTP Server TBD  Click on button “Change” and “Apply” to save configuration
  • 12. 8. Click SYSTEM menu  Upload firmware - click on button “Choose File” and “Select” file XM- v5.5.build12536.bin and click button “Open”  Click button ”Upload”  Click button ”Update”
  • 13.  Wait until finish uploading  Firmware Version: XM.v5.5 is successful update
  • 14.  Set – Device name “AP Main Node 1” TBD o Click key icon for change new password  Set - Administrator Username:Admin  Set – Current Password : ubnt  Set - New Password: m5d1t383  Set - Verify New Password : m5d1t383  Click on button “Change” and “Apply” to save configuration Configuration main node is complete
  • 15. Figure 1: The final installation Access Point (x3) sectorial in main node
  • 17. 3) Sub Node Configuration Access Point - Rocket M2 1. By default Rocket M2 IP address is 192.168.1.20. Set Laptop to static IP TCP/IPv4  Set – 192.168.1.22 as Laptop IP Address  Set – 255.255.255.0 as Subnet Mask  Set - 192.168.1.20 as Default Getaway
  • 18. 2. Open browser and type Rocket M2 IP address 192.168.1.20. Default username and password:  Username - ubnt  Password - ubnt  * for the first time or after reset to factory default o Country – United State o Language - English o I agree to these terms of use – Tick o Click button “Login”
  • 19. 3. Click WIRELESS menu  Wireless Mode – Access Point  SSID – KTW WIFI ZON A/ZON B/ZON C  Channel Width – 20 MHz  Antenna Gain – 13dBi  Output Power – 24 dBm  Click on button “Change” and “Apply” to save configuration
  • 20. 4. Click NETWORK menu  Set – 10.21.9.60 as IP address (Omni AP A for sub node)  Set – 255.255.255.224 as Netmask (main node using /27)  Set – 10.21.9.65 as Gateway IP (briging IP address)  Click on button “Change” and “Apply” to save configuration
  • 21. 5. Re-insert address is 10.16.9.2. Set Laptop to static IP TCP/IPv4  Set – 10.21.9.60 as Laptop IP Address  Set – 255.255.255.0 as Subnet Mask  Set - 10.21.9.60 as Default Getaway 6. Open browser and type Rocket M2 IP address 0.21.9.60 Default username and password:  Username - ubnt  Password – ubnt  Click button “Login”
  • 22. 7. Click SERVICES menu  Set – Enable SNMP Agent  Set – PI1M2HOME as SNMP community TBD  Set – FELDA MEMPAGA 3 (refer to which Pi1M)  Set – Enable Telnet Server  Set – Enable NTP Client  Set – 10.10.10.1 as NTP Server TBD  Click on button “Change” and “Apply” to save configuration
  • 23. 8. Click SYSTEM menu  Upload firmware - click on button “Choose File” and “Select” file XM- v5.5.build12536.bin and click button “Open”  Click button ”Upload”  Click button ”Update”
  • 24.  Wait until finish uploading  Firmware Version: XM.v5.5 is successful update
  • 25.  Set – Device name “AP Main Node 1” TBD o Click key icon for change new password  Set – Current Password : ubnt  Set - Administrator Username:Admin  Set - New Password: m5d1t383  Set - Verify New Password : m5d1t383  Click on button “Change” and “Apply” to save configuration Configuration sub node is complete
  • 26. Figure 2: The final installation Access Point (x4) omni in sub node
  • 27. 4) Connection Test 1. Plug in first network cable from laptop to LAN port at POE adapter 2. Change laptop IP address same with NanoBridge M5 IP segment 3. On PC/Laptop run command prompt a. Windows = Start>run> type “cmd” > hit Enter 4. Ping 10.16.9.98 (main node / sub node IP Address) to NanoBridge M5 IP address to see the connection between laptop and AP
  • 28. 5) Troubleshoot 1. Cannot detect NanoBridge M5 IP address  Open ubnt-discovery.bat and wait until it show AP detail including IP address and MAC address 2. How to reboot device  Click on button “Reboot”and button “Yes, reboot!”
  • 29.  Wait for a while until finish rebooting device 3. How to backup configuration device  Click on button “Download”
  • 30.  Save the file
  • 31. 4. How to upload configuration  Click on button “Choose File”  Click on button “Upload”  Click on button “Apply” to save configuration
  • 32. 5. How to reset to factory default device  Click SYSTEM menu and click Reset button at Reset to Factory Default  Wait until Rocket M2 AP reboot completely  By default IP Address is 192.168.1.20