SlideShare a Scribd company logo
1 of 65
Download to read offline
2014
INTRODUCTION TO AVR
GETTING STARTED WITH
1. AVR STUDIO
2. AVR OSP
3. SINA PROG
INTERFACING
1. LCD,KEYPAD
2. ADC,I2C,SERIAL,PWM
ATMEGA DEVELOPMENT BOARD
Programming With AVR
Microcontroller
Atmega 16/32 Microcontroller
www.researchdesignlab.com Page 1
ATMEGA 16/32
MICROCONTROLLER
Atmega 16/32 Microcontroller
www.researchdesignlab.com Page 2
Table of Contents
OVERVIEW:.............................................................................................................................................. 3
PORTS:...................................................................................................................................................................3
PIN DESCRIPTION: ................................................................................................................................ 5
WRITING THE CODE ............................................................................................................................. 7
1. AVR STUDIO ..................................................................................................................................................7
BURNING THE CODE...........................................................................................................................14
1. AVR osp-2.................................................................................................................................................... 14
2. SINA PROG 2.1............................................................................................................................................. 22
INTERFACE.............................................................................................................................................25
1. LED BLINKING.............................................................................................................................................. 25
2. LCD.............................................................................................................................................................. 27
3. PULSE WIDTH MODULATION.......................................................................................................................30
4. ADC ............................................................................................................................................................. 32
5. KEYPAD ....................................................................................................................................................... 36
SERIAL COMMUNICATION:...............................................................................................................39
What is the USART?............................................................................................................................................. 39
Setting up the Hardware...................................................................................................................................... 39
Setting up HyperTerminal.................................................................................................................................... 40
Initializing the USART........................................................................................................................................... 43
Sending and receiving data..................................................................................................................................44
CODE: .................................................................................................................................................................. 45
Atmega 16/32 Microcontroller
www.researchdesignlab.com Page 3
OVERVIEW:
ATmega16 is an 8-bit high performance microcontroller of Atmel’s Mega AVR
family with low power consumption. Atmega16 is based on enhanced RISC
architecture with 131 powerful instructions. Most of the instructions execute in one
machine cycle. Atmega16 can work on a maximum frequency of 16MHz.
PORTS:
There are 32 I/O (Input/Output) pins grouped as A, B, C & D with 8 pins in each
group. This group is called as PORT.
PA0 - PA7 (PORTA)
PB0 - PB7 (PORTB)
PC0 - PC7 (PORTC)
PD0 - PD7 (PORTD)
These are additional function that pin can perform other
than I/O. Some of them are.
• ADC (ADC0 - ADC7 on PORTA)
• UART (Rx,Tx on PORTD)
• TIMERS (OC0 - OC2)
• SPI (MISO, MOSI, SCK on PORTB)
• External Interrupts (INT0 - INT2)
Atmega 16/32 Microcontroller
www.researchdesignlab.com Page 4
Atmega 16/32 Microcontroller
www.researchdesignlab.com Page 5
PIN DESCRIPTION:
• VCC: Digital supply voltage. (+5V)
• GND: Ground. (0 V) Note there are 2 ground Pins.
• Port A (PA7 - PA0)
Port A serves as the analog inputs to the A/D Converter. Port A also serves
as an 8-bit bi-directional I/O port, if the A/D Converter is not used. When
pins PA0 to PA7 are used as inputs and are externally pulled low, they will
source current if the internal pull-up resistors are activated. The Port A pins
are tri-stated when a reset condition becomes active, even if the clock is not
running.
• Port B (PB7 - PB0)
Port B is an 8-bit bi-directional I/O port with internal pull-up resistors
(selected for each bit). Port B also serves the functions of various special
features of the ATmega16 as listed on page 58 of datasheet.
• Port C (PC7 - PC0)
Port C is an 8-bit bi-directional I/O port with internal pull-up resistors
(selected for each bit). Port C also serves the functions of the JTAG
interface and other special features of the ATmega16 as listed on page 61 of
datasheet. If the JTAG interface is enabled, the pull-up resistors on pins
PC5 (TDI), PC3 (TMS) and PC2 (TCK) will be activated even if a reset
occurs.
• Port D (PD7 - PD0)
Port D is an 8-bit bi-directional I/O port with internal pull-up resistors
(selected for each bit). Port D also serves the functions of various special
features of the ATmega16 as listed on page 63 of datasheet.
Atmega 16/32 Microcontroller
www.researchdesignlab.com Page 6
• RESET: Reset Input. A low level on this pin for longer than the
minimum pulse length will generate a reset, even if the clock is not
running.
• XTAL1: External oscillator pin 1
• XTAL2: External oscillator pin 2
• AVCC: AVCC is the supply voltage pin for Port A and the A/D
Converter. It should be externally connected to VCC, even if the
ADC is not used. If the ADC is used, it should be connected to VCC
through a low-pass filter.
• AREF: AREF is the analog reference pin for the A/D Converter.
Atmega 16/32 Microcontroller
www.researchdesignlab.com Page 7
WRITING THE CODE
1. AVR STUDIO
Setup:
1. open AVR studio 4
2. click new project
3. Select AVR GCC as we would be doing program in c and enter the
project name.
Atmega 16/32 Microcontroller
www.researchdesignlab.com Page 8
4. Add your project name. Here I have given my project name as serial and
it will automatically create your initial file name in .c format
5. click on next
Atmega 16/32 Microcontroller
www.researchdesignlab.com Page 9
6. Select AVR simulator in debug platform and in the Device select the
Device your using as here I am using ATmega 16 i have selected that.(for
Atmega 32 select Atmega 32).
7. click on finish
Atmega 16/32 Microcontroller
www.researchdesignlab.com Page 10
8. This is the default window you will see after you click on finish and
project name called serial will get open
9. Now click on this to create a new file
10. Type the program and save it .To compile the files first you need to add
files in your source for doing that right click on the source file and then
Atmega 16/32 Microcontroller
www.researchdesignlab.com Page 11
click on add existing source file
11.Now inside that source file their will be your file saved here the file
name I have used is urted
Atmega 16/32 Microcontroller
www.researchdesignlab.com Page 12
12. Now to build the file go to build and click on build
Atmega 16/32 Microcontroller
www.researchdesignlab.com Page 13
13. If your program has no errors it will be successfully build and it will
show the build window like this
TO BURN THE PROGRAM IN YOUR MICROCONTROLLER YOU NEED A BURNER
FOR BURNING WE USE AVR OPS-2
Atmega 16/32 Microcontroller
www.researchdesignlab.com Page 14
BURNING THE CODE
1. AVR osp-2
1. click on avr osp
2. The default avr osp 2 will look like this
Atmega 16/32 Microcontroller
www.researchdesignlab.com Page 15
3. First you need to configure your avr osp to check its connected to the
same com port or not and default Baud rate
Atmega 16/32 Microcontroller
www.researchdesignlab.com Page 16
4. you can manually select the device which you are using or else u can
even auto detect it
5. In device select which device you are using as here I am using
ATmega 16 I have selected that .Even you can Auto Detect your
device that option will automatically Detect your Device which you
Atmega 16/32 Microcontroller
www.researchdesignlab.com Page 17
are using
6. after pressing auto detect you will see this means that your
microcontroller has been detected and it read to flash program on to it
7. To flash the program on the Microcontroller You Browse the program
and Then click on program after click on the program it will flash the
Atmega 16/32 Microcontroller
www.researchdesignlab.com Page 18
program.
Atmega 16/32 Microcontroller
www.researchdesignlab.com Page 19
8. Browse your hex file where you have store
9. After clicking on program it will erase the previous content of the chip
and will flash the program on to the chip
Atmega 16/32 Microcontroller
www.researchdesignlab.com Page 20
Atmega 16/32 Microcontroller
www.researchdesignlab.com Page 21
10. After the completion of the flash it will compare the flash data if its
equal than it means that your flash is successful and it will show
“Equal”
Atmega 16/32 Microcontroller
www.researchdesignlab.com Page 22
2. SINA PROG 2.1
• If You are using ISP Atmega Programmer to Burn the code In Your Microcontroller than this
Programmer will surely come in handy
• Its simple to use and You can easily use the Microcontroller For External Crystal Frequency
Atmega 16/32 Microcontroller
www.researchdesignlab.com Page 23
• If You Want to Change Internal Frequency Or want To use External Crystal Frequency than You
can change the Fuse.
• Here You Can Set Internal Frequency To
1. 1 MHz
2. 2 MHz
3. 4 MHz
4. 8 MHz
• If You want to use External Frequency than select Ext.Crys.
(If Ext Crys Doesn’t work properly than Try changing the BC valve as shown in Below Pic)
Atmega 16/32 Microcontroller
www.researchdesignlab.com Page 24
• Usually For Atmega 16 it comes out to be BC 32 KHz and For Atmega 32 BC 16 KHz but try with
Other Valve if this Doesn’t Works.
Atmega 16/32 Microcontroller
www.researchdesignlab.com Page 25
INTERFACE
1. LED BLINKING
Here we are blinking the led making it on and off for a certain duration using
AT Mega 16
Circuit diagram:
Atmega 16/32 Microcontroller
www.researchdesignlab.com Page 26
Program:
# define F_CPU 1000000UL
#define FOSC 16000000L //here we define the clock frequency
#include <avr/io.h>
#include <util/delay.h>
int main(void)
{
DDRB = 0xFF; //Makes PORTC as Output
While (1) //infinite loop
{
PORTB = 0xFF; //Turns ON All LEDs
_delay_ms(1000); //1 second delay
PORTB= 0x00; //Turns OFF All LEDs
_delay_ms(1000); //1 second delay
}
}
Atmega 16/32 Microcontroller
www.researchdesignlab.com Page 27
2. LCD :
CIRCUIT DIAGRAM:
Program:
# define F_CPU 1000000UL
#include <avr/io.h>
#include <util/delay.h>
#include <string.h>
//#define LCD_PORT PORTB
#define RS PC0 //initialize register select as PC0 pin
#define EN PC1 //initialize enable pin as PC1
Atmega 16/32 Microcontroller
www.researchdesignlab.com Page 28
void CMD_WRT(unsigned char val)
{
PORTB=val;
PORTC = PORTC & (~(1<<RS));
_delay_ms(1); // here we provide a delay of 1 sec
ORTC = PORTC | ((1<<EN)); //make enable pin high
_delay_ms(1);
PORTC = PORTC & (~(1<<EN)); //make enable pin low
}
void DATA_WRT(unsigned char ch)
{
PORTB = ch;
PORTC = PORTC | ((1<<RS));//make register select pin high
_delay_ms(1);
PORTC = PORTC | ((1<<EN)); //make enable pin high
_delay_ms(1);
PORTC = PORTC & (~(1<<EN)); //make enable pin low
}
void LCD_WRT( char *string)
{
while(*string)
DATA_WRT(*string++);//will write the strings
}
int main(void)
{
//setting the display of the lcd
Atmega 16/32 Microcontroller
www.researchdesignlab.com Page 29
unsigned char CMD[]={0x38,0x01,0x0f,0x06,0x80},TEMP1,i;
DDRB=0XFF; //make PORTB as output
DDRC = 0xFF;//(1<<RS)|(1<<EN); //make PORTC as output
_delay_ms(10); //provide the delay of 10ms
for(i=0;i<5;i++)
{
TEMP1=CMD[i]; //it will place the command in cmd array
CMD_WRT(TEMP1); //it will write all the cmd that is in the cmd array
}
while(1)
{
CMD_WRT(0X01); //clear display
CMD_WRT(0X80); // blink the cursor in 1st row
LCD_WRT(" --RDL--");//display RDL in lcd
CMD_WRT(0XC0); //to use 2nd row of lcd
LCD_WRT(" LCD_DISPLAY"); //display LCD_DISPLAY in lcd
_delay_ms(1000); //delay of 1sec
}
return 0;
}
Atmega 16/32 Microcontroller
www.researchdesignlab.com Page 30
3. PULSE WIDTH MODULATION:
Program:
// program to change brightness of an LED
// demonstration of PWM
#include <avr/io.h>
#include <util/delay.h>
// initialize PWM
void pwm_init()
{
// initialize timer0 in PWM mode
TCCR0 |= (1<<WGM00)|(1<<COM01)|(1<<WGM01)|(1<<CS00);
// make sure to make OC0 pin (pin PB3 for atmega32) as output pin
DDRB |= (1<<PB3);
}
void main()
{
uint8_t brightness;
// initialize timer0 in PWM mode
pwm_init();
// run forever
while(1)
{
// increasing brightness
for (brightness = 0; brightness < 255; ++brightness)
{
Atmega 16/32 Microcontroller
www.researchdesignlab.com Page 31
// set the brightness as duty cycle
OCR0 = brightness;
// delay so as to make the user "see" the change in brightness
_delay_ms(10);
}
// decreasing brightness
for (brightness = 255; brightness > 0; --brightness)
{
// set the brightness as duty cycle
OCR0 = brightness;
// delay so as to make the user "see" the change in brightness
_delay_ms(10);
}
// repeat this forever
}
}
Atmega 16/32 Microcontroller
www.researchdesignlab.com Page 32
4. ADC :
Program:
# define F_CPU 1000000UL
#include <avr/io.h>
#include <util/delay.h>
#include <string.h>
//#include <iom16.h>
//#define LCD_PORT PORTB
#define RS PC0 // connect register select pin to PC0
#define EN PC1 // connect enable pin to PC1
#define LTHRES 500 //setting the threshold valve
#define RTHRES 500
#include <stdlib.h>
void CMD_WRT(unsigned char val)
{
PORTB=val; // initializing PORTB as input and passing valve onto it
PORTC = PORTC & (~(1<<RS));//make RS pin low
_delay_ms(1);
PORTC = PORTC | ((1<<EN));// make EN pin high
_delay_ms(1);
PORTC = PORTC & (~(1<<EN));// make EN pin low
}
Atmega 16/32 Microcontroller
www.researchdesignlab.com Page 33
void DATA_WRT(unsigned char ch)
{
PORTB = ch; //initializing PORTB as input and passing CMD onto it
PORTC = PORTC | ((1<<RS)); // make RS pin high
_delay_ms(1);
PORTC = PORTC | ((1<<EN));//make EN pin high
_delay_ms(1);
PORTC = PORTC & (~(1<<EN));// make EN pin low
}
void LCD_WRT( char *string)
{
while(*string)
DATA_WRT(*string++);
}
// initialize adc
void adc_init()
{
// AREF = AVcc
ADMUX = (1<<REFS0); //initialize admux
// ADC Enable and prescaler of 128
// 16000000/128 = 125000
ADCSRA = (1<<ADEN)|(1<<ADPS2)|(1<<ADPS1)|(1<<ADPS0);
} //ADEN means ADC enabled
// read adc value
int adc_read(char ch)
Atmega 16/32 Microcontroller
www.researchdesignlab.com Page 34
{
// select the corresponding channel 0~7
// ANDing with '7' will always keep the value
// of 'ch' between 0 and 7
ch &= 0b00000111; // AND operation with 7
ADMUX = (ADMUX & 0xF8)|ch; // clears the bottom 3 bits
before ORing
// start single conversion
// write '1' to ADSC
ADCSRA |= (1<<ADSC);
// wait for conversion to complete
// ADSC becomes '0' again
// till then, run loop continuously
while(ADCSRA & (1<<ADSC));
return (ADC);
}
int main(void)
{
uint16_t adc_result0;//, adc_result1;
char int_buffer[10]; //creating array of 10
unsigned char CMD[]={0x38,0x01,0x0f,0x06,0x80},TEMP1,i;
DDRB=0XFF;//set port b as output
DDRC = 0xFF;//(1<<RS)|(1<<EN);
_delay_ms(10);
for(i=0;i<5;i++)
{
Atmega 16/32 Microcontroller
www.researchdesignlab.com Page 35
TEMP1=CMD[i]; //for each one cycle each command will be placed in
that cmd array
CMD_WRT(TEMP1);
}
adc_init();
while(1)
{
//adc_result0 = adc_read(0); // read adc value at PA0
adc_result0 = adc_read(1);
itoa(adc_result0, int_buffer,10);
CMD_WRT(0X01); //clear display
CMD_WRT(0X80); // cursor on first line
LCD_WRT(" --RDL--"); //display RDL
CMD_WRT(0XC0); //cursor on next line
LCD_WRT(int_buffer);
_delay_ms(1000);
//TODO:: Please write your application code
}
return 0;
}
Atmega 16/32 Microcontroller
www.researchdesignlab.com Page 36
5. KEYPAD:
Block diagram:
Atmega 16/32 Microcontroller
www.researchdesignlab.com Page 37
Program:
#include<avr/io.h>
#include <avr/keypad.h> // to initialize the keypad
#define F_CPU 1000000UL
#include <util/delay.h> //header to use delay function
#define KEYPAD_PORT PORTC // connecting keypad to port c
#define KEYPAD_PIN PINC //initializing pins for keypad
#define LCD_DATA_PORT PORTB
#define LCD_CONT_PORT PORTD
#define LCD_RS PD0
#define LCD_RW PD1
#define LCD_EN PD2
#include <lcd.h> //header to initialize LCD commands
void main(void)
{
DDRB=0xFF; //make PORTB as output
DDRD=0X07; //make PORTD pin 0, 1, 2 as output
DDRB=0X0F;
PORTC=0xFF; //make PORTC as output
unsigned char keypad_valve;
lcd_init();
while(1)
{
lcd_command_write(0x08); //display off cursor off
lcd_string_write("PRESS ANY KEY");
lcd_command_write(0xc0);//2nd line display
keypad_valve=read_keypad();
Atmega 16/32 Microcontroller
www.researchdesignlab.com Page 38
if(keypad_valve!=0xFF)
{
lcd_number_write(keypad_valve,10);//if key is pressed corresponding
valve will be displayed
lcd_data_write(' ');
}
else
;
_delay_ms(300);
}
}
Atmega 16/32 Microcontroller
www.researchdesignlab.com Page 39
SERIAL COMMUNICATION:
What is the USART?
The vast majority of devices in the current AVR family lineup contain a
USART hardware subsystem. The USART hardware allows the AVR to
transmit and receive data serially to and from other devices - such as a
computer or another AVR.
The USART transmission system differs to most other digital busses in that
it does not utilize a separate pin for the serial clock. An agreed clock rate is
preset into both devices, which is then used to sample the Rx/Tx lines at
regular intervals. Because of this, the USART requires only three wires for
bi-directional communication (Rx, Tx and GND).
Setting up the Hardware
• Connect your USART to a computer via the Com port.
• You need to first identify which pins of your AVR(ATmega 16) are
responsible for serial communication.
• For ATmega 16 Pin 14 and Pin 15 are used for receiving and
transmission.
• Connect tx pin of usart to rx pin of ATmega 16 and rx pin of usart to
the tx pin of the ATmega 16 .
• Now to see the transmitted word back in pc you need to use
HyperTerminal (it’s a free software you need to download it)
• set the Baud rate in the HyperTerminal
Atmega 16/32 Microcontroller
www.researchdesignlab.com Page 40
Setting up HyperTerminal
1. open the HyperTerminal
2. Add name here I have added serial
Atmega 16/32 Microcontroller
www.researchdesignlab.com Page 41
3. Select your com port which you are using and press ok (to check
the com port go to device manger and check in which com port is the usart connected)
4. select the baud rate that you have set or just click Restore
default it will set the default valve and press ok
Atmega 16/32 Microcontroller
www.researchdesignlab.com Page 42
5. serial HyperTerminal will get open
Atmega 16/32 Microcontroller
www.researchdesignlab.com Page 43
Initializing the USART
First off, you need to enable both the USART's transmission and
reception circuitry. For the MEGA16, these are bits named RXEN and TXEN, and
they are located in the control register UCSRB. When set, these two bits turn on
the serial buffers to allow for serial communications
Code:
int main (void)
{
UCSRB = (1 << RXEN) | (1 << TXEN); // Turn on the transmission and reception circuitry
}
Next, we need to tell the AVR what type of serial format we're using.
Looking again at the MEGA16 datasheet, we can see that the bits responsible for
the serial format are named UCSZ0 to UCSZ2, and are located in the USART
control register C named UCSRC.
Code:
UCSRC = (1 << URSEL) | (1 << UCSZ0) | (1 << UCSZ1); // Use 8-bit character sizes - URSEL bit
set to select the UCRSC register
The last thing to set for basic serial communications is the baud rate
register. The baud rate register is 16-bit, split into two 8-bit registers as is the case
with all 16-bit registers in the AVR device family. For this the baud valve need to
be found for that we have a formula
BaudValue = (((F_CPU / (USART_BAUDRATE * 16))) - 1)
Where F_CPU is your AVR's system clock frequency (in Hz), and USART_BAUDRATE is the desired
communication baud rate.
Given my example project using a system clock of 7372800Hz and a baud rate of 9600, our formula
gives:
Atmega 16/32 Microcontroller
www.researchdesignlab.com Page 44
BaudValue = (((F_CPU / (USART_BAUDRATE * 16UL))) - 1) BaudValue = (7372800 / (9600 * 16) - 1)
BaudValue = (7372800 / 153600 - 1)
BaudValue = (48 - 1)
BaudValue = 47
This avoids "magic numbers" (unexplained constants) in our source code,
and makes changing the baud rate later on very easy - just change the
BAUD_RATE macro value. Now, we need to load this into the baud rate registers,
named UBRRH (for the high byte) and UBRRL (for the low byte). This is simple
via a simple bit shift to grab the upper eight bits of the BAUD_PRESCALE
constant:
UBRRH = (BAUD_PRESCALE >> 8); // Load upper 8-bits of the baud rate value into the high byte
of the UBRR register
UBRRL = BAUD_PRESCALE; // Load lower 8-bits of the baud rate value into the low byte of the
UBRR register
Sending and receiving data
We do this by the special register named UDR - short for "USART I/O
Data Register”. On the MEGA16, the Transmission Complete flag is located in the
control register UCSRA, and it is named TXC. Using this information we can
construct a simple wait loop which will prevent data from being written to the
UDR register until the current transmission is complete.
UDR = ByteToSend; // Send out the byte value in the variable "ByteToSend"
while ((UCSRA & (1 << TXC)) == 0) {}; // Do nothing until transmission complete flag set
However this is non-optimal. We spend time waiting after each byte which
could be better spent performing other tasks - better to check before a transmission
to see if the UDR register is ready for data. We can do this by checking the
USART Data Register Empty flag instead (called UDRE), also located in the
UCSRA control register of the MEGA16
Atmega 16/32 Microcontroller
www.researchdesignlab.com Page 45
while ((UCSRA & (1 << UDRE)) == 0) {}; // Do nothing until UDR is ready for more data to be
written to it
UDR = ByteToSend; // Send out the byte value in the variable "ByteToSend"
Now we can move on to receiving data. we need to check to see if we have
received a byte.
To do this, we can check the USART Receive Complete (RXC) flag to see if it is
set. Again, this is located in the UCSRA control register of the MEGA16:
while ((UCSRA & (1 << RXC)) == 0) {}; // Do nothing until data have been received and is ready
to be read from UDR
ReceivedByte = UDR; // Fetch the received byte value into the variable "ReceivedByte"
CODE:
#include <avr/io.h>
#include <avr/delay.h>
#define F_CPU ((unsigned long)8000000)
#define F_OSC 8000000// for 8mhz
#define USART_BAUDRATE 9600
#define BAUD_PRESCALE (((F_CPU / ( USART_BAUDRATE * 16UL))) - 1)
unsigned char
int main (void)
Atmega 16/32 Microcontroller
www.researchdesignlab.com Page 46
{
char ReceivedByte;
UCSRB = (1 << RXEN) | (1 << TXEN); // Turn on the transmission and reception
circuitry
UCSRC = (1 << URSEL) | (1 << UCSZ0) | (1 << UCSZ1); // Use 8-bit character sizes
UBRRH = (BAUD_PRESCALE >> 8); // Load upper 8-bits of the baud rate value into the
high byte of the UBRR register
UBRRL = BAUD_PRESCALE; // Load lower 8-bits of the baud rate value into the low byte
of the UBRR register
for (;;) // Loop forever
{
while ((UCSRA & (1 << RXC)) == 0) {}; // Do nothing until data have been
received and is ready to be read from UDR
ReceivedByte = UDR; // Fetch the received byte value into the variable
"ByteReceived"
//_delay_ms(1000);
while ((UCSRA & (1 << UDRE)) == 0) {}; // Do nothing until UDR is ready for
more data to be written to it
UDR = ReceivedByte; // Echo back the received byte back to the computer
}
}
Atmega 16/32 Microcontroller
www.researchdesignlab.com Page 47
Related Products:
Atmega 16/32/64 Project Board Atmega 16/32/64 Development Board-USB
Product Code: G89S52 Product Code: ATM-U
Atmega Programmer-USB ISP Atmel Programmer
Product Code: AVR Product Code: UAB
01010101010101010100101010101010101010101010101010101010101010101010101010101010101
01010101010101010100101010101010101010101010101010101010101010101010101010101010101
01010101010101010100101010101010101010101010101010101010101010101010101010101010101
01010101010101010100101010101010101010101010101010101010101010101010101010101010101
01010101010101010100101010101010101010101010101010101010101010101010101010101010101
01010101010101010100101010101010101010101010101010101010101010101010101010101010101
01010101010101010100101010101010101010101010101010101010101010101010101010101010101
01010101010101010100101010101010101010101010101010101010101010101010101010101010101
01010101010101010100101010101010101010101010101010101010101010101010101010101010101
01010101010101010100101010101010101010101010101010101010101010101010101010101010101
01010101010101010100101010101010101010101010101010101010101010101010101010101010101
01010101010101010100101010101010101010101010101010101010101010101010101010101010101
01010101010101010100101010101010101010101010101010101010101010101010101010101010101
01010101010101010100101010101010101010101010101010101010101010101010101010101010101
01010101010101010100101010101010101010101010101010101010101010101010101010101010101
01010101010101010100101010101010101010101010101010101010101010101010101010101010101
01010101010101010100101010101010101010101010101010101010101010101010101010101010101
01010101010101010100101010101010101010101010101010101010101010101010101010101010101
01010101010101010100101010101010101010101010101010101010101010101010101010101010101
01010101010101010100101010101010101010101010101010101010101010101010101010101010101
01010101010101010100101010101010101010101010101010101010101010101010101010101010101
01010101010101010100101010101010101010101010101010101010101010101010101010101010101
01010101010101010100101010101010101010101010101010101010101010101010101010101010101
01010101010101010100101010101010101010101010101010101010101010101010101010101010101
01010101010101010100101010101010101010101010101010101010101010101010101010101010101
01010101010101010100101010101010101010101010101010101010101010101010101010101010101
01010101010101010100101010101010101010101010101010101010101010101010101010101010101
01010101010101010100101010101010101010101010101010101010101010101010101010101010101
01010101010101010100101010101010101010101010101010101010101010101010101010101010101
01010101010101010100101010101010101010101010101010101010101010101010101010101010101
01010101010101010100101010101010101010101010101010101010101010101010101010101010101
01010101010101010100101010101010101010101010101010101010101010101010101010101010101
01010101010101010100101010101010101010101010101010101010101010101010101010101010101
01010101010101010100101010101010101010101010101010101010101010101010101010101010101
01010101010101010100101010101010101010101010101010101010101010101010101010101010101
01010101010101010100101010101010101010101010101010101010101010101010101010101010101
01010101010101010100101010101010101010101010101010101010101010101010101010101010101
01010101010101010100101010101010101010101010101010101010101010101010101010101010101
01010101010101010100101010101010101010101010101010101010101010101010101010101010101
01010101010101010100101010101010101010101010101010101010101010101010101010101010101
01010101010101010100101010101010101010101010101010101010101010101010101010101010101
01010101010101010100101010101010101010101010101010101010101010101010101010101010101
01010101010101010100101010101010101010101010101010101010101010101010101010101010101
01010101010101010100101010101010101010101010101010101010101010101010101010101010101
01010101010101010100101010101010101010101010101010101010101010101010101010101010101
01010101010101010100101010101010101010101010101010101010101010101010101010101010101
01010101010101010100101010101010101010101010101010101010101010101010101010101010101
01010101010101010100101010101010101010101010101010101010101010101010101010101010101
01010101010101010100101010101010101010101010101010101010101010101010101010101010101
01010101010101010100101010101010101010101010101010101010101010101010101010101010101
01010101010101010100101010101010101010101010101010101010101010101010101010101010101
01010101010101010100101010101010101010101010101010101010101010101010101010101010101
01010101010101010100101010101010101010101010101010101010101010101010101010101010101
01010101010101010100101010101010101010101010101010101010101010101010101010101010101
01010101010101010100101010101010101010101010101010101010101010101010101010101010101
Research
Design Lab
www.researchdesignlab.com
Email: sales@researchdesignlab.com I www.researchdesignlab.com
An ISO 9001- 2008 Certified Company
Atmega Development Board
RESEARCH DESIGN LABS | VOLUME 1, ISSUE 1 WWW.RESEARCHDESIGNLAB.COM
1. Power supply, 5V-12V
2. 40 pin ZIF socket for IC mount.
3. ISP connector*
4. Reset
5. Node connector
6. 4x1 7 segment display
7. 26 pin raspberry connector
8. Arduino Shield footprint
9. ULN 2803 driver
10. I2C bus
11. SPI bus
12. XBEE footprint/XBEE Adaptor module
13. FT232 breakout board connector
14. DC 3.3V connectors
15. DB-9 female connector
16. 8x1 LED's
17. 8 way DIP switch
18. RTC Module
19. EEPROM
20. 2x5x2 jumper node.
21. DC 5V connectors
22. Analog to Digital output
23. 4x1 keypad
24. 16x2 LCD connectors
25. Node connector
26. 4x4 Matrix Keypad
27. DC 12V connectors
28. Power ON switch
RESEARCH DESIGN LABS | VOLUME 1, ISSUE 1 WWW.RESEARCHDESIGNLAB.COM
All digital circuits require regulated power supply. Here is
a simple power supply circuit diagram used on this board.
You can use AC or DC source (12V) which converts into
regulated 5V which is required for driving the
development board circuit.
Power supply, 5V-12V
Select the IC's from the given list and mount on the ZIF socket. ZIF socket pin maps out PORT1
PORT2 PORT3 PORT4 for easy making connections for the rest of the circuit. Port 1 is enabled with
pull up circuit and also connected ISP for easy on board Programming.
1. 40 pin ZIF socket for IC mount & ISP connector*
RESEARCH DESIGN LABS | VOLUME 1, ISSUE 1 WWW.RESEARCHDESIGNLAB.COM
2. Reset
Resets your microcontroller Node connector is an additional on board
connection extender or 1 connection
IN and 1 connection OUT
One seven segment digit consist of 7+1 LEDs which are arranged in a specific formation which
can be used to represent digits from 0 to 9 and even some letters. One additional LED is used for
marking the decimal dot, in case you want to write a decimal point in the desired segment.
3. Node connector
4. 4 digit 7 segment display
RESEARCH DESIGN LABS | VOLUME 1, ISSUE 1 WWW.RESEARCHDESIGNLAB.COM
26 Pin Raspberry Pi connector is an easy way
for making connections with Raspberry Pi
along with this development board.
Arduino Shield footprint is provided in the
board to mount different types of Arduino
compatible shields on this development board.
IC ULN2803 consists of octal high voltage, high current darlington transistor arrays. The eight NPN
Darlington connected transistors in this family of arrays are ideally suited for interfacing between
low logic level digital circuitry (such as TTL, CMOS or PMOS/NMOS) and the higher
current/voltage requirements of lamps, relays, printer hammers or other similar loads for a
broad range of computer, industrial, and consumer applications.
5. 26 pin Raspberry Pi connector 6. Arduino Shield footprint
7. ULN 2803 driver
RESEARCH DESIGN LABS | VOLUME 1, ISSUE 1 WWW.RESEARCHDESIGNLAB.COM
• Eight Darlingtons with Common Emitter.
• Open–collector outputs.
• Free wheeling clamp diodes for
transient suppression.
• Output Current to 500 mA.
• Output Voltage to 50 V.
• Inputs pinned opposite outputs to
simplify board layout.
The ULN 2803 IC consists of eight NPN
Darlington connected transistors (often
called a Darlington pair). Darlington pair
consists of two bipolar transistors such
that the current amplified by the first is
amplified further by the second to get a
high current gain β or hFE. The figure
shown below is one of the eight Darlington
pairs of ULN 2803 IC.
Now 2 cases arise:-
Case 1: When IN is 0 volts.
Q1 and Q2 both will not conduct as there is
no base current provided to them. Thus,
nothing will appear at the output (OUT).
Case 2: When IN is 5 volts.
Input current will increase and both transistors Q1 and Q2 will begin to conduct. Now, input
current of Q2 is combination of input current and emitter current of Q1, so Q2 will conduct more
than Q1 resulting in higher current gain which is very much required to meet the higher current
requirements of devices like motors, relays etc. Output current flows through Q2 providing a
path (sink) to ground for the external circuit that the output is applied to. Thus, when a 5V input
is applied to any of the input pins (1 to 8), output voltage at corresponding output pin (11 to 18)
drops down to zero providing GND for the external circuit. Thus, the external circuit gets
grounded at one end while it is provided +Vcc at its other end. So, the circuit gets completed and
starts operating.
Features Working
RESEARCH DESIGN LABS | VOLUME 1, ISSUE 1 WWW.RESEARCHDESIGNLAB.COM
One IC that wants to communicate to another must: (Protocol)
1) Wait until it sees no activity on the I2C bus. SDAand SCLare both high. The bus is 'free'.
2) Put a message on the bus that says 'its mine' - I have STARTED to use the bus. All other ICs then
LISTEN to the bus data to see whether they might be the one who will be called up
(addressed).
3) Provide on the CLOCK (SCL) wire a clock signal. It will be used by all the ICs as the reference
time at which each bit of DATA on the data (SDA) wire will be correct (valid) and can be used.
The data on the data wire (SDA) must be valid at the time the clock wire (SCL) switches from
'low' to 'high' voltage.
4) Put out in serial form the unique binary 'address'(name) of the IC that it wants to
communicate with.
5) Put a message (one bit) on the bus telling whether it wants to SEND or RECEIVE data from the
other chip. (The read/write wire is gone!)
6) Ask the other IC toACKNOWLEDGE (using one bit) that it recognized its address and is ready to
communicate.
7) After the other IC acknowledges all is OK, data can be transferred.
8) The first IC sends or receives as many 8-bit words of data as it wants. After every 8-bit data
word the sending IC expects the receiving IC to acknowledge the transfer is going OK.
9) When all the data is finished the first chip must free up the bus and it does that by a special
message called 'STOP'. It is just one bit of information transferred by a special 'wiggling' of the
SDA/SCLwires of the bus.
8. I2C bus
RESEARCH DESIGN LABS | VOLUME 1, ISSUE 1 WWW.RESEARCHDESIGNLAB.COM
Serial to Peripheral Interface (SPI) is a hardware/firmware communications protocol developed
by Motorola and later adopted by others in the industry. Microwire of National Semiconductor is
same as SPI. Sometimes SPI is also called a "four wire" serial bus.
The Serial Peripheral Interface or SPI-bus is a simple 4-wire serial communications interface used
by many microprocessor/microcontroller peripheral chips that enables the controllers and
peripheral devices to communicate each other. Even though it is developed primarily for the
communication between host processor and peripherals, a connection of two processors via SPI is
just as well possible.
The SPI bus, which operates at full duplex (means, signals carrying data can go in both directions
simultaneously), is a synchronous type data link setup with a Master / Slave interface and can
support up to 1 megabaud or 10Mbps of speed. Both single-master and multi-master protocols are
possible in SPI. But the multi-master bus is rarely used and look awkward, and are usually limited
to a single slave.
The SPI Bus is usually used only on the PCB. There are many facts, which prevent us from using it
outside the PCB area. The SPI Bus was designed to transfer data between various IC chips, at very
high speeds. Due to this high-speed aspect, the bus lines cannot be too long, because their
reactance increases too much, and the Bus becomes unusable. However, its possible to use the SPI
Bus outside the PCB at low speeds, but this is not quite practical.
The peripherals can be a Real Time Clocks, converters like ADC and DAC, memory modules like
EEPROM and FLASH, sensors like temperature sensors and pressure sensors, or some other devices
like signal-mixer, potentiometer, LCD controller, UART, CAN controller, USB controller and
amplifier.
9. SPI bus
RESEARCH DESIGN LABS | VOLUME 1, ISSUE 1 WWW.RESEARCHDESIGNLAB.COM
All XBeeZNet 2.5 modules can be identified by their unique 64-bit addresses or a user-
configurableASCII string identifier The 64-bit address of a module can be read using the SH and SL
commands. TheASCII string identifier is configured using the NI command.
To transmit using device addressing, only the destination address must be configured. The
destination address can be specified using either the destination device's 64-bit address or its NI-
string. The XBee modules also support coordinator and broadcast addressing modes. Device
addressing in the AT firmware is configured using the DL, DH, or DN commands. In the API
firmware, the ZigBee Transmit Request API frame (0x10) can be used to specify destination
addresses.
To address a node by its 64-bit address, the destination address must be set to match the 64-bit
address of the remote. In the AT firmware, the DH and DL commands set the destination 64-bit
address. In the API firmware, the destination 64-bit address is set in the ZigBee Transmit Request
frame. ZigBee end devices rely on a parent (router or coordinator) to remain awake and receive
any data packets destined for the end device. When the end device wakes from sleep, it sends a
transmission (poll request) to its parent asking if the parent has received any RF data destined for
the end device. The parent, upon receipt of the poll request, will send an RF response and the
buffered data (if present). If the parent has no data for the end device, the end device may return
to sleep, depending on its sleep mode configuration settings. The following figure demonstrates
how the end device uses polling to receive RF data through its parent.
10. XBEE footprint/ XBEE Adaptor module
RESEARCH DESIGN LABS | VOLUME 1, ISSUE 1 WWW.RESEARCHDESIGNLAB.COM
A s t a n d a r d F T 2 3 2
breakout board from
researchdesignlab.com
could be used to interface
on these connectors,
whose other end is
connected to a USB.
These connectors provide on board
3.3V DC connections.
RS-232 is a standard communication protocol for linking computer and its peripheral devices to
allow serial data exchange. In simple terms RS232 defines the voltage for the path used for data
exchange between the devices. It specifies common voltage and signal level, common pin wire
configuration and minimum, amount of control signals.
11. Ft232 breakout
board connector
12. DC 3.3V connectors
13. DB-9 female connector
RESEARCH DESIGN LABS | VOLUME 1, ISSUE 1 WWW.RESEARCHDESIGNLAB.COM
LED's are used to indicate
something, whether any pin is high
or indicating the output for many
purposes like indicating I/O status
or program debugging running
state. We have 8 led outputs on
board which can be used by the
programmer as per the requirement
for testing and development.
DIP switches are an alternative to jumper blocks. Their main advantages are that they are
quicker to change and there are no parts on lose.
The DS1307 Serial Real Time Clock is a low power, full BCD clock/calendar plus 56 bytes of
nonvolatile SRAM. Address and data are transferred serially via a 2-wire bi-directional bus. The
clock/calendar provides seconds, minutes, hours, day, date, month, and year information. The
end of the month date is automatically adjusted for months with less than 31 days, including
corrections for leap year. The clock operates in either the 24-hour or 12-hour format with AM/PM
indicator. The DS1307 has a built-in power sense circuit which detects power failures and
automatically switches to the battery supply.
14. 8x1 LED's
15. 8 way DIP switch
16. RTC Module
RESEARCH DESIGN LABS | VOLUME 1, ISSUE 1 WWW.RESEARCHDESIGNLAB.COM
The DS1307 operates as a slave device on the serial bus. Access is obtained by implementing a
START condition and providing a device identification code followed by a register address.
Subsequent registers can be accessed sequentially until a STOP condition is executed. When VCC
falls below 1.25 x VBAT the device terminates an access in progress and resets the device address
counter. Inputs to the device will not be recognized at this time to prevent erroneous data from
being written to the device from an out of tolerance system. When VCC falls below VBAT the
device switches into a low current battery backup mode. Upon power up, the device switches
from battery to VCC when VCC is greater than VBAT +0.2V and recognizes inputs.
Features:
1. 56 byte nonvolatile RAM for data storage
2. 2-wire serial interface
3. Programmable square wave output signal
4. Automatic power-fail detect and switch circuitry
5. Consumes less than 500 nA in battery backup mode with oscillator running
6. Optional industrial temperature range -40°C to +85°C
7. Available in 8-pin DIP or SOIC
8. Recognized by Underwriters Laboratory
PIN DESCRIPTION
1. VCC - Primary Power Supply
2. X1, X2 - 32.768 kHz Crystal
Connection
3. VBAT - +3V Battery Input
4. GND - Ground
5. SDA - Serial Data
6. SCL - Serial Clock
7. SQW/OUT - Square
wave/Output Driver
Operation
RESEARCH DESIGN LABS | VOLUME 1, ISSUE 1 WWW.RESEARCHDESIGNLAB.COM
IC, EEPROM I2C 4K, 24C04, DIP8
Memory Size: 4Kbit
Memory Configuration: 512 x 8
Interface Type: I2C, Serial
Clock Frequency: 400kHz
Supply Voltage Range: 2.5V to 5.5V
Memory Case Style: DIP
No. of Pins: 8
Operating Temperature Range: -40°C to
+85°C
SVHC: No SVHC (19-Dec-2011)
Base Number: 24
Device Marking: M24C04
IC Generic Number: 24C04
Interface: I2C
Interface Type: Serial, I2C
Logic Function Number: 24C04
Memory Configuration: 512 x 8
Memory Size: 4Kbit
Memory Type: EEPROM
Memory Voltage Vcc: 2.5V
Operating Temperature Max: +85°C
Operating Temperature Min: -40°C
Package / Case: DIP
Supply Voltage Max: 5.5V
Supply Voltage Min: 2.5V
Termination Type: Through Hole
Voltage Vcc: 2.5V
18. 2x5x2 jumper node
17. EEPROM
Node connector is an additional on board connection
extender or 1 connection IN and 1 connection OUT
RESEARCH DESIGN LABS | VOLUME 1, ISSUE 1 WWW.RESEARCHDESIGNLAB.COM
These connectors provide on board 5V
DC connections.
The Potentiometer Option allows the user to adjust the voltage reference by rotating a
potentiometers dial. Turning the potentiometer changes the voltage reference making it easier
to adjust the motor speed and also to set the duty cycle for PWM values (via programming).
Switches are mainly used to
switch the controls of a
module. We have four
switches on board which can
be used by the programmer
as per the requirement for
testing and development.
19. DC 5V connectors
20. Potentiometer
21.4x1 keypad
RESEARCH DESIGN LABS | VOLUME 1, ISSUE 1 WWW.RESEARCHDESIGNLAB.COM
LCD screen consists of two lines with 16 characters each. Each character consists of 5x7 dot
matrix. Contrast on display depends on the power supply voltage and whether messages are
displayed in one or two lines. For that reason, variable voltage 0-Vdd is applied on pin marked as
Vee. Trimmer potentiometer is usually used for that purpose. Some versions of displays have built
in backlight (blue or green diodes). When used during operating, a resistor for current limitation
should be used (like with any LE diode). LCD Connection Depending on how many lines are used for
connection to the microcontroller, there are 8-bit and 4-bit LCD modes. The appropriate mode is
determined at the beginning of the process in a phase called “initialization”. In the first case, the
data are transferred through outputs D0-D7 as it has been already explained. In case of 4-bit LED
mode, for the sake of saving valuable I/O pins of the microcontroller, there are only 4 higher bits
(D4-D7) used for communication, while other may be left unconnected.
Consequently, each data is sent to LCD in two steps: four higher bits are sent first (that normally
would be sent through lines D4-D7), four lower bits are sent afterwards. With the help of
initialization, LCD will correctly connect and interpret each data received. Besides, with regards
to the fact that data are rarely read from LCD (data mainly are transferred from microcontroller
to LCD) one more I/O pin may be saved by simple connecting R/W pin to the Ground. Such saving
has its price. Even though message displaying will be normally performed, it will not be possible
to read from busy flag since it is not possible to read from display.
Features:
1. Can display 224 different symbols.
2. Low power consumption.
3. 5x7 dot matrix format.
4. Powerful command set and user produced characters.
Fig: Circuit connections of LCD
22. 16x2 LCD connectors
10k
RESEARCH DESIGN LABS | VOLUME 1, ISSUE 1 WWW.RESEARCHDESIGNLAB.COM
1. Gnd:- Power supply ground
2. VCC:-+5v Power supply input
3. RS:- Register Select
Node connector is an additional on board connection extender or 1 connection IN and 1
connection OUT
4. R/W:- Read/Write pin
5. En:-Enable pin
6. D0-D7:- Data lines
Pin Description
23. Node connector
RESEARCH DESIGN LABS | VOLUME 1, ISSUE 1 WWW.RESEARCHDESIGNLAB.COM
In a 4x4 matrix keypad eight Input/Output ports are used for interfacing with any
microcontrollers. Rows are connected to Peripheral Input/Output (PIO) pins configured as
output. Columns are connected to PIO pins configured as input with interrupts.
FEATURES
1. Contact debouncing.
2. Easy to interface.
3. Interfaces to any microcontroller or microprocessor.
4. Data valid output signal for interrupt activation.
PIN DETAILS
pin 1-4: R0-R3:- Rows
pin 5-8: C0-C3:- Columns
24. 4x4 Matrix Keypad
These connectors provide on
board 12V DC connections.
25. DC 12V connectors
Programming Codes:
• LED BLINK
http://researchdesignlab.com/8051-i/o-code
• LCD
http://researchdesignlab.com/8051-lcd-code
• KEYPAD
http://researchdesignlab.com/8051-keypad-code
• UART
http://researchdesignlab.com/8051-uart-code
• RTC
http://researchdesignlab.com/8051-rtc-code
• EEPROM
http://researchdesignlab.com/8051-eeprom-code
• ADC
http://researchdesignlab.com/8051-adc-code.html
• 7 Segment Display
http://researchdesignlab.com/7-segment-atmel-code.html

More Related Content

What's hot

Master synchronous serial port (mssp)
Master synchronous serial port (mssp)Master synchronous serial port (mssp)
Master synchronous serial port (mssp)babak danyal
 
Project report on the Digital clock using RTC and microcontroller 8051
Project report on the Digital clock using RTC and microcontroller 8051Project report on the Digital clock using RTC and microcontroller 8051
Project report on the Digital clock using RTC and microcontroller 8051Maulik Sanchela
 
Voltage controlled oscillators
Voltage controlled oscillatorsVoltage controlled oscillators
Voltage controlled oscillatorsZunAib Ali
 
Lecture 05 pic io port programming
Lecture 05 pic io port programmingLecture 05 pic io port programming
Lecture 05 pic io port programmingVajira Thambawita
 
Introduction to AVR Microcontroller
Introduction to AVR Microcontroller Introduction to AVR Microcontroller
Introduction to AVR Microcontroller Mahmoud Sadat
 
DESIGN AND SIMULATION OF DIFFERENT 8-BIT MULTIPLIERS USING VERILOG CODE BY SA...
DESIGN AND SIMULATION OF DIFFERENT 8-BIT MULTIPLIERS USING VERILOG CODE BY SA...DESIGN AND SIMULATION OF DIFFERENT 8-BIT MULTIPLIERS USING VERILOG CODE BY SA...
DESIGN AND SIMULATION OF DIFFERENT 8-BIT MULTIPLIERS USING VERILOG CODE BY SA...Saikiran Panjala
 
I2C protocol and DS1307 RTC interfacing
I2C protocol and DS1307 RTC interfacingI2C protocol and DS1307 RTC interfacing
I2C protocol and DS1307 RTC interfacingBhargav Kakadiya
 
Unit II Study of Onchip Peripherals
Unit II Study of Onchip PeripheralsUnit II Study of Onchip Peripherals
Unit II Study of Onchip PeripheralsDr. Pankaj Zope
 
Sequential cmos logic circuits
Sequential cmos logic circuitsSequential cmos logic circuits
Sequential cmos logic circuitsSakshi Bhargava
 
Diodes,BJT,MOSFET,JFET
Diodes,BJT,MOSFET,JFETDiodes,BJT,MOSFET,JFET
Diodes,BJT,MOSFET,JFETRaafat Ismael
 
8051 Microcontroller Notes
8051 Microcontroller Notes8051 Microcontroller Notes
8051 Microcontroller NotesDr.YNM
 
Introducion to MSP430 Microcontroller.pptx
Introducion to MSP430 Microcontroller.pptxIntroducion to MSP430 Microcontroller.pptx
Introducion to MSP430 Microcontroller.pptxDr.YNM
 
Router 1X3 – RTL Design and Verification
Router 1X3 – RTL Design and VerificationRouter 1X3 – RTL Design and Verification
Router 1X3 – RTL Design and VerificationIJERD Editor
 
DSP_FOEHU - Lec 07 - Digital Filters
DSP_FOEHU - Lec 07 - Digital FiltersDSP_FOEHU - Lec 07 - Digital Filters
DSP_FOEHU - Lec 07 - Digital FiltersAmr E. Mohamed
 

What's hot (20)

Dc unit 2
Dc unit 2Dc unit 2
Dc unit 2
 
Master synchronous serial port (mssp)
Master synchronous serial port (mssp)Master synchronous serial port (mssp)
Master synchronous serial port (mssp)
 
Project report on the Digital clock using RTC and microcontroller 8051
Project report on the Digital clock using RTC and microcontroller 8051Project report on the Digital clock using RTC and microcontroller 8051
Project report on the Digital clock using RTC and microcontroller 8051
 
ARM Processor
ARM ProcessorARM Processor
ARM Processor
 
8051 Presentation
8051 Presentation8051 Presentation
8051 Presentation
 
Voltage controlled oscillators
Voltage controlled oscillatorsVoltage controlled oscillators
Voltage controlled oscillators
 
Lecture 05 pic io port programming
Lecture 05 pic io port programmingLecture 05 pic io port programming
Lecture 05 pic io port programming
 
Introduction to AVR Microcontroller
Introduction to AVR Microcontroller Introduction to AVR Microcontroller
Introduction to AVR Microcontroller
 
DESIGN AND SIMULATION OF DIFFERENT 8-BIT MULTIPLIERS USING VERILOG CODE BY SA...
DESIGN AND SIMULATION OF DIFFERENT 8-BIT MULTIPLIERS USING VERILOG CODE BY SA...DESIGN AND SIMULATION OF DIFFERENT 8-BIT MULTIPLIERS USING VERILOG CODE BY SA...
DESIGN AND SIMULATION OF DIFFERENT 8-BIT MULTIPLIERS USING VERILOG CODE BY SA...
 
I2C protocol and DS1307 RTC interfacing
I2C protocol and DS1307 RTC interfacingI2C protocol and DS1307 RTC interfacing
I2C protocol and DS1307 RTC interfacing
 
Unit II Study of Onchip Peripherals
Unit II Study of Onchip PeripheralsUnit II Study of Onchip Peripherals
Unit II Study of Onchip Peripherals
 
Sequential cmos logic circuits
Sequential cmos logic circuitsSequential cmos logic circuits
Sequential cmos logic circuits
 
Digital Filters Part 2
Digital Filters Part 2Digital Filters Part 2
Digital Filters Part 2
 
Diodes,BJT,MOSFET,JFET
Diodes,BJT,MOSFET,JFETDiodes,BJT,MOSFET,JFET
Diodes,BJT,MOSFET,JFET
 
8051 Microcontroller Notes
8051 Microcontroller Notes8051 Microcontroller Notes
8051 Microcontroller Notes
 
Introducion to MSP430 Microcontroller.pptx
Introducion to MSP430 Microcontroller.pptxIntroducion to MSP430 Microcontroller.pptx
Introducion to MSP430 Microcontroller.pptx
 
cplds
cpldscplds
cplds
 
Router 1X3 – RTL Design and Verification
Router 1X3 – RTL Design and VerificationRouter 1X3 – RTL Design and Verification
Router 1X3 – RTL Design and Verification
 
DSP_FOEHU - Lec 07 - Digital Filters
DSP_FOEHU - Lec 07 - Digital FiltersDSP_FOEHU - Lec 07 - Digital Filters
DSP_FOEHU - Lec 07 - Digital Filters
 
Dif fft
Dif fftDif fft
Dif fft
 

Viewers also liked

The 8051 microcontroller and embedded systems using assembly and c 2nd-ed
The 8051 microcontroller and embedded systems using assembly and c 2nd-edThe 8051 microcontroller and embedded systems using assembly and c 2nd-ed
The 8051 microcontroller and embedded systems using assembly and c 2nd-edĐinh Công Thiện Taydo University
 
مجموعه آموزش های برنامه نویسی آردوینو با محوریت پروژه های رباتیک
مجموعه آموزش های برنامه نویسی آردوینو با محوریت پروژه های رباتیکمجموعه آموزش های برنامه نویسی آردوینو با محوریت پروژه های رباتیک
مجموعه آموزش های برنامه نویسی آردوینو با محوریت پروژه های رباتیکfaradars
 
Serial Communication & Embedded System Interface
Serial Communication & Embedded System InterfaceSerial Communication & Embedded System Interface
Serial Communication & Embedded System InterfaceKUET
 
Interfacing methods of microcontroller
Interfacing methods of microcontrollerInterfacing methods of microcontroller
Interfacing methods of microcontrollerDiwaker Pant
 
123 robotics experiments for the evil genius
123 robotics experiments for the evil genius123 robotics experiments for the evil genius
123 robotics experiments for the evil genius江里久 ちかと
 
M gopal digital control and state variable methods - copy
M gopal   digital control and state variable methods - copyM gopal   digital control and state variable methods - copy
M gopal digital control and state variable methods - copyShweta Yadav
 
Software engineering uploaded by dlkanth
Software engineering uploaded by dlkanthSoftware engineering uploaded by dlkanth
Software engineering uploaded by dlkanthLakshmi Kanth
 
Refrigeração industrial
Refrigeração industrialRefrigeração industrial
Refrigeração industrialandydurdem
 
Mp upload by dlkanth
Mp upload by dlkanthMp upload by dlkanth
Mp upload by dlkanthLakshmi Kanth
 
Catalogo motores eléctricos WEG
Catalogo motores eléctricos WEGCatalogo motores eléctricos WEG
Catalogo motores eléctricos WEGJaime F. Alvarido
 
Convertidores De Frecuencia, Controladores De Motores Y Ssr
Convertidores De Frecuencia, Controladores De Motores Y SsrConvertidores De Frecuencia, Controladores De Motores Y Ssr
Convertidores De Frecuencia, Controladores De Motores Y SsrMiguel Jaquet
 
Handbook on satellite_communications
Handbook on satellite_communicationsHandbook on satellite_communications
Handbook on satellite_communicationsvideoseosubmission
 
Aula 03 de ciências naturais e suas tecnologias
Aula 03 de ciências naturais e suas tecnologiasAula 03 de ciências naturais e suas tecnologias
Aula 03 de ciências naturais e suas tecnologiasHomero Alves de Lima
 
Weg mpw-guardamotores
Weg mpw-guardamotoresWeg mpw-guardamotores
Weg mpw-guardamotoresaliaga_metal
 

Viewers also liked (20)

The 8051 microcontroller and embedded systems using assembly and c 2nd-ed
The 8051 microcontroller and embedded systems using assembly and c 2nd-edThe 8051 microcontroller and embedded systems using assembly and c 2nd-ed
The 8051 microcontroller and embedded systems using assembly and c 2nd-ed
 
مجموعه آموزش های برنامه نویسی آردوینو با محوریت پروژه های رباتیک
مجموعه آموزش های برنامه نویسی آردوینو با محوریت پروژه های رباتیکمجموعه آموزش های برنامه نویسی آردوینو با محوریت پروژه های رباتیک
مجموعه آموزش های برنامه نویسی آردوینو با محوریت پروژه های رباتیک
 
ATMEGA 328
ATMEGA 328ATMEGA 328
ATMEGA 328
 
Serial Communication & Embedded System Interface
Serial Communication & Embedded System InterfaceSerial Communication & Embedded System Interface
Serial Communication & Embedded System Interface
 
I pod new
I pod newI pod new
I pod new
 
Interfacing methods of microcontroller
Interfacing methods of microcontrollerInterfacing methods of microcontroller
Interfacing methods of microcontroller
 
Manualweg
ManualwegManualweg
Manualweg
 
123 robotics experiments for the evil genius
123 robotics experiments for the evil genius123 robotics experiments for the evil genius
123 robotics experiments for the evil genius
 
M gopal digital control and state variable methods - copy
M gopal   digital control and state variable methods - copyM gopal   digital control and state variable methods - copy
M gopal digital control and state variable methods - copy
 
Software engineering uploaded by dlkanth
Software engineering uploaded by dlkanthSoftware engineering uploaded by dlkanth
Software engineering uploaded by dlkanth
 
Refrigeração industrial
Refrigeração industrialRefrigeração industrial
Refrigeração industrial
 
Condensadores 2012
Condensadores 2012Condensadores 2012
Condensadores 2012
 
Mp upload by dlkanth
Mp upload by dlkanthMp upload by dlkanth
Mp upload by dlkanth
 
2 principios de electrónica
2  principios de electrónica2  principios de electrónica
2 principios de electrónica
 
Catalogo motores eléctricos WEG
Catalogo motores eléctricos WEGCatalogo motores eléctricos WEG
Catalogo motores eléctricos WEG
 
Cpc 2008
Cpc 2008Cpc 2008
Cpc 2008
 
Convertidores De Frecuencia, Controladores De Motores Y Ssr
Convertidores De Frecuencia, Controladores De Motores Y SsrConvertidores De Frecuencia, Controladores De Motores Y Ssr
Convertidores De Frecuencia, Controladores De Motores Y Ssr
 
Handbook on satellite_communications
Handbook on satellite_communicationsHandbook on satellite_communications
Handbook on satellite_communications
 
Aula 03 de ciências naturais e suas tecnologias
Aula 03 de ciências naturais e suas tecnologiasAula 03 de ciências naturais e suas tecnologias
Aula 03 de ciências naturais e suas tecnologias
 
Weg mpw-guardamotores
Weg mpw-guardamotoresWeg mpw-guardamotores
Weg mpw-guardamotores
 

Similar to ATmega 16/32 Microcontroller Programming Guide

Itsp documentation quadcopter flight controller based on kalman filters
Itsp documentation   quadcopter flight controller based on kalman filtersItsp documentation   quadcopter flight controller based on kalman filters
Itsp documentation quadcopter flight controller based on kalman filtersJyotirmaya Mahanta
 
Advanced View of Atmega Microcontroller Projects List - ATMega32 AVR.pdf
Advanced View of Atmega Microcontroller Projects List - ATMega32 AVR.pdfAdvanced View of Atmega Microcontroller Projects List - ATMega32 AVR.pdf
Advanced View of Atmega Microcontroller Projects List - ATMega32 AVR.pdfWiseNaeem
 
Advanced View of Atmega Microcontroller Projects List - ATMega32 AVR.pdf
Advanced View of Atmega Microcontroller Projects List - ATMega32 AVR.pdfAdvanced View of Atmega Microcontroller Projects List - ATMega32 AVR.pdf
Advanced View of Atmega Microcontroller Projects List - ATMega32 AVR.pdfWiseNaeem
 
Advanced View of Atmega Microcontroller Projects List - ATMega32 AVR.pdf
Advanced View of Atmega Microcontroller Projects List - ATMega32 AVR.pdfAdvanced View of Atmega Microcontroller Projects List - ATMega32 AVR.pdf
Advanced View of Atmega Microcontroller Projects List - ATMega32 AVR.pdfWiseNaeem
 
Advanced View of Atmega Microcontroller Projects List - ATMega32 AVR.pdf
Advanced View of Atmega Microcontroller Projects List - ATMega32 AVR.pdfAdvanced View of Atmega Microcontroller Projects List - ATMega32 AVR.pdf
Advanced View of Atmega Microcontroller Projects List - ATMega32 AVR.pdfWiseNaeem
 
Advanced View of Atmega Microcontroller Projects List - Projects Tutorials Co...
Advanced View of Atmega Microcontroller Projects List - Projects Tutorials Co...Advanced View of Atmega Microcontroller Projects List - Projects Tutorials Co...
Advanced View of Atmega Microcontroller Projects List - Projects Tutorials Co...WiseNaeem
 
AVR Atmega16 based Projects List - ATMega32 AVR _ Atmega16 based Projects.pdf
AVR Atmega16 based Projects List - ATMega32 AVR _ Atmega16 based Projects.pdfAVR Atmega16 based Projects List - ATMega32 AVR _ Atmega16 based Projects.pdf
AVR Atmega16 based Projects List - ATMega32 AVR _ Atmega16 based Projects.pdfIsmailkhan77481
 
Advanced View of Atmega Microcontroller Projects List - Projects Tutorials Co...
Advanced View of Atmega Microcontroller Projects List - Projects Tutorials Co...Advanced View of Atmega Microcontroller Projects List - Projects Tutorials Co...
Advanced View of Atmega Microcontroller Projects List - Projects Tutorials Co...WiseNaeem
 
Advanced View of Atmega Microcontroller Projects List - ATMega32 AVR.pdf
Advanced View of Atmega Microcontroller Projects List - ATMega32 AVR.pdfAdvanced View of Atmega Microcontroller Projects List - ATMega32 AVR.pdf
Advanced View of Atmega Microcontroller Projects List - ATMega32 AVR.pdfWiseNaeem
 
Tutorial on avr atmega8 microcontroller, architecture and its applications
Tutorial on avr atmega8 microcontroller, architecture and its applicationsTutorial on avr atmega8 microcontroller, architecture and its applications
Tutorial on avr atmega8 microcontroller, architecture and its applicationsEdgefxkits & Solutions
 
Advanced View of Atmega Microcontroller Projects List - ATMega32 AVR.pdf
Advanced View of Atmega Microcontroller Projects List - ATMega32 AVR.pdfAdvanced View of Atmega Microcontroller Projects List - ATMega32 AVR.pdf
Advanced View of Atmega Microcontroller Projects List - ATMega32 AVR.pdfWiseNaeem
 
AVR atmega8 microcontroller based projects list - ATMega32 AVR.pdf
AVR atmega8 microcontroller based projects list - ATMega32 AVR.pdfAVR atmega8 microcontroller based projects list - ATMega32 AVR.pdf
AVR atmega8 microcontroller based projects list - ATMega32 AVR.pdfIsmailkhan77481
 
Sonar Project Report
Sonar Project ReportSonar Project Report
Sonar Project ReportSumit Sapra
 
Microcontroller
MicrocontrollerMicrocontroller
MicrocontrollerSpitiq
 
AVR Atmega16 based Projects List - ATMega32 AVR _ Atmega16 based Projects.pdf
AVR Atmega16 based Projects List - ATMega32 AVR _ Atmega16 based Projects.pdfAVR Atmega16 based Projects List - ATMega32 AVR _ Atmega16 based Projects.pdf
AVR Atmega16 based Projects List - ATMega32 AVR _ Atmega16 based Projects.pdfIsmailkhan77481
 

Similar to ATmega 16/32 Microcontroller Programming Guide (20)

Itsp documentation quadcopter flight controller based on kalman filters
Itsp documentation   quadcopter flight controller based on kalman filtersItsp documentation   quadcopter flight controller based on kalman filters
Itsp documentation quadcopter flight controller based on kalman filters
 
Advanced View of Atmega Microcontroller Projects List - ATMega32 AVR.pdf
Advanced View of Atmega Microcontroller Projects List - ATMega32 AVR.pdfAdvanced View of Atmega Microcontroller Projects List - ATMega32 AVR.pdf
Advanced View of Atmega Microcontroller Projects List - ATMega32 AVR.pdf
 
Advanced View of Atmega Microcontroller Projects List - ATMega32 AVR.pdf
Advanced View of Atmega Microcontroller Projects List - ATMega32 AVR.pdfAdvanced View of Atmega Microcontroller Projects List - ATMega32 AVR.pdf
Advanced View of Atmega Microcontroller Projects List - ATMega32 AVR.pdf
 
Advanced View of Atmega Microcontroller Projects List - ATMega32 AVR.pdf
Advanced View of Atmega Microcontroller Projects List - ATMega32 AVR.pdfAdvanced View of Atmega Microcontroller Projects List - ATMega32 AVR.pdf
Advanced View of Atmega Microcontroller Projects List - ATMega32 AVR.pdf
 
Advanced View of Atmega Microcontroller Projects List - ATMega32 AVR.pdf
Advanced View of Atmega Microcontroller Projects List - ATMega32 AVR.pdfAdvanced View of Atmega Microcontroller Projects List - ATMega32 AVR.pdf
Advanced View of Atmega Microcontroller Projects List - ATMega32 AVR.pdf
 
Advanced View of Atmega Microcontroller Projects List - Projects Tutorials Co...
Advanced View of Atmega Microcontroller Projects List - Projects Tutorials Co...Advanced View of Atmega Microcontroller Projects List - Projects Tutorials Co...
Advanced View of Atmega Microcontroller Projects List - Projects Tutorials Co...
 
Advanced View of Atmega Microcontroller Projects List - Projects Tutorials Co...
Advanced View of Atmega Microcontroller Projects List - Projects Tutorials Co...Advanced View of Atmega Microcontroller Projects List - Projects Tutorials Co...
Advanced View of Atmega Microcontroller Projects List - Projects Tutorials Co...
 
AVR Atmega16 based Projects List - ATMega32 AVR _ Atmega16 based Projects.pdf
AVR Atmega16 based Projects List - ATMega32 AVR _ Atmega16 based Projects.pdfAVR Atmega16 based Projects List - ATMega32 AVR _ Atmega16 based Projects.pdf
AVR Atmega16 based Projects List - ATMega32 AVR _ Atmega16 based Projects.pdf
 
Atmega tutorial
Atmega tutorialAtmega tutorial
Atmega tutorial
 
Advanced View of Atmega Microcontroller Projects List - Projects Tutorials Co...
Advanced View of Atmega Microcontroller Projects List - Projects Tutorials Co...Advanced View of Atmega Microcontroller Projects List - Projects Tutorials Co...
Advanced View of Atmega Microcontroller Projects List - Projects Tutorials Co...
 
Advanced View of Atmega Microcontroller Projects List - Projects Tutorials Co...
Advanced View of Atmega Microcontroller Projects List - Projects Tutorials Co...Advanced View of Atmega Microcontroller Projects List - Projects Tutorials Co...
Advanced View of Atmega Microcontroller Projects List - Projects Tutorials Co...
 
Advanced View of Atmega Microcontroller Projects List - ATMega32 AVR.pdf
Advanced View of Atmega Microcontroller Projects List - ATMega32 AVR.pdfAdvanced View of Atmega Microcontroller Projects List - ATMega32 AVR.pdf
Advanced View of Atmega Microcontroller Projects List - ATMega32 AVR.pdf
 
Tutorial on avr atmega8 microcontroller, architecture and its applications
Tutorial on avr atmega8 microcontroller, architecture and its applicationsTutorial on avr atmega8 microcontroller, architecture and its applications
Tutorial on avr atmega8 microcontroller, architecture and its applications
 
Advanced View of Atmega Microcontroller Projects List - ATMega32 AVR.pdf
Advanced View of Atmega Microcontroller Projects List - ATMega32 AVR.pdfAdvanced View of Atmega Microcontroller Projects List - ATMega32 AVR.pdf
Advanced View of Atmega Microcontroller Projects List - ATMega32 AVR.pdf
 
embedded system and AVR
embedded system and AVRembedded system and AVR
embedded system and AVR
 
AVR atmega8 microcontroller based projects list - ATMega32 AVR.pdf
AVR atmega8 microcontroller based projects list - ATMega32 AVR.pdfAVR atmega8 microcontroller based projects list - ATMega32 AVR.pdf
AVR atmega8 microcontroller based projects list - ATMega32 AVR.pdf
 
Sonar Project Report
Sonar Project ReportSonar Project Report
Sonar Project Report
 
Microcontroller
MicrocontrollerMicrocontroller
Microcontroller
 
AVR Atmega16 based Projects List - ATMega32 AVR _ Atmega16 based Projects.pdf
AVR Atmega16 based Projects List - ATMega32 AVR _ Atmega16 based Projects.pdfAVR Atmega16 based Projects List - ATMega32 AVR _ Atmega16 based Projects.pdf
AVR Atmega16 based Projects List - ATMega32 AVR _ Atmega16 based Projects.pdf
 

More from Raghav Shetty

8 Channel Relay Board-Bluetooth
8 Channel Relay Board-Bluetooth8 Channel Relay Board-Bluetooth
8 Channel Relay Board-BluetoothRaghav Shetty
 
4 Channel Relay Board 5V-Bluetooth Compatible for Arduino
4 Channel Relay Board 5V-Bluetooth Compatible for Arduino4 Channel Relay Board 5V-Bluetooth Compatible for Arduino
4 Channel Relay Board 5V-Bluetooth Compatible for ArduinoRaghav Shetty
 
4 Channel Relay Board 12V-Compatible for Arduino
4 Channel Relay Board 12V-Compatible for Arduino4 Channel Relay Board 12V-Compatible for Arduino
4 Channel Relay Board 12V-Compatible for ArduinoRaghav Shetty
 
8 Channel Relay Board-Rs485
8 Channel Relay Board-Rs485 8 Channel Relay Board-Rs485
8 Channel Relay Board-Rs485 Raghav Shetty
 
Digitla Vibration Sensor
Digitla Vibration SensorDigitla Vibration Sensor
Digitla Vibration SensorRaghav Shetty
 
Digital Soil Moisture Sensor
Digital Soil Moisture SensorDigital Soil Moisture Sensor
Digital Soil Moisture SensorRaghav Shetty
 
Micro SD Memory Card Interface for 5V MCU
Micro SD Memory Card Interface for 5V MCUMicro SD Memory Card Interface for 5V MCU
Micro SD Memory Card Interface for 5V MCURaghav Shetty
 
Micro SD Memory Card Interface for 3.3V MCU
Micro SD Memory Card Interface for 3.3V MCUMicro SD Memory Card Interface for 3.3V MCU
Micro SD Memory Card Interface for 3.3V MCURaghav Shetty
 
Regulated Power Supply
Regulated Power Supply Regulated Power Supply
Regulated Power Supply Raghav Shetty
 
8 Channel Bi Directional Logic Level Converter
8 Channel Bi Directional Logic Level Converter8 Channel Bi Directional Logic Level Converter
8 Channel Bi Directional Logic Level ConverterRaghav Shetty
 
Plastic REED Float Switch
Plastic REED Float SwitchPlastic REED Float Switch
Plastic REED Float SwitchRaghav Shetty
 

More from Raghav Shetty (20)

8 Channel Relay Board-Bluetooth
8 Channel Relay Board-Bluetooth8 Channel Relay Board-Bluetooth
8 Channel Relay Board-Bluetooth
 
4 Channel Relay Board 5V-Bluetooth Compatible for Arduino
4 Channel Relay Board 5V-Bluetooth Compatible for Arduino4 Channel Relay Board 5V-Bluetooth Compatible for Arduino
4 Channel Relay Board 5V-Bluetooth Compatible for Arduino
 
4 Channel Relay Board 12V-Compatible for Arduino
4 Channel Relay Board 12V-Compatible for Arduino4 Channel Relay Board 12V-Compatible for Arduino
4 Channel Relay Board 12V-Compatible for Arduino
 
8 Channel Relay Board-Rs485
8 Channel Relay Board-Rs485 8 Channel Relay Board-Rs485
8 Channel Relay Board-Rs485
 
Xbee X-CTU Software
Xbee X-CTU SoftwareXbee X-CTU Software
Xbee X-CTU Software
 
Digitla Vibration Sensor
Digitla Vibration SensorDigitla Vibration Sensor
Digitla Vibration Sensor
 
Thermal Printer
Thermal PrinterThermal Printer
Thermal Printer
 
Digital Soil Moisture Sensor
Digital Soil Moisture SensorDigital Soil Moisture Sensor
Digital Soil Moisture Sensor
 
Micro SD Memory Card Interface for 5V MCU
Micro SD Memory Card Interface for 5V MCUMicro SD Memory Card Interface for 5V MCU
Micro SD Memory Card Interface for 5V MCU
 
Micro SD Memory Card Interface for 3.3V MCU
Micro SD Memory Card Interface for 3.3V MCUMicro SD Memory Card Interface for 3.3V MCU
Micro SD Memory Card Interface for 3.3V MCU
 
Regulated Power Supply
Regulated Power Supply Regulated Power Supply
Regulated Power Supply
 
PIC Project Board
PIC Project BoardPIC Project Board
PIC Project Board
 
8 Channel Bi Directional Logic Level Converter
8 Channel Bi Directional Logic Level Converter8 Channel Bi Directional Logic Level Converter
8 Channel Bi Directional Logic Level Converter
 
LCD Keypad Shield
LCD Keypad ShieldLCD Keypad Shield
LCD Keypad Shield
 
L298 Motor Driver
L298 Motor DriverL298 Motor Driver
L298 Motor Driver
 
Joystick Shield
Joystick ShieldJoystick Shield
Joystick Shield
 
Force Sensor
Force SensorForce Sensor
Force Sensor
 
Plastic REED Float Switch
Plastic REED Float SwitchPlastic REED Float Switch
Plastic REED Float Switch
 
Flex Sensor
Flex SensorFlex Sensor
Flex Sensor
 
Serial EEPROM
Serial EEPROMSerial EEPROM
Serial EEPROM
 

Recently uploaded

Presentation on how to chat with PDF using ChatGPT code interpreter
Presentation on how to chat with PDF using ChatGPT code interpreterPresentation on how to chat with PDF using ChatGPT code interpreter
Presentation on how to chat with PDF using ChatGPT code interpreternaman860154
 
Next-generation AAM aircraft unveiled by Supernal, S-A2
Next-generation AAM aircraft unveiled by Supernal, S-A2Next-generation AAM aircraft unveiled by Supernal, S-A2
Next-generation AAM aircraft unveiled by Supernal, S-A2Hyundai Motor Group
 
Integration and Automation in Practice: CI/CD in Mule Integration and Automat...
Integration and Automation in Practice: CI/CD in Mule Integration and Automat...Integration and Automation in Practice: CI/CD in Mule Integration and Automat...
Integration and Automation in Practice: CI/CD in Mule Integration and Automat...Patryk Bandurski
 
Enhancing Worker Digital Experience: A Hands-on Workshop for Partners
Enhancing Worker Digital Experience: A Hands-on Workshop for PartnersEnhancing Worker Digital Experience: A Hands-on Workshop for Partners
Enhancing Worker Digital Experience: A Hands-on Workshop for PartnersThousandEyes
 
08448380779 Call Girls In Diplomatic Enclave Women Seeking Men
08448380779 Call Girls In Diplomatic Enclave Women Seeking Men08448380779 Call Girls In Diplomatic Enclave Women Seeking Men
08448380779 Call Girls In Diplomatic Enclave Women Seeking MenDelhi Call girls
 
FULL ENJOY 🔝 8264348440 🔝 Call Girls in Diplomatic Enclave | Delhi
FULL ENJOY 🔝 8264348440 🔝 Call Girls in Diplomatic Enclave | DelhiFULL ENJOY 🔝 8264348440 🔝 Call Girls in Diplomatic Enclave | Delhi
FULL ENJOY 🔝 8264348440 🔝 Call Girls in Diplomatic Enclave | Delhisoniya singh
 
Hyderabad Call Girls Khairatabad ✨ 7001305949 ✨ Cheap Price Your Budget
Hyderabad Call Girls Khairatabad ✨ 7001305949 ✨ Cheap Price Your BudgetHyderabad Call Girls Khairatabad ✨ 7001305949 ✨ Cheap Price Your Budget
Hyderabad Call Girls Khairatabad ✨ 7001305949 ✨ Cheap Price Your BudgetEnjoy Anytime
 
SQL Database Design For Developers at php[tek] 2024
SQL Database Design For Developers at php[tek] 2024SQL Database Design For Developers at php[tek] 2024
SQL Database Design For Developers at php[tek] 2024Scott Keck-Warren
 
Making_way_through_DLL_hollowing_inspite_of_CFG_by_Debjeet Banerjee.pptx
Making_way_through_DLL_hollowing_inspite_of_CFG_by_Debjeet Banerjee.pptxMaking_way_through_DLL_hollowing_inspite_of_CFG_by_Debjeet Banerjee.pptx
Making_way_through_DLL_hollowing_inspite_of_CFG_by_Debjeet Banerjee.pptxnull - The Open Security Community
 
Swan(sea) Song – personal research during my six years at Swansea ... and bey...
Swan(sea) Song – personal research during my six years at Swansea ... and bey...Swan(sea) Song – personal research during my six years at Swansea ... and bey...
Swan(sea) Song – personal research during my six years at Swansea ... and bey...Alan Dix
 
Advanced Test Driven-Development @ php[tek] 2024
Advanced Test Driven-Development @ php[tek] 2024Advanced Test Driven-Development @ php[tek] 2024
Advanced Test Driven-Development @ php[tek] 2024Scott Keck-Warren
 
Neo4j - How KGs are shaping the future of Generative AI at AWS Summit London ...
Neo4j - How KGs are shaping the future of Generative AI at AWS Summit London ...Neo4j - How KGs are shaping the future of Generative AI at AWS Summit London ...
Neo4j - How KGs are shaping the future of Generative AI at AWS Summit London ...Neo4j
 
AI as an Interface for Commercial Buildings
AI as an Interface for Commercial BuildingsAI as an Interface for Commercial Buildings
AI as an Interface for Commercial BuildingsMemoori
 
Maximizing Board Effectiveness 2024 Webinar.pptx
Maximizing Board Effectiveness 2024 Webinar.pptxMaximizing Board Effectiveness 2024 Webinar.pptx
Maximizing Board Effectiveness 2024 Webinar.pptxOnBoard
 
Slack Application Development 101 Slides
Slack Application Development 101 SlidesSlack Application Development 101 Slides
Slack Application Development 101 Slidespraypatel2
 
GenCyber Cyber Security Day Presentation
GenCyber Cyber Security Day PresentationGenCyber Cyber Security Day Presentation
GenCyber Cyber Security Day PresentationMichael W. Hawkins
 
CloudStudio User manual (basic edition):
CloudStudio User manual (basic edition):CloudStudio User manual (basic edition):
CloudStudio User manual (basic edition):comworks
 
Pigging Solutions in Pet Food Manufacturing
Pigging Solutions in Pet Food ManufacturingPigging Solutions in Pet Food Manufacturing
Pigging Solutions in Pet Food ManufacturingPigging Solutions
 
#StandardsGoals for 2024: What’s new for BISAC - Tech Forum 2024
#StandardsGoals for 2024: What’s new for BISAC - Tech Forum 2024#StandardsGoals for 2024: What’s new for BISAC - Tech Forum 2024
#StandardsGoals for 2024: What’s new for BISAC - Tech Forum 2024BookNet Canada
 
My Hashitalk Indonesia April 2024 Presentation
My Hashitalk Indonesia April 2024 PresentationMy Hashitalk Indonesia April 2024 Presentation
My Hashitalk Indonesia April 2024 PresentationRidwan Fadjar
 

Recently uploaded (20)

Presentation on how to chat with PDF using ChatGPT code interpreter
Presentation on how to chat with PDF using ChatGPT code interpreterPresentation on how to chat with PDF using ChatGPT code interpreter
Presentation on how to chat with PDF using ChatGPT code interpreter
 
Next-generation AAM aircraft unveiled by Supernal, S-A2
Next-generation AAM aircraft unveiled by Supernal, S-A2Next-generation AAM aircraft unveiled by Supernal, S-A2
Next-generation AAM aircraft unveiled by Supernal, S-A2
 
Integration and Automation in Practice: CI/CD in Mule Integration and Automat...
Integration and Automation in Practice: CI/CD in Mule Integration and Automat...Integration and Automation in Practice: CI/CD in Mule Integration and Automat...
Integration and Automation in Practice: CI/CD in Mule Integration and Automat...
 
Enhancing Worker Digital Experience: A Hands-on Workshop for Partners
Enhancing Worker Digital Experience: A Hands-on Workshop for PartnersEnhancing Worker Digital Experience: A Hands-on Workshop for Partners
Enhancing Worker Digital Experience: A Hands-on Workshop for Partners
 
08448380779 Call Girls In Diplomatic Enclave Women Seeking Men
08448380779 Call Girls In Diplomatic Enclave Women Seeking Men08448380779 Call Girls In Diplomatic Enclave Women Seeking Men
08448380779 Call Girls In Diplomatic Enclave Women Seeking Men
 
FULL ENJOY 🔝 8264348440 🔝 Call Girls in Diplomatic Enclave | Delhi
FULL ENJOY 🔝 8264348440 🔝 Call Girls in Diplomatic Enclave | DelhiFULL ENJOY 🔝 8264348440 🔝 Call Girls in Diplomatic Enclave | Delhi
FULL ENJOY 🔝 8264348440 🔝 Call Girls in Diplomatic Enclave | Delhi
 
Hyderabad Call Girls Khairatabad ✨ 7001305949 ✨ Cheap Price Your Budget
Hyderabad Call Girls Khairatabad ✨ 7001305949 ✨ Cheap Price Your BudgetHyderabad Call Girls Khairatabad ✨ 7001305949 ✨ Cheap Price Your Budget
Hyderabad Call Girls Khairatabad ✨ 7001305949 ✨ Cheap Price Your Budget
 
SQL Database Design For Developers at php[tek] 2024
SQL Database Design For Developers at php[tek] 2024SQL Database Design For Developers at php[tek] 2024
SQL Database Design For Developers at php[tek] 2024
 
Making_way_through_DLL_hollowing_inspite_of_CFG_by_Debjeet Banerjee.pptx
Making_way_through_DLL_hollowing_inspite_of_CFG_by_Debjeet Banerjee.pptxMaking_way_through_DLL_hollowing_inspite_of_CFG_by_Debjeet Banerjee.pptx
Making_way_through_DLL_hollowing_inspite_of_CFG_by_Debjeet Banerjee.pptx
 
Swan(sea) Song – personal research during my six years at Swansea ... and bey...
Swan(sea) Song – personal research during my six years at Swansea ... and bey...Swan(sea) Song – personal research during my six years at Swansea ... and bey...
Swan(sea) Song – personal research during my six years at Swansea ... and bey...
 
Advanced Test Driven-Development @ php[tek] 2024
Advanced Test Driven-Development @ php[tek] 2024Advanced Test Driven-Development @ php[tek] 2024
Advanced Test Driven-Development @ php[tek] 2024
 
Neo4j - How KGs are shaping the future of Generative AI at AWS Summit London ...
Neo4j - How KGs are shaping the future of Generative AI at AWS Summit London ...Neo4j - How KGs are shaping the future of Generative AI at AWS Summit London ...
Neo4j - How KGs are shaping the future of Generative AI at AWS Summit London ...
 
AI as an Interface for Commercial Buildings
AI as an Interface for Commercial BuildingsAI as an Interface for Commercial Buildings
AI as an Interface for Commercial Buildings
 
Maximizing Board Effectiveness 2024 Webinar.pptx
Maximizing Board Effectiveness 2024 Webinar.pptxMaximizing Board Effectiveness 2024 Webinar.pptx
Maximizing Board Effectiveness 2024 Webinar.pptx
 
Slack Application Development 101 Slides
Slack Application Development 101 SlidesSlack Application Development 101 Slides
Slack Application Development 101 Slides
 
GenCyber Cyber Security Day Presentation
GenCyber Cyber Security Day PresentationGenCyber Cyber Security Day Presentation
GenCyber Cyber Security Day Presentation
 
CloudStudio User manual (basic edition):
CloudStudio User manual (basic edition):CloudStudio User manual (basic edition):
CloudStudio User manual (basic edition):
 
Pigging Solutions in Pet Food Manufacturing
Pigging Solutions in Pet Food ManufacturingPigging Solutions in Pet Food Manufacturing
Pigging Solutions in Pet Food Manufacturing
 
#StandardsGoals for 2024: What’s new for BISAC - Tech Forum 2024
#StandardsGoals for 2024: What’s new for BISAC - Tech Forum 2024#StandardsGoals for 2024: What’s new for BISAC - Tech Forum 2024
#StandardsGoals for 2024: What’s new for BISAC - Tech Forum 2024
 
My Hashitalk Indonesia April 2024 Presentation
My Hashitalk Indonesia April 2024 PresentationMy Hashitalk Indonesia April 2024 Presentation
My Hashitalk Indonesia April 2024 Presentation
 

ATmega 16/32 Microcontroller Programming Guide

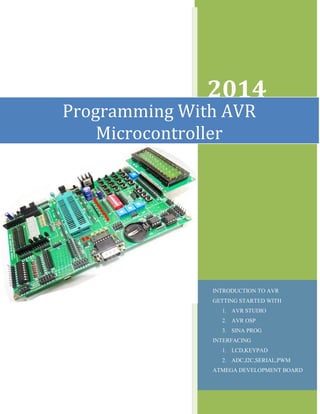
  • 1. 2014 INTRODUCTION TO AVR GETTING STARTED WITH 1. AVR STUDIO 2. AVR OSP 3. SINA PROG INTERFACING 1. LCD,KEYPAD 2. ADC,I2C,SERIAL,PWM ATMEGA DEVELOPMENT BOARD Programming With AVR Microcontroller
  • 2. Atmega 16/32 Microcontroller www.researchdesignlab.com Page 1 ATMEGA 16/32 MICROCONTROLLER
  • 3. Atmega 16/32 Microcontroller www.researchdesignlab.com Page 2 Table of Contents OVERVIEW:.............................................................................................................................................. 3 PORTS:...................................................................................................................................................................3 PIN DESCRIPTION: ................................................................................................................................ 5 WRITING THE CODE ............................................................................................................................. 7 1. AVR STUDIO ..................................................................................................................................................7 BURNING THE CODE...........................................................................................................................14 1. AVR osp-2.................................................................................................................................................... 14 2. SINA PROG 2.1............................................................................................................................................. 22 INTERFACE.............................................................................................................................................25 1. LED BLINKING.............................................................................................................................................. 25 2. LCD.............................................................................................................................................................. 27 3. PULSE WIDTH MODULATION.......................................................................................................................30 4. ADC ............................................................................................................................................................. 32 5. KEYPAD ....................................................................................................................................................... 36 SERIAL COMMUNICATION:...............................................................................................................39 What is the USART?............................................................................................................................................. 39 Setting up the Hardware...................................................................................................................................... 39 Setting up HyperTerminal.................................................................................................................................... 40 Initializing the USART........................................................................................................................................... 43 Sending and receiving data..................................................................................................................................44 CODE: .................................................................................................................................................................. 45
  • 4. Atmega 16/32 Microcontroller www.researchdesignlab.com Page 3 OVERVIEW: ATmega16 is an 8-bit high performance microcontroller of Atmel’s Mega AVR family with low power consumption. Atmega16 is based on enhanced RISC architecture with 131 powerful instructions. Most of the instructions execute in one machine cycle. Atmega16 can work on a maximum frequency of 16MHz. PORTS: There are 32 I/O (Input/Output) pins grouped as A, B, C & D with 8 pins in each group. This group is called as PORT. PA0 - PA7 (PORTA) PB0 - PB7 (PORTB) PC0 - PC7 (PORTC) PD0 - PD7 (PORTD) These are additional function that pin can perform other than I/O. Some of them are. • ADC (ADC0 - ADC7 on PORTA) • UART (Rx,Tx on PORTD) • TIMERS (OC0 - OC2) • SPI (MISO, MOSI, SCK on PORTB) • External Interrupts (INT0 - INT2)
  • 6. Atmega 16/32 Microcontroller www.researchdesignlab.com Page 5 PIN DESCRIPTION: • VCC: Digital supply voltage. (+5V) • GND: Ground. (0 V) Note there are 2 ground Pins. • Port A (PA7 - PA0) Port A serves as the analog inputs to the A/D Converter. Port A also serves as an 8-bit bi-directional I/O port, if the A/D Converter is not used. When pins PA0 to PA7 are used as inputs and are externally pulled low, they will source current if the internal pull-up resistors are activated. The Port A pins are tri-stated when a reset condition becomes active, even if the clock is not running. • Port B (PB7 - PB0) Port B is an 8-bit bi-directional I/O port with internal pull-up resistors (selected for each bit). Port B also serves the functions of various special features of the ATmega16 as listed on page 58 of datasheet. • Port C (PC7 - PC0) Port C is an 8-bit bi-directional I/O port with internal pull-up resistors (selected for each bit). Port C also serves the functions of the JTAG interface and other special features of the ATmega16 as listed on page 61 of datasheet. If the JTAG interface is enabled, the pull-up resistors on pins PC5 (TDI), PC3 (TMS) and PC2 (TCK) will be activated even if a reset occurs. • Port D (PD7 - PD0) Port D is an 8-bit bi-directional I/O port with internal pull-up resistors (selected for each bit). Port D also serves the functions of various special features of the ATmega16 as listed on page 63 of datasheet.
  • 7. Atmega 16/32 Microcontroller www.researchdesignlab.com Page 6 • RESET: Reset Input. A low level on this pin for longer than the minimum pulse length will generate a reset, even if the clock is not running. • XTAL1: External oscillator pin 1 • XTAL2: External oscillator pin 2 • AVCC: AVCC is the supply voltage pin for Port A and the A/D Converter. It should be externally connected to VCC, even if the ADC is not used. If the ADC is used, it should be connected to VCC through a low-pass filter. • AREF: AREF is the analog reference pin for the A/D Converter.
  • 8. Atmega 16/32 Microcontroller www.researchdesignlab.com Page 7 WRITING THE CODE 1. AVR STUDIO Setup: 1. open AVR studio 4 2. click new project 3. Select AVR GCC as we would be doing program in c and enter the project name.
  • 9. Atmega 16/32 Microcontroller www.researchdesignlab.com Page 8 4. Add your project name. Here I have given my project name as serial and it will automatically create your initial file name in .c format 5. click on next
  • 10. Atmega 16/32 Microcontroller www.researchdesignlab.com Page 9 6. Select AVR simulator in debug platform and in the Device select the Device your using as here I am using ATmega 16 i have selected that.(for Atmega 32 select Atmega 32). 7. click on finish
  • 11. Atmega 16/32 Microcontroller www.researchdesignlab.com Page 10 8. This is the default window you will see after you click on finish and project name called serial will get open 9. Now click on this to create a new file 10. Type the program and save it .To compile the files first you need to add files in your source for doing that right click on the source file and then
  • 12. Atmega 16/32 Microcontroller www.researchdesignlab.com Page 11 click on add existing source file 11.Now inside that source file their will be your file saved here the file name I have used is urted
  • 13. Atmega 16/32 Microcontroller www.researchdesignlab.com Page 12 12. Now to build the file go to build and click on build
  • 14. Atmega 16/32 Microcontroller www.researchdesignlab.com Page 13 13. If your program has no errors it will be successfully build and it will show the build window like this TO BURN THE PROGRAM IN YOUR MICROCONTROLLER YOU NEED A BURNER FOR BURNING WE USE AVR OPS-2
  • 15. Atmega 16/32 Microcontroller www.researchdesignlab.com Page 14 BURNING THE CODE 1. AVR osp-2 1. click on avr osp 2. The default avr osp 2 will look like this
  • 16. Atmega 16/32 Microcontroller www.researchdesignlab.com Page 15 3. First you need to configure your avr osp to check its connected to the same com port or not and default Baud rate
  • 17. Atmega 16/32 Microcontroller www.researchdesignlab.com Page 16 4. you can manually select the device which you are using or else u can even auto detect it 5. In device select which device you are using as here I am using ATmega 16 I have selected that .Even you can Auto Detect your device that option will automatically Detect your Device which you
  • 18. Atmega 16/32 Microcontroller www.researchdesignlab.com Page 17 are using 6. after pressing auto detect you will see this means that your microcontroller has been detected and it read to flash program on to it 7. To flash the program on the Microcontroller You Browse the program and Then click on program after click on the program it will flash the
  • 20. Atmega 16/32 Microcontroller www.researchdesignlab.com Page 19 8. Browse your hex file where you have store 9. After clicking on program it will erase the previous content of the chip and will flash the program on to the chip
  • 22. Atmega 16/32 Microcontroller www.researchdesignlab.com Page 21 10. After the completion of the flash it will compare the flash data if its equal than it means that your flash is successful and it will show “Equal”
  • 23. Atmega 16/32 Microcontroller www.researchdesignlab.com Page 22 2. SINA PROG 2.1 • If You are using ISP Atmega Programmer to Burn the code In Your Microcontroller than this Programmer will surely come in handy • Its simple to use and You can easily use the Microcontroller For External Crystal Frequency
  • 24. Atmega 16/32 Microcontroller www.researchdesignlab.com Page 23 • If You Want to Change Internal Frequency Or want To use External Crystal Frequency than You can change the Fuse. • Here You Can Set Internal Frequency To 1. 1 MHz 2. 2 MHz 3. 4 MHz 4. 8 MHz • If You want to use External Frequency than select Ext.Crys. (If Ext Crys Doesn’t work properly than Try changing the BC valve as shown in Below Pic)
  • 25. Atmega 16/32 Microcontroller www.researchdesignlab.com Page 24 • Usually For Atmega 16 it comes out to be BC 32 KHz and For Atmega 32 BC 16 KHz but try with Other Valve if this Doesn’t Works.
  • 26. Atmega 16/32 Microcontroller www.researchdesignlab.com Page 25 INTERFACE 1. LED BLINKING Here we are blinking the led making it on and off for a certain duration using AT Mega 16 Circuit diagram:
  • 27. Atmega 16/32 Microcontroller www.researchdesignlab.com Page 26 Program: # define F_CPU 1000000UL #define FOSC 16000000L //here we define the clock frequency #include <avr/io.h> #include <util/delay.h> int main(void) { DDRB = 0xFF; //Makes PORTC as Output While (1) //infinite loop { PORTB = 0xFF; //Turns ON All LEDs _delay_ms(1000); //1 second delay PORTB= 0x00; //Turns OFF All LEDs _delay_ms(1000); //1 second delay } }
  • 28. Atmega 16/32 Microcontroller www.researchdesignlab.com Page 27 2. LCD : CIRCUIT DIAGRAM: Program: # define F_CPU 1000000UL #include <avr/io.h> #include <util/delay.h> #include <string.h> //#define LCD_PORT PORTB #define RS PC0 //initialize register select as PC0 pin #define EN PC1 //initialize enable pin as PC1
  • 29. Atmega 16/32 Microcontroller www.researchdesignlab.com Page 28 void CMD_WRT(unsigned char val) { PORTB=val; PORTC = PORTC & (~(1<<RS)); _delay_ms(1); // here we provide a delay of 1 sec ORTC = PORTC | ((1<<EN)); //make enable pin high _delay_ms(1); PORTC = PORTC & (~(1<<EN)); //make enable pin low } void DATA_WRT(unsigned char ch) { PORTB = ch; PORTC = PORTC | ((1<<RS));//make register select pin high _delay_ms(1); PORTC = PORTC | ((1<<EN)); //make enable pin high _delay_ms(1); PORTC = PORTC & (~(1<<EN)); //make enable pin low } void LCD_WRT( char *string) { while(*string) DATA_WRT(*string++);//will write the strings } int main(void) { //setting the display of the lcd
  • 30. Atmega 16/32 Microcontroller www.researchdesignlab.com Page 29 unsigned char CMD[]={0x38,0x01,0x0f,0x06,0x80},TEMP1,i; DDRB=0XFF; //make PORTB as output DDRC = 0xFF;//(1<<RS)|(1<<EN); //make PORTC as output _delay_ms(10); //provide the delay of 10ms for(i=0;i<5;i++) { TEMP1=CMD[i]; //it will place the command in cmd array CMD_WRT(TEMP1); //it will write all the cmd that is in the cmd array } while(1) { CMD_WRT(0X01); //clear display CMD_WRT(0X80); // blink the cursor in 1st row LCD_WRT(" --RDL--");//display RDL in lcd CMD_WRT(0XC0); //to use 2nd row of lcd LCD_WRT(" LCD_DISPLAY"); //display LCD_DISPLAY in lcd _delay_ms(1000); //delay of 1sec } return 0; }
  • 31. Atmega 16/32 Microcontroller www.researchdesignlab.com Page 30 3. PULSE WIDTH MODULATION: Program: // program to change brightness of an LED // demonstration of PWM #include <avr/io.h> #include <util/delay.h> // initialize PWM void pwm_init() { // initialize timer0 in PWM mode TCCR0 |= (1<<WGM00)|(1<<COM01)|(1<<WGM01)|(1<<CS00); // make sure to make OC0 pin (pin PB3 for atmega32) as output pin DDRB |= (1<<PB3); } void main() { uint8_t brightness; // initialize timer0 in PWM mode pwm_init(); // run forever while(1) { // increasing brightness for (brightness = 0; brightness < 255; ++brightness) {
  • 32. Atmega 16/32 Microcontroller www.researchdesignlab.com Page 31 // set the brightness as duty cycle OCR0 = brightness; // delay so as to make the user "see" the change in brightness _delay_ms(10); } // decreasing brightness for (brightness = 255; brightness > 0; --brightness) { // set the brightness as duty cycle OCR0 = brightness; // delay so as to make the user "see" the change in brightness _delay_ms(10); } // repeat this forever } }
  • 33. Atmega 16/32 Microcontroller www.researchdesignlab.com Page 32 4. ADC : Program: # define F_CPU 1000000UL #include <avr/io.h> #include <util/delay.h> #include <string.h> //#include <iom16.h> //#define LCD_PORT PORTB #define RS PC0 // connect register select pin to PC0 #define EN PC1 // connect enable pin to PC1 #define LTHRES 500 //setting the threshold valve #define RTHRES 500 #include <stdlib.h> void CMD_WRT(unsigned char val) { PORTB=val; // initializing PORTB as input and passing valve onto it PORTC = PORTC & (~(1<<RS));//make RS pin low _delay_ms(1); PORTC = PORTC | ((1<<EN));// make EN pin high _delay_ms(1); PORTC = PORTC & (~(1<<EN));// make EN pin low }
  • 34. Atmega 16/32 Microcontroller www.researchdesignlab.com Page 33 void DATA_WRT(unsigned char ch) { PORTB = ch; //initializing PORTB as input and passing CMD onto it PORTC = PORTC | ((1<<RS)); // make RS pin high _delay_ms(1); PORTC = PORTC | ((1<<EN));//make EN pin high _delay_ms(1); PORTC = PORTC & (~(1<<EN));// make EN pin low } void LCD_WRT( char *string) { while(*string) DATA_WRT(*string++); } // initialize adc void adc_init() { // AREF = AVcc ADMUX = (1<<REFS0); //initialize admux // ADC Enable and prescaler of 128 // 16000000/128 = 125000 ADCSRA = (1<<ADEN)|(1<<ADPS2)|(1<<ADPS1)|(1<<ADPS0); } //ADEN means ADC enabled // read adc value int adc_read(char ch)
  • 35. Atmega 16/32 Microcontroller www.researchdesignlab.com Page 34 { // select the corresponding channel 0~7 // ANDing with '7' will always keep the value // of 'ch' between 0 and 7 ch &= 0b00000111; // AND operation with 7 ADMUX = (ADMUX & 0xF8)|ch; // clears the bottom 3 bits before ORing // start single conversion // write '1' to ADSC ADCSRA |= (1<<ADSC); // wait for conversion to complete // ADSC becomes '0' again // till then, run loop continuously while(ADCSRA & (1<<ADSC)); return (ADC); } int main(void) { uint16_t adc_result0;//, adc_result1; char int_buffer[10]; //creating array of 10 unsigned char CMD[]={0x38,0x01,0x0f,0x06,0x80},TEMP1,i; DDRB=0XFF;//set port b as output DDRC = 0xFF;//(1<<RS)|(1<<EN); _delay_ms(10); for(i=0;i<5;i++) {
  • 36. Atmega 16/32 Microcontroller www.researchdesignlab.com Page 35 TEMP1=CMD[i]; //for each one cycle each command will be placed in that cmd array CMD_WRT(TEMP1); } adc_init(); while(1) { //adc_result0 = adc_read(0); // read adc value at PA0 adc_result0 = adc_read(1); itoa(adc_result0, int_buffer,10); CMD_WRT(0X01); //clear display CMD_WRT(0X80); // cursor on first line LCD_WRT(" --RDL--"); //display RDL CMD_WRT(0XC0); //cursor on next line LCD_WRT(int_buffer); _delay_ms(1000); //TODO:: Please write your application code } return 0; }
  • 37. Atmega 16/32 Microcontroller www.researchdesignlab.com Page 36 5. KEYPAD: Block diagram:
  • 38. Atmega 16/32 Microcontroller www.researchdesignlab.com Page 37 Program: #include<avr/io.h> #include <avr/keypad.h> // to initialize the keypad #define F_CPU 1000000UL #include <util/delay.h> //header to use delay function #define KEYPAD_PORT PORTC // connecting keypad to port c #define KEYPAD_PIN PINC //initializing pins for keypad #define LCD_DATA_PORT PORTB #define LCD_CONT_PORT PORTD #define LCD_RS PD0 #define LCD_RW PD1 #define LCD_EN PD2 #include <lcd.h> //header to initialize LCD commands void main(void) { DDRB=0xFF; //make PORTB as output DDRD=0X07; //make PORTD pin 0, 1, 2 as output DDRB=0X0F; PORTC=0xFF; //make PORTC as output unsigned char keypad_valve; lcd_init(); while(1) { lcd_command_write(0x08); //display off cursor off lcd_string_write("PRESS ANY KEY"); lcd_command_write(0xc0);//2nd line display keypad_valve=read_keypad();
  • 39. Atmega 16/32 Microcontroller www.researchdesignlab.com Page 38 if(keypad_valve!=0xFF) { lcd_number_write(keypad_valve,10);//if key is pressed corresponding valve will be displayed lcd_data_write(' '); } else ; _delay_ms(300); } }
  • 40. Atmega 16/32 Microcontroller www.researchdesignlab.com Page 39 SERIAL COMMUNICATION: What is the USART? The vast majority of devices in the current AVR family lineup contain a USART hardware subsystem. The USART hardware allows the AVR to transmit and receive data serially to and from other devices - such as a computer or another AVR. The USART transmission system differs to most other digital busses in that it does not utilize a separate pin for the serial clock. An agreed clock rate is preset into both devices, which is then used to sample the Rx/Tx lines at regular intervals. Because of this, the USART requires only three wires for bi-directional communication (Rx, Tx and GND). Setting up the Hardware • Connect your USART to a computer via the Com port. • You need to first identify which pins of your AVR(ATmega 16) are responsible for serial communication. • For ATmega 16 Pin 14 and Pin 15 are used for receiving and transmission. • Connect tx pin of usart to rx pin of ATmega 16 and rx pin of usart to the tx pin of the ATmega 16 . • Now to see the transmitted word back in pc you need to use HyperTerminal (it’s a free software you need to download it) • set the Baud rate in the HyperTerminal
  • 41. Atmega 16/32 Microcontroller www.researchdesignlab.com Page 40 Setting up HyperTerminal 1. open the HyperTerminal 2. Add name here I have added serial
  • 42. Atmega 16/32 Microcontroller www.researchdesignlab.com Page 41 3. Select your com port which you are using and press ok (to check the com port go to device manger and check in which com port is the usart connected) 4. select the baud rate that you have set or just click Restore default it will set the default valve and press ok
  • 43. Atmega 16/32 Microcontroller www.researchdesignlab.com Page 42 5. serial HyperTerminal will get open
  • 44. Atmega 16/32 Microcontroller www.researchdesignlab.com Page 43 Initializing the USART First off, you need to enable both the USART's transmission and reception circuitry. For the MEGA16, these are bits named RXEN and TXEN, and they are located in the control register UCSRB. When set, these two bits turn on the serial buffers to allow for serial communications Code: int main (void) { UCSRB = (1 << RXEN) | (1 << TXEN); // Turn on the transmission and reception circuitry } Next, we need to tell the AVR what type of serial format we're using. Looking again at the MEGA16 datasheet, we can see that the bits responsible for the serial format are named UCSZ0 to UCSZ2, and are located in the USART control register C named UCSRC. Code: UCSRC = (1 << URSEL) | (1 << UCSZ0) | (1 << UCSZ1); // Use 8-bit character sizes - URSEL bit set to select the UCRSC register The last thing to set for basic serial communications is the baud rate register. The baud rate register is 16-bit, split into two 8-bit registers as is the case with all 16-bit registers in the AVR device family. For this the baud valve need to be found for that we have a formula BaudValue = (((F_CPU / (USART_BAUDRATE * 16))) - 1) Where F_CPU is your AVR's system clock frequency (in Hz), and USART_BAUDRATE is the desired communication baud rate. Given my example project using a system clock of 7372800Hz and a baud rate of 9600, our formula gives:
  • 45. Atmega 16/32 Microcontroller www.researchdesignlab.com Page 44 BaudValue = (((F_CPU / (USART_BAUDRATE * 16UL))) - 1) BaudValue = (7372800 / (9600 * 16) - 1) BaudValue = (7372800 / 153600 - 1) BaudValue = (48 - 1) BaudValue = 47 This avoids "magic numbers" (unexplained constants) in our source code, and makes changing the baud rate later on very easy - just change the BAUD_RATE macro value. Now, we need to load this into the baud rate registers, named UBRRH (for the high byte) and UBRRL (for the low byte). This is simple via a simple bit shift to grab the upper eight bits of the BAUD_PRESCALE constant: UBRRH = (BAUD_PRESCALE >> 8); // Load upper 8-bits of the baud rate value into the high byte of the UBRR register UBRRL = BAUD_PRESCALE; // Load lower 8-bits of the baud rate value into the low byte of the UBRR register Sending and receiving data We do this by the special register named UDR - short for "USART I/O Data Register”. On the MEGA16, the Transmission Complete flag is located in the control register UCSRA, and it is named TXC. Using this information we can construct a simple wait loop which will prevent data from being written to the UDR register until the current transmission is complete. UDR = ByteToSend; // Send out the byte value in the variable "ByteToSend" while ((UCSRA & (1 << TXC)) == 0) {}; // Do nothing until transmission complete flag set However this is non-optimal. We spend time waiting after each byte which could be better spent performing other tasks - better to check before a transmission to see if the UDR register is ready for data. We can do this by checking the USART Data Register Empty flag instead (called UDRE), also located in the UCSRA control register of the MEGA16
  • 46. Atmega 16/32 Microcontroller www.researchdesignlab.com Page 45 while ((UCSRA & (1 << UDRE)) == 0) {}; // Do nothing until UDR is ready for more data to be written to it UDR = ByteToSend; // Send out the byte value in the variable "ByteToSend" Now we can move on to receiving data. we need to check to see if we have received a byte. To do this, we can check the USART Receive Complete (RXC) flag to see if it is set. Again, this is located in the UCSRA control register of the MEGA16: while ((UCSRA & (1 << RXC)) == 0) {}; // Do nothing until data have been received and is ready to be read from UDR ReceivedByte = UDR; // Fetch the received byte value into the variable "ReceivedByte" CODE: #include <avr/io.h> #include <avr/delay.h> #define F_CPU ((unsigned long)8000000) #define F_OSC 8000000// for 8mhz #define USART_BAUDRATE 9600 #define BAUD_PRESCALE (((F_CPU / ( USART_BAUDRATE * 16UL))) - 1) unsigned char int main (void)
  • 47. Atmega 16/32 Microcontroller www.researchdesignlab.com Page 46 { char ReceivedByte; UCSRB = (1 << RXEN) | (1 << TXEN); // Turn on the transmission and reception circuitry UCSRC = (1 << URSEL) | (1 << UCSZ0) | (1 << UCSZ1); // Use 8-bit character sizes UBRRH = (BAUD_PRESCALE >> 8); // Load upper 8-bits of the baud rate value into the high byte of the UBRR register UBRRL = BAUD_PRESCALE; // Load lower 8-bits of the baud rate value into the low byte of the UBRR register for (;;) // Loop forever { while ((UCSRA & (1 << RXC)) == 0) {}; // Do nothing until data have been received and is ready to be read from UDR ReceivedByte = UDR; // Fetch the received byte value into the variable "ByteReceived" //_delay_ms(1000); while ((UCSRA & (1 << UDRE)) == 0) {}; // Do nothing until UDR is ready for more data to be written to it UDR = ReceivedByte; // Echo back the received byte back to the computer } }
  • 48. Atmega 16/32 Microcontroller www.researchdesignlab.com Page 47 Related Products: Atmega 16/32/64 Project Board Atmega 16/32/64 Development Board-USB Product Code: G89S52 Product Code: ATM-U Atmega Programmer-USB ISP Atmel Programmer Product Code: AVR Product Code: UAB
  • 49. 01010101010101010100101010101010101010101010101010101010101010101010101010101010101 01010101010101010100101010101010101010101010101010101010101010101010101010101010101 01010101010101010100101010101010101010101010101010101010101010101010101010101010101 01010101010101010100101010101010101010101010101010101010101010101010101010101010101 01010101010101010100101010101010101010101010101010101010101010101010101010101010101 01010101010101010100101010101010101010101010101010101010101010101010101010101010101 01010101010101010100101010101010101010101010101010101010101010101010101010101010101 01010101010101010100101010101010101010101010101010101010101010101010101010101010101 01010101010101010100101010101010101010101010101010101010101010101010101010101010101 01010101010101010100101010101010101010101010101010101010101010101010101010101010101 01010101010101010100101010101010101010101010101010101010101010101010101010101010101 01010101010101010100101010101010101010101010101010101010101010101010101010101010101 01010101010101010100101010101010101010101010101010101010101010101010101010101010101 01010101010101010100101010101010101010101010101010101010101010101010101010101010101 01010101010101010100101010101010101010101010101010101010101010101010101010101010101 01010101010101010100101010101010101010101010101010101010101010101010101010101010101 01010101010101010100101010101010101010101010101010101010101010101010101010101010101 01010101010101010100101010101010101010101010101010101010101010101010101010101010101 01010101010101010100101010101010101010101010101010101010101010101010101010101010101 01010101010101010100101010101010101010101010101010101010101010101010101010101010101 01010101010101010100101010101010101010101010101010101010101010101010101010101010101 01010101010101010100101010101010101010101010101010101010101010101010101010101010101 01010101010101010100101010101010101010101010101010101010101010101010101010101010101 01010101010101010100101010101010101010101010101010101010101010101010101010101010101 01010101010101010100101010101010101010101010101010101010101010101010101010101010101 01010101010101010100101010101010101010101010101010101010101010101010101010101010101 01010101010101010100101010101010101010101010101010101010101010101010101010101010101 01010101010101010100101010101010101010101010101010101010101010101010101010101010101 01010101010101010100101010101010101010101010101010101010101010101010101010101010101 01010101010101010100101010101010101010101010101010101010101010101010101010101010101 01010101010101010100101010101010101010101010101010101010101010101010101010101010101 01010101010101010100101010101010101010101010101010101010101010101010101010101010101 01010101010101010100101010101010101010101010101010101010101010101010101010101010101 01010101010101010100101010101010101010101010101010101010101010101010101010101010101 01010101010101010100101010101010101010101010101010101010101010101010101010101010101 01010101010101010100101010101010101010101010101010101010101010101010101010101010101 01010101010101010100101010101010101010101010101010101010101010101010101010101010101 01010101010101010100101010101010101010101010101010101010101010101010101010101010101 01010101010101010100101010101010101010101010101010101010101010101010101010101010101 01010101010101010100101010101010101010101010101010101010101010101010101010101010101 01010101010101010100101010101010101010101010101010101010101010101010101010101010101 01010101010101010100101010101010101010101010101010101010101010101010101010101010101 01010101010101010100101010101010101010101010101010101010101010101010101010101010101 01010101010101010100101010101010101010101010101010101010101010101010101010101010101 01010101010101010100101010101010101010101010101010101010101010101010101010101010101 01010101010101010100101010101010101010101010101010101010101010101010101010101010101 01010101010101010100101010101010101010101010101010101010101010101010101010101010101 01010101010101010100101010101010101010101010101010101010101010101010101010101010101 01010101010101010100101010101010101010101010101010101010101010101010101010101010101 01010101010101010100101010101010101010101010101010101010101010101010101010101010101 01010101010101010100101010101010101010101010101010101010101010101010101010101010101 01010101010101010100101010101010101010101010101010101010101010101010101010101010101 01010101010101010100101010101010101010101010101010101010101010101010101010101010101 01010101010101010100101010101010101010101010101010101010101010101010101010101010101 01010101010101010100101010101010101010101010101010101010101010101010101010101010101 Research Design Lab www.researchdesignlab.com Email: sales@researchdesignlab.com I www.researchdesignlab.com An ISO 9001- 2008 Certified Company Atmega Development Board
  • 50. RESEARCH DESIGN LABS | VOLUME 1, ISSUE 1 WWW.RESEARCHDESIGNLAB.COM 1. Power supply, 5V-12V 2. 40 pin ZIF socket for IC mount. 3. ISP connector* 4. Reset 5. Node connector 6. 4x1 7 segment display 7. 26 pin raspberry connector 8. Arduino Shield footprint 9. ULN 2803 driver 10. I2C bus 11. SPI bus 12. XBEE footprint/XBEE Adaptor module 13. FT232 breakout board connector 14. DC 3.3V connectors 15. DB-9 female connector 16. 8x1 LED's 17. 8 way DIP switch 18. RTC Module 19. EEPROM 20. 2x5x2 jumper node. 21. DC 5V connectors 22. Analog to Digital output 23. 4x1 keypad 24. 16x2 LCD connectors 25. Node connector 26. 4x4 Matrix Keypad 27. DC 12V connectors 28. Power ON switch
  • 51. RESEARCH DESIGN LABS | VOLUME 1, ISSUE 1 WWW.RESEARCHDESIGNLAB.COM All digital circuits require regulated power supply. Here is a simple power supply circuit diagram used on this board. You can use AC or DC source (12V) which converts into regulated 5V which is required for driving the development board circuit. Power supply, 5V-12V Select the IC's from the given list and mount on the ZIF socket. ZIF socket pin maps out PORT1 PORT2 PORT3 PORT4 for easy making connections for the rest of the circuit. Port 1 is enabled with pull up circuit and also connected ISP for easy on board Programming. 1. 40 pin ZIF socket for IC mount & ISP connector*
  • 52. RESEARCH DESIGN LABS | VOLUME 1, ISSUE 1 WWW.RESEARCHDESIGNLAB.COM 2. Reset Resets your microcontroller Node connector is an additional on board connection extender or 1 connection IN and 1 connection OUT One seven segment digit consist of 7+1 LEDs which are arranged in a specific formation which can be used to represent digits from 0 to 9 and even some letters. One additional LED is used for marking the decimal dot, in case you want to write a decimal point in the desired segment. 3. Node connector 4. 4 digit 7 segment display
  • 53. RESEARCH DESIGN LABS | VOLUME 1, ISSUE 1 WWW.RESEARCHDESIGNLAB.COM 26 Pin Raspberry Pi connector is an easy way for making connections with Raspberry Pi along with this development board. Arduino Shield footprint is provided in the board to mount different types of Arduino compatible shields on this development board. IC ULN2803 consists of octal high voltage, high current darlington transistor arrays. The eight NPN Darlington connected transistors in this family of arrays are ideally suited for interfacing between low logic level digital circuitry (such as TTL, CMOS or PMOS/NMOS) and the higher current/voltage requirements of lamps, relays, printer hammers or other similar loads for a broad range of computer, industrial, and consumer applications. 5. 26 pin Raspberry Pi connector 6. Arduino Shield footprint 7. ULN 2803 driver
  • 54. RESEARCH DESIGN LABS | VOLUME 1, ISSUE 1 WWW.RESEARCHDESIGNLAB.COM • Eight Darlingtons with Common Emitter. • Open–collector outputs. • Free wheeling clamp diodes for transient suppression. • Output Current to 500 mA. • Output Voltage to 50 V. • Inputs pinned opposite outputs to simplify board layout. The ULN 2803 IC consists of eight NPN Darlington connected transistors (often called a Darlington pair). Darlington pair consists of two bipolar transistors such that the current amplified by the first is amplified further by the second to get a high current gain β or hFE. The figure shown below is one of the eight Darlington pairs of ULN 2803 IC. Now 2 cases arise:- Case 1: When IN is 0 volts. Q1 and Q2 both will not conduct as there is no base current provided to them. Thus, nothing will appear at the output (OUT). Case 2: When IN is 5 volts. Input current will increase and both transistors Q1 and Q2 will begin to conduct. Now, input current of Q2 is combination of input current and emitter current of Q1, so Q2 will conduct more than Q1 resulting in higher current gain which is very much required to meet the higher current requirements of devices like motors, relays etc. Output current flows through Q2 providing a path (sink) to ground for the external circuit that the output is applied to. Thus, when a 5V input is applied to any of the input pins (1 to 8), output voltage at corresponding output pin (11 to 18) drops down to zero providing GND for the external circuit. Thus, the external circuit gets grounded at one end while it is provided +Vcc at its other end. So, the circuit gets completed and starts operating. Features Working
  • 55. RESEARCH DESIGN LABS | VOLUME 1, ISSUE 1 WWW.RESEARCHDESIGNLAB.COM One IC that wants to communicate to another must: (Protocol) 1) Wait until it sees no activity on the I2C bus. SDAand SCLare both high. The bus is 'free'. 2) Put a message on the bus that says 'its mine' - I have STARTED to use the bus. All other ICs then LISTEN to the bus data to see whether they might be the one who will be called up (addressed). 3) Provide on the CLOCK (SCL) wire a clock signal. It will be used by all the ICs as the reference time at which each bit of DATA on the data (SDA) wire will be correct (valid) and can be used. The data on the data wire (SDA) must be valid at the time the clock wire (SCL) switches from 'low' to 'high' voltage. 4) Put out in serial form the unique binary 'address'(name) of the IC that it wants to communicate with. 5) Put a message (one bit) on the bus telling whether it wants to SEND or RECEIVE data from the other chip. (The read/write wire is gone!) 6) Ask the other IC toACKNOWLEDGE (using one bit) that it recognized its address and is ready to communicate. 7) After the other IC acknowledges all is OK, data can be transferred. 8) The first IC sends or receives as many 8-bit words of data as it wants. After every 8-bit data word the sending IC expects the receiving IC to acknowledge the transfer is going OK. 9) When all the data is finished the first chip must free up the bus and it does that by a special message called 'STOP'. It is just one bit of information transferred by a special 'wiggling' of the SDA/SCLwires of the bus. 8. I2C bus
  • 56. RESEARCH DESIGN LABS | VOLUME 1, ISSUE 1 WWW.RESEARCHDESIGNLAB.COM Serial to Peripheral Interface (SPI) is a hardware/firmware communications protocol developed by Motorola and later adopted by others in the industry. Microwire of National Semiconductor is same as SPI. Sometimes SPI is also called a "four wire" serial bus. The Serial Peripheral Interface or SPI-bus is a simple 4-wire serial communications interface used by many microprocessor/microcontroller peripheral chips that enables the controllers and peripheral devices to communicate each other. Even though it is developed primarily for the communication between host processor and peripherals, a connection of two processors via SPI is just as well possible. The SPI bus, which operates at full duplex (means, signals carrying data can go in both directions simultaneously), is a synchronous type data link setup with a Master / Slave interface and can support up to 1 megabaud or 10Mbps of speed. Both single-master and multi-master protocols are possible in SPI. But the multi-master bus is rarely used and look awkward, and are usually limited to a single slave. The SPI Bus is usually used only on the PCB. There are many facts, which prevent us from using it outside the PCB area. The SPI Bus was designed to transfer data between various IC chips, at very high speeds. Due to this high-speed aspect, the bus lines cannot be too long, because their reactance increases too much, and the Bus becomes unusable. However, its possible to use the SPI Bus outside the PCB at low speeds, but this is not quite practical. The peripherals can be a Real Time Clocks, converters like ADC and DAC, memory modules like EEPROM and FLASH, sensors like temperature sensors and pressure sensors, or some other devices like signal-mixer, potentiometer, LCD controller, UART, CAN controller, USB controller and amplifier. 9. SPI bus
  • 57. RESEARCH DESIGN LABS | VOLUME 1, ISSUE 1 WWW.RESEARCHDESIGNLAB.COM All XBeeZNet 2.5 modules can be identified by their unique 64-bit addresses or a user- configurableASCII string identifier The 64-bit address of a module can be read using the SH and SL commands. TheASCII string identifier is configured using the NI command. To transmit using device addressing, only the destination address must be configured. The destination address can be specified using either the destination device's 64-bit address or its NI- string. The XBee modules also support coordinator and broadcast addressing modes. Device addressing in the AT firmware is configured using the DL, DH, or DN commands. In the API firmware, the ZigBee Transmit Request API frame (0x10) can be used to specify destination addresses. To address a node by its 64-bit address, the destination address must be set to match the 64-bit address of the remote. In the AT firmware, the DH and DL commands set the destination 64-bit address. In the API firmware, the destination 64-bit address is set in the ZigBee Transmit Request frame. ZigBee end devices rely on a parent (router or coordinator) to remain awake and receive any data packets destined for the end device. When the end device wakes from sleep, it sends a transmission (poll request) to its parent asking if the parent has received any RF data destined for the end device. The parent, upon receipt of the poll request, will send an RF response and the buffered data (if present). If the parent has no data for the end device, the end device may return to sleep, depending on its sleep mode configuration settings. The following figure demonstrates how the end device uses polling to receive RF data through its parent. 10. XBEE footprint/ XBEE Adaptor module
  • 58. RESEARCH DESIGN LABS | VOLUME 1, ISSUE 1 WWW.RESEARCHDESIGNLAB.COM A s t a n d a r d F T 2 3 2 breakout board from researchdesignlab.com could be used to interface on these connectors, whose other end is connected to a USB. These connectors provide on board 3.3V DC connections. RS-232 is a standard communication protocol for linking computer and its peripheral devices to allow serial data exchange. In simple terms RS232 defines the voltage for the path used for data exchange between the devices. It specifies common voltage and signal level, common pin wire configuration and minimum, amount of control signals. 11. Ft232 breakout board connector 12. DC 3.3V connectors 13. DB-9 female connector
  • 59. RESEARCH DESIGN LABS | VOLUME 1, ISSUE 1 WWW.RESEARCHDESIGNLAB.COM LED's are used to indicate something, whether any pin is high or indicating the output for many purposes like indicating I/O status or program debugging running state. We have 8 led outputs on board which can be used by the programmer as per the requirement for testing and development. DIP switches are an alternative to jumper blocks. Their main advantages are that they are quicker to change and there are no parts on lose. The DS1307 Serial Real Time Clock is a low power, full BCD clock/calendar plus 56 bytes of nonvolatile SRAM. Address and data are transferred serially via a 2-wire bi-directional bus. The clock/calendar provides seconds, minutes, hours, day, date, month, and year information. The end of the month date is automatically adjusted for months with less than 31 days, including corrections for leap year. The clock operates in either the 24-hour or 12-hour format with AM/PM indicator. The DS1307 has a built-in power sense circuit which detects power failures and automatically switches to the battery supply. 14. 8x1 LED's 15. 8 way DIP switch 16. RTC Module
  • 60. RESEARCH DESIGN LABS | VOLUME 1, ISSUE 1 WWW.RESEARCHDESIGNLAB.COM The DS1307 operates as a slave device on the serial bus. Access is obtained by implementing a START condition and providing a device identification code followed by a register address. Subsequent registers can be accessed sequentially until a STOP condition is executed. When VCC falls below 1.25 x VBAT the device terminates an access in progress and resets the device address counter. Inputs to the device will not be recognized at this time to prevent erroneous data from being written to the device from an out of tolerance system. When VCC falls below VBAT the device switches into a low current battery backup mode. Upon power up, the device switches from battery to VCC when VCC is greater than VBAT +0.2V and recognizes inputs. Features: 1. 56 byte nonvolatile RAM for data storage 2. 2-wire serial interface 3. Programmable square wave output signal 4. Automatic power-fail detect and switch circuitry 5. Consumes less than 500 nA in battery backup mode with oscillator running 6. Optional industrial temperature range -40°C to +85°C 7. Available in 8-pin DIP or SOIC 8. Recognized by Underwriters Laboratory PIN DESCRIPTION 1. VCC - Primary Power Supply 2. X1, X2 - 32.768 kHz Crystal Connection 3. VBAT - +3V Battery Input 4. GND - Ground 5. SDA - Serial Data 6. SCL - Serial Clock 7. SQW/OUT - Square wave/Output Driver Operation
  • 61. RESEARCH DESIGN LABS | VOLUME 1, ISSUE 1 WWW.RESEARCHDESIGNLAB.COM IC, EEPROM I2C 4K, 24C04, DIP8 Memory Size: 4Kbit Memory Configuration: 512 x 8 Interface Type: I2C, Serial Clock Frequency: 400kHz Supply Voltage Range: 2.5V to 5.5V Memory Case Style: DIP No. of Pins: 8 Operating Temperature Range: -40°C to +85°C SVHC: No SVHC (19-Dec-2011) Base Number: 24 Device Marking: M24C04 IC Generic Number: 24C04 Interface: I2C Interface Type: Serial, I2C Logic Function Number: 24C04 Memory Configuration: 512 x 8 Memory Size: 4Kbit Memory Type: EEPROM Memory Voltage Vcc: 2.5V Operating Temperature Max: +85°C Operating Temperature Min: -40°C Package / Case: DIP Supply Voltage Max: 5.5V Supply Voltage Min: 2.5V Termination Type: Through Hole Voltage Vcc: 2.5V 18. 2x5x2 jumper node 17. EEPROM Node connector is an additional on board connection extender or 1 connection IN and 1 connection OUT
  • 62. RESEARCH DESIGN LABS | VOLUME 1, ISSUE 1 WWW.RESEARCHDESIGNLAB.COM These connectors provide on board 5V DC connections. The Potentiometer Option allows the user to adjust the voltage reference by rotating a potentiometers dial. Turning the potentiometer changes the voltage reference making it easier to adjust the motor speed and also to set the duty cycle for PWM values (via programming). Switches are mainly used to switch the controls of a module. We have four switches on board which can be used by the programmer as per the requirement for testing and development. 19. DC 5V connectors 20. Potentiometer 21.4x1 keypad
  • 63. RESEARCH DESIGN LABS | VOLUME 1, ISSUE 1 WWW.RESEARCHDESIGNLAB.COM LCD screen consists of two lines with 16 characters each. Each character consists of 5x7 dot matrix. Contrast on display depends on the power supply voltage and whether messages are displayed in one or two lines. For that reason, variable voltage 0-Vdd is applied on pin marked as Vee. Trimmer potentiometer is usually used for that purpose. Some versions of displays have built in backlight (blue or green diodes). When used during operating, a resistor for current limitation should be used (like with any LE diode). LCD Connection Depending on how many lines are used for connection to the microcontroller, there are 8-bit and 4-bit LCD modes. The appropriate mode is determined at the beginning of the process in a phase called “initialization”. In the first case, the data are transferred through outputs D0-D7 as it has been already explained. In case of 4-bit LED mode, for the sake of saving valuable I/O pins of the microcontroller, there are only 4 higher bits (D4-D7) used for communication, while other may be left unconnected. Consequently, each data is sent to LCD in two steps: four higher bits are sent first (that normally would be sent through lines D4-D7), four lower bits are sent afterwards. With the help of initialization, LCD will correctly connect and interpret each data received. Besides, with regards to the fact that data are rarely read from LCD (data mainly are transferred from microcontroller to LCD) one more I/O pin may be saved by simple connecting R/W pin to the Ground. Such saving has its price. Even though message displaying will be normally performed, it will not be possible to read from busy flag since it is not possible to read from display. Features: 1. Can display 224 different symbols. 2. Low power consumption. 3. 5x7 dot matrix format. 4. Powerful command set and user produced characters. Fig: Circuit connections of LCD 22. 16x2 LCD connectors 10k
  • 64. RESEARCH DESIGN LABS | VOLUME 1, ISSUE 1 WWW.RESEARCHDESIGNLAB.COM 1. Gnd:- Power supply ground 2. VCC:-+5v Power supply input 3. RS:- Register Select Node connector is an additional on board connection extender or 1 connection IN and 1 connection OUT 4. R/W:- Read/Write pin 5. En:-Enable pin 6. D0-D7:- Data lines Pin Description 23. Node connector
  • 65. RESEARCH DESIGN LABS | VOLUME 1, ISSUE 1 WWW.RESEARCHDESIGNLAB.COM In a 4x4 matrix keypad eight Input/Output ports are used for interfacing with any microcontrollers. Rows are connected to Peripheral Input/Output (PIO) pins configured as output. Columns are connected to PIO pins configured as input with interrupts. FEATURES 1. Contact debouncing. 2. Easy to interface. 3. Interfaces to any microcontroller or microprocessor. 4. Data valid output signal for interrupt activation. PIN DETAILS pin 1-4: R0-R3:- Rows pin 5-8: C0-C3:- Columns 24. 4x4 Matrix Keypad These connectors provide on board 12V DC connections. 25. DC 12V connectors Programming Codes: • LED BLINK http://researchdesignlab.com/8051-i/o-code • LCD http://researchdesignlab.com/8051-lcd-code • KEYPAD http://researchdesignlab.com/8051-keypad-code • UART http://researchdesignlab.com/8051-uart-code • RTC http://researchdesignlab.com/8051-rtc-code • EEPROM http://researchdesignlab.com/8051-eeprom-code • ADC http://researchdesignlab.com/8051-adc-code.html • 7 Segment Display http://researchdesignlab.com/7-segment-atmel-code.html