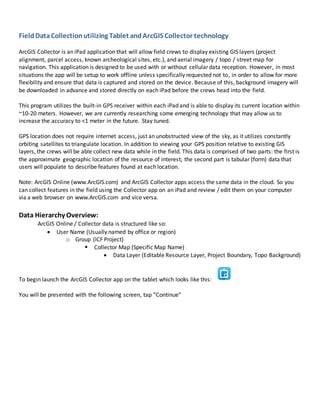
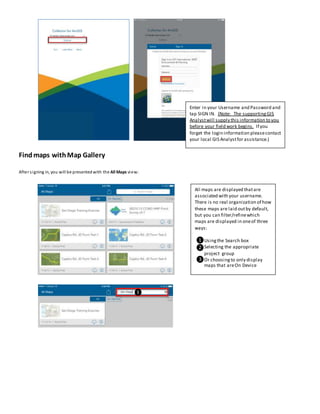
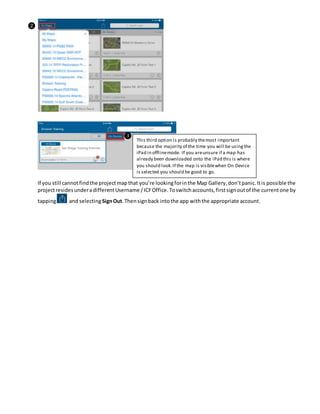
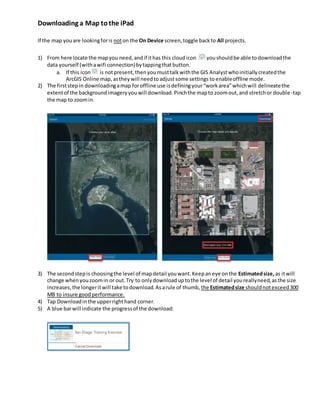
Download to read offline
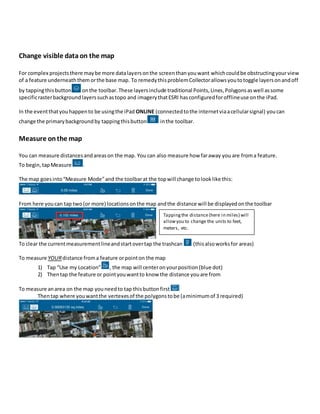
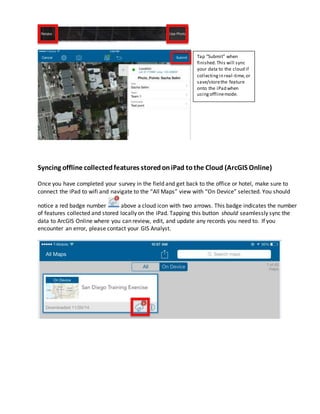

The document provides information on using ArcGIS Collector on an iPad to collect field data. Key points include: 1) ArcGIS Collector allows field crews to display existing GIS layers, imagery, and their location to collect geographic data points and associated attribute information. 2) Data is collected either online by syncing in real-time or offline by storing on the iPad and syncing later. 3) Crews can collect points, lines, and polygons manually or via GPS streaming as they walk a feature. Photos can also be associated with collected data.

![Mpwhelp Eng[1]](https://cdn.slidesharecdn.com/ss_thumbnails/mpwhelpeng1-090810105927-phpapp01-thumbnail.jpg?width=640&height=640&fit=bounds)


![Rs unit iii-gis--- [repaired]](https://cdn.slidesharecdn.com/ss_thumbnails/rsunit-iiigis-repaired-180305142425-thumbnail.jpg?width=640&height=640&fit=bounds)


