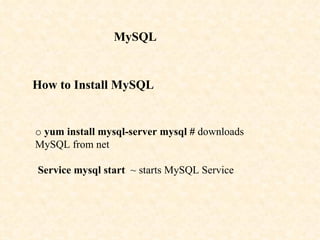
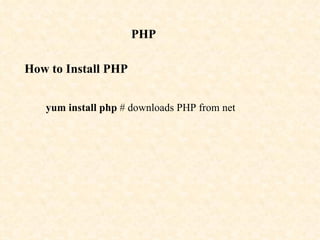
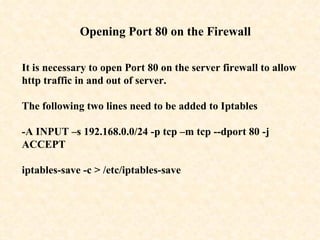
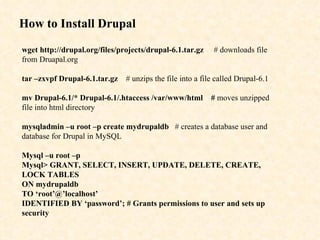
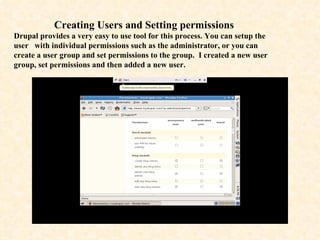
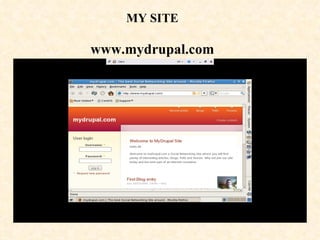
Internet & Network Services   Individual Project   *****************************    Lamp Server & Drupal Quick Install Guide   Anthony McKeown  March 09
Introduction   The first task for this project is the building and configuring of a Lamp server. A Lamp server is a common choice server that is used for hosting websites. Lamp stands for Linux, Apache, MySQL and PHP.    The second task is to install software on top of the Lamp server. My choice from the list provided is Drupal, a freely available Content Management System.   
  Goal My Goal is to provide a Social Networking website that will allow the users to log in and take part in Social networking activities such as creating blogs, participating in forums as well as creating web pages and stories.
Lamp Server Installation   Linux Apache MySQL PHP
Linux  The choice of Linux Operating system used was CentOS. CentOS stands for community enterprise operating system and is a freely available open source operating system based on Red Hat Enterprise Linux. CentOS is built by a number of developers who call themselves “The CentOS Project”. The version of CentOS used in this project was CentOS 5.2. We downloaded the software ISO file form the site  www.centos.org  , where you can find many installation guides, explanations, forums, blogs etc all related to the CentOS operating system.           CentOS logo
Apache   How to Install Apache yum install httpd  #  This command installs Apache from the net chkconfig httpd on  # ensures apache starts on boot up Service apached start      Service apached stop #  used to start and stop the service
Checking that Apache works yum install elinks   Browse to localhost 127.0.0.1  # you see this page : Install correct
MySQL How to Install MySQL o   yum install mysql-server mysql #  downloads MySQL from net   Service mysql start   ~ starts MySQL Service
PHP   How to Install PHP yum install php  # downloads PHP from net
Opening Port 80 on the Firewall It is necessary to open Port 80 on the server firewall to allow http traffic in and out of server. The following two lines need to be added to Iptables - A INPUT –s 192.168.0.0/24 -p tcp –m tcp --dport 80 -j ACCEPT   iptables-save -c > /etc/iptables-save
Drupal Installation   Drupal Logo
What is Drupal? Drupal is a free software package that allows an individual or a community of users to easily publish, manage and organize a wide variety of content on a website. Tens of thousands of people and organizations are  using Drupal  to power scores of different web sites, including           Community web portals            Discussion sites            Corporate web sites            Intranet applications            Personal web sites or blogs            Aficionado sites            E-commerce applications            Resource directories  Social Networking sites
How to Install Drupal wget http://drupal.org/files/projects/drupal-6.1.tar.gz   # downloads file from Druapal.org tar –zxvpf Drupal-6.1.tar.gz   # unzips the file into a file called Drupal-6.1 mv Drupal-6.1/* Drupal-6.1/.htaccess /var/www/html  #  moves unzipped file into html directory mysqladmin –u root –p create mydrupaldb   # creates a database user and database for Drupal in MySQL Mysql –u root –p Mysql> GRANT, SELECT, INSERT, UPDATE, DELETE, CREATE, LOCK TABLES ON mydrupaldb TO ‘root’@’localhost’ IDENTIFIED BY ‘password’; # Grants permissions to user and sets up security
Running Drupal Install Browse to the following address and follow the instructions to complete the installation http://192.168.0.10/install.php
Starting Drupal Browse to the following address http://192.168.0.10 You will be presented with a page similar to this
Configuring Drupal   The administration  of Drupal is split into the following two sections. Browse through each section to select the look of your site Section 1:           Content Management – setting up of the various content holders ie blogs page, forum  page etc             Site Building – selecting themes, arranging menu’s             User Management – creating users and setting permissions             Site Configuration – setting up e-mail, site url, site name and logo             Reports – creating site reports
 
Section 2: Creating Content
Creating Users and Setting permissions Drupal provides a very easy to use tool for this process. You can setup the user  with individual permissions such as the administrator, or you can create a user group and set permissions to the group.  I created a new user group, set permissions and then added a new user.
MY SITE www.mydrupal.com
THE END Anthony McKeown Mar 09

Anthony McKeown Drupal Presentation

  • 1.
    Internet & NetworkServices   Individual Project   *****************************    Lamp Server & Drupal Quick Install Guide Anthony McKeown March 09
  • 2.
    Introduction   Thefirst task for this project is the building and configuring of a Lamp server. A Lamp server is a common choice server that is used for hosting websites. Lamp stands for Linux, Apache, MySQL and PHP.   The second task is to install software on top of the Lamp server. My choice from the list provided is Drupal, a freely available Content Management System.  
  • 3.
      Goal MyGoal is to provide a Social Networking website that will allow the users to log in and take part in Social networking activities such as creating blogs, participating in forums as well as creating web pages and stories.
  • 4.
    Lamp Server Installation Linux Apache MySQL PHP
  • 5.
    Linux Thechoice of Linux Operating system used was CentOS. CentOS stands for community enterprise operating system and is a freely available open source operating system based on Red Hat Enterprise Linux. CentOS is built by a number of developers who call themselves “The CentOS Project”. The version of CentOS used in this project was CentOS 5.2. We downloaded the software ISO file form the site www.centos.org , where you can find many installation guides, explanations, forums, blogs etc all related to the CentOS operating system.         CentOS logo
  • 6.
    Apache   Howto Install Apache yum install httpd # This command installs Apache from the net chkconfig httpd on # ensures apache starts on boot up Service apached start      Service apached stop # used to start and stop the service
  • 7.
    Checking that Apacheworks yum install elinks Browse to localhost 127.0.0.1 # you see this page : Install correct
  • 8.
    MySQL How toInstall MySQL o   yum install mysql-server mysql # downloads MySQL from net   Service mysql start ~ starts MySQL Service
  • 9.
    PHP How to Install PHP yum install php # downloads PHP from net
  • 10.
    Opening Port 80on the Firewall It is necessary to open Port 80 on the server firewall to allow http traffic in and out of server. The following two lines need to be added to Iptables - A INPUT –s 192.168.0.0/24 -p tcp –m tcp --dport 80 -j ACCEPT iptables-save -c > /etc/iptables-save
  • 11.
  • 12.
    What is Drupal?Drupal is a free software package that allows an individual or a community of users to easily publish, manage and organize a wide variety of content on a website. Tens of thousands of people and organizations are using Drupal to power scores of different web sites, including          Community web portals          Discussion sites          Corporate web sites          Intranet applications          Personal web sites or blogs          Aficionado sites          E-commerce applications          Resource directories Social Networking sites
  • 13.
    How to InstallDrupal wget http://drupal.org/files/projects/drupal-6.1.tar.gz # downloads file from Druapal.org tar –zxvpf Drupal-6.1.tar.gz # unzips the file into a file called Drupal-6.1 mv Drupal-6.1/* Drupal-6.1/.htaccess /var/www/html # moves unzipped file into html directory mysqladmin –u root –p create mydrupaldb # creates a database user and database for Drupal in MySQL Mysql –u root –p Mysql> GRANT, SELECT, INSERT, UPDATE, DELETE, CREATE, LOCK TABLES ON mydrupaldb TO ‘root’@’localhost’ IDENTIFIED BY ‘password’; # Grants permissions to user and sets up security
  • 14.
    Running Drupal InstallBrowse to the following address and follow the instructions to complete the installation http://192.168.0.10/install.php
  • 15.
    Starting Drupal Browseto the following address http://192.168.0.10 You will be presented with a page similar to this
  • 16.
    Configuring Drupal The administration of Drupal is split into the following two sections. Browse through each section to select the look of your site Section 1:          Content Management – setting up of the various content holders ie blogs page, forum page etc            Site Building – selecting themes, arranging menu’s            User Management – creating users and setting permissions            Site Configuration – setting up e-mail, site url, site name and logo            Reports – creating site reports
  • 17.
  • 18.
  • 19.
    Creating Users andSetting permissions Drupal provides a very easy to use tool for this process. You can setup the user with individual permissions such as the administrator, or you can create a user group and set permissions to the group. I created a new user group, set permissions and then added a new user.
  • 20.
  • 21.
    THE END AnthonyMcKeown Mar 09