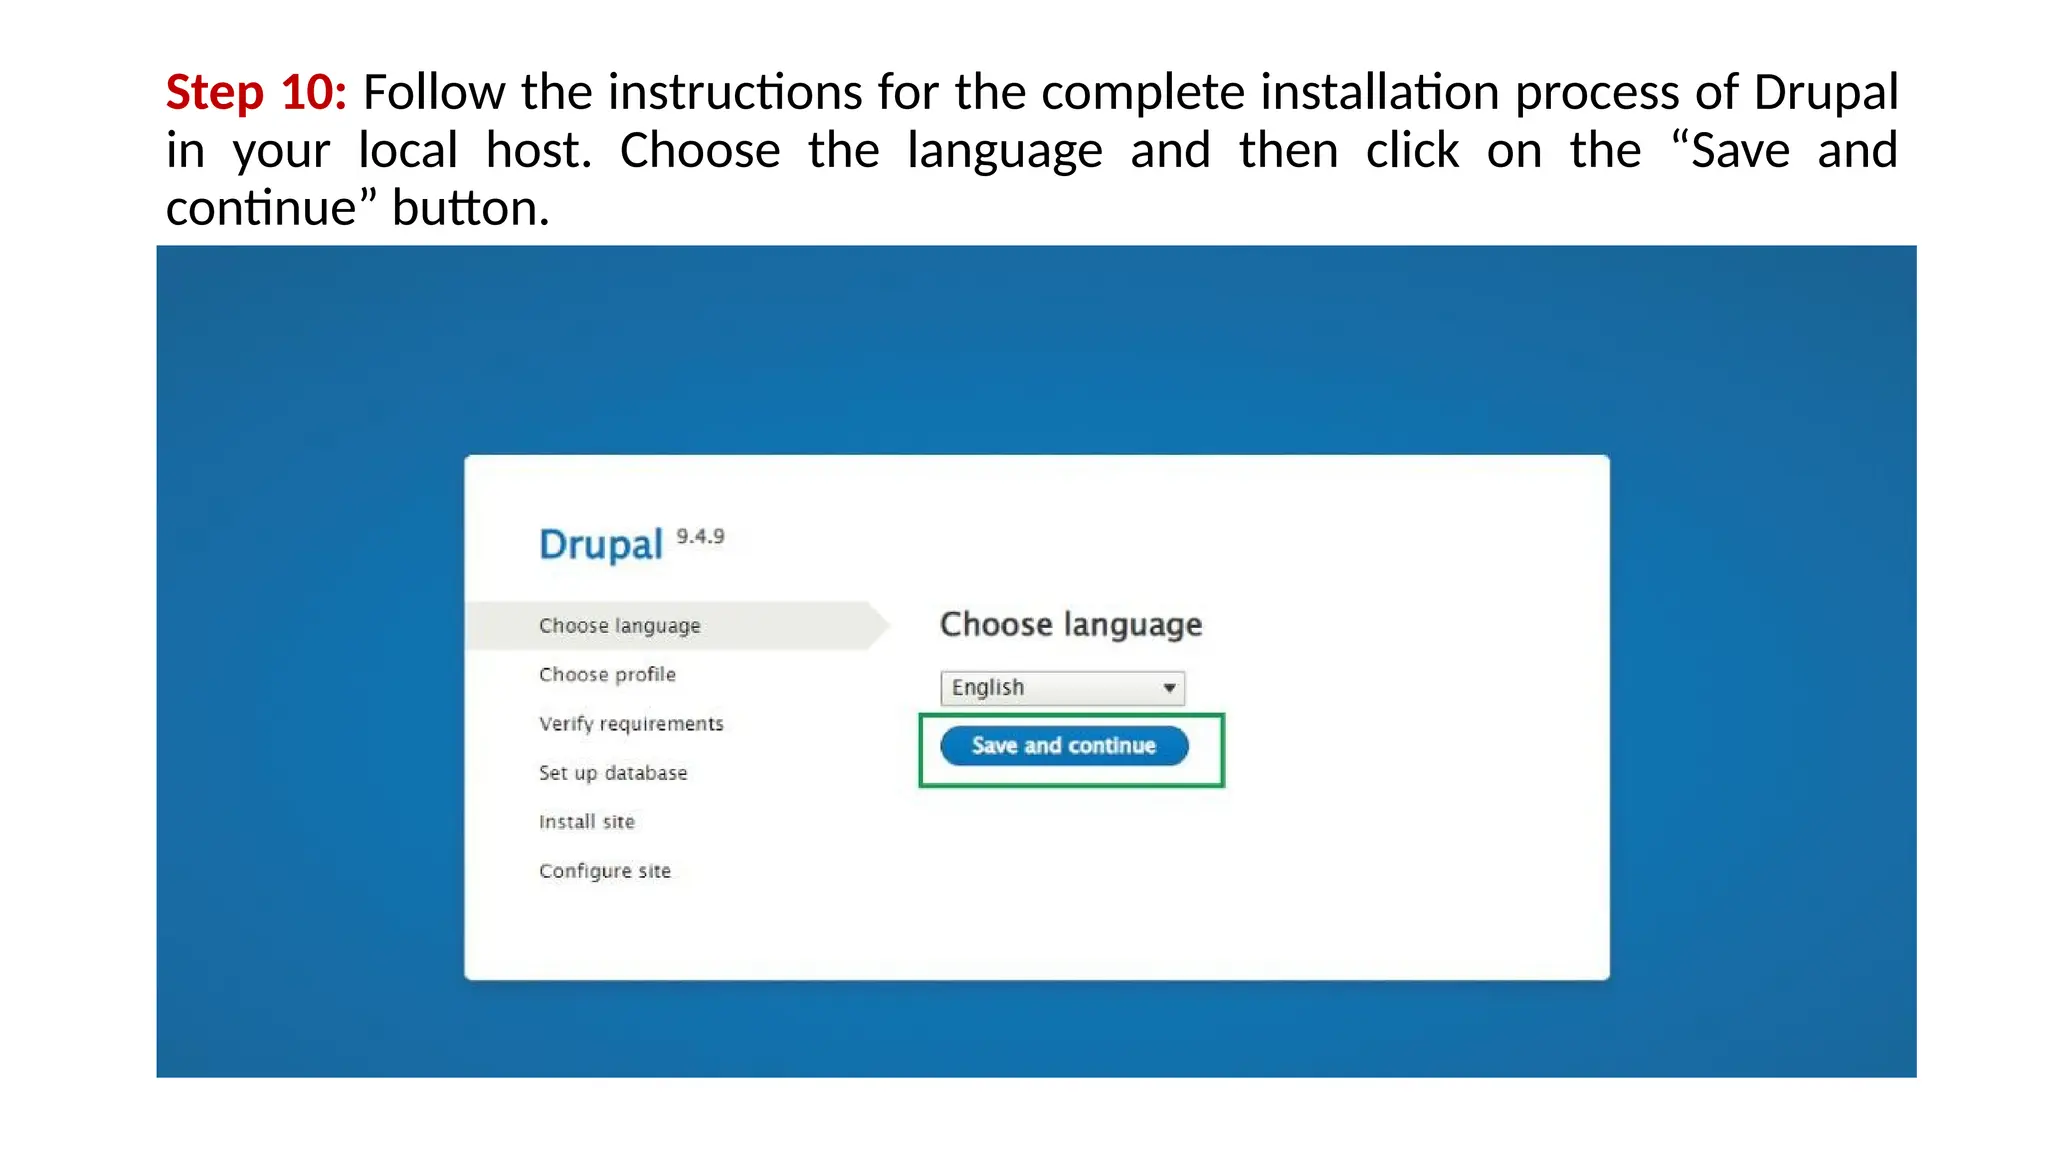
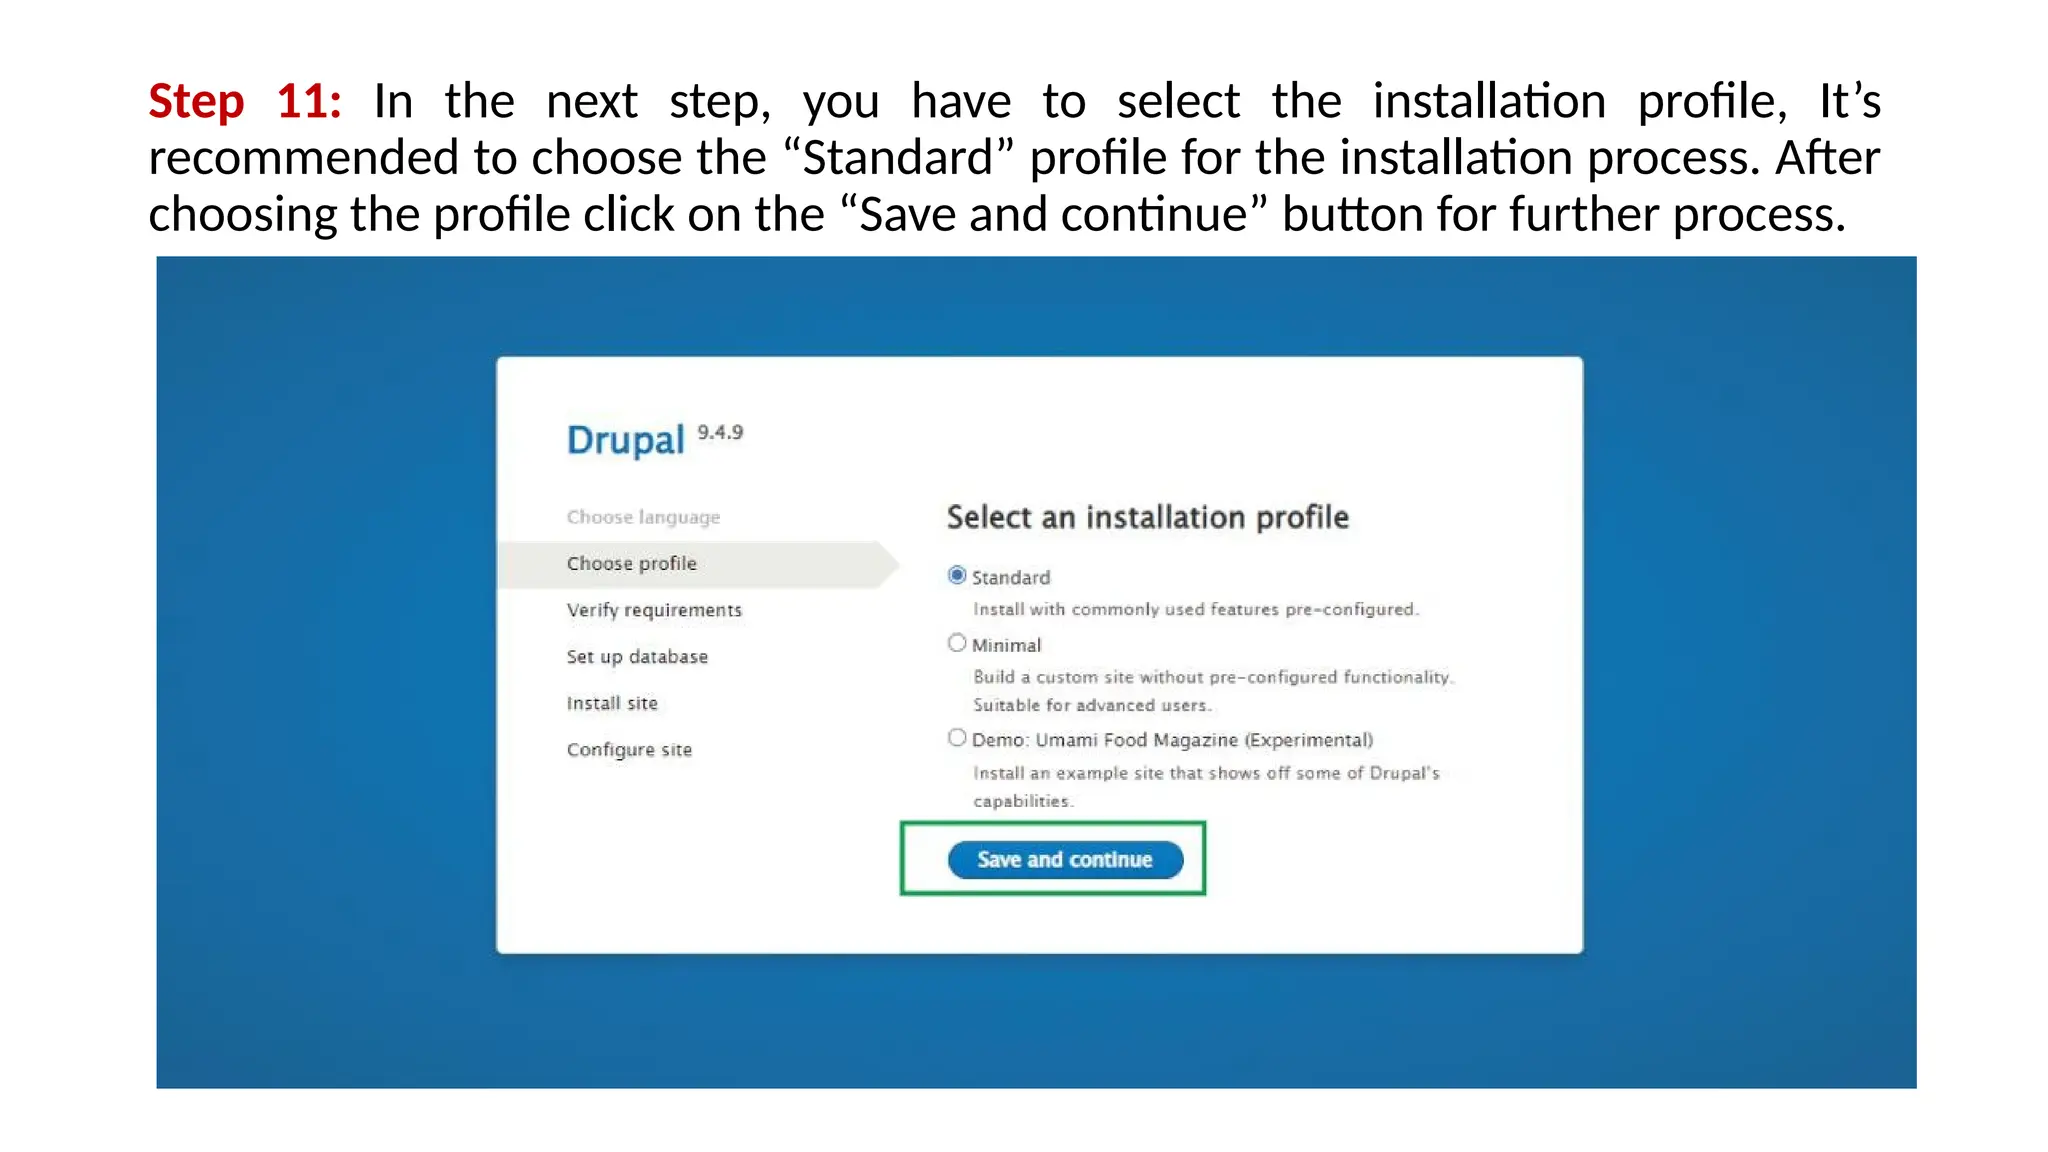
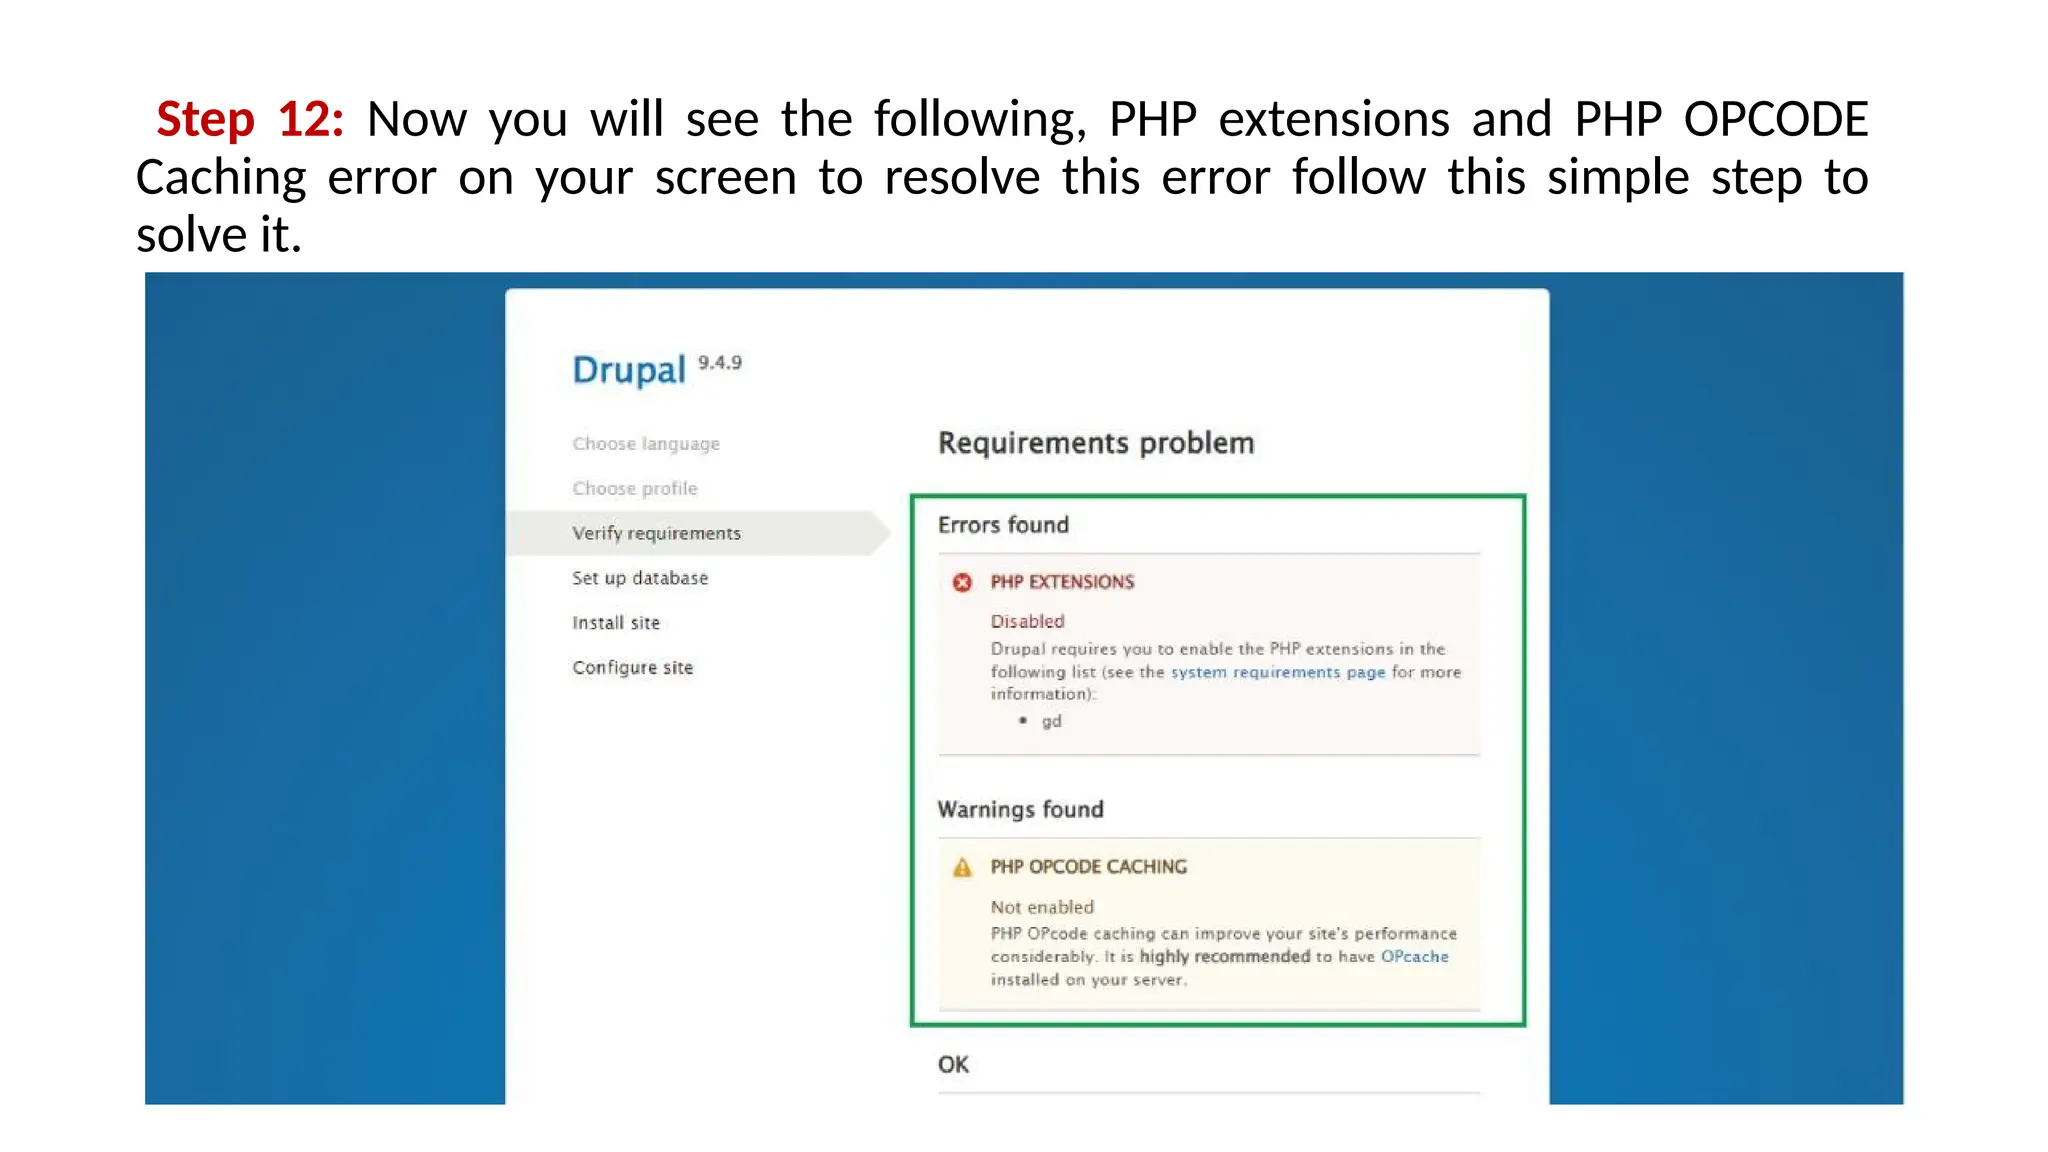
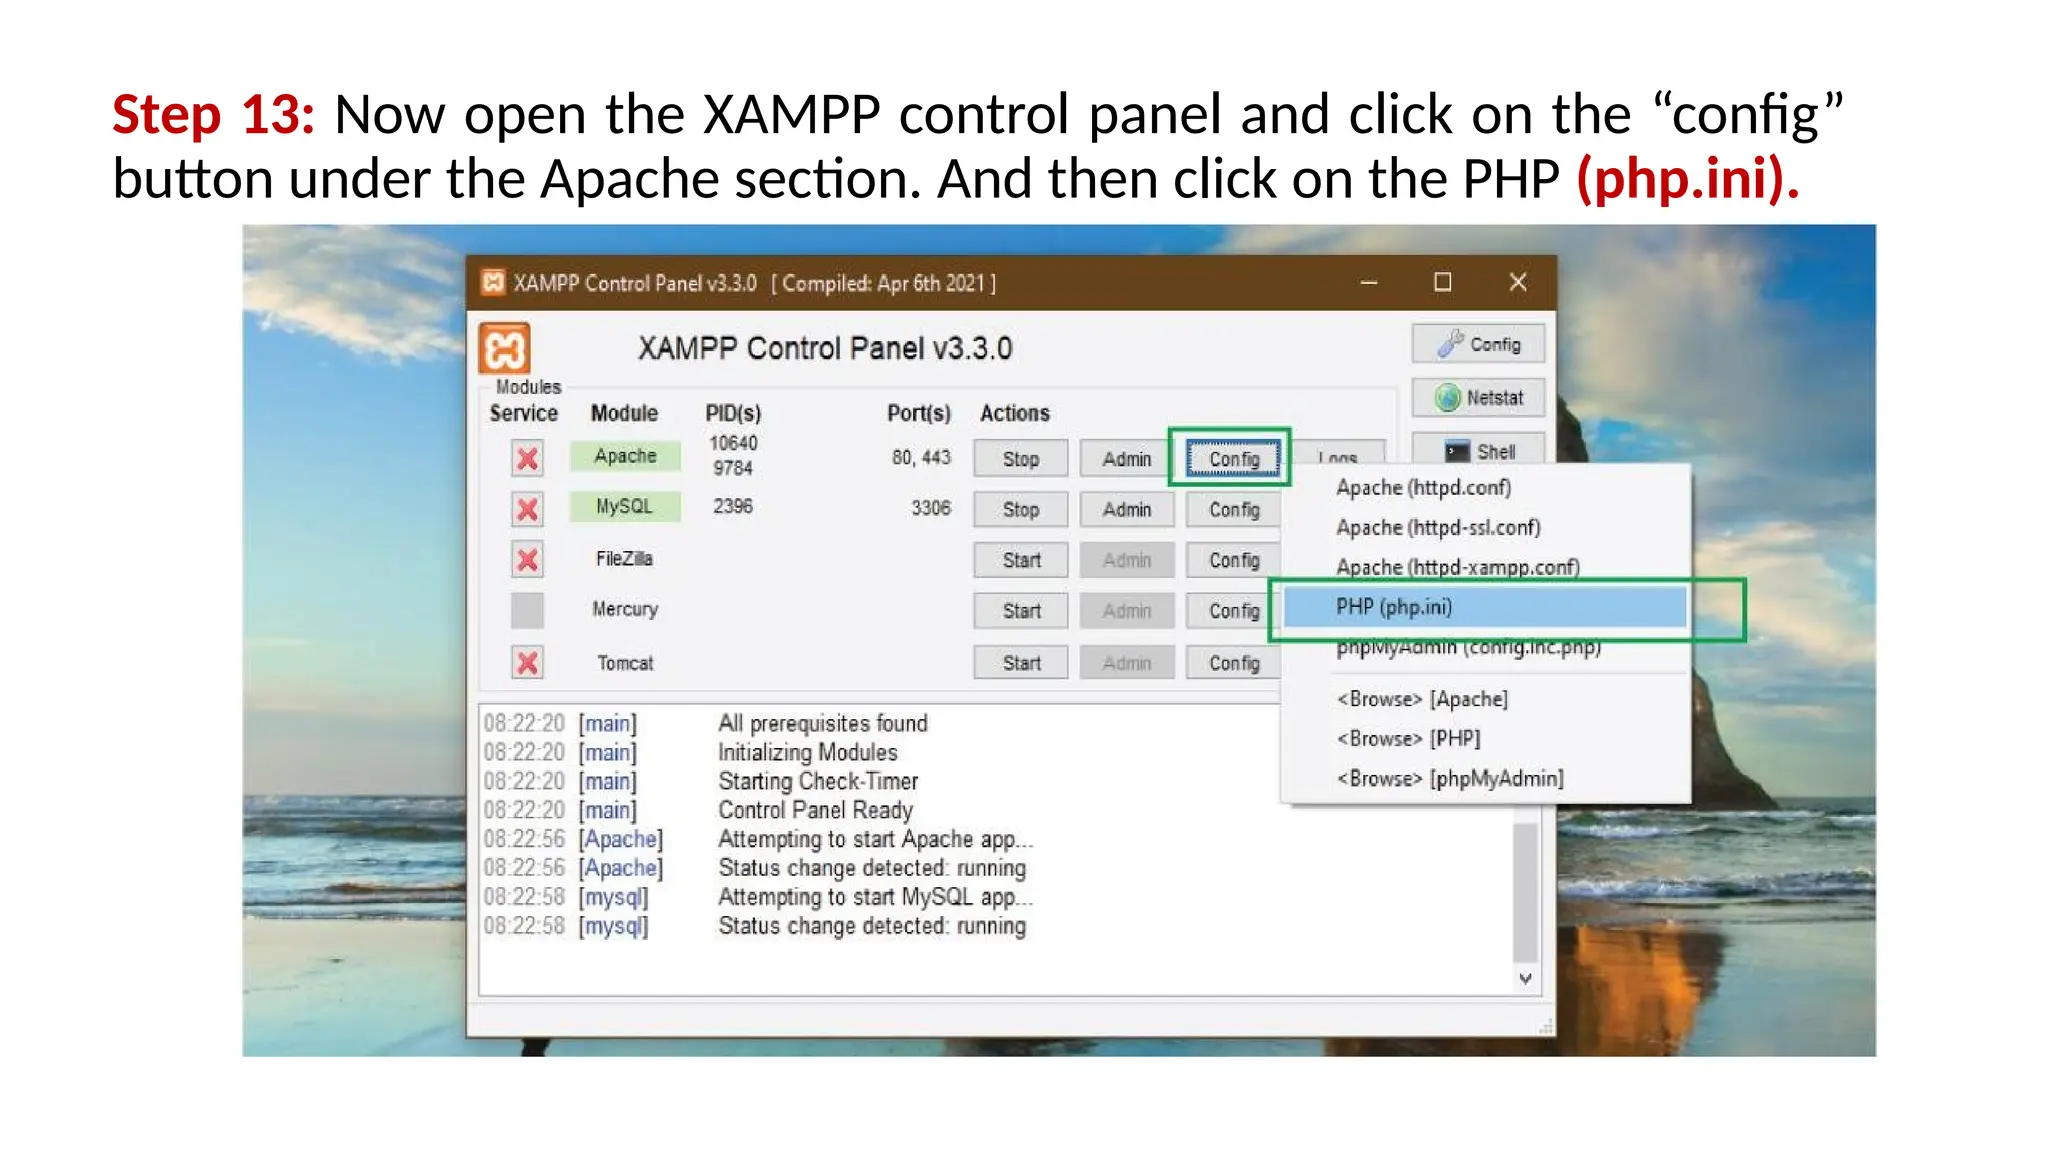
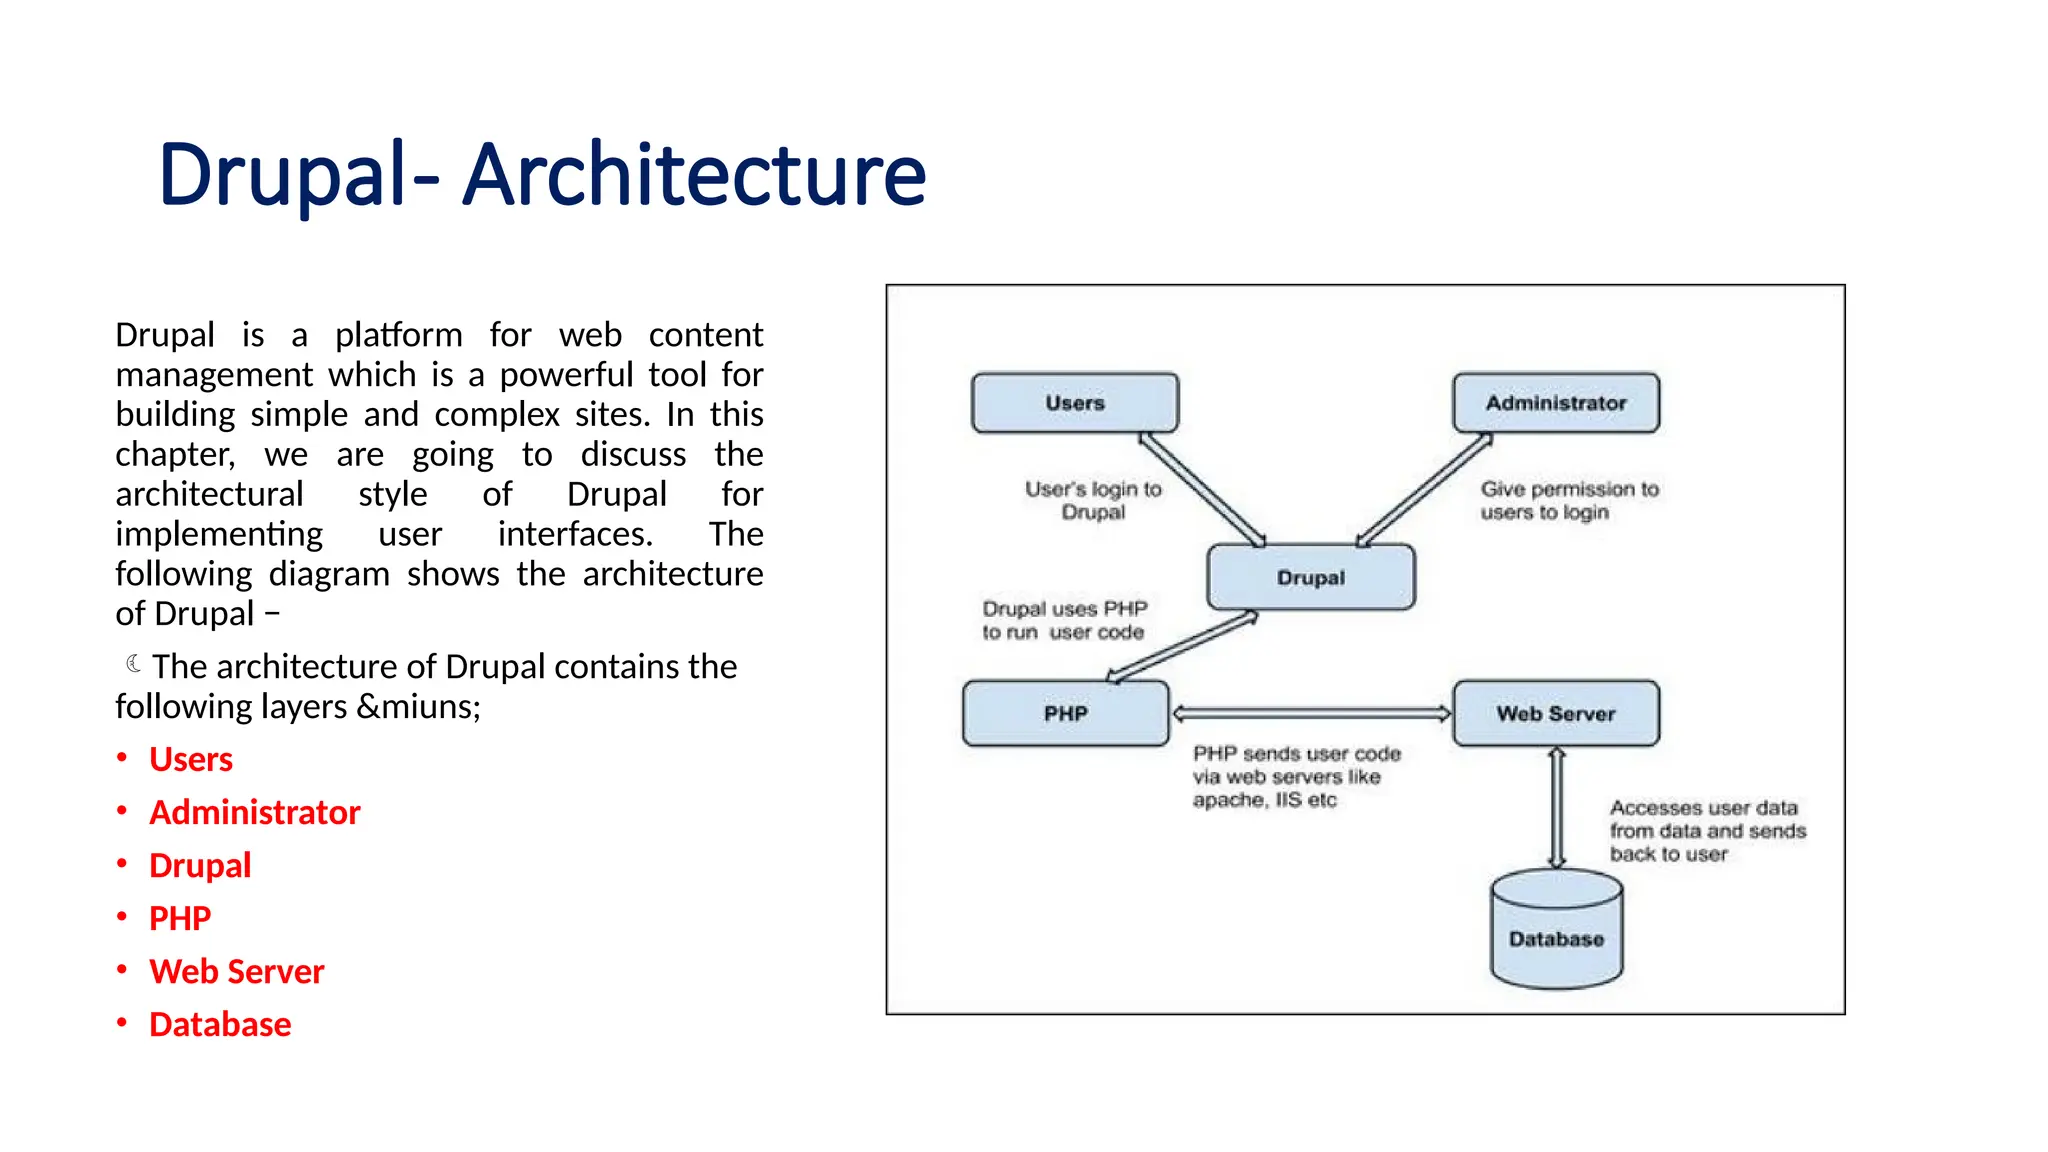
The document provides a step-by-step guide for installing the Drupal content management system (CMS) on a localhost using XAMPP on Windows. It covers the installation of XAMPP, downloading and setting up Drupal, configuring the database, resolving common errors, and finalizing the Drupal installation. Additionally, it outlines the features, advantages, and disadvantages of using Drupal, along with its architectural overview and menu creation process.
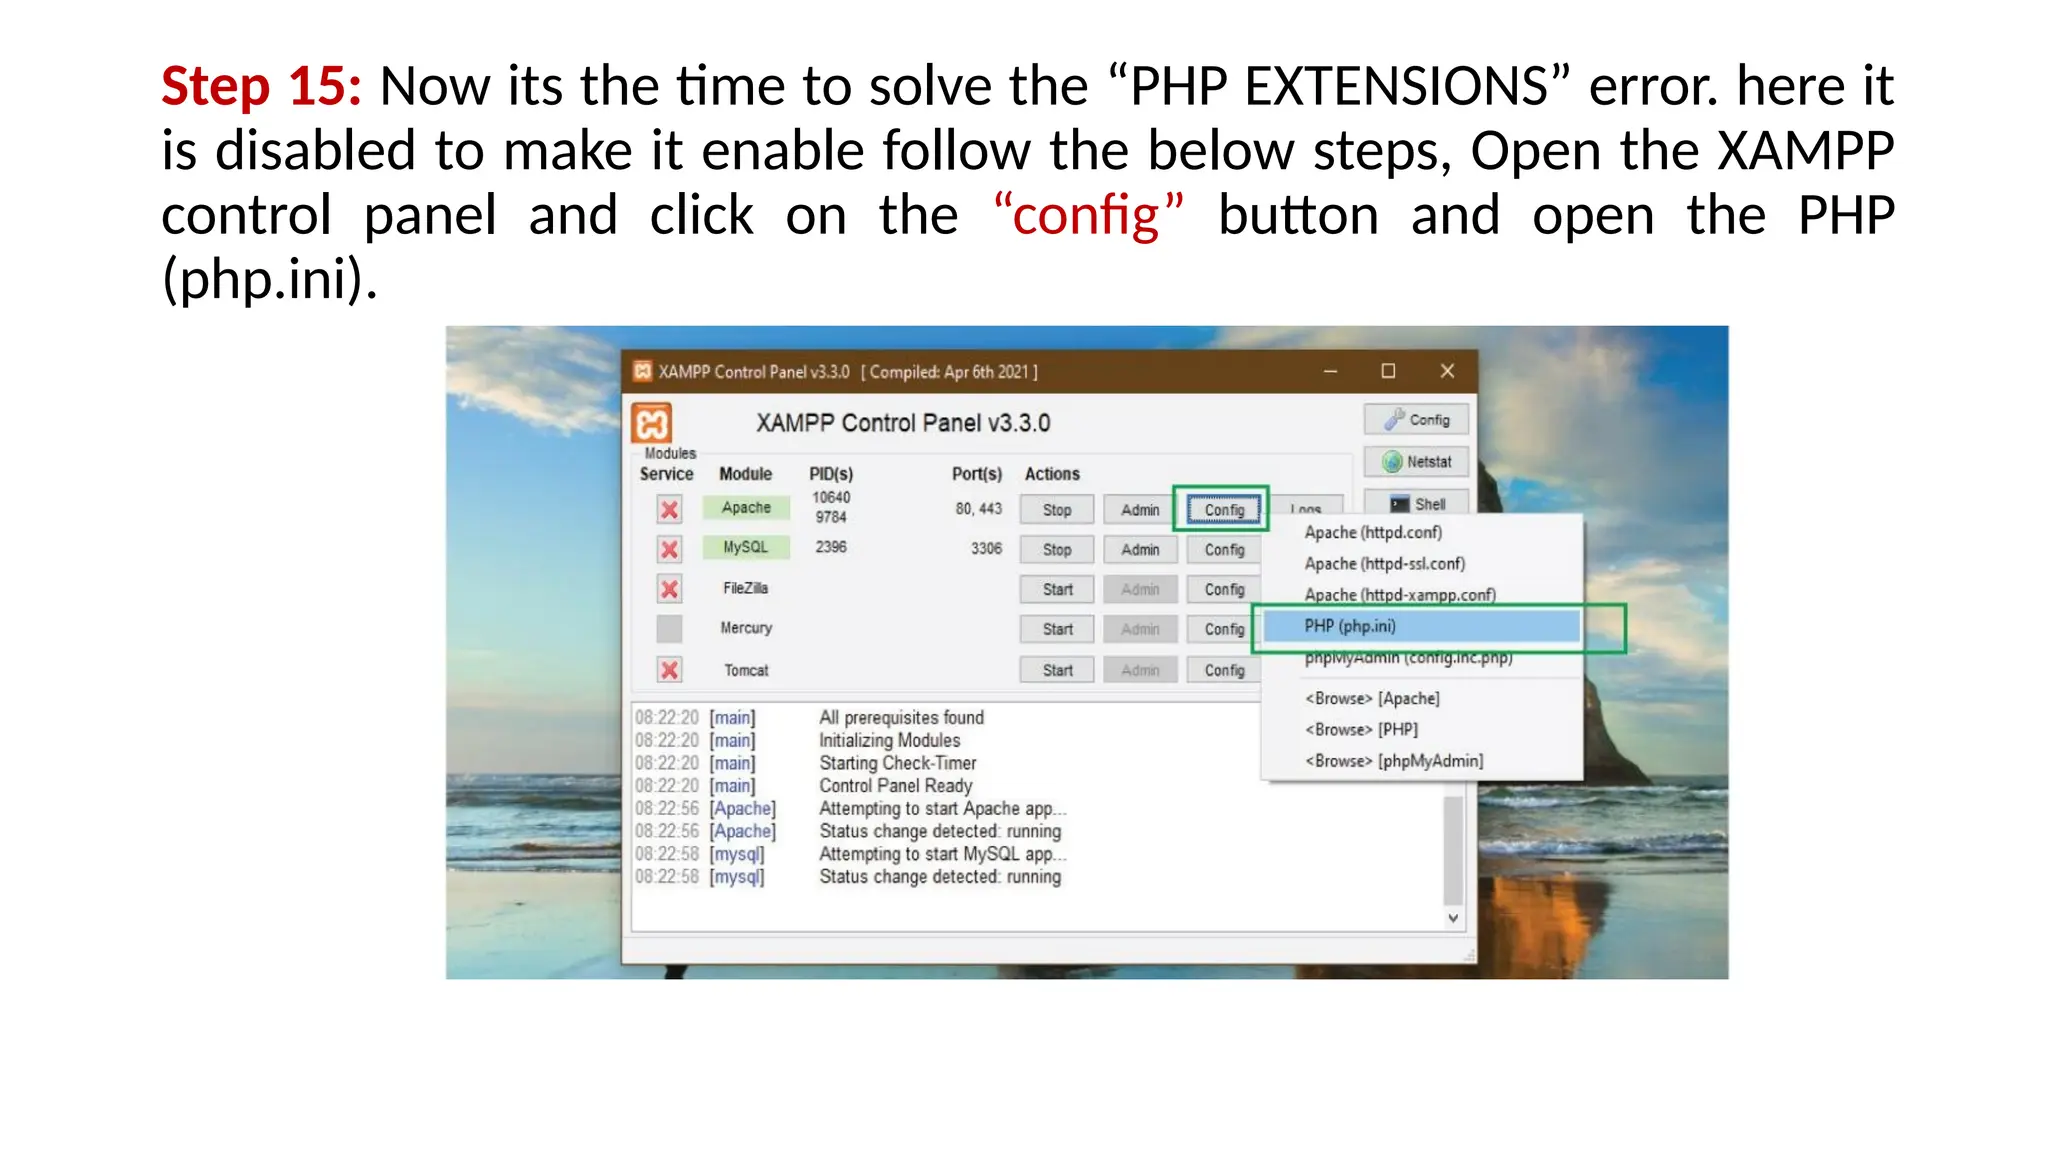
![Step 14: Add this code in php.ini to enable OP code caching.
[opcache]
zend_extension=php_opcache.dll
; Determines if Zend OPCache is enabled
opcache.enable=1
After adding this code in the php.ini file restart the apache server and refresh your page. you will find the OP
code caching error gets solved.](https://image.slidesharecdn.com/drupalpart1-241205054726-c7e5bdc7/75/Drupaljdnndkdkckmfkfkkffmfkkfkfk_Part1-pptx-17-2048.jpg)


![printed_robotic_arm_project[1] [Read-Only].pptx](https://cdn.slidesharecdn.com/ss_thumbnails/printedroboticarmproject1read-only-250714044307-0e6c267b-thumbnail.jpg?width=640&height=640&fit=bounds)


