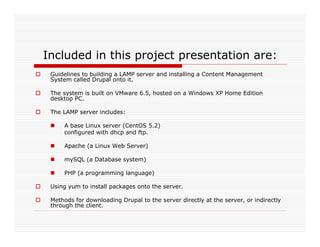
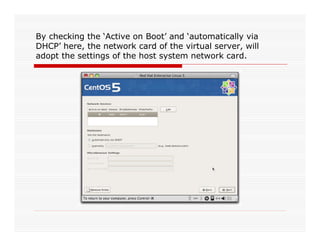
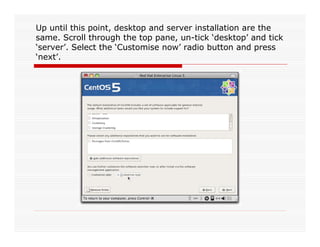
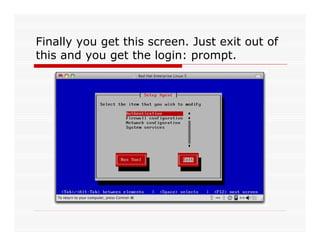
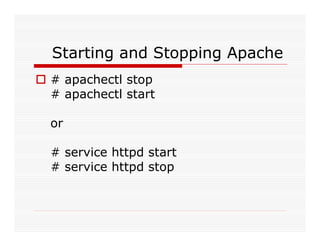
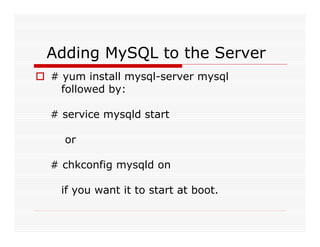
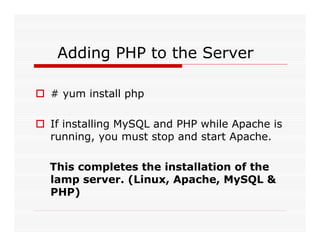
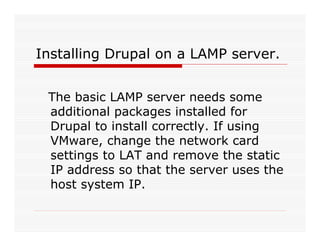
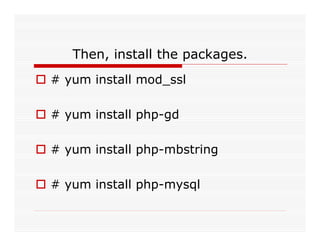
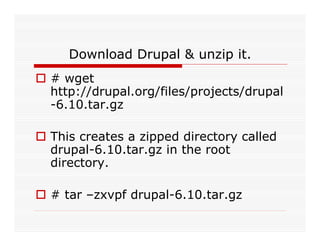
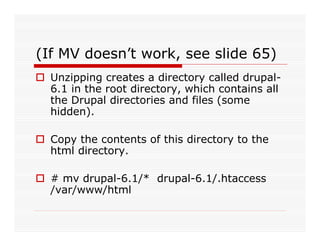
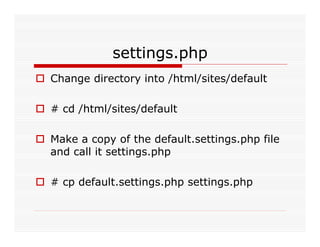
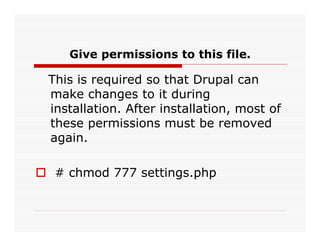
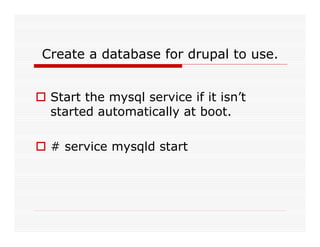
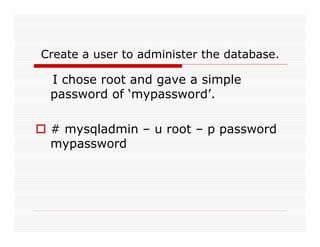
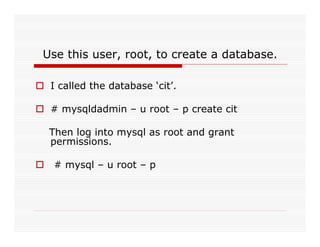
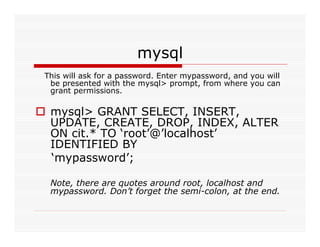
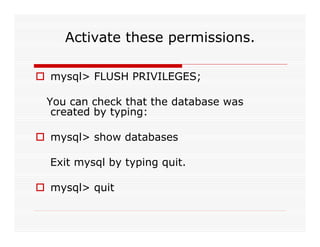
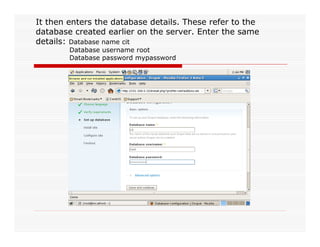
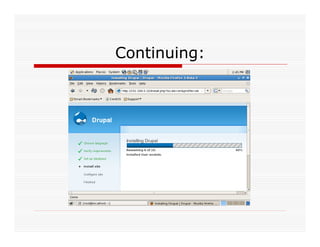
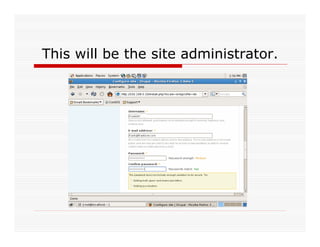
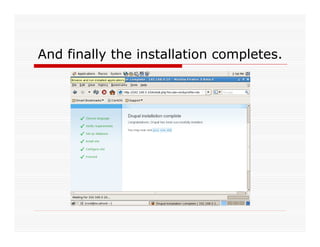
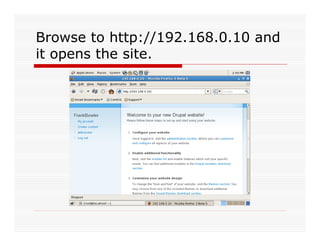
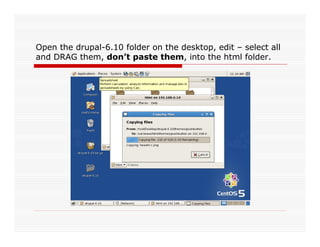
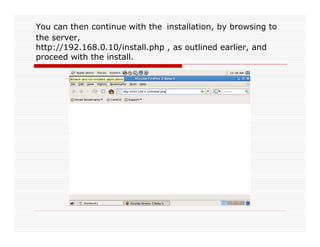
This document provides instructions for installing a LAMP server with Drupal on it. It describes installing CentOS as the base Linux server, then using yum to add Apache, MySQL, PHP, and additional packages to create a full LAMP stack. It details configuring DHCP and FTP services. It also explains downloading and extracting Drupal, creating a MySQL database for it, and navigating through the Drupal installation process via a web browser. The key steps are: 1) installing a base Linux server; 2) using yum to add Apache, MySQL, PHP to create a LAMP server; 3) downloading and extracting Drupal; 4) creating a MySQL database; and 5) navigating through the Drupal installation
The following article is the best simplified steps that will help you install and configure LEMP stack. its written by one of the genius engineers or Rootgate.com
Hello Everyone,
How to Reset New Root Passwd or Fix Broken Sudo.......
Errors that you are getting..........
Error 1:- you may notice an error saying you're not in the sudoers file and the incident is going to be reported.
Error 2:- sorry user usuario is not allowed to execute '/usr/bin/passwd root' as root on.
Cause and symptoms :-
the /etc/sudoers file has been altered to no longer allow users in the admin group to escalate privilege
the permissions on the /etc/sudoers file are changed to something other than 0440
a user who should not have been has been taken out of the admin group.
By above error and cause can be done by following steps.....
To Reset Root Passwd
step1 :- Restart your server or desktop
step2 :- press continue shift untill boot menu show
step3 :- select ubuntu generic second option press Enter
step4 :- then select root shell press Enter
step5 :- type mount -o rw,remount /
step6 :- sudo passwd root or passwd root assign passwd and then repeat again the same passwd
Note :- inplace of root you can set your name,hostname any name that u assign during installation OR Login.
You can also Create NEW USER
step7 :-sudo adduser ubuntu and give new passwd
Thanking You
Red Hat Certified Engineer (RHCE) EX294 Exam QuestionsStudy Material
Do you want to succeed in attaining Red Hat Certified Engineer (RHCE) in one shot? Dumpspedia can do that for you. It’s no joke! We have fantastic set of several RedHat Practice Test Questions Answers to choose from. All of them extracted directly from Red Hat Certified Engineer (RHCE) exam for Red Hat Enterprise Linux 8 Test Questions. EX294 Test Questions are verified and authentic with possibilities highest as they come to be on your actual exam. We put your satisfaction on top while making a perfect collection of valid EX294 Practice Questions. Join us on our website to have a better insight.
https://www.dumpspedia.com/EX294-dumps-questions.html
Dating Pro is a fully functional dating software script that allows the prompt and easy creation of dating, personals and social networking websites. This instruction helps to install Dating Pro software fast and easily .
How To Deploy A Cloud Based Webserver in 5 minutes - LAMPMatt Dunlap
Simple tutorial showing how easy it is to deploy a cloud based webserver with apache, mysql and php in about 5 minutes. You can also watch the video for this slideshow at http://www.youtube.com/watch?v=3eqUZ6fzpOM
How lve stats2 works for you and your customersCloudLinux
LVE Stats2 is a complete re-write of our customer’s statistics module in CloudLinux OS. It features more detailed charts, flexible architecture, and ability to extend the functionality. In this presentation, Igor Seletskiy, our CEO, discusses LVE Stats2.
How To Setup Highly Available Web Servers with Keepalived & Floating IPs on U...VEXXHOST Private Cloud
In this guide, we will show you to use keepalived to set up a highly available web service on Ubuntu 16.04 by using a floating IP address that can be moved between two capable web servers. The keepalived daemon can be used to monitor services or systems and to automatically failover to a standby if their’s any problems occur. If the primary server goes down, the floating IP will be moved to the second server automatically, allowing service to resume by the help of floating IP that we are gonna use in this tutorial.
Presented by VEXXHOST, provider of Openstack based Public and Private Cloud Infrastructure
https://vexxhost.com/
Installation And Configuration Of DNS, Web And FTP Servers On Virtual Machine...JohnWilson47710
The first Virtual Machine should be installed and have the BIND (DNS) server installed on it. While you do not own any address space/ name space your name server should manage the following domains:
The name server should answer queries for this domain. In addition to the saffioti.org.au zone, a zone should be set up for the reverse zone – the reverse zone would be whatever the address range is of your virtual machine. You should do some research on how Bind handles reverse zones. Visit: https://myassignmenthelp.com/free-samples/infs5907-managing-security-and-ethics-in-cyberspace/when-implementing-the-virtual-machines.html
This article introduces LAMP software stack on zLinux (Linux on IBM System z). Let’s call it zLAMP. We will delve into configuring and starting up individual components of zLAMP and then downloading, installing and testing few LAMP based off the shelf open source applications
2024.06.01 Introducing a competency framework for languag learning materials ...Sandy Millin
http://sandymillin.wordpress.com/iateflwebinar2024
Published classroom materials form the basis of syllabuses, drive teacher professional development, and have a potentially huge influence on learners, teachers and education systems. All teachers also create their own materials, whether a few sentences on a blackboard, a highly-structured fully-realised online course, or anything in between. Despite this, the knowledge and skills needed to create effective language learning materials are rarely part of teacher training, and are mostly learnt by trial and error.
Knowledge and skills frameworks, generally called competency frameworks, for ELT teachers, trainers and managers have existed for a few years now. However, until I created one for my MA dissertation, there wasn’t one drawing together what we need to know and do to be able to effectively produce language learning materials.
This webinar will introduce you to my framework, highlighting the key competencies I identified from my research. It will also show how anybody involved in language teaching (any language, not just English!), teacher training, managing schools or developing language learning materials can benefit from using the framework.
The Roman Empire A Historical Colossus.pdfkaushalkr1407
The Roman Empire, a vast and enduring power, stands as one of history's most remarkable civilizations, leaving an indelible imprint on the world. It emerged from the Roman Republic, transitioning into an imperial powerhouse under the leadership of Augustus Caesar in 27 BCE. This transformation marked the beginning of an era defined by unprecedented territorial expansion, architectural marvels, and profound cultural influence.
The empire's roots lie in the city of Rome, founded, according to legend, by Romulus in 753 BCE. Over centuries, Rome evolved from a small settlement to a formidable republic, characterized by a complex political system with elected officials and checks on power. However, internal strife, class conflicts, and military ambitions paved the way for the end of the Republic. Julius Caesar’s dictatorship and subsequent assassination in 44 BCE created a power vacuum, leading to a civil war. Octavian, later Augustus, emerged victorious, heralding the Roman Empire’s birth.
Under Augustus, the empire experienced the Pax Romana, a 200-year period of relative peace and stability. Augustus reformed the military, established efficient administrative systems, and initiated grand construction projects. The empire's borders expanded, encompassing territories from Britain to Egypt and from Spain to the Euphrates. Roman legions, renowned for their discipline and engineering prowess, secured and maintained these vast territories, building roads, fortifications, and cities that facilitated control and integration.
The Roman Empire’s society was hierarchical, with a rigid class system. At the top were the patricians, wealthy elites who held significant political power. Below them were the plebeians, free citizens with limited political influence, and the vast numbers of slaves who formed the backbone of the economy. The family unit was central, governed by the paterfamilias, the male head who held absolute authority.
Culturally, the Romans were eclectic, absorbing and adapting elements from the civilizations they encountered, particularly the Greeks. Roman art, literature, and philosophy reflected this synthesis, creating a rich cultural tapestry. Latin, the Roman language, became the lingua franca of the Western world, influencing numerous modern languages.
Roman architecture and engineering achievements were monumental. They perfected the arch, vault, and dome, constructing enduring structures like the Colosseum, Pantheon, and aqueducts. These engineering marvels not only showcased Roman ingenuity but also served practical purposes, from public entertainment to water supply.
The French Revolution, which began in 1789, was a period of radical social and political upheaval in France. It marked the decline of absolute monarchies, the rise of secular and democratic republics, and the eventual rise of Napoleon Bonaparte. This revolutionary period is crucial in understanding the transition from feudalism to modernity in Europe.
For more information, visit-www.vavaclasses.com
This is a presentation by Dada Robert in a Your Skill Boost masterclass organised by the Excellence Foundation for South Sudan (EFSS) on Saturday, the 25th and Sunday, the 26th of May 2024.
He discussed the concept of quality improvement, emphasizing its applicability to various aspects of life, including personal, project, and program improvements. He defined quality as doing the right thing at the right time in the right way to achieve the best possible results and discussed the concept of the "gap" between what we know and what we do, and how this gap represents the areas we need to improve. He explained the scientific approach to quality improvement, which involves systematic performance analysis, testing and learning, and implementing change ideas. He also highlighted the importance of client focus and a team approach to quality improvement.
Operation “Blue Star” is the only event in the history of Independent India where the state went into war with its own people. Even after about 40 years it is not clear if it was culmination of states anger over people of the region, a political game of power or start of dictatorial chapter in the democratic setup.
The people of Punjab felt alienated from main stream due to denial of their just demands during a long democratic struggle since independence. As it happen all over the word, it led to militant struggle with great loss of lives of military, police and civilian personnel. Killing of Indira Gandhi and massacre of innocent Sikhs in Delhi and other India cities was also associated with this movement.
Students, digital devices and success - Andreas Schleicher - 27 May 2024..pptxEduSkills OECD
Andreas Schleicher presents at the OECD webinar ‘Digital devices in schools: detrimental distraction or secret to success?’ on 27 May 2024. The presentation was based on findings from PISA 2022 results and the webinar helped launch the PISA in Focus ‘Managing screen time: How to protect and equip students against distraction’ https://www.oecd-ilibrary.org/education/managing-screen-time_7c225af4-en and the OECD Education Policy Perspective ‘Students, digital devices and success’ can be found here - https://oe.cd/il/5yV
Students, digital devices and success - Andreas Schleicher - 27 May 2024..pptx
Lamp Server With Drupal Installation
1. Included in this project presentation are:
Guidelines to building a LAMP server and installing a Content Management
System called Drupal onto it.
The system is built on VMware 6.5, hosted on a Windows XP Home Edition
desktop PC.
The LAMP server includes:
A base Linux server (CentOS 5.2)
configured with dhcp and ftp.
Apache (a Linux Web Server)
mySQL (a Database system)
PHP (a programming language)
Using yum to install packages onto the server.
Methods for downloading Drupal to the server directly at the server, or indirectly
through the client.
2. Installing a LAMP Server
A LAMP server is a server configuration that
can host websites, intranets, and Web 2.0
type content management systems.
The acronym LAMP refers to:
Linux (Operating System)
Apache (Web Server)
MySQL (Database)
PHP (A Programming language)
3. Installing a Base (Linux) Server
Only screen shots of interest are
included for the server installation.
5. Base Server Installation
Once you see this screen, it is a
matter of selecting configurable items
as the installation progresses.
After pressing the ‘next’ option
above, the installation moves on to a
number of language selection
screens.
6. If installing on a virtual machine, don’t
worry about this warning. Press ‘yes’ and
then ‘next’.
7. Again, don’t be alarmed by this message if
installing on a virtual machine. Press
‘next’.
8. By checking the ‘Active on Boot’ and ‘automatically via
DHCP’ here, the network card of the virtual server, will
adopt the settings of the host system network card.
9. Continuing on:
This is followed by a time zone
selection screen.
Which in turn, is followed by a screen
which sets the root password. The
root password must be at least 6
characters in length.
10. Up until this point, desktop and server installation are the
same. Scroll through the top pane, un-tick ‘desktop’ and tick
‘server’. Select the ‘Customise now’ radio button and press
‘next’.
11. Continuing on:
The next 2 screens allow you to choose
what type of tools and applications you
want to install. This will vary depending on
your requirements. I chose ‘development’
and ‘development tools’, followed by ‘base
system’ and ‘base’. This is the point you
also select a GUI, if you want to. If you
don’t, you will only have a command
prompt to work with after installation.
12. Click ‘next’,
And the installation process begins. It
takes approximately 15 minute.
A screen saying ‘Formatting/file
system’ appears.
Then a screen saying ‘Starting install
process’ appears.
And these are followed by a screen
with a progress bar.
16. YUM (Yellow-Dog Unified Modifier.)
Yum is a packet management utility.
It can be used to update the
operating System installation.
It can also be used to install
additional services on the basic server
installation.
17. Updating the OS
This is simply achieved by logging in
as root, and typing the command:
#yum update
18. Adding DHCP to the Basic Server
DHCP centralises and manages the
allocation of TCP/IP configuration
information on a DHCP server.
A DHCP server allocates IP addresses to
client system that are configured to use
DHCP.
These IP addresses can be leased for a
specific period and the client can attempt to
renew its lease before it expires.
19. Installing DHCP
Again we use yum.
#yum –y install dhcp
This displays a screen that shows the
version of the DHCP download and a
progress bar and percentage
indicator.
20. Some basic DHCP configuration.
First you have to give the DHCP server a
static IP address. This is done by typing:
#ifconfig eth0 192.168.0.10 netmask
255.255.255.0 up
Eth0 is the interface name. This can vary
depending on what interface you are using
to connect to the network.
21. Making this address permanent.
This address will be lost after a
reboot, if it is not permanently saved.
To save the IP address, we use the
following command:
#system-config-network
This opens a utility that allows us to
enter the information.
22. /etc/dhcpd.conf
When DHCP starts, it reads the
/etc/dhcpd.conf file.
This file contains the configuration
information for the DHCP service.
Among its configurable parameters
are:
The network and subnetmask.
23. /etc/dhcpd.conf
The default gateway and its subnet
mask.
The domain name.
The DNS Server address.
The range of IP addresses that the
DHCP Server can allocate.
The terms of the lease.
24. /etc/dhcpd.conf
A text editor like vi or nano can be
used to edit the /etc/dhcpd.conf file.
To start the DHCP service, type
#service dhcpd start
To ensure that it starts at boot, type
#chkconfig dhcpd on
25. DHCP: where to send the IP offers.
The DHCP server must be configured
to know on what interface, to send an
IP address to a client requesting one.
# route add -host 255.255.255.255
dev eth0
This tells the server to broadcast the
address out the eth0 interface.
26. Testing the DHCP server
Install a CentOS client and set it to
receive its IP address through DHCP.
If using VMware, team the DHCP
server and the client and change their
network card settings to Lan1. To do
this, right click the settings tab in
VMware or the network card itself.
27. Testing the DHCP server
Ping the server IP address. If you get
replies, the connection is ok.
Get the IP address of the client by
typing:
#ifconfig
And ping the client from the server.
28. Adding FTP to the Server
Configure the server to use the Host IP
address again by:
Breaking the VMware team.
Changing the network card from Lan1 to
NAT
Typing:
#system-config-network
Which opens the following screen.
30. FTP Installation commands.
#yum install vsftpd
#chkconfig vsftpd on
This ensures that the FTP service runs
a boot time.
Turn iptables off or else set a rule to
allow FTP. To turn iptable off type:
#service iptables off
31. Starting FTP
Start the FTP service.
#service vsftpd start
and ensure that it starts at boot time.
#chkconfig vsftpd on
32. Testing FTP
This can be done in two ways.
From the server, by typing
#ftp localhost
or from the client, (after reteaming with the
server in VMware), by typing
#ftp 192.168.0.10 ( the server IP
address)
Use ‘anonymous’ as the username and
‘password’ as the password.
33. Installing Apache
Apache is a linux web server. By installing
it on the base server, the server can be
used to host websites.
To install it on the base server, type:
#yum install httpd
followed by:
#chkconfig httpd on
This ensures that it starts at boot.
34. Checking Installation
As I didn’t install a GUI on the server
during the base server installation, I
must install a text based browser
called elinks, to test it.
To install elinks, type:
#yum install elinks
36. Starting and Stopping Apache
# apachectl stop
# apachectl start
or
# service httpd start
# service httpd stop
37. Adding MySQL to the Server
# yum install mysql-server mysql
followed by:
# service mysqld start
or
# chkconfig mysqld on
if you want it to start at boot.
38. Adding PHP to the Server
# yum install php
If installing MySQL and PHP while Apache is
running, you must stop and start Apache.
This completes the installation of the
lamp server. (Linux, Apache, MySQL &
PHP)
39. Installing Drupal on a LAMP server.
The basic LAMP server needs some
additional packages installed for
Drupal to install correctly. If using
VMware, change the network card
settings to LAT and remove the static
IP address so that the server uses the
host system IP.
41. Download Drupal & unzip it.
# wget
http://drupal.org/files/projects/drupal
-6.10.tar.gz
This creates a zipped directory called
drupal-6.10.tar.gz in the root
directory.
# tar –zxvpf drupal-6.10.tar.gz
42. (If MV doesn’t work, see slide 65)
Unzipping creates a directory called drupal-
6.1 in the root directory, which contains all
the Drupal directories and files (some
hidden).
Copy the contents of this directory to the
html directory.
# mv drupal-6.1/* drupal-6.1/.htaccess
/var/www/html
43. The mv command & What it does.
This is actually two commands, the
asterisk, ‘*’ means all files and directories.
However, asterisk, won’t copy the hidden
file .htaccess, so this must also be
specified.
(This command is in effect, # mv drupal-
6.1/* /var/www/html and # mv drupal-
6.1/.htaccess /var/www/html)
44. settings.php
Change directory into /html/sites/default
# cd /html/sites/default
Make a copy of the default.settings.php file
and call it settings.php
# cp default.settings.php settings.php
45. Give permissions to this file.
This is required so that Drupal can
make changes to it during
installation. After installation, most of
these permissions must be removed
again.
# chmod 777 settings.php
46. The files directory.
Check that the /html/sites/default/files
directory exists. If not, make it .
# mkdir files
# chmod 777 files
47. Create a database for drupal to use.
Start the mysql service if it isn’t
started automatically at boot.
# service mysqld start
48. Create a user to administer the database.
I chose root and gave a simple
password of ‘mypassword’.
# mysqladmin – u root – p password
mypassword
49. Use this user, root, to create a database.
I called the database ‘cit’.
# mysqldadmin – u root – p create cit
Then log into mysql as root and grant
permissions.
# mysql – u root – p
50. mysql
This will ask for a password. Enter mypassword, and you will
be presented with the mysql> prompt, from where you can
grant permissions.
mysql> GRANT SELECT, INSERT,
UPDATE, CREATE, DROP, INDEX, ALTER
ON cit.* TO ‘root’@’localhost’
IDENTIFIED BY
‘mypassword’;
Note, there are quotes around root, localhost and
mypassword. Don’t forget the semi-colon, at the end.
51. Activate these permissions.
mysql> FLUSH PRIVILEGES;
You can check that the database was
created by typing:
mysql> show databases
Exit mysql by typing quit.
mysql> quit
52. Re-team the server and client.
Change the network card settings
back to LAN1, ie team it with the
client in VMware, and give the server
its static IP address again, through
the system-config-network command.
Reboot the server.
53. After rebooting:
Turn iptables off, if you haven’t written specific rules, so
that the client system is allowed to browse to it.
# service iptables stop
An iptables rule to allow traffic to port 80 from hosts on
the server network of 192.168.0.0 255.255.255.0 reads:
-A INPUT -s 192.168.0.0/24 –p tcp –m tcp --dport 80 –j
ACCEPT
Save this in the /etc/sysconfig/iptables file on the server
54. Make sure that mysqld is started, by
typing:
# service mysqld start
55. Boot the client system.
Make sure that httpd is running on the
client.
# service httpd start
Open the firefox browser on the client and
enter the URL,
http://192.168.0.10/install.php
58. It goes through the install steps listed on the left hand side of the screen. If
there are errors or warnings, it prompts you with a possible solution, as
shown in this screen.
59. It then enters the database details. These refer to the
database created earlier on the server. Enter the same
details: Database name cit
Database username root
Database password mypassword
64. Reduce permissions on settings.php
Log onto the server again and change
directory, into the default, so that
you can remove some of the
permissions on settings.php .
# cd /var/www/html/sites/default
# chmod 555 settings.php
65. Alternative method of downloading Drupal onto
the server through the client.
Change the network card settings on the client
to NAT, so that it can access the internet
Open the browser and browse to drupal.org.
Click on the Download Drupal 6.10 link. It is
downloaded to the desktop as a zipped folder.
Double click it and extract it.
66. This creates another folder called drupal-6.1,
which contains all of the installation files. Re-
establish the VMware team .
68. Go to Places – Network Servers and double
click SFTP File Transfer on WWW
69. You are presented with a screen, requesting a password.
Enter the password for the server, and you login to the
server, from where you can view its directories and folders.
70. Scroll through the folders, and double click the var folder,
then www folder, and finally the html folder. If there are
files in it, delete them, and minimise the screen.
71. Open the drupal-6.10 folder on the desktop, edit – select all
and DRAG them, don’t paste them, into the html folder.
72. You can then continue with the installation, by browsing to
the server,
http://192.168.0.10/install.php , as outlined earlier, and
proceed with the install.