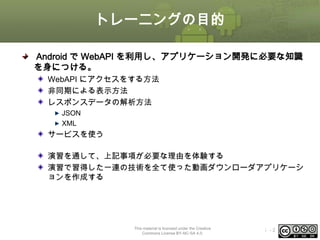
トレーニングの目的
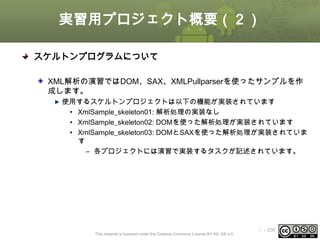
Android で WebAPIを利用し、アプリケーション開発に必要な知識
を身につける。
WebAPI にアクセスをする方法
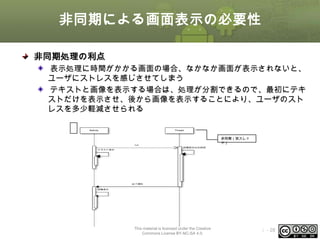
非同期による表示方法
レスポンスデータの解析方法
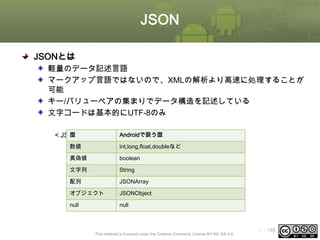
JSON
XML
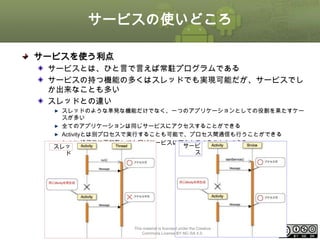
サービスを使う
演習を通して、上記事項が必要な理由を体験する
演習で習得した一連の技術を全て使った動画ダウンローダアプリケーシ
ョンを作成する
This material is licensed under the Creative
Commons License BY-NC-SA 4.0.
ⅰ-2
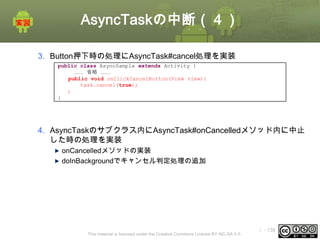
3.
トレーニングスケジュール
1日目
1章 トレーニング概要
2章 WebAPI開発知識
3章チュートリアル
4章 ListViewの応用
5章 非同期処理
2日目
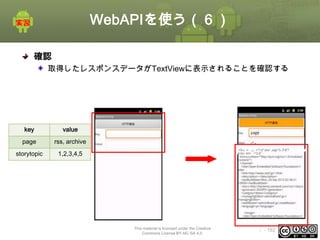
6章
7章
8章
9章
10章
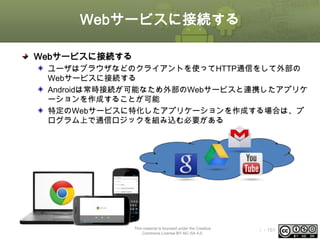
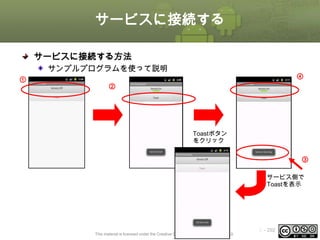
Webサービスに接続する
JSON,XMLの解析
サービス
動画ダウンローダを作る
トレーニングのまとめ
This material is licensed under the Creative
Commons License BY-NC-SA 4.0.
ⅰ-3
4.
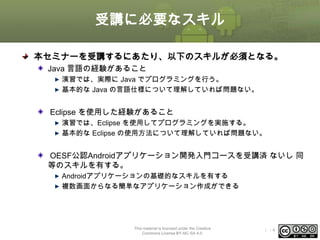
受講に必要なスキル
本セミナーを受講するにあたり、以下のスキルが必須となる。
Java 言語の経験があること
演習では、実際に Javaでプログラミングを行う。
基本的な Java の言語仕様について理解していれば問題ない。
Eclipse を使用した経験があること
演習では、Eclipse を使用してプログラミングを実施する。
基本的な Eclipse の使用方法について理解していれば問題ない。
OESF公認Androidアプリケーション開発入門コースを受講済 ないし 同
等のスキルを有する。
Androidアプリケーションの基礎的なスキルを有する
複数画面からなる簡単なアプリケーション作成ができる
This material is licensed under the Creative
Commons License BY-NC-SA 4.0.
ⅰ-4
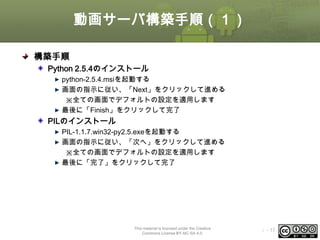
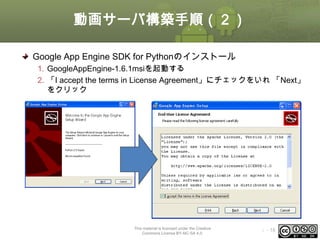
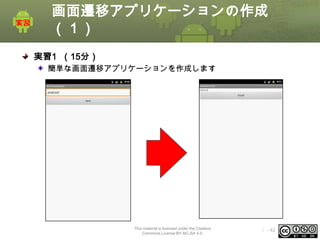
動画サーバ構築手順(2)
Google App EngineSDK for Pythonのインストール
1. GoogleAppEngine-1.6.1msiを起動する
2. 「I accept the terms in License Agreement」にチェックをいれ 「Next」
をクリック
This material is licensed under the Creative
Commons License BY-NC-SA 4.0.
ⅰ - 18
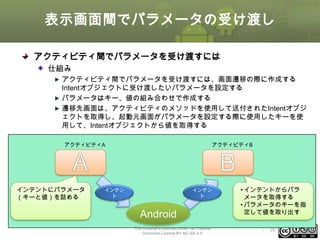
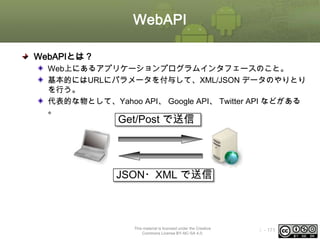
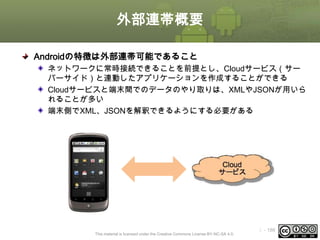
WebAPI とは ?
WebApplication Programing Interface
Web 上にあるアプリケーションプログラムインタフェースのこと
基本的にはリクエストにパラメータを付与して、JSON・XML データの
やりとりを行う
代表的な物として、Yahoo API、 Google API、 Youtube API などがあ
る
Get/Post で送信
JSON・XML で送
信
This material is licensed under the Creative
Commons License BY-NC-SA 4.0.
ⅰ - 27
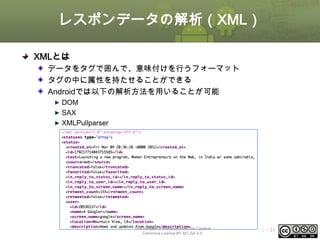
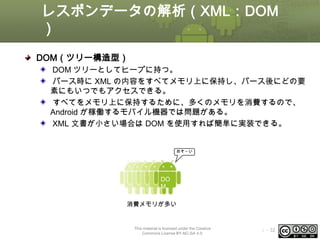
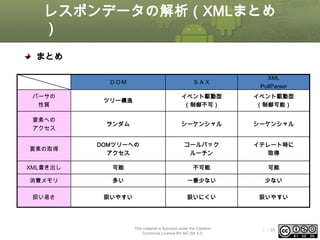
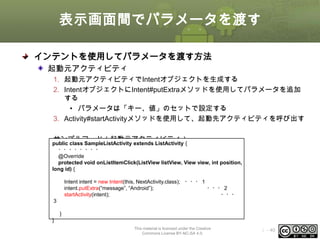
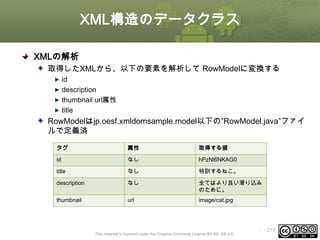
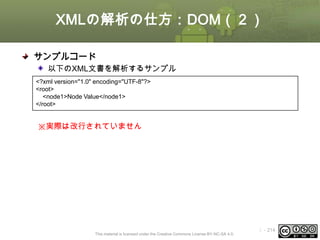
レスポンデータの解析(XML:DOM
)
DOM(ツリー構造型)
DOM ツリーとしてヒープに持つ。
パース時に XMLの内容をすべてメモリ上に保持し、パース後にどの要
素にもいつでもアクセスできる。
すべてをメモリ上に保持するために、多くのメモリを消費するので、
Android が稼働するモバイル機器では問題がある。
XML 文書が小さい場合は DOM を使用すれば簡単に実装できる。
おそ~い
DO
M
消費メモリが多い
This material is licensed under the Creative
Commons License BY-NC-SA 4.0.
ⅰ - 32
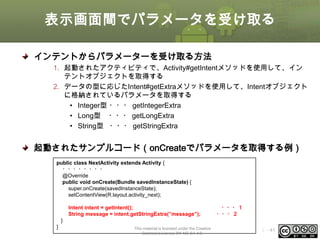
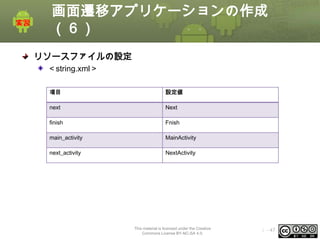
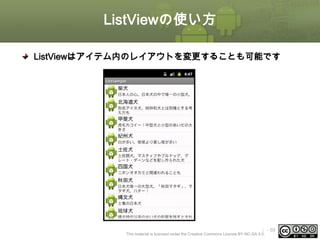
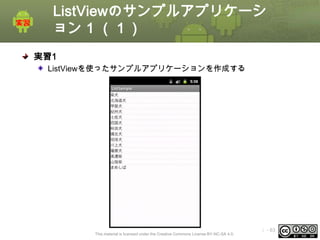
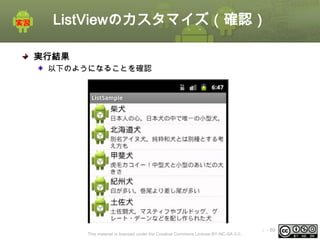
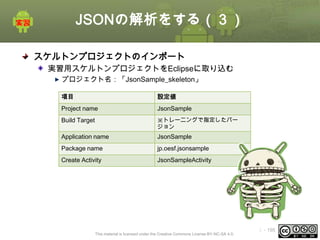
ListViewのサンプルアプリケーシ
ョン 1 (2)
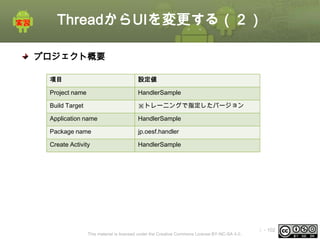
プロジェクトの概要
項目
設定値
Projectname
ListSample
Build Target
※トレーニングで指定したバージョン
Application name
ListSample
Package name
jp.oesf.listsample
Create Activity
ListSampleActivity
This material is licensed under the Creative Commons License BY-NC-SA 4.0.
ⅰ - 64
65.
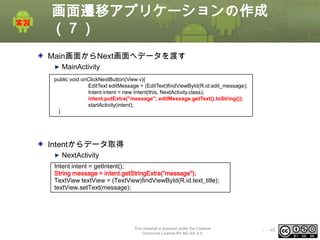
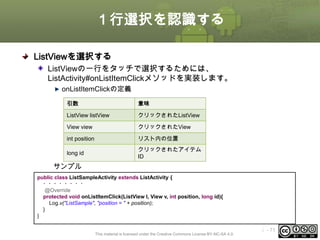
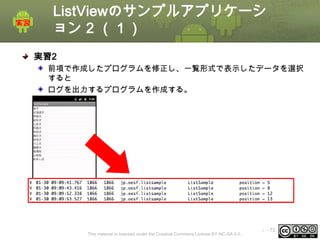
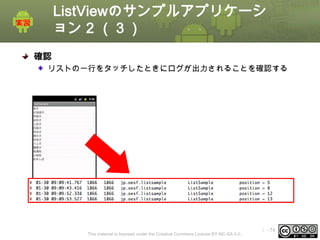
ListViewのサンプルアプリケーシ
ョン 1 (3)
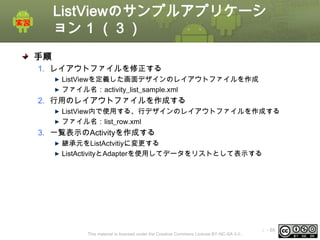
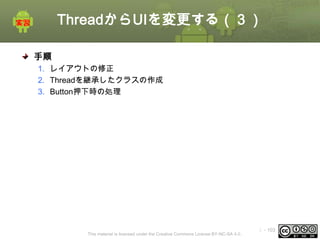
手順
1.レイアウトファイルを修正する
ListViewを定義した画面デザインのレイアウトファイルを作成
ファイル名:activity_list_sample.xml
2. 行用のレイアウトファイルを作成する
ListView内で使用する、行デザインのレイアウトファイルを作成する
ファイル名:list_row.xml
3. 一覧表示のActivityを作成する
継承元をListActvitiyに変更する
ListActivityとAdapterを使用してデータをリストとして表示する
This material is licensed under the Creative Commons License BY-NC-SA 4.0.
ⅰ - 65
66.
ListViewのサンプルアプリケーシ
ョン 1 (4)
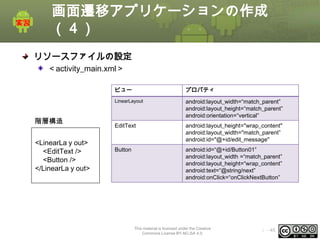
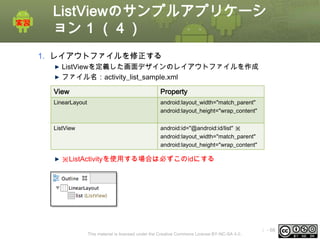
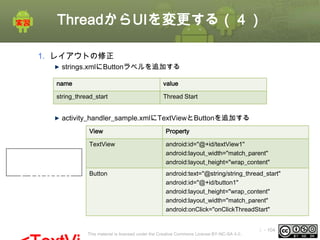
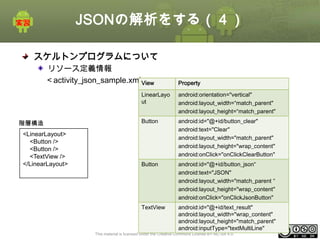
1.レイアウトファイルを修正する
ListViewを定義した画面デザインのレイアウトファイルを作成
ファイル名:activity_list_sample.xml
View
Property
LinearLayout
android:layout_width="match_parent"
android:layout_height="wrap_content"
ListView
android:id="@android:id/list" ※
android:layout_width="match_parent"
android:layout_height="wrap_content"
※ListActivityを使用する場合は必ずこのidにする
This material is licensed under the Creative Commons License BY-NC-SA 4.0.
ⅰ - 66
67.
ListViewのサンプルアプリケーシ
ョン 1 (5)
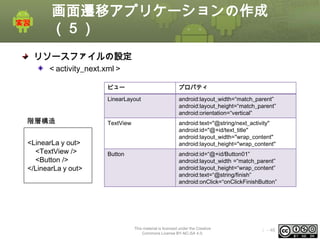
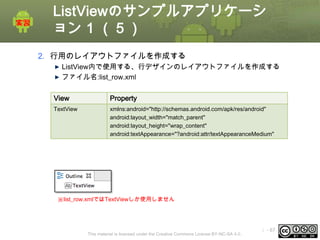
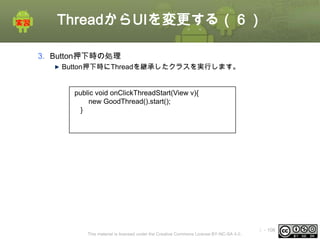
2.行用のレイアウトファイルを作成する
ListView内で使用する、行デザインのレイアウトファイルを作成する
ファイル名:list_row.xml
View
Property
TextView
xmlns:android="http://schemas.android.com/apk/res/android"
android:layout_width="match_parent"
android:layout_height="wrap_content"
android:textAppearance="?android:attr/textAppearanceMedium"
※list_row.xmlではTextViewしか使用しません
This material is licensed under the Creative Commons License BY-NC-SA 4.0.
ⅰ - 67
68.
ListViewのサンプルアプリケーシ
ョン 1 (6)
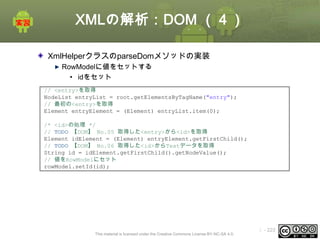
3.一覧表示のActivityを作成する
ListSampleActivityクラスの継承元をListActvitiyに変更する
ListActivityとAdapterを使用してデータをリストとして表示する
ArrayAdapterをセットする
public class ListSampleActivity extends ListActivity {
・・・
public static final String[] ITEMS = { "柴犬", "北海道犬", "甲斐犬", "紀州犬", "土佐犬",
①
"四国犬", "秋田犬", "縄文犬", "琉球犬", "川上犬", "薩摩犬", "美濃柴", "山陰柴", "まめしば" };
/** Called when the activity is first created. */
@Override
public void onCreate(Bundle savedInstanceState) {
super.onCreate(savedInstanceState);
setContentView(R.layout.activity_list_sample);
ArrayAdapter<String> adapter = new ArrayAdapter<String>(this,
R.layout.list_row, ITEMS);
setListAdapter(adapter);
・・・
}
・・・
②
③
}
This material is licensed under the Creative Commons License BY-NC-SA 4.0.
ⅰ - 68
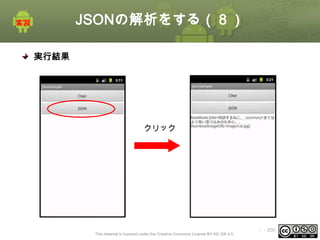
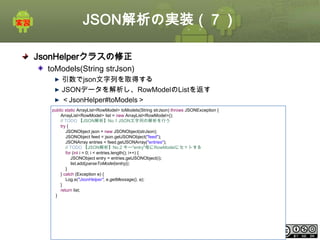
手順 2. カスタムAdapterを作成す
る(1)
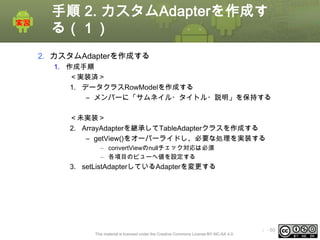
2.カスタムAdapterを作成する
1. 作成手順
<実装済>
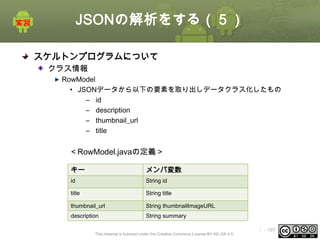
1. データクラスRowModelを作成する
– メンバーに「サムネイル・タイトル・説明」を保持する
<未実装>
2. ArrayAdapterを継承してTableAdapterクラスを作成する
– getView()をオーバーライドし、必要な処理を実装する
– convertViewのnullチェック対応は必須
– 各項目のビューへ値を設定する
3. setListAdapterしているAdapterを変更する
This material is licensed under the Creative Commons License BY-NC-SA 4.0.
ⅰ - 80
81.
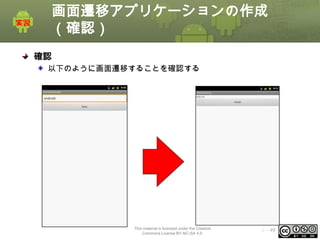
手順 2. カスタムAdapterを作成す
る(2)
1.RowModelを作成する
「src」フォルダ配下にパッケージ [jp.oesf.listsample.model]を作成する
RowModelクラスを作成する
「サムネイル タイトル 説明」 を保持するメンバ変数を定義する
各変数のgetter,setterメソッドを用意
public class RowModel {
private String title;
private Drawable thumbnailImage;
private String summary;
「
各変数のgetter setter を記載 」
}
This material is licensed under the Creative Commons License BY-NC-SA 4.0.
ⅰ - 81
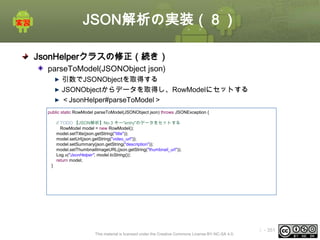
82.
手順 2. カスタムAdapterを作成す
る(3)
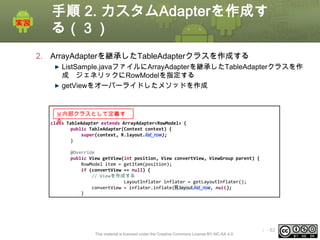
2.ArrayAdapterを継承したTableAdapterクラスを作成する
ListSample.javaファイルにArrayAdapterを継承したTableAdapterクラスを作
成 ジェネリックにRowModelを指定する
getViewをオーバーライドしたメソッドを作成
※内部クラスとして定義す
る
class TableAdapter extends ArrayAdapter<RowModel> {
public TableAdapter(Context context) {
super(context, R.layout.list_row);
}
@Override
public View getView(int position, View convertView, ViewGroup parent) {
RowModel item = getItem(position);
if (convertView == null) {
// Viewを作成する
LayoutInflater inflater = getLayoutInflater();
convertView = inflater.inflate(R.layout.list_row, null);
}
This material is licensed under the Creative Commons License BY-NC-SA 4.0.
ⅰ - 82
83.
手順 2. カスタムAdapterを作成す
る(4)
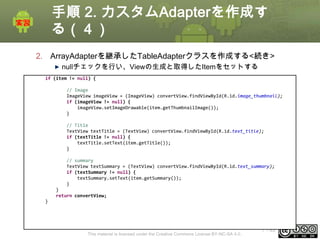
2.ArrayAdapterを継承したTableAdapterクラスを作成する<続き>
nullチェックを行い、Viewの生成と取得したItemをセットする
if (item != null) {
// Image
ImageView imageView = (ImageView) convertView.findViewById(R.id.image_thumbnail);
if (imageView != null) {
imageView.setImageDrawable(item.getThumbnailImage());
}
// Title
TextView textTitle = (TextView) convertView.findViewById(R.id.text_title);
if (textTitle != null) {
textTitle.setText(item.getTitle());
}
// summary
TextView textSummary = (TextView) convertView.findViewById(R.id.text_summary);
if (textSummary != null) {
textSummary.setText(item.getSummary());
}
}
return convertView;
}
This material is licensed under the Creative Commons License BY-NC-SA 4.0.
ⅰ - 83
84.
手順 2. カスタムAdapterを作成す
る(5)
3.Adapterと値のセット
MainActivityのonCreateメソッドでsetListAdapterでTableAdapterをセット
リソースからテキスト配列を取得する
public void onCreate(Bundle savedInstanceState) {
super.onCreate(savedInstanceState);
setContentView(R.layout.activity_list_sample);
TableAdapter adapter= new TableAdapter(this);
setListAdapter(adapter);
//RowModelの作成
String[] titles = getResources().getStringArray(R.array.titles);
String[] summaries =
getResources().getStringArray(R.array.summaries);
Drawable image =
getResources().getDrawable(R.drawable.ic_launcher);
int num = titles.length;
This material is licensed under the Creative Commons License BY-NC-SA 4.0.
ⅰ - 84
85.
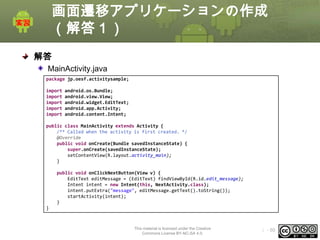
手順 2. カスタムAdapterを作成す
る(6)
3.Adapterと値のセット <続き>
取得した配列からRowModelの値をセット
RowModelをAdapterにセットする
for(int i = 0; i < num; i++){
RowModel row = new RowModel();
row.setTitle(titles[i]);
row.setSummary(summaries[i]);
row.setThumbnailImage(image);
adapter.add(row);
}
This material is licensed under the Creative Commons License BY-NC-SA 4.0.
ⅰ - 85
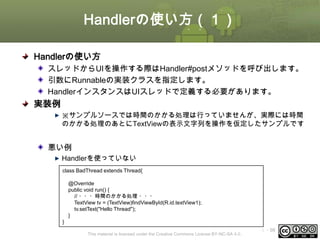
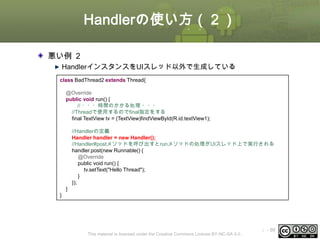
Handlerの使い方(2)
悪い例 2
HandlerインスタンスをUIスレッド以外で生成している
class BadThread2extends Thread{
@Override
public void run() {
// ・・・時間のかかる処理 ・・・
//Threadで使用するのでfinal指定をする
final TextView tv = (TextView)findViewById(R.id.textView1);
//Handlerの定義
Handler handler = new Handler();
//Handler#postメソッドを呼び出すとrunメソッドの処理がUIスレッド上で実行される
handler.post(new Runnable() {
@Override
public void run() {
tv.setText("Hello Thread");
}
});
}
}
This material is licensed under the Creative Commons License BY-NC-SA 4.0.
ⅰ - 99
100.
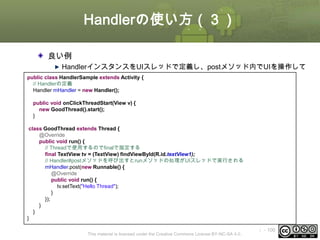
Handlerの使い方(3)
良い例
HandlerインスタンスをUIスレッドで定義し、postメソッド内でUIを操作して
いる
public class HandlerSampleextends Activity {
// Handlerの定義
Handler mHandler = new Handler();
public void onClickThreadStart(View v) {
new GoodThread().start();
}
class GoodThread extends Thread {
@Override
public void run() {
// Threadで使用するのでfinalで指定する
final TextView tv = (TextView) findViewById(R.id.textView1);
// Handler#postメソッドを呼び出すとrunメソッドの処理がUIスレッドで実行される
mHandler.post(new Runnable() {
@Override
public void run() {
tv.setText("Hello Thread");
}
});
}
}
}
This material is licensed under the Creative Commons License BY-NC-SA 4.0.
ⅰ - 100
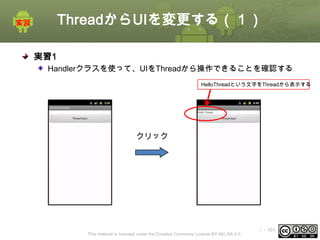
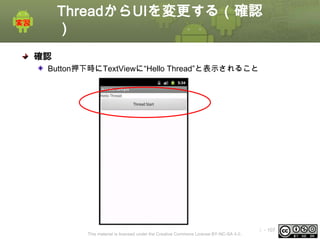
ThreadからUIを変更する(解答
)
解答
public class HandlerSampleextends Activity {
// Handlerの定義
Handler mHandler = new Handler();
@Override
public void onCreate(Bundle savedInstanceState) {
super.onCreate(savedInstanceState);
setContentView(R.layout.activity_handler_sample);
}
public void onClickThreadStart(View v) {
new GoodThread().start();
}
class GoodThread extends Thread {
@Override
public void run() {
// Threadで使用するのでfinalで指定する
final TextView tv = (TextView) findViewById(R.id.textView1);
// Handler#postメソッドを呼び出すとrunメソッドの処理がUIスレッドで実行される
mHandler.post(new Runnable() {
@Override
public void run() {
tv.setText("Hello Thread");
}
});
}
}
}
This material is licensed under the Creative Commons License BY-NC-SA 4.0.
ⅰ - 108
109.
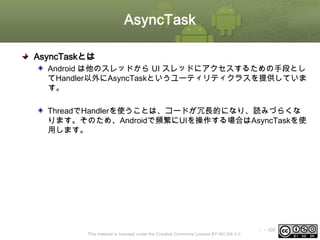
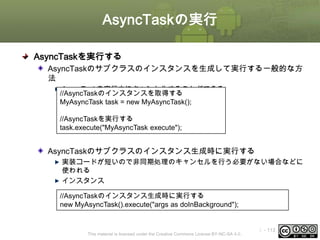
AsyncTask
AsyncTaskとは
Android は他のスレッドから UIスレッドにアクセスするための手段とし
てHandler以外にAsyncTaskというユーティリティクラスを提供していま
す。
ThreadでHandlerを使うことは、コードが冗長的になり、読みづらくな
ります。そのため、Androidで頻繁にUIを操作する場合はAsyncTaskを使
用します。
This material is licensed under the Creative Commons License BY-NC-SA 4.0.
ⅰ - 109
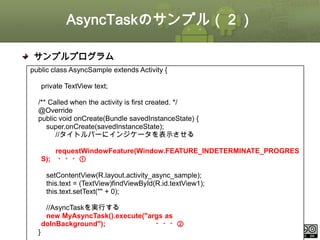
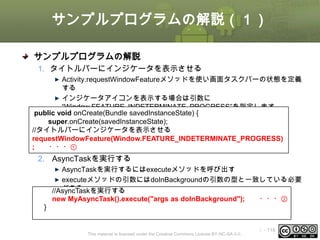
AsyncTaskのサンプル(2)
サンプルプログラム
public class AsyncSampleextends Activity {
private TextView text;
/** Called when the activity is first created. */
@Override
public void onCreate(Bundle savedInstanceState) {
super.onCreate(savedInstanceState);
//タイトルバーにインジケータを表示させる
requestWindowFeature(Window.FEATURE_INDETERMINATE_PROGRES
S); ・・・①
setContentView(R.layout.activity_async_sample);
this.text = (TextView)findViewById(R.id.textView1);
this.text.setText("" + 0);
//AsyncTaskを実行する
new MyAsyncTask().execute("args as
doInBackground");
・・・②
}
This material is licensed under the Creative Commons License BY-NC-SA 4.0.
ⅰ - 115
116.
AsyncTaskのサンプル(3)
サンプルプログラム
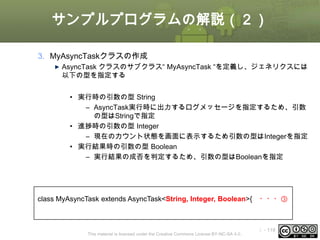
class MyAsyncTask extendsAsyncTask<String, Integer, Boolean>{
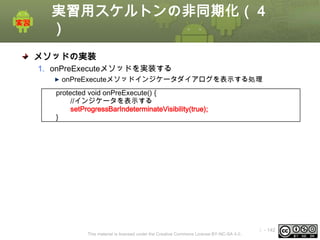
@Override
protected void onPreExecute()
{
・・・④
//onPreExecuteではHandlerを使わずにUIを変更できる
//インジケータを表示する
setProgressBarIndeterminateVisibility(true);
}
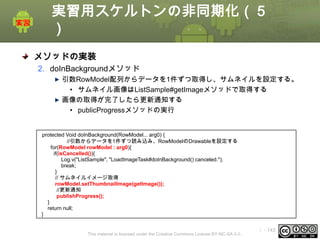
@Override
protected Boolean doInBackground(String... params) {
Log.v("MyAsyncTask", "param:" + params[0]);
for( int i = 0; i <= 10; i++){
try {
//進捗状況の更新通知
publishProgress(i);
・・・⑥ −1
Thread.sleep(1000);
} catch (InterruptedException e) {
e.printStackTrace();under the Creative Commons License BY-NC-SA 4.0.
This material is licensed
・・・③
・・・⑤
ⅰ - 116
117.
AsyncTaskのサンプル(4)
サンプルプログラム
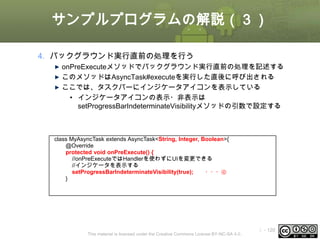
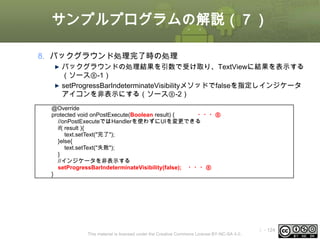
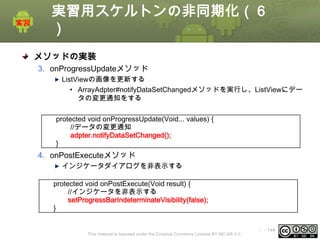
@Override
protected void onPostExecute(Booleanresult) {
・・・⑧-1
//onPostExecuteではHandlerを使わずにUIを変更できる
if( result ){
text.setText("完了");
}else{
text.setText("失敗");
}
//インジケータを非表示する
setProgressBarIndeterminateVisibility(false);
・・・⑧-2
}
@Override
protected void onProgressUpdate(Integer... values) { ・・・⑥−2
//onProgressUpdateではHandlerを使わずにUIを変更できる
text.setText("" + values[0]);
}
}
}
This material is licensed under the Creative Commons License BY-NC-SA 4.0.
ⅰ - 117
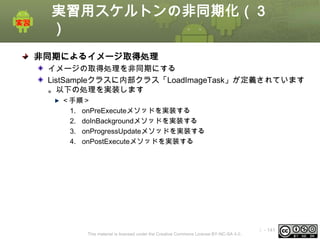
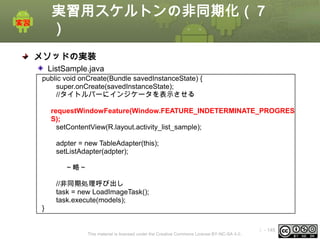
実習用スケルトンの非同期化(7
)
メソッドの実装
ListSample.java
public void onCreate(BundlesavedInstanceState) {
super.onCreate(savedInstanceState);
//タイトルバーにインジケータを表示させる
requestWindowFeature(Window.FEATURE_INDETERMINATE_PROGRES
S);
setContentView(R.layout.activity_list_sample);
adpter = new TableAdapter(this);
setListAdapter(adpter);
~略~
//非同期処理呼び出し
task = new LoadImageTask();
task.execute(models);
}
This material is licensed under the Creative Commons License BY-NC-SA 4.0.
ⅰ - 145
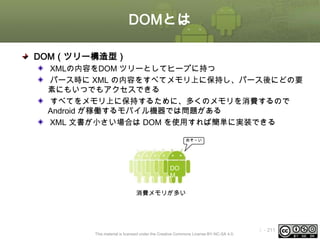
DOMとは
DOM(ツリー構造型)
XMLの内容をDOM ツリーとしてヒープに持つ
パース時に XMLの内容をすべてメモリ上に保持し、パース後にどの要
素にもいつでもアクセスできる
すべてをメモリ上に保持するために、多くのメモリを消費するので
Android が稼働するモバイル機器では問題がある
XML 文書が小さい場合は DOM を使用すれば簡単に実装できる
おそ~い
DO
M
消費メモリが多い
This material is licensed under the Creative Commons License BY-NC-SA 4.0.
ⅰ - 211
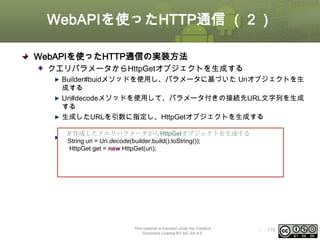
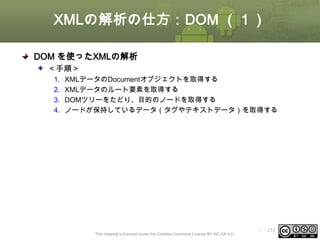
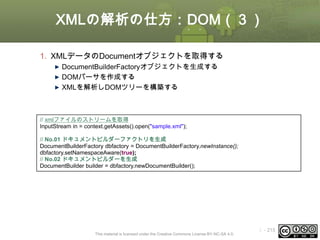
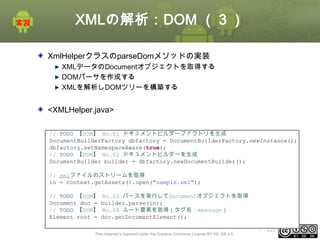
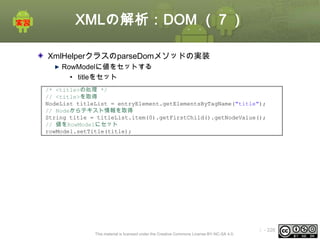
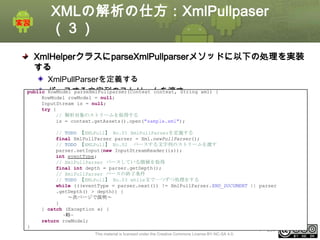
XMLの解析の仕方:DOM(4)
2. XMLデータのルート要素を取得する
3. DOMツリーをたどり、目的のノードを取得する
4.ノードが保持しているデータ(タグやテキストデータ)を取得する
InputStream in = null;
try {
// ドキュメントビルダーファクトリを生成
DocumentBuilderFactory dbfactory = DocumentBuilderFactory
.newInstance();
// ドキュメントビルダーを生成
DocumentBuilder builder = dbfactory.newDocumentBuilder();
// xmlファイルのストリームを取得
in = getAssets().open("sample.xml");
// パースを実行してDocumentオブジェクトを取得
Document doc = builder.parse(in);
// ルート要素を取得(タグ名:root)
Element root = doc.getDocumentElement();
// <node1>を取得
NodeList entryList = root.getElementsByTagName("node1");
// 最初の<node1>を取得
Element node1Element = (Element) entryList.item(0);
// <node1>の値を取得
String nodevalue = node1Element.getFirstChild().getNodeValue();
// 値を表示
Log.v(TAG, nodevalue);
} catch (Exception e) {
This material is licensed under the Creative Commons License BY-NC-SA 4.0.
ⅰ - 216
217.
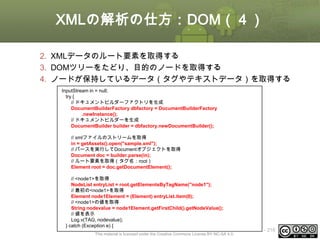
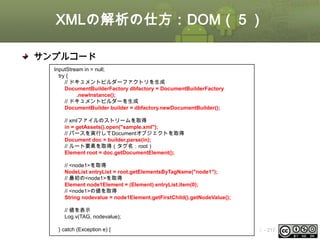
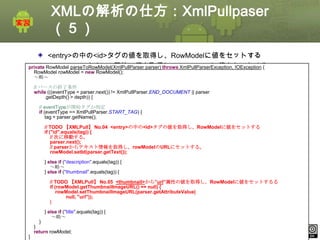
XMLの解析の仕方:DOM(5)
サンプルコード
InputStream in =null;
try {
// ドキュメントビルダーファクトリを生成
DocumentBuilderFactory dbfactory = DocumentBuilderFactory
.newInstance();
// ドキュメントビルダーを生成
DocumentBuilder builder = dbfactory.newDocumentBuilder();
// xmlファイルのストリームを取得
in = getAssets().open("sample.xml");
// パースを実行してDocumentオブジェクトを取得
Document doc = builder.parse(in);
// ルート要素を取得(タグ名:root)
Element root = doc.getDocumentElement();
// <node1>を取得
NodeList entryList = root.getElementsByTagName("node1");
// 最初の<node1>を取得
Element node1Element = (Element) entryList.item(0);
// <node1>の値を取得
String nodevalue = node1Element.getFirstChild().getNodeValue();
// 値を表示
Log.v(TAG, nodevalue);
} catch (Exception e) {
This material is licensed under the Creative Commons License BY-NC-SA 4.0.
ⅰ - 217
218.
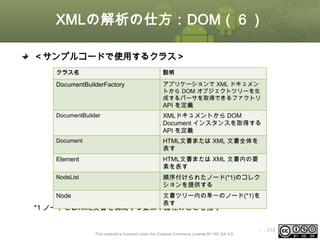
XMLの解析の仕方:DOM(6)
<サンプルコードで使用するクラス>
クラス名
説明
DocumentBuilderFactory
アプリケーションで XML ドキュメン
トからDOM オブジェクトツリーを生
成するパーサを取得できるファクトリ
API を定義
DocumentBuilder
XMLドキュメントから DOM
Document インスタンスを取得する
API を定義
Document
HTML文書または XML 文書全体を
表す
Element
HTML文書または XML 文書内の要
素を表す
NodeList
順序付けられたノード(*1)のコレク
ションを提供する
Node
文書ツリー内の単一のノード(*1)を
表す
*1 ノードとはXML文書を構成する要素や属性のことを指す
This material is licensed under the Creative Commons License BY-NC-SA 4.0.
ⅰ - 218
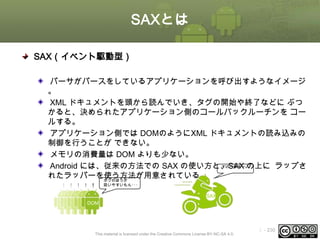
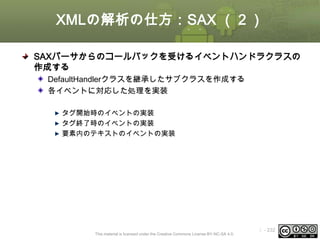
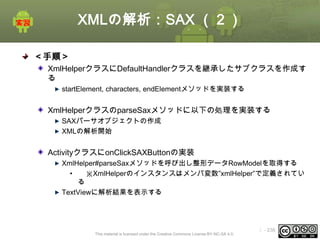
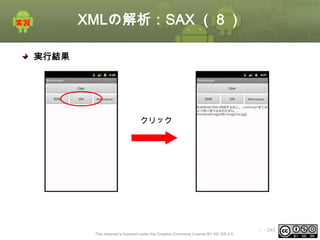
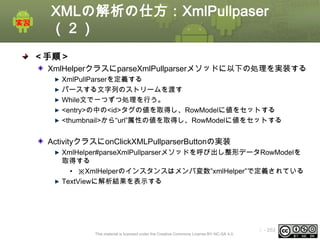
XMLの解析:SAX (2)
<手順>
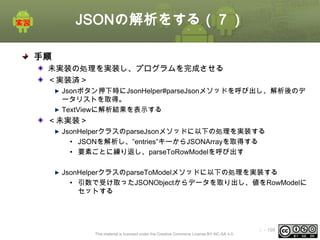
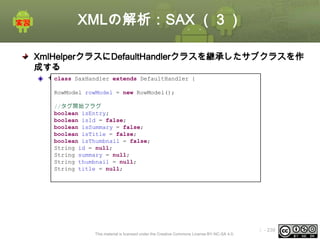
XmlHelperクラスにDefaultHandlerクラスを継承したサブクラスを作成す
る
startElement, characters,endElementメソッドを実装する
XmlHelperクラスのparseSaxメソッドに以下の処理を実装する
SAXパーサオブジェクトの作成
XMLの解析開始
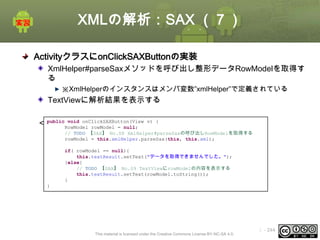
ActivityクラスにonClickSAXButtonの実装
XmlHelper#parseSaxメソッドを呼び出し整形データRowModelを取得する
•
※XmlHelperのインスタンスはメンバ変数”xmlHelper”で定義されてい
る
TextViewに解析結果を表示する
This material is licensed under the Creative Commons License BY-NC-SA 4.0.
ⅰ - 238
239.
XMLの解析:SAX (3)
XmlHelperクラスにDefaultHandlerクラスを継承したサブクラスを作
成する
class SaxHandler
サブクラスの定義extends
DefaultHandler {
RowModel rowModel = new RowModel();
//タグ開始フラグ
boolean isEntry;
boolean isId = false;
boolean isSummary = false;
boolean isTitle = false;
boolean isThumbnail = false;
String id = null;
String summary = null;
String thumbnail = null;
String title = null;
This material is licensed under the Creative Commons License BY-NC-SA 4.0.
ⅰ - 239
240.
XMLの解析:SAX (4)
XmlHelperクラスにDefaultHandlerクラスを継承したサブクラスを作
成する
class SaxHandlerextends DefaultHandler {
startElement, characters, endElementメソッドを実装する
~略~
@Override
public void startElement(String uri, String localName, String qName,
Attributes attributes) throws SAXException {
~略~
}
@Override
public void endElement(String uri, String localName, String qName)
throws SAXException {
~略~
}
@Override
public void characters(char[] ch, int start, int length)
throws SAXException {
~略~
}
}
This material is licensed under the Creative Commons License BY-NC-SA 4.0.
ⅰ - 240
241.
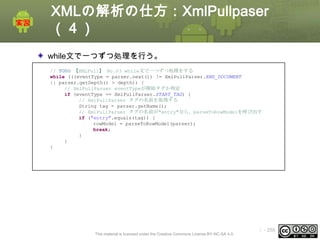
XMLの解析:SAX (5)
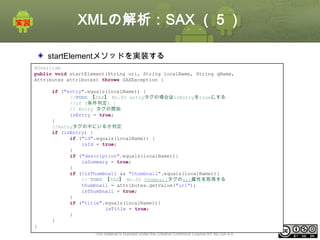
startElementメソッドを実装する
@Override
public voidstartElement(String uri, String localName, String qName,
Attributes attributes) throws SAXException {
if ("entry".equals(localName)) {
//TODO 【SAX】 No.01 entryタグの場合はisEntryをtrueにする
//if (条件判定) {
// Entry タグの開始
isEntry = true;
}
//entryタグの中にいるか判定
if (isEntry) {
if ("id".equals(localName)) {
isId = true;
}
if ("description".equals(localName)){
isSummary = true;
}
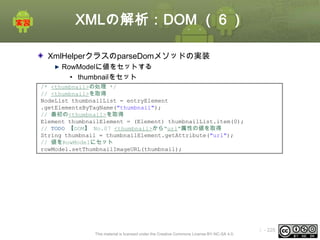
if (!isThumbnail && "thumbnail".equals(localName)){
// TODO 【SAX】 No.02 thumnailタグのurl属性を取得する
thumbnail = attributes.getValue("url");
isThumbnail = true;
}
if ("title".equals(localName)){
isTitle = true;
}
}
}
This material is licensed under the Creative Commons License BY-NC-SA 4.0.
ⅰ - 241
242.
XMLの解析:SAX (5)
charactersメソッドを実装する
@Override
public voidcharacters(char[] ch, int start, int length) throws SAXException {
if (isEntry) {
if (isId) {
//idを取得する
id = new String(ch, start, length);
isId = false;
}
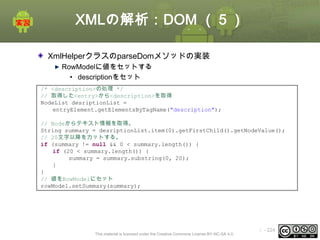
if (isSummary) {
//descriptionを取得する
summary = new String(ch, start, length);
if (summary != null && 0 < summary.length()) {
if (20 < length) {
summary = summary.substring(0, 20);
}
}
isSummary = false;
}
if (isTitle) {
// TODO 【SAX】 No.04 titleを取得する
title = new String(ch, start, length);
isTitle = false;
}
}
}
This material is licensed under the Creative Commons License BY-NC-SA 4.0.
ⅰ - 242
243.
XMLの解析:SAX (6)
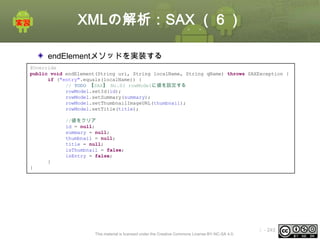
endElementメソッドを実装する
@Override
public voidendElement(String uri, String localName, String qName) throws SAXException {
if ("entry".equals(localName)) {
// TODO 【SAX】 No.03 rowModelに値を設定する
rowModel.setId(id);
rowModel.setSummary(summary);
rowModel.setThumbnailImageURL(thumbnail);
rowModel.setTitle(title);
//値をクリア
id = null;
summary = null;
thumbnail = null;
title = null;
isThumbnail = false;
isEntry = false;
}
}
This material is licensed under the Creative Commons License BY-NC-SA 4.0.
ⅰ - 243
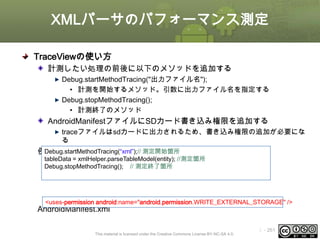
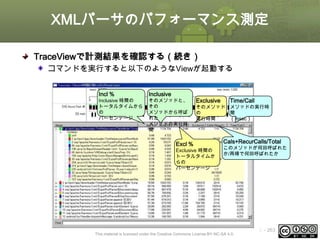
XMLパーサのパフォーマンス測定
TraceViewで計測結果を確認する
<手順>
出力した trace ログファイルをDDMS を使って PC に格納する。
コマンドプロンプトより traceview [ファイル名] として実行する。
※AndroidSDKのバージョンが12以前では[ファイル名]はフルパスで指定する
必要がある。以下の例ではC:work時間計測xml.traceとなっている
This material is licensed under the Creative Commons License BY-NC-SA 4.0.
ⅰ - 262
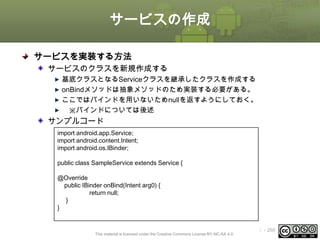
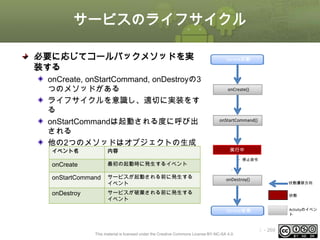
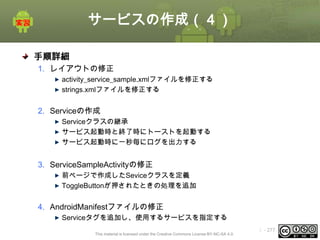
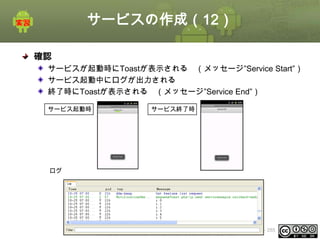
サービスの作成(5)
スケルトンプログラムの内容
<ServiceSampleActivity.java>
public void onClickServiceButton(Viewv){
ToggleButton tb = (ToggleButton)v;
if( tb.isChecked()){
// TODO No.01 サービスを開始する
Intent intent = new Intent(this, ServiceSampleService.class);
startService(intent);
}else{
// TODO No.02 サービスを終了する
Intent intent = new Intent(this, ServiceSampleService.class);
stopService(intent);
}
}
トグルボタンが押された
ときの処理
This material is licensed under the Creative Commons License BY-NC-SA 4.0.
ⅰ - 278
279.
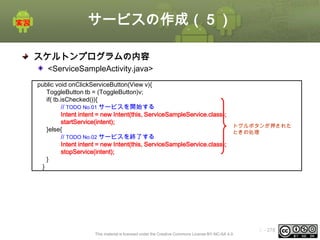
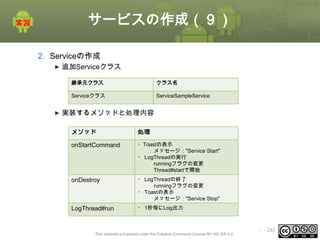
サービスの作成(6)
スケルトンプログラムの内容
<ServiceSampleService.java>
public class ServiceSampleServiceextends Service {
AtomicBoolean running = new AtomicBoolean(false);
LogThread thread = new LogThread();
スレッドランニングフラグ
@Overrid
public IBinder onBind(Intent intent) {
return null;
}
@Override
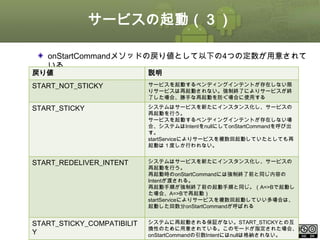
public int onStartCommand(Intent intent, int flags, int startId) {
//TODO No.03 Toastを表示する
Toast.makeText(this, “Service Start”, Toast.LENGTH_SHORT).show();
サービス開始時の処理
//TODO No.04 runnigフラグの変更
running.set(true);
//TODO No.05 Threadの開始
thread.start();
return START_STICKY;
}
This material is licensed under the Creative Commons License BY-NC-SA 4.0.
ⅰ - 279
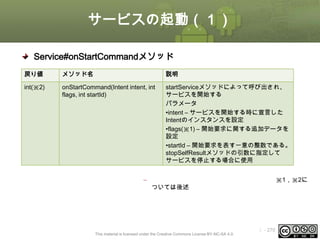
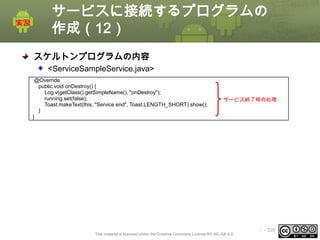
280.
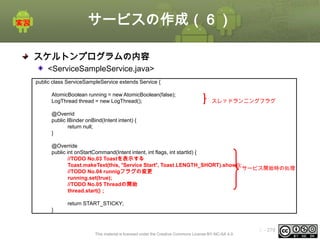
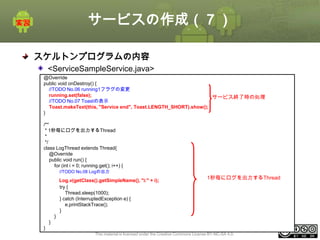
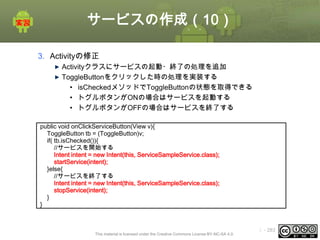
サービスの作成(7)
スケルトンプログラムの内容
<ServiceSampleService.java>
@Override
public void onDestroy(){
//TODO No.06 running1フラグの変更
running.set(false);
サービス終了時の処理
//TODO No.07 Toastの表示
Toast.makeText(this, "Service end", Toast.LENGTH_SHORT).show();
}
/**
* 1秒毎にログを出力するThread
*
*/
class LogThread extends Thread{
@Override
public void run() {
for (int i = 0; running.get(); i++) {
//TODO No.08 Logの出力
Log.v(getClass().getSimpleName(), "i:" + i);
try {
Thread.sleep(1000);
} catch (InterruptedException e) {
e.printStackTrace();
}
1秒毎にログを出力するThread
}
}
}
This material is licensed under the Creative Commons License BY-NC-SA 4.0.
ⅰ - 280
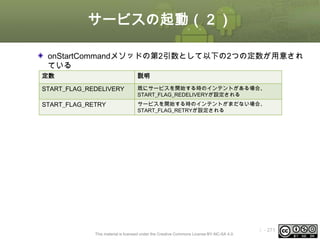
281.
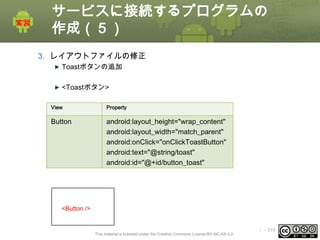
サービスの作成(8)
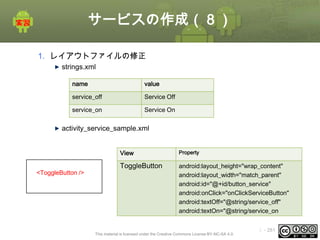
1. レイアウトファイルの修正
strings.xml
name
value
service_off
Service Off
service_on
ServiceOn
activity_service_sample.xml
階層構造
<LinearLayout>
<ToggleButton />
</LinearLayout>
View
Property
ToggleButton
android:layout_height="wrap_content"
android:layout_width="match_parent"
android:id="@+id/button_service"
android:onClick="onClickServiceButton"
android:textOff="@string/service_off"
android:textOn="@string/service_on
This material is licensed under the Creative Commons License BY-NC-SA 4.0.
ⅰ - 281
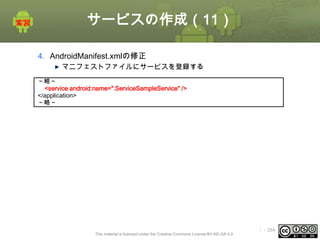
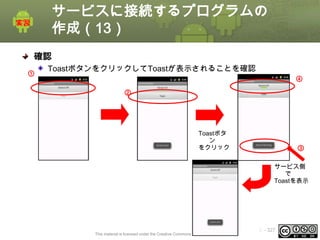
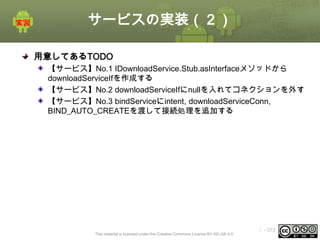
サービスの作成 [補足実習 1]
実習2補足1
実習2で作成したアプリケーションには以下のバグが存在するので修正
する
ToggleButtonをクリックし
てServiceを起動する
「ServiceSample」アプリ
ケーションを起動する
ToggleButtonをクリックし
てServiceを起動する
①
エラーが発生する
③
バックキー
を押下する
②
This material is licensed under the Creative Commons License BY-NC-SA 4.0.
④
ⅰ - 288
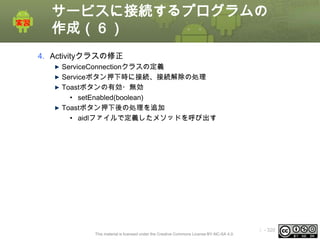
サービスの作成 [補足実習 2]
実習2補足2
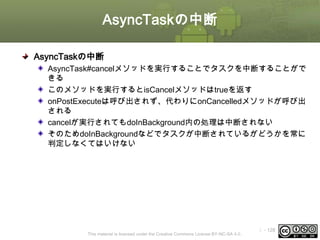
実習2 補足1の解答例ではThreadの複数起動ができませんでした。
実習2で作成したアプリケーションにThreadの複数起動処理に対応した
修正をしてエラーが発生しないことを確認してください
解答
解答ドキュメントを参照 「第11章 Service
実習2 補足2 解答」
This material is licensed under the Creative Commons License BY-NC-SA 4.0.
ⅰ - 290
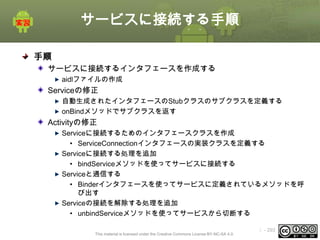
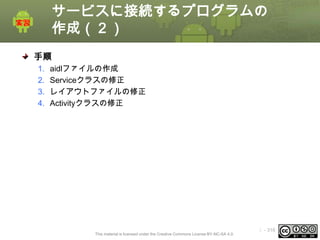
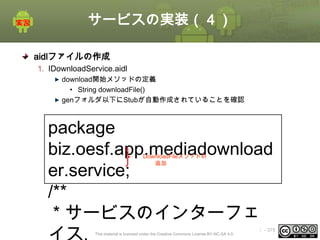
手順 1. サービス接続インタフェース
の作成(2)
aidlファイルとは
サービスに実装するメソッドを定義したインターフェイスファイル
aidlで記述されたファイルの拡張子は.aidl
aidlファイルにサービスに実装させたいインターフェースを記述する
aidlファイルにはjavaの構文をそのまま使える
aidlファイルを使うことで、Activityから、サービスに実装されているインタ
フェースを経由してpublicメソッドを呼び出すことができる
This material is licensed under the Creative Commons License BY-NC-SA 4.0.
ⅰ - 295
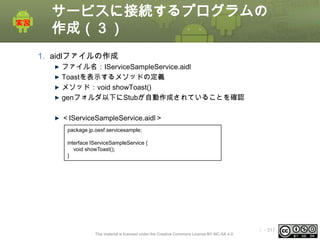
296.
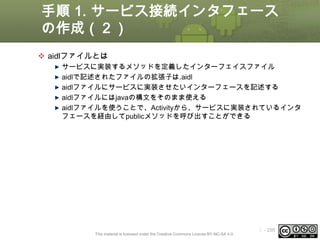
手順 1. サービス接続インタフェース
の作成(3)
1.aidlファイルの作成 (続き)
メソッドを定義する
package jp.oesf.servicesample;
interface IServiceSampleService{
void showToast();
}
自動生成されたjavaファイルの確認
• ソースコードと同じディレクトリにaidlファイルを保存すると、
Eclipseが自動的にコンパイルし、Javaのインターフェースが生成される
– gen/aidlファイル名.javaファイルが作成される
This material is licensed under the Creative Commons License BY-NC-SA 4.0.
ⅰ - 296
297.
手順 1. サービス接続インタフェース
の作成(4)
自動作成されたjavaファイルについて
作成されたインターフェースの中には、Stubと呼ばれる抽象クラスが作成さ
れている。
• [インタフェース名].Stubインタフェースで作成される
• aidlに定義したメソッドがオーバライドされている
Stubクラスを使用することによってプロセス間でメソッドの呼び出しが可能
になる。
public interface IServiceSampleService extends android.os.IInterface {
/** Local-side IPC implementation stub class. */
public static abstract class Stub extends android.os.Binder implements
jp.oesf.servicesample.IServiceSampleService {
private static final java.lang.String DESCRIPTOR =
"jp.oesf.servicesample.IServiceSampleService";
/** Construct the stub at attach it to the interface. */
public Stub() {
this.attachInterface(this, DESCRIPTOR);
}
~略~
public void showToast() throws android.os.RemoteException;
}
※実際のファイルはインデントされていません。
This material is licensed under the Creative Commons License BY-NC-SA 4.0.
ⅰ - 297
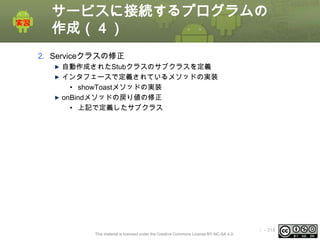
298.
手順 2. Serviceの修正
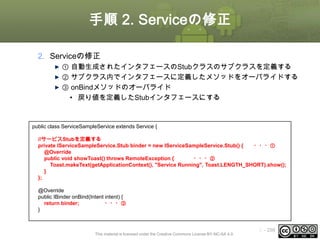
2.Serviceの修正
① 自動生成されたインタフェースのStubクラスのサブクラスを定義する
② サブクラス内でインタフェースに定義したメソッドをオーバライドする
③ onBindメソッドのオーバライド
• 戻り値を定義したStubインタフェースにする
public class ServiceSampleService extends Service {
//サービスStubを定義する
private IServiceSampleService.Stub binder = new IServiceSampleService.Stub() {
・・・①
@Override
public void showToast() throws RemoteException {
・・・②
Toast.makeText(getApplicationContext(), "Service Running", Toast.LENGTH_SHORT).show();
}
};
@Override
public IBinder onBind(Intent intent) {
return binder;
・・・③
}
This material is licensed under the Creative Commons License BY-NC-SA 4.0.
ⅰ - 298
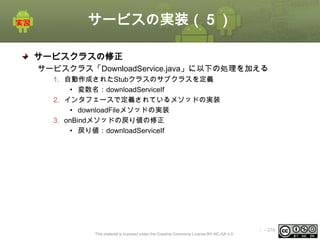
299.
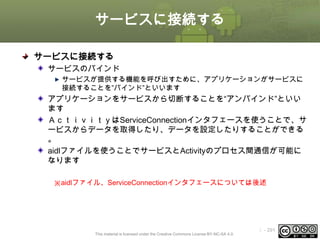
手順 3. Activityの修正(1)
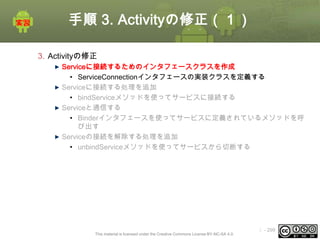
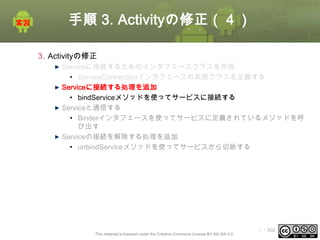
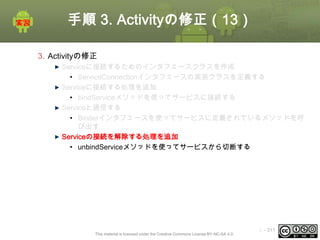
3.Activityの修正
Serviceに接続するためのインタフェースクラスを作成
• ServiceConnectionインタフェースの実装クラスを定義する
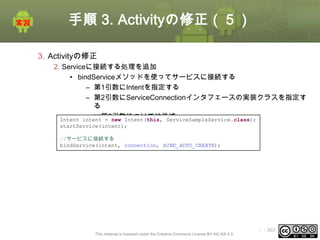
Serviceに接続する処理を追加
• bindServiceメソッドを使ってサービスに接続する
Serviceと通信する
• Binderインタフェースを使ってサービスに定義されているメソッドを呼
び出す
Serviceの接続を解除する処理を追加
• unbindServiceメソッドを使ってサービスから切断する
This material is licensed under the Creative Commons License BY-NC-SA 4.0.
ⅰ - 299
300.
手順 3. Activityの修正(2)
ServiceConnectionインタフェースとは
サービス接続した時と異常終了した時のコールバックメソッドが定義されて
いる。
• サービス接続時:onServiceConnected
– Context#bindServiceを使ってサービスにバインドする
– バインドすると、ServiceConnection#onServiceConnected がコー
ルバックされる。
– onServiceConnectedメソッドの引数でStubインタフェースを取得
– このStubインタフェースを使ってサービスに定義してあるメソッド
を呼び出すことができる
• 異常終了時:onServiceDisconnected
– サービスがクラッシュしたり強制終了などのときにAndroidシステ
ムよりonServiceDisconnectedメソッドがコールバックされる
– Context#unbindServiceを使ってサービスからアンバインドしても
呼び出されることはない
This material is licensed under the Creative Commons License BY-NC-SA 4.0.
ⅰ - 300
301.
手順 3. Activityの修正(3)
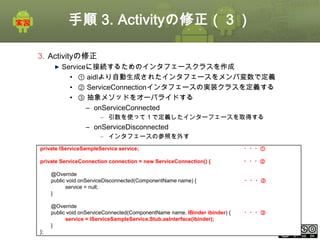
3.Activityの修正
Serviceに接続するためのインタフェースクラスを作成
• ① aidlより自動生成されたインタフェースをメンバ変数で定義
• ② ServiceConnectionインタフェースの実装クラスを定義する
• ③ 抽象メソッドをオーバライドする
– onServiceConnected
– 引数を使って1で定義したインターフェースを取得する
– onServiceDisconnected
– インタフェースの参照を外す
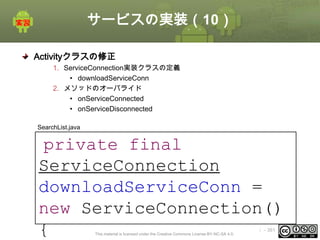
private IServiceSampleService service;
・・・①
private ServiceConnection connection = new ServiceConnection() {
・・・②
@Override
public void onServiceDisconnected(ComponentName name) {
service = null;
}
@Override
public void onServiceConnected(ComponentName name, IBinder ibinder) {
service = IServiceSampleService.Stub.asInterface(ibinder);
}
};
This material is licensed under the Creative Commons License BY-NC-SA 4.0.
・・・③
・・・③
ⅰ - 301
302.
手順 3. Activityの修正(4)
3.Activityの修正
Serviceに接続するためのインタフェースクラスを作成
• ServiceConnectionインタフェースの実装クラスを定義する
Serviceに接続する処理を追加
• bindServiceメソッドを使ってサービスに接続する
Serviceと通信する
• Binderインタフェースを使ってサービスに定義されているメソッドを呼
び出す
Serviceの接続を解除する処理を追加
• unbindServiceメソッドを使ってサービスから切断する
This material is licensed under the Creative Commons License BY-NC-SA 4.0.
ⅰ - 302
303.
手順 3. Activityの修正(5)
3.Activityの修正
2. Serviceに接続する処理を追加
• bindServiceメソッドを使ってサービスに接続する
– 第1引数にIntentを指定する
– 第2引数にServiceConnectionインタフェースの実装クラスを指定す
る
– ※第3引数については後述
Intent intent = new Intent(this, ServiceSampleService.class);
startService(intent);
//サービスに接続する
bindService(intent, connection, BIND_AUTO_CREATE);
This material is licensed under the Creative Commons License BY-NC-SA 4.0.
ⅰ - 303
304.
手順 3. Activityの修正(6)
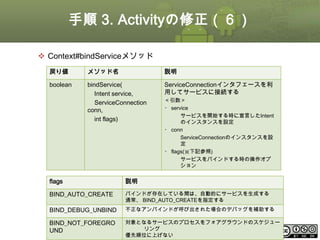
Context#bindServiceメソッド
戻り値
メソッド名
説明
boolean
bindService(
Intent service,
ServiceConnection
conn,
int flags)
ServiceConnectionインタフェースを利
用してサービスに接続する
<引数>
・ service
サービスを開始する時に宣言したIntent
のインスタンスを設定
・ conn
ServiceConnectionのインスタンスを設
定
・ flags(※下記参照)
サービスをバインドする時の操作オプ
ション
bindServiceメソッドの第3引数で指定する定数
flags
説明
BIND_AUTO_CREATE
バインドが存在している間は、自動的にサービスを生成する
通常、 BIND_AUTO_CREATEを指定する
BIND_DEBUG_UNBIND
不正なアンバインドが呼び出された場合のデバッグを補助する
対象となるサービスのプロセスをフォアグラウンドのスケジュー
BIND_NOT_FOREGRO
リング
ⅰ - 304
UND
This material is licensed under the Creative Commons License BY-NC-SA 4.0.
優先順位に上げない
305.
手順 3. Activityの修正(7)
3.Activityの修正
2. Serviceに接続する処理を追加(続き)
• bindServiceを実行すると、Service#onBindメソッドが呼び出され、
ServiceConnection#onServiceConnectedがコールバックされる
• onServiceConnectedの第2引数IBinderでonBindの戻り値で指定したイン
タフェースが取得できる
private ServiceConnection connection = new ServiceConnection() {
〜略〜
@Override
public void onServiceConnected(ComponentName name, IBinder ibinder) {
service = IServiceSampleService.Stub.asInterface(ibinder);
}
};
This material is licensed under the Creative Commons License BY-NC-SA 4.0.
ⅰ - 305
306.
手順 3. Activityの修正(8)
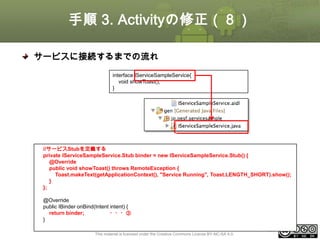
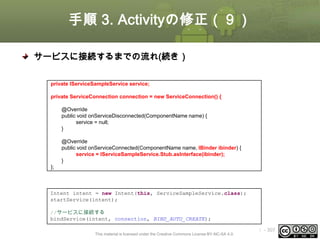
サービスに接続するまでの流れ
①aidlファイルを作成
interface IServiceSampleService{
void showToast();
}
② javaインタフェース
が自動生成される
③ インタフェースの実装とonBindのオーバライド
//サービスStubを定義する
private IServiceSampleService.Stub binder = new IServiceSampleService.Stub() {
@Override
public void showToast() throws RemoteException {
Toast.makeText(getApplicationContext(), "Service Running", Toast.LENGTH_SHORT).show();
}
};
@Override
public IBinder onBind(Intent intent) {
return binder;
・・・③
}
This material is licensed under the Creative Commons License BY-NC-SA 4.0.
ⅰ - 306
307.
手順 3. Activityの修正(9)
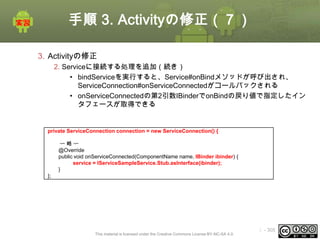
サービスに接続するまでの流れ(続き)
④ServiceConnectionインタフェースの実装クラスを定義
private IServiceSampleService service;
private ServiceConnection connection = new ServiceConnection() {
@Override
public void onServiceDisconnected(ComponentName name) {
service = null;
}
@Override
public void onServiceConnected(ComponentName name, IBinder ibinder) {
service = IServiceSampleService.Stub.asInterface(ibinder);
}
};
⑤ サービスに接続する
Intent intent = new Intent(this, ServiceSampleService.class);
startService(intent);
//サービスに接続する
bindService(intent, connection, BIND_AUTO_CREATE);
This material is licensed under the Creative Commons License BY-NC-SA 4.0.
ⅰ - 307
308.
手順 3. Activityの修正(10)
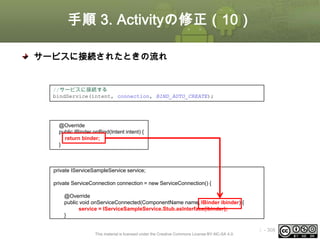
サービスに接続されたときの流れ
①サービスに接続する
//サービスに接続する
bindService(intent, connection, BIND_AUTO_CREATE);
② Service#onBIndが呼び出される
@Override
public IBinder onBind(Intent intent) {
return binder;
}
③ ServiceConnection#onServiceConnectedが呼び出される
private IServiceSampleService service;
private ServiceConnection connection = new ServiceConnection() {
@Override
public void onServiceConnected(ComponentName name, IBinder ibinder) {
service = IServiceSampleService.Stub.asInterface(ibinder);
}
This material is licensed under the Creative Commons License BY-NC-SA 4.0.
ⅰ - 308
309.
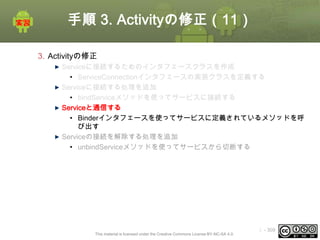
手順 3. Activityの修正(11)
3.Activityの修正
Serviceに接続するためのインタフェースクラスを作成
• ServiceConnectionインタフェースの実装クラスを定義する
Serviceに接続する処理を追加
• bindServiceメソッドを使ってサービスに接続する
Serviceと通信する
• Binderインタフェースを使ってサービスに定義されているメソッドを呼
び出す
Serviceの接続を解除する処理を追加
• unbindServiceメソッドを使ってサービスから切断する
This material is licensed under the Creative Commons License BY-NC-SA 4.0.
ⅰ - 309
310.
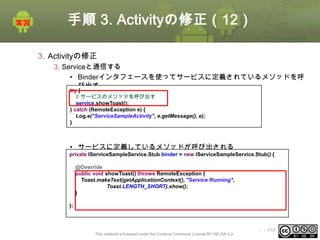
手順 3. Activityの修正(12)
3.Activityの修正
3. Serviceと通信する
• Binderインタフェースを使ってサービスに定義されているメソッドを呼
び出す
try {
// サービスのメソッドを呼び出す
service.showToast();
} catch (RemoteException e) {
Log.e("ServiceSampleActivity", e.getMessage(), e);
}
• サービスに定義しているメソッドが呼び出される
private IServiceSampleService.Stub binder = new IServiceSampleService.Stub() {
@Override
public void showToast() throws RemoteException {
Toast.makeText(getApplicationContext(), "Service Running",
Toast.LENGTH_SHORT).show();
}
};
This material is licensed under the Creative Commons License BY-NC-SA 4.0.
ⅰ - 310
311.
手順 3. Activityの修正(13)
3.Activityの修正
Serviceに接続するためのインタフェースクラスを作成
• ServiceConnectionインタフェースの実装クラスを定義する
Serviceに接続する処理を追加
• bindServiceメソッドを使ってサービスに接続する
Serviceと通信する
• Binderインタフェースを使ってサービスに定義されているメソッドを呼
び出す
Serviceの接続を解除する処理を追加
• unbindServiceメソッドを使ってサービスから切断する
This material is licensed under the Creative Commons License BY-NC-SA 4.0.
ⅰ - 311
312.
手順 3. Activityの修正(14)
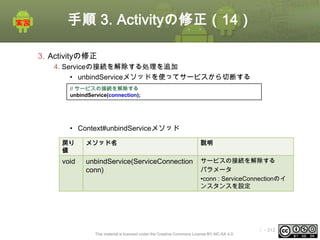
3.Activityの修正
4. Serviceの接続を解除する処理を追加
• unbindServiceメソッドを使ってサービスから切断する
// サービスの接続を解除する
unbindService(connection);
• Context#unbindServiceメソッド
戻り
値
メソッド名
説明
void
unbindService(ServiceConnection
conn)
サービスの接続を解除する
パラメータ
•conn : ServiceConnectionのイ
ンスタンスを設定
This material is licensed under the Creative Commons License BY-NC-SA 4.0.
ⅰ - 312
313.
手順 3. Activityの修正まとめ (1)
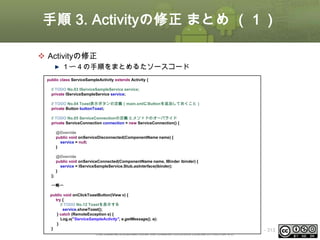
Activityの修正
1〜4の手順をまとめるたソースコード
public class ServiceSampleActivity extends Activity {
// TODO No.03 IServiceSampleService service;
private IServiceSampleService service;
// TODO No.04 Toast表示ボタンの定義(main.xmlにButtonを追加しておくこと)
private Button buttonToast;
// TODO No.05 ServiceConnectionの定義 とメソッドのオーバライド
private ServiceConnection connection = new ServiceConnection() {
@Override
public void onServiceDisconnected(ComponentName name) {
service = null;
}
@Override
public void onServiceConnected(ComponentName name, IBinder ibinder) {
service = IServiceSampleService.Stub.asInterface(ibinder);
}
};
〜略〜
public void onClickToastButton(View v) {
try {
// TODO No.12 Toastを表示する
service.showToast();
} catch (RemoteException e) {
Log.e("ServiceSampleActivity", e.getMessage(), e);
}
}
This material is licensed under the Creative Commons License BY-NC-SA 4.0.
ⅰ - 313
314.
手順 3. Activityの修正まとめ (2)
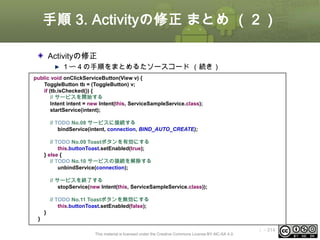
Activityの修正
1〜4の手順をまとめるたソースコード (続き)
public void onClickServiceButton(View v) {
ToggleButton tb = (ToggleButton) v;
if (tb.isChecked()) {
// サービスを開始する
Intent intent = new Intent(this, ServiceSampleService.class);
startService(intent);
// TODO No.08 サービスに接続する
bindService(intent, connection, BIND_AUTO_CREATE);
// TODO No.09 Toastボタンを有効にする
this.buttonToast.setEnabled(true);
} else {
// TODO No.10 サービスの接続を解除する
unbindService(connection);
// サービスを終了する
stopService(new Intent(this, ServiceSampleService.class));
// TODO No.11 Toastボタンを無効にする
this.buttonToast.setEnabled(false);
}
}
This material is licensed under the Creative Commons License BY-NC-SA 4.0.
ⅰ - 314
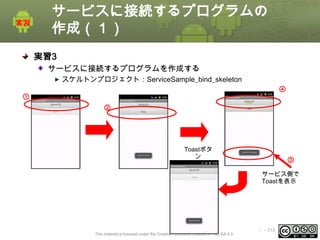
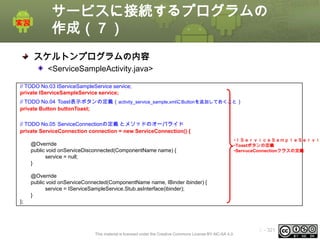
サービスに接続するプログラムの
作成(7)
スケルトンプログラムの内容
<ServiceSampleActivity.java>
// TODO No.03IServiceSampleService service;
private IServiceSampleService service;
// TODO No.04 Toast表示ボタンの定義(activity_service_sample.xmlにButtonを追加しておくこと)
private Button buttonToast;
// TODO No.05 ServiceConnectionの定義 とメソッドのオーバライド
private ServiceConnection connection = new ServiceConnection() {
@Override
public void onServiceDisconnected(ComponentName name) {
service = null;
}
•IServiceSampleServi
•Toastボタンの定義
•ServuceConnectionクラスの定義
@Override
public void onServiceConnected(ComponentName name, IBinder ibinder) {
service = IServiceSampleService.Stub.asInterface(ibinder);
}
};
This material is licensed under the Creative Commons License BY-NC-SA 4.0.
ⅰ - 321
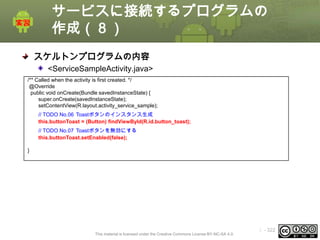
322.
サービスに接続するプログラムの
作成(8)
スケルトンプログラムの内容
<ServiceSampleActivity.java>
/** Called whenthe activity is first created. */
@Override
public void onCreate(Bundle savedInstanceState) {
super.onCreate(savedInstanceState);
setContentView(R.layout.activity_service_sample);
// TODO No.06 Toastボタンのインスタンス生成
this.buttonToast = (Button) findViewById(R.id.button_toast);
// TODO No.07 Toastボタンを無効にする
this.buttonToast.setEnabled(false);
}
This material is licensed under the Creative Commons License BY-NC-SA 4.0.
ⅰ - 322
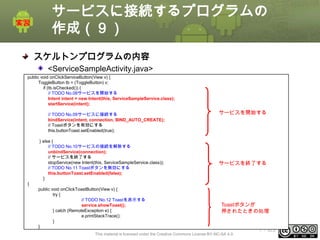
323.
サービスに接続するプログラムの
作成(9)
スケルトンプログラムの内容
<ServiceSampleActivity.java>
public void onClickServiceButton(Viewv) {
ToggleButton tb = (ToggleButton) v;
if (tb.isChecked()) {
// TODO No.08サービスを開始する
Intent intent = new Intent(this, ServiceSampleService.class);
startService(intent);
// TODO No.09サービスに接続する
bindService(intent, connection, BIND_AUTO_CREATE);
// Toastボタンを有効にする
this.buttonToast.setEnabled(true);
} else {
// TODO No.10サービスの接続を解除する
unbindService(connection);
// サービスを終了する
stopService(new Intent(this, ServiceSampleService.class));
// TODO No.11 Toastボタンを無効にする
this.buttonToast.setEnabled(false);
}
サービスを開始する
サービスを終了する
}
public void onClickToastButton(View v) {
try {
// TODO No.12 Toastを表示する
service.showToast();
} catch (RemoteException e) {
e.printStackTrace();
}
}
Toastボタンが
押されたときの処理
This material is licensed under the Creative Commons License BY-NC-SA 4.0.
ⅰ - 323
324.
サービスに接続するプログラムの
作成(10)
スケルトンプログラムの内容
<ServiceSampleService.java>
public class ServiceSampleServiceextends Service{
AtomicBoolean running = new AtomicBoolean(true);
スレッドランニングフラグ
// TODO No.01 IServiceSampleService.Stubのサブクラスを定義とshowToastメソッドのオーバライド
private IServiceSampleService.Stub binder = new IServiceSampleService.Stub() { IServiceSampleService.Stub
のサブクラスを定義
@Override
public void showToast() throws RemoteException {
Toast.makeText(getApplicationContext(), "Service Running",
Toast.LENGTH_SHORT).show();
}
};
@Override
public IBinder onBind(Intent intent) {
//TODO No.02 No.01で定義したStubクラスを返す
return binder;
}
This material is licensed under the Creative Commons License BY-NC-SA 4.0.
ⅰ - 324
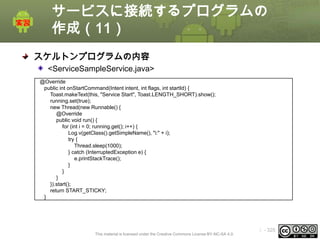
325.
サービスに接続するプログラムの
作成(11)
スケルトンプログラムの内容
<ServiceSampleService.java>
@Override
public int onStartCommand(Intentintent, int flags, int startId) {
Toast.makeText(this, "Service Start", Toast.LENGTH_SHORT).show();
running.set(true);
new Thread(new Runnable() {
@Override
public void run() {
for (int i = 0; running.get(); i++) {
Log.v(getClass().getSimpleName(), "i:" + i);
try {
Thread.sleep(1000);
} catch (InterruptedException e) {
e.printStackTrace();
}
}
}
}).start();
return START_STICKY;
}
This material is licensed under the Creative Commons License BY-NC-SA 4.0.
ⅰ - 325
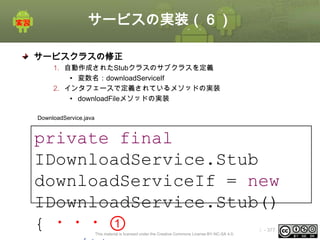
サービスの実装(6)
サービスクラスの修正
1. 自動作成されたStubクラスのサブクラスを定義
• 変数名:downloadServiceIf
2.インタフェースで定義されているメソッドの実装
• downloadFileメソッドの実装
DownloadService.java
private final
IDownloadService.Stub
downloadServiceIf = new
IDownloadService.Stub()
{ ・・・①
This material is licensed under the Creative Commons License BY-NC-SA 4.0.
ⅰ - 377


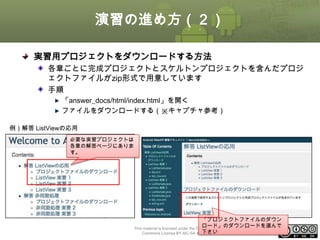
![演習概要
開発環境の説明
ディレクトリ構成
トレーニングに必要なファイルは全てandroid_traing_webapiに用意してあり
ます。
以下はandroid_traing_webapiのディレクトリ構成になります
パス(c:¥android_trainig_webapi以下)
内容
adt-bundle-windows-x86-[日付]¥sdk
AndroidSDK
adt-bundle-windows-x86-[日付]¥eclipse
eclipse
workspace
eclipseのワークスペース
gae_setup
GAEサーバ環境構築ツール
server¥webapi_server
WebAPIサーバ
datas
サンプル動画
answer_docs/html
実習の解答ドキュメント
This material is licensed under the Creative
Commons License BY-NC-SA 4.0.
ⅰ-8](https://image.slidesharecdn.com/androidwebapidevelopment-140310000707-phpapp02/85/Android-WebAPI-8-320.jpg)

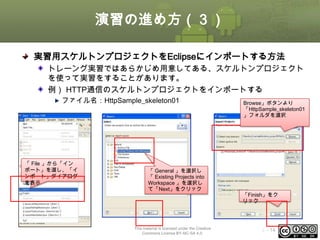


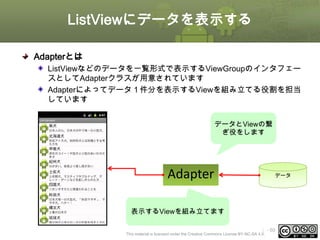
![ArrayAdapter
ArrayAdapter
Androidにはデータの管理方法に適したAdapterクラスが複数用意されて
います
ArrayAdapterクラスは配列やListなどのデータ形式を管理するのに適した
Adapterです
ArrayAdapter<T>( Context context,
int textViewResourceId,
T[] objects)
ArrayAdapterのコンストラクタ
引数
説明
Context context
クラスのオブジェクトを指定します。
int textViewResourceId
行レイアウトのリソースIDを指定します。
T[] objects
表示データ配列のオブジェクト を指定
ⅰ - 62
This material is licensed under the Creative Commons License BY-NC-SA 4.0.](https://image.slidesharecdn.com/androidwebapidevelopment-140310000707-phpapp02/85/Android-WebAPI-62-320.jpg)

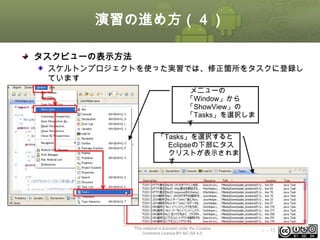
![ListViewのサンプルアプリケーシ
ョン 1 (6)
3. 一覧表示のActivityを作成する
ListSampleActivityクラスの継承元をListActvitiyに変更する
ListActivityとAdapterを使用してデータをリストとして表示する
ArrayAdapterをセットする
public class ListSampleActivity extends ListActivity {
・・・
public static final String[] ITEMS = { "柴犬", "北海道犬", "甲斐犬", "紀州犬", "土佐犬",
①
"四国犬", "秋田犬", "縄文犬", "琉球犬", "川上犬", "薩摩犬", "美濃柴", "山陰柴", "まめしば" };
/** Called when the activity is first created. */
@Override
public void onCreate(Bundle savedInstanceState) {
super.onCreate(savedInstanceState);
setContentView(R.layout.activity_list_sample);
ArrayAdapter<String> adapter = new ArrayAdapter<String>(this,
R.layout.list_row, ITEMS);
setListAdapter(adapter);
・・・
}
・・・
②
③
}
This material is licensed under the Creative Commons License BY-NC-SA 4.0.
ⅰ - 68](https://image.slidesharecdn.com/androidwebapidevelopment-140310000707-phpapp02/85/Android-WebAPI-68-320.jpg)
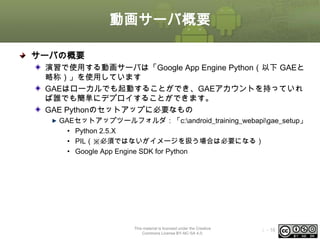
![ListViewのサンプルアプリケーシ
ョン 2 (2)
手順
ListActivity#onListItemClickの実装
onListItemClickメソッド内にログ出力
• tag :「ListSample」
• message :「position = [選択番号]」
This material is licensed under the Creative Commons License BY-NC-SA 4.0.
ⅰ - 73](https://image.slidesharecdn.com/androidwebapidevelopment-140310000707-phpapp02/85/Android-WebAPI-73-320.jpg)

![手順 2. カスタムAdapterを作成す
る(2)
1. RowModelを作成する
「src」フォルダ配下にパッケージ [jp.oesf.listsample.model]を作成する
RowModelクラスを作成する
「サムネイル タイトル 説明」 を保持するメンバ変数を定義する
各変数のgetter,setterメソッドを用意
public class RowModel {
private String title;
private Drawable thumbnailImage;
private String summary;
「
各変数のgetter setter を記載 」
}
This material is licensed under the Creative Commons License BY-NC-SA 4.0.
ⅰ - 81](https://image.slidesharecdn.com/androidwebapidevelopment-140310000707-phpapp02/85/Android-WebAPI-81-320.jpg)
![手順 2. カスタムAdapterを作成す
る(5)
3. Adapterと値のセット
MainActivityのonCreateメソッドでsetListAdapterでTableAdapterをセット
リソースからテキスト配列を取得する
public void onCreate(Bundle savedInstanceState) {
super.onCreate(savedInstanceState);
setContentView(R.layout.activity_list_sample);
TableAdapter adapter= new TableAdapter(this);
setListAdapter(adapter);
//RowModelの作成
String[] titles = getResources().getStringArray(R.array.titles);
String[] summaries =
getResources().getStringArray(R.array.summaries);
Drawable image =
getResources().getDrawable(R.drawable.ic_launcher);
int num = titles.length;
This material is licensed under the Creative Commons License BY-NC-SA 4.0.
ⅰ - 84](https://image.slidesharecdn.com/androidwebapidevelopment-140310000707-phpapp02/85/Android-WebAPI-84-320.jpg)
![手順 2. カスタムAdapterを作成す
る(6)
3. Adapterと値のセット <続き>
取得した配列からRowModelの値をセット
RowModelをAdapterにセットする
for(int i = 0; i < num; i++){
RowModel row = new RowModel();
row.setTitle(titles[i]);
row.setSummary(summaries[i]);
row.setThumbnailImage(image);
adapter.add(row);
}
This material is licensed under the Creative Commons License BY-NC-SA 4.0.
ⅰ - 85](https://image.slidesharecdn.com/androidwebapidevelopment-140310000707-phpapp02/85/Android-WebAPI-85-320.jpg)
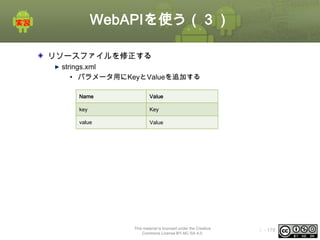
![文字列配列リソース(1)
string-arrayタグ
xmlファイルにデータを記載することで、アプリケーションから文字列
配列のデータを取得できるようになります。
構文
<?xml version="1.0" encoding="utf-8"?>
<resources>
<string-array name="string_array_name">
<item>text_string</item>
<item>text_string</item>
</string-array>
</resources>
string-arrayの定義名を記載します。
リソースIDとして使用されます。
String-arrayの中に格納される
データを記載します。
◆値の取得方法
getStringArray(”定義名”)を使用することで<item></item>内の値を取得できます
String titles[] = getResources().getStringArray(R.array.string_array_name);
This material is licensed under the Creative Commons License BY-NC-SA 4.0.
ⅰ - 86](https://image.slidesharecdn.com/androidwebapidevelopment-140310000707-phpapp02/85/Android-WebAPI-86-320.jpg)
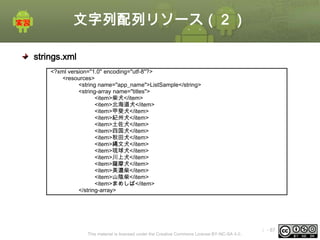
![文字列配列リソース(3)
strings.xml(続き)
<string-array name="summaries">
<item>日本人の心。日本犬の中で唯一の小型犬。</item>
<item>別名アイヌ犬。純粋和犬とは別種とする考え方も</item>
<item>虎毛カコイー!中型と小型のあいだの大きさ</item>
<item>白が多い。巻尾より差し尾が多い</item>
<item>土佐闘犬。マスティフやブルドッグ、グレート・デーンなどを配し作られた犬
</item>
<item>ニホンオオカミと間違われることも!</item>
<item>日本犬唯一の大型犬。、「秋田マタギ」、マタギ犬。ハチー!</item>
<item>土着の日本犬</item>
<item>縄文時代以来の古い犬の形質を残すとされる</item>
<item>長野県の天然記念物</item>
<item>西郷隆盛の愛犬</item>
<item>美濃犬、飛騨柴とも</item>
<item>因幡犬がベース。差し尾、晩成型。飼えば飼うほど形が変わる?!</item>
<item>小型の柴犬の愛称。JKCや日本犬保存会には「豆柴」という血統書は存在しない
</item>
</string-array>
</resources>
リソースとして取得するコード
// getting resource array data
String titles[] = getResources().getStringArray(R.array.titles);
String summaries[] = getResources().getStringArray(R.array.summaries);
This material is licensed under the Creative Commons License BY-NC-SA 4.0.
ⅰ - 88](https://image.slidesharecdn.com/androidwebapidevelopment-140310000707-phpapp02/85/Android-WebAPI-88-320.jpg)


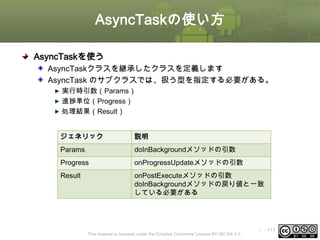
![AsyncTaskを定義する
AsyncTaskを定義する
各メソッドの引数に対応し
た型を指定する
class MyAsyncTask extends AsyncTask<Params, Progress, Result>{
@Override
protected Result doInBackground(Params... params) {
return null;
}
}
doInBackgroundは
オーバライド必須
戻り値
メソッド名
説明
abstract Result
doInBackground(Params... params)
バックグラウンド実行処理
void
onPreExecute()
バックグラウンド実行を行う直前の処
理
void
onPostExecute(Result result)
バックグラウンド実行完了時の処理
void
onProgressUpdate(Progress... values)
バックグラウンド処理の進捗状況の更
新
void
onCancelled()
バックグラウンド処理のキャンセル
※ doInBackgroundとonProgressUpdateは可変長引数のため、配列以外で渡したときもparam[0]で参照する必要がある
This material is licensed under the Creative Commons License BY-NC-SA 4.0.
ⅰ - 112](https://image.slidesharecdn.com/androidwebapidevelopment-140310000707-phpapp02/85/Android-WebAPI-112-320.jpg)
![AsyncTaskのサンプル(3)
サンプルプログラム
class MyAsyncTask extends AsyncTask<String, Integer, Boolean>{
@Override
protected void onPreExecute()
{
・・・④
//onPreExecuteではHandlerを使わずにUIを変更できる
//インジケータを表示する
setProgressBarIndeterminateVisibility(true);
}
@Override
protected Boolean doInBackground(String... params) {
Log.v("MyAsyncTask", "param:" + params[0]);
for( int i = 0; i <= 10; i++){
try {
//進捗状況の更新通知
publishProgress(i);
・・・⑥ −1
Thread.sleep(1000);
} catch (InterruptedException e) {
e.printStackTrace();under the Creative Commons License BY-NC-SA 4.0.
This material is licensed
・・・③
・・・⑤
ⅰ - 116](https://image.slidesharecdn.com/androidwebapidevelopment-140310000707-phpapp02/85/Android-WebAPI-116-320.jpg)
![AsyncTaskのサンプル(4)
サンプルプログラム
@Override
protected void onPostExecute(Boolean result) {
・・・⑧-1
//onPostExecuteではHandlerを使わずにUIを変更できる
if( result ){
text.setText("完了");
}else{
text.setText("失敗");
}
//インジケータを非表示する
setProgressBarIndeterminateVisibility(false);
・・・⑧-2
}
@Override
protected void onProgressUpdate(Integer... values) { ・・・⑥−2
//onProgressUpdateではHandlerを使わずにUIを変更できる
text.setText("" + values[0]);
}
}
}
This material is licensed under the Creative Commons License BY-NC-SA 4.0.
ⅰ - 117](https://image.slidesharecdn.com/androidwebapidevelopment-140310000707-phpapp02/85/Android-WebAPI-117-320.jpg)
![サンプルプログラムの解説(4)
5. バックグラウンドの処理を行う
doInBackgroundメソッドでバックグラウンドの処理を実装する
引数はAsyncTask#executeの引数で指定した値が入る
引数の型が可変長引数(Param… param)になっているため、参照する際は
必ず配列の要素番号を指定する
• (例) String s = param[0];
ここでは引数にAsyncTask開始時に出力するメッセージが入っていますので
、要素番号0を指定し、Logに出力している
@Override
protected Boolean doInBackground(String... params) {
Log.v("MyAsyncTask", "param:" + params[0]);
・・・⑤
This material is licensed under the Creative Commons License BY-NC-SA 4.0.
ⅰ - 121](https://image.slidesharecdn.com/androidwebapidevelopment-140310000707-phpapp02/85/Android-WebAPI-121-320.jpg)
![サンプルプログラムの解説(5)
6. 進捗状況の更新通知
進捗毎の更新処理はAsyncTask#onProgressUpdateで行う
進捗状況を更新したいタイミングで publishProgressメソッドを呼び出すと、
AsyncTask#onProgressUpdateがコールバックされる
ここでは、ループ毎に、 publishProgress(ソース⑥-1の箇所)を呼び出し、
現在のカウント値を引数に指定する
onProgressUpdateメソッド(ソース⑥-2の箇所)では受けっ取ったカウント値
をTextViewにセットしている
通常メインスレッド以外でUIの設定を変更する場合はHandlerを使用し、明示
的にメインスレッドで実行指定するが、onProgressUpdateメソッド内ではUI
の変更にHandlerを使う必要はない
@Override
protected void onProgressUpdate(Integer... values) { ・・・⑥−2
//onProgressUpdateではHandlerを使わずにUIを変更できる
text.setText("" + values[0]);
}
This material is licensed under the Creative Commons License BY-NC-SA 4.0.
ⅰ - 122](https://image.slidesharecdn.com/androidwebapidevelopment-140310000707-phpapp02/85/Android-WebAPI-122-320.jpg)
![サンプルプログラムの解説(6)
7. 実行結果を返す
バックグラウンドの処理で正常終了したときは”true”を返し、例外が発生した
ときは“false”を返す
返した値は、 onPostExecuteの引数で渡される
@Override
protected Boolean doInBackground(String... params) {
Log.v("MyAsyncTask", "param:" + params[0]);
for( int i = 0; i <= 10; i++){
try {
//進捗状況の更新通知
publishProgress(i);
Thread.sleep(1000);
} catch (InterruptedException e) {
e.printStackTrace();
return false;
・・・⑦−1
}
}
return true;
・・・⑦−2
}
This material is licensed under the Creative Commons License BY-NC-SA 4.0.
ⅰ - 123](https://image.slidesharecdn.com/androidwebapidevelopment-140310000707-phpapp02/85/Android-WebAPI-123-320.jpg)

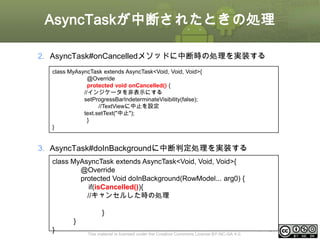
![AsyncTaskの中断(5)
public class AsyncSample extends Activity {
private TextView text;
……… 省略 ………
class MyAsyncTask extends AsyncTask<String, Integer, Boolean>{
……… 省略 ………
@Override
protected Boolean doInBackground(String... params) {
Log.v("MyAsncTask", "params:" + params[0]);
for (int i = 0; i < 10; i++) {
try {
if(isCancelled()){
break;
}
Log.v("MyAsyncTask", "i:" + i);
……… 省略 ………
}
@Override
protected void onCancelled() {
// インジケータを非表示にする
setProgressBarIndeterminateVisibility(false);
// TextViewに中止を設定
text.setText("中止");
}
}
This material is licensed under the Creative Commons License BY-NC-SA 4.0.
ⅰ - 136](https://image.slidesharecdn.com/androidwebapidevelopment-140310000707-phpapp02/85/Android-WebAPI-136-320.jpg)


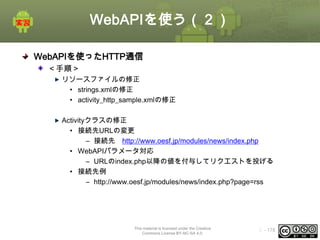
![HTTP通信をする(3)
サンプルプログラムの作成
<手順>
※スケルトンでは、いくつかの処理は実装済ため確認のみ行う
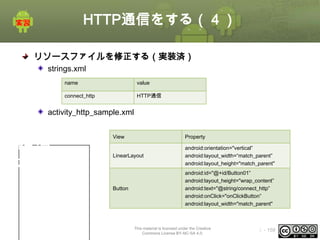
リソースファイルの修正(実装済)
• strings.xml
• activity_http_sample.xml
Activityの修正
• HTTP通信処理の追加
– 接続先“http://www.oesf.jp/”
– ネットワーク環境がない場合”http://[IPアドレス]:8080/oesf.html”
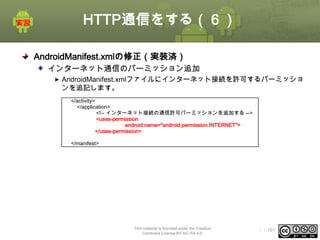
AndroidManifest.xmlの修正(実装済)
• インターネット通信のパーミッション追加する。
This material is licensed under the Creative
Commons License BY-NC-SA 4.0.
ⅰ - 158](https://image.slidesharecdn.com/androidwebapidevelopment-140310000707-phpapp02/85/Android-WebAPI-158-320.jpg)
![HTTP通信をする(5)
Activityクラスの修正
HTTP通信処理の追加する
onClickButtonメソッドの実装
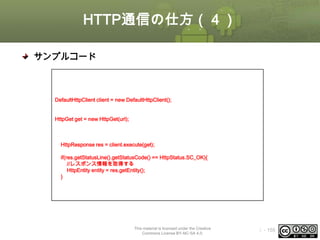
DefaultHttpClientクラスを生成する。
リクエストメソッドの設定をする。
• HttpGetオブジェクトを生成する。
– 引数にurl:” http://www.oesf.jp/”を指定する
– ネットワークが環境がない場合”http://[IPアドレス]:8080/oesf.html”
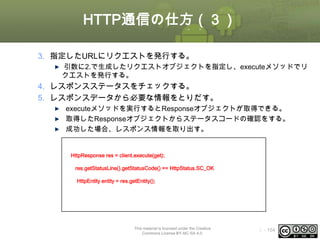
指定したURLにリクエストを発行する。
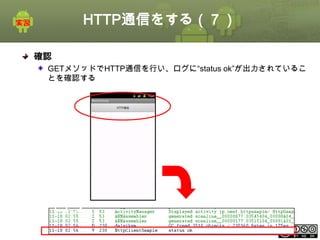
レスポンスステータスをチェックする。
• ステータスが200ならログを出力する。
• 出力ログ:Log.v(TAG, "status ok");
This material is licensed under the Creative
Commons License BY-NC-SA 4.0.
ⅰ - 160](https://image.slidesharecdn.com/androidwebapidevelopment-140310000707-phpapp02/85/Android-WebAPI-160-320.jpg)


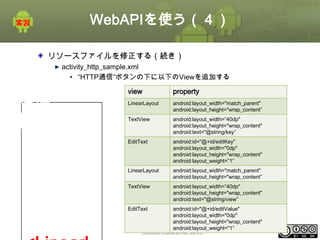
![概要
外部連帯概要
JSONの解析
JSONの解析 [実習]
This material is licensed under the Creative Commons License BY-NC-SA 4.0.
ⅰ - 185](https://image.slidesharecdn.com/androidwebapidevelopment-140310000707-phpapp02/85/Android-WebAPI-185-320.jpg)
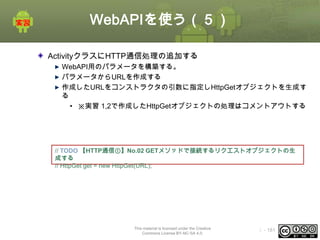
![解析の仕方
JSONの解析
<手順>
JSON文字列の構造を十分に把握し、ルートデータがJSONObjectなのか
、JSONArrayなのかを確認する
JSONObjectまたはJSONArrayのコンストラクタにJSON文字列を引数で
指定してオブジェクトを生成する
JSONObjectの場合
• { と } で囲まれたデータ
• 生成したJSONObjectからkeyを指定してデータを取得する
JSONArrayの場合
• [ と ] で囲まれたデータ
• 配列の数だけループし各要素のデータを取得する
This material is licensed under the Creative Commons License BY-NC-SA 4.0.
ⅰ - 189](https://image.slidesharecdn.com/androidwebapidevelopment-140310000707-phpapp02/85/Android-WebAPI-189-320.jpg)
![JSON解析のサンプル
サンプルコード
以下のJSONを解析するサンプル
構成
ルートの型:JSONObject
• key:rootのJSONのObject
– key:nodeのJSONArray
– Stringの配列
{
"root": {
"node": [
"value1",
"value2"
]
}
}
This material is licensed under the Creative Commons License BY-NC-SA 4.0.
ⅰ - 191](https://image.slidesharecdn.com/androidwebapidevelopment-140310000707-phpapp02/85/Android-WebAPI-191-320.jpg)
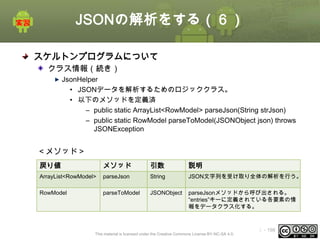
![JSON解析のサンプル
サンプルコード
1. JSON文字列からJSONObjectを生成する
2. JSONObjectから”root”をキーに指定しJSONObjectを生成する
3. 2で生成したJSONをObjectから”node”をキーに指定し、JSONArrayを生
成する
4. JSONArrayをforで繰り返し、要素番号を指定してn番目のデータを取得
ArrayList<String> values = new ArrayList<String>();
する
try {
JSONObject json = new JSONObject(strJson); ・・・ 1
JSONObject root = json.getJSONObject(“root”); ・・・ 2
JSONArray node = root.getJSONArray(“node”); ・・・ 3
for(int i = 0; i < node.length(); i++){
・・・ 4
values.add(node.getString(i));
}
} catch (JSONException e) {
Log.e("JsonSampleForDocActivity" , e.getMessage(), e);
}
This material is licensed under the Creative Commons License BY-NC-SA 4.0.
JSON文字列
{
"root": {
"node": [
"value1",
"value2"
]
}
}
ⅰ - 192](https://image.slidesharecdn.com/androidwebapidevelopment-140310000707-phpapp02/85/Android-WebAPI-192-320.jpg)
![JSONの解析をする(2)
JSONデータの構成
以下のJSONを、org.jsonパッケージを使って解析を行う
<sample.json> ※sample.jsonはassetsフォルダ以下に保存されています
{
"feed": {
"entries": [
{
"id": "hPzNl6NKAG0”,
"group": {
"description": "全てはより良い滑り込みのために。",
"thumbnail_url": "image/cat.jpg",
"title": "特訓するねこ。"
}
},
{
"id": ”xxxxxxxx”,
"group": {
“description”: “xxxxxxx",
"thumbnail_url": “xxxxxxxx”,
“title”: “xxxxxx"
}
}
]
}
}
※解析対象
This material is licensed under the Creative Commons License BY-NC-SA 4.0.
ⅰ - 194](https://image.slidesharecdn.com/androidwebapidevelopment-140310000707-phpapp02/85/Android-WebAPI-194-320.jpg)
![JSONの解析をする[実習補足]
実習[補足]
asset/sample.jsonを編集してentries内にデータを追加し、2つ以上のデ
ータクラスを取得できるようにする
sample.json
{
"feed": {
"entries": [
{
"id": "hPzNl6NKAG0”,
"group": {
"description": "全てはより良い滑り込みのために。",
"thumbnail_url": "image/cat.jpg",
"title": "特訓するねこ。"
}
},
{
※データを追加する
"id": ”xxxxxxxx”,
"group": {
“description”: “xxxxxxx",
"thumbnail_url": “xxxxxxxx”,
“title”: “xxxxxx"
}
}
]
}
}
This material is licensed under the Creative Commons License BY-NC-SA 4.0.
ⅰ - 202](https://image.slidesharecdn.com/androidwebapidevelopment-140310000707-phpapp02/85/Android-WebAPI-202-320.jpg)
![[補足]XMLの解析](https://image.slidesharecdn.com/androidwebapidevelopment-140310000707-phpapp02/85/Android-WebAPI-203-320.jpg)


![XMLの解析の仕方:SAX (3)
<オーバライドするメソッド>
戻り値
メソッド名
説明
void
startElement(String uri,
String localName,
String qName,
Attributes attributes)
要素の開始通知を受け取る
パラメータ
•uri - 名前空間 URI
•localName - 前置修飾子を含まないローカル名
•qName - 接頭辞を持つ修飾名
•attributes - 要素に付加された属性
void
endElement(String uri,
String localName,
String qName)
要素の終了通知を受け取る
パラメータ
•uri - 名前空間 URI
•localName - 前置修飾子を含まないローカル名
•qName - 接頭辞を持つ修飾名
void
void characters(char[] ch,
int start,
int length)
要素内の文字データの通知を受け取る
パラメータ
•ch - 文字
•start - 文字配列内の開始位置
•length - 文字配列から使用される文字数
This material is licensed under the Creative Commons License BY-NC-SA 4.0.
ⅰ - 233](https://image.slidesharecdn.com/androidwebapidevelopment-140310000707-phpapp02/85/Android-WebAPI-233-320.jpg)

![XMLの解析の仕方:SAX (6)
class SaxHandler extends DefaultHandler {
//タグ開始フラグ
boolean isNode1;
@Override
public void startElement(String uri, String localName, String qName,
Attributes attributes) throws SAXException {
if ("node1".equals(localName)) {
// node1 タグの開始
isNode1= true;
}
}
タグ開始時の処理
@Override
public void endElement(String uri, String localName, String qName)
throws SAXException {
if ("node1".equals(localName)) {
// node1 タグの開始
isNode1= false;
}
}
@Override
public void characters(char[] ch, int start, int length)
throws SAXException {
//node1タグが開始されていたら、文字列をログに出力
if (isNode1) {
String nodevalue = new String(ch, start, length);
Log.v(TAG, nodevalue);
}
}
}
タグ終了時の処理
テキストイベントの処理
This material is licensed under the Creative Commons License BY-NC-SA 4.0.
ⅰ - 236](https://image.slidesharecdn.com/androidwebapidevelopment-140310000707-phpapp02/85/Android-WebAPI-236-320.jpg)
![XMLの解析:SAX (4)
XmlHelperクラスにDefaultHandlerクラスを継承したサブクラスを作
成する
class SaxHandler extends DefaultHandler {
startElement, characters, endElementメソッドを実装する
~略~
@Override
public void startElement(String uri, String localName, String qName,
Attributes attributes) throws SAXException {
~略~
}
@Override
public void endElement(String uri, String localName, String qName)
throws SAXException {
~略~
}
@Override
public void characters(char[] ch, int start, int length)
throws SAXException {
~略~
}
}
This material is licensed under the Creative Commons License BY-NC-SA 4.0.
ⅰ - 240](https://image.slidesharecdn.com/androidwebapidevelopment-140310000707-phpapp02/85/Android-WebAPI-240-320.jpg)
![XMLの解析:SAX (5)
charactersメソッドを実装する
@Override
public void characters(char[] ch, int start, int length) throws SAXException {
if (isEntry) {
if (isId) {
//idを取得する
id = new String(ch, start, length);
isId = false;
}
if (isSummary) {
//descriptionを取得する
summary = new String(ch, start, length);
if (summary != null && 0 < summary.length()) {
if (20 < length) {
summary = summary.substring(0, 20);
}
}
isSummary = false;
}
if (isTitle) {
// TODO 【SAX】 No.04 titleを取得する
title = new String(ch, start, length);
isTitle = false;
}
}
}
This material is licensed under the Creative Commons License BY-NC-SA 4.0.
ⅰ - 242](https://image.slidesharecdn.com/androidwebapidevelopment-140310000707-phpapp02/85/Android-WebAPI-242-320.jpg)
![XMLパーサのパフォーマンス測定
TraceViewで計測結果を確認する
<手順>
出力した trace ログファイルを DDMS を使って PC に格納する。
コマンドプロンプトより traceview [ファイル名] として実行する。
※AndroidSDKのバージョンが12以前では[ファイル名]はフルパスで指定する
必要がある。以下の例ではC:work時間計測xml.traceとなっている
This material is licensed under the Creative Commons License BY-NC-SA 4.0.
ⅰ - 262](https://image.slidesharecdn.com/androidwebapidevelopment-140310000707-phpapp02/85/Android-WebAPI-262-320.jpg)


![サービスの作成 [補足実習 1]
実習2 補足1
実習2で作成したアプリケーションには以下のバグが存在するので修正
する
ToggleButtonをクリックし
てServiceを起動する
「ServiceSample」アプリ
ケーションを起動する
ToggleButtonをクリックし
てServiceを起動する
①
エラーが発生する
③
バックキー
を押下する
②
This material is licensed under the Creative Commons License BY-NC-SA 4.0.
④
ⅰ - 288](https://image.slidesharecdn.com/androidwebapidevelopment-140310000707-phpapp02/85/Android-WebAPI-288-320.jpg)
![サービスの作成 [補足実習 1]
バグの原因
バグの原因はサービス内で、既に実行中のThreadを起動することが原因
です
バグを修正するには以下の2つの方法が考えられます
ActivityのonPause()メソッド内でサービスを明示的に終了する
サービス内のThreadが既に実行されているか条件分岐する
解答
解答ドキュメントを参照 「Service実習2 補足1 解答」
This material is licensed under the Creative Commons License BY-NC-SA 4.0.
ⅰ - 289](https://image.slidesharecdn.com/androidwebapidevelopment-140310000707-phpapp02/85/Android-WebAPI-289-320.jpg)
![サービスの作成 [補足実習 2]
実習2 補足2
実習2 補足1の解答例ではThreadの複数起動ができませんでした。
実習2で作成したアプリケーションにThreadの複数起動処理に対応した
修正をしてエラーが発生しないことを確認してください
解答
解答ドキュメントを参照 「第11章 Service
実習2 補足2 解答」
This material is licensed under the Creative Commons License BY-NC-SA 4.0.
ⅰ - 290](https://image.slidesharecdn.com/androidwebapidevelopment-140310000707-phpapp02/85/Android-WebAPI-290-320.jpg)
![手順 1. サービス接続インタフェ
ースの作成(1)
サービスに接続するインタフェースを作成する
aidlファイルの作成
• メニューの[File] → [New]→[File]から”[インタフェース名].aidl”というファ
イルを作成(ここでは「IServiceSampleService.aidl」)
This material is licensed under the Creative Commons License BY-NC-SA 4.0.
ⅰ - 294](https://image.slidesharecdn.com/androidwebapidevelopment-140310000707-phpapp02/85/Android-WebAPI-294-320.jpg)
![手順 1. サービス接続インタフェース
の作成(4)
自動作成されたjavaファイルについて
作成されたインターフェースの中には、Stubと呼ばれる抽象クラスが作成さ
れている。
• [インタフェース名].Stubインタフェースで作成される
• aidlに定義したメソッドがオーバライドされている
Stubクラスを使用することによってプロセス間でメソッドの呼び出しが可能
になる。
public interface IServiceSampleService extends android.os.IInterface {
/** Local-side IPC implementation stub class. */
public static abstract class Stub extends android.os.Binder implements
jp.oesf.servicesample.IServiceSampleService {
private static final java.lang.String DESCRIPTOR =
"jp.oesf.servicesample.IServiceSampleService";
/** Construct the stub at attach it to the interface. */
public Stub() {
this.attachInterface(this, DESCRIPTOR);
}
~略~
public void showToast() throws android.os.RemoteException;
}
※実際のファイルはインデントされていません。
This material is licensed under the Creative Commons License BY-NC-SA 4.0.
ⅰ - 297](https://image.slidesharecdn.com/androidwebapidevelopment-140310000707-phpapp02/85/Android-WebAPI-297-320.jpg)


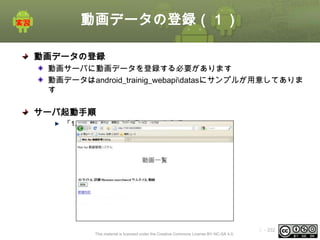
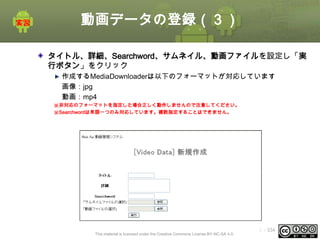
![動画データの登録(2)
手順
コマンドプロンプトから以下のコマンドを入力しGAEサーバを起動する
”dev_appserver.py --address [IPアドレス] webapi_server”
ブラウザを起動しURLに”http://[IPアドレス]:8080”を指定する
新規作成リンクを選択する
This material is licensed under the Creative Commons License BY-NC-SA 4.0.
ⅰ - 333](https://image.slidesharecdn.com/androidwebapidevelopment-140310000707-phpapp02/85/Android-WebAPI-333-320.jpg)
![動画ダウンローダの作成
前章までに作成したサンプルプログラムを元に必要な機能を実装す
る
<手順>
HTTP通信の実装
• 接続先ホストの指定
• DefaultHttpClientのサブクラスを作成する。
• WebAPIパラメータを生成する
JSON, XML解析の実装
• JSONの解析処理を実装する
• [補足]XML解析は計測結果で最もパフォーマンスの良かったSAXパーサ
を使う
非同期処理
• 一覧表示の際に画像の読み込み処理をAsncTaskを使って非同期化する
。
サービス化
• 動画データをダウンロード処理をサービス化する。
This material is licensed under the Creative Commons License BY-NC-SA 4.0.
ⅰ - 336](https://image.slidesharecdn.com/androidwebapidevelopment-140310000707-phpapp02/85/Android-WebAPI-336-320.jpg)
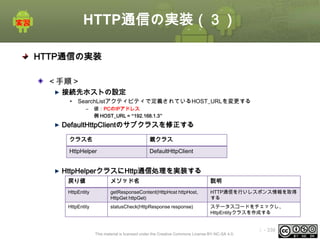
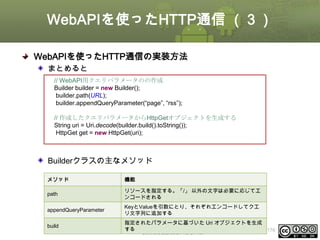
![HTTP通信の実装(4)
WebAPIパラメータの生成
SearchListに定義されているSearchTaskクラスの処理を確認する
1. WebAPIパラメータの生成
• SearchList.SearchTask#doInBackgroundメソッドに処理を追加
• android.net.Uri.Builderクラスを使い、URLパラメータ情報を付加する
2. HttpHelperクラスに接続処理を依頼
@Override
protected List<RowModel> doInBackground(final Object... params) {
final String query = (String) params[0];
Builder builder = new Builder();
builder.path(FEED_URL);
builder.appendQueryParameter(PARAM_QUERY, query);
builder.appendQueryParameter(PARAM_TYPE, PARAM_TYPE_JSON);
・・・①
HttpHelper httpHelper = HttpHelper.getInstance();
final HttpGet httpGet = new HttpGet(builder.build().toString());
final HttpHost httpHost = new HttpHost(HOST_URL, PORT, "http");
// String url = "http://xx.xx.xx.xx:xxxx/_api?searchword=" + query;
try {
HttpEntity entity = httpHelper.getResponseContent(httpHost,
httpGet);
This material is licensed under the Creative Commons License BY-NC-SA 4.0.
・・・②
ⅰ - 340](https://image.slidesharecdn.com/androidwebapidevelopment-140310000707-phpapp02/85/Android-WebAPI-340-320.jpg)
![JSON解析の実装(3)
JSONデータの解析
WebAPIを使ってHTTP通信をすると以下のようなJSONデータが取得で
きる
以下のJSONをの解析を行う
{
http://xx.xx.xx.xx:xxxx/_api?searchword=[サーチワード]&type=json にリ
クエストを投げると以下のようなjsonが返ってきます
"feed": {
"entries": [
{
"description": "全てはより良い滑りのために。(ただ遊んでいるだけです)",
"id": 2,
"thumbnail_url": "img/full?image_key=UQWle82pGtOnvMPQn3vN3w==",
"title": "特訓するねこ。",
"video_url": "video/dl?video_key=7Ye5LdAYDZeYKn2Res5R1A=="
}
]
}
}
This material is licensed under the Creative Commons License BY-NC-SA 4.0.
ⅰ - 346](https://image.slidesharecdn.com/androidwebapidevelopment-140310000707-phpapp02/85/Android-WebAPI-346-320.jpg)
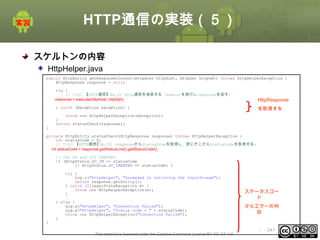
![JSON解析の実装(5)
スケルトンコードの確認
SearchList$SearchTask#doInBackground
非同期によるHTTP通信処理の後にSearchList#parseJsonメソッドを呼び出す
@Override
protected List<RowModel> doInBackground(final Object... params) {
final String query = (String) params[0];
〜略〜
try {
HttpEntity entity = httpHelper.getResponseContent(httpHost,
httpGet);
parseJson(entity);
// TODO 【XML解析】以下のコメントアウトを解除する
// parseXml(entity);
} catch (Exception e) {
Log.e(TAG, "", e);
}
This material is licensed under the Creative Commons License BY-NC-SA 4.0.
ⅰ - 348](https://image.slidesharecdn.com/androidwebapidevelopment-140310000707-phpapp02/85/Android-WebAPI-348-320.jpg)
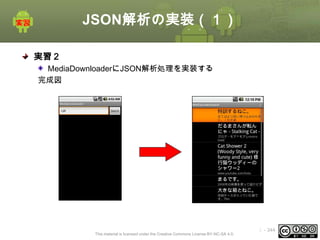
![[補足] XML解析の実装(1)
実習2[補足]
MediaDownloaderにXML解析処理を実装する
完成図
This material is licensed under the Creative Commons License BY-NC-SA 4.0.
ⅰ - 354](https://image.slidesharecdn.com/androidwebapidevelopment-140310000707-phpapp02/85/Android-WebAPI-354-320.jpg)
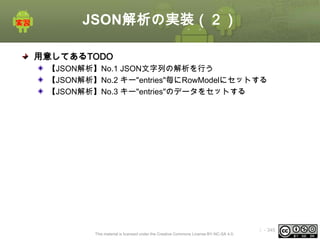
![[補足] XML解析の実装(2)
用意してあるTODO
【XML解析】No.1 イベントハンドラを作成する
【XML解析】No.2 パーサにイベントハンドラと入力データを渡す
【XML解析】No.3 各フラグをみて、フラグがtrueであれば各変数に値を
入れる
その他複数の箇所でコメントアウトの解除
This material is licensed under the Creative Commons License BY-NC-SA 4.0.
ⅰ - 355](https://image.slidesharecdn.com/androidwebapidevelopment-140310000707-phpapp02/85/Android-WebAPI-355-320.jpg)
![[補足] XML解析の実装(3)
XMLデータの解析
WebAPIを使ってHTTP通信をすると以下のようなデータが取得されます
以下のXML文書を使い、DOM・SAX・XMLPullparserでXMLの解析を行
う
http://xx.xx.xx.xx:xxxx/_api?searchword=[サーチワード]にリクエストを
投げると以下のようなxmlが返ってきます
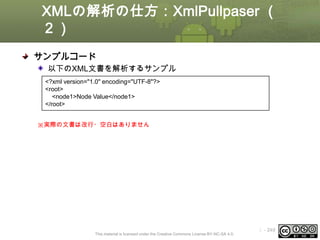
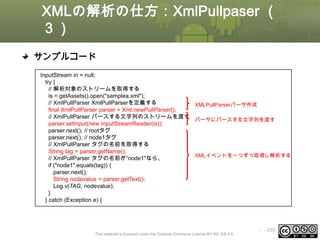
<?xml version="1.0" encoding="UTF-8"?>
<feed>
<entry>
<id>4</id>
<video url="video/dl?video_key=uh-LLppl4DiGfv5hp2uM1A=="></video>
<description>全てはより良い滑りのために。(ただ遊んでいるだけです)
</description>
<thumbnail
url="img/full?image_key=TeTgNSQrLuvhVH_uM6CTCw=="></thumbnail>
<title>特訓するねこ。</title>
<searchword>cat</searchword>
</entry>
</feed>
This material is licensed under the Creative Commons License BY-NC-SA 4.0.
ⅰ - 356](https://image.slidesharecdn.com/androidwebapidevelopment-140310000707-phpapp02/85/Android-WebAPI-356-320.jpg)
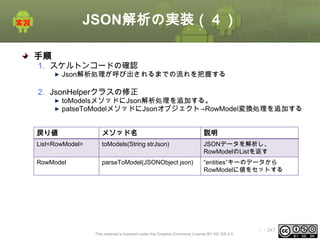
![[補足] XML解析の実装(4)
手順
1. XmlHelperクラスの修正
2. SaxHandlerクラスの修正
This material is licensed under the Creative Commons License BY-NC-SA 4.0.
ⅰ - 357](https://image.slidesharecdn.com/androidwebapidevelopment-140310000707-phpapp02/85/Android-WebAPI-357-320.jpg)
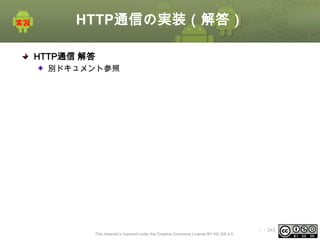
![[補足] XML解析の実装(5)
1. XmlHelperクラスの修正
• parseTableModelSaxメソッドにXML解析処理を追加する。
戻り値
メソッド名
説明
HttpEntity
getResponseContent(HttpHost httpHost,
HttpGet httpGet)
HTTP通信を行いレスポンス情報を
取得する
HttpEntity
statusCheck(HttpResponse response)
ステータスコードをチェックし、
HttpEntityクラスを作成する
This material is licensed under the Creative Commons License BY-NC-SA 4.0.
ⅰ - 358](https://image.slidesharecdn.com/androidwebapidevelopment-140310000707-phpapp02/85/Android-WebAPI-358-320.jpg)
![[補足] XML解析の実装(6)
2. SaxHandlerクラスの修正
•
•
DefaultHandlerクラスを継承したサブクラスを作成する
startElement, characters, endElementメソッドを実装する
戻り値
メソッド名
説明
void
startElement(String uri, String localName,
String qName, Attributes attributes)
要素の開始タグ読み込み時
void
characters(char[] ch, int offset, int length)
テキストデータ読み込み時
void
endElement(String uri, String localName,
String qName)
要素の終了タグ読み込み時
This material is licensed under the Creative Commons License BY-NC-SA 4.0.
ⅰ - 359](https://image.slidesharecdn.com/androidwebapidevelopment-140310000707-phpapp02/85/Android-WebAPI-359-320.jpg)
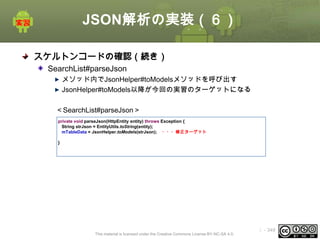
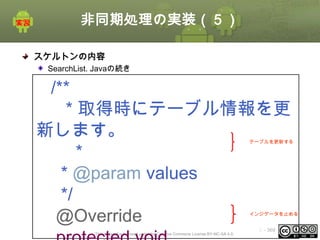
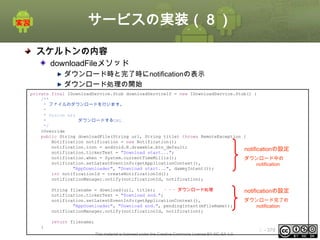
![[補足] XML解析の実装(7)
スケルトンの内容
XMLHelper.java
public List<RowModel>
parseTableModelSax(final
HttpEntity entity) throws
IllegalStateException,
IOException,
ParserConfigurationExcept
ion, SAXException {
SAXパーサの作成
作成したイベントハン
ドラ
から結果を受け取る
This material is licensed under the Creative Commons License BY-NC-SA 4.0.
ⅰ - 360](https://image.slidesharecdn.com/androidwebapidevelopment-140310000707-phpapp02/85/Android-WebAPI-360-320.jpg)
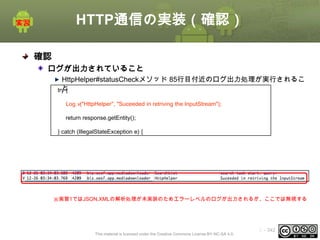
![[補足] XML解析の実装(8)
スケルトンの内容
XMLHelper.javaの続き
private class SaxHandler extends DefaultHandler {
[ 変数の定義 ]
/**
* 要素の開始タグ読み込み時
*/
@Override
public void startElement(String uri, String localName, String qName,
Attributes attributes) {
if ("entry".equals(localName)) {
// Entry タグの開始
isEntry = true;
}
if (isEntry) {
if (!isVideo && "video".equals(localName)) {
url = attributes.getValue("url");
isVideo = true;
}
if ("description".equals(localName)) {
isSummary = true;
}
if (!isThumbnail && "thumbnail".equals(localName)) {
thumbnail = attributes.getValue("url");
isThumbnail = true;
}
if ("title".equals(localName)) {
isTitle = true;
}
}
}
IDのフラグを立
てる
サマリーのフラグを立てる
サムネイルは取得す
る。
タイトルのフラグを立てる
This material is licensed under the Creative Commons License BY-NC-SA 4.0.
ⅰ - 361](https://image.slidesharecdn.com/androidwebapidevelopment-140310000707-phpapp02/85/Android-WebAPI-361-320.jpg)
![[補足] XML解析の実装(9)
スケルトンの内容
XMLHelper.javaの続き
/**
* テキストデータ読み込み時
*/
@Override
public void characters(char[] ch, int offset, int length) {
// TODO 【XML解析】No.2 各フラグをみて、フラグがtrueであれば各変数に値を入れる。
}
/**
* 要素の終了タグ読み込み時
*/
@Override
public void endElement(String uri, String localName, String qName) {
if ("entry".equals(localName)) {
// Entry タグの終了
RowModel rowModel = new RowModel();
rowModel.setUrl(url);
rowModel.setSummary(summary);
rowModel.setThumbnailImageURL(thumbnail);
rowModel.setTitle(title);
各フラグから、対応する変数に
値を入れた後、対象フラグを
Falseに変更
各データをセットする
result.add(rowModel);
url = null;
summary = null;
thumbnail = null;
title = null;
isThumbnail = false;
全フラグをクリアする
}
}
This material is licensed under the Creative Commons License BY-NC-SA 4.0.
ⅰ - 362](https://image.slidesharecdn.com/androidwebapidevelopment-140310000707-phpapp02/85/Android-WebAPI-362-320.jpg)
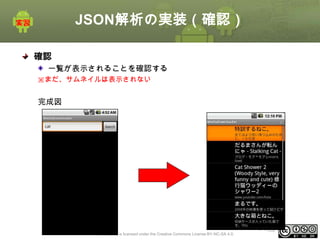
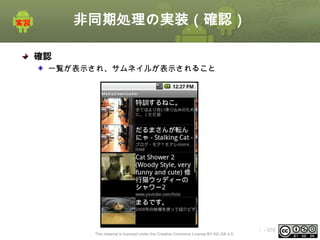
![[補足] XML解析の実装(確認)
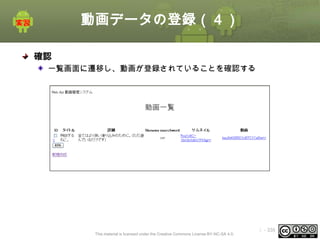
確認
一覧が表示されること
This material is licensed under the Creative Commons License BY-NC-SA 4.0.
ⅰ - 363](https://image.slidesharecdn.com/androidwebapidevelopment-140310000707-phpapp02/85/Android-WebAPI-363-320.jpg)
![[補足] XML解析の実装(解答)
解答
別ドキュメント参照
This material is licensed under the Creative Commons License BY-NC-SA 4.0.
ⅰ - 364](https://image.slidesharecdn.com/androidwebapidevelopment-140310000707-phpapp02/85/Android-WebAPI-364-320.jpg)
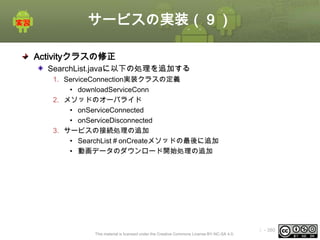
![サービスの実装(11)
Activityクラスの修正(続き)
3. サービスの接続処理の追加
• SearchList#onCreateメソッドの最後に追加
• 動画データのダウンロード開始処理の追加
SearchList.java
protected void onCreate(Bundle savedInstanceState) {
super.onCreate(savedInstanceState);
requestWindowFeature(Window.FEATURE_INDETERMINATE_PROGRESS);
setContentView(R.layout.list);
〜略〜
Log.d(TAG, "search task start. query=" + query);
task = new SearchTask().execute(new Object[] { query });
// Intent intent = new Intent(IDownloadService.class.getName());
Intent intent = new Intent(this, DownloadService.class);
// TODO 【サービス】No.3 bindServiceにintent, downloadServiceConn,
サービス
// BIND_AUTO_CREATEを渡して接続処理を追加する
bindService(intent, downloadServiceConn, BIND_AUTO_CREATE);
に接続
}
This material is licensed under the Creative Commons License BY-NC-SA 4.0.
ⅰ - 382](https://image.slidesharecdn.com/androidwebapidevelopment-140310000707-phpapp02/85/Android-WebAPI-382-320.jpg)

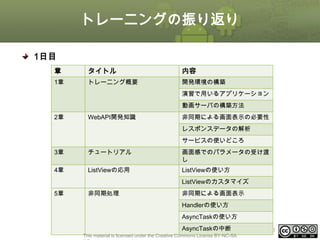
![トレーニングの振り返り
2日目
章
タイトル
概要
6章
HTTP通信
Webサービスに接続する
WebAPIを使ったHTTP通信
WebAPIを使ったHTTP通信
7章
JSONの解析
JSONの解析の仕方
7章
[補足]XMLの解析
XMLの解析の仕方:DOM
XMLの解析の仕方:SAX
XMLの解析の仕方:XMLPullparser
8章
サービス
サービスの使いどころ
サービスの使い方
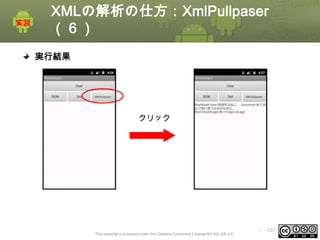
サービスに接続する
9章
動画ダウンローダの作成
習得した一連の技術を全て使ったアプ
リケーション作成
ⅰ - 387
This material is licensed under the Creative Commons License BY-NC-SA 4.0.](https://image.slidesharecdn.com/androidwebapidevelopment-140310000707-phpapp02/85/Android-WebAPI-387-320.jpg)
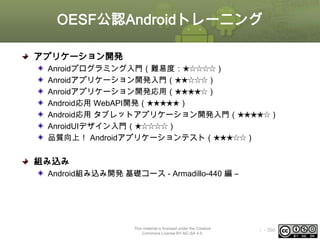
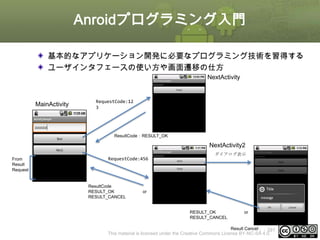

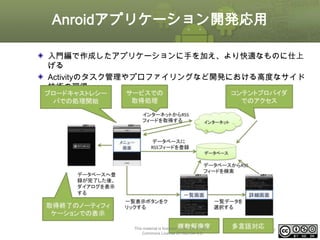
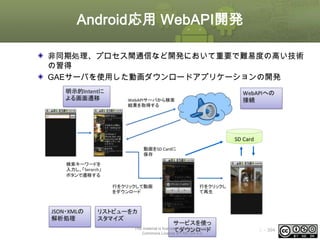
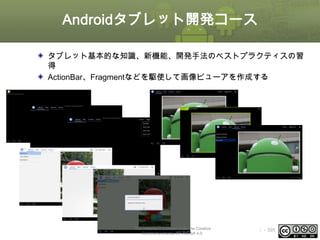
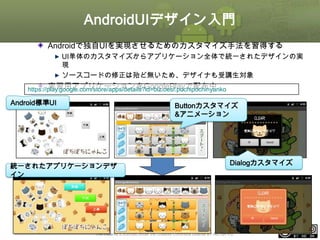
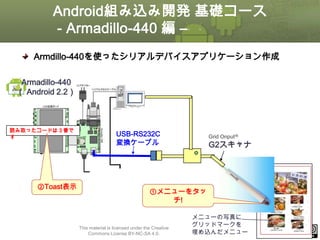
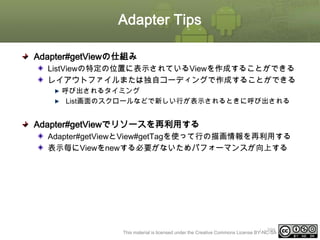
![Adapter Tips
<サンプルコード page1>
public class MyAdapter extends BaseAdapter {
//表示データ
ArrayList<String> arStr = new ArrayList<String>();
private String[] data = {
"Abbaye de Belloc", "Abbaye du Mont des Cats", "Abertam", "Abondance", "Ackawi",
"Acorn", "Adelost", "Affidelice au Chablis", "Afuega'l Pitu", "Airag", "Airedale",
"Aisy Cendre", "Allgauer Emmentaler", "Alverca", "Ambert", "American Cheese",
"Ami du Chambertin", "Anejo Enchilado", "Anneau du Vic-Bilh", "Anthoriro",
"Appenzell",
"Aragon", "Ardi Gasna", "Ardrahan", "Armenian String", "Aromes au Gene de Marc",
"Asadero", "Asiago"};
private LayoutInflater inflater;
//1行に表示するView情報クラス
static class ViewHolder {
TextView textName;
}
ⅰ - 400
This material is licensed under the Creative Commons License BY-NC-SA 4.0.](https://image.slidesharecdn.com/androidwebapidevelopment-140310000707-phpapp02/85/Android-WebAPI-400-320.jpg)
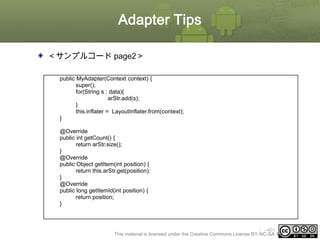
![Adapter Tips
<サンプルコード page3>
@Override
public View getView(int position, View convertView, ViewGroup parent) {
View row = convertView;
ViewHolder viewHolder;
//Rowデータの作成
if (row == null) {
//Rowデータが存在しない場合は作成する
row = this.inflater.inflate(R.layout.list_row, null);
viewHolder = new ViewHolder();
viewHolder.textName = (TextView) row.findViewById(R.id.TextViewName);
//作成したRow情報をTagに設定する
row.setTag(viewHolder);
} else {
//Row情報が存在する場合は再利用する
viewHolder = (ViewHolder) row.getTag();
}
//表示データを更新する
viewHolder.textName.setText(data[position]);
return row;
}
}
ⅰ - 402
This material is licensed under the Creative Commons License BY-NC-SA 4.0.](https://image.slidesharecdn.com/androidwebapidevelopment-140310000707-phpapp02/85/Android-WebAPI-402-320.jpg)


![[デブサミ2012]趣味と実益の脆弱性発見](https://cdn.slidesharecdn.com/ss_thumbnails/devsumi-hasegawa-120216203637-phpapp01-thumbnail.jpg?width=640&height=640&fit=bounds)


