Practical skills week 1
•Download as PPTX, PDF•
1 like•941 views

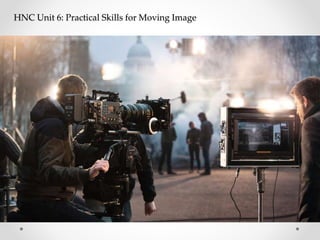
This document provides information on the course "HNC Unit 6: Practical Skills for Moving Image". The 15 credit course runs from October 2nd to December 19th and aims to develop skills in moving image production. Learners will develop abilities in using video and audio equipment, understanding client requirements, and completing productions. The course covers topics like camera basics, lighting, audio, pre-production, and editing. There are 3 assignments including practical assignments, a presentation, and an individual film production with written evaluation. The document provides details on the course schedule, learning outcomes, content, and assignments.

Recommended
Recommended
More Related Content
What's hot
What's hot (20)
Viewers also liked
Similar to Practical skills week 1
Similar to Practical skills week 1 (20)
Recently uploaded
Recently uploaded (20)
Practical skills week 1
- 1. HNC Unit 6: Practical Skills for Moving Image
- 2. Lesson Objectives • To understand the course requirements and assignments • To begin to understand how to use video and audio equipment for Moving image production
- 3. Course schedule & aims • Credit value: 15 • Dates: W/C 2nd Oct – last day of term 19th Dec • Course runs through half term (W/C 23rd Oct) Aim • This unit aims to develop learners’ skills in moving image production using the moving image and sound technologies currently employed in the industry.
- 4. Learning outcomes • On successful completion of this unit a learner will: • 1 Be able to use video and audio equipment for moving image recording • 2 Understand how to realise client requirements in relation to specified audiences • 3 Be able to follow appropriate procedures to complete productions for clients.
- 6. Course Content Camera Basics Composition and framing Audio Basics Capturing clean audio, monitoring, audio editing Lighting Basics Lighting on location, studio and 3-point lighting Pre-production to broadcast Developing a pitch; narrative approach and visual techniques; scripting Filming, editing
- 7. Assignments • Assignment 1 • Hand out date: 02/10/17 • Portfolio - Series of practical assignments with written commentary • Hand in date: 15/12/17 • Assignment 2 • Hand out date: 9/10/17 • Presentation (learning outcome 2) presenting pre-production materials for your individual production • Hand in date: 8/11/17 • Assignment 3 & 4 • Hand out date: 9/10/17 • Individual film production • 1000 word written evaluation • Hand in date: 15/12/17
- 9. Camera Types z • Today there are many different types of camera available to use. • Super 8mm cameras and film • Initially favoured for home movies the film comes in 50-foot cartridges (2 min 30 secs at 24 frames per second) • 16mm Cameras and film • Ideal for shooting low budget independent movies on film. Quality is high and can be blown up to 35mm for cinematic release. • Super 16mm cameras and film • Is close to 16: 9 in ratio and offers a better quality for blowing up to 35mm • 35mm cameras and film • Professional format and expensive • DSLR cameras (Canon, Sony, Nikon, Panasonic) • Red 4k Nearly four times the quality of high definition
- 10. Camera Types
- 11. Camera Parts: • Viewing Monitor (On Most Professional cameras you would use a separate calibrated monitor as the viewer is not reliable enough for accurate colour balance or exposure. • Hot Shoe: For attaching accessories such as extra microphones or a light. • Viewfinder • Battery: Obviously always remember to have this fully charged before shooting. • Iris Control • Focus Ring • Zoom Lens • Lens Hood • Microphone (Good quality cameras should have XLR inputs for separate microphone inputs) • Image Sensor • Manual Override/Function Buttons
- 12. Camera Parts
- 13. Camera Parts
- 14. Shooting Ratio: 16: 9 Versus 4: 3 • We will be shooting on the Panasonic GH5 in 16: 9 (Widescreen) Aspect Ratio’s explained: • The aspect ratio of an image is its width divided by its height. • When cinema attendance dropped, Hollywood created widescreen aspect ratios (such as the 1.85:1 ratio mentioned earlier) in order to differentiate their industry from the TV. • 16:9 (generally named as: "Sixteen-Nine", "Sixteen-by-Nine" or "Sixteen-to-Nine") is the international standard format of HDTV as used in Australia, Canada, Japan, United States and Europe.
- 15. Aspect Ratios
- 17. Video recording modes • 4K 10bit 4:2:2 at 25/30p (50/60 frames per second) • 4K 24 frames per second • Creating high quality & natural motion/slow motion • Full HD 1080p 24 frames per second
- 18. Camera Basics:
- 20. ISO ISO ratings determine the image sensor’s sensitivity to light, each value of the rating represents a “stop” of light, and each incremental ISO number (up or down) represents a doubling or halving of the sensor’s sensitivity to light. ISO is actually an acronym, which stands for International Standards Organization. The lower the ISO rating, the less sensitive the image sensor is and therefore the smoother the image. The higher the ISO rating (more sensitive) the stronger the image sensor has to work to establish an effective image, which thereby produces more digital noise. Increasing the ISO, allows for shooting in lower light situations, but The ISO rating, which ranges in value from 25 you increase the amount of digital noise inherent in the photo to 3200
- 22. APERTURE A lens’s aperture is similar to the pupil in our eye. When we are in a dark room our pupil opens up to let in more light and on a bright sunny day it closes down to let less light in. The blades on a lens aperture the opening in the diaphragm that determines the amount of focused light passing through the lens. At a small f-stop, say f/2, a tremendous amount of light passes through, even at a fraction of a second; but at f/22, when the diaphragm is perhaps at its smallest, only a tiny amount of light is let in (even at longer shutter speeds).
- 24. APERTURE With a large Aperture you will get a shallow depth of field. Remember the lower the number the larger the aperture!! With a small aperture you will get a deep depth of field. Which one of the images on the right has a deep depth of field? When might we want to use a Shallow and a deep depth of field?
- 25. SHUTTER SPEED Shutter speed is measured in fractions of a second, and indicates how fast the curtains at the film plane open and close. The shutter speed controls how long light enters the lens and hits the image sensor or film plane. Snapping the shutter gives you control on how motion is recorded. If the shutter speed is faster than the object or background, then the image will be tack sharp. If the shutter speed is slower, then you’ll get blurred objects. Think about the rain in a rainstorm, how fast is that water falling? Well, at 1/30th the raindrops are streaks of undistinguishable white. But at 1/250th, the raindrops hover in mid air and you can see the full swell of each water drop.
- 27. White Balance • Professional video cameras have built-in filters, which you set according to the light you’ll be shooting under.
- 28. Shooting Basics/Tips • Organisation - You need to be organised when you are filming. Make sure you have your memory card, battery’s are charged and the camera is in the right mode • Make sure you have your shot list or storyboard so that you know which shots you are going to film. • Framing - Normally it's better to use a tripod. If you can't use a tripod, it's easier to hold the camera steady if you zoom out and get in close to the subject. • vary the framing: use a long shot or a wide shot to show the context, and use close-ups to show details and emotions. • Shoot separate shots rather than reframing and waving the camera about while you're filming.
- 29. Shooting Basics/Tips • If you do use camera movements, have the camera moving smoothly in one direction. Pan and tilt your shots smoothly. • Don't zoom while you're filming unless it is integral to the narrative • Check the light - Try to film where there is plenty of light, and don't mix different light sources such as daylight and fluorescent light as this will make the colours appear strange. Don't shoot into the light or against a very light or dark background. • Shoot enough material – Don’t start the action immediately start the camera rolling and then after a few sections say action or start your shot. Shoot at least ten seconds of each shot (count one second, two seconds etc or watch the counter in the camera viewfinder.)
- 30. Different Shots • Television programs and films are made up of hundreds and thousands of pictures, called shots, each of which must be carefully planned. • The long shot, medium shot, and close-up (and many other camera-subject distances such as the medium long shot and extreme close-up) are the basis of editing in movies and on television. • Without these shots, the person who edits the movie, TV show, or commercial would have nothing to work with. Editing, in nearly all cases, is the combining of long shots, medium shots, and close-ups to create an effective visual presentation. • Conventions aren't rules: expert practitioners break them for deliberate effect, which is one of the rare occasions that we become aware of what the convention is.
- 31. Camera Shots
- 32. Camera Shots • Long shot (LS). Shot which shows all or most of a fairly large subject (for example, a person) and usually much of the surroundings. • Establishing shot. Opening shot or sequence, frequently an exterior 'General View' as an Extreme Long Shot (ELS). Used to set the scene. • Medium shots. Medium Shot or Mid-Shot (MS). In such a shot the subject or actor and its setting occupy roughly equal areas in the frame. • Close-up (CU). A picture which shows a fairly small part of the scene, such as a character's face, in great detail so that it fills the screen. It abstracts the subject from a context.
- 33. Shot Angles
- 34. Shot Angles • Angle of shot. The direction and height from which the camera takes the scene. The convention is that in 'factual' programmes subjects should be shot from eye-level only. Viewpoint. The apparent distance and angle from which the camera views and records the subject. • Point-of-view shot (POV). A shot made from a camera position close to the line of sight of a performer who is to be watching the action shown in the point-of-view shot. • Two-shot. A shot of two people together. • Selective focus. Rendering only part of the action field in sharp focus through the use of a shallow depth of field. A shift of focus from foreground to background or vice versa is called rack focus. • Soft focus. An effect in which the sharpness of an image, or part of it, is reduced by the use of an optical device. • Wide-angle shot. A shot of a broad field of action taken with a wide-angle lens. • Tilted shot. When the camera is tilted on its axis so that normally vertical lines appear slanted to the left or right, ordinary expectations are frustrated. Such shots are often used in mystery and suspense films to create a sense of unease in the viewer.
- 36. Camera and Lens Movement • Zoom. In zooming in the camera does not move; the lens is focussed down from a long-shot to a close-up whilst the picture is still being shown. • Following pan. The camera swivels (in the same base position) to follow a moving subject. A space is left in front of the subject: the pan 'leads' rather than 'trails'. A pan usually begins and ends with a few seconds of still picture to give greater impact. • Surveying pan. The camera slowly searches the scene: may build to a climax or anticlimax. • Tilt. A vertical movement of the camera - up or down- while the camera mounting stays fixed. • Crab. The camera moves (crabs) right or left. • Tracking (dollying). Tracking involves the camera itself being moved smoothly towards or away from the subject (contrast with zooming). Hand-held camera. A hand-held camera can produce a jerky, bouncy, unsteady image which may create a sense of immediacy or chaos. Its use is a form of subjective treatment. • Process shot. A shot made of action in front of a rear projection screen having on it still or moving images as a background.
- 37. The Rule of Thirds • Proper framing • The first thing to learn is how to frame your subject. If you’re a still photographer you’ll already know about the rule of thirds. This works for filmmaking as well. • The rule of thirds: This is a general principle in photography, which is generally considered to make shots more appealing to the eye. One can easily visualize this rule by taking a frame and dividing the horizontal piece into three equal sections and dividing the vertical in three equal sections. This creates 9 equal sections. Where these sections meet are four points on the frame. By aligning the central object into these points of the frame (often called the power points), instead of centering the object, you get more aesthetically and professional-looking shots. Common uses of this rule in video are: • Framing an interview: The eyes of your subject should fall in one of the upper powerpoints and the subject should be looking towards the empty space on the frame. • Shooting a horizon: Rather than position the horizon on the center of the frame, align it along the upper or lower third depending on what you want to emphasize. For example, if you’re shooting a cloud time-lapse you will want two- thirds of the shot centered on the sky.
- 38. The Rule of Thirds
- 39. BALANCE
- 40. BALANCE
- 41. BALANCE
- 42. BALANCE & COLOUR
- 43. Continuity Editing • Continuity editing is the standard approach to editing used in Narrative film • It is the process of combining related shots into a sequence so that the viewer is able to understand the narrative across both time and physical location
- 44. Psycho Dir. Alfred Hitchcock 1960, US
- 45. Shot/Reverse Shot • Definition: Two shots edited together that alternate characters, typically in a conversation situation. Usually characters in one frame look left, and in the following frame look right
- 46. Establishing Shot • Definition: A long shot or extreme long shot that shows spatial relations between the important figures, objects and setting in a scene
- 47. 180 Degree rule How to achieve it The angle between any two consecutive shots should not exceed the 180 degree rule, in order to maintain spatial relationships between people and objects in any given sequence of shots
- 48. Crosscutting (Montage) Definition: Editing that alternates between shots occurring simultaneously in two or more different locations The Godfather
- 49. Match on Action Definition: A cut between two shots that places two different framings of the same action next to each other, making it seem to continue uninterrupted
- 50. Eyeline Match Definition: A cut between two shots in which the first shot shows a person looking off in one direction and the second shot shows either a space containing what he or she sees, or a person looking back in exactly the opposite direction Example: Rear Window
- 51. Final Tips • For any scene, identify where the key light source is coming from and whether it has a hard or soft quality. • Prevent ugly lens flare: don't point the camera at hard light sources and avoid solely backlit subjects. • Try to exclude bright windows from indoors shots. • Outdoor pictures look best in early morning or late afternoon light. • If it looks good, it is good - if it looks bad, it is bad!
- 52. Composition Task
- 53. EXERCISE 1: COMPOSITION Record a short (10 seconds) clip of an outdoor scene with one principal subject. First, place the subject in the exact center of the frame. Then, reframe the scene by moving your camera or changing your position to use the rule of thirds to place the principal subject in one of the key positions shown. Record a short clip. Find a second subject that’s either closer to the camera or further away than the first subject. Record two clips, one with the subject centered and the other using a different one of the four placement points of the rule of thirds.
- 54. EXERCISE 2: BALANCE Record two short clips of two different subjects. First, pick a subject that doesn’t move and record a clip with the subject centered in the frame and then adjust the frame to provide proper balance. This can be a person looking out of the frame or an object that requires balance. Second, select a moving subject, such as a car, that will require you to pan to keep the subject in the same portion of the frame. Record the first clip with the moving subject in the center of the frame and the second clip placing the subject in the frame in a way that will give balance to the shot. Because panning with a moving subject takes some practice, you may want to do this several times. Remember to move from an uncomfortable position to a comfortable position.
- 55. EXERCISE 3 BALANCE: COLOURS Use one of your actors as the subject and place your subject against backgrounds of different colors/textures (brick, wood,painted surface etc) both neutral (white, gray, and black) and bright colors. Record short clips of the different combinations and then review to see which ones provide a sense of balance that places emphasis on your subject rather than the background. Balance is to some degree a subjective thing. The more combinations you try, the more you’ll learn.
- 56. Task Exercise: The daydream Using one camera, first create a shot list and then film a sequence as follows: Person A is working at a desk. They start daydreaming. In the daydream, they nervously walk along a corridor and approach a door. They don’t know what’s on the other side. They walk through the door and see Person B, someone they hadn’t expected to see. The dialogue goes as follows: Person B (in a sinister voice): Hello. Person A (who’s just walked through the door): Oh no! What are you doing here? Person B (the person in the room): I could ask the same thing about you.
- 57. Your sequence must include at least eight separate shots. It must include at least one each of the following: • long or wide shot • mid shot • close up • big closeup or extreme closeup You may not use zooms. You may use only one camera movement - in one direction - only. Use a storyboard to help you plan your sequence. Recce the location to work out where the camera should be. Think about how you can use framing, camera angle, lighting (if available) and editing to: • show Person A's nervousness • show that it's a daydream. • make the action appear to be continuous • show the power relationships between the characters
- 58. WORK IN GROUPS OF THREE. FILM THE SEQUENCE AND THEN SWAP ROUND SO THAT EVERYONE HAS THERE OWN VERSION OF THE SEQUENCE. FOR EXTRA MARKS YOU COULD EXTEND THE SEQUENCE OR COME UP WITH AN ENDING
- 59. Work so far… Composition Tasks – edit and export with your initials – add to Media Store Short Doc – edit and export with your initials – add to Media store Blade
- 60. Live brief: Harrowby Football Club To create two promotional videos for HNC Sport Harrowby Football club and a new HNC For web and promotional purposes. The prom needs to include: Footage of Games, training and interviews with lecturers and students Meet at Harrowby Football Club Next Tuesday at 9:00am Address: 13 Dickens Road, Grantham NG31 9QY
- 61. Examples Euro 2016 England Promo 2016 Adelaide University Sport promo Lincoln College • Film at a high frame rate and shutter speed • Slow shutter speeds create too much motion blur • Try 60fps at 1/120th shutter • Favour wide shots • Find high ground • Deep depth of field like f16 • Use a tripod • Don’t pan or zoom too quickly