Download as PDF, PPTX

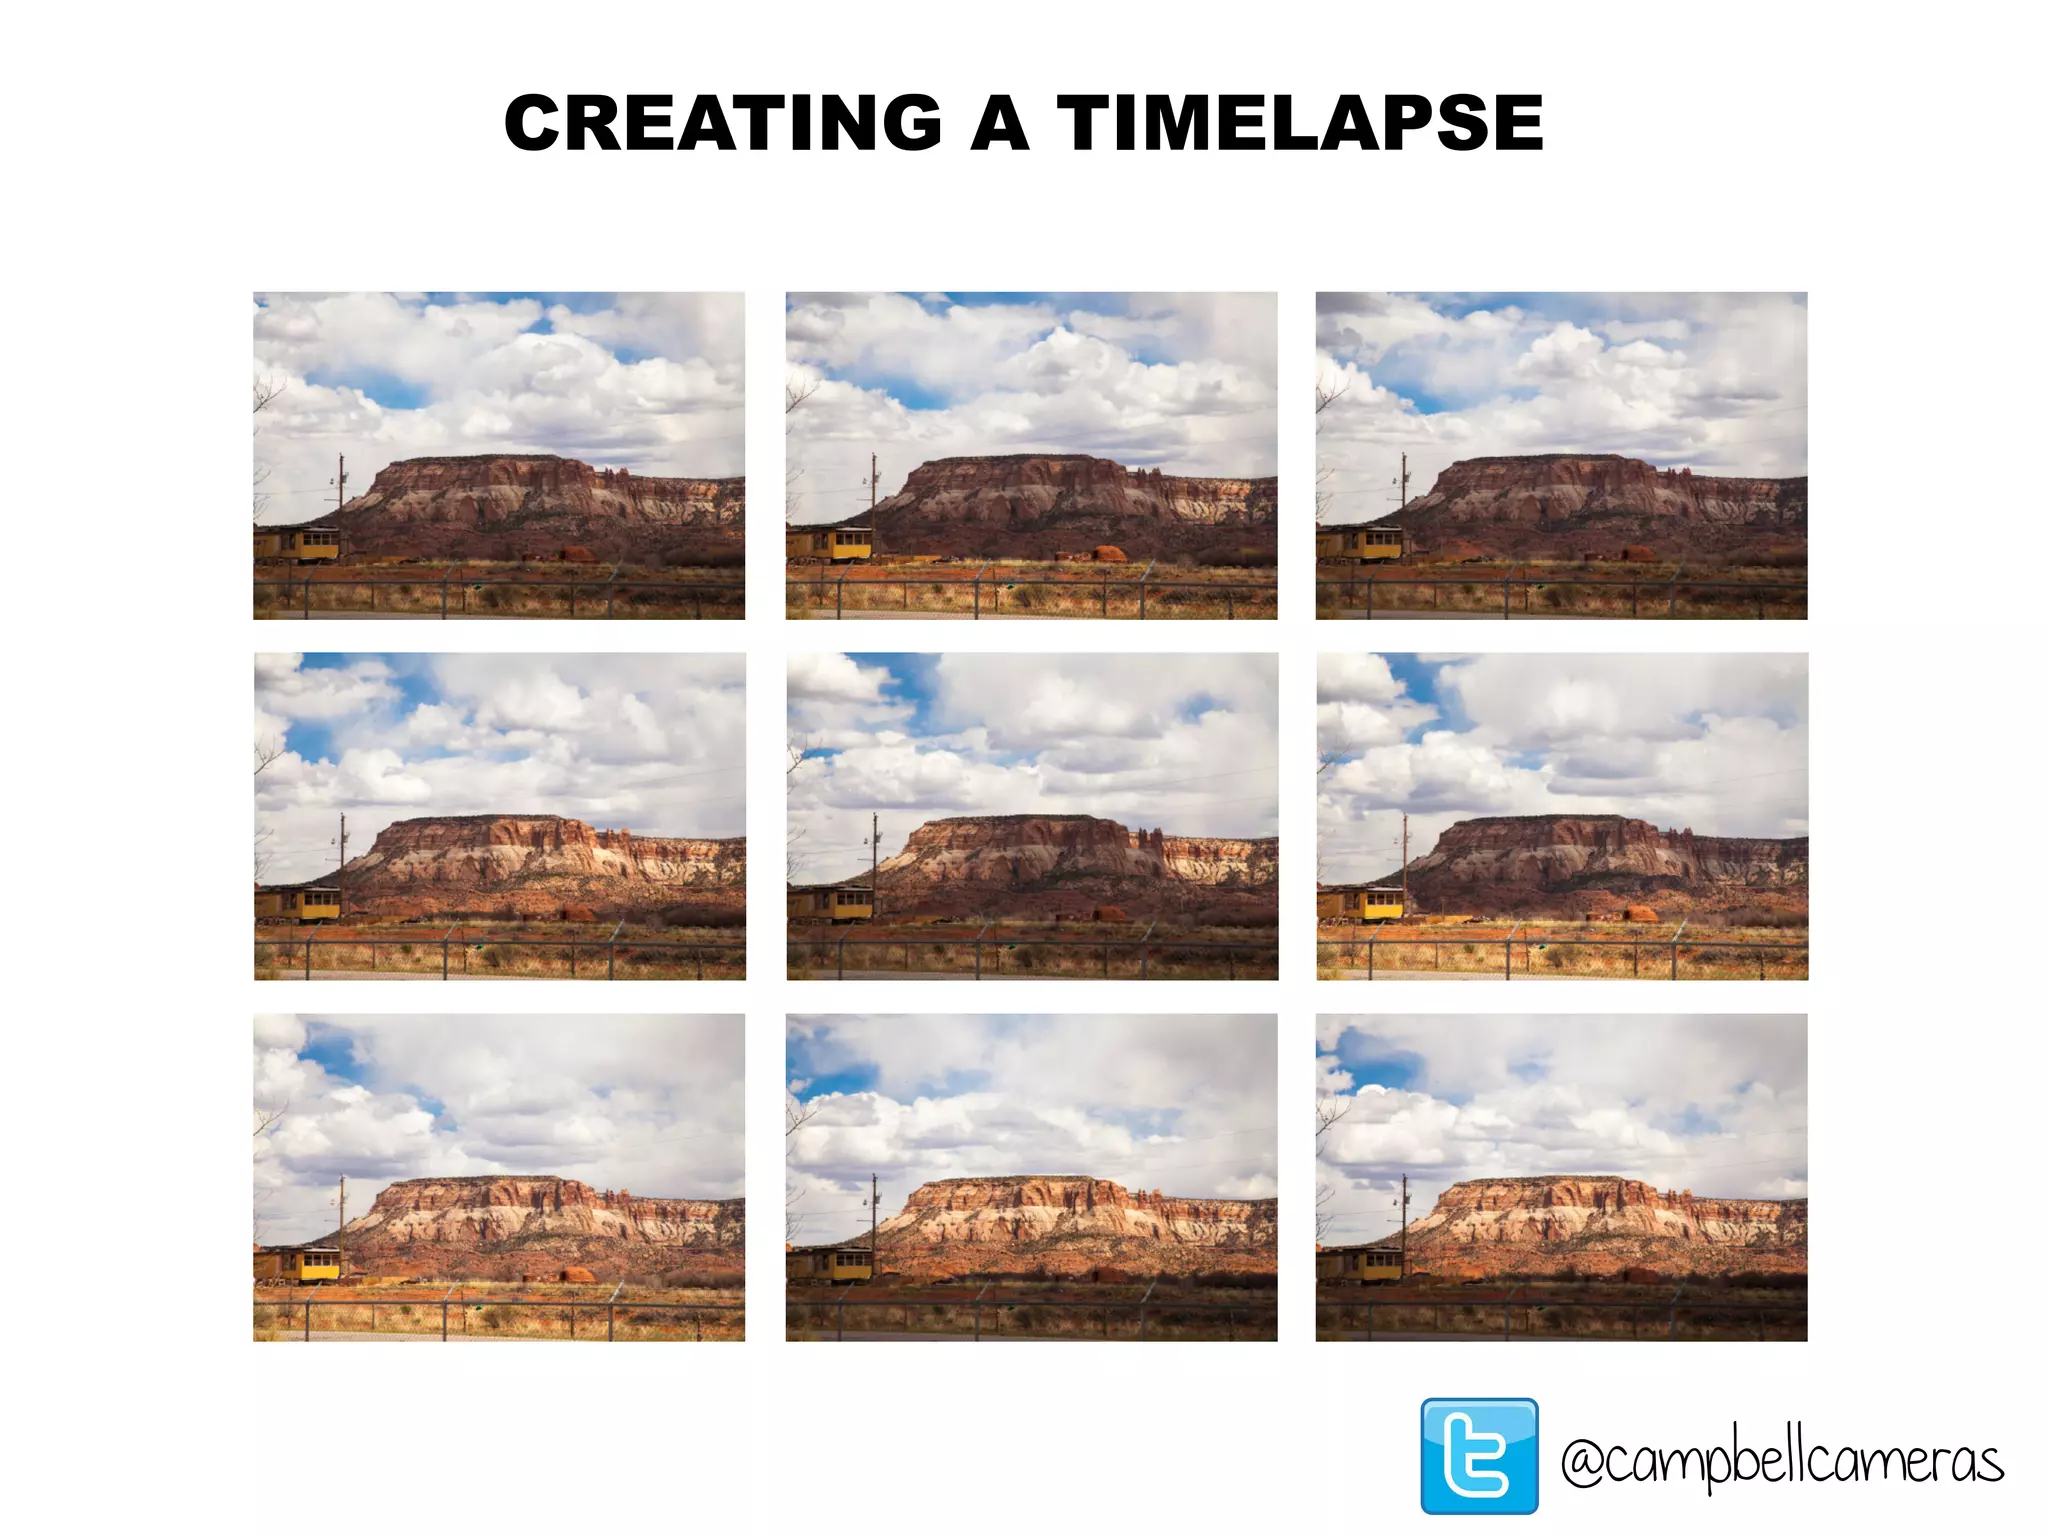
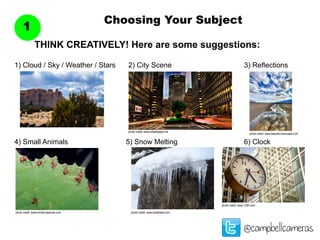
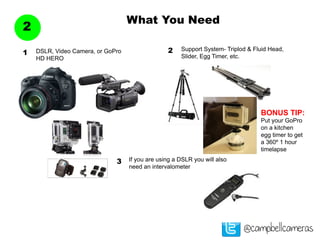
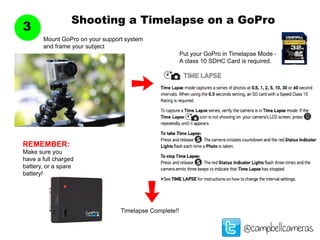
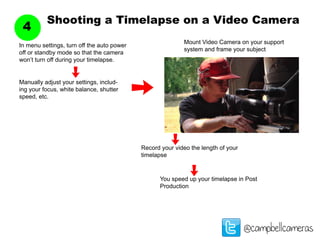
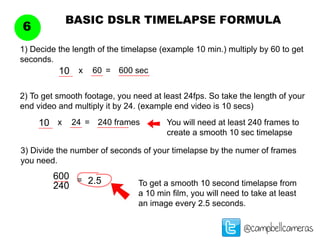

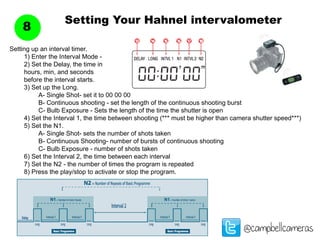

This document provides a comprehensive guide on creating timelapse videos using various cameras, including DSLRs and GoPros. It includes tips on selecting subjects, camera settings, and the essential equipment required, such as intervalometers and support systems. Additionally, it outlines a basic formula for achieving smooth timelapse footage and instructions for setting up different intervalometers.


