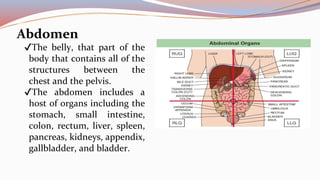
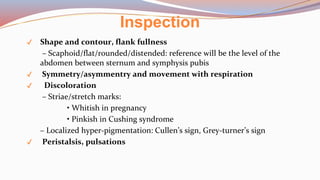
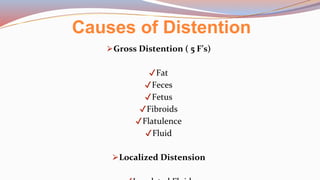
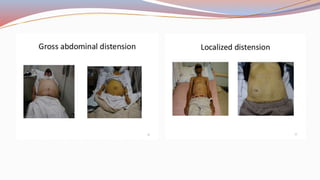
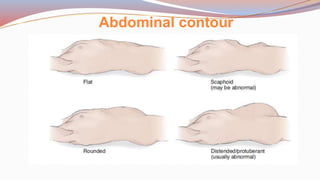
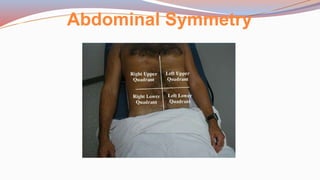
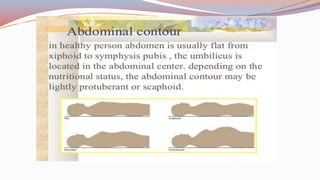
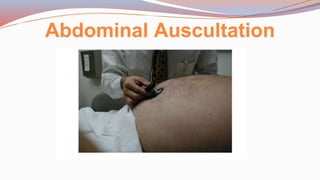
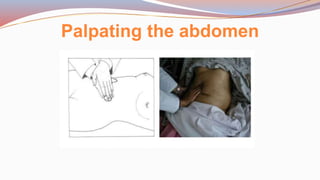
2. Objectives:
I. Define Abdomen and the physical Assessment
II. Discuss the abdominal examination Steps
✔Inspect
✔Auscultation
✔Percussion
✔Palpation
III. At the end of the discussion we will be able to understand the
assessment process of the abdomen.
3. Abdomen
✔The belly, that part of the
body that contains all of the
structures between the
chest and the pelvis.
✔The abdomen includes a
host of organs including the
stomach, small intestine,
colon, rectum, liver, spleen,
pancreas, kidneys, appendix,
gallbladder, and bladder.
4. Types of Pain
⚫ Visceral pain
this type of pain is often characterized
as dull, aching, burning, cramping, or
colicky.
⚫ Parietal pain
This type of pain tends to localize more to
the source and is characterized as more
severe and steady pain.
⚫ Referred pain
This type of pain travels, or refers, from the
primary site and becomes highly localized at
the distant site.
5. Abdominal Physical Examination Purpose
The abdominal examination is performed for a variety of different reasons:
✔ As part of a comprehensive health examination;
✔ to explore gastrointestinal complaints;
✔ to assess abdominal pain, tenderness, or masses;
✔ to monitor the client post operatively.
6. Preparing the client
Note: Ask the client to empty the bladder
before beginning the examination to eliminate
bladder distention and interference with an
accurate examination. Instruct the client to
remove clothes and to put on a gown.
7. Clinical Tip
⮚ Raising arms above the head or folding
them behind the head will tense the
abdominal muscles.
8. Physical Assessment
⚫The examination evaluates the
following abdominal structures
in the abdominal quadrants:
skin, stomach, bowel, spleen,
liver, kidneys, aorta, and bladder.
Note: Remember to Auscultate
after inspection and before
percussion and, finally, to palpate.
9. Common Abnormal Findings
⮚Abdominal edema, or swelling
⮚ signifying as cites; abdominal masses signifying abnormal growths
or constipation
⮚unusual pulsations such as those seen with an aneurysm of the
abdominal aorta; and
⮚pain associated with appendicitis.
11. ✔ Shape and contour, flank fullness
– Scaphoid/flat/rounded/distended: reference will be the level of the
abdomen between sternum and symphysis pubis
✔ Symmetry/asymmentry and movement with respiration
✔ Discoloration
– Striae/stretch marks:
• Whitish in pregnancy
• Pinkish in Cushing syndrome
– Localized hyper-pigmentation: Cullen’s sign, Grey-turner’s sign
✔ Peristalsis, pulsations
Inspection
12. ✔Distended vessels:
– Normal direction of flow: above the umbilicus upward and below the
umbilicus downward.
▪ Portal hypertension-veins draining away from the umbilicus
▪ IVC obstruction - reversal of flow in the lower abdomen – i.e draining towards the
umbilicus
Inspection
✔Umbilicus
–location of umbilical/contour umbilicus
– Swelling
– Discoloration
– Nodule around or signs of inflammation
✔ Hernia sites
26. Auscultation
✔ Bowel sounds: four quadrant
– Normal range 4-35/min, every 2-5 sec
– Hypoactive: eg. Peritonitis
– Hyperactive: eg. Obstruction
✔Bruits:
– Over enlarged organ
– Renal artery: few cm above the umbilicus lateral at the edge of rectus
abdominus.
– Aneurysmal
27. Auscultation
✔Venus hum:
– Heard over collateral veins disappear by hard pressing with stethoscope
unlike bruit
– Not localized to systole only unlike bruit
– May disappear with changing position unlike bruit
✔ Friction rub:
– seen in infarction, sub-capsular hemorrhage and inflammation of spleen or
liver
28. Percussion
✔Starting from the epigastrium umbilical suprapubic rt/lt lumbar region.
✔Look for:
– Tympanicity/tone
– Dullness-
• Direct and shifting
• Total vertical liver span
• Splenic percussion
29. ✔ Traube’s semilunar space
– 6th rib superiorly, lt mid axillary line laterally and costal margin
inferiorly.
– Normal percussion note medial to lateral is resonant.
✔ Nixon’s method:
– lower border of pulmonary resonance at Lt posterior axillary
percuss diagonal 90 degree to mid lt costal margin
– Normal 6-8cm. If > 8 cm= splenomegaly
A Splenic percussion
Delineating the spleen by Percussion
30.
31. ⚫If you cannot accurately percuss the liver borders, perform the scratch
test. Auscultate over the liver and, starting in the RLQ, scratch lightly
over the abdomen, progressing upward toward the liver.
33. Before starting palpation, remember:
Relax the abdominal muscles.
If necessary, ask the patient to bend the knee to relax the muscle.
Ask if any particular area is tender and palpate that area last.
Look into patient facial expression while palpating the abdomen.
34. Methods of Palpation
Light Palpation
Deep Palpation
-Slipping Palpation -Press Palpation - Bimanual Palpation - two hand deep
35. ✔Step 1: ask for any pain and location.
✔Step 2:
– Start superficial palpation away from the site.
– If none proceed with anticlockwise move starting from the LLQ :
– look for tenderness, temperature, crepitus, mass,size, countor, location, consistency,
swelling.
- Assess chest expansion; pulsation
✔Step 3:
– Deep palpation starting from the LLQ.
– Examine the Left large bowel, Spleen, Epigsatrium, Liver, RUQ, suprapubic and
periumblical,
✔ Step 4: Bi-manual palpation for both kidneys
✔ Step 5: Flank fullness and fluid thrill, Succusion splash
Palpation
36. Perform blunt percussion for Kidneys
and Liver
⚫To assess for tenderness in
difficult-to-palpate structures.
Percuss the liver by placing your
left hand flat against the lower
right anterior rib cage. Use the
ulnar side of your right fist to
strike your left hand.