Download to read offline

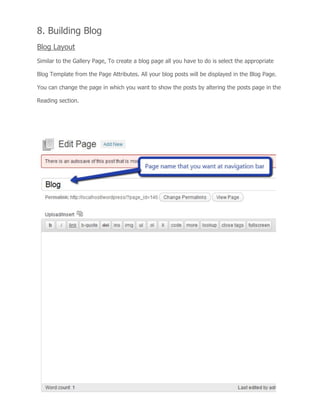
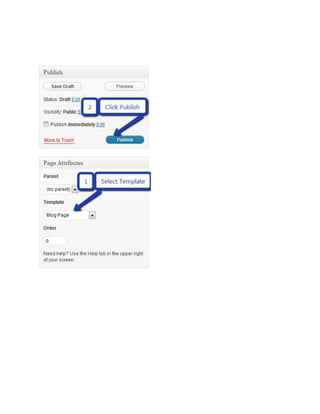
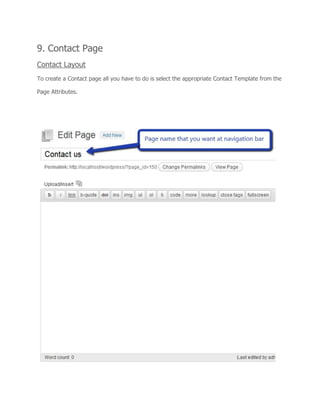
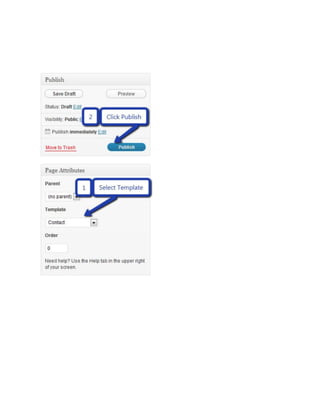

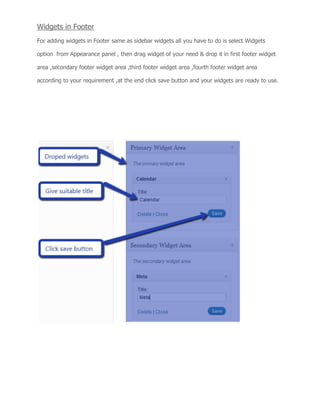
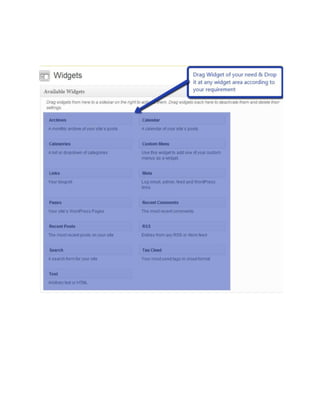
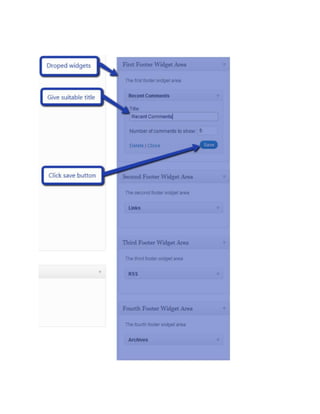
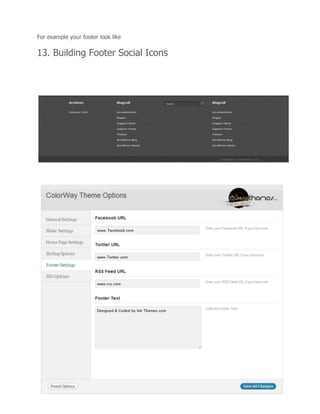


The Woodberry theme from a2wpress is easy to install and customize, allowing users to create various page types such as blogs, galleries, and contact pages by selecting appropriate templates. Users can configure the homepage with options for logos, sliders, and featured images, while also managing menus and widgets. Additional resources, including video demos and professional assistance for customizations, are available for users who need help.


